


- 之前公司内部一直用的 SVN ,项目多了,感觉也不好管理。所以这里进行做下 Git 学习以及使用(PS:之前自己也用过 Github)。
服务器最低配置要求(官方):2 核 4 G
- 这里不详细累赘描述 Centos 7 如何安装了,自行网上搜索教程安装即可。
- 配置 IP : Centos 7 配置静态IP
以上是准备工作;
依赖文件
yum -y install policycoreutils policycoreutils-python openssh-server openssh-clients postfix自启服务
- 开启并设置自启 postfix 服务,postfix 支持 Gitlab 发信功能
systemctl enable postfix && systemctl start postfix开放端口
firewall-cmd --zone=public --add-port=80/tcp --permanent # 添加 80 端口firewall-cmd --reload # 重载下载镜像
- Centos 6 : 清华大学镜像站
- Centos 7 : 清华大学镜像站
我这里选择的版本是:12.0.3 -> (gitlab-ce-12.0.3-ce.0.el7.x86_64.rpm)
wget https://mirrors.tuna.tsinghua.edu.cn/gitlab-ce/yum/el7/gitlab-ce-12.0.3-ce.0.el7.x86_64.rpm # 下载rpm -i gitlab-ce-12.0.3-ce.0.el7.x86_64.rpm # 安装安装结果
- 这是安装后的结果输出
warning: gitlab-ce-12.0.3-ce.0.el7.x86_64.rpm: Header V4 RSA/SHA1 Signature, key ID f27eab47: NOKEYIt looks like GitLab has not been configured yet; skipping the upgrade script. *. *. *** *** ***** ***** .****** ******* ******** ******** ,,,,,,,,,***********,,,,,,,,, ,,,,,,,,,,,*********,,,,,,,,,,, .,,,,,,,,,,,*******,,,,,,,,,,,, ,,,,,,,,,*****,,,,,,,,,. ,,,,,,,****,,,,,, .,,,***,,,, ,*,. _______ __ __ __ / ____(_) /_/ / ____ _/ /_ / / __/ / __/ / / __ `/ __ / /_/ / / /_/ /___/ /_/ / /_/ / ____/_/__/_____/__,_/_.___/ Thank you for installing GitLab!GitLab was unable to detect a valid hostname for your instance.Please configure a URL for your GitLab instance by setting `external_url`configuration in /etc/gitlab/gitlab.rb file.Then, you can start your GitLab instance by running the following command: sudo gitlab-ctl reconfigureFor a comprehensive list of configuration options please see the Omnibus GitLab readmehttps://gitlab.com/gitlab-org/omnibus-gitlab/blob/master/README.md配置主机
- 在安装结果中,也提示到了,无法检测到你的实例有效主机名,需要进行配置;
- 针对 external_url 进行配置
- 详细的配置项可参考配置说明:https://gitlab.com/gitlab-org/omnibus-gitlab/blob/master/README.md
vi /etc/gitlab/gitlab.rb- i 进行编辑
- 找到 external_url
默认的配置说明
## GitLab URL##! URL on which GitLab will be reachable.##! For more details on configuring external_url see:##! https://docs.gitlab.com/omnibus/settings/configuration.html#configuring-the-external-url-for-gitlabexternal_url 'http://gitlab.example.com'- 将 http://gitlab.example.com 改成 你的服务器 IP + 端口
external_url 'http://192.158.1.58'- 退出编辑器的方法:Esc -> Shift+: -> 输入wq-> 回车
重启并启动
sudo gitlab-ctl reconfigure- 启动日志比较长,因为要启动的服务比较多,请耐心等待
- 启动完成后会看到如下结果
Running handlers:Running handlers completeChef Client finished, 513/1343 resources updated in 05 minutes 36 secondsgitlab Reconfigured!登录访问
- 192.168.1.58 -> 我们刚刚改的 external_url 地址
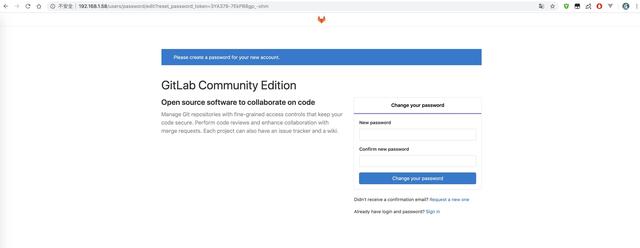
- 首次进去需要进行修改 root 密码
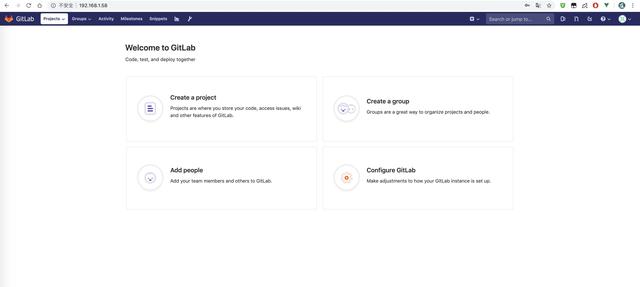
- 改完后就可以登录进来了。 username : root
修改中文
- 点击右上角头像 -> Settings -> Preferences -> Localization -> Language 选择 简体中文 -> Save changes
这不是一个很完善的中文(系统自带)
中文汉化
- 上面已经设置了中文,部分还是会存在英文的,不妨碍使用,如有需要的,可针对进行中文汉化;纯如有需要的情况下操作,不需要则直接忽略
GitLab 中文社区版:https://gitlab.com/xhang/gitlab
采用方式
- 我采用的是下载的方式进行操作的,因为 git clone 太慢了
- 我下载的是 gitlab-12-0-stable-zh.tar.gz
解压
tar -xvf gitlab-12-0-stable-zh.tar.gz # 解压cat gitlab-12-0-stable-zh/VERSION # 查看版本 12.0.0备份
- 主要是备份原版,如替换有问题,可及时还原
cp -r /opt/gitlab/embedded/service/gitlab-rails{,.ori}覆盖
/bin/cp -rf gitlab-12-0-stable-zh/* /opt/gitlab/embedded/service/gitlab-rails/加载配置
sudo gitlab-ctl reconfigure重启
sudo gitlab-ctl restart- 重启日志
ok: run: alertmanager: (pid 22872) 0sok: run: gitaly: (pid 22887) 0sok: run: gitlab-monitor: (pid 22903) 0sok: run: gitlab-workhorse: (pid 22906) 1sok: run: grafana: (pid 22917) 1sok: run: logrotate: (pid 22927) 0sok: run: nginx: (pid 22937) 0sok: run: node-exporter: (pid 22944) 1sok: run: postgres-exporter: (pid 22953) 0sok: run: postgresql: (pid 22964) 1sok: run: prometheus: (pid 22973) 0sok: run: redis: (pid 22990) 1sok: run: redis-exporter: (pid 22995) 0sok: run: sidekiq: (pid 23005) 1sok: run: unicorn: (pid 23017) 0s再次访问
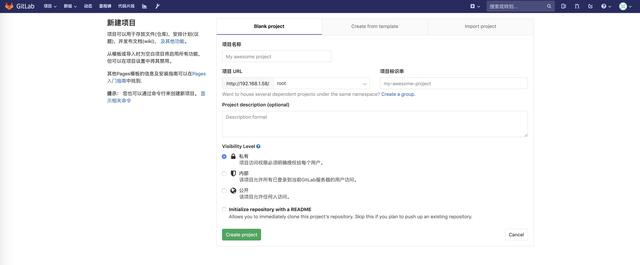
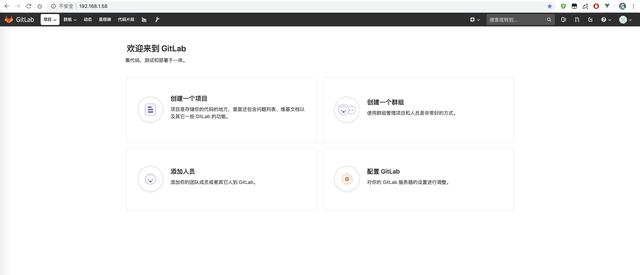
- 再次访问,就能看到中文界面了(可跟之前的图进行对比)
配置邮箱
vi /etc/gitlab/gitlab.rb## GitLab User Settingsuser['git_user_name'] = "izpan[No Reply]"user['git_user_email'] = "service@izpan.com"### Email Settingsgitlab_rails['gitlab_email_enabled'] = truegitlab_rails['gitlab_email_from'] = 'service@izpan.com'### GitLab email server settings###! Docs: https://docs.gitlab.com/omnibus/settings/smtp.html###! **Use smtp instead of sendmail/postfix.**gitlab_rails['smtp_enable'] = truegitlab_rails['smtp_address'] = "smtp.exmail.qq.com"gitlab_rails['smtp_port'] = 465gitlab_rails['smtp_user_name'] = "service@izpan.com"gitlab_rails['smtp_password'] = "xxx"gitlab_rails['smtp_domain'] = "smtp.qq.com"gitlab_rails['smtp_authentication'] = "plain"gitlab_rails['smtp_enable_starttls_auto'] = truegitlab_rails['smtp_tls'] = true


 2670
2670


 被折叠的 条评论
为什么被折叠?
被折叠的 条评论
为什么被折叠?
 到【灌水乐园】发言


