


 本文介绍了在uni-app结合uview开发中遇到的问题,包括CSS选择器样式错乱的解决方案,textarea的层级问题,高度计算的兼容性处理,以及如何使用watch的深度监听。此外,还详细阐述了uni-app组件的创建和使用方法。
uni-app + uview 开发
1.css选择器 书写样式与v-for 结合使用 渲染样式会出现错乱
解决:目前是放弃使用css选择器,避开这个问题
2.textarea层级问题
textarea在微信小程序 依旧存在层级问题;当触发的事件的区域和textarea有区域交互时,该事件不会触发
3.关于<scroll-view >的高度计算 ,同时兼容各种机型
因为像素单位用的是rpx,所以整个布局会随机型的变化,进行相应的像素比例调整
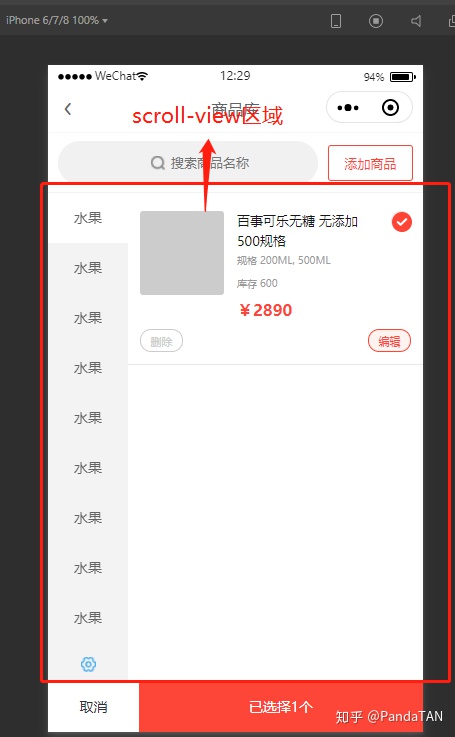
- 如下这种做法,即将高度的单位用px;然后获取移动端的屏幕高度。进行计算;普通机型是行的通的;但是不兼容ipad等超大屏机型
const res = uni.getSystemInfoSync();
        let top = res.safeArea.top;
this.HEIGHT = res.windowHeight - 50 - 60 - 48 - top + 'px';- so,可用如下方法;具体API参考uni-app官方文档;注:uni.createSelectorQuery()该API需写在mounted中
    mounted() {
        const res = uni.getSystemInfoSync();
        const query = uni.createSelectorQuery().in(this);
        query
            .selectAll('.buttom-btn-choose,.nav-top')
            .boundingClientRect(data => {
                this.HEIGHT = res.windowHeight - data[0].bottom - data[1].height + 'px';
            })
            .exec();
},- html代码
<scroll-view scroll-y scroll-with-animation class="menu-cate" :style="{ height: HEIGHT }">
<block v-for="(item, index) in cateList" :key="index">
<view class="cate-box" :class="[cateIndex == index ? 'cate-bg' : '']" @click="cateChange(index)">{{ item.name }}</view>
</block>
</scroll-view>4.关于watch侦听器 --- 深度监听
- 对于负责数据类型,array,object;简单的写法是不会监听到数据的变化的;需要加上deep属性
watch: {
goods_spec_arr: {
handler(newData, oldData) {
let frist = '';
if (this.checked) {
oldData.forEach((item, index) => {
if (index == 0) {
return;
}
if (index == 1) {
frist = item.price;
return;
}
if (frist != item.price) {
this.checked = false;
}
});
if (this.checked) {
let second = '';
oldData.forEach((item, index) => {
if (index == 0) {
second = item.price;
return;
}
item.price = second;
});
}
}
},
deep: true
},
checked(val) {
if (val) {
this.goods_spec_arr.forEach(item => {
item.price = this.goods_spec_arr[0].price;
});
}
}
}- 注:在watch不能进行数组操作;如unshift,splice等;但可以对其键值对进行操作
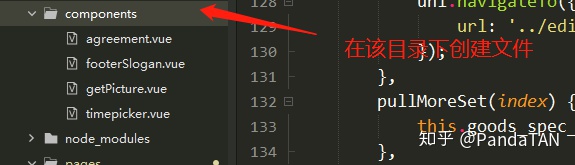
5.组件封装使用
5.1 组件创建
5.2 组件
<template>
<view class="box">
<view class="get-picture-box" @click="getPicture()" v-if="!goods_title_img">
<view class="get-camera-icon"><image src="camera.png"></image></view>
<image src="add-picture.png"></image>
</view>
<view class="picture-box" v-if="goods_title_img">
<image style="width: 75px;height: 75px;border-radius: 5px;" :src="goods_title_img"></image>
<view class="picture-del-icon" @tap="delPicture">
<image style="width:15px ;height: 15px;" src="picture-delete-icon.png"> </image>
</view>
</view>
</view>
</template>
<script>
export default {
props: {
index: {
type: String,
default: ''
}
},
data() {
return {
goods_title_img: ''
};
},
methods: {
/*获取图片出发事件*/
getPicture() {
let _this = this;
uni.chooseImage({
count: 1, //默认9
sizeType: ['original', 'compressed'], //可以指定是原图还是压缩图,默认二者都有
sourceType: ['album', 'camera '], //从相册选择
success: function(res) {
_this.goods_title_img = res.tempFilePaths[0];
_this.$emit('getPicture', _this.goods_title_img, _this.index);
}
});
},
/*删除图片出发事件*/
delPicture() {
console.log(123);
this.goods_title_img = '';
this.$emit('delPicture', this.goods_title_img, this.index);
}
}
};
</script>
<style lang="scss" scoped>
.box {
margin-top: 20rpx;
}
.get-picture-box {
width: 150rpx;
height: 150rpx;
border: 4rpx solid #b7b7b7;
border-radius: 10rpx;
.get-camera-icon {
display: flex;
justify-content: flex-end;
> image {
margin: 12rpx 12rpx 0 0;
width: 24rpx;
height: 20rpx;
}
}
> image {
display: block;
margin: 8rpx auto 0;
width: 72rpx;
height: 72rpx;
}
}
.picture-box {
position: relative;
// border-radius: 5px;
width: 150rpx;
height: 150rpx;
background-color: #ccc;
.picture-del-icon {
width: 30rpx;
height: 30rpx;
position: absolute;
top: 0;
right: 0;
transform: translate(50%, -100%);
}
}
</style>
5.3 在页面中使用组件
import getPicture from '../../../components/getPicture.vue'; // 导入组件
export default {
    // 注册组件
    components: { getPicture },
}
在页面中使用
<get-picture :index="index" @getPicture="getPicture()" @delPicture="delPicture()">
</get-picture>


 436
436

 被折叠的 条评论
为什么被折叠?
被折叠的 条评论
为什么被折叠?
 到【灌水乐园】发言


