


一、安装ActiveMQ
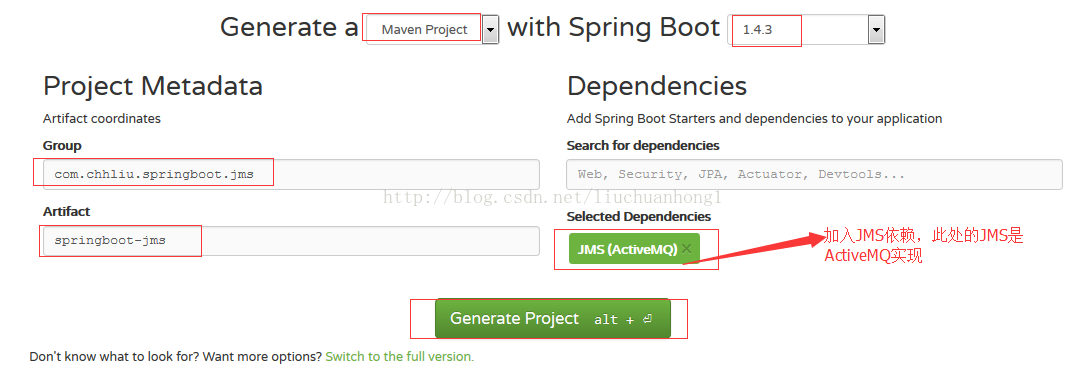
二、新建spring boot工程,并加入JMS(ActiveMQ)依赖
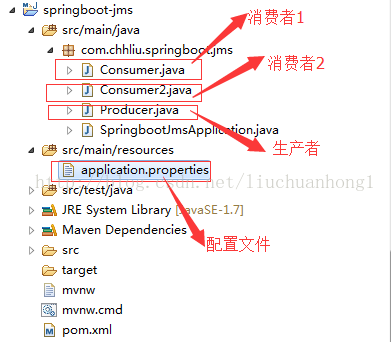
三、工程结构
pom依赖如下:
xsi:schemaLocation="http://maven.apache.org/POM/4.0.0 http://maven.apache.org/xsd/maven-4.0.0.xsd">
4.0.0
com.chhliu.springboot.jms
springboot-jms
0.0.1-SNAPSHOT
jar
springboot-jms
Demo project for Spring Boot Jms
org.springframework.boot
spring-boot-starter-parent
1.4.3.RELEASE
UTF-8
UTF-8
1.7
org.springframework.boot
spring-boot-starter-activemq
org.springframework.boot
spring-boot-starter-test
test
org.springframework.boot
spring-boot-maven-plugin
四、修改application.properties配置文件
## URL of the ActiveMQ broker. Auto-generated by default. For instance `tcp://localhost:61616`
# failover:(tcp://localhost:61616,tcp://localhost:61617)
# tcp://localhost:61616
spring.activemq.broker-url=tcp://localhost:61616
spring.activemq.in-memory=true
spring.activemq.pool.enabled=false //如果此处设置为true,需要加如下的依赖包,否则会自动配置失败,报JmsMessagingTemplate注入失败
org.apache.activemq
activemq-pool
五、消息生产者
package com.chhliu.springboot.jms;
import javax.jms.Destination;
import org.springframework.beans.factory.annotation.Autowired;
import org.springframework.jms.core.JmsMessagingTemplate;
import org.springframework.stereotype.Service;
@Service("producer")
public class Producer {
@Autowired // 也可以注入JmsTemplate,JmsMessagingTemplate对JmsTemplate进行了封装
private JmsMessagingTemplate jmsTemplate;
// 发送消息,destination是发送到的队列,message是待发送的消息
public void sendMessage(Destination destination, final String message){
jmsTemplate.convertAndSend(destination, message);
}
}
六、消息消费者
package com.chhliu.springboot.jms;
import org.springframework.jms.annotation.JmsListener;
import org.springframework.stereotype.Component;
@Component
public class Consumer {
// 使用JmsListener配置消费者监听的队列,其中text是接收到的消息
@JmsListener(destination = "mytest.queue")
public void receiveQueue(String text) {
System.out.println("Consumer收到的报文为:"+text);
}
}
消费者2的代码同上,注意,消息消费者的类上必须加上@Component,或者是@Service,这样的话,消息消费者类就会被委派给Listener类,原理类似于使用SessionAwareMessageListener以及MessageListenerAdapter来实现消息驱动POJO
七、测试
package com.chhliu.springboot.jms;
import javax.jms.Destination;
import org.apache.activemq.command.ActiveMQQueue;
import org.junit.Test;
import org.junit.runner.RunWith;
import org.springframework.beans.factory.annotation.Autowired;
import org.springframework.boot.test.context.SpringBootTest;
import org.springframework.test.context.junit4.SpringRunner;
@RunWith(SpringRunner.class)
@SpringBootTest
public class SpringbootJmsApplicationTests {
@Autowired
private Producer producer;
@Test
public void contextLoads() throws InterruptedException {
Destination destination = new ActiveMQQueue("mytest.queue");
for(int i=0; i<100; i++){
producer.sendMessage(destination, "myname is chhliu!!!");
}
}
}
测试结果如下:
Consumer2收到的报文为:myname is chhliu!!!
Consumer收到的报文为:myname is chhliu!!!
Consumer2收到的报文为:myname is chhliu!!!
Consumer收到的报文为:myname is chhliu!!!
Consumer2收到的报文为:myname is chhliu!!!
Consumer收到的报文为:myname is chhliu!!!
Consumer2收到的报文为:myname is chhliu!!!
Consumer收到的报文为:myname is chhliu!!!
Consumer2收到的报文为:myname is chhliu!!!
Consumer收到的报文为:myname is chhliu!!!
Consumer2收到的报文为:myname is chhliu!!!
Consumer收到的报文为:myname is chhliu!!!
Consumer2收到的报文为:myname is chhliu!!!
经过上面的几个步骤,spring boot和Jms就基本上整合完成了,是不是使用起来很方便了!
八、实现双向队列
1、下面首先来对Consumer2这个消费者来进行下改造,代码如下:
package com.chhliu.springboot.jms;
import org.springframework.jms.annotation.JmsListener;
import org.springframework.messaging.handler.annotation.SendTo;
import org.springframework.stereotype.Component;
@Component
public class Consumer2 {
@JmsListener(destination = "mytest.queue")
@SendTo("out.queue")
public String receiveQueue(String text) {
System.out.println("Consumer2收到的报文为:"+text);
return "return message"+text;
}
}
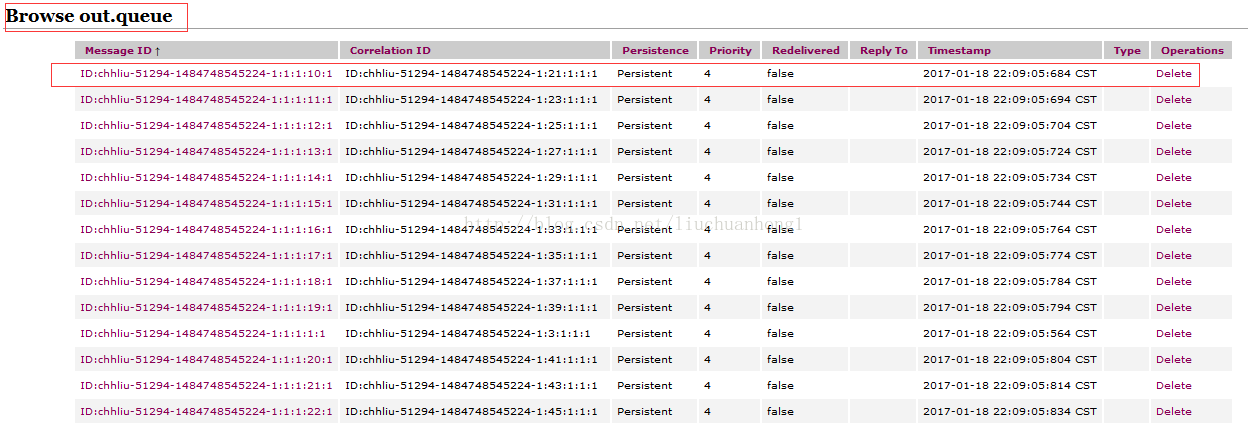
从上面的代码可以看出,我们在receiveQueue方法上面多加了一个注解@SendTo("out.queue"),该注解的意思是将return回的值,再发送的"out.queue"队列中,下面我们再来跑一下前面的测试,在监控页面中,我们发现,"out.queue"队列中已经有内容了,如下:

进入Browse界面观看:
最后看下收到的具体信息:
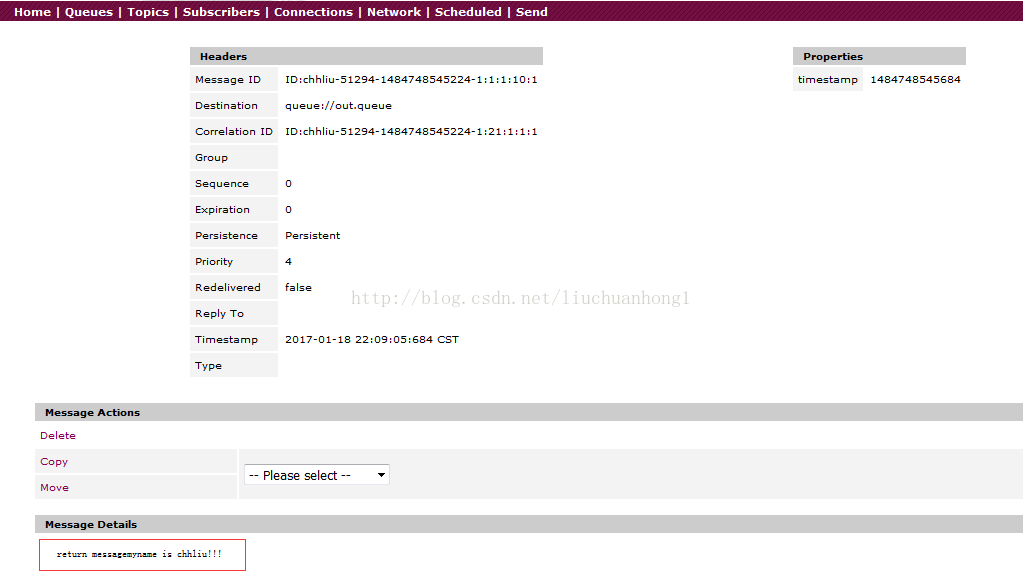
我们发现,该队列中的消息,就是我们返回的值!
九、对Producer进行改造
通过上面的示例,我们现在对Producer进行改造,使其既能生产报文,又能消费队列中的报文,代码如下:
package com.chhliu.springboot.jms;
import javax.jms.Destination;
import org.springframework.beans.factory.annotation.Autowired;
import org.springframework.jms.annotation.JmsListener;
import org.springframework.jms.core.JmsMessagingTemplate;
import org.springframework.stereotype.Service;
@Service("producer")
public class Producer {
@Autowired
private JmsMessagingTemplate jmsTemplate;
public void sendMessage(Destination destination, final String message){
jmsTemplate.convertAndSend(destination, message);
}
@JmsListener(destination="out.queue")
public void consumerMessage(String text){
System.out.println("从out.queue队列收到的回复报文为:"+text);
}
}
测试结果如下:
从out.queue队列收到的回复报文为:return messagemyname is chhliu!!!
Consumer收到的报文为:myname is chhliu!!!
Consumer2收到的报文为:myname is chhliu!!!
从out.queue队列收到的回复报文为:return messagemyname is chhliu!!!
Consumer收到的报文为:myname is chhliu!!!
Consumer2收到的报文为:myname is chhliu!!!
从out.queue队列收到的回复报文为:return messagemyname is chhliu!!!
Consumer收到的报文为:myname is chhliu!!!
Consumer2收到的报文为:myname is chhliu!!!
从out.queue队列收到的回复报文为:return messagemyname is chhliu!!!


 1902
1902


 被折叠的 条评论
为什么被折叠?
被折叠的 条评论
为什么被折叠?
 到【灌水乐园】发言


