


因为Spring AOP只能对方法进行拦截,所以首先要确定需要拦截什么方法,让它能织入约定的流程中去。
步骤1:确定连接点(在spring中就是什么类的什么方法)
1.1 创建一个UserService接口,它有userService方法
package com.springboot.aoparound.aspect.service;import com.springboot.aoparound.pojo.User;/** * 描述: * * @author * @create 2019-03-24 18:20 */public interface UserService { public void userService(User user);}当然这里需要创建一个普通java对象pojo类,代码如下:
package com.springboot.aoparound.pojo;import org.springframework.stereotype.Component;/** * 描述: * * @author * @create 2019-03-24 18:18 */@Componentpublic class User { private Long id; private String userName; private String note; public Long getId() { return id; } public void setId(Long id) { this.id = id; } public String getUserName() { return userName; } public void setUserName(String userName) { this.userName = userName; } public String getNote() { return note; } public void setNote(String note) { this.note = note; }}1.2 给它写一个实现类
package com.springboot.aoparound.aspect.service.userserviceimpl;import com.springboot.aoparound.aspect.service.UserService;import com.springboot.aoparound.pojo.User;import org.springframework.stereotype.Service;/** * 描述: * * @author * @create 2019-03-24 18:24 */@Servicepublic class UserServiceImpl implements UserService { @Override public void userService(User user) { if(user == null){ throw new RuntimeException("输入参数异常..."); } System.out.println("id="+user.getId()); System.out.println("userName="+user.getUserName()); System.out.println("note="+user.getNote()); }}这样一个普通的服务接口和实现类就实现了,接下来就是以userService方法为连接点,进行AOP编程。
步骤2:有了连接点,我们还需要一个切面,,通过它可以描述AOP的其它信息,用来描述流程的织入。创建切面类如下:
package com.springboot.aoparound.aspect;import com.springboot.aoparound.aspect.validator.UserValidator;import com.springboot.aoparound.aspect.validator.impl.UserValidatorImpl;import org.aspectj.lang.ProceedingJoinPoint;import org.aspectj.lang.annotation.*;/** * 描述: * * @author * @create 2019-03-24 18:29 */@Aspectpublic class MyAspect { @Pointcut("execution(* com.springboot.aoparound.aspect.service.userserviceimpl.UserServiceImpl.userService(..))") public void pointCut(){ } @Before("pointCut()") public void before(){ System.out.println("this is before..."); } @After("pointCut()") public void after(){ System.out.println("this is after..."); } @AfterReturning("pointCut()") public void afterReturning(){ System.out.println("this is afterReturning..."); } @AfterThrowing("pointCut()") public void afterThrowing(){ System.out.println("this is afterThrowing..."); }}如果对于这个切面类不能理解,我上一篇笔记是解释什么是约定编程的,可以帮助理解切面编程的。
步骤三:创建一个Config类作为java配置文件类,它是一个控制器,通过它,我们能在web浏览器的搜索栏输入URL和对应的参数,然后通过自动注入的UserService接口就能够进行用户信息的打印,因为方法标注了@ResponseBody,所以Spring MVC会将其转换成JSON响应请求。
package com.springboot.aoparound.config;import com.springboot.aoparound.aspect.service.UserService;import com.springboot.aoparound.aspect.validator.UserValidator;import com.springboot.aoparound.pojo.User;import org.springframework.beans.factory.annotation.Autowired;import org.springframework.stereotype.Controller;import org.springframework.web.bind.annotation.RequestMapping;import org.springframework.web.bind.annotation.ResponseBody;/** * 描述: * * @author * @create 2019-03-24 18:41 */@Controller@RequestMapping("/user")public class Config { @Autowired private UserService userService = null; @RequestMapping("/print") @ResponseBody public User getUser(Long id,String userName,String note){ User user = new User(); user.setId(id); user.setUserName(userName); user.setNote(note);// user = null; userService.userService(user); return user; }}步骤四:配置启动文件
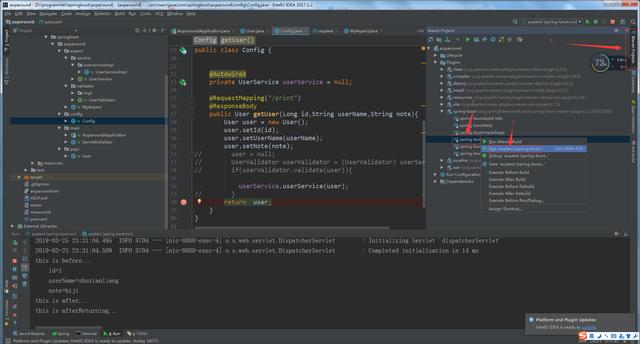
package com.springboot.aoparound.main;import com.springboot.aoparound.aspect.MyAspect;import org.springframework.boot.SpringApplication;import org.springframework.boot.autoconfigure.SpringBootApplication;import org.springframework.context.annotation.Bean;@SpringBootApplication(scanBasePackages = "com.springboot.aoparound")public class AoparoundApplication { @Bean("myAspect") public MyAspect initMyAspect(){ return new MyAspect(); } public static void main(String[] args) { SpringApplication.run(AoparoundApplication.class, args); }}然后通过如下的路径启动项目:
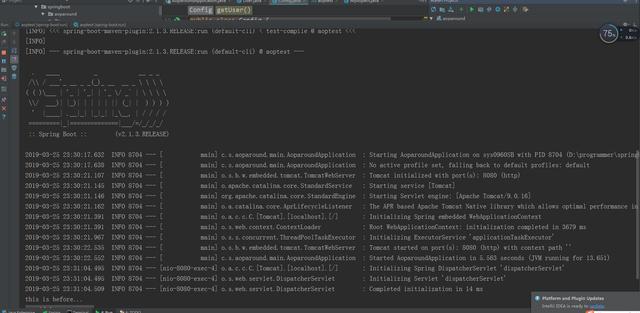
看到后台运行如下:
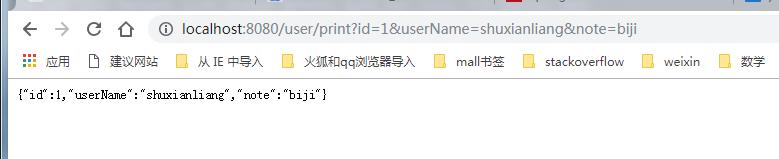
运行成功后再web浏览器的搜索框输入:http://localhost:8080/user/print?id=1&userName=shuxianliang¬e=biji
会看到浏览器返回了参数如下图:
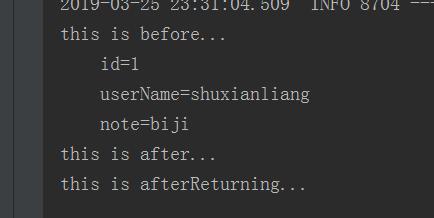
后台打出的日志如下图所示:
感谢你的阅读,如果想了解更多也可查阅文章下方的其它智能检索文章,相信会有适合你的文章哒,点个赞呗~~~啊哈哈


 5652
5652


 被折叠的 条评论
为什么被折叠?
被折叠的 条评论
为什么被折叠?
 到【灌水乐园】发言


