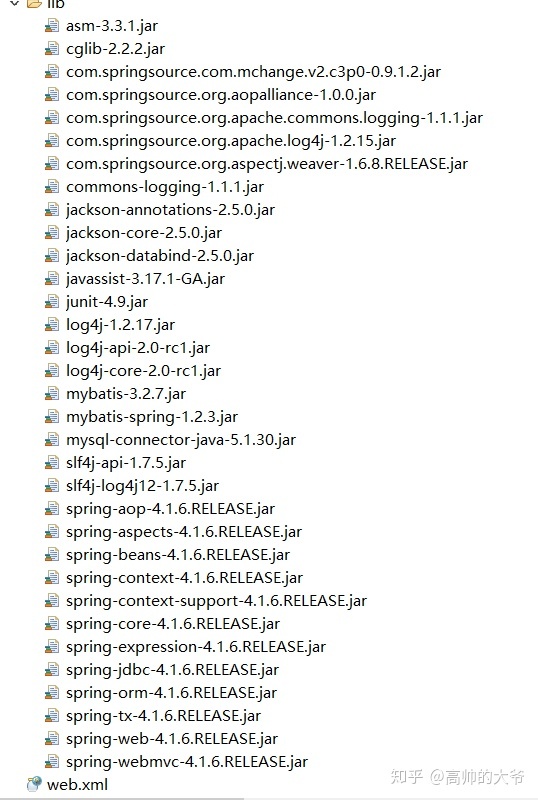
1.创建web项目导入整合所需要的jar包
![226672ec70c917888750ce319790428b.png](https://img-blog.csdnimg.cn/img_convert/226672ec70c917888750ce319790428b.png)
2.SpringMVC和Spring整合
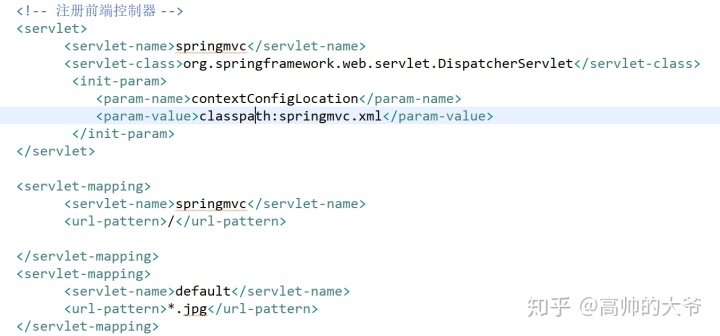
(1)在web.xml中配置前端控制器,用<init-param>声明springmvc配置文件的位置,
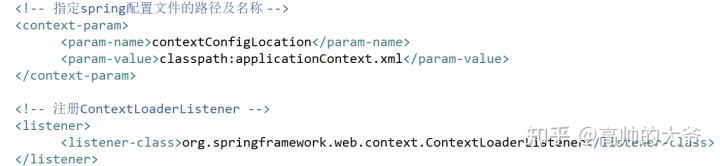
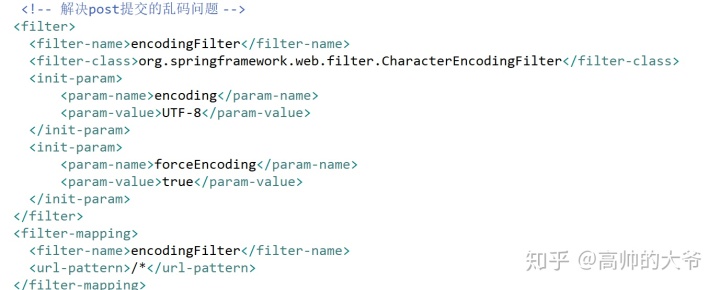
指定spring配置文件的路径及名称,注册ContextLoaderListener为了防止中文乱
码问题,配置字符编码过滤器
![06fceac6dfbe69dedc5aa7cb1e95edfc.png](https://img-blog.csdnimg.cn/img_convert/06fceac6dfbe69dedc5aa7cb1e95edfc.png)
![feaef41ce7d4308610ca9c037a7ded66.png](https://img-blog.csdnimg.cn/img_convert/feaef41ce7d4308610ca9c037a7ded66.png)
![d62c9728923dbcd077952998a938b3fd.png](https://img-blog.csdnimg.cn/img_convert/d62c9728923dbcd077952998a938b3fd.png)
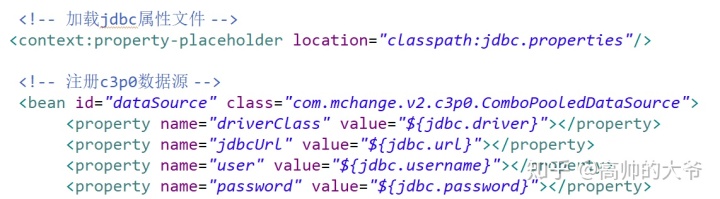
(2) 在src下新建jdbc.properties和sping配置文件applicationContext.xml
配置思路:
1. 依赖关系配置: dataSource-àsqlSessionFactory
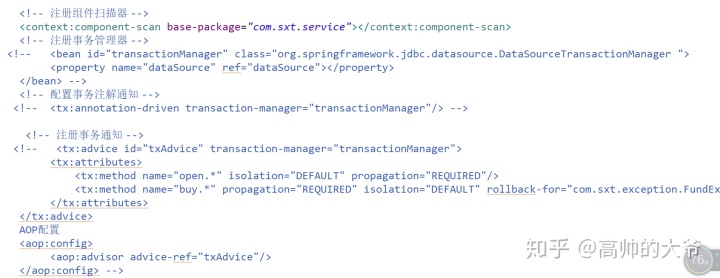
2. Spring声明式事务的配置:transactionManager-àtxAdvice-àPointCut-
àtxAdvisor
(3)配置springmvc.xml
![c402c245cb9645c5507a27adab171219.png](https://img-blog.csdnimg.cn/img_convert/c402c245cb9645c5507a27adab171219.png)
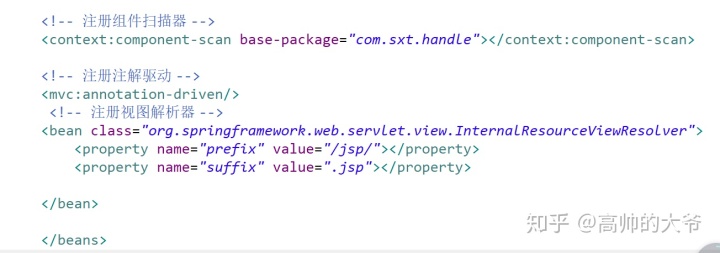
(4)配置applicationContext.xml
![64c4cfd6977155eae7f2f8f797c0c55b.png](https://img-blog.csdnimg.cn/img_convert/64c4cfd6977155eae7f2f8f797c0c55b.png)
![dfcffb539a933bd865a6aa74cd4d2ca1.png](https://img-blog.csdnimg.cn/img_convert/dfcffb539a933bd865a6aa74cd4d2ca1.png)
2.Spring与Mybatis整合
(1)配置applicationContext.xml
sqlSessionFactory作用:解析spring配置文件,监听ServletContext,当其初始
化时创建spring容器对象并将其封装到ServletContext作用域中
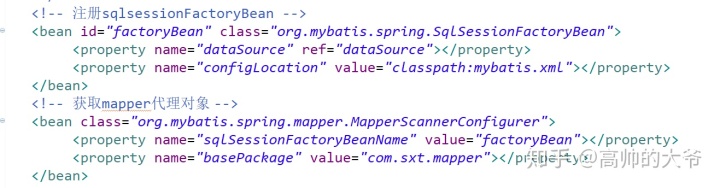
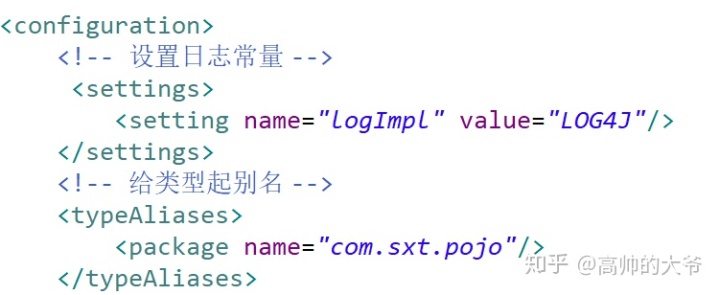
![e0f43b01486726fda7365bbed57a9071.png](https://img-blog.csdnimg.cn/img_convert/e0f43b01486726fda7365bbed57a9071.png)
(2)配置mybatis.xml
![e5b73c5b2c51af143e215d52dc90f772.png](https://img-blog.csdnimg.cn/img_convert/e5b73c5b2c51af143e215d52dc90f772.png)