


前一段时间,一直在忙框架方面的工作,偶尔也会帮业务同学去优化优化使用TensorFlow的代码,也加上之前看了dmlc/relay,nnvm的代码,觉得蛮有意思,也想分别看下TensorFlow的Graph IR、PaddlePaddle的Graph IR,上周五,看代码看的正津津有味的时候,看到某个数据竞赛群里面讨论东西,不记得具体内容,大概说的是框架的代码实现, 有几位算法大佬说看底层源码比较麻烦,因为比较早从框架,这块代码通常都还能看,问题都不大,和群里小伙伴吹水了半天之后,感觉是可以写篇如何看TensorFlow或者其他框架底层源码的劝退文了。
利其器
首先,一定是要找个好工作来看源码,很多人推荐vs code、sublime,我试过vs code+bazel的,好像也不错,但是后面做c++适应了clion之后,除了资源要求比较多,还是蛮不错的,使用c++一般推荐使用cmake来看编译项目,但是TensorFlow是bazel的,无法直接支持,最开始,这边是自己写简单的cmake,能够实现简单的代码跳转,但是涉及到比如protobuf之类的编译过后产生的文件无法跳转,比较麻烦,不够纯粹,很早之前知道clion有bazel的组件,但是不知道为啥一直搞不通,上周找时间再试了试,发现竟然通了,使用之后,这才是看tf源码的真正方式:
首先,选择合适版本的bazel,千万不能太高,也不能太低,这里我拉的是TF2.0的代码,使用bazel 0.24.0刚刚好,切记千万别太高也比太低, 千万别太高也比太低,千万别太高也比太低。


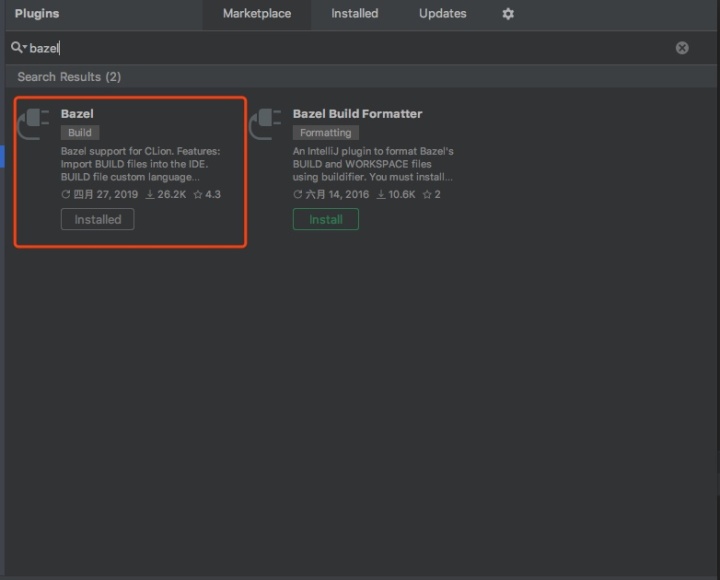
其次,clion上选择bazel的插件

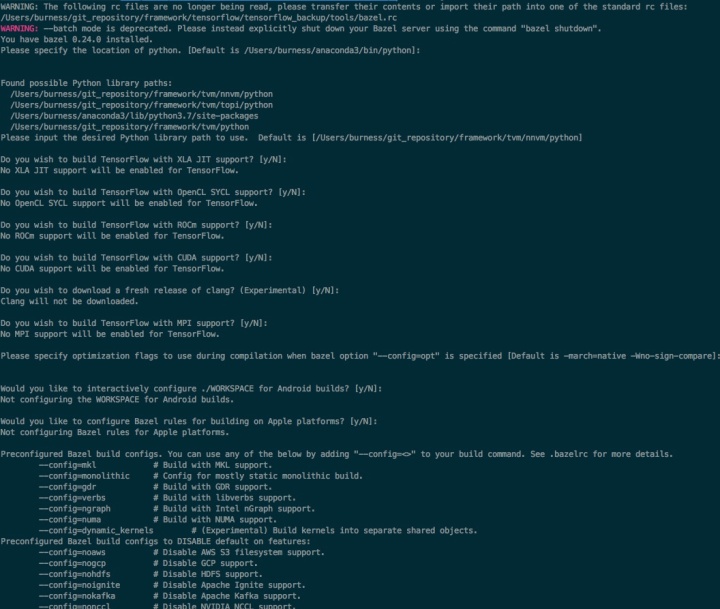
第三步,./configure,然后按你的意图选择合适的编译配置

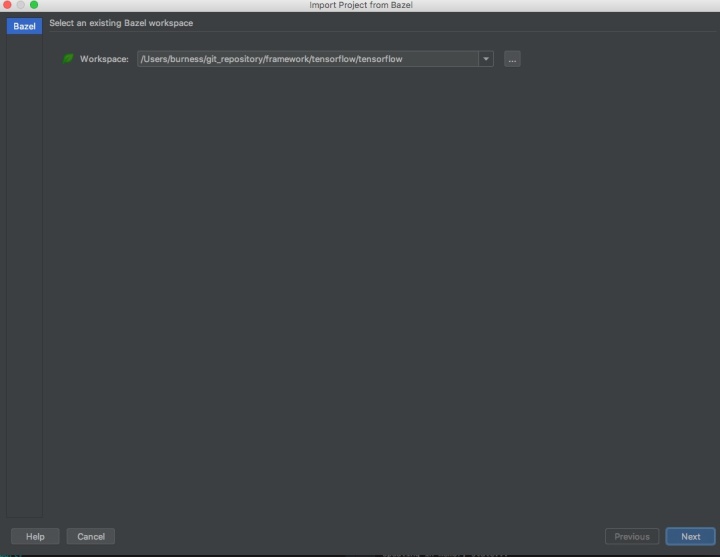
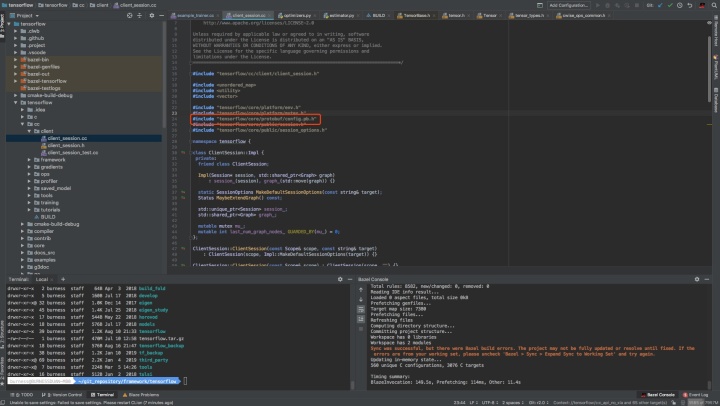
第四步,导入bazel项目:File=>Import Bazel Project
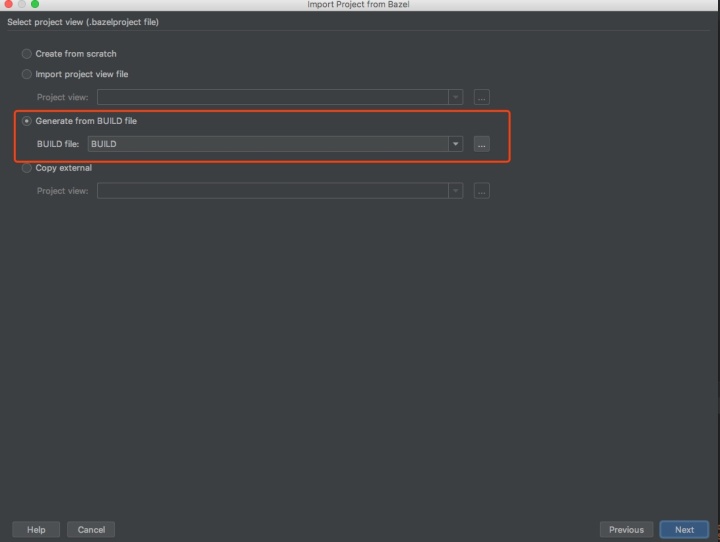

经过上面几步之后,接下来就要经过比较长时间的等待,clion会导入bazel项目,然后编译整个项目,这个耗时视你机器和网络而定(顺便提一句,最好保证比较畅通的访问github的网络,另外由于上面targets:all,会编译TensorFlow所有的项目,如果你知道是什么意思,可以自己修改,如果不知道的话我先不提了,默认就好,期间会有很多Error出现,放心,问题不大,因为会默认编译所有的模块)
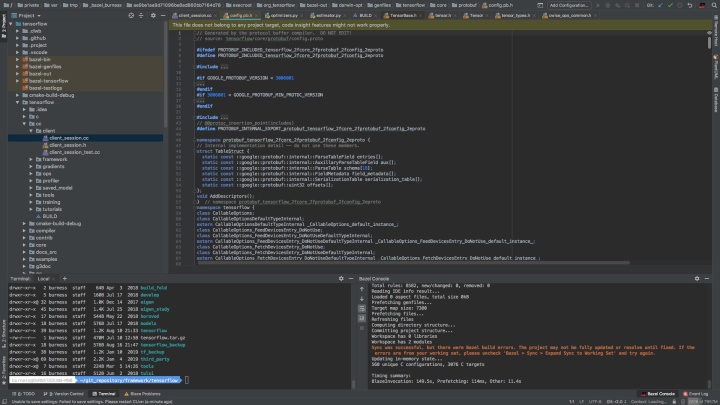
经过上面之后,我们就可以愉快的看代码啦,连protobuf生成的文件都很开心的跳转啦

极简版c++入门
TensorFlow大部分人都知道,底层是c++写的,然后外面包了一层python的api,既然底层是c++写的,那么用c++也是可以用来训练模型的,大部分人应该都用过c++或者java去载入frozen的模型,然后做serving应用在业务系统上,应该很少人去使用c++来训练模型,既然我们这里要读代码,我们先尝试看看用c++写模型,文件路径如下图:
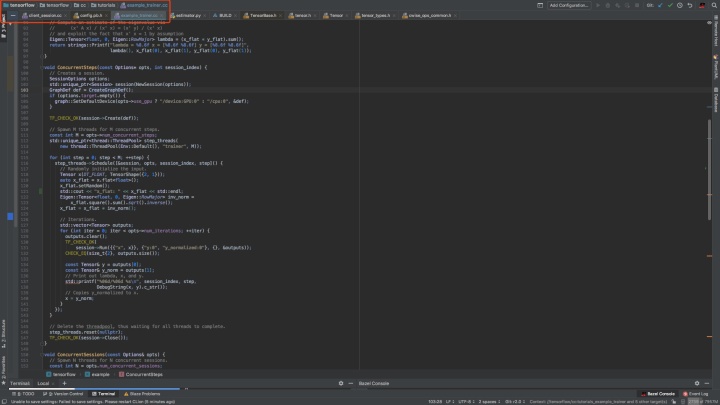

主要函数就那么几个:CreateGraphDef, ConcurrentSteps, ConcurrentSessions:
CreateGraphDef 构造计算图
GraphDef CreateGraphDef() {
// TODO(jeff,opensource): This should really be a more interesting
// computation. Maybe turn this into an mnist model instead?
Scope root = Scope::NewRootScope();
using namespace ::tensorflow::ops; // NOLINT(build/namespaces)
// A = [3 2; -1 0]. Using Const<float> means the result will be a
// float tensor even though the initializer has integers.
auto a = Const<float>(root, {{3, 2}, {-1, 0}});
// x = [1.0; 1.0]
auto x = Const(root.WithOpName("x"), {{1.f}, {1.f}});
// y = A * x
auto y = MatMul(root.WithOpName("y"), a, x);
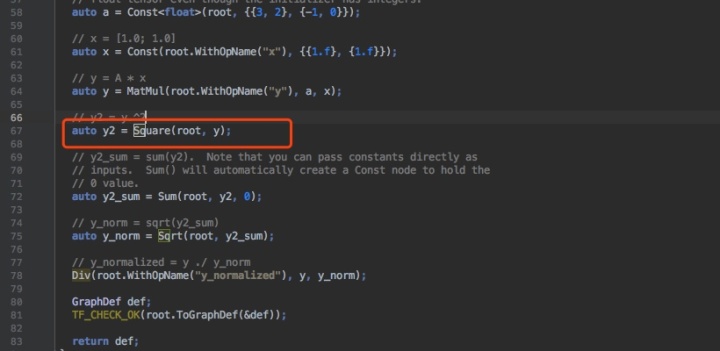
// y2 = y.^2
auto y2 = Square(root, y);
// y2_sum = sum(y2). Note that you can pass constants directly as
// inputs. Sum() will automatically create a Const node to hold the
// 0 value.
auto y2_sum = Sum(root, y2, 0);
// y_norm = sqrt(y2_sum)
auto y_norm = Sqrt(root, y2_sum);
// y_normalized = y ./ y_norm
Div(root.WithOpName("y_normalized"), y, y_norm);
GraphDef def;
TF_CHECK_OK(root.ToGraphDef(&def));
return def;
}定义graph 节点 root, 然后定义常数变量a (shape为2*2), x (shape为2* 1),然后 y = A * x, y2 = y.2, y2_sum = sum(y2), y_norm = sqrt(y2_sum), y_normlized = y ./ y_norm。代码很简洁, 看起来一目了然,
然后是ConcurrentSteps
void ConcurrentSteps(const Options* opts, int session_index) {
  // Creates a session.
  SessionOptions options;
  std::unique_ptr<Session> session(NewSession(options));
  GraphDef def = CreateGraphDef();
  if (options.target.empty()) {
    graph::SetDefaultDevice(opts->use_gpu ? "/device:GPU:0" : "/cpu:0", &def);
  }

  TF_CHECK_OK(session->Create(def));

  // Spawn M threads for M concurrent steps.
  const int M = opts->num_concurrent_steps;
  std::unique_ptr<thread::ThreadPool> step_threads(
      new thread::ThreadPool(Env::Default(), "trainer", M));

  for (int step = 0; step < M; ++step) {
    step_threads->Schedule([&session, opts, session_index, step]() {
      // Randomly initialize the input.
      Tensor x(DT_FLOAT, TensorShape({2, 1}));
      auto x_flat = x.flat<float>();
      x_flat.setRandom();
      std::cout << "x_flat: " << x_flat << std::endl;
      Eigen::Tensor<float, 0, Eigen::RowMajor> inv_norm =
          x_flat.square().sum().sqrt().inverse();
      x_flat = x_flat * inv_norm();

      // Iterations.
      std::vector<Tensor> outputs;
      for (int iter = 0; iter < opts->num_iterations; ++iter) {
        outputs.clear();
        TF_CHECK_OK(
            session->Run({{"x", x}}, {"y:0", "y_normalized:0"}, {}, &outputs));
        CHECK_EQ(size_t{2}, outputs.size());

        const Tensor& y = outputs[0];
        const Tensor& y_norm = outputs[1];
        // Print out lambda, x, and y.
        std::printf("%06d/%06d %sn", session_index, step,
                    DebugString(x, y).c_str());
        // Copies y_normalized to x.
        x = y_norm;
      }
    });
  }

  // Delete the threadpool, thus waiting for all threads to complete.
  step_threads.reset(nullptr);
  TF_CHECK_OK(session->Close());
}
新建一个session,然后设置10个线程来计算,来执行:
std::vector<Tensor> outputs;
      for (int iter = 0; iter < opts->num_iterations; ++iter) {
        outputs.clear();
        TF_CHECK_OK(
            session->Run({{"x", x}}, {"y:0", "y_normalized:0"}, {}, &outputs));
        CHECK_EQ(size_t{2}, outputs.size());

        const Tensor& y = outputs[0];
        const Tensor& y_norm = outputs[1];
        // Print out lambda, x, and y.
        std::printf("%06d/%06d %sn", session_index, step,
                    DebugString(x, y).c_str());
        // Copies y_normalized to x.
        x = y_norm;
      }
每次计算之后,x=y_norm,这里的逻辑其实就是为了计算矩阵A的最大eigenvalue, 重复执行x = y/y_norm; y= A*x;
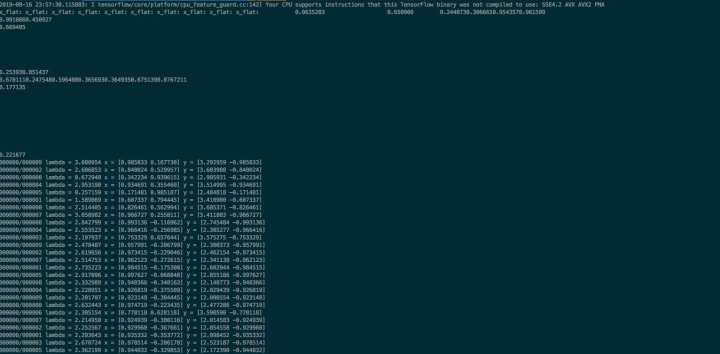
编译:
bazel build //tensorflow/cc:tutorials_example_trainer执行结果,前面不用太care是我打印的一些调试输出:
简单的分析
上面简单的c++入门实例之后,可以抽象出TensorFlow的逻辑:
- 构造graphdef,使用TensorFlow本身的Graph API,利用算子去构造一个逻辑计算的graph,可以试上述简单地计算eigenvalue,也可以是复杂的卷积网络,这里是涉及到Graph IR的东西,想要了解的话,我建议先看下nnvm和relay,才会有初步的概念;
- 用于构造graphdef的各种操作,比如上述将达到的Square、MatMul,这些操作可以是自己写的一些数学操作也可以是TensorFlow本身封装一些数学计算操作,可以是MKL的封装,也可以是cudnn的封装,当然也可以是非数学库,如TFRecord的读取;
- Session的构造,新建一个session,然后用于graph外与graph内部的数据交互:session->Run({{"x", x}}, {"y:0", "y_normalized:0"}, {}, &outputs));这里不停地把更新的x王graph里喂来计算y与y_normalized,然后将x更新为y_normalized;
GraphDef这一套,太过复杂,不适合演示如何看TF源码,建议大家先有一定的基础知识之后,再看,这里我们摘出一些算法同学感兴趣的,比如Square这个怎么在TF当中实现以及绑定到对应操作
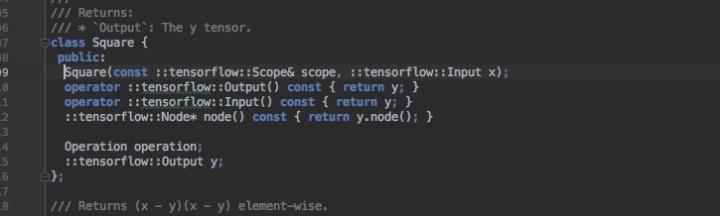
- 代码中直接跳转到Square类,如下图;
2.很明显看到Square类的定义,其构造函数,接收一个scope还有一个input, 然后我们找下具体实现,如下图:
3.同目录下, http://math_ops.cc,看实现逻辑,我们是构造一个名为Square的op,然后往scope里更新,既然如此,肯定是预先有保存名为Square的op,接下来我们看下图:
4.这里讲functor::square注册到"Square"下,且为UnaryOp,这个我不知道怎么解释,相信用过eigen的人都知道,不知道的话去google下,很容易理解,且支持各种数据类型;

5.那么看起来,square的实现就在functor::square,我们再进去看看,集成base模板类,且看起来第二个模板参数为其实现的op,再跳转看看:

 6.最后,我们到达了最终的实现逻辑:operator()和packetOp,也看到了最终的实现,是不是没有想象的那么难。

更重要一点
看完了上面那些,基本上会知道怎么去看TensorFlow的一些基础的代码,如果你了解graph ir这套,可以更深入去理解下,这个过程中,如果对TensorFlow各个文件逻辑感兴趣,不妨去写写测试用例,TensorFlow很多源码文件都有对应的test用例,我们可以通过Build文件来查看,比如我想跑下http://client_session_test.cc这里的测试用例


我们看一下Build文件中

这里表明了对应的编译规则,然后我们只需要
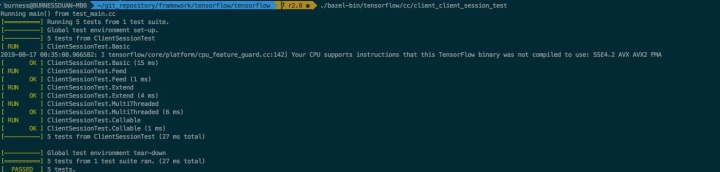
bazel build //tensorflow/cc:client_client_session_test
然后运行相应的测试程序即可
更更重要的一点
上面把如何看TensorFlow代码的小经验教给各位,但是其实这个只是真正的开始,无论TensorFlow、MXNet、PaddlePaddle异或是TVM这些,单纯去看代码,很难理解深刻其中原理,需要去找相关行业的paper,以及找到行业的精英去请教,去学习。目前网上ml system的资料还是蛮多的,有点『乱花迷人眼』的感觉,也没有太多的课程来分享这块的工作,十分期望这些框架的官方分享这些框架的干货,之后我也会在学习中总结一些资料,有机会的话分享给大家。最后,这些东西确实是很复杂,作者在这块也是还是懵懵懂懂,希望能花时间把这些内在的东西搞清楚,真的还蛮有意思的。
也欢迎大家关注我的同名微信公众号 小石头的码疯窝(xiaoshitou_ml_tech),或者通过公众号加我的个人微信进行讨论


 3923
3923


 被折叠的 条评论
为什么被折叠?
被折叠的 条评论
为什么被折叠?
 到【灌水乐园】发言


