


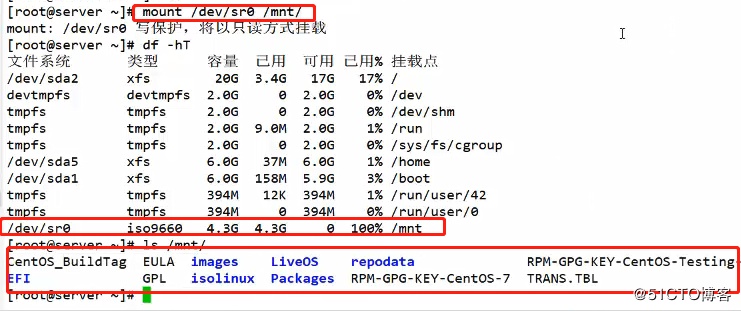
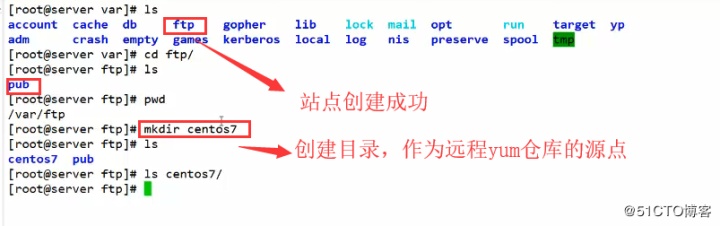
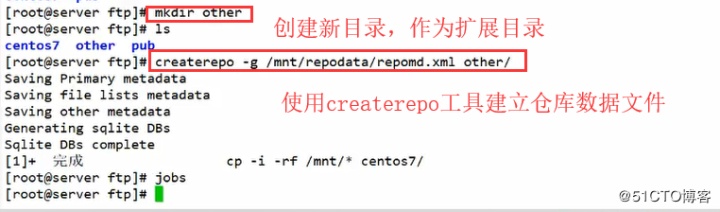
实验环境:两台centos7虚拟机。实验过程:一、配置服务端,将本地镜像挂载,安装FTP服务(FTP服务默认路径:/var/ftp),创建站点,将镜像复制到源点centos7/中,创建扩展目录/other 存放非官方(存在依赖关系)RPM包组,使用createrepo命令[root@server ~]# mount /dev/sr0 /mnt/ 挂载镜像至本地/mnt中 [root@server var]# yum install vsftpd -y 安装FTP服务 [root@server ftp] # mkdir centos7 创建一个目录,作为远程yum仓库的源点[root@server ftp]# cp -rf /mnt/* centos7/ & 复制镜像至源点目录中,于后台运行 [root@server ftp]# mkdir other 创建扩展目录 [root@server ftp]# createrepo -g /mnt/ repodata/ repomd.xml other/ 使用createrepo命令建立仓库数据文件


二、开启FTP服务(服务的名称为vsftps)。关闭防火墙,关闭增强安全性的功能,确保客户端能够成功访问。[root@server ~]# systemctl start vsftpd 开启FTP服务 [root@server ~]# systemctl stop firewalld.service 关闭防火墙 [root@server ~]# setenforce 0 关闭增强安全性的功能

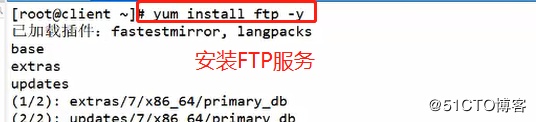
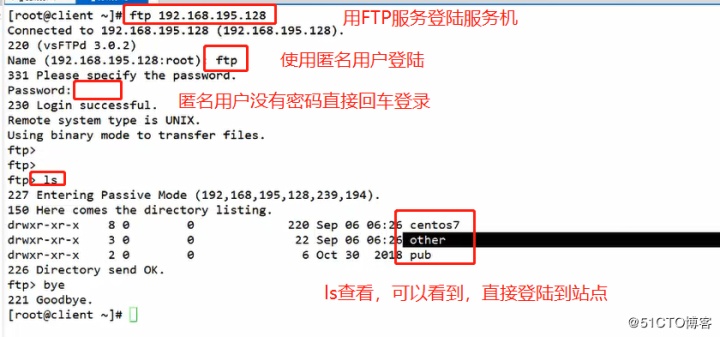
三、用客户机去访问服务机,首先安装FTP服务,然后去访问服务机,访问成功表明可以使用远程yun仓库[root@client ~]# yum install ftp -y 安装ftp服务[root@client ~]# ftp 192.168.195.128 使用ftp服务访问服务机
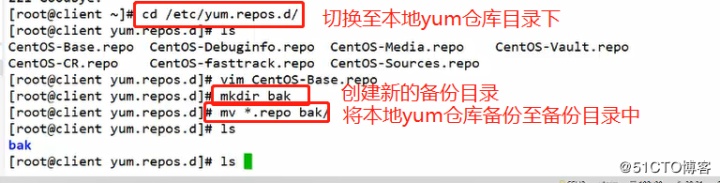
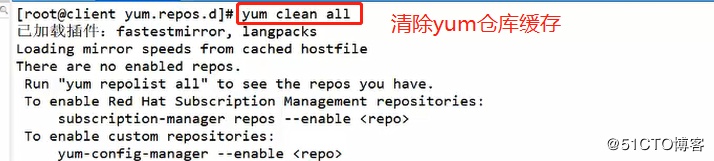
四、将本地yum仓库做好备份,移动至新建备份目录中(因为系统默认读取官方默认目录yum.reops.d,若将其移到别处,则使用yum install安装时读取不到,无法安装),清除本地yum仓库[root@client ~]# cd /etc/yum.repos.d/ 切换到本地yum仓库配置文件目录下 [root@client yum.repos.d]# mkdir bak 创建新的备份目录 [root@client yum.repos.d]# mv *.repo bak/ 将本地yum仓科配置文件移动到备份目录中 [root@client yum.repos.d]# yum clean all 清除yum仓库缓存
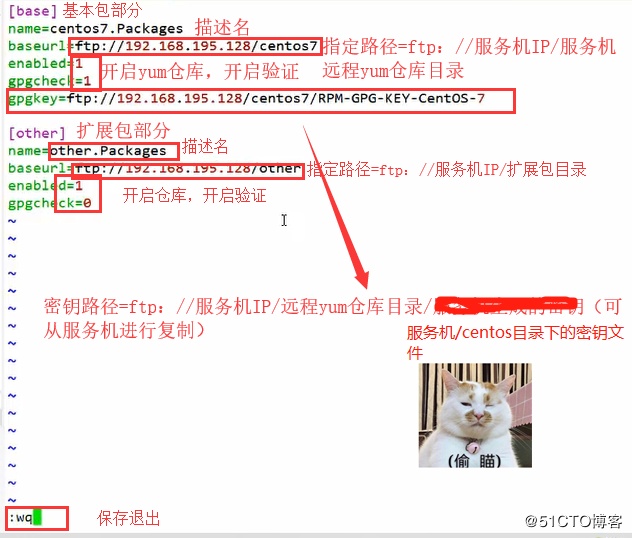
五、编辑配置文件为客户机指定远程yum仓库的位置(密钥文件在服务机/centos7目录下,可进行复制)[root@client yum.repos.d]# vim sentos7.repo 编辑配置文件

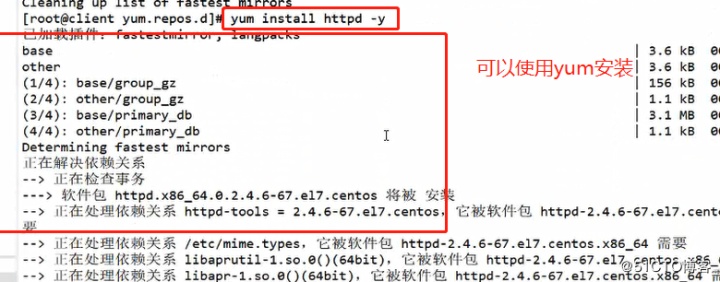
六、测试远程yum仓库能否正常使用root@client yum.repos.d]# yum install httpd -y 安装httpd服务测试
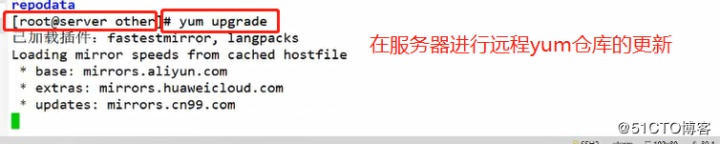
七、yum仓库的更新(可在服务机也可在客户机更新):[root@client yum.repos.d]# yum update 更新软件包,并更新软件和系统内核[root@client yum.repos.d]# yum upgrade 只更新软件包[root@server other]# yum upgrade 在服务机更新yum仓库
远程yum仓库搭建完成。
写在最后:
本专栏所有文章均为南京课工场学员投稿,如有问题欢迎指出讨论,未经允许,禁止转载!


 876
876


 被折叠的 条评论
为什么被折叠?
被折叠的 条评论
为什么被折叠?
 到【灌水乐园】发言


