


前言
前几天我曾分享过几张不那么严谨的思维导图,其中便有关于设计模式的一张:
 在很长的一段时间里,我只能记住某几种设计模式,并没有很好的应用。
索性我们就以该图为大纲,讲讲那些我们不经意间使用的设计模式 --- 创建型。
1. 三种工厂模式: FactoryPattern
 通常来说三种设计模式为:
简单工厂模式(
SimpleFactory)工厂方法模式(
Factorymethod)抽象工厂模式(
Abstractfactory)
其核心就是:
工厂起到的作用就是隐藏了创建实例的复杂度,只需要提供一个接口,简单清晰。--- 摘自《前端面试之道》
而区别则是:
简单工厂模式,用来创建某一种产品对象的实例,用来创建单一对象。
工厂方法模式,将创建实例推迟到子类中进行。
抽象工厂模式,是对类的工厂抽象用来创建产品类簇,不负责创建某一类产品的实例。
其实从你会用 jQuery开始,就已经在用工厂模式了:
JavaScript设计模式与实践--工厂模式
1. jQuery的 $(selector)
jQuery中 $('div')和 new$('div')哪个好用?很显然直接 $()最方便 ,这是因为 $()已经是一个工厂方法了。
class jQuery {
constructor(selector) {
super(selector)
}
// ....
}
window.$ = function(selector) {
return new jQuery(selector)
}
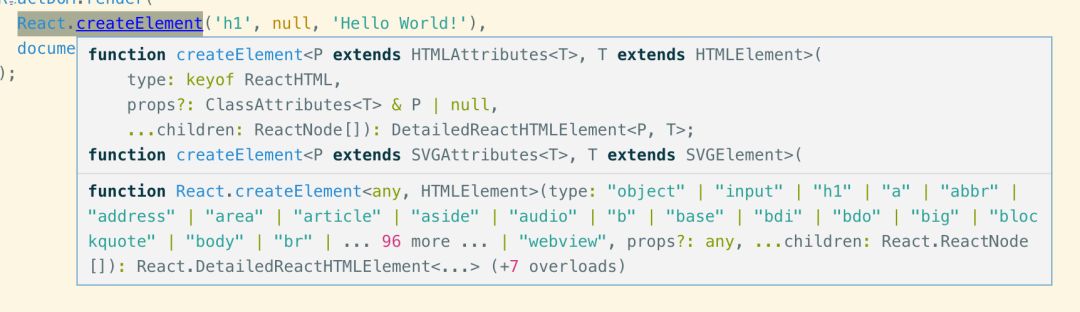
2. React的 createElement()
React.createElement()方法就是一个工厂方法
React.createElement('h1', null, 'Hello World!'),
3. Vue的异步组件
通过 promise的方式 resolve出来一个组件 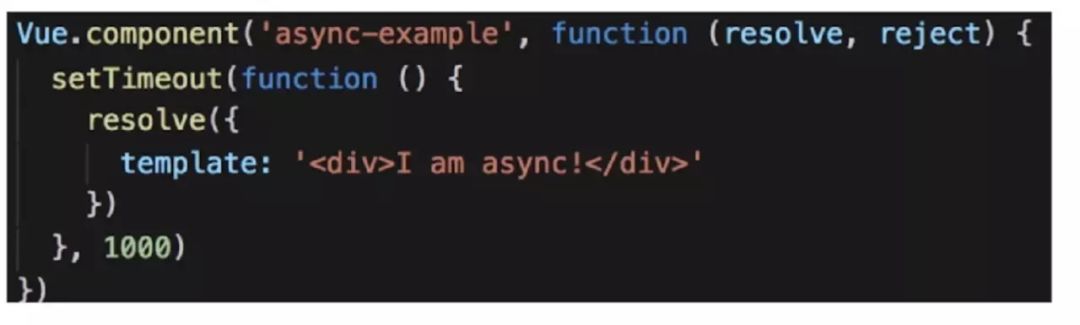 对应源码:
对应源码:
export function createComponent (
Ctor: Class<Component> | Function | Object | void,
data: ?VNodeData,
context: Component,
children: ?Array<VNode>,
tag?: string
): VNode | Array<VNode> | void {
// ...逻辑处理
// async component
let asyncFactory
const vnode = new VNode(
`vue-component-${Ctor.cid}${name ? `-${name}` : ''}`,
data, undefined, undefined, undefined, context,
{ Ctor, propsData, listeners, tag, children },
asyncFactory
)
}
2. 单例模式: SingletonPattern

单例模式是最简单的设计模式之一。用一句大白话来解释就是:
实例一次后处处可用
单例模式的要点有三个:
某个类只能有一个实例;
它必须自行创建这个实例;
它必须自行向整个系统提供这个实例。
从具体实现角度来说,就是以下三点:
单例模式的类只提供私有的构造函数
类定义中含有一个该类的静态私有对象
该类提供了一个静态的公有的函数用于创建或获取它本身的静态私有对象。
同样的,它也是我们最早接触的一种设计模式:
1. 引用第三方库
多次引用只会使用一个库引用,如 jQuery, lodash, moment等。
2. Vuex/Redux
全局状态管理 store
Vuex和Redux数据保存在单一store中,Mobx将数据保存在分散的多个store中
const store = createStore(reducer)
render(
<Provider store={store}>
<App />
Provider>,
document.getElementById('root')
)
3. Vue中第三方插件的安装
首当其冲的就是 Vuex安装:
let Vue // bind on install
export function install (_Vue) {
if (Vue && _Vue === Vue) {
// 如果发现 Vue 有值,就不重新创建实例了
return
}
Vue = _Vue
applyMixin(Vue)
}
其它也类似,感兴趣的可以去 GitHub搜索 exportfunctioninstall(Vue)

4. 简单实现一个单例模式:
class SingletonClass {
constructor() {
if (!SingletonClass.instance) {
SingletonClass.instance = this;
}
return SingletonClass.instance;
}
// other things
}
const instance = new SingletonClass();
Object.freeze(instance);
export default instance;
3. 建造者模式: BuilderPattern
、建造者模式主要用于 “分步骤构建一个复杂的对象”

这在其中“分步骤”是一个稳定的算法,而复杂对象的各个部分则经常变化。
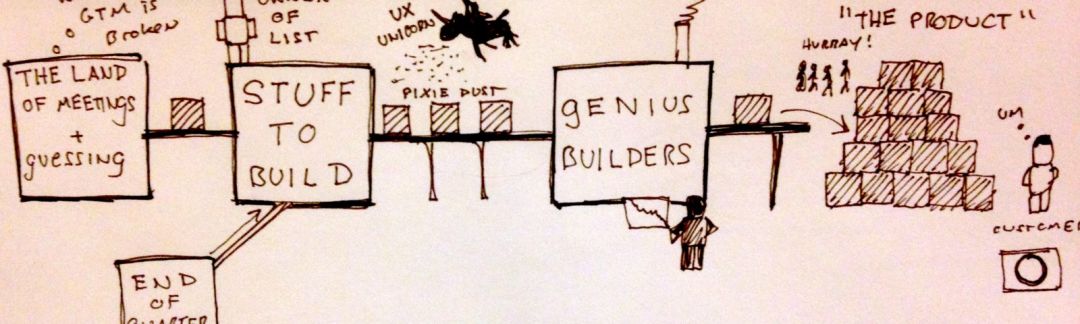
一句话:指挥者分配任务,建造者进行开发,各执其责,稳定在一个大的流程里面去。
建造者模式概念拟物化解读
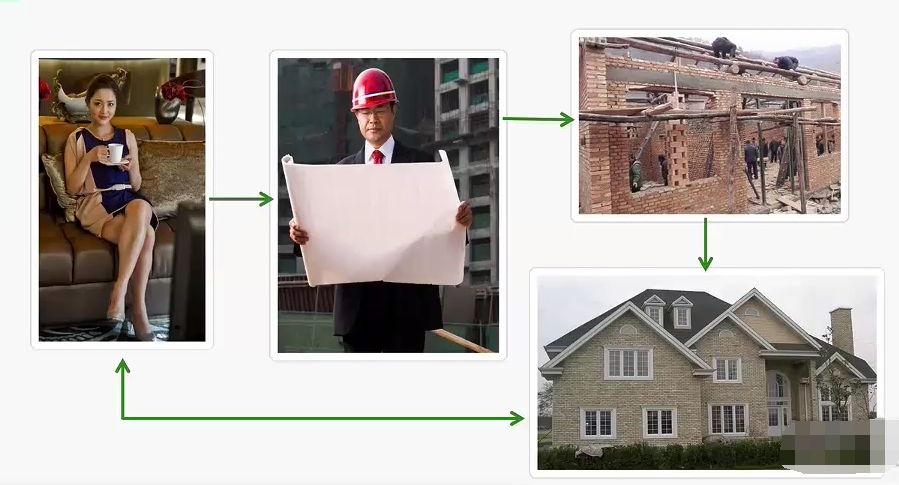 一位女士要建造一座别墅,需要找来一位包工头,包工头再将具体的任务分配给工人做,做完之后再给女士使用。
1. jQuery中的建造者
jQuery中建造者模式体现在:
$( "
foo">bar" );$( "
test
">foo bar").appendTo("body" );var newParagraph = $( " ).text( "Hello world" );
$( "" )
.attr({ "type": "text", "id":"sample"});
.appendTo("#container");
下面是 jQuery源码内部 jQuery.prototype方法的一个片段,它将从传递给 jQuery()选择器的标记构建 jQuery对象。
无论是否 document.createElement用于创建新元素,对元素(找到或创建)的引用都会注入到返回的对象中,因此 .attr()可以在其后立即使用其他方法。
// HANDLE: $(html) -> $(array)
if ( match[1] ) {
context = context instanceof jQuery ? context[0] : context;
doc = ( context ? context.ownerDocument || context : document );
//如果传入的是单个字符串,并且是单个标记
//只需执行createElement并跳过其余部分
ret = rsingleTag.exec( selector );
if ( ret ) {
if ( jQuery.isPlainObject( context ) ) {
selector = [ document.createElement( ret[1] ) ];
jQuery.fn.attr.call( selector, context, true );
} else {
selector = [ doc.createElement( ret[1] ) ];
}
} else {
ret = jQuery.buildFragment( [ match[1] ], [ doc ] );
selector = ( ret.cacheable ? jQuery.clone(ret.fragment)
: ret.fragment ).childNodes;
}
return jQuery.merge( this, selector );
1. 建造者模式的理想实现
本质上,建造者模式的目标是减少构造函数所用的参数数量,并提供向对象添加灵活的行为方法。
// 使用建造者模式之前
const person1 = new Person('Peter', 26, true, 40074986, 4, 2);
// 使用建造者模式之后
const person1 = new Person();
person1
.name('Peter')
.age(26)
.member(true)
.phone(40074986)
.children(4)
.cars(2);
2. ES6中的建造者模式
我们来假设一个商品录入系统的业务场景,有四个必填信息,分别是:名称,价格,分类。该 build方法将返回最终的 JavaScript对象。
// 书籍建造者类
class ProductBuilder {
constructor() {
this.name = '';
this.price = 0;
this.category = '';
}
withName(name) {
this.name = name
return this
}
withPrice(price) {
this.price = price
return this
}
withCategory(category) {
this.category = category
return this
}
build() {
return {
name: this.name,
price: this.price,
category: this.category,
}
}
}
console.log(
new ProductBuilder()
.withName('《哈利·波特》')
.withCategory('book')
.withPrice('29.9')
.build()
虽然只有三个属性,我们的构建器已经相当大,并且需要很多 withers。
构建器的大小随字段数量线性增长。我们有太多的 withxxxx方法。我们其实可以自动创建这类 withxxxx方法以简化代码。
3. 建造者模式简化
class ProductBuilder {
constructor() {
this.name = ''
this.price = ''
this.category = 'other'
// 为每个属性生成`wither`
Object.keys(this).forEach(key => {
const witherName = `with${key.substring(0, 1).toUpperCase()}${key.substring(1)}`
this[witherName] = value => {
this[key] = value
return this
}
})
}
build() {
// 获取此生成器的所有非函数属性的数组
const keysNoWithers = Object.keys(this).filter(key => typeof this[key] !== 'function')
return keysNoWithers.reduce((returnValue, key) => {
return {
...returnValue,
[key]: this[key],
}
}, {})
}
}
console.log(
new ProductBuilder()
.withName('《哈利波特》')
.withCategory('book')
.build()
)
我们将所有的建造方法withxxxx在constructor调用时自动被创建,这里我们使用了一些ES6的新语法:Object.keys获取对象属性数组,...的合并对象的语法
最终我们得到了一种声明式(易于理解)的方法,且可以动态添加属性的建造者模式。
5. 提取公用部分,实现多个建造者
当你有许多建造者时,我们可以轻松地将其广义部分提取到一个通用的父类中,从而可以非常轻松地创建新的建造者。
class BaseBuilder {
init() {
Object.keys(this).forEach((key) => {
const witherName = `with${key.substring(0,1).toUpperCase()}${key.substring(1)}`;
this[witherName] = (value) => {
this[key] = value;
return this;
};
});
}
build() {
const keysNoWithers = Object.keys(this).filter((key) => (
typeof this[key] !== 'function'
));
return keysNoWithers.reduce((returnValue, key) => {
return {
...returnValue,
[key]: this[key]
};
}, {});
}
}
然后就可以创建多个建造者了:
class ProductBuilder extends BaseBuilder {
constructor() {
super();
this.name = '《前端劝退秘诀》';
this.price = 9.99;
this.category = 'other';
super.init();
}
}
可以看出,建造者模式的使用有且只适合创建极为复杂的对象。在前端的实际业务中,在没有这类极为复杂的对象的创建时,还是应该直接使用对象字面或工厂模式等方式创建对象。
4. 原型模式
prototype...再讲会被砍死吧。
5. 下一篇:结构型设计模式
原本打算又双叒憋它个一万多字,把所有设计模式写个遍。
但是觉得吧,这样阅读体验其实并不好(主要还是懒,想慢慢写。)

噢对了,现在还有靠谱内推的可以联系我

微信:
huab119邮箱:
454274033@qq.com
参考文章
An Exploration of JavaScript Builders
The Builder Pattern
《前端面试之道》
作者掘金文章总集
需要转载到公众号的喊我加下白名单就行了。
「真®全栈之路」Web前端开发的后端指南
「Vue实践」5分钟撸一个Vue CLI 插件
「Vue实践」武装你的前端项目
「中高级前端面试」JavaScript手写代码无敌秘籍
「从源码中学习」面试官都不知道的Vue题目答案
「从源码中学习」Vue源码中的JS骚操作
「从源码中学习」彻底理解Vue选项Props
「Vue实践」项目升级vue-cli3的正确姿势
为何你始终理解不了JavaScript作用域链?
公众号


最后推介一个我觉得很不错的 JavaScript 设计模式专栏,是我的好朋友写的。
当然,我也会持续更新这个系列。


 4502
4502


 被折叠的 条评论
为什么被折叠?
被折叠的 条评论
为什么被折叠?
 到【灌水乐园】发言


