


作 者:朱季谦
原文链接:https://www.cnblogs.com/zhujiqian/p/13832506.html
请说说,“System.out.println()”原理......

这应该是刚开始学习Java时用到最多一段代码,迄今为止,与它算是老朋友了。既然是老朋友,就应该多去深入了解下其“内心”深处的“真正想法”。
在深入了解之前,先给自己提几个问题:
System是什么?out是什么?println又是什么?三个代码组成为何能实现打印信息的功能?
接下来,我们就带着问题,去熟悉我们这位相处已久的老伙计。
先从System开始一步一步探究。
在百度百科上,有对System做了这样的说明:System类代表系统,其中系统级的很多属性和控制方法都放置在该类的内部。
简而言之,该类与系统有关,可获取系统内部的众多属性以及方法,其部分源码如下:
1 public final class System { 2 private static native void registerNatives(); 3 static { 4 registerNatives(); 5 } 6 private System() { 7 } 8 public final static InputStream in = null; 9 public final static PrintStream out = null;10 public final static PrintStream err = null;11 private static volatile SecurityManager security = null;12 public static void setIn(InputStream in) {13 checkIO();14 setIn0(in);15 }16 public static void setOut(PrintStream out) {17 checkIO();18 setOut0(out);19 }20 ......21 }打开源码,发现这是一个final定义的类,其次,该类的构造器是以private权限进行定义的。根据这两情况可以说明,该类即不能被继承也无法实例化成对象,同时需注意一点,就是这个类里定义的很多变量和方法都是static来定义的,即这些类成员都是属于类而非对象。
因此,若需调用类中的这些带static定义的属性或者方法,无需创建对象就能直接通过“类名.成员名”来调用。
在System源码中,需要留意的是in,out,or三者,它们分别代表标准输入流,标准输出流,标准错误输出流。
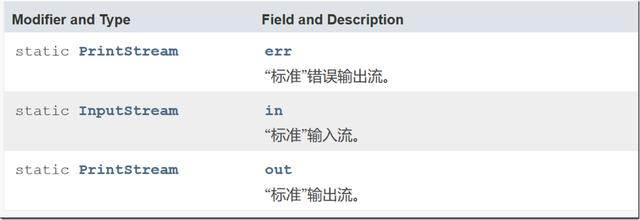
到这一步,便可以逐渐看到System.out.println中的影子,没错,这行代码里的System.out,即为引用System类里静态成员out,它是PrintStream类型的引用变量,称为"字节输出流"。作为static定义的out引用变量,它在类加载时就被初始化了,初始化后,会创建PrintStream对象对out赋值,之后便能调用PrintStream类中定义的方法。
具体怎么创建PrintStream并赋值给静态成员out,我放在本文后面讲解。
接着,进入到PrintStream类当中——
1 public class PrintStream extends FilterOutputStream 2 implements Appendable, Closeable 3 { 4 ...... 5 public void println() { 6 newLine(); 7 } 8 9 public void println(boolean x) {10 synchronized (this) {11 print(x);12 newLine();13 }14 }15 16 public void println(char x) {17 synchronized (this) {18 print(x);19 newLine();20 }21 }22 23 public void println(int x) {24 synchronized (this) {25 print(x);26 newLine();27 }28 }29 30 public void println(long x) {31 synchronized (this) {32 print(x);33 newLine();34 }35 }36 37 public void println(float x) {38 synchronized (this) {39 print(x);40 newLine();41 }42 }43 44 public void println(double x) {45 synchronized (this) {46 print(x);47 newLine();48 }49 }50 51 public void println(char x[]) {52 synchronized (this) {53 print(x);54 newLine();55 }56 }57 58 public void println(String x) {59 synchronized (this) {60 print(x);61 newLine();62 }63 }64 65 ......66 }发现这PrintStream里边存在诸多以println名字命名的重载方法。
这个,就是我们本文中最后需要回答的问题,即println是什么?
它其实是PrintStream打印输出流类里的方法。
每个有传参的println方法里,其最后调用的方法都是print()与newLine()。
值得注意一点,这些带有传参的println方法当中,里面都是通过同步synchronized来修饰,这说明System.out.println其实是线程安全的。同时还有一点需注意,在多线程情况下,当大量方法执行同一个println打印时,其synchronized同步性能效率都可能出现严重性能问题。因此,在实际生产上,普遍是用log.info()类似方式来打印日志而不会用到System.out.println。
在以上代码里,其中 newLine()是代表打印换行的意思。
众所周知,以System.out.println()来打印信息时,每条打印信息都会换行的,之所以会出现换行,其原理就是println()内部通过newLine()方法实现的。
若换成System.out.print()来打印,则不会出现换行情况。
为什么print()不会出现换行呢?
分析一下print()里代码便可得知,是因为其方法里并没有调用newLine()方法来实现换行的——
1 public void print(boolean b) { 2 write(b ? "true" : "false"); 3 } 4 5 public void print(char c) { 6 write(String.valueOf(c)); 7 } 8 9 public void print(int i) {10 write(String.valueOf(i));11 }12 13 public void print(long l) {14 write(String.valueOf(l));15 }16 17 public void print(float f) {18 write(String.valueOf(f));19 }20 21 public void print(double d) {22 write(String.valueOf(d));23 }24 25 public void print(char s[]) {26 write(s);27 }28 29 30 public void print(String s) {31 if (s == null) {32 s = "null";33 }34 write(s);35 }这些重载方法里面都调用相同的write()方法,值得注意的是,在调用write()时,部分方法的实现是都把参数转换成了String字符串类型,之后进入到write()方法详情里——
1 private void write(String s) { 2 try { 3 synchronized (this) { 4 ensureOpen(); 5 textOut.write(s); 6 textOut.flushBuffer(); 7 charOut.flushBuffer(); 8 if (autoFlush && (s.indexOf('') >= 0)) 9 out.flush();10 }11 }12 catch (InterruptedIOException x) {13 Thread.currentThread().interrupt();14 }15 catch (IOException x) {16 trouble = true;17 }18 }其中,ensureOpen()的方法是判断out流是否已经开启,其详细方法如下:
1 private void ensureOpen() throws IOException {2 if (out == null)3 throw new IOException("Stream closed");4 }由方法可得知,在进行写入打印信息时,需判断PrintStream流是否已经开启,若没有开启,则无法将打印信息写入计算机,故而抛出说明流是关闭状态的异常提示:“Stream closed”
若流是开启的,即可执行 textOut.write(s);
根据个人理解,这里的textOut是BufferedWriter引用变量,即为常说的IO流里写入流,最终会将信息写入到控制台上,即我们平常说的控制台打印。可以理解成,控制台就是一个文件,但是能被我们实时看到里面是什么的文件,这样当每次写入东西时,就会实时呈现在文件里,也就是能被我们看到的控制台打印信息。
那么,问题来了,哪行代码是表示写入到控制台文件的呢?System、out、println又是如何组成到一起来起作用的?
让我们回到System类最开始的地方——
1 public final class System { 2 3 /* register the natives via the static initializer. 4 * 5 * VM will invoke the initializeSystemClass method to complete 6 * the initialization for this class separated from clinit. 7 * Note that to use properties set by the VM, see the constraints 8 * described in the initializeSystemClass method. 9 */10 private static native void registerNatives();11 static {12 registerNatives();13 }14 15 }以上的静态代码会在类的初始化阶段被初始化,其会调用一个native方法registerNatives()。根据该方法的英文注释“VM will invoke the initializeSystemClass method to complete”,可知,VM将调用initializeSystemClass方法来完成该类初始化。
我们找到该initializeSystemClass方法,下面只列出本文需要用到的核心代码,稍微做了一下注释:
1 private static void initializeSystemClass() { 2 //被vm执行系统属性初始化 3 props = new Properties(); 4 initProperties(props); 5 sun.misc.VM.saveAndRemoveProperties(props); 6 7 //从系统属性中获取系统相关的换行符,赋值给变量lineSeparator 8 lineSeparator = props.getProperty("line.separator"); 9 sun.misc.Version.init();10 //分别创建in、out、err的实例对象,并通过set()方法初始化11 FileInputStream fdIn = new FileInputStream(FileDescriptor.in);12 FileOutputStream fdOut = new FileOutputStream(FileDescriptor.out);13 FileOutputStream fdErr = new FileOutputStream(FileDescriptor.err);14 setIn0(new BufferedInputStream(fdIn));15 setOut0(newPrintStream(fdOut, props.getProperty("sun.stdout.encoding")));16 setErr0(newPrintStream(fdErr, props.getProperty("sun.stderr.encoding")));17 18 ......19 }主要关注这两行代码:
1 FileOutputStream fdOut = new FileOutputStream(FileDescriptor.out);2 setOut0(newPrintStream(fdOut, props.getProperty("sun.stdout.encoding")));一.这里逐行进行分析,首先FileDescriptor是一个“文件描述符”,可以通俗地把它当成一个文件,它有以下三个属性:
- in:标准输入(键盘)的描述符
- out:标准输出(屏幕)的描述符
- err:标准错误输出(屏幕)的描述符
FileDescriptor.out代表为“标准输出(屏幕)”,可以通俗地理解成标准输出到控制台的文件,即表示控制台。
new FileOutputStream(FileDescriptor.out)该行代码即说明通过文件输出流将信息输出到屏幕即控制台上。
若还是不理解,可举一个比较常见的例子——
1 public static void main(String[] args) throws IOException {2 FileOutputStream out=new FileOutputStream("C:file.txt");3 out.write(66);4 }这是比较简单的通过FileOutputStream输出流写入文件的写法,这里的路径“C:file.txt”就与FileDescriptor.out做法类似,都是描述一个可写入数据的文件,只不过FileDescriptor.out比较特殊,它描述的是屏幕,即常说的控制台。
二.接下来是newPrintStream(fdOut, props.getProperty("sun.stdout.encoding"))——
1 private static PrintStream newPrintStream(FileOutputStream fos, String enc) {2 if (enc != null) {3 try {4 return new PrintStream(new BufferedOutputStream(fos, 128), true, enc);5 } catch (UnsupportedEncodingException uee) {}6 }7 return new PrintStream(new BufferedOutputStream(fos, 128), true);8 }该方法是为输出流创建一个BufferedOutputStream缓冲输出流,起到流缓冲的作用,最后通过new PrintStream()创建一个打印输出流。
通过该流的打印接口,如print(), println(),可实现打印输出的作用。
三.最后就是执行 setOut0(newPrintStream(fdOut, props.getProperty("sun.stdout.encoding")));
1 private static native void setOut0(PrintStream out);
可知,该方法是一个native方法,感兴趣的童鞋可继续深入研究,这里大概就是将生成的PrintStream对象赋值给System里的静态对象引用变量:out。
1 public final static PrintStream out = null;
到这里,就回到了我们最开始的地方:System.out.println,没错,这里面的out,就是通过setOut0来进行PrintStream对象赋值的,我们既然能拿到了PrintStream的对象引用out,自然就可以访问PrintStream类里的任何public方法里,包括println(),包括print(),等等。
可提取以上初始化out的源码重做一个手动打印的测试,如:
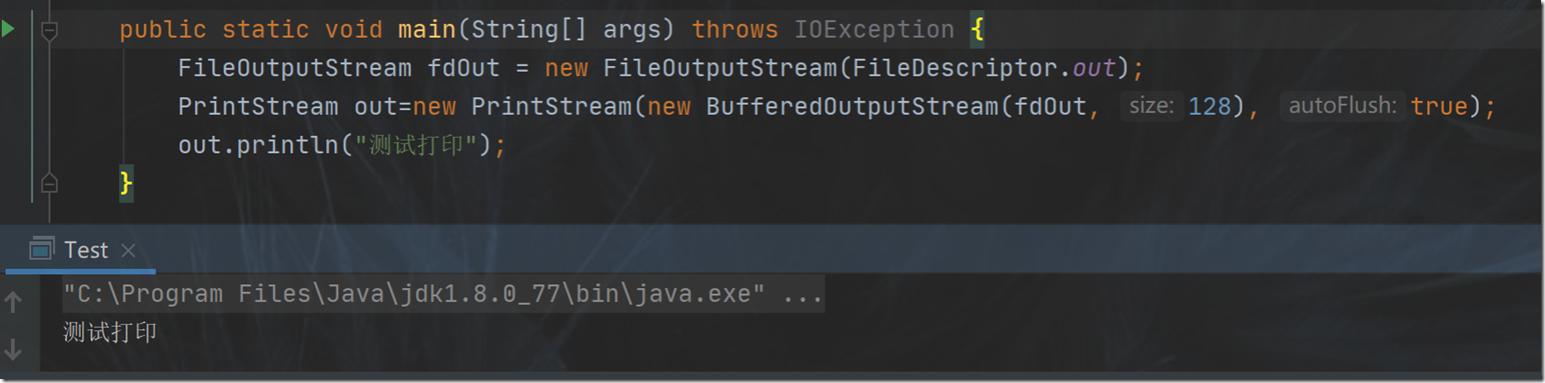
执行,发现可以控制台上打印出"测试打印"四字。
最后,总结一下,System.out.println的原理是在类加载System时,会初始化System的initializeSystemClass()方法,该方法中将创建一个打印输出流PrintStream对象,随后通过setOut0(PrintStream out)方法,会将初始化创建的PrintStream 对象赋值给System静态引用变量out。out被赋值对象地址后,就可以调用PrintStream中的各种public修饰的方法里,其中就包括println()、print()这类打印信息的方法,通过out.println(“xxxx”)即可将“xxxx”打印到控制台上,也就是等价于System.out.println("xxxx")。
1 System.out.println("打印数据");2 等价于--->3 PrintStream out=System.out;4 out.println("打印数据");以上,就是System.out.println的执行原理。


 3752
3752


 被折叠的 条评论
为什么被折叠?
被折叠的 条评论
为什么被折叠?
 到【灌水乐园】发言


