


寒假如约而至,玩了两天游戏的我,盯着琳琅满目的STEAM成就,枯燥且无味。随意瞥一眼下学期课表,裂开来:
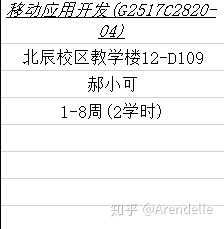
同时大脑开始飞速计算:1-8周的时间需要学习完整的安卓开发对脑袋愚钝的吾辈来说实在过于艰难,但如果从寒假就开始学习那么到时候就可以省下时间来打游。。。然后把学习历程放到知乎就可以保证到时候不会忘嘿嘿嘿。。。
于是就有了以下:
首先我使用的开发环境为:谷歌提供的开发工具——AndroidStudio,语言使用JAVA。

基本布局:
在Android中提供了超级多超级多的布局(Layout),对于我而言,常用的就两个:
①LinearLayout(线性布局)
②RelativeLayout(相对布局)
对于所有的布局,都具有基本属性:
 android:layout_width=""//宽度
 android:layout_height=""//高度
以上属性值可为:match_parent(匹配父元素)或 具体的数值,单位建议使用dp,以适配不同尺寸的设备。
在LinearLayout中,有重要属性orientation,即布局方向:
 android:orientation="vertical"//竖直线性布局
 android:orientation="horizontal"//水平线性布局
在RelativeLayout中,有相对其他元素的布局属性:
android:layout_below="@+id/"      //位于元素的下方
android:layout_above="@+id/"      //位于元素的的上方
android:layout_toLeftOf="@+id/"   //位于元素的左边
android:layout_toRightOf="@+id/"  //位于元素的右边
基本控件:
(一)文本控件:
常用文本控件有两种:
①TextView(文本控件)
②EditText(可编辑文本控件)
两种文本控件的使用方法基本相同,区别仅仅为EditText可编辑。
这两种控件的常用属性有:
//控件id
android:id = "@+id/xxx"  @+id/xxx表示新增控件命名为xxx

//宽度与高度
android:layout_width="wrap_content"  //wrap_content或者match_parent
android:layout_height="wrap_content"  //wrap_content或者match_parent

//文本文字
android:text="@string/hello_world" //两种方式,直接具体文本或者引用values下面的string.xml里面的元素

//文本提示内容
android:hint="hello_world" //android:text和android:hint区别是后者只是提示作用,真正需要输入的时候提示的内容会消失

//字体大小
android:textSize="24sp"  //以sp为单位

//字体颜色
android:textColor="#0000FF"  //RGB颜色

//字体格式
android:textStyle="normal"  //normal,bold,italic分别为正常,加粗以及斜体,默认为normal

//文本显示位置
android:gravity="center"  //来指定文字的对齐方式,可选值有 top、bottom、left、right、center 等

//是否只在一行内显示全部内容
android:singleLine="true"  //true或者false,默认为false

//输入内容设置为password类型
android:password="true"  //输入的内容会变成······

//输入内容设置为phoneNumber类型
android:phoneNumber="true"  //只能输入数字

//设定光标为显示/隐藏
android:cursorVisible = "false" //true或者false,默认为true显示
在文本控件的属性中,Android允许“单行显示文本,显示不下允许‘聚焦’时滚动显示”。可用以下属性集实现:
    <TextView
        android:id="@+id/t3"
        android:layout_below="@id/RL2"
        android:layout_height="50dp"
        android:layout_width="match_parent"
        android:ellipsize="marquee"
        android:text="程序搞起来还是很简单的,就是头冷~~~~"
        android:textSize="40sp"
        android:textColor="#00FFFF"
        android:singleLine="true"
        android:focusable="true"
        android:focusableInTouchMode="true"
        android:marqueeRepeatLimit="-1"
        android:scrollHorizontally = "true"
        />
(二)按钮类控件:
常用的按钮类控件有:
①Button(按钮)
②ImageButton(图片按钮)
③RadioButton & RadioGroup(单选按钮)
④CheckBox(复选按钮)
这些按钮的使用方法基本相同,而按钮类控件的重要属性便是点击事件。使用Android (JAVA)的按钮点击事件,需要在Activity中为Button的点击事件注册一个监听器:
public class MainActivity extends AppCompatActivity {
private TextView tv;
    @Override
    protected void onCreate(Bundle savedInstanceState) {
        super.onCreate(savedInstanceState);
        setContentView(R.layout.activity_main);
        tv = (TextView) findViewById(R.id.t3);

    }

    public void onButtonClick(View view){
        tv.requestFocus();

    }
}
对于按钮类控件,后续会更新Android计算器的实现,用以巩固按钮控件知识。
(三)图片控件:
ImageView:
ImageView 是一个图片控件,负责显示图片,图片的来源可以是系统提供的资源文件,也可以是 Drawable 对象,有以下重要属性:
<ImageView
//控件id
android:id = "@+id/xxx"  @+id/xxx表示新增控件命名为xxx

//宽度与高度
android:layout_width="wrap_content"   //wrap_content或者match_parent
android:layout_height="wrap_content"  //wrap_content或者match_parent

//此外,可以具体设置高度和宽度显示的像素,不过这样设置如果图片尺寸大于设置的显示的尺寸,则图片是显示不全的,这是可以配合android:scaleType属性。
android:layout_width="200dp"
android:layout_height="200dp"

//把原图按照指定的大小在View中显示,拉伸显示图片,不保持原比例,填满ImageButton.
android:scaleType="fitXY"

//其他的关于android:scaleType的参数解释,也可以参考下面的直观图
//android:scaleType="center"  在视图中心显示图片,并且不缩放图片
//android:scaleType="centercrop"  按比例缩放图片,使得图片长 (宽)的大于等于视图的相应维度
//android:scaleType="centerinside"  按比例缩放图片,使得图片长 (宽)的小于等于视图的相应维度
//android:scaleType="fitcenter" 按比例缩放图片到视图的最小边,居中显示
//android:scaleType="fitend" 按比例缩放图片到视图的最小边,显示在视图的下部分位置
//android:scaleType="fitstart" 把图片按比例扩大/缩小到视图的最小边,显示在视图的上部分位置
//android:scaleType="matrix" 用矩阵来绘制

//图片来源,需要将图片复制放到res/drawable文件夹里面,引用的时候不需要写图片的后缀
android:src ="@drawable/beautiful">
(四)时钟控件:
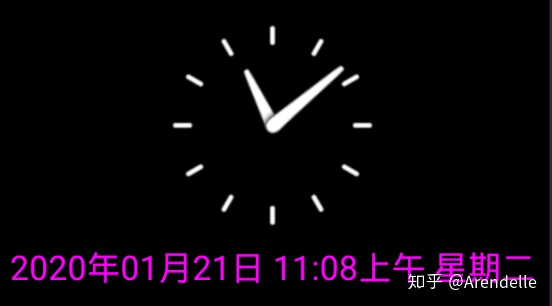
Android提供多种时钟控件,常用有以下两种:
①AnalogClock(表盘时钟)
②TextClock(数字时钟)
实现如下:
<AnalogClock
android:layout_centerHorizontal="true"
android:layout_below="@+id/btn"
android:layout_width="wrap_content"
android:layout_height="wrap_content"
android:id="@+id/analogClock" />
<TextClock
android:layout_centerHorizontal="true"
android:layout_below="@id/analogClock"
android:layout_width="wrap_content"
android:layout_height="wrap_content"
android:textSize="10pt"
android:textColor="#f0f"
android:format12Hour="yyyy年MM月dd日 H:mma EEEE"
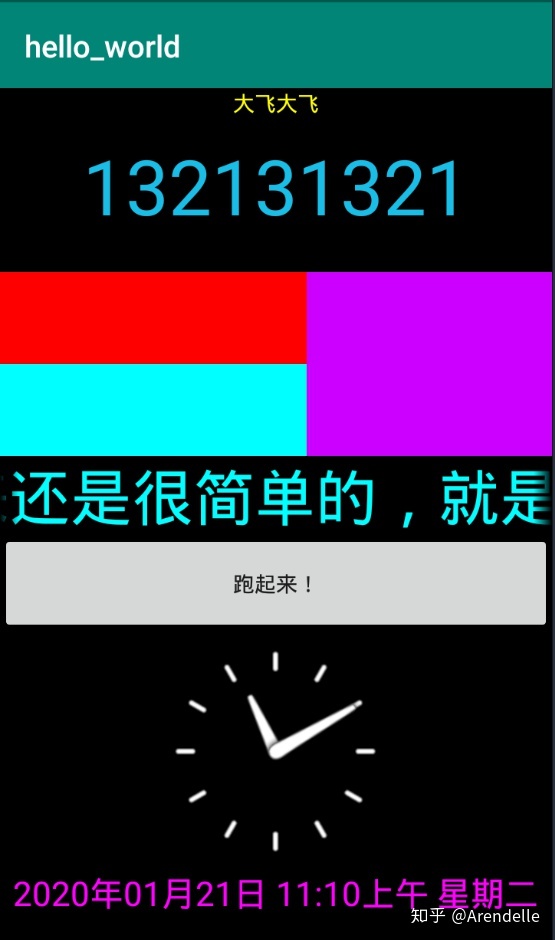
/>效果如下:
总结用代码及效果截图:
<?xml version="1.0" encoding="utf-8"?>

<RelativeLayout xmlns:android="http://schemas.android.com/apk/res/android"
xmlns:app="http://schemas.android.com/apk/res-auto"
xmlns:tools="http://schemas.android.com/tools"
    android:orientation="vertical"
    android:layout_width="match_parent"
    android:layout_height="match_parent"
    tools:context=".MainActivity"
    android:background="#000000"
    >
    <TextView
        android:id="@+id/t1"
        android:layout_width="match_parent"
        android:layout_height="20dp"
        android:text="大飞大飞"
        android:textColor="#FFFF00"
        android:gravity="center_horizontal"
        />
    <EditText
        android:id="@+id/t2"
        android:layout_width="match_parent"
        android:layout_height="90dp"
        android:text="输入:"
        android:textColor="#1ABDE6"
        android:textSize="50sp"
        android:gravity="center_horizontal"
        android:layout_marginTop="30dp"
        />
        <RelativeLayout
            android:id="@+id/RL1"
            android:layout_below="@id/t2"
            android:layout_width="200dp"
            android:layout_height="60dp"
            android:background="#FF0000"
            >
        </RelativeLayout>>

        <RelativeLayout
            android:id="@+id/RL2"
            android:layout_below="@id/RL1"
            android:layout_width="200dp"
            android:layout_height="60dp"
            android:background="#00FFFF"
            >
        </RelativeLayout>>

    <RelativeLayout
        android:id="@+id/RL3"
        android:layout_width="211dp"
        android:layout_height="120dp"
        android:layout_below="@id/t2"
        android:layout_toRightOf="@id/RL1"
        android:background="#CC00FF">

    </RelativeLayout>>
    <TextView
        android:id="@+id/t3"
        android:layout_below="@id/RL2"
        android:layout_height="50dp"
        android:layout_width="match_parent"
        android:ellipsize="marquee"
        android:text="程序搞起来还是很简单的,就是头冷~~~~"
        android:textSize="40sp"
        android:textColor="#00FFFF"
        android:singleLine="true"
        android:focusable="true"
        android:focusableInTouchMode="true"
        android:marqueeRepeatLimit="-1"
        android:scrollHorizontally = "true"
        />

    <Button
        android:id="@+id/btn"
        android:layout_width="match_parent"
        android:layout_height="66dp"
        android:layout_below="@id/t3"
        android:onClick="onButtonClick"
        android:text="跑起来!" />
    <AnalogClock
        android:layout_centerHorizontal="true"
        android:layout_below="@+id/btn"
        android:layout_width="wrap_content"
        android:layout_height="wrap_content"
        android:id="@+id/analogClock" />
    <TextClock
        android:layout_centerHorizontal="true"
        android:layout_below="@id/analogClock"
        android:layout_width="wrap_content"
        android:layout_height="wrap_content"
        android:textSize="10pt"
        android:textColor="#f0f"
        android:format12Hour="yyyy年MM月dd日 H:mma EEEE"
        />

</RelativeLayout>
package com.example.hello_world;
import androidx.appcompat.app.AppCompatActivity;
import android.os.Bundle;
import android.widget.TextView;
import android.view.*;
public class MainActivity extends AppCompatActivity {
private TextView tv;
@Override
protected void onCreate(Bundle savedInstanceState) {
super.onCreate(savedInstanceState);
setContentView(R.layout.activity_main);
tv = (TextView) findViewById(R.id.t3);
}
public void onButtonClick(View view){
tv.requestFocus();
}
}


 3611
3611

 被折叠的 条评论
为什么被折叠?
被折叠的 条评论
为什么被折叠?
 到【灌水乐园】发言


