


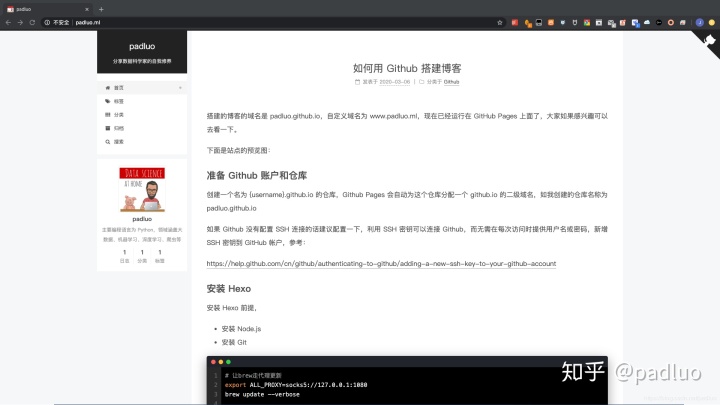
搭建的博客的域名是 http://padluo.github.io,自定义域名为 www.padluo.ml,现在已经运行在 GitHub Pages 上面了,大家如果感兴趣可以去看一下。
下面是站点的预览图:
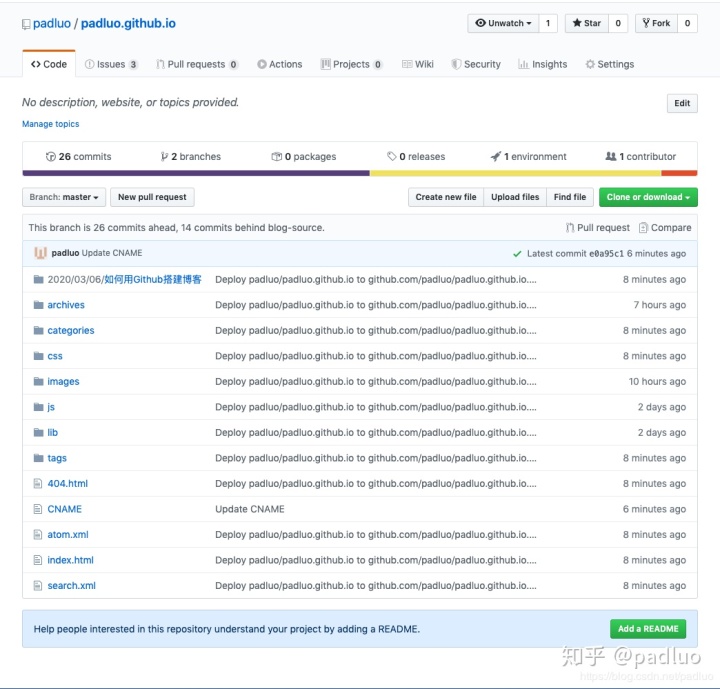
准备 Github 账户和仓库
创建一个名为 {username}.http://github.io 的仓库,Github Pages 会自动为这个仓库分配一个 http://github.io 的二级域名,如我创建的仓库名称为 http://padluo.github.io
如果 Github 没有配置 SSH 连接的话建议配置一下,利用 SSH 密钥可以连接 Github,而无需在每次访问时提供用户名或密码,新增 SSH 密钥到 GitHub 帐户,参考:
https://help.github.com/cn/github/authenticating-to-github/adding-a-new-ssh-key-to-your-github-account
安装 Hexo
安装 Hexo 前提,
- 安装 Node.js
- 安装 Git
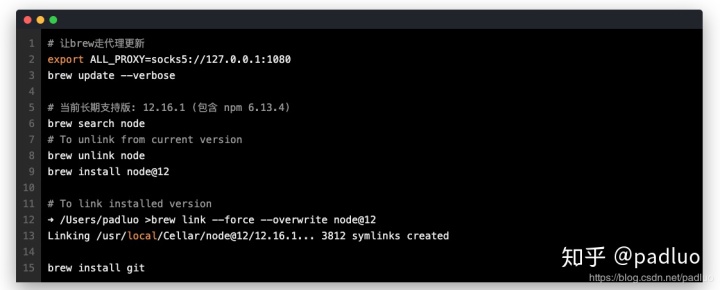
# 让brew走代理更新
export ALL_PROXY=socks5://127.0.0.1:1080
brew update --verbose

# 当前长期支持版: 12.16.1 (包含 npm 6.13.4)
brew search node
# To unlink from current version
brew unlink node
brew install node@12

# To link installed version
➜ /Users/padluo >brew link --force --overwrite node@12
Linking /usr/local/Cellar/node@12/12.16.1... 3812 symlinks created

brew install git
安装完毕之后,确保环境变量配置好,能正常使用 npm 命令。
node -v
npm -v
当安装完 Git 应该做的第一件事就是设置用户名称与邮件地址,因为每一个 Git 的提交都会使用这些信息,并且它会写入到每一次提交中,不可更改:
git config --global user.name "padluo"
git config --global user.email padluo@example.com
git config --list
安装 Hexo,
npm install -g hexo-cli
安装完毕之后,确保环境变量配置好,能正常使用 hexo 命令。
初始化项目
$ hexo init padluo_blog
$ cd padluo_blog
$ hexo generate
$ hexo server
INFO  Start processing
INFO  Hexo is running at http://localhost:4000 . Press Ctrl+C to stop.
初始化的博客架子就出来了。
部署
接下来我们将这个初始化的博客进行部署,放到 Github Pages 上面验证可用性。
部署命令如下:
hexo deploy
在部署之前,需要先知道博客的部署地址,它需要配置一个 Github 的一个 Repository 的地址。
打开项目根目录的_config.yml文件,找到 Deployment 这个地方,把刚才新建的 Repository 地址贴过来,然后指定分支为 master 分支,最终修改为如下内容:
# Deployment
## Docs: https://hexo.io/docs/deployment.html
deploy:
  type: 'git'
  repo: git@github.com:padluo/padluo.github.io.git
  branch: master
另外还需要安装一个支持 Git 的部署插件 hexo-deployer-git ,如果不安装,在执行部署命令时会报如下错误:
ERROR Deployer not found: git
在项目目录下执行安装命令如下:
npm install hexo-deployer-git --save
安装成功之后,执行部署命令,运行结果类似如下:
INFO  Deploying: git
INFO  Clearing .deploy_git folder...
INFO  Copying files from public folder...
INFO  Copying files from extend dirs...
位于分支 master
无文件要提交,干净的工作区
Warning: Permanently added the RSA host key for IP address '13.229.188.59' to the list of known hosts.
枚举对象: 46, 完成.
对象计数中: 100% (46/46), 完成.
使用 8 个线程进行压缩
压缩对象中: 100% (36/36), 完成.
写入对象中: 100% (46/46), 507.65 KiB | 1.75 MiB/s, 完成.
总共 46 (差异 4),复用 0 (差异 0)
remote: Resolving deltas: 100% (4/4), done.
To github.com:padluo/padluo.github.io.git
 + b8ed093...2d5edc2 HEAD -> master (forced update)
分支 'master' 设置为跟踪来自 'git@github.com:padluo/padluo.github.io.git' 的远程分支 'master'。
INFO  Deploy done: git
这时候我们访问一下 GitHub Repository 同名的链接,比如我的博客 Repository 名称是 http://padluo.github.io ,那我就访问 http://padluo.github.io ,这时候我们可以看到和本地一模一样的内容。这实际上是把博客文件夹下面的 public 下的所有内容,Hexo 把编译之后的静态页面内容上传到 GitHub 的 master 分支上面去了。
如果想把博客的源码页放到 GitHub 上面,可以新建一个分支。如我这边新建一个 blog-source 分支,代表博客源码。
git init
git checkout -b blog-source
git add -A
git commit -m "init blog"
git remote add origin git@github.com:padluo/padluo.github.io.git
git push origin blog-source
配置站点信息
找到项目根目录下的 _config.yml 文件,修改博客的一些基本信息,找到 Site 区域,配置站点 title、副标题 subtitle、关键字 keywords 等内容,
# Site
title: padluo
subtitle: 分享数据科学家的自我修养
description: 主要编程语言为 Python,领域涵盖大数据、机器学习、深度学习、爬虫等
keywords: "Python, 大数据, 机器学习, 深度学习, 爬虫"
author: padluo
language: zh-CN
timezone: ''
修改主题
使用 Next 主题,命令行进入到项目到根目录,执行如下命令:
git clone https://github.com/theme-next/hexo-theme-next.git themes/next
执行完毕后 Next 主题到源码就会出现在项目到 themes/next 文件夹下。
然后我们修改一些博客所用的主题名称,修改项目根目录下的 _config.yml 文件,找到 theme 字段, 修改为 next 即可,
theme: next
主题配置
Next 主题内部页提供了一个配置文件,名字同样是 _config.yml,位置在 themes/next 文件夹下,下文所述内容如果没有特别说明,都是修改的 themes/next/_config.yml 文件,
样式
修改配置文件的 scheme 字段即可,我选了 Pisces 样式(注意是 themes/next/_config.yml 文件),
scheme: Pisces
favicon
favicon 就是站点标签栏的小图标,有一个网站可以直接将图片转化为站点小图标,站点链接为:https://realfavicongenerator.net,到这里上传一张图,便可以字节打包下载各种尺寸和适配不同设备的小图标。
图片下载下来之后放在 themes/next/source/images 目录下面。
然后在配置文件里找到 favicon 配置项,把一些相关路径配置进去即可,如:
favicon:
  small: /images/favicon-16x16.png
  medium: /images/favicon-32x32.png
  apple_touch_icon: /images/apple-touch-icon.png
  safari_pinned_tab: /images/safari-pinned-tab.svg
avatar
avatar 类似站点的头像,如果设置了,会在站点的作者信息旁边额外显示一个头像,比如我这边有一张 avatar.png 图片,将其放置到 themes/next/source/images/avatar.png 路径,然后在主题 _config.yml 文件下编辑 avatar 到配置,修改为正确到路径。

# Sidebar Avatar
avatar:
  # Replace the default image and set the url here.
  url: /images/avatar.jpg
  # If true, the avatar will be dispalyed in circle.
  rounded: false
  # If true, the avatar will be rotated with the cursor.
  rotated: true
这里 rounded 选项是是否显示圆形,rotated 是是否带有旋转效果。
rss
开启 RSS 订阅,需要安装一个插件 hexo-generator-feed ,安装完成之后,不需要其他配置,以后每次编译生成站点的时候,就会自动生成 RSS Feed 文件了。
npm install hexo-generator-feed --save
code
代码块到显示,把代码到颜色修改为黑色,并把复制按钮到样式修改为类似 Mac 的样式,修改 _config.yml 文件的 codeblock 区块,
codeblock:
  # Code Highlight theme
  # Available values: normal | night | night eighties | night blue | night bright | solarized | solarized dark | galactic
  # See: https://github.com/chriskempson/tomorrow-theme
  highlight_theme: night bright
  # Add copy button on codeblock
  copy_button:
    enable: true
    # Show text copy result.
    show_result: true
    # Available values: default | flat | mac
    style: mac
修改后的代码样式如下:
top
快速返回到网站的上端,一般有一个按钮辅助,修改 _config.yml 的 back2top 字段。sidebar 如果设置为 true,按钮会出现在侧栏下方,scrollpercent 就是显示阅读百分比。
back2top:
  enable: true
  # Back to top in sidebar.
  sidebar: false
  # Scroll percent label in b2t button.
  scrollpercent: true
reading_process
阅读进度,站点的最上方会出现一个细细的进度条,代表页面加载进度和阅读进度,大家可以设置后根据喜好选择。
# Reading progress bar
reading_progress:
  enable: true
  # Available values: top | bottom
  position: top
  color: "#222"
  height: 2px
bookmark
书签,可以根据阅读历史记录,在下次打开页面的时候帮助我们定位到上次的位置。
# Bookmark Support
bookmark:
  enable: false
  # Customize the color of the bookmark.
  color: "#222"
  # If auto, save the reading progress when closing the page or clicking the bookmark-icon.
  # If manual, only save it by clicking the bookmark-icon.
  save: auto
github_banner
打开右上角的 GitHub 图标,点击之后可以跳转到其源码页面。
# `Follow me on GitHub` banner in the top-right corner.
github_banner:
  enable: true
  permalink: https://github.com/padluo/padluo.github.io
  title: padluo GitHub
gitalk
Hexo 是静态博客,没有连接数据库功能,评论功能不能自行集成,可以集成第三方的服务。
这里采用 gitalk,首先需要在 GitHub 上面注册一个 OAuth Application,链接为:https://github.com/settings/applications/new,注册完毕之后拿到 Client ID、Client Secret 就可以了。
首先在 _config.yml 文件的 comments 区域配置使用 gitalk:
# Multiple Comment System Support
comments:
  # Available values: tabs | buttons
  style: tabs
  # Choose a comment system to be displayed by default.
  # Available values: changyan | disqus | disqusjs | gitalk | livere | valine
  active: gitalk
然后找到 gitalk 配置,添加各项配置:
# Gitalk
# For more information: https://gitalk.github.io, https://github.com/gitalk/gitalk
gitalk:
  enable: true
  github_id: padluo # GitHub repo owner
  repo: padluo.github.io # Repository name to store issues
  client_id: [client_id] # GitHub Application Client ID
  client_secret: [client_secret] # GitHub Application Client Secret
  admin_user: padluo # GitHub repo owner and collaborators, only these guys can initialize gitHub issues
  distraction_free_mode: true # Facebook-like distraction free mode
  # Gitalk's display language depends on user's browser or system environment
  # If you want everyone visiting your site to see a uniform language, you can set a force language value
  # Available values: en | es-ES | fr | ru | zh-CN | zh-TW
  language: zh-CN
配置完之后 gitalk 就可以使用了,点击进入文章页面,就会出现如下页面:
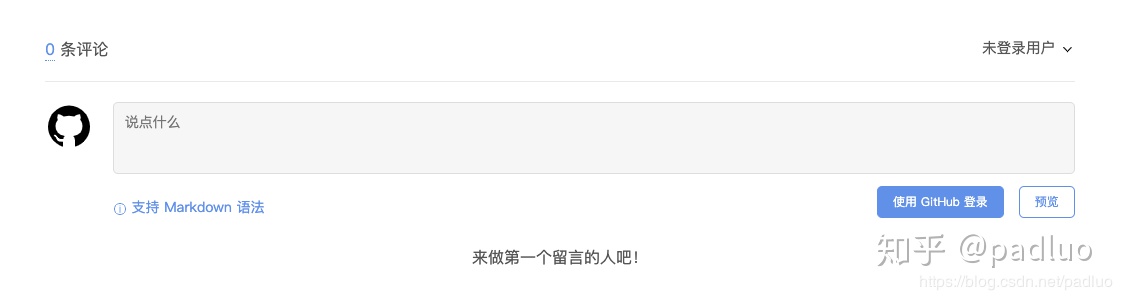
GitHub 授权登录之后就可以使用了,评论的内容会自动出现在 Issue 里面。
pangu
在主题里面开启这个选项,在编译生成页面的时候,中英文之间就会自动添加空格。
pangu: true
math
支持公式显示,Next 主题提供了两个渲染引擎,分别是 mathjax 和 katex,后者相对前者来说渲染速度更快,而且不需要 JavaScript 的额外支持,但后者支持的功能现在还不如前者丰富,具体的对比可以看官方文档:https://theme-next.org/docs/third-party-services/math-equations。
所以我这里选择了 mathjax,通过修改配置即可启用:
# Math Formulas Render Support
math:
  enable: true
  # Default (true) will load mathjax / katex script on demand.
  # That is it only render those page which has `mathjax: true` in Front-matter.
  # If you set it to false, it will load mathjax / katex srcipt EVERY PAGE.
  per_page: true

  # hexo-renderer-pandoc (or hexo-renderer-kramed) required for full MathJax support.
  mathjax:
    enable: true
    # See: https://mhchem.github.io/MathJax-mhchem/
    mhchem: true

  # hexo-renderer-markdown-it-plus (or hexo-renderer-markdown-it with markdown-it-katex plugin) required for full Katex support.
  katex:
    enable: false
    # See: https://github.com/KaTeX/KaTeX/tree/master/contrib/copy-tex
    copy_tex: false
mathjax 的使用需要我们额外安装一个插件,叫做 hexo-renderer-kramed,另外也可以安装 hexo-renderer-pandoc,命令如下:
npm un hexo-renderer-marked --save
npm i hexo-renderer-kramed --save
pjax
利用 Ajax 技术实现了局部页面刷新,既可以实现 URL 的更换,又可以做到无刷新加载。
要开启这个功能需要先将 pjax 功能开启,然后安装对应的 pjax 依赖库,首先修改 _config.yml 如下:
pjax: true
然后安装依赖库,切换到 next 主题下,然后安装依赖库:
cd themes/next
git clone https://github.com/theme-next/theme-next-pjax source/lib/pjax
文章
现在整个站点只有一篇文章,那么我们怎样来增加其他的文章呢?调用 Hexo 提供的命令即可。
比如增加一篇「如何用GitHub搭建博客」增加文章,如果标题包含空格的话,请使用引号括起来。
hexo new "如何用Github搭建博客"
创建的文章会出现在 source/_posts 文件夹下,是 MarkDown 格式。在文章开头通过如下格式添加必要信息:
---
title: demo # 自动创建
date: 2020-03-03 17:01:24 # 自动创建
tags:
- Github
categories:
- Github
---

## 标题1

正文1

## 标题2

正文2
开头下方撰写正文,MarkDown 格式书写即可。
这样在下次编译的时候就会自动识别标题、时间、标签、类别等等,另外还有其他的一些参数设置,可以参考文档:https://hexo.io/zh-cn/docs/writing.html 。
标签页
增加标签页,在根目录下执行命令如下:
hexo new page tags
执行这个命令之后会自动帮我们生成一个 source/tags/index.md 文件,内容就只有这样子的:
---
title: tags
date: 2020-03-03 17:16:02
---
我们可以自行添加一个 type 字段来指定页面的类型:
type: tags
comments: false
然后再在主题的 _config.yml 文件将这个页面的链接添加到主菜单里面,修改 menu 字段如下:
menu:
  home: / || home
  #about: /about/ || user
  tags: /tags/ || tags
  #categories: /categories/ || th
  archives: /archives/ || archive
  #schedule: /schedule/ || calendar
  #sitemap: /sitemap.xml || sitemap
  #commonweal: /404/ || heartbeat
分类页
分类功能和标签类似,一个文章可以对应某个分类,如果要增加分类页面可以使用如下命令创建:
hexo new page categories
然后同样的,会生成一个 source/categories/index.md 文件。我们可以自行添加一个 type 字段来指定页面的类型:
type: categories
comments: false
然后再在主题的 _config.yml 文件将这个页面的链接添加到主菜单里面,修改 menu 字段如下:
menu:
  home: / || home
  #about: /about/ || user
  tags: /tags/ || tags
  categories: /categories/ || th
  archives: /archives/ || archive
  #schedule: /schedule/ || calendar
  #sitemap: /sitemap.xml || sitemap
  #commonweal: /404/ || heartbeat
搜索页
如果要添加搜索功能,需要在项目根目录下先安装一个插件,叫做 hexo-generator-searchdb,命令如下:
npm install hexo-generator-searchdb --save
然后在项目的 _config.yml 里面添加搜索设置如下:
search:
  path: search.xml
  field: post
  format: html
  limit: 10000
然后在主题的 _config.yml 里面修改如下:
# Local search
# Dependencies: https://github.com/wzpan/hexo-generator-search
local_search:
  enable: true
  # If auto, trigger search by changing input.
  # If manual, trigger search by pressing enter key or search button.
  trigger: auto
  # Show top n results per article, show all results by setting to -1
  top_n_per_article: 5
  # Unescape html strings to the readable one.
  unescape: false
  # Preload the search data when the page loads.
  preload: false
这里用的是 Local Search,如果想使用其他的 Search Service 的话可以参考官方文档:https://theme-next.org/docs/third-party-services/search-services 。
404 页面
另外还需要添加一个 404 页面,直接在根目录 source 文件夹新建一个 404.md 文件即可,内容可以仿照如下:
---
title: 404 Not Found
date: 2020-03-03 17:31:00
---

<center>
对不起,您所访问的页面不存在或者已删除。
您可以<a href="https://padluo.github.io>">点击此处</a>返回首页。
</center>

<blockquote class="blockquote-center">
    padluo
</blockquote>
这里面的一些相关信息和链接可以替换成自己的。
完成了上面的配置基本就完成了大半了,其实 Hexo 还有很多很多功能,大家可以直接参考官方文档:https://hexo.io/zh-cn/docs/ 查看更多的配置。
自动部署
且听下回分解。
问题
问题一:仓库嵌套
warning: adding embedded git repository: themes/next
➜ /Users/padluo/Projects/Hexo/padluo_blog git:(blog-source) ✗ >git add _config.yml package-lock.json package.json source/404.md source/_posts/demo.md source/categories source/tags themes/next
warning: 正在添加嵌入式 git 仓库:themes/next
提示:You've added another git repository inside your current repository.
提示:Clones of the outer repository will not contain the contents of
提示:the embedded repository and will not know how to obtain it.
提示:If you meant to add a submodule, use:
提示:
提示:  git submodule add <url> themes/next
提示:
提示:If you added this path by mistake, you can remove it from the
提示:index with:
提示:
提示:  git rm --cached themes/next
提示:
提示:See "git help submodule" for more information.
➜ /Users/padluo/Projects/Hexo/padluo_blog git:(blog-source) ✗ >git status
位于分支 blog-source
要提交的变更:
  (使用 "git reset HEAD <文件>..." 以取消暂存)

    修改:     _config.yml
    修改:     package-lock.json
    修改:     package.json
    新文件:   source/404.md
    新文件:   source/_posts/demo.md
    新文件:   source/categories/index.md
    新文件:   source/tags/index.md
    新文件:   themes/next

尚未暂存以备提交的变更:
  (使用 "git add <文件>..." 更新要提交的内容)
  (使用 "git checkout -- <文件>..." 丢弃工作区的改动)
  (提交或丢弃子模组中未跟踪或修改的内容)

    修改:     themes/next (修改的内容)
仓库内克隆其他仓库,后续该如何进行管理?
方法一:因为之前是直接把第三方主题克隆到博客目录,有什么改动是无法推送到作者 Git 仓库的,这个时候需要把第三方主题的项目Fork到自己仓库,自己账号下生成一个同名的仓库,并对应一个 url,我们应该 git clone 自己账号下仓库的 url。
git submodule add git@github.com:padluo/hexo-theme-next.git themes/next
把自己仓库下面第三方主题添加到 Git 子模块,注意: themes/next 这里的目录是因为我用的 next 主题才会写 themes/next,如果你用的不是 next 请把 next 替换成你的第三方主题文件夹名字。博客的根目录会多一个.gitmodules文件,这是一个配置文件,保存了项目 URL 和你拉取到的本地子目录。
方法二:从第一步git add的 warning 提示可以看出 git 在后续克隆将不会包含这个 themes/next 的内容,当我 push 完之后,在 GitHub 上看到的将是一个灰色的图标,代表这是一个子模块,但是不知道这个子模块的仓库所在的 url,因此在 GitHub 上无法打开这个文件夹。
解决方案:不使用 git submodule 功能,而是直接将这个文件夹作为根仓库的内容加入并 commit。
Step1: 删除已经 staged 过的文件
git rm --cached themes/next
Step2: 查看当前状态
git status
Step3: 重新 stage 这个文件夹
git add themes/next/
注意:这里一定要加上 /,表示将这个文件夹加入,而不是将这个文件夹当做一个子模块。
两者区别:
git add themes/next
git add themes/next/
问题二:安装完 Git 没有设置用户名称与邮件地址
➜ /Users/padluo/Projects/Hexo/padluo_blog git:(blog-source) ✗ >git commit -m "add .travis.yml"
[blog-source 285845d] add .travis.yml
 Committer: JIANPING LUO <padluo@JIANPINGdeMacBook-Pro.local>
您的姓名和邮件地址基于登录名和主机名进行了自动设置。请检查它们正确
与否。您可以对其进行设置以免再出现本提示信息。运行如下命令在编辑器
中编辑您的配置文件:

    git config --global --edit

设置完毕后,您可以用下面的命令来修正本次提交所使用的用户身份:

    git commit --amend --reset-author

 1 file changed, 20 insertions(+)
 create mode 100644 .travis.yml
参考资料
- https://mp.weixin.qq.com/s/udAoloIeKINK74T04fQNbQ
- https://hexo.io/zh-cn/docs/
微信公众号「padluo」,分享数据科学家的自我修养,既然遇见,不如一起成长。
http://weixin.qq.com/r/P3WGnj3E82CMrXn99yAt (二维码自动识别)
读者交流电报群
https://t.me/sspadluo
知识星球交流群


 5036
5036


 被折叠的 条评论
为什么被折叠?
被折叠的 条评论
为什么被折叠?
 到【灌水乐园】发言


