


前言
FFmpeg是什么? 引用 FFmpeg 官网 的介绍:
A complete, cross-platform solution to record, convert and stream audio and video.
它是一个音视频录制,转换和流化(流媒体推流/接收)的完整的跨平台的解决方案.
它简单易用, 同样是官网的一个视频转换格式的例子, 命令很简单:
$ ffmpeg -i input.mp4 output.aviFFmpeg的文档资源也是相当丰富的,不过都是英文的
FFmpeg的安装方法
关于为什么要通过自行编译的方式安装FFmpeg及如何在不同的平台上编译并安装的方法, 在FFmpeg的官方wiki上可以找到详细的答案, 我们先来看一下wiki给出的理由, 如果确实需要自己编译, 再来按照教程一步一步的编译并安装. 如果不是这种情况,那请直接跳到二进制安装包安装方式.
自己动手通过源代码编译安装的三个理由:
- 二进制安装包版本不是最新的,有可能包含一些严重的bug或一些新版本重要的功能没有包含进去
- 需要自定义编译过程, 如包含平台相关的优化, 链接特定的库等
- 你需改了源代码
编译与安装
平台: Ubuntu 18.04
GCC: 7.5.0
FFmpeg: 4.3
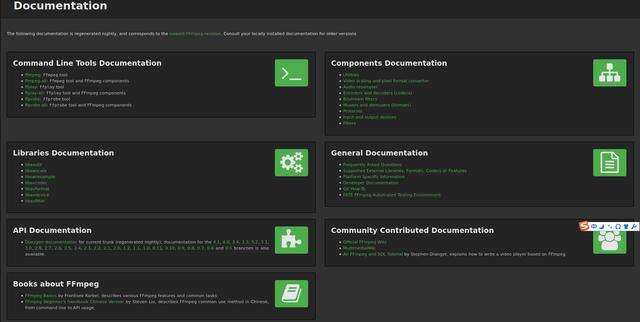
进入官方wiki
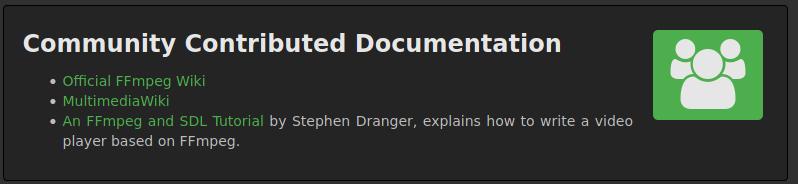
在文档(Documentation)页面的右下方, 有一个社区共享的文档区域(Community Contributed Documentation), 在这里可以进入官方wiki界面.
进入官方wiki之后,找到编译FFmpeg(Compiling FFmpeg)

获取源代码
git clone https://git.ffmpeg.org/ffmpeg.git ffmpeg或者通过gitbub仓库下载
git clone https://github.com/FFmpeg/FFmpeg安装依赖包
sudo apt-get update -qq && sudo apt-get -y install autoconf automake build-essential cmake git-core libass-dev libfreetype6-dev libgnutls28-dev libsdl2-dev libtool libva-dev libvdpau-dev libvorbis-dev libxcb1-dev libxcb-shm0-dev libxcb-xfixes0-dev pkg-config texinfo wget yasm zlib1g-dev安装常用的第三方库
这些第三方库有:
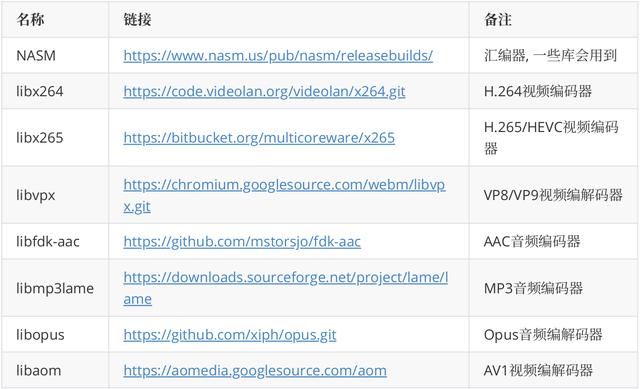
这些库的安装有两种方式, 一是通过二进制包安装, ubuntu下就是用命令行apt-get install安装,二是通过源码编译安装.以NASM举例:
sudo apt-get install nasm或者
下载源代码 wget https://www.nasm.us/pub/nasm/releasebuilds/2.15.03/nasm-2.15.03.tar.bz2解压 tar xjvf nasm-2.15.03.tar.bz2 进入到源码根目录 cd nasm-2.14.02 生成configure文件 ./autogen.sh 生成makefile文件 ./configure编译 make安装 make install详细的安装过程请参考官方wiki 编译过程参考
编译前的配置
这里指的是运行.configure文件. 在配置之前,我们可以先了解一下配置选项, 在FFmpeg源码根目录下运行.configure -h查看帮助.
./configure -hUsage: configure [options]Options: [defaults in brackets after descriptions]Help options: --help print this message --quiet Suppress showing informative output --list-decoders show all available decoders --list-encoders show all available encoders --list-hwaccels show all available hardware accelerators --list-demuxers show all available demuxers --list-muxers show all available muxers --list-parsers show all available parsers --list-protocols show all available protocols --list-bsfs show all available bitstream filters --list-indevs show all available input devices --list-outdevs show all available output devices --list-filters show all available filtersStandard options: --logfile=FILE log tests and output to FILE [ffbuild/config.log] --disable-logging do not log configure debug information --fatal-warnings fail if any configure warning is generated --prefix=PREFIX install in PREFIX [/usr/local] --bindir=DIR install binaries in DIR [PREFIX/bin] --datadir=DIR install data files in DIR [PREFIX/share/ffmpeg] --docdir=DIR install documentation in DIR [PREFIX/share/doc/ffmpeg] --libdir=DIR install libs in DIR [PREFIX/lib] --shlibdir=DIR install shared libs in DIR [LIBDIR] --incdir=DIR install includes in DIR [PREFIX/include] --mandir=DIR install man page in DIR [PREFIX/share/man] --pkgconfigdir=DIR install pkg-config files in DIR [LIBDIR/pkgconfig] --enable-rpath use rpath to allow installing libraries in paths not part of the dynamic linker search path use rpath when linking programs (USE WITH CARE) --install-name-dir=DIR Darwin directory name for installed targetsLicensing options: --enable-gpl allow use of GPL code, the resulting libs and binaries will be under GPL [no] --enable-version3 upgrade (L)GPL to version 3 [no] --enable-nonfree allow use of nonfree code, the resulting libs and binaries will be unredistributable [no]Configuration options: --disable-static do not build static libraries [no] --enable-shared build shared libraries [no] --enable-small optimize for size instead of speed --disable-runtime-cpudetect disable detecting CPU capabilities at runtime (smaller binary) --enable-gray enable full grayscale support (slower color) --disable-swscale-alpha disable alpha channel support in swscale --disable-all disable building components, libraries and programs --disable-autodetect disable automatically detected external libraries [no]以上只截取了很少的一部分内容,可以看到它的帮助文档非常详尽,当然内容也是很多的,需要花一些时间去研究. 这里我直接列出我编译时的配置选项
./configure --extra-libs='-lpthread -lm' --enable-gpl --enable-libass --enable-libfreetype --enable-libmp3lame --enable-libopus --enable-libvorbis --enable-libvpx --enable-libx264 --enable-libx265 --enable-pthreads --enable-shared --disable-static --enable-libfontconfig编译
如果配置过程没有错误,编译就很简单,没什么好说的. 如果提示缺少什么库之类的,就先安装缺少的库,再重新configure, 直到成功为止.
make安装
sudo make install测试安装是否成功
在终端运行 ffmpeg, 如果看到类似以下信息,说明安装成功了.我们能看到编译选项和包含模块的名字和版本
ffmpeg ffmpeg version n4.3.1-5-g98c8920d86 Copyright (c) 2000-2020 the FFmpeg developers built with gcc 7 (Ubuntu 7.5.0-3ubuntu1~18.04) configuration: --extra-libs='-lpthread -lm' --enable-gpl --enable-libass --enable-libfreetype --enable-libmp3lame --enable-libopus --enable-libvorbis --enable-libvpx --enable-libx264 --enable-libx265 --enable-pthreads --enable-shared --disable-static --enable-debug=3 --disable-optimizations --disable-asm --disable-stripping --enable-libfontconfig libavutil 56. 51.100 / 56. 51.100 libavcodec 58. 91.100 / 58. 91.100 libavformat 58. 45.100 / 58. 45.100 libavdevice 58. 10.100 / 58. 10.100 libavfilter 7. 85.100 / 7. 85.100 libswscale 5. 7.100 / 5. 7.100 libswresample 3. 7.100 / 3. 7.100 libpostproc 55. 7.100 / 55. 7.100Hyper fast Audio and Video encoderusage: ffmpeg [options] [[infile options] -i infile]... {[outfile options] outfile}...Use -h to get full help or, even better, run 'man ffmpeg'debug模式配置
如果要编译成debug模式, 配置的时候就要加上以下选项
--enable-debug=3 --disable-optimizations --disable-asm --disable-stripping二进制包安装
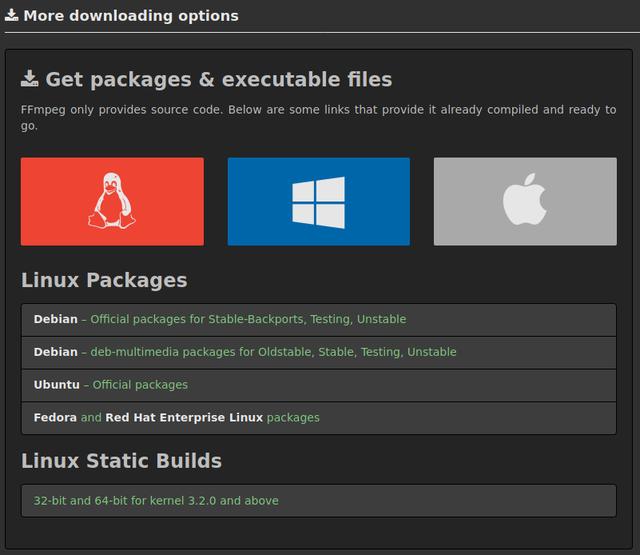
在FFmpeg官网的download页面左下角有如下图所示的区域,这是各个平台预编译好的二进制安装文件的链接.我们找到对应平台的安装文件,下载下来安装即可.


 7710
7710


 被折叠的 条评论
为什么被折叠?
被折叠的 条评论
为什么被折叠?
 到【灌水乐园】发言


