


 本文介绍了如何利用TensorBoard工具有效地可视化TensorFlow构建的神经网络模型,包括输入输出变量、激活函数等关键组件,并展示了如何通过命令行和URL访问生成的流程图。遇到问题时,作者提供了解决方法,如访问URL的技巧。
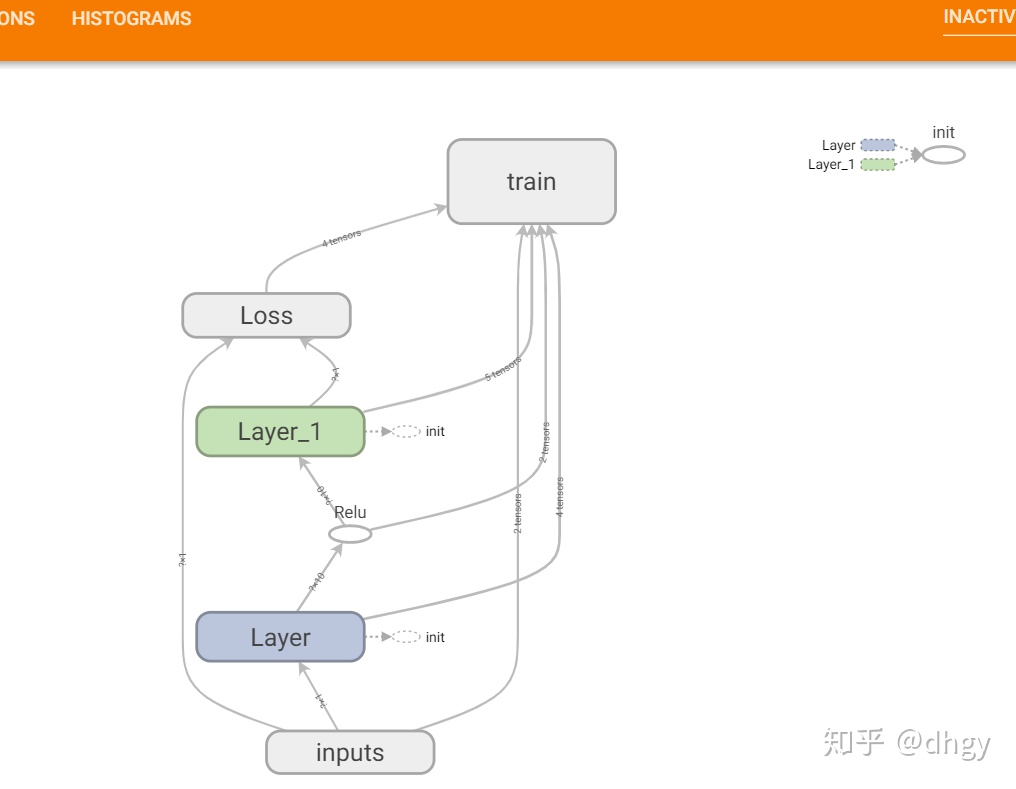
才发现TensorBoard这个工具也太好用了吧。可以很清楚的看到你构建的网络框架,比如输入变量输出变量,选取的激活函数等。
首先使用cmd打开命令行窗口,激活tensorflow 使用activate tensorflow

接着到你保存的路径文件夹下

接着就会出现地址类似这样的

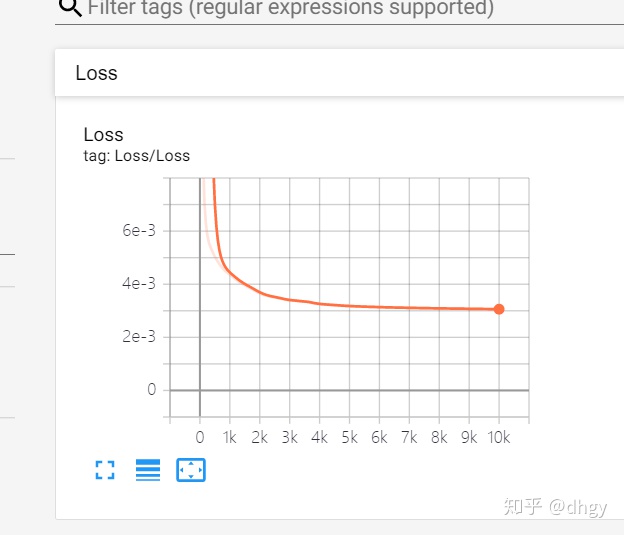
复制这个地址在浏览器打开,然后就可以看到可视化结果了。
可是我的这个地址打不开,然后加了host就可以了

访问的网址:http://localhost:6006/ 或者http://127.0.0.1:6006/ 都可以了
生成流程图的代码如下:
import numpy as np
import tensorflow as tf


def add_layer(inputs, in_size, out_size, activation_function=None):
    # 每使用该函数创建一层,则生成一个名为Layer_n的外层框
    with tf.name_scope('Layer'):
        # 内层权重框
        with tf.name_scope('Wights'):
            Weights = tf.Variable(tf.random_normal([in_size, out_size]))
        # 内层Bias框
        with tf.name_scope('Biases'):
            biases = tf.Variable(tf.zeros([1, out_size]) + 0.1)
        # 内层z(x,w,b)框
        with tf.name_scope('Wx_plus_b'):
            Wx_plus_b = tf.matmul(inputs, Weights) + biases
    if activation_function is None:
        outputs = Wx_plus_b
    else:
        outputs = activation_function(Wx_plus_b)
    return outputs


# 准备数据
x_data = np.linspace(-1, 1, 300)[:, np.newaxis]
noise = np.random.normal(0, 0.05, x_data.shape)
y_data = np.square(x_data) - 0.5 + noise

# 使用tensorboard画inputs层
with tf.name_scope('inputs'):  # 一个名为inputs的外层框
    # x_input和y_input
    xs = tf.placeholder(tf.float32, [None, 1], name='x_input')
    ys = tf.placeholder(tf.float32, [None, 1], name='y_input')

l1 = add_layer(xs, 1, 10, activation_function=tf.nn.relu)
prediction = add_layer(l1, 10, 1, activation_function=None)

# Loss框,其中包含计算Loss的各个步骤,例如sub,square,sum,mean等
with tf.name_scope("Loss"):
    loss = tf.reduce_mean(tf.reduce_sum(tf.square(ys - prediction),
                                        reduction_indices=[1]))
# train框,其中包含梯度下降步骤和权重更新步骤
with tf.name_scope('train'):
    train_step = tf.train.GradientDescentOptimizer(0.1).minimize(loss)

init = tf.compat.v1.global_variables_initializer()

with tf.Session() as sess:
    # 将图写入文件夹logs
    writer = tf.compat.v1.summary.FileWriter('logs/')
    # 写入文件,名为events.out.tfevents.1561191707.06P2GHW85CAH236
    writer.add_graph(sess.graph)
    sess.run(init)


 690
690

 被折叠的 条评论
为什么被折叠?
被折叠的 条评论
为什么被折叠?
 到【灌水乐园】发言


