


一、基本介绍
1,什么是 MyBatis
MyBatis 是一款优秀的持久化框架,原名叫做 iBatis,2010 年改名为 MyBatis。
MyBatis 支持定制化 SQL、存储过程以及高级映射。MyBatis 几乎避免了所有的 JDBC 代码手动设置参数以及获取结果集。
在传统的 SSM 框架整合中,使用 MyBatis 需要大量的 XML 配置。而在 Spring Boot 中,MyBatis 官方提供了一套自动化配置方案,可以做到 MyBatis 开箱即用。
2,安装配置
mybatis-spring-boot-starter:MyBatis 依赖
mysql-connector-java:MySQL 数据库驱动
druid:Druid 是阿里巴巴开发的号称为监控而生的数据库连接池,也是目前最好的数据库连接池。
  <!--        get和set注解-->
<dependency>
    <groupId>org.projectlombok</groupId>
    <artifactId>lombok</artifactId>
    <optional>true</optional>
</dependency>
<!-- MyBatis依赖 -->
<dependency>
    <groupId>org.mybatis.spring.boot</groupId>
    <artifactId>mybatis-spring-boot-starter</artifactId>
    <version>1.3.2</version>
</dependency>

<!-- 数据库驱动依赖 -->
<dependency>
    <groupId>mysql</groupId>
    <artifactId>mysql-connector-java</artifactId>
</dependency>

<!-- 数据库连接池 -->
<dependency>
    <groupId>com.alibaba</groupId>
    <artifactId>druid</artifactId>
    <version>1.1.9</version>
</dependency>
2)接着在 application.properties 中配置数据库连接信息:
#数据库
spring.datasource.type=com.alibaba.druid.pool.DruidDataSource
spring.datasource.url=jdbc:mysql://localhost:3306/springbootdemo?serverTimezone=Asia/Shanghai
spring.datasource.username=root
spring.datasource.password=123456
# 重新指明资源文件位置
mybatis.mapper-locations=classpath:mapper/*.xml
二、基本用法
1,创建实体类
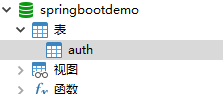
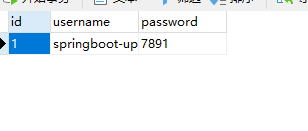
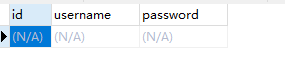
(1)假设我们数据库表结构如下:

(2)创建对应的 Auth实体类:
package com.example.demo.model;

import lombok.Getter;
import lombok.NoArgsConstructor;
import lombok.Setter;
import lombok.ToString;

@Setter
@Getter
@NoArgsConstructor
@ToString
public class Auth {
    private Integer id;
    private String userName;
    private String passWord;
}
2,创建数据库访问层
(1)首先创建 AuthMapper 接口:
要指明一个类是 Mapper 有如下两种方式:
一种如本样例所示,在 AuthMapper 上添加 @Mapper 注解,表明该接口是一个 MyBatis 中的 Mapper。这种方式就是需要在每一个 Mapper 上都添加注解。
另一种更简单的方式是在配置类上添加 @MapperScan(“com.example.demo.mapper”) 注解,表示扫描 com.example.demo.mapper 包下的所有接口作为 Mapper。这样就不需要在每个接口上配置 @Mapper 注解了。
package com.example.demo.mapper;

import com.example.demo.model.Auth;
import org.apache.ibatis.annotations.Mapper;
import java.util.List;

@Mapper
public interface AuthMapper {
    int addAuth(Auth auth);
    int updateAuth(Auth auth);
    int deleteAuthById(String id);
    Auth getAuthById(String id);
    List<Auth> getAllAuth();
}
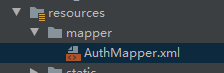
(2)接着在resource文件下创建mapper文件 并在创建 AuthMapper.xml 文件,内容如下:
代码说明:
针对 AuthMapper接口中的每一个方法都在 AuthMapper.xml 中列出了实现。
#{} 用来代替接口中的参数,实体类中的属性可以直接通过 #{实体类属性名} 获取。
<?xml version="1.0" encoding="UTF-8" ?>
<!DOCTYPE mapper
        PUBLIC "-//mybatis.org//DTD Mapper 3.0//EN"
        "http://mybatis.org/dtd/mybatis-3-mapper.dtd">
<mapper namespace="com.example.demo.mapper.AuthMapper">
    <insert id="addAuth" parameterType="com.example.demo.model.Auth">
        insert into auth(id,username,password) values (#{id},#{userName},#{passWord})
    </insert>
    <delete id="deleteAuthById" parameterType="java.lang.String">
        DELETE FROM auth WHERE id=#{id}
    </delete>
    <update id="updateAuth" parameterType="com.example.demo.model.Auth">
        UPDATE auth set username=#{userName}, password=#{passWord} WHERE id=#{id}
    </update>
    <select id="getAuthById" parameterType="java.lang.String" resultType="com.example.demo.model.Auth">
        SELECT * FROM auth WHERE id=#{id}
    </select>
    <select id="getAllAuth" resultType="com.example.demo.model.Auth">
        SELECT * FROM auth
    </select>
</mapper>
3.创建Service层
(1.)Service层
package com.example.demo.service;

import com.example.demo.model.Auth;
import java.util.List;

public interface AuthService {
    int addAuth(Auth auth);
    int updateAuth(Auth auth);
    int deleteAuthById(String id);
    Auth getAuthById(String id);
    List<Auth> getAllAuth();
}
(2.)ServiceImpl层
package com.example.demo.service.impl;

import com.example.demo.mapper.AuthMapper;
import com.example.demo.model.Auth;
import com.example.demo.service.AuthService;
import org.springframework.beans.factory.annotation.Autowired;
import org.springframework.stereotype.Service;

import java.util.List;

@Service
public class AuthServiceImpl implements AuthService{
    @Autowired
    private AuthMapper authMapper;
    @Override
    public int addAuth(Auth auth){
        int i1 = authMapper.addAuth(auth);
        System.out.println("插入一条数据>>>" + i1);
        return i1;
    }
    @Override
    public int updateAuth(Auth auth){
        // 修改数据
        int i2 = authMapper.updateAuth(auth);
        System.out.println("更新一条数据>>>" + i2);
        return i2;
    }
    @Override
    public  int deleteAuthById(String id){
        // 删除数据
        int i3 = authMapper.deleteAuthById(id);
        System.out.println("删除一条数据>>>" + i3);
        return i3;
    }
    @Override
    public Auth getAuthById(String id){
        // 查询单条数据
        Auth auth4 = authMapper.getAuthById(id);
        System.out.println("查询1条数据>>>" + auth4.toString());
        return auth4;
    }
    @Override
    public List<Auth> getAllAuth(){
        // 查询多条数据
        List<Auth> auths = authMapper.getAllAuth();
        System.out.println("查询多条数据>>>" + auths);
        return auths;
    }
}
4,创建 Controller
我们在 Controller 中通过调用 AuthMapper进行数据的增、删、改、查操作。
package com.example.demo.controller;

import com.example.demo.model.Auth;
import com.example.demo.service.AuthService;
import org.springframework.beans.factory.annotation.Autowired;
import org.springframework.web.bind.annotation.GetMapping;
import org.springframework.web.bind.annotation.PathVariable;
import org.springframework.web.bind.annotation.PostMapping;
import org.springframework.web.bind.annotation.RequestBody;
import org.springframework.web.bind.annotation.RequestParam;
import org.springframework.web.bind.annotation.RestController;
import java.util.List;

@RestController
public class AuthController {
    @Autowired
    private AuthService authService;

    @PostMapping("/authAdd")
    public int addAuth(@RequestBody Auth auth) {
      return authService.addAuth(auth);
    }
    @PostMapping("/updateAuth")
    public int updateAuth(@RequestBody Auth auth) {
     return authService.updateAuth(auth);
    }
    @PostMapping(value = "/deleteAuth/{id}")
    public int deleteAuthById(@PathVariable(name = "id") String id) {
        // 删除数据
       return authService.deleteAuthById(id);
    }
    @GetMapping(value = "/queryAuth")
    public Auth getAuthById(@RequestParam(value = "id") String id) {
        // 查询单条数据
        Auth auth4 = authService.getAuthById(id);
        System.out.println("查询1条数据>>>" + auth4.toString());
        return auth4;
    }
    @GetMapping("/allAuth")
    public List<Auth> getAllAuth() {
        // 查询多条数据
        List<Auth> auths = authService.getAllAuth();
        System.out.println("查询多条数据>>>" + auths);
        return auths;
    }
}
4,运行测试
(1.)新增
http://localhost:8080/authAdd


(2.)修改
http://localhost:8080/updateAuth


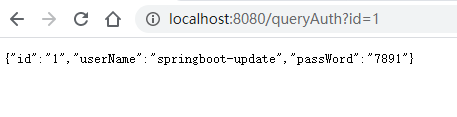
(3.)根据id查询
http://localhost:8080/queryAuth?id=1

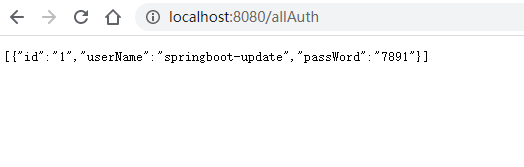
(4)查所有
http://localhost:8080/allAuth
(5.)根据id删除
http://localhost:8080/deleteAuth/1


 6826
6826


 被折叠的 条评论
为什么被折叠?
被折叠的 条评论
为什么被折叠?
 到【灌水乐园】发言


