


1 Spring框架的引言
spring(春天),生于在2002年,由Rod Johnson创作。Spring框架是一个集众多设计模式于一身的开源的、轻量级的项目管理框架。致力于JAVAEE轻量级解决方案。相对于原来学过的框架而言,spring框架和之前学习的struts2 、 mybatis 框架有了本质的区别,不是替换原来的某个框架,而是对其进行整合管理。
轻量级解决方案:提供一个以简单的、统一的、高效的方式构造整个应用,并且可以将单层框架以最佳的组合揉和在一起建立一个连贯的体系。
2 Spring框架的核心作用
Spring 框架用来管理[创建|使用|销毁]项目中的组件,由于spring 框架可以帮我们生产项目中组件对象,因此也习惯称spring是一个工厂|容器。
组件: 项目中的service,dao,action,都是项目中的组件 。
注意: spring框架通常不管理对实体类对象创建。
3.第一个环境搭建
1.打开IDEA如图所示的界面,点击Create New Project。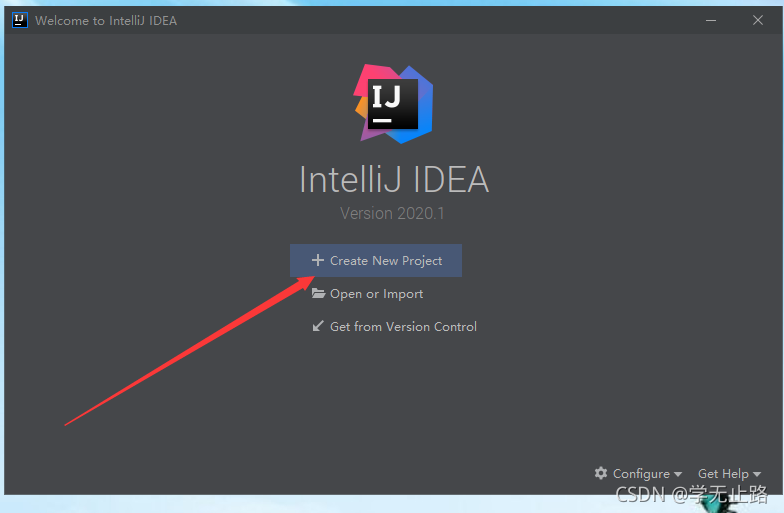
2.选择Empty Java,点击Next。如图所示: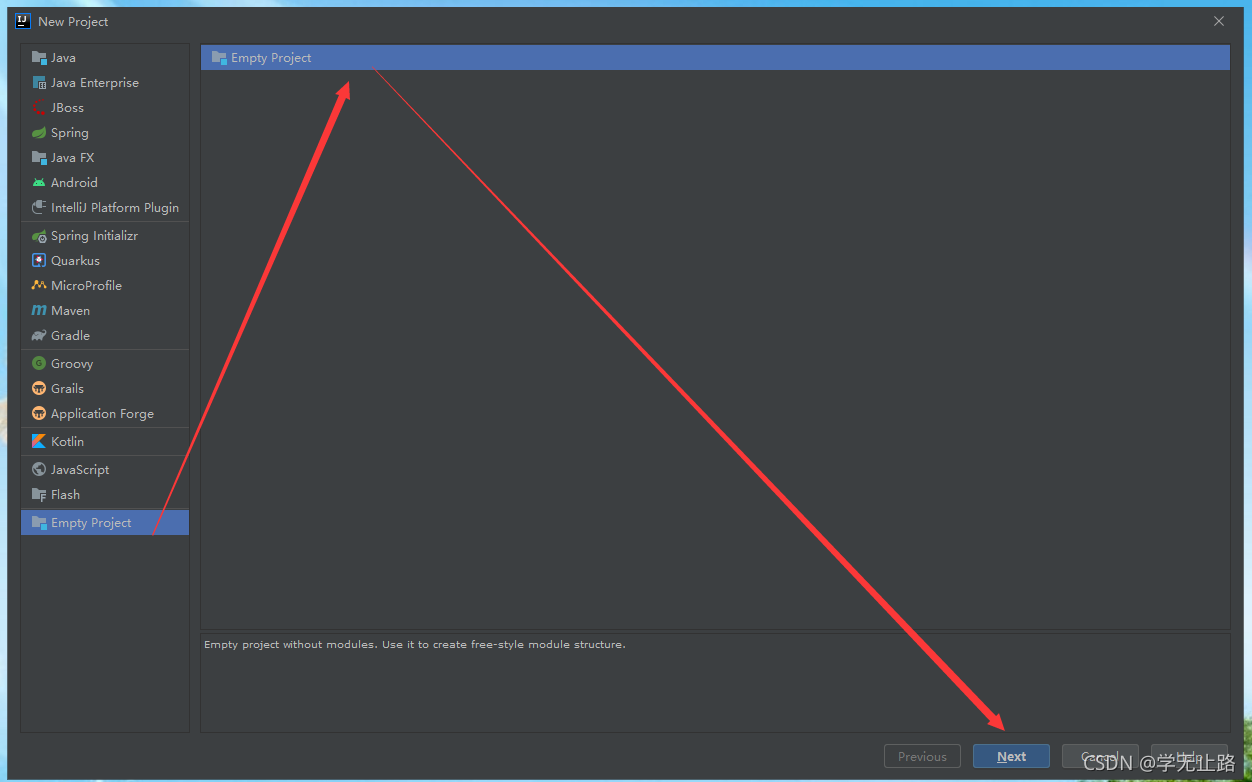
3.填写项目名称,点击Finish。如图所示: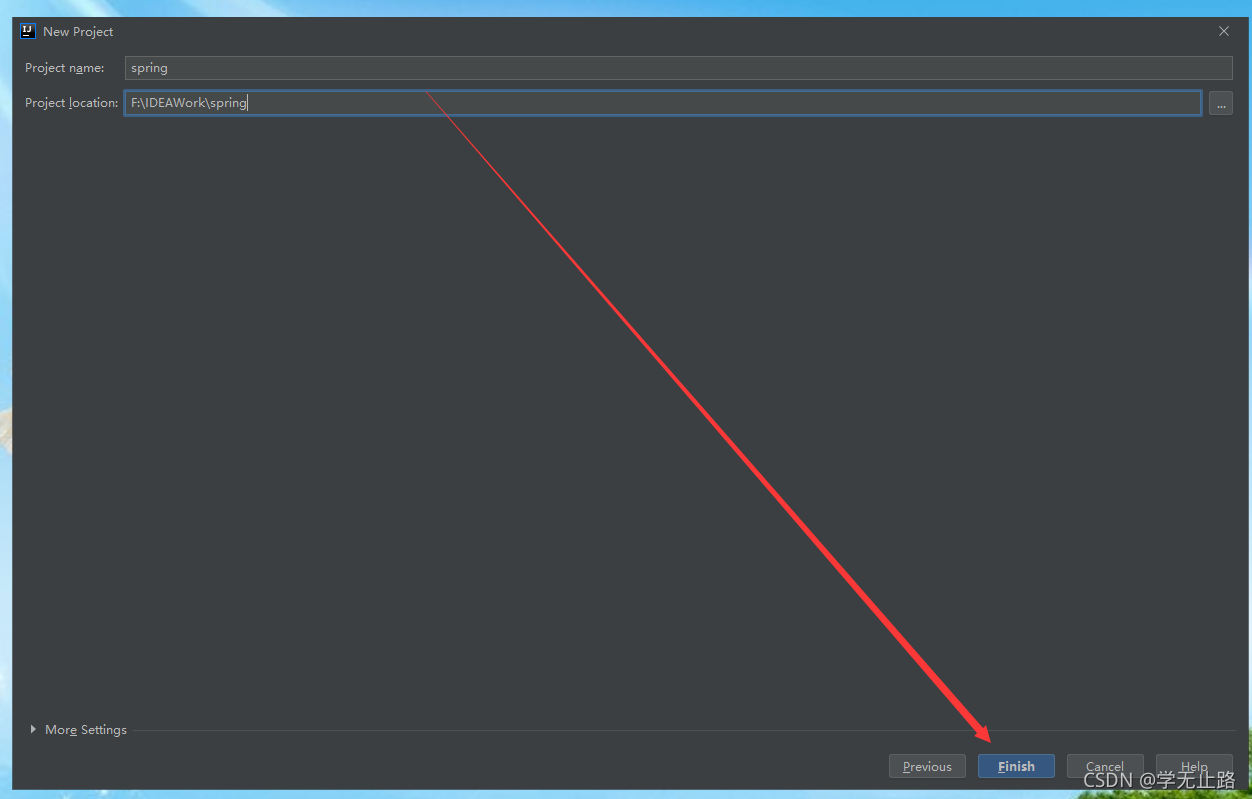
4.选择Module点击+,如图所示: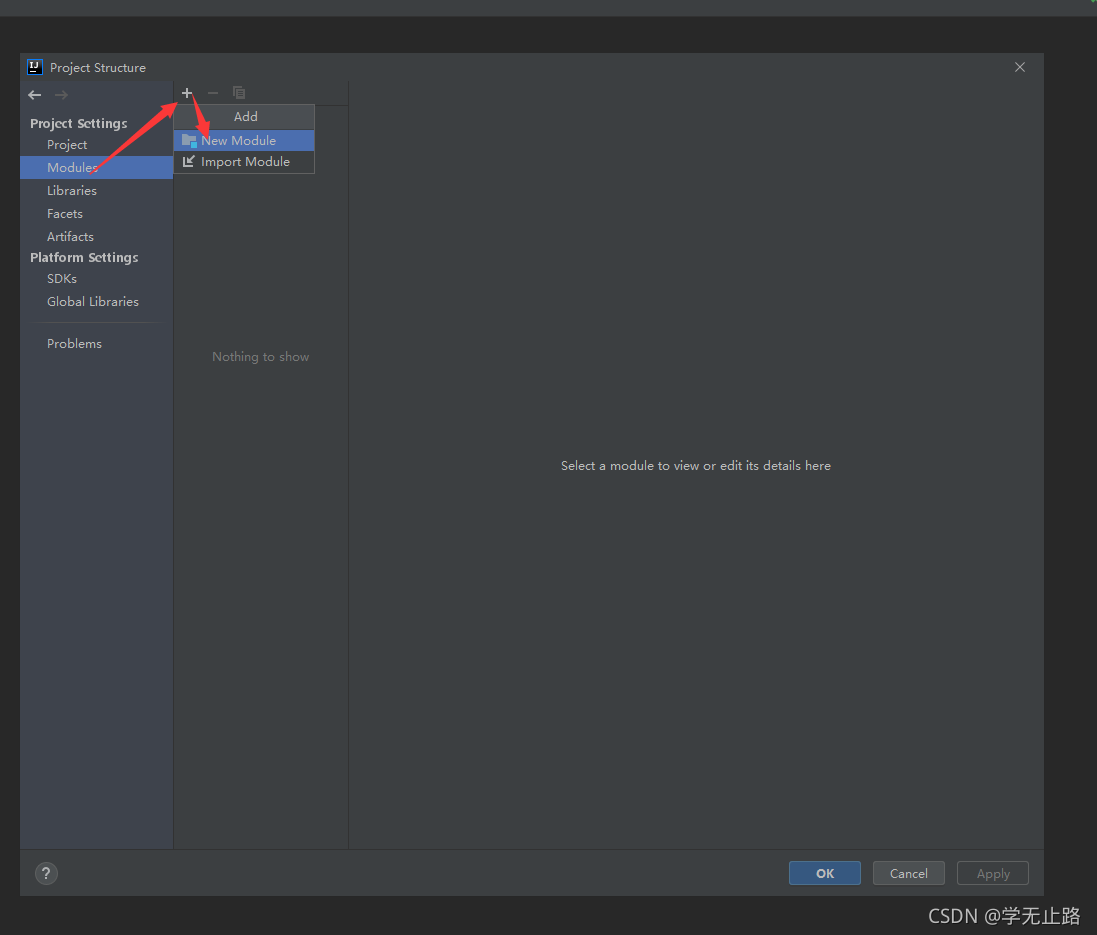
5.选择Maven工程,点击Next。如图所示: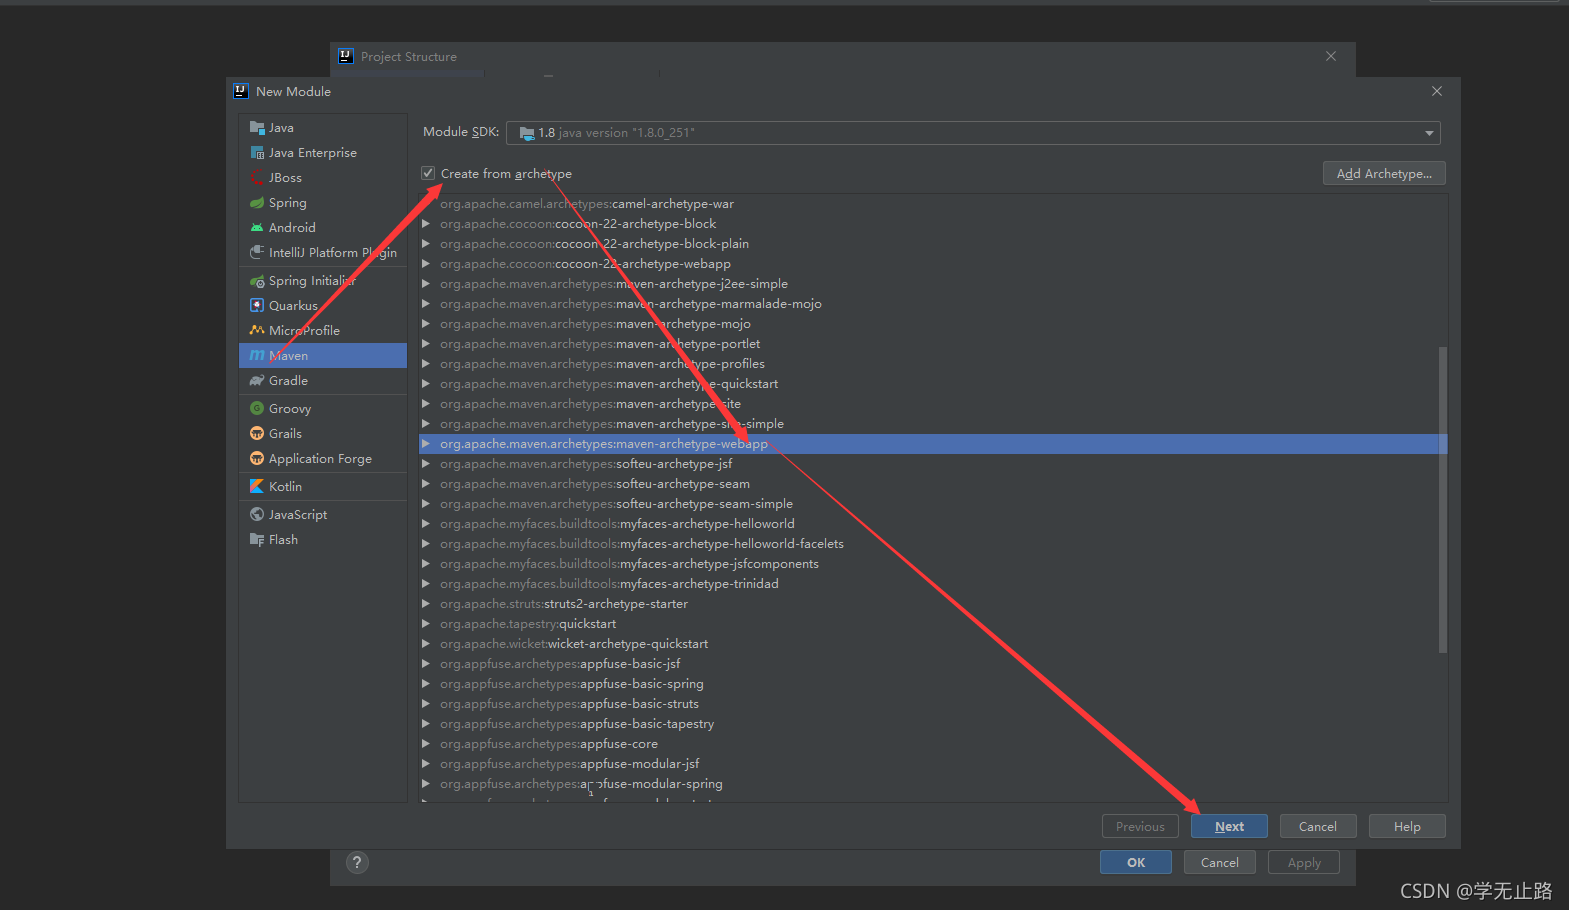
6.填写项目名称,点击Next。如图所示: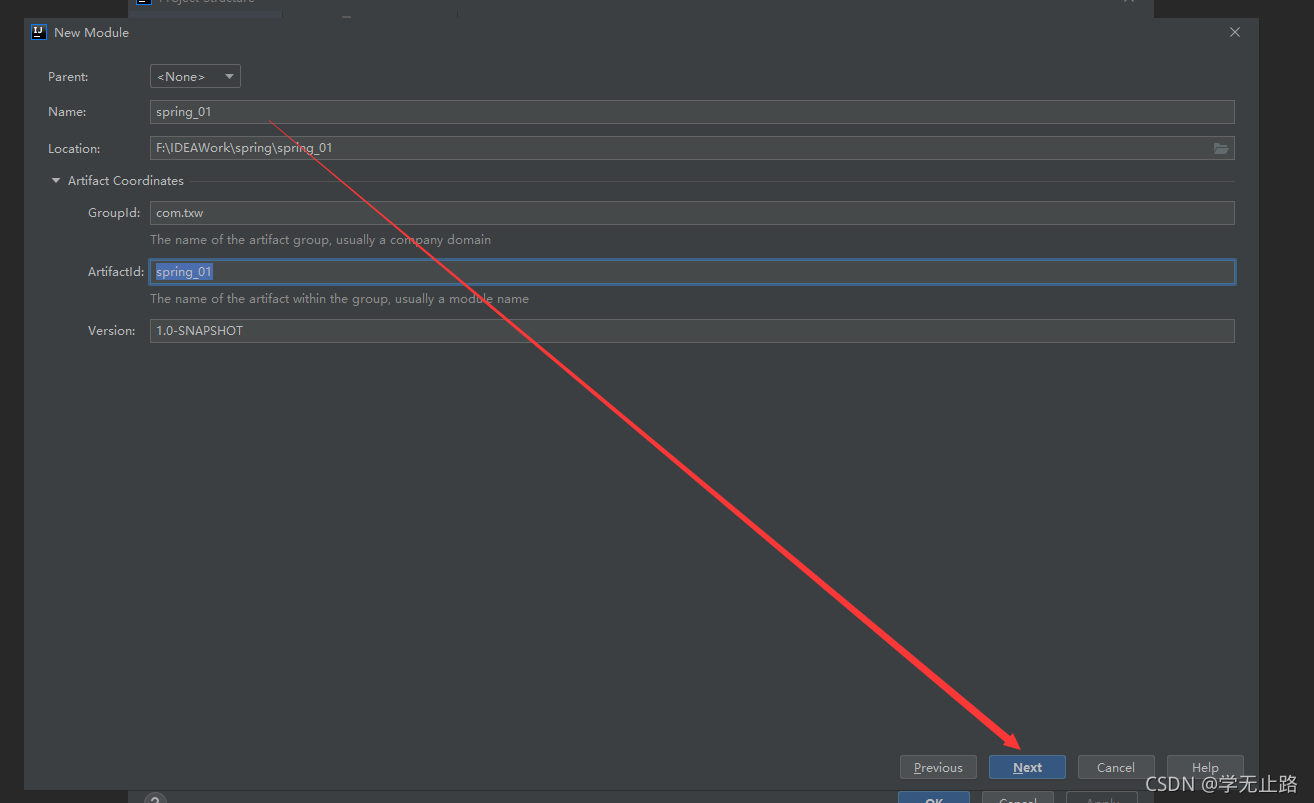
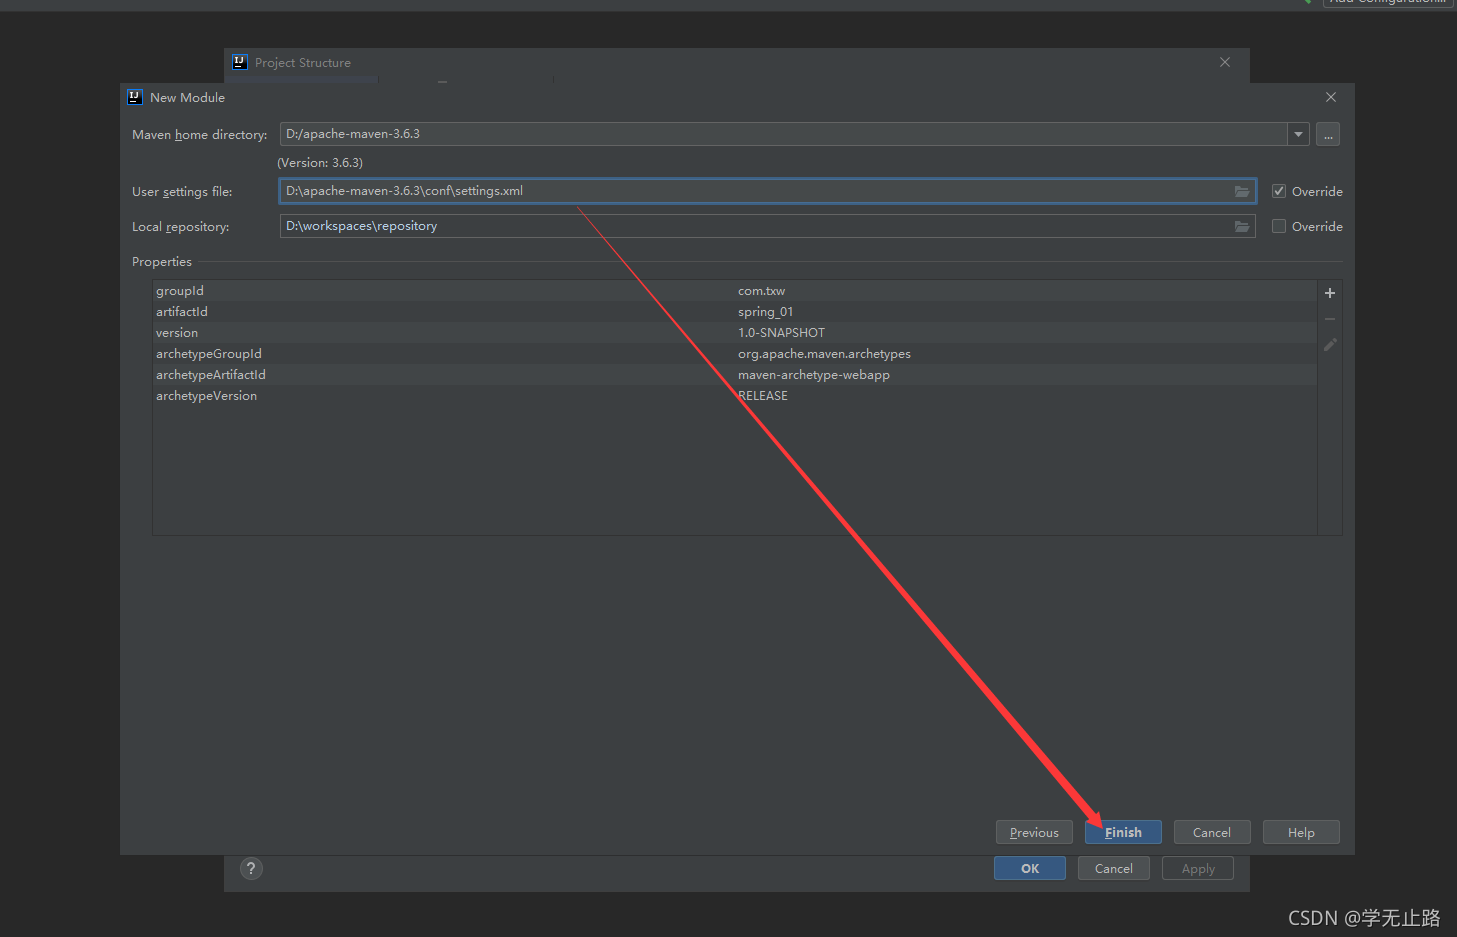
7.点击Finish,如图所示:
8.引入相关的依赖的代码如下:
<?xml version="1.0" encoding="UTF-8"?>

<project xmlns="http://maven.apache.org/POM/4.0.0" xmlns:xsi="http://www.w3.org/2001/XMLSchema-instance"
  xsi:schemaLocation="http://maven.apache.org/POM/4.0.0 http://maven.apache.org/xsd/maven-4.0.0.xsd">
  <modelVersion>4.0.0</modelVersion>
  <groupId>com.txw</groupId>
  <artifactId>spring_01</artifactId>
  <version>1.0-SNAPSHOT</version>
  <packaging>war</packaging>
  <properties>
    <project.build.sourceEncoding>UTF-8</project.build.sourceEncoding>
    <maven.compiler.source>1.8</maven.compiler.source>
    <maven.compiler.target>1.8</maven.compiler.target>
  </properties>
  <!--相关依赖-->
  <dependencies>
    <dependency>
      <groupId>junit</groupId>
      <artifactId>junit</artifactId>
      <version>4.11</version>
      <scope>test</scope>
    </dependency>
    <!--spring 4.3.2相关依赖-->
    <dependency>
      <groupId>org.springframework</groupId>
      <artifactId>spring-core</artifactId>
      <version>4.3.2.RELEASE</version>
    </dependency>
    <dependency>
      <groupId>org.springframework</groupId>
      <artifactId>spring-beans</artifactId>
      <version>4.3.2.RELEASE</version>
    </dependency>
    <dependency>
      <groupId>org.springframework</groupId>
      <artifactId>spring-web</artifactId>
      <version>4.3.2.RELEASE</version>
    </dependency>
    <dependency>
      <groupId>org.springframework</groupId>
      <artifactId>spring-expression</artifactId>
      <version>4.3.2.RELEASE</version>
    </dependency>
    <dependency>
      <groupId>org.springframework</groupId>
      <artifactId>spring-aop</artifactId>
      <version>4.3.2.RELEASE</version>
    </dependency>
    <dependency>
      <groupId>org.springframework</groupId>
      <artifactId>spring-context</artifactId>
      <version>4.3.2.RELEASE</version>
    </dependency>
    <dependency>
      <groupId>org.springframework</groupId>
      <artifactId>spring-context-support</artifactId>
      <version>4.3.2.RELEASE</version>
    </dependency>
    <dependency>
      <groupId>org.springframework</groupId>
      <artifactId>spring-aspects</artifactId>
      <version>4.3.2.RELEASE</version>
    </dependency>
    <dependency>
      <groupId>org.springframework</groupId>
      <artifactId>spring-jdbc</artifactId>
      <version>4.3.2.RELEASE</version>
    </dependency>
  </dependencies>
  <build>
  </build>
</project>
如图所示: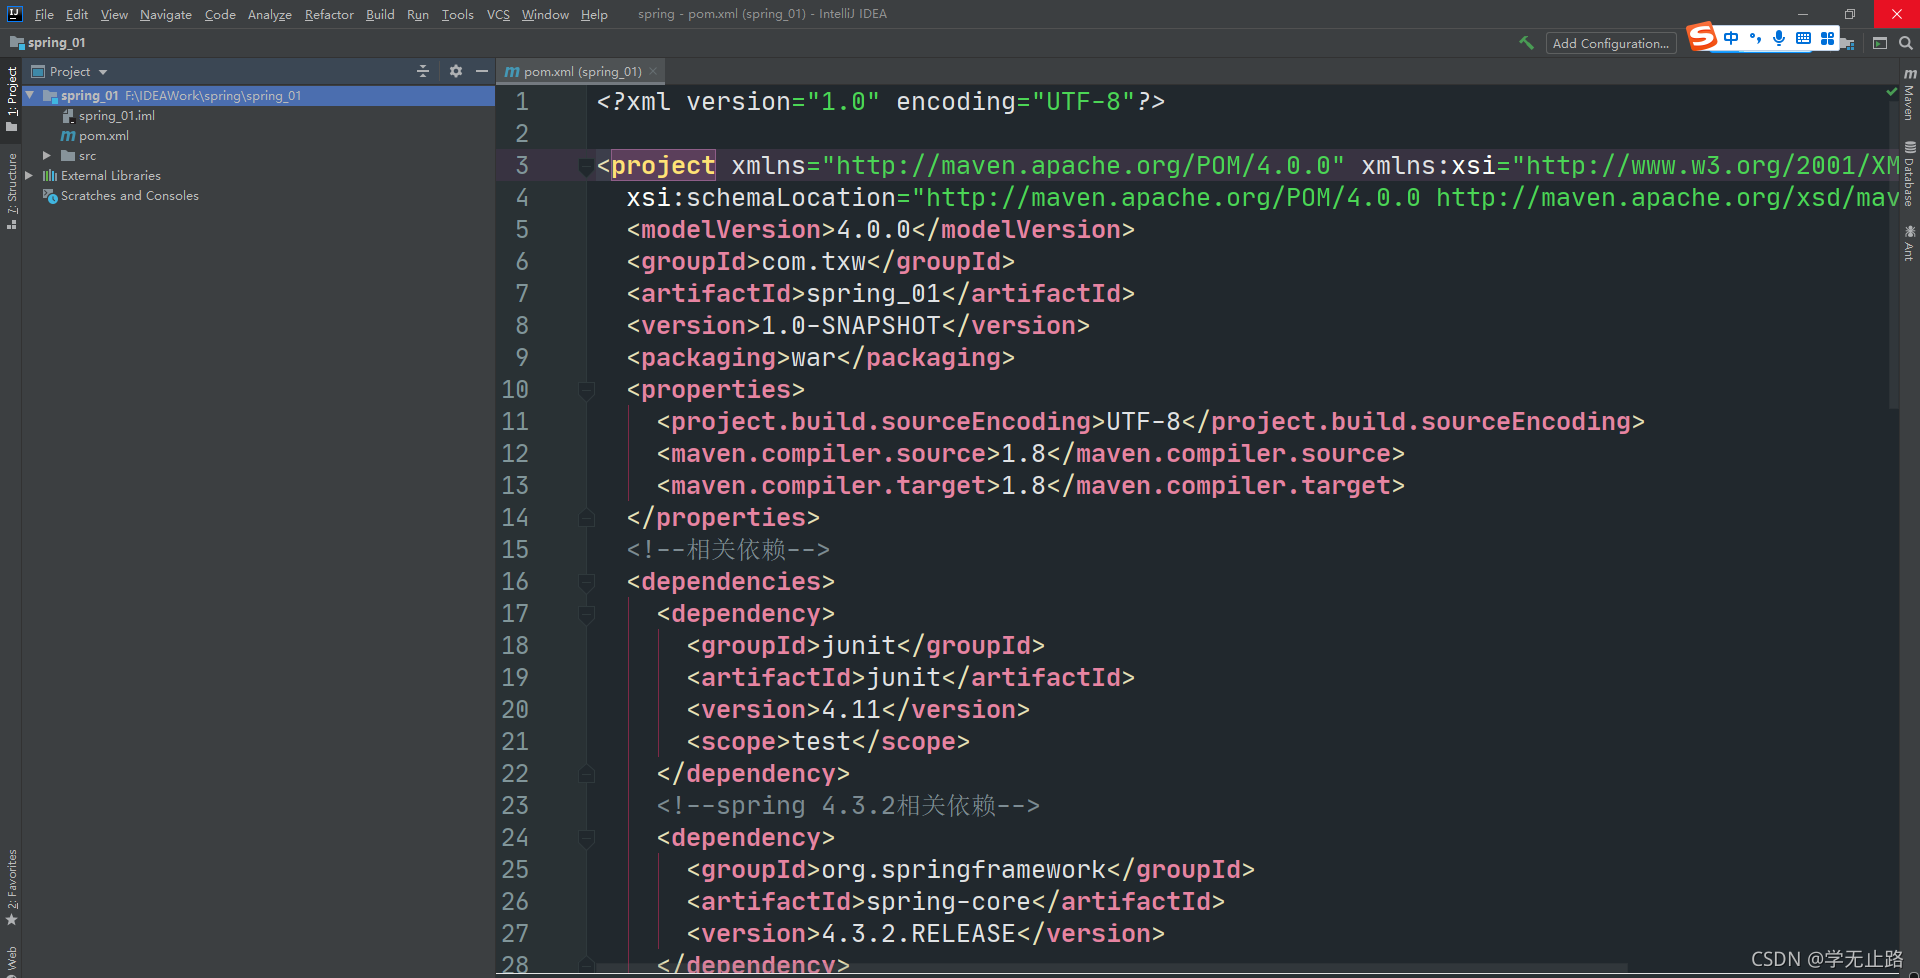
9.引入spring相关配置文件的代码如下:
<?xml version="1.0" encoding="UTF-8"?>
<beans xmlns="http://www.springframework.org/schema/beans"
       xmlns:xsi="http://www.w3.org/2001/XMLSchema-instance"
       xsi:schemaLocation="http://www.springframework.org/schema/beans
           http://www.springframework.org/schema/beans/spring-beans-3.2.xsd ">

</beans>
如图所示: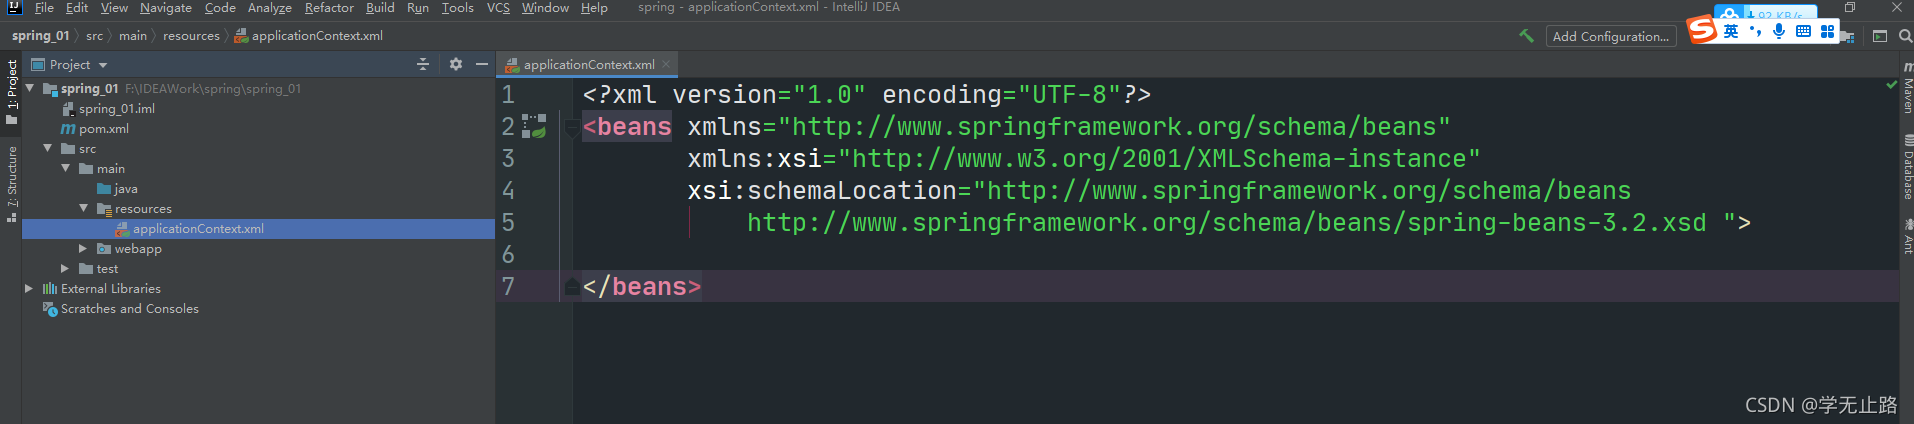
10.编写UserDao的代码如下:
package com.txw.dao;

/**
 * 用户持久层
 * @author Adair
 * E-mail: 1578533828@qq.com
 */
@SuppressWarnings("all")  // 注解警告信息
public interface UserDao {

    /**
     * 保存
     * @param name
     */
    public void save(String name);
}
如图所示: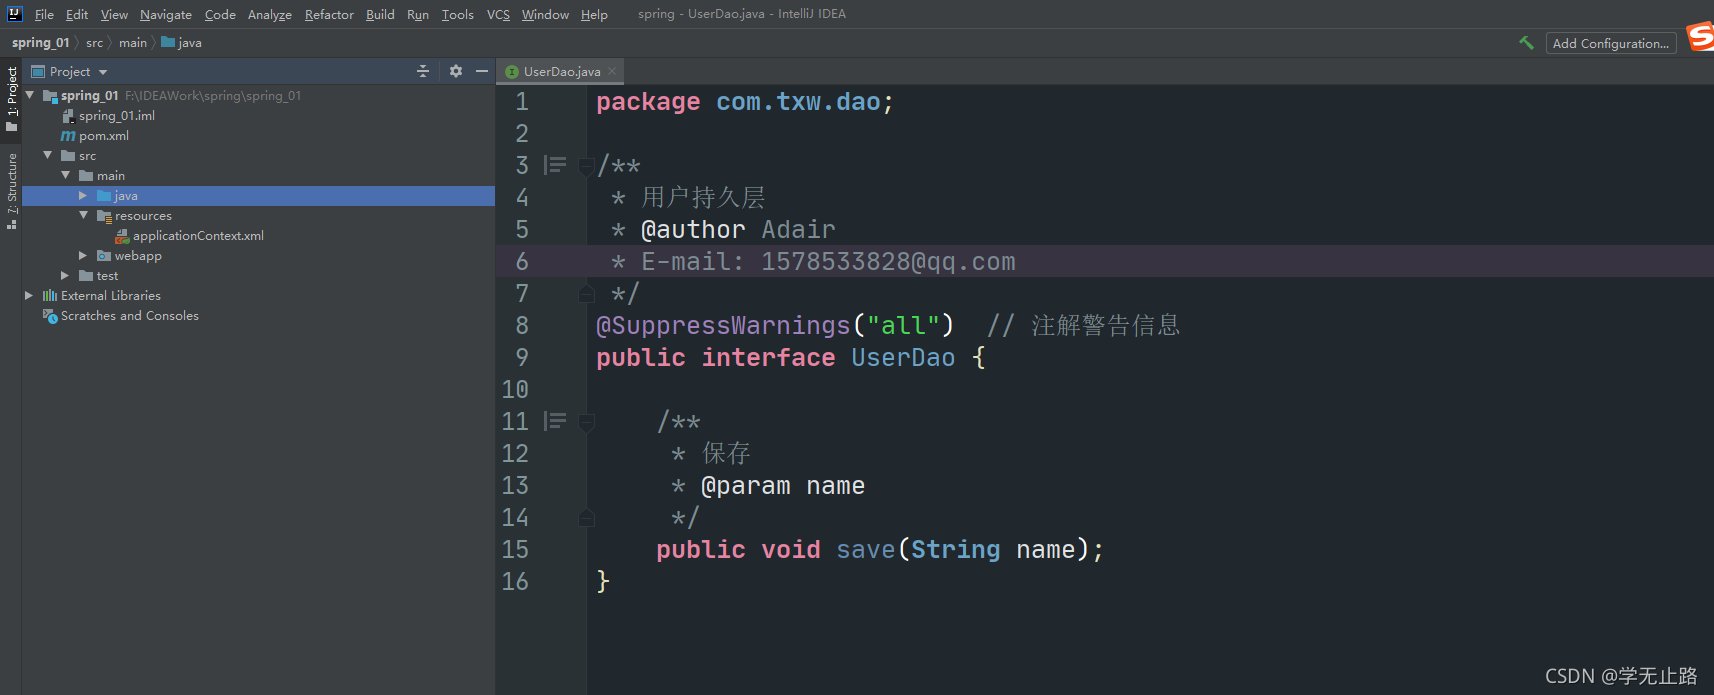
11.编写UserDaoImpl的代码如下:
package com.txw.dao.impl;

import com.txw.dao.UserDao;
/**
 * 用户持久层
 * @author Adair
 * E-mail: 1578533828@qq.com
 */
@SuppressWarnings("all")  // 注解警告信息
public class UserDaoImpl implements UserDao {

    /**
     * 保存
     * @param name
     */
    @Override
    public void save(String name) {
        System.out.println("姓名:" + name);
    }
}
如图所示: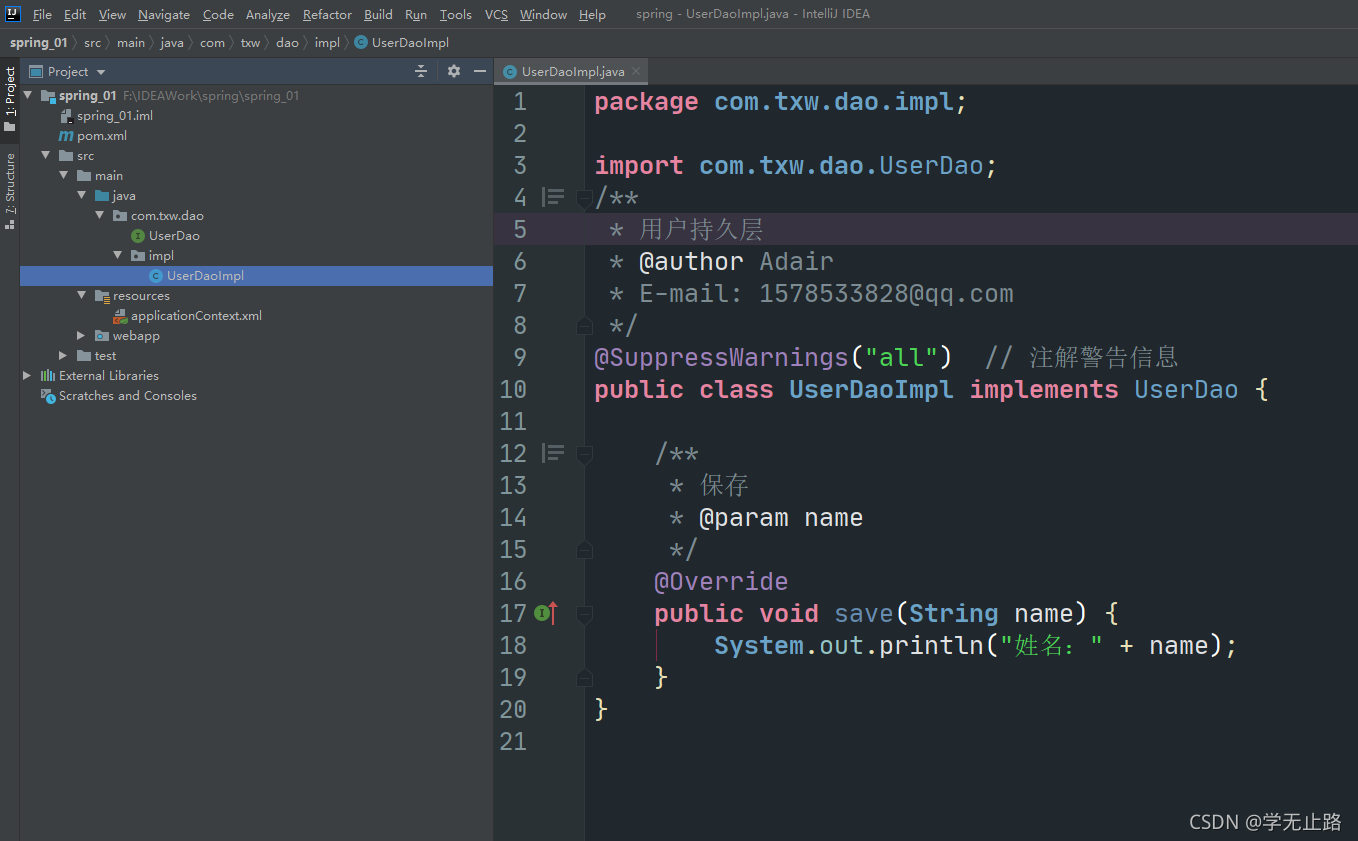
12.在applicationContext.xml添加的代码如下:
<?xml version="1.0" encoding="UTF-8"?>
<beans xmlns="http://www.springframework.org/schema/beans"
       xmlns:xsi="http://www.w3.org/2001/XMLSchema-instance"
       xsi:schemaLocation="http://www.springframework.org/schema/beans
           http://www.springframework.org/schema/beans/spring-beans-3.2.xsd ">
      <!--负责组件对象的创建 UserDao实现类对象
        class属性:工厂要创建对象的类的全限定名 包名.类名
        id属性:工厂创建对象唯一标识 随意 唯一
    -->
    <bean id="userDao" class="com.txw.dao.impl.UserDaoImpl"></bean>

</beans>
如图所示:
13.编写UserDaoTest的代码如下:
package com.txw.test;

import com.txw.dao.UserDao;
import org.junit.Test;
import org.springframework.context.ApplicationContext;
import org.springframework.context.support.ClassPathXmlApplicationContext;
/**
 * 测试类
 * @author Adair
 * E-mail: 1578533828@qq.com
 */
@SuppressWarnings("all")  // 注解警告信息
public class UserDaoTest {

    /**
     * 测试保存
     */
    @Test
    public void tsetSave(){
        // 启动工厂 参数:spring配置文件的位置
        ApplicationContext context = new ClassPathXmlApplicationContext("applicationContext.xml");
        // 从工厂中获取对象 参数:对象在工厂中的唯一标识,id的属性
        UserDao userDao = (UserDao) context.getBean("userDao");
        userDao.save("Adair");
    }
}
如图所示: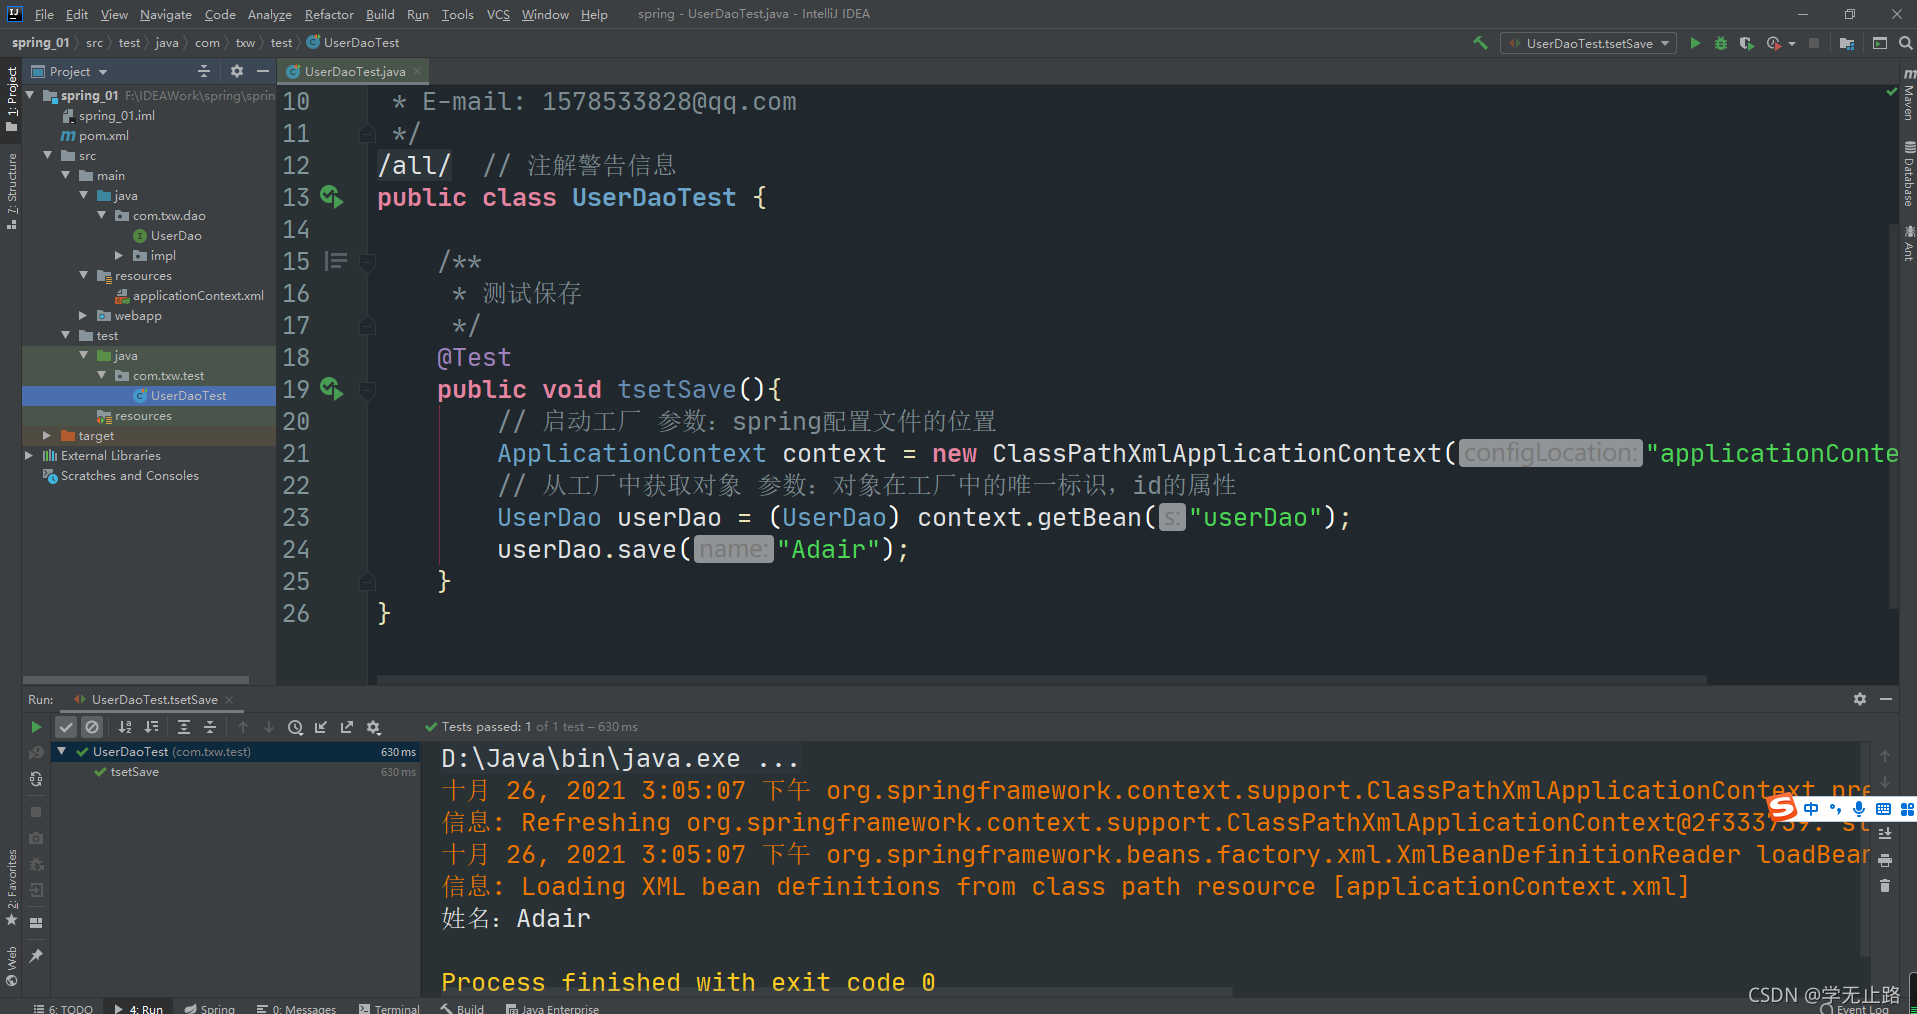
4 Spring框架中的核心思想
4.1 IOC[控制反转]
IOC(inversion of controll)控制反转# 1.定义 将对象的创建由原来(new)的方式转移到配置文件中,交给spring工厂来创建对象DI(dependcy Injection)依赖注入
如图所示:# 1.定义 Spring不仅要创建对象,还要建立类与类之间的关系,因此在控制反转的基础上又提出了依赖注入的概念。
1.编写CityDao的代码如下:
package com.txw.dao;

/**
 * 城市持久层
 * @author Adair
 * E-mail: 1578533828@qq.com
 */
@SuppressWarnings("all")  // 注解警告信息
public interface CityDao {
    public void ma();

    public void mb(String name);
}
如图所示: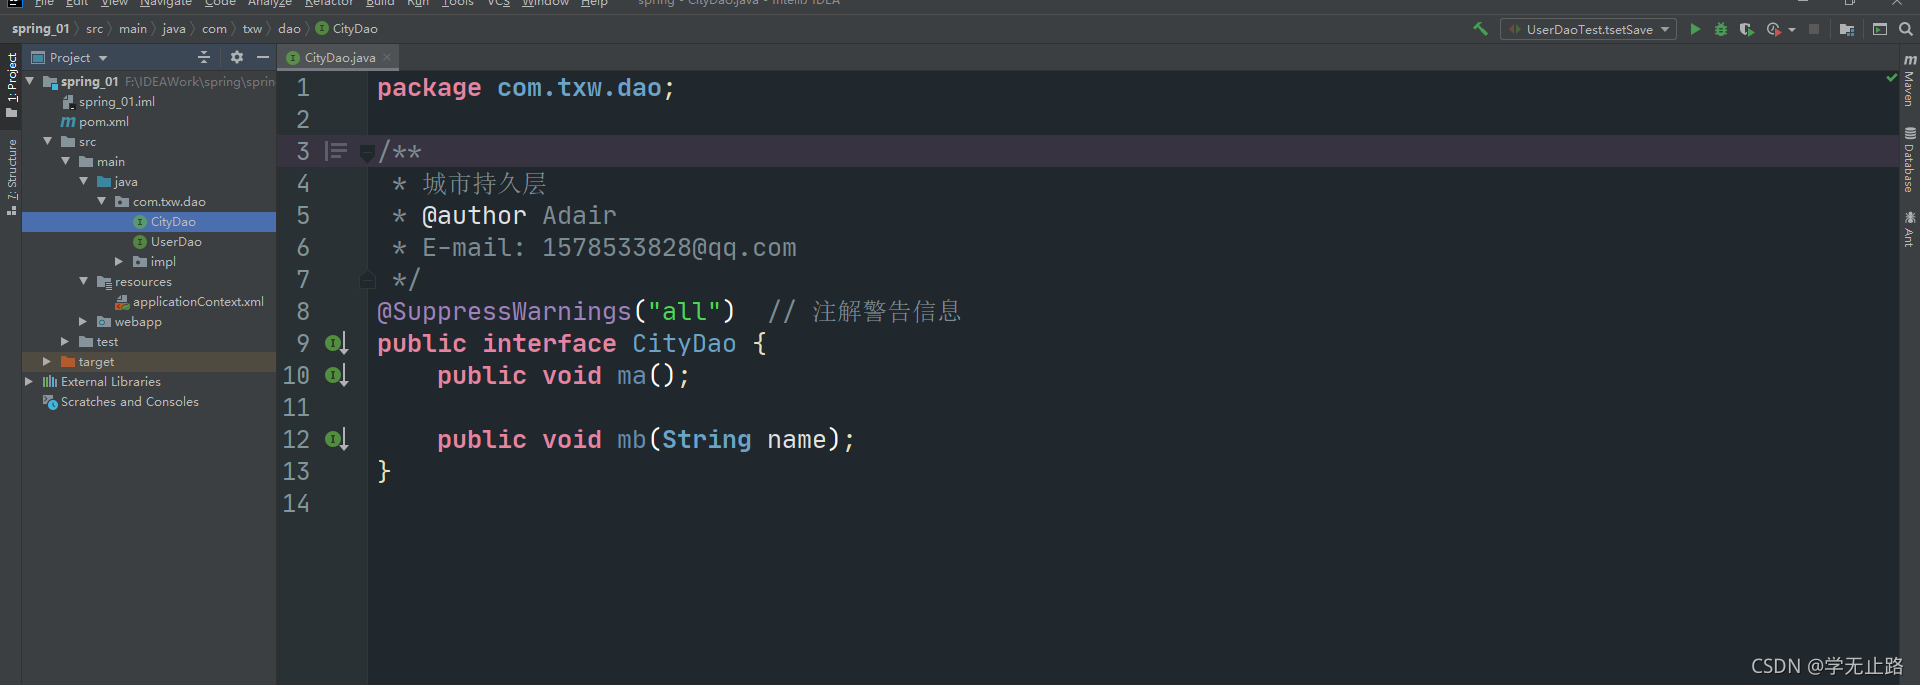
2.编写CityDaoImpl的代码如下:
package com.txw.dao.impl;

import com.txw.dao.CityDao;
/**
 * 城市持久层
 * @author Adair
 * E-mail: 1578533828@qq.com
 */
@SuppressWarnings("all")  // 注解警告信息
public class CityDaoImpl implements CityDao {

    @Override
    public void ma() {
        System.out.println("ma method invoke");
    }

    @Override
    public void mb(String name) {
        System.out.println("mb method invoke" + name);
    }
}
如图所示: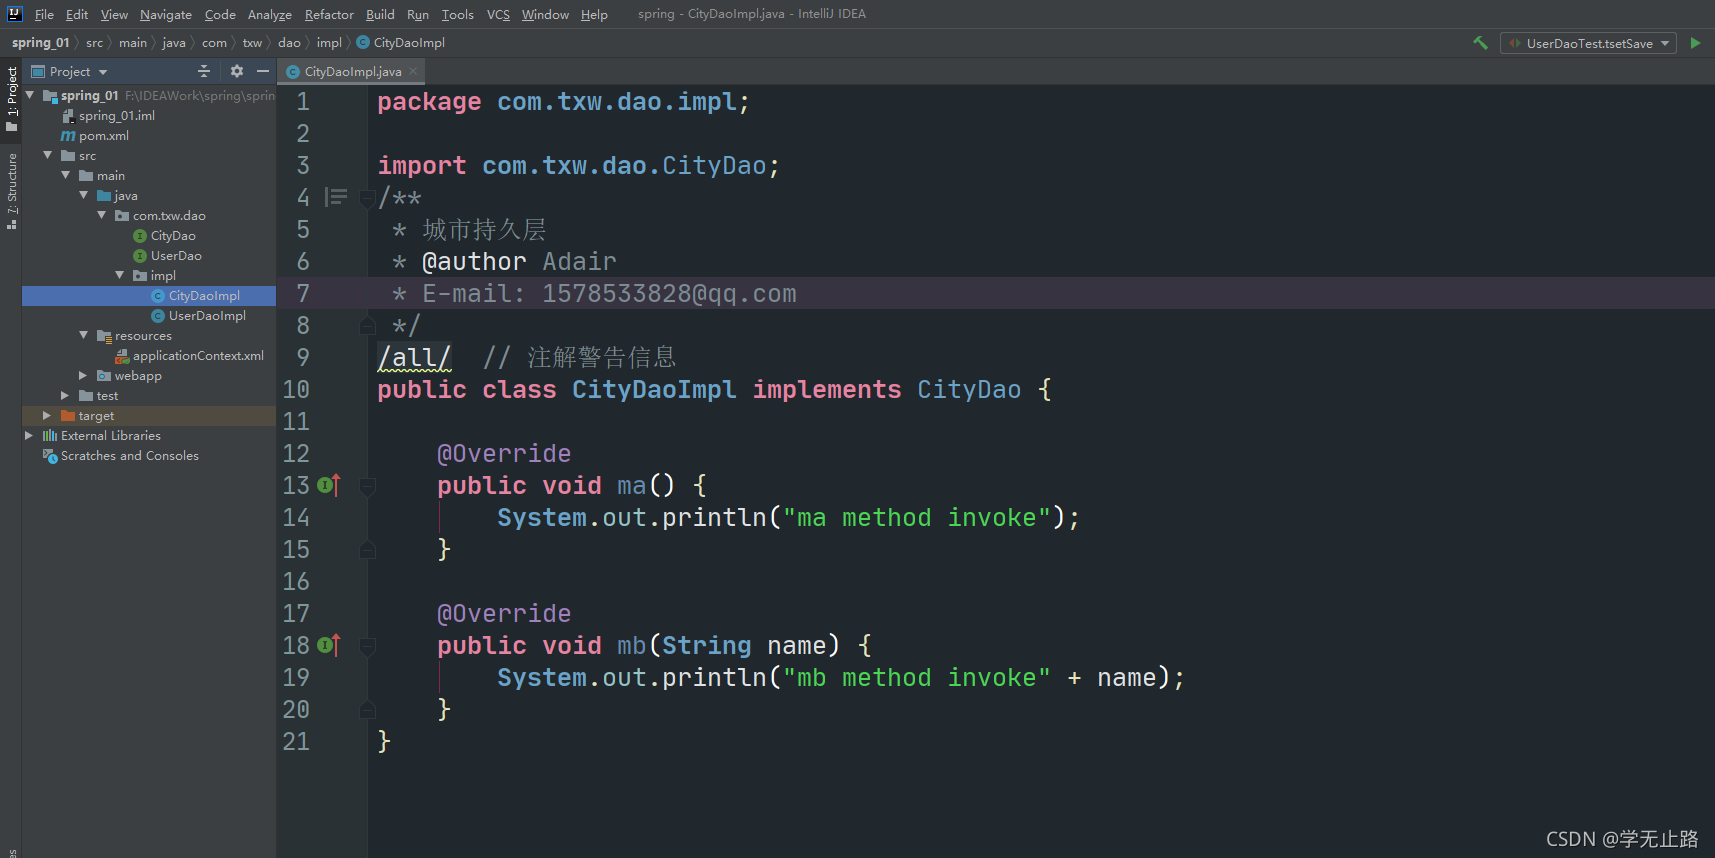
3.编写CityServicet的代码如下:
package com.txw.service;

/**
 * 城市业务层
 * @author Adair
 * E-mail: 1578533828@qq.com
 */
@SuppressWarnings("all")  // 注解警告信息
public interface CityService {
    public void ma();
    public void mb(String name);
}
如图所示: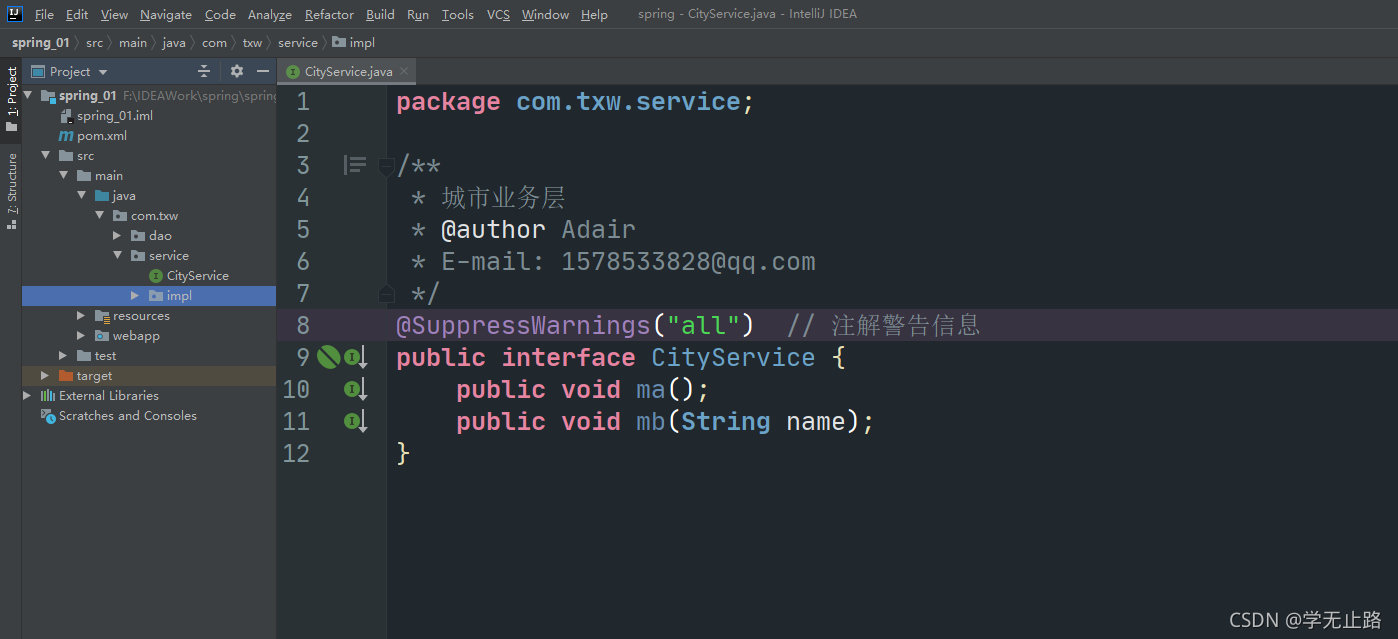
4 .编写CityServiceImplt的代码如下:
package com.txw.service.impl;

import com.txw.dao.CityDao;
import com.txw.service.CityService;
/**
 * 城市业务层
 * @author Adair
 * E-mail: 1578533828@qq.com
 */
@SuppressWarnings("all")  // 注解警告信息
public class CityServiceImpl implements CityService {

    // 当前组件依赖CityDao组件
    private CityDao cityDao;

    public void setCityDao(CityDao cityDao) {
        this.cityDao = cityDao;
    }

    @Override
    public void ma() {
        cityDao.ma();
        // 需要调用DAO中的方法
        System.out.println("service ma----");
    }

    @Override
    public void mb(String name) {
        cityDao.mb("六盘水市");
        System.out.println("service mb----" + name);
    }
}
如图所示: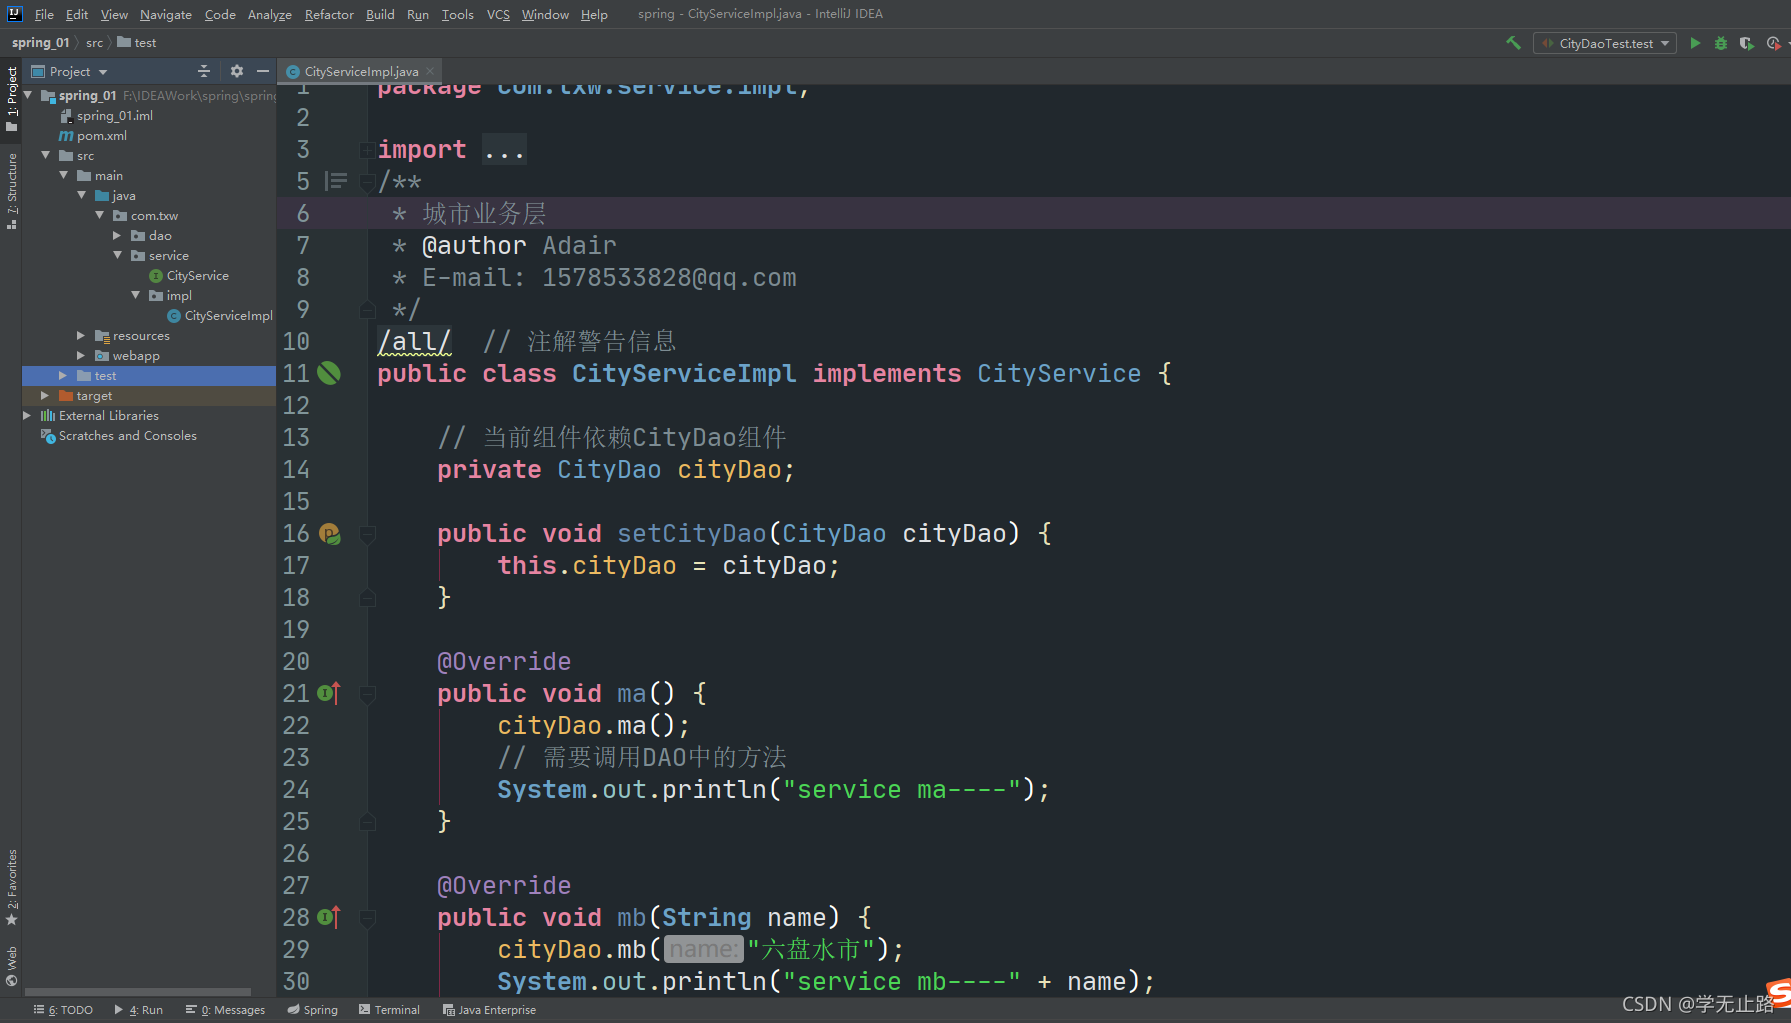
5.在applicationContex.xml添加的代码如下:
<?xml version="1.0" encoding="UTF-8"?>
<beans xmlns="http://www.springframework.org/schema/beans"
       xmlns:xsi="http://www.w3.org/2001/XMLSchema-instance"
       xsi:schemaLocation="http://www.springframework.org/schema/beans
           http://www.springframework.org/schema/beans/spring-beans-3.2.xsd ">
    <!--负责组件对象的创建 UserDao实现类对象
        class属性:工厂要创建对象的类的全限定名 包名.类名
        id属性:工厂创建对象唯一标识 随意 唯一
    -->
    <bean id="userDao" class="com.txw.dao.impl.UserDaoImpl"></bean>
    <bean id="cityDao" class="com.txw.dao.impl.CityDaoImpl"></bean>
    <bean id="cityService" class="com.txw.service.impl.CityServiceImpl">
        <!--注入的语法 通过property标签完成成员的赋值
            name:当前要注入的成员变量的名字
            ref:为当前的成员变量赋值 值是工厂中的另外一个组件
            值:书写已有组件对象的id属性值
        -->
        <property name="cityDao" ref="cityDao"/>
    </bean>
</beans>
如图所示;: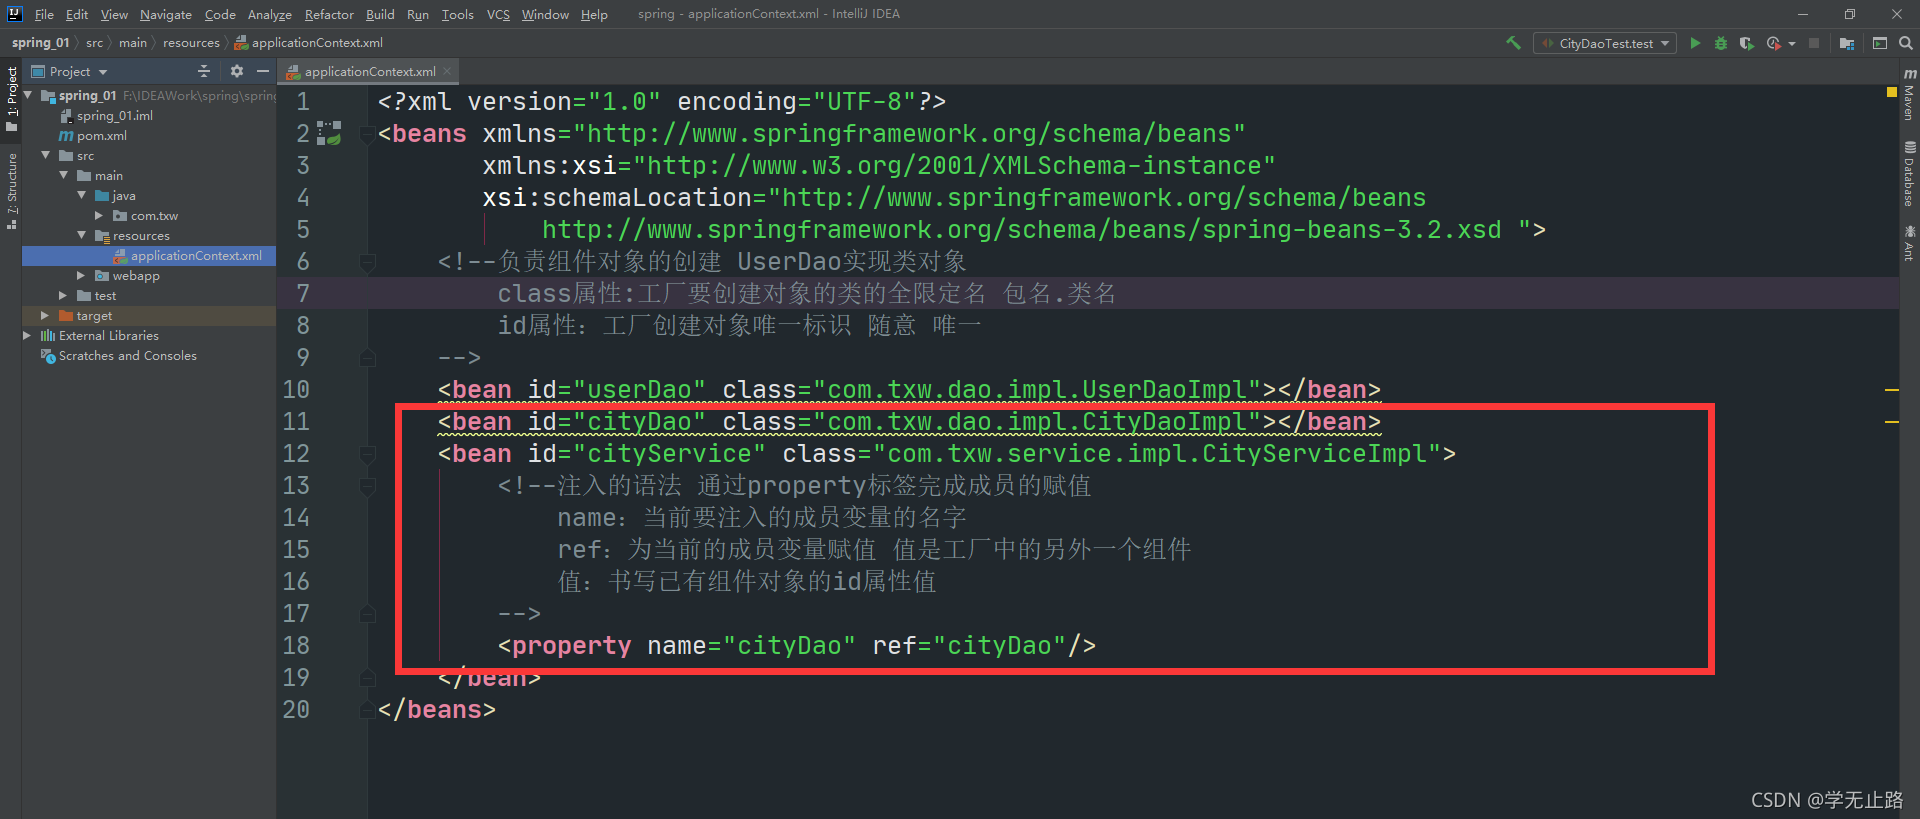
4.编写CityDaoTest的代码如下:
package com.txw.test;

import com.txw.service.CityService;
import org.junit.Test;
import org.springframework.context.ApplicationContext;
import org.springframework.context.support.ClassPathXmlApplicationContext;
/**
 * 测试
 * @author Adair
 * E-mail: 1578533828@qq.com
 */
@SuppressWarnings("all")  // 注解警告信息
public class CityDaoTest {

    @Test
    public void test(){
        // 启动工厂 参数:spring配置文件的位置
        ApplicationContext context = new ClassPathXmlApplicationContext("applicationContext.xml");
        // 从工厂中获取对象 参数:对象在工厂中的唯一标识,id的属性
        CityService cityService = (CityService) context.getBean("cityService");
        cityService.ma();
        cityService.mb("贵州省");
    }
}
如图所示: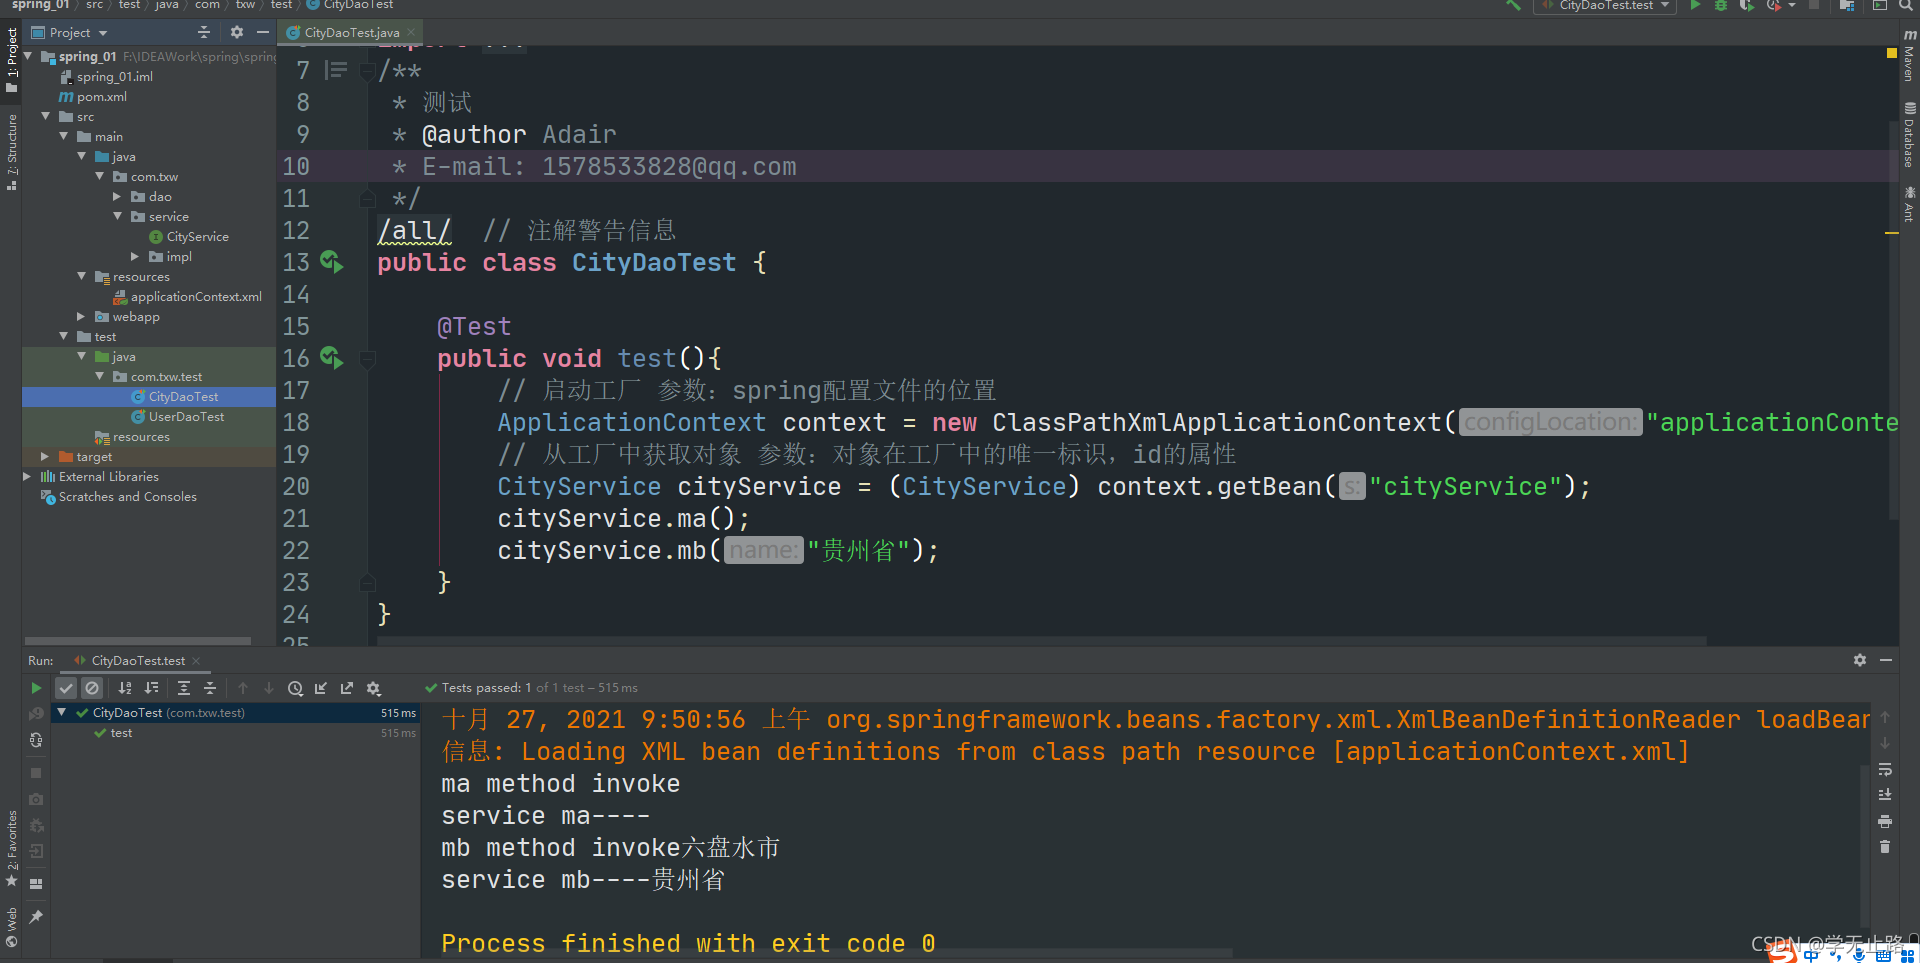
5 SET方式注入
5.1 八种基本类型+String类型 +日期类型的注入
1.编写的ClazzService的代码如下:
package com.txw.service;

/**
 * @author Adair
 * E-mail: 1578533828@qq.com
 */
@SuppressWarnings("all")  // 注解警告信息
public interface ClazzService {

    public void ma();
}
如图所示: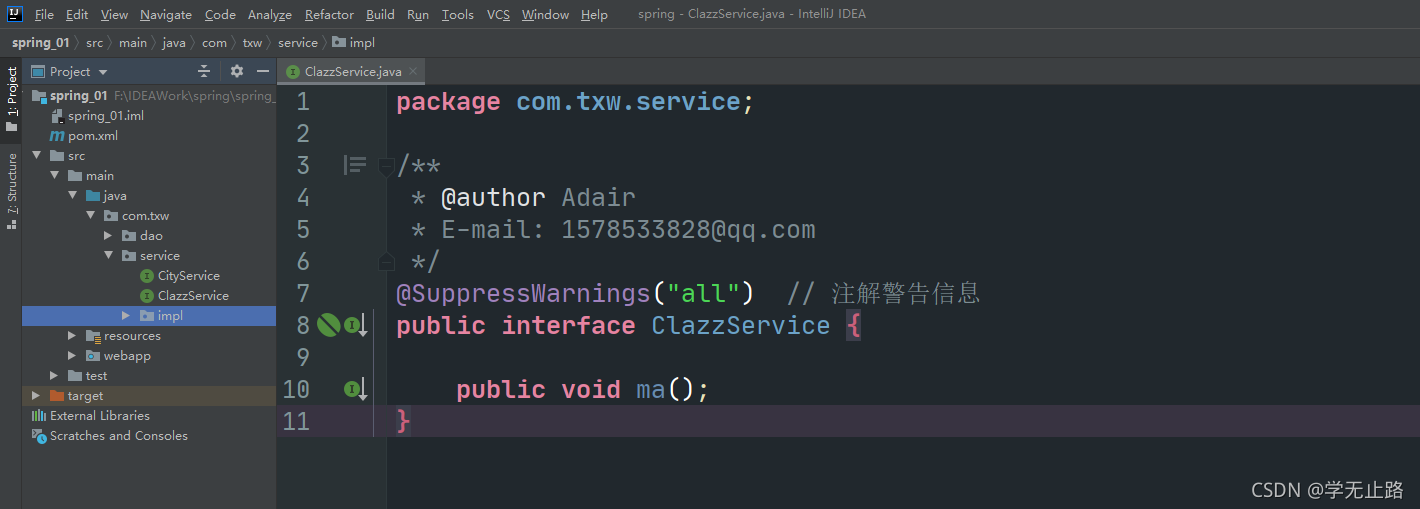
2.编写的ClazzServiceImpl的代码如下:
package com.txw.service.impl;

import com.txw.service.ClazzService;
import java.util.Date;
/**
 * @author Adair
 * E-mail: 1578533828@qq.com
 */
@SuppressWarnings("all")  // 注解警告信息
public class ClazzServiceImpl implements ClazzService {
    private int id;
    private String name;
    private int age;
    private Date birthday;
    private double price;

    public void setId(int id) {
        this.id = id;
    }

    public void setName(String name) {
        this.name = name;
    }

    public void setAge(int age) {
        this.age = age;
    }

    public void setBirthday(Date birthday) {
        this.birthday = birthday;
    }

    public void setPrice(double price) {
        this.price = price;
    }

    @Override
    public void ma() {
        System.out.println("id is" + id);
        System.out.println("name is" + name);
        System.out.println("age is" + age);
        System.out.println("birthday is" + birthday);
        System.out.println("price is" + price);
        System.out.println("----ma invoke!-----");
    }
}
如图所示: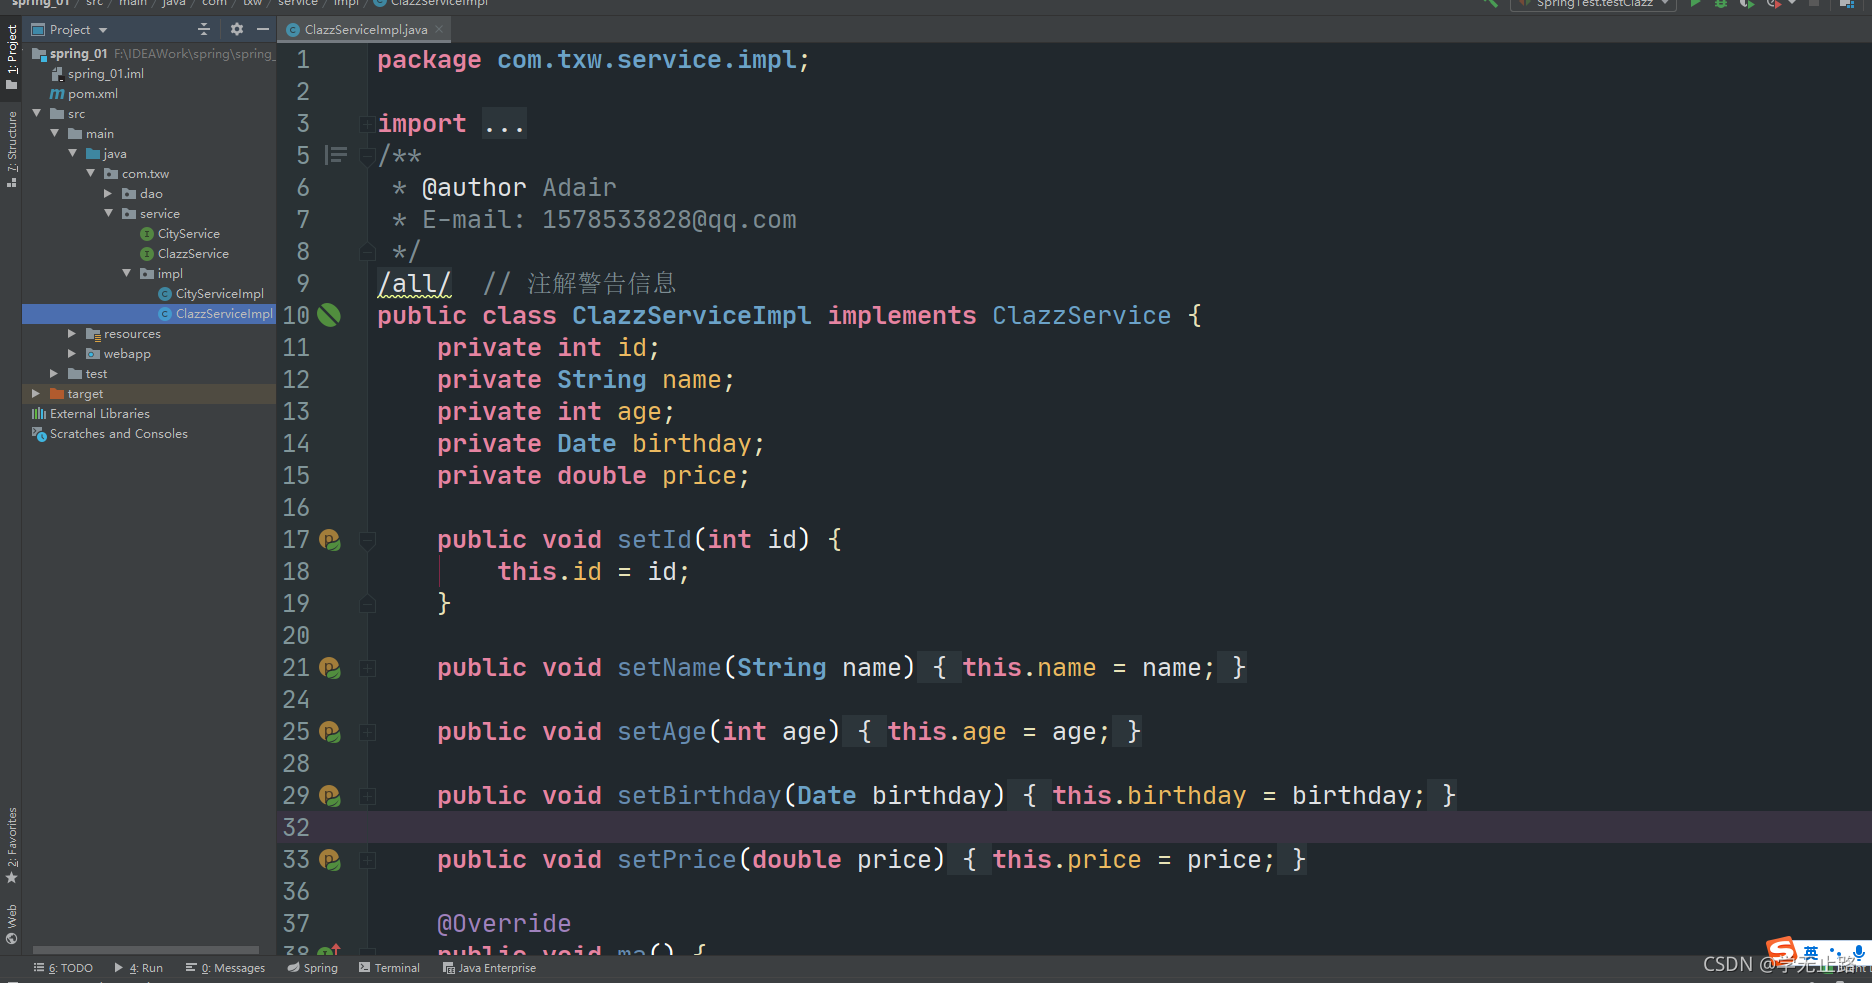
3.在applicationContex.xml添加的代码如下:
<?xml version="1.0" encoding="UTF-8"?>
<beans xmlns="http://www.springframework.org/schema/beans"
xmlns:xsi="http://www.w3.org/2001/XMLSchema-instance"
xsi:schemaLocation="http://www.springframework.org/schema/beans
http://www.springframework.org/schema/beans/spring-beans-3.2.xsd ">
<!--负责组件对象的创建 UserDao实现类对象
class属性:工厂要创建对象的类的全限定名 包名.类名
id属性:工厂创建对象唯一标识 随意 唯一
-->
<!-- <bean id="userDao" class="com.txw.dao.impl.UserDaoImpl"></bean>
<bean id="cityDao" class="com.txw.dao.impl.CityDaoImpl"></bean>
<bean id="cityService" class="com.txw.service.impl.CityServiceImpl">
<!–注入的语法 通过property标签完成成员的赋值
name:当前要注入的成员变量的名字
ref:为当前的成员变量赋值 值是工厂中的另外一个组件
值:书写已有组件对象的id属性值
–>
<property name="cityDao" ref="cityDao"/>
</bean>-->
<!--通过管理对象-->
<bean id="clazzService" class="com.txw.service.impl.ClazzServiceImpl">
<property name="name" value="zhagnsan"/>
<property name="age" value="21"/>
<property name="id" value="100063"/>
<property name="birthday" value="2012/12/12"/>
<property name="price" value="23.23"/>
</bean>
</beans>
如图所示: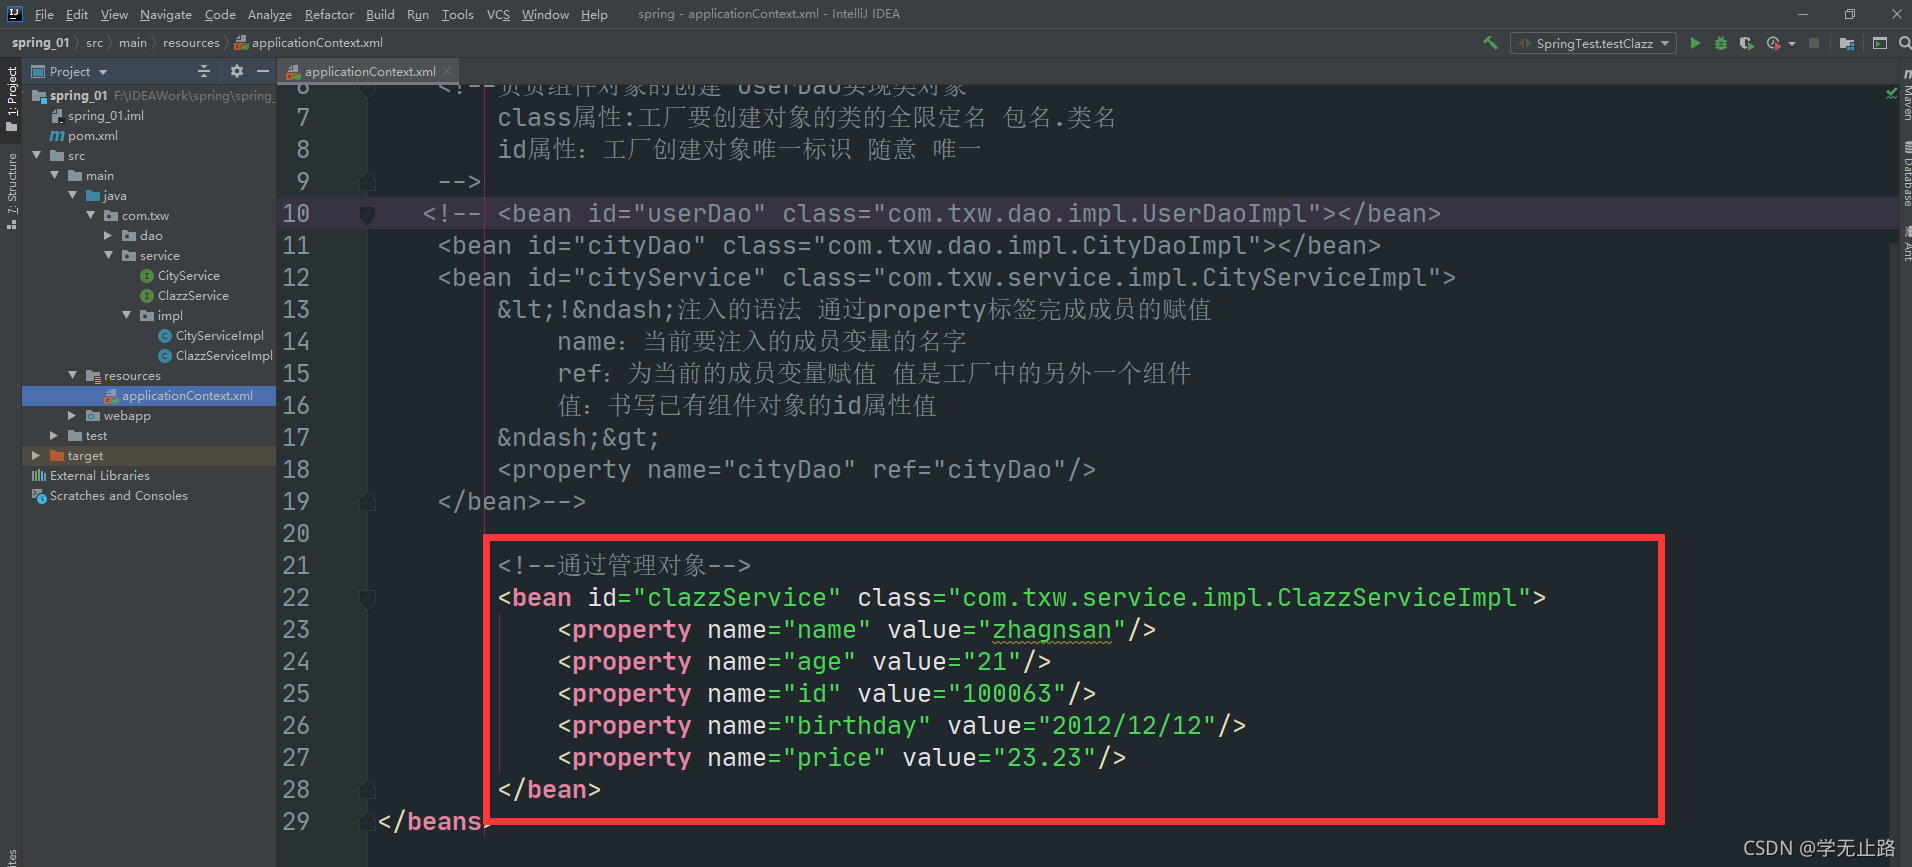
4.编写的SpringTest 的代码如下:
package com.txw.test;

import com.txw.service.ClazzService;
import org.junit.Test;
import org.springframework.context.ApplicationContext;
import org.springframework.context.support.ClassPathXmlApplicationContext;
/**
 * 测试
 * @author Adair
 * E-mail: 1578533828@qq.com
 */
@SuppressWarnings("all")  // 注解警告信息
public class SpringTest {

    @Test
    public void testClazz(){
        ApplicationContext context = new ClassPathXmlApplicationContext("applicationContext.xml");
        ClazzService clazzService = (ClazzService) context.getBean("clazzService");
        clazzService.ma();
    }
}
如图所示:
5.2 数组类型注入
1.编写的ClazzServiceImpl的代码如下:
package com.txw.service.impl;

import com.txw.service.ClazzService;
import java.util.Date;
/**
 * @author Adair
 * E-mail: 1578533828@qq.com
 */
@SuppressWarnings("all")  // 注解警告信息
public class ClazzServiceImpl implements ClazzService {
    private int id;
    private String name;
    private int age;
    private Date birthday;
    private double price;
    // 数组
   private String[] qqs;

    public void setId(int id) {
        this.id = id;
    }

    public void setName(String name) {
        this.name = name;
    }

    public void setAge(int age) {
        this.age = age;
    }

    public void setBirthday(Date birthday) {
        this.birthday = birthday;
    }

    public void setPrice(double price) {
        this.price = price;
    }

    public void setQqs(String[] qqs) {
        this.qqs = qqs;
    }

    @Override
    public void ma() {
        System.out.println("id is" + id);
        System.out.println("name is" + name);
        System.out.println("age is" + age);
        System.out.println("birthday is" + birthday);
        System.out.println("price is" + price);
        System.out.println("-----------字符串数组-----------------------");
        for (String qq : qqs) {
            System.out.println(qq);
        }
        System.out.println("----ma invoke!-----");
    }
}
如图所示: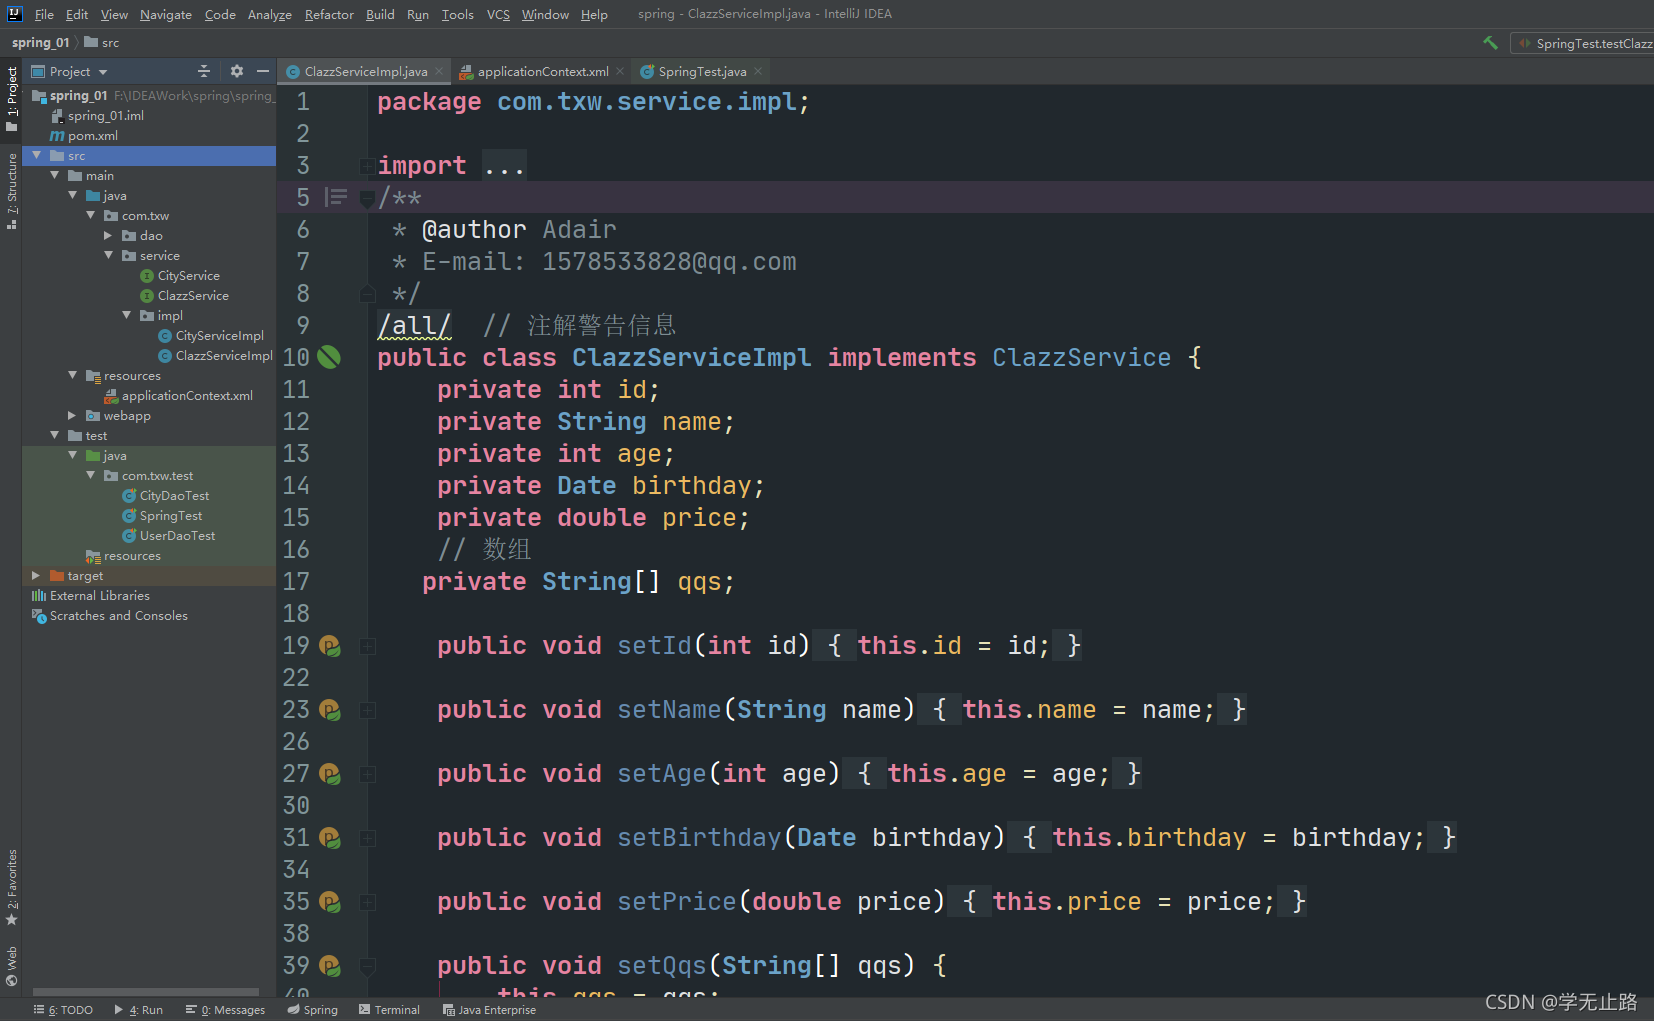
2.在applicationContex.xml添加的代码如下:
<?xml version="1.0" encoding="UTF-8"?>
<beans xmlns="http://www.springframework.org/schema/beans"
xmlns:xsi="http://www.w3.org/2001/XMLSchema-instance"
xsi:schemaLocation="http://www.springframework.org/schema/beans
http://www.springframework.org/schema/beans/spring-beans-3.2.xsd ">
<!--负责组件对象的创建 UserDao实现类对象
class属性:工厂要创建对象的类的全限定名 包名.类名
id属性:工厂创建对象唯一标识 随意 唯一
-->
<!-- <bean id="userDao" class="com.txw.dao.impl.UserDaoImpl"></bean>
<bean id="cityDao" class="com.txw.dao.impl.CityDaoImpl"></bean>
<bean id="cityService" class="com.txw.service.impl.CityServiceImpl">
<!–注入的语法 通过property标签完成成员的赋值
name:当前要注入的成员变量的名字
ref:为当前的成员变量赋值 值是工厂中的另外一个组件
值:书写已有组件对象的id属性值
–>
<property name="cityDao" ref="cityDao"/>
</bean>-->
<!--通过管理对象-->
<bean id="clazzService" class="com.txw.service.impl.ClazzServiceImpl">
<property name="name" value="zhagnsan"/>
<property name="age" value="21"/>
<property name="id" value="100063"/>
<property name="birthday" value="2012/12/12"/>
<property name="price" value="23.23"/>
<!--注入数组类型数据-->
<property name="qqs">
<array>
<value>xxx</value>
<value>qqq</value>
<value>vvvv</value>
</array>
</property>
</bean>
</beans>
如图所示: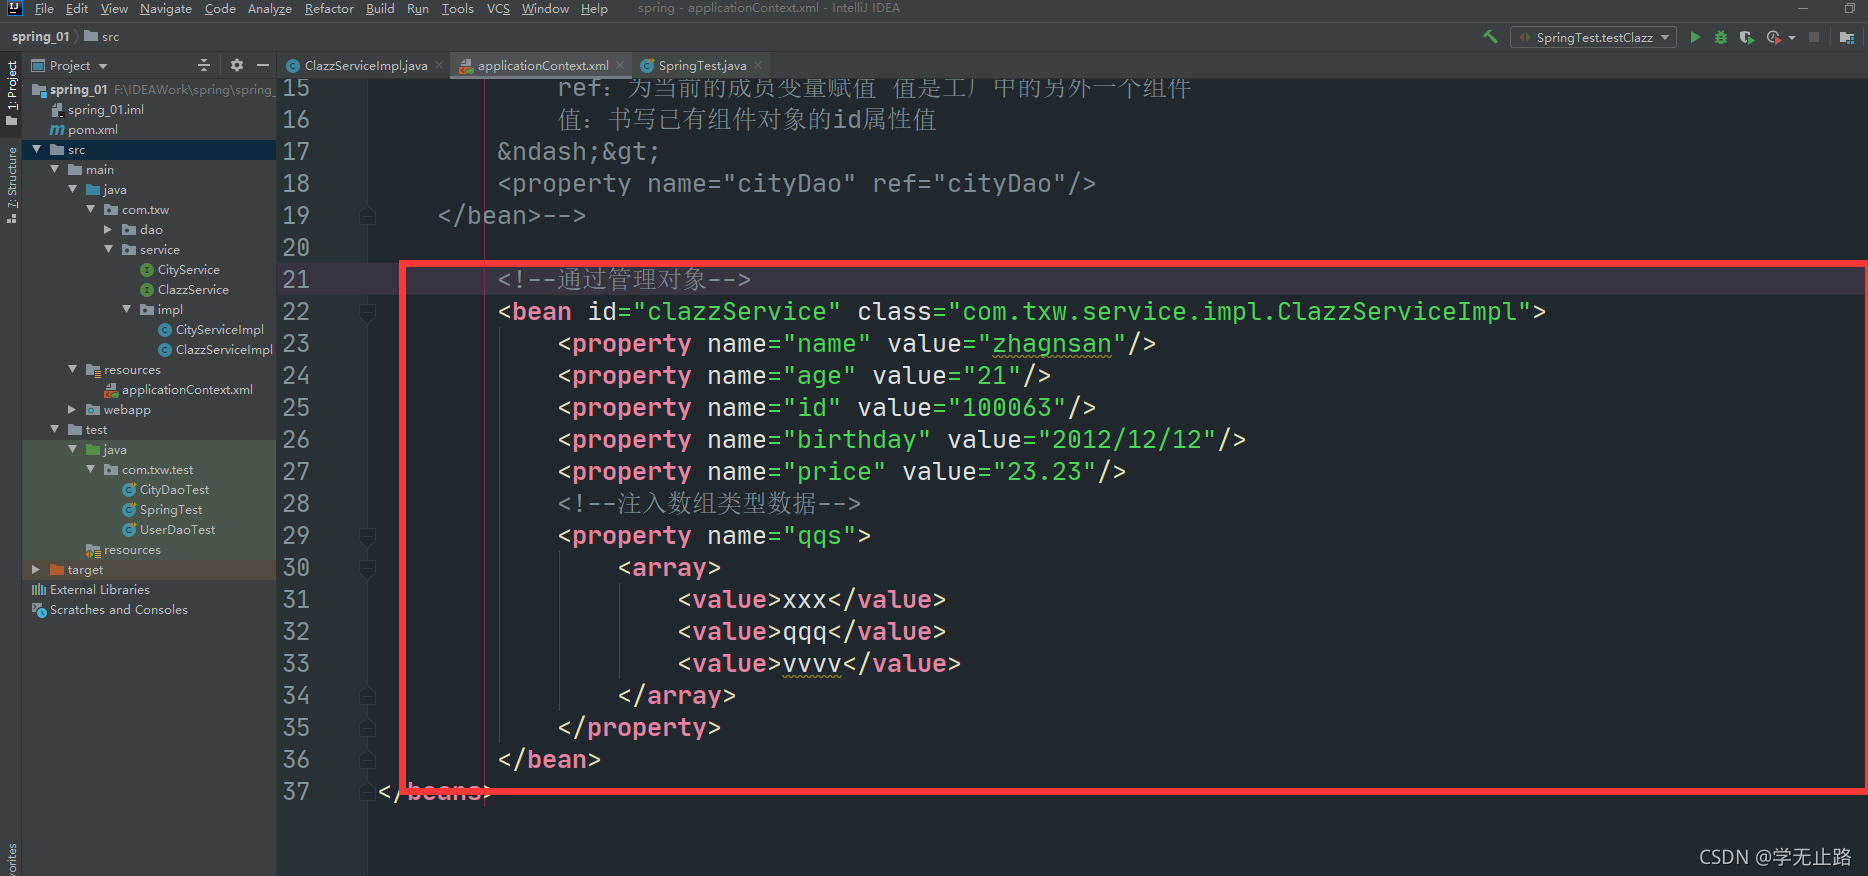
3.编写的SpringTest的代码如下:
package com.txw.test;

import com.txw.service.ClazzService;
import org.junit.Test;
import org.springframework.context.ApplicationContext;
import org.springframework.context.support.ClassPathXmlApplicationContext;
/**
 * 测试
 * @author Adair
 * E-mail: 1578533828@qq.com
 */
@SuppressWarnings("all")  // 注解警告信息
public class SpringTest {

    @Test
    public void testClazz(){
        ApplicationContext context = new ClassPathXmlApplicationContext("applicationContext.xml");
        ClazzService clazzService = (ClazzService) context.getBean("clazzService");
        clazzService.ma();
    }
}
如图所示: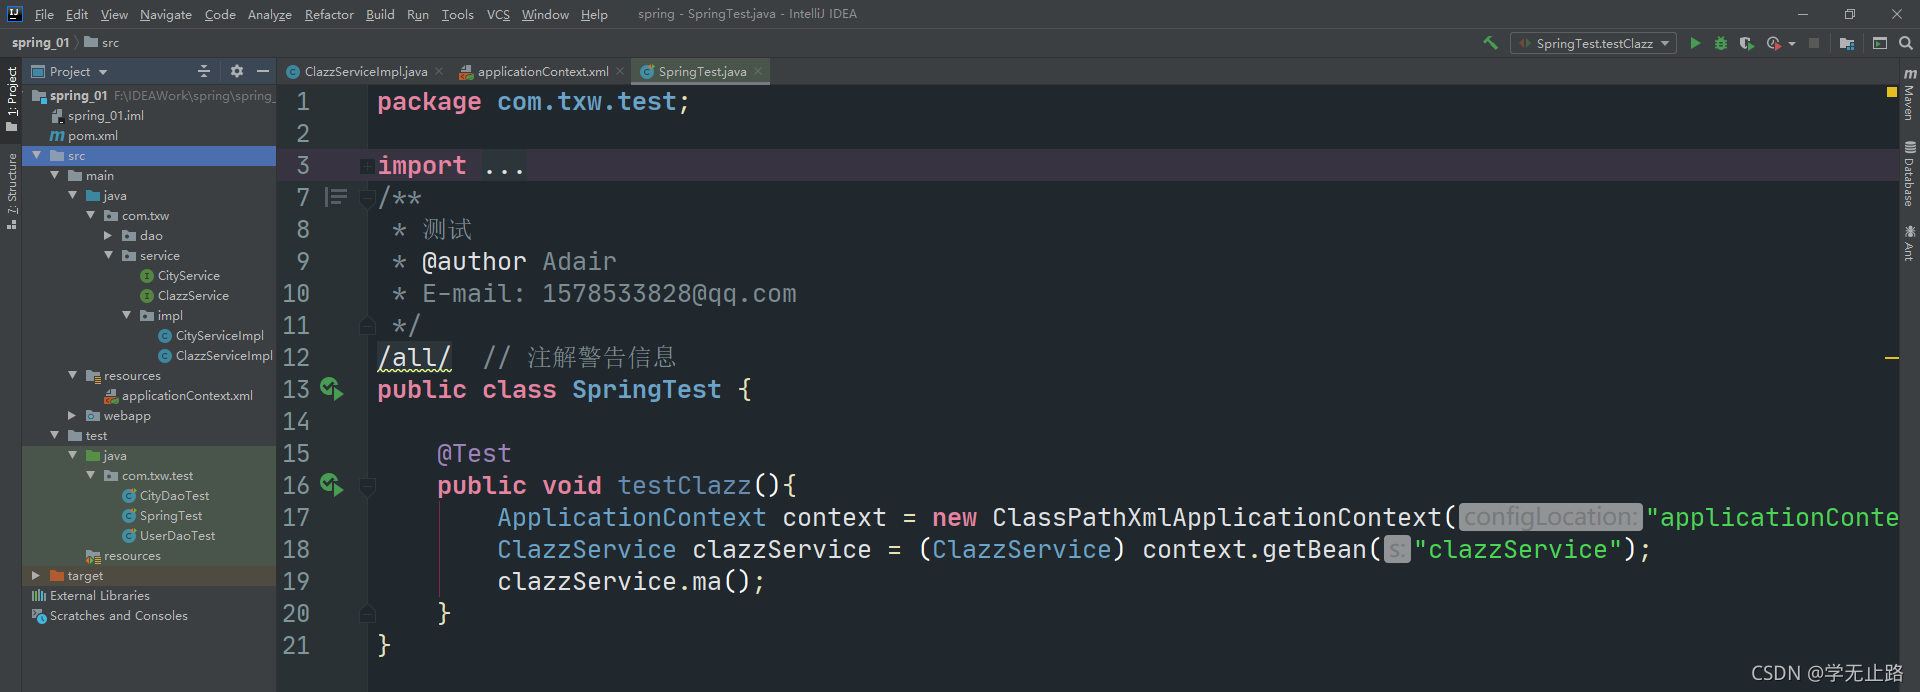
5.3 注入引用类型和集合类型
1.编写ClazzDaol的代码如下:
package com.txw.dao;

/**
 * @author Adair
 * E-mail: 1578533828@qq.com
 */
@SuppressWarnings("all")  // 注解警告信息
public interface ClazzDao {
    public void ma();
}
如图所示: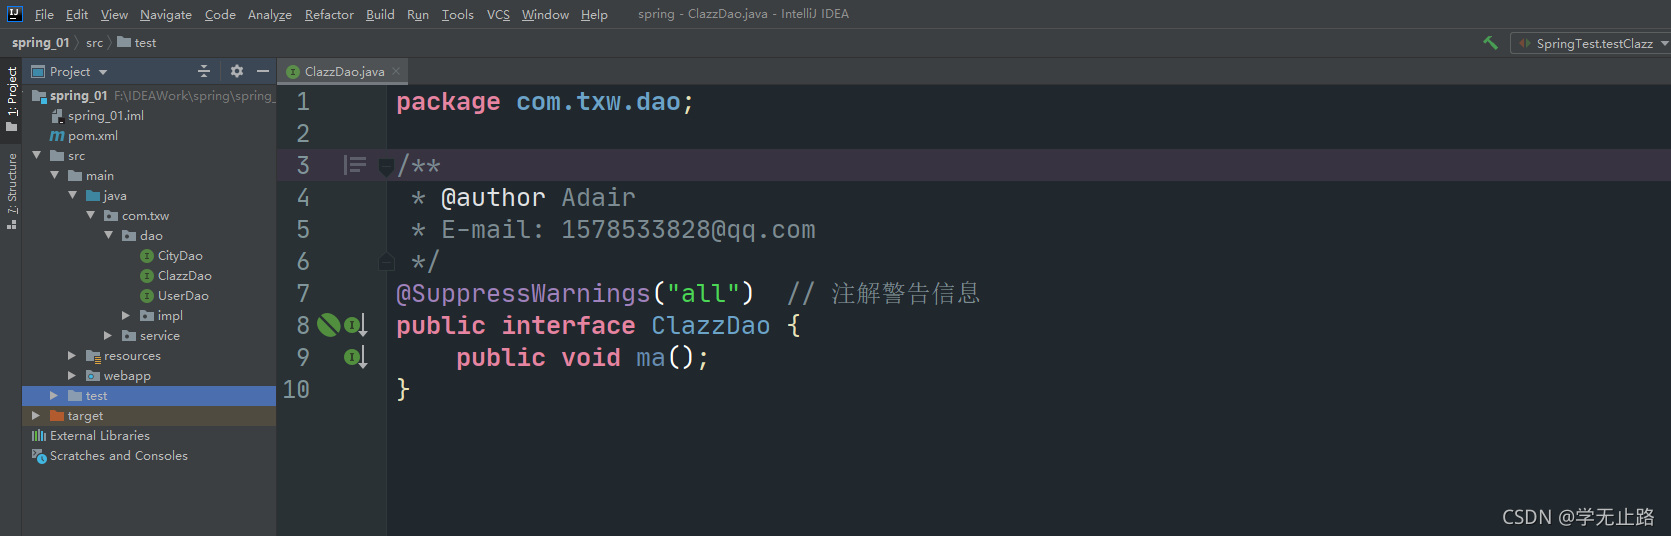
2.编写ClazzDaoImpl的代码如下:
package com.txw.dao.impl;

import com.txw.dao.ClazzDao;
/**
 * @author Adair
 * E-mail: 1578533828@qq.com
 */
public class ClazzDaoImpl implements ClazzDao {
    @Override
    public void ma() {
        System.out.println("dao ma--------");
    }
}
如图所示: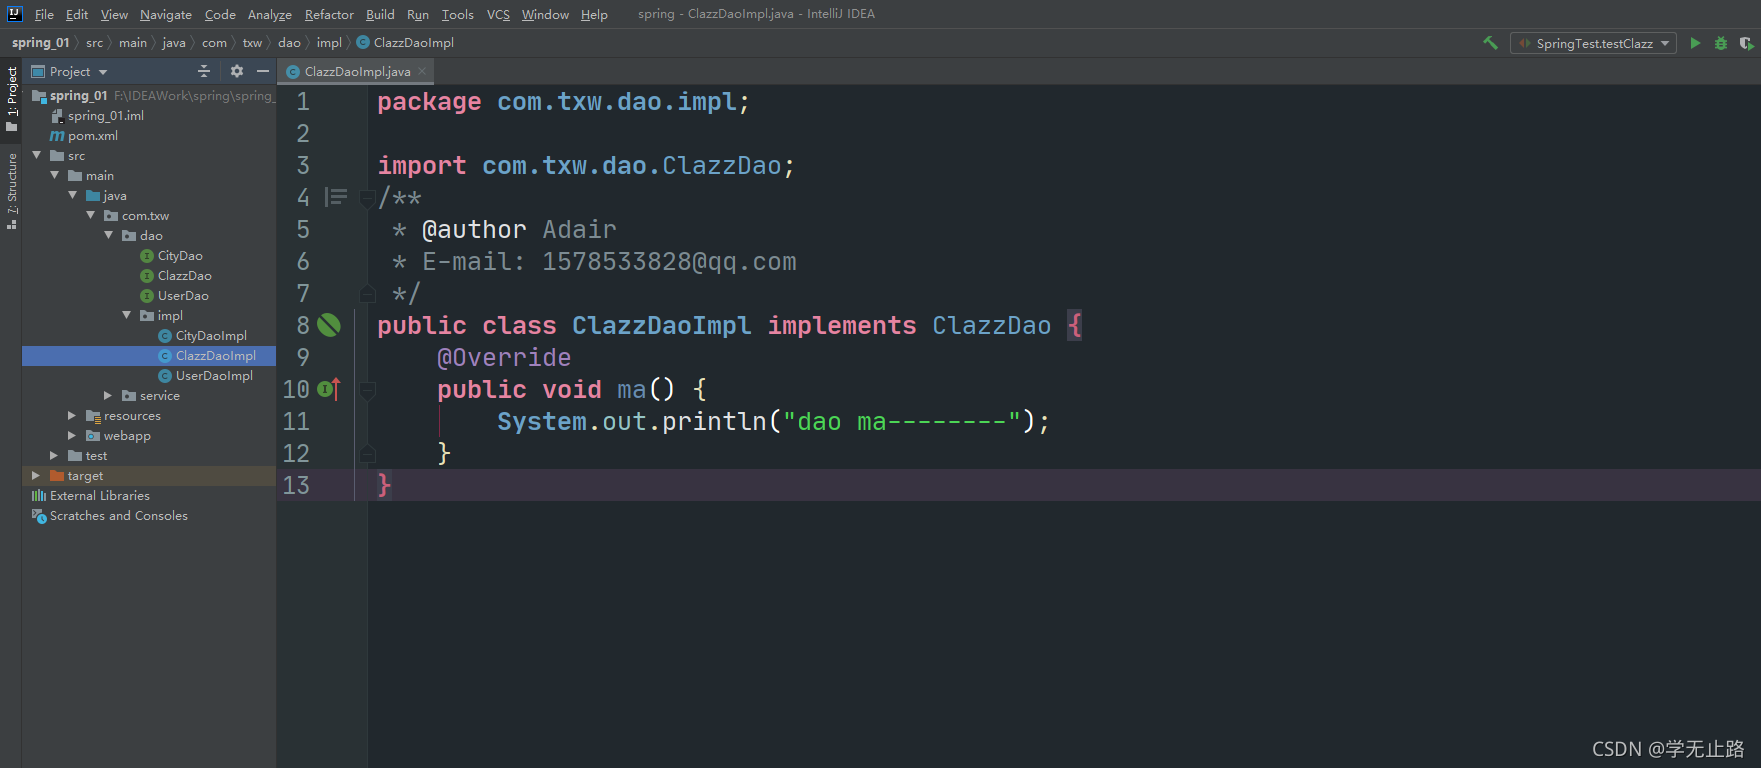
3.编写的ClazzServiceImpl的代码如下:
package com.txw.service.impl;

import com.txw.dao.ClazzDao;
import com.txw.service.ClazzService;
import java.util.Date;
import java.util.List;
import java.util.Map;
import java.util.Properties;
/**
 * @author Adair
 * E-mail: 1578533828@qq.com
 */
@SuppressWarnings("all")  // 注解警告信息
public class ClazzServiceImpl implements ClazzService {
    private int id;
    private String name;
    private int age;
    private Date birthday;
    private double price;
    // 数组
    private String[] qqs;
    private ClazzDao[] clazzDaos;
    // list集合
    private List<String> lists;
    // map集合
    private Map<String,String > maps;
    // properties
    private Properties props;
    public void setId(int id) {
        this.id = id;
    }

    public void setName(String name) {
        this.name = name;
    }

    public void setAge(int age) {
        this.age = age;
    }

    public void setBirthday(Date birthday) {
        this.birthday = birthday;
    }

    public void setPrice(double price) {
        this.price = price;
    }

    public void setQqs(String[] qqs) {
        this.qqs = qqs;
    }

    public void setClazzDaos(ClazzDao[] clazzDaos) {
        this.clazzDaos = clazzDaos;
    }

    public void setLists(List<String> lists) {
        this.lists = lists;
    }

    public void setMaps(Map<String, String> maps) {
        this.maps = maps;
    }

    public void setProps(Properties props) {
        this.props = props;
    }

    @Override
    public void ma() {
        System.out.println("id is" + id);
        System.out.println("name is" + name);
        System.out.println("age is" + age);
        System.out.println("birthday is" + birthday);
        System.out.println("price is" + price);
        System.out.println("-----------字符串数组-----------------------");
        for (String qq : qqs) {
            System.out.println(qq);
        }
        System.out.println("-----------对象数组-------------------------------");
        for (ClazzDao clazzDao : clazzDaos) {
            System.out.println(clazzDao);
        }
        System.out.println("-----------字符串的list集合------------------------------");
        for (String list : lists) {
            System.out.println(list);
        }
        System.out.println("-----------字符串的map集合------------------------------");
        for (Map.Entry<String, String> entry : maps.entrySet()) {
            System.out.println("key is " + entry.getKey() + "value is" + entry.getValue());
        }
        System.out.println("-----------props-------------");
        for (Map.Entry<Object, Object> entry : props.entrySet()) {
            System.out.println("key is " + entry.getKey() + "value is" + entry.getValue());
        }
        System.out.println("----ma invoke!-----");
    }
}
如图所示:
4.在applicationContex.xml添加的代码如下:
<?xml version="1.0" encoding="UTF-8"?>
<beans xmlns="http://www.springframework.org/schema/beans"
xmlns:xsi="http://www.w3.org/2001/XMLSchema-instance"
xsi:schemaLocation="http://www.springframework.org/schema/beans
http://www.springframework.org/schema/beans/spring-beans-3.2.xsd ">
<!--负责组件对象的创建 UserDao实现类对象
class属性:工厂要创建对象的类的全限定名 包名.类名
id属性:工厂创建对象唯一标识 随意 唯一
-->
<!-- <bean id="userDao" class="com.txw.dao.impl.UserDaoImpl"></bean>
<bean id="cityDao" class="com.txw.dao.impl.CityDaoImpl"></bean>
<bean id="cityService" class="com.txw.service.impl.CityServiceImpl">
<!–注入的语法 通过property标签完成成员的赋值
name:当前要注入的成员变量的名字
ref:为当前的成员变量赋值 值是工厂中的另外一个组件
值:书写已有组件对象的id属性值
–>
<property name="cityDao" ref="cityDao"/>
</bean>-->
<!--通过管理对象-->
<bean id="clazzDao" class="com.txw.dao.impl.ClazzDaoImpl"></bean>
<bean id="clazzService" class="com.txw.service.impl.ClazzServiceImpl">
<property name="name" value="zhagnsan"/>
<property name="age" value="21"/>
<property name="id" value="100063"/>
<property name="birthday" value="2012/12/12"/>
<property name="price" value="23.23"/>
<!--注入数组类型数据-->
<property name="qqs">
<array>
<value>xxx</value>
<value>qqq</value>
<value>vvvv</value>
</array>
</property>
<!--注入引用类型和对象-->
<property name="clazzDaos" ref="clazzDao"/>
<property name="lists">
<list>
<value>aaa</value>
<value>bbb</value>
<value>ccc</value>
</list>
</property>
<property name="maps">
<map>
<entry key="aa" value="xiaohei"/>
<entry key="bb" value="xiaoming"/>
<entry key="cc" value="xiaosan"/>
</map>
</property>
<property name="props">
<props>
<prop key="url">jdbc:mysql://localhost:3306/test</prop>
<prop key="driver">com.mysql.jdbc.Driver</prop>
<prop key="username">hr</prop>
<prop key="password">hr</prop>
</props>
</property>
</bean>
</beans>
如图所示: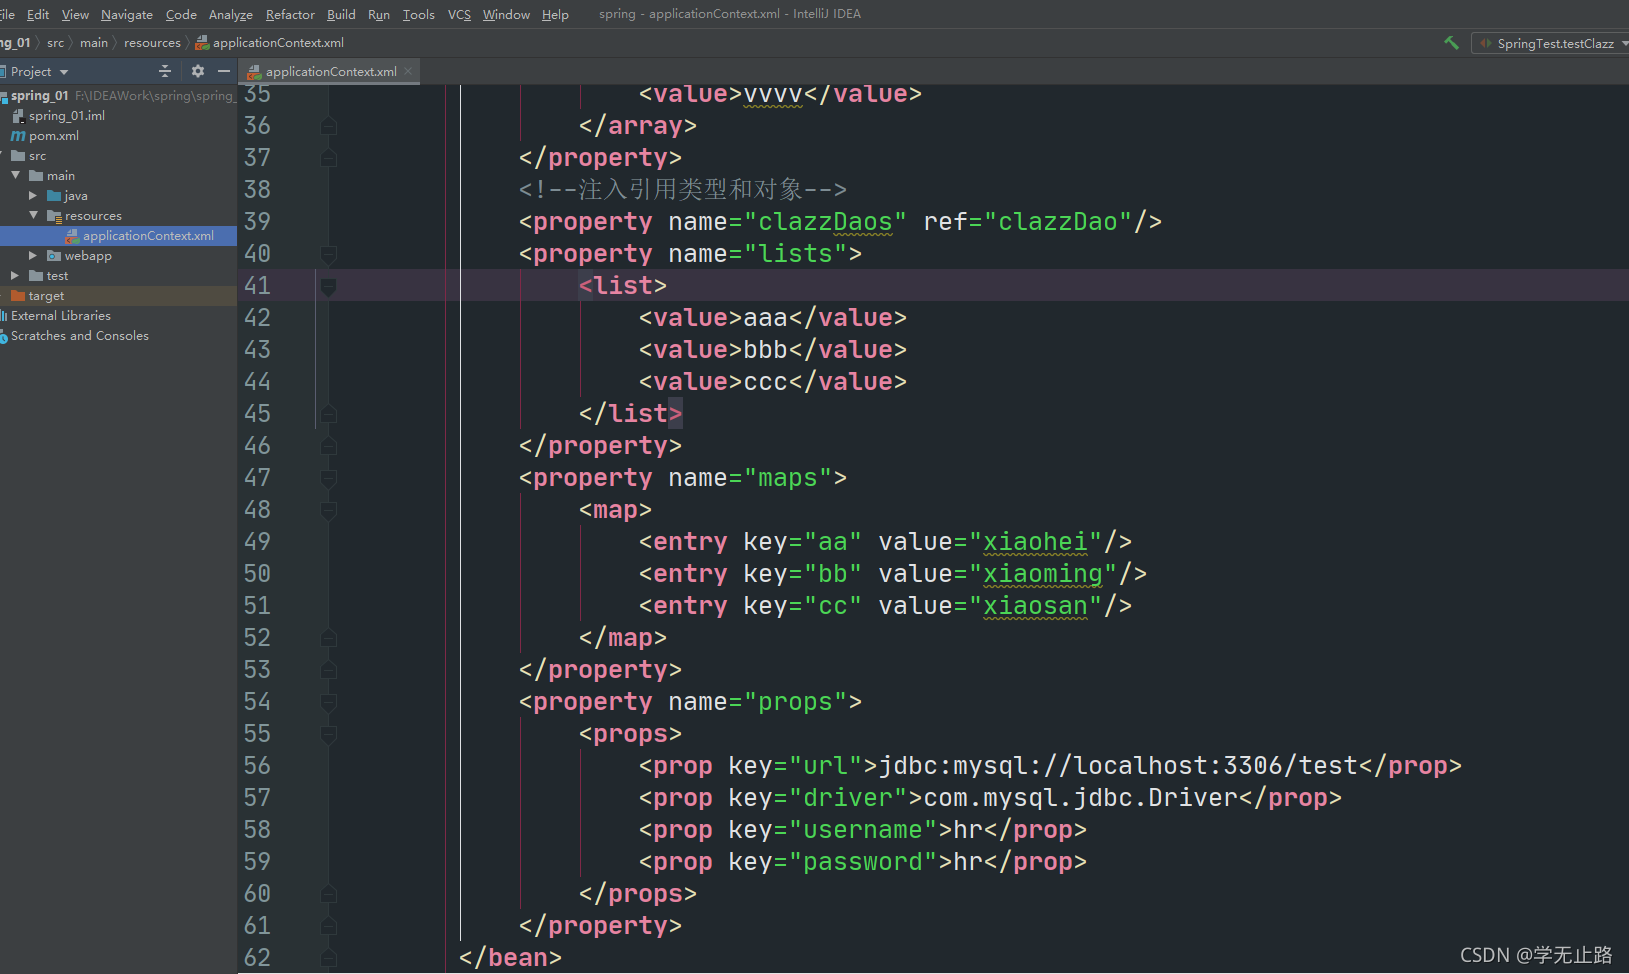
5.编写的SpringTest的代码如下:
package com.txw.test;

import com.txw.service.ClazzService;
import org.junit.Test;
import org.springframework.context.ApplicationContext;
import org.springframework.context.support.ClassPathXmlApplicationContext;
/**
 * 测试
 * @author Adair
 * E-mail: 1578533828@qq.com
 */
@SuppressWarnings("all")  // 注解警告信息
public class SpringTest {

    @Test
    public void testClazz(){
        ApplicationContext context = new ClassPathXmlApplicationContext("applicationContext.xml");
        ClazzService clazzService = (ClazzService) context.getBean("clazzService");
        clazzService.ma();
    }
}
如图所示: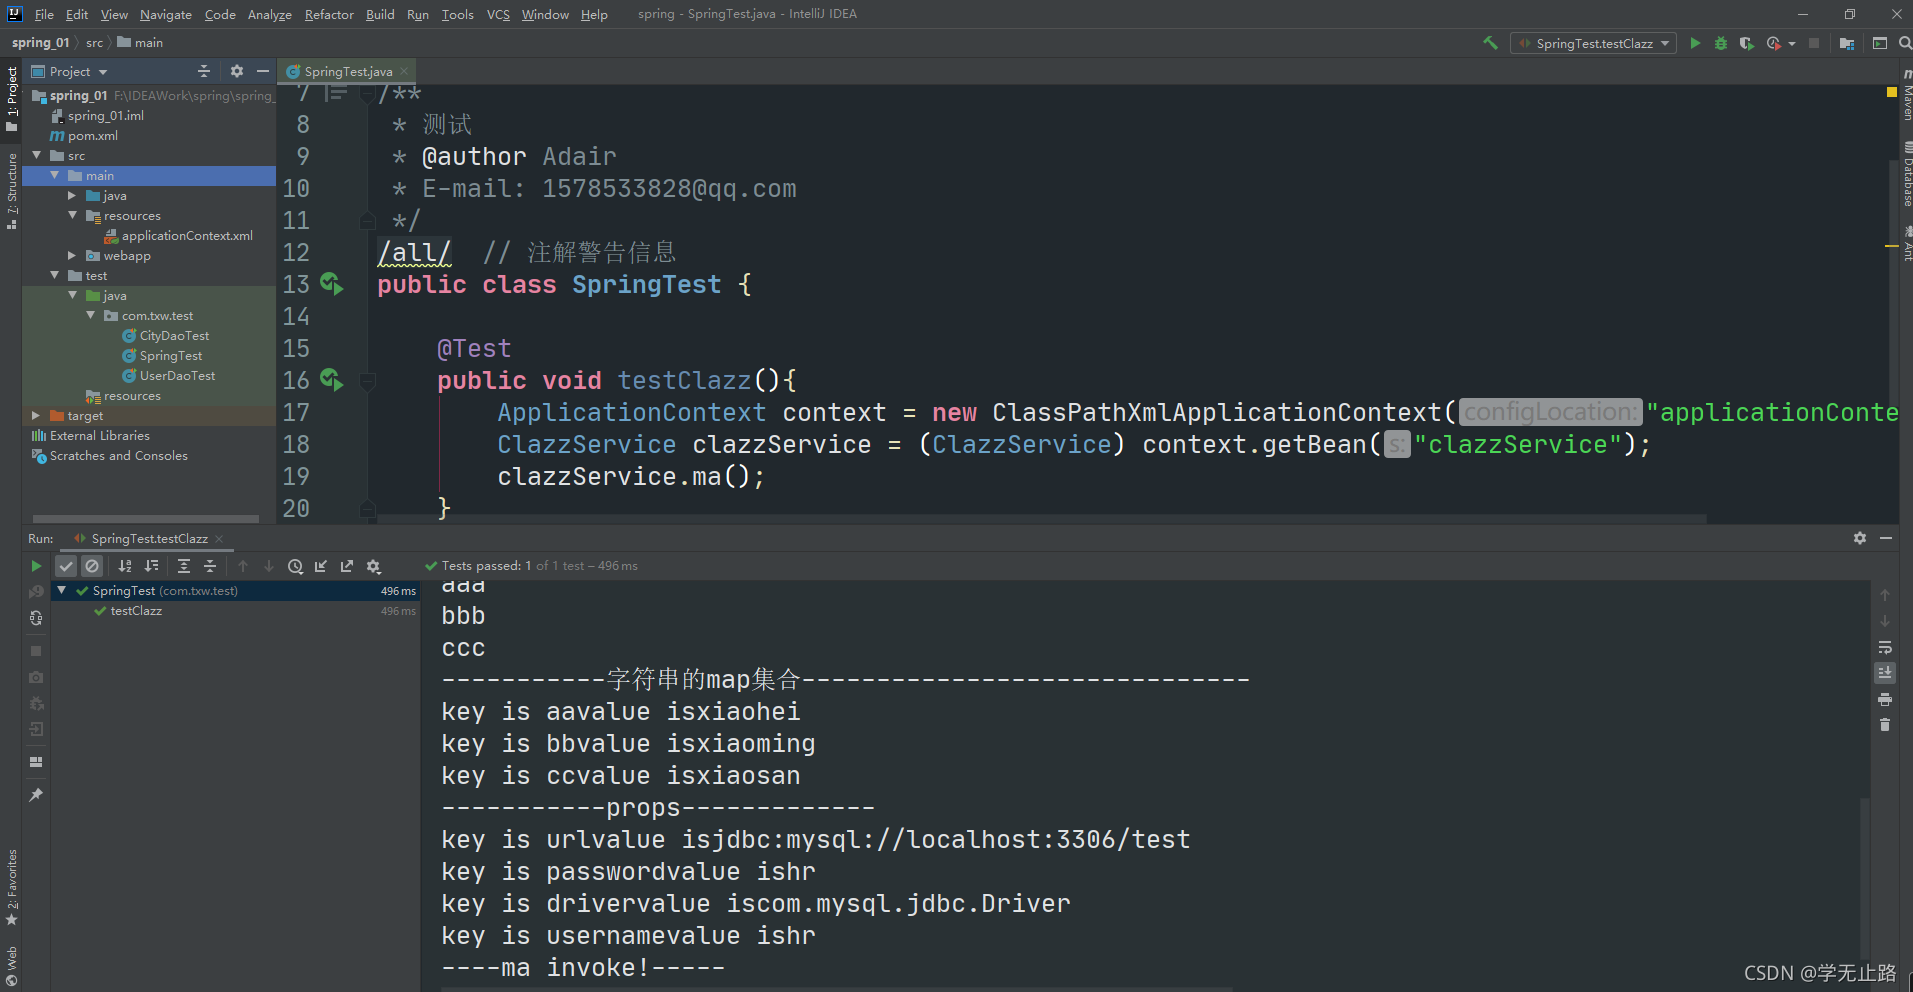
**注意**: 引用类型使用ref属性注入,基本类型使用value属性注入
6 构造注入
注意:构造注入并不常用,不过在一些框架类中必须使用构造注入,这里先了解其注入语法即可。`
1.编写的EmpDao的代码如下:
package com.txw.dao;

/**
 * @author Adair
 * E-mail: 1578533828@qq.com
 */
@SuppressWarnings("all")   // 注解警告信息
public interface EmpDao {

    public void ma();
}
如图所示: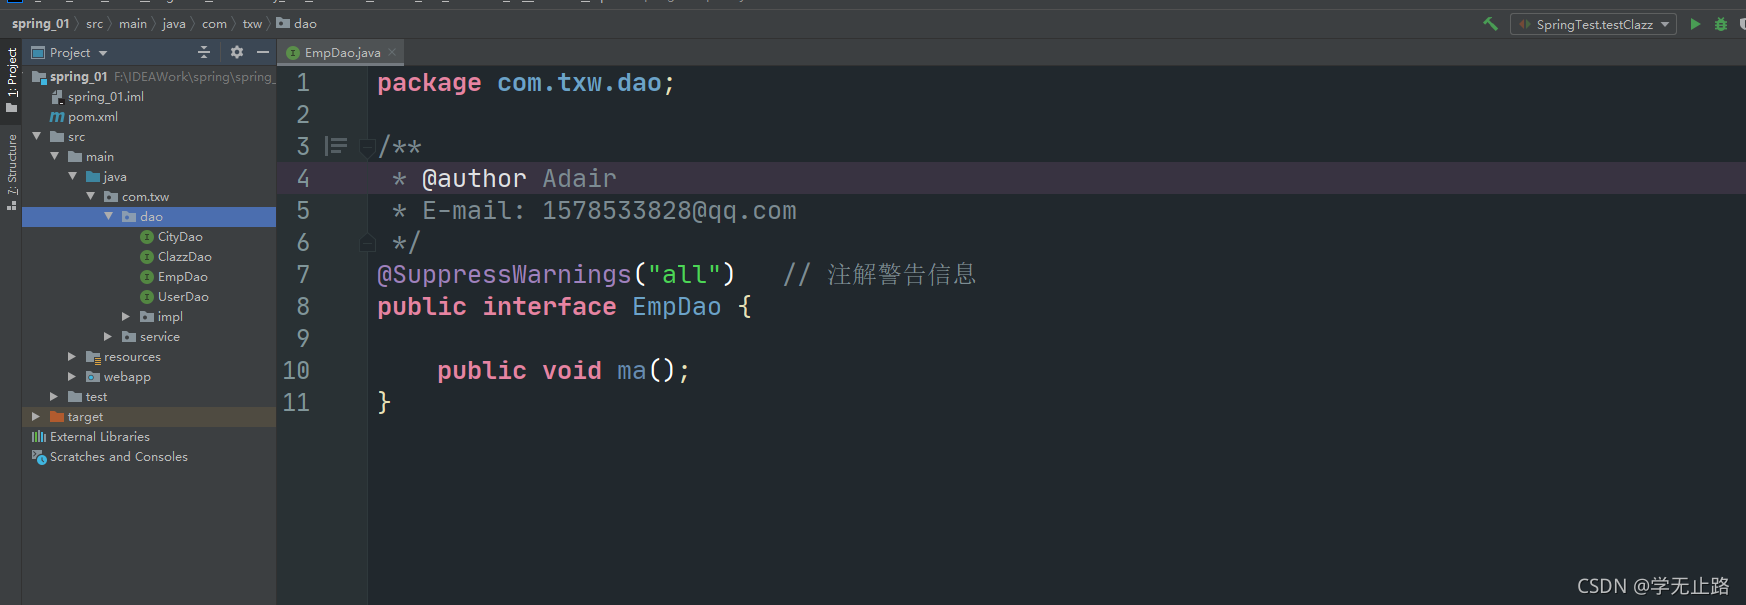
2.编写的EmpDaoImpl的代码如下:
package com.txw.dao.impl;

import com.txw.dao.EmpDao;
/**
 * @author Adair
 * E-mail: 1578533828@qq.com
 */
@SuppressWarnings("all")   // 注解警告信息
public class EmpDaoImpl implements EmpDao {

    @Override
    public void ma() {
        System.out.println("dao ma invoke!");
    }
}
如图所示: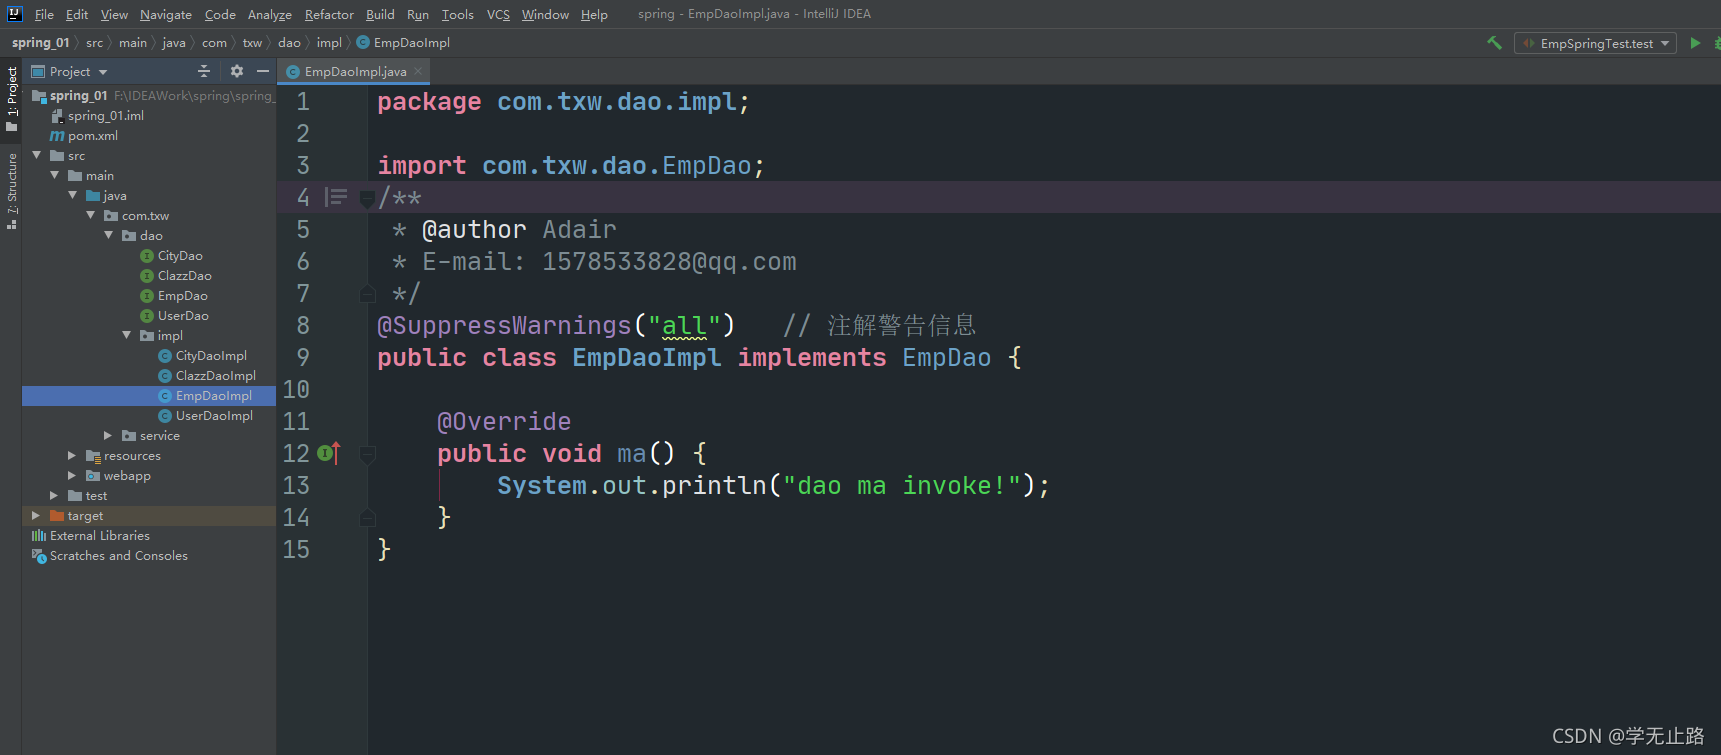
3.编写的EmpService的代码如下:
package com.txw.service;

/**
 * @author Adair
 * E-mail: 1578533828@qq.com
 */
@SuppressWarnings("all")   // 注解警告信息
public interface EmpService {
    public void ma();
}
如图所示: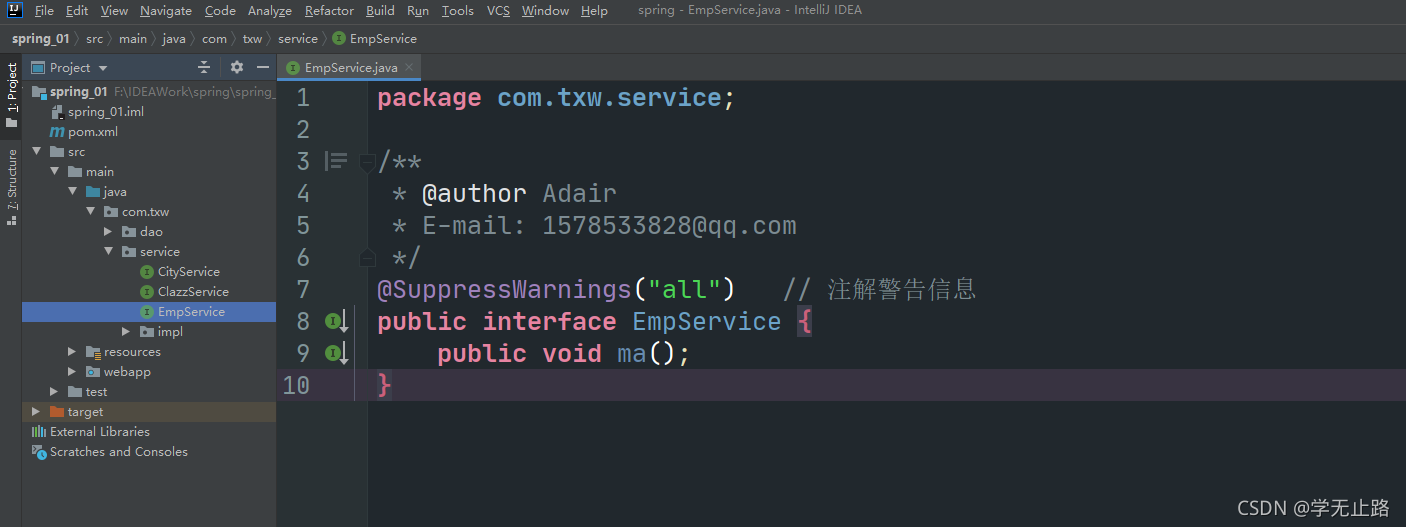
4.编写的EmpServiceImpl的代码如下:
package com.txw.service.impl;

import com.txw.dao.EmpDao;
import com.txw.service.EmpService;
/**
 * @author Adair
 * E-mail: 1578533828@qq.com
 */
@SuppressWarnings("all")   // 注解警告信息
public class EmpServiceImpl implements EmpService {
    private EmpDao empDao;

    public EmpServiceImpl(EmpDao empDao) {
        this.empDao = empDao;
    }

    @Override
    public void ma() {
        empDao.ma();
        System.out.println("service ma invoke!");
    }
}
如图所示: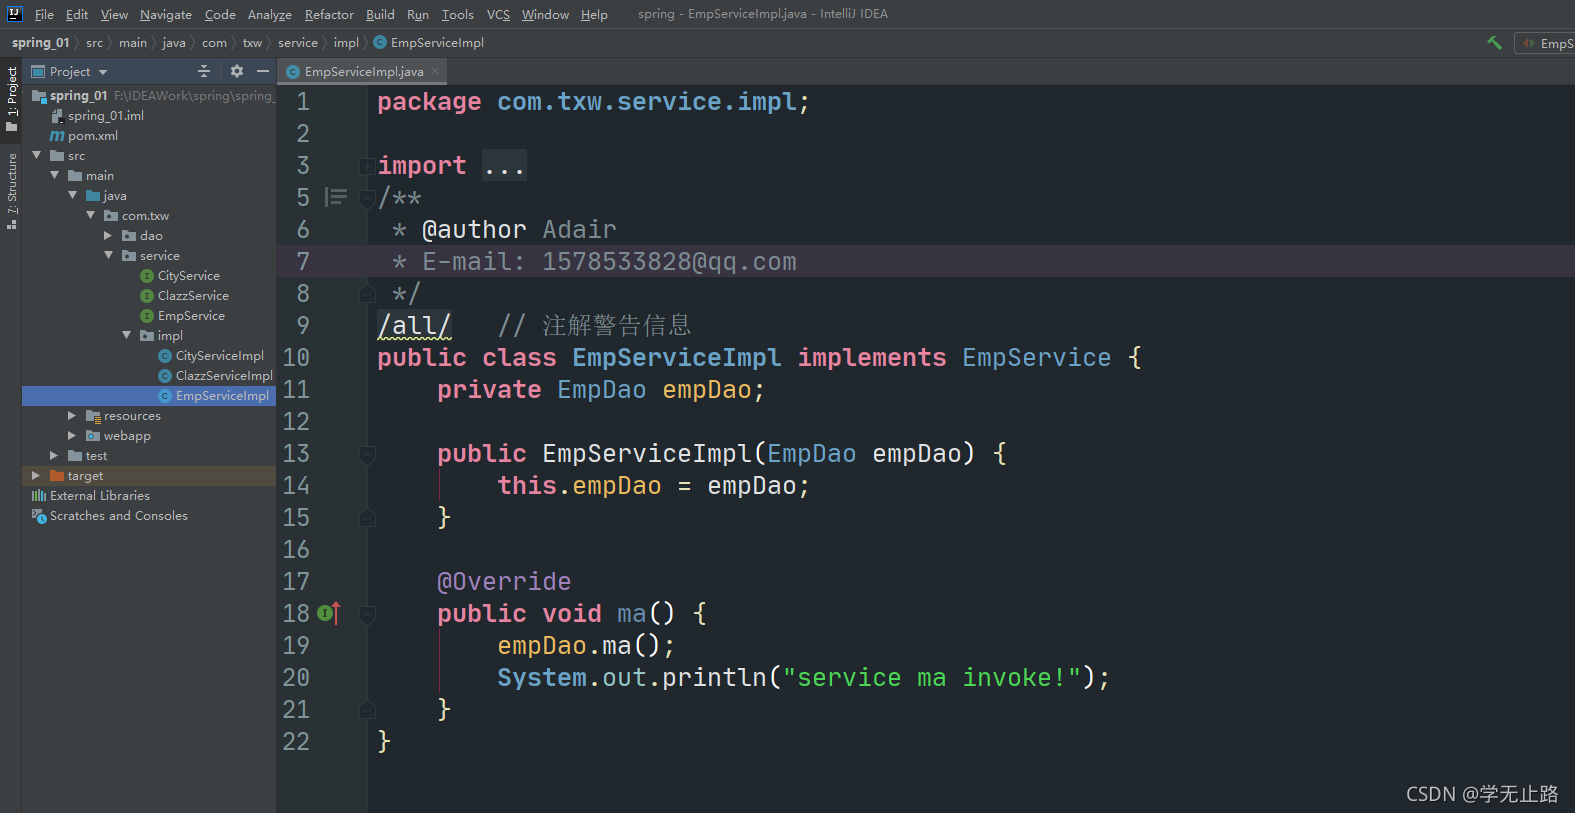
5.在spring.xml添加的代码如下:
<?xml version="1.0" encoding="UTF-8"?>
<beans xmlns="http://www.springframework.org/schema/beans"
       xmlns:xsi="http://www.w3.org/2001/XMLSchema-instance"
       xsi:schemaLocation="http://www.springframework.org/schema/beans
           http://www.springframework.org/schema/beans/spring-beans-3.2.xsd ">
    <bean id="empDao" class="com.txw.dao.impl.EmpDaoImpl"></bean>
    <bean id="empService" class="com.txw.service.impl.EmpServiceImpl">
        <!--构造方法注入 constructor-arg进行构造注入
            name:使用的构造方法的参数名
            index:当前参数的下标
        -->
        <constructor-arg name="empDao" index="0" ref="empDao" ></constructor-arg>
    </bean>

</beans>
如图所示:
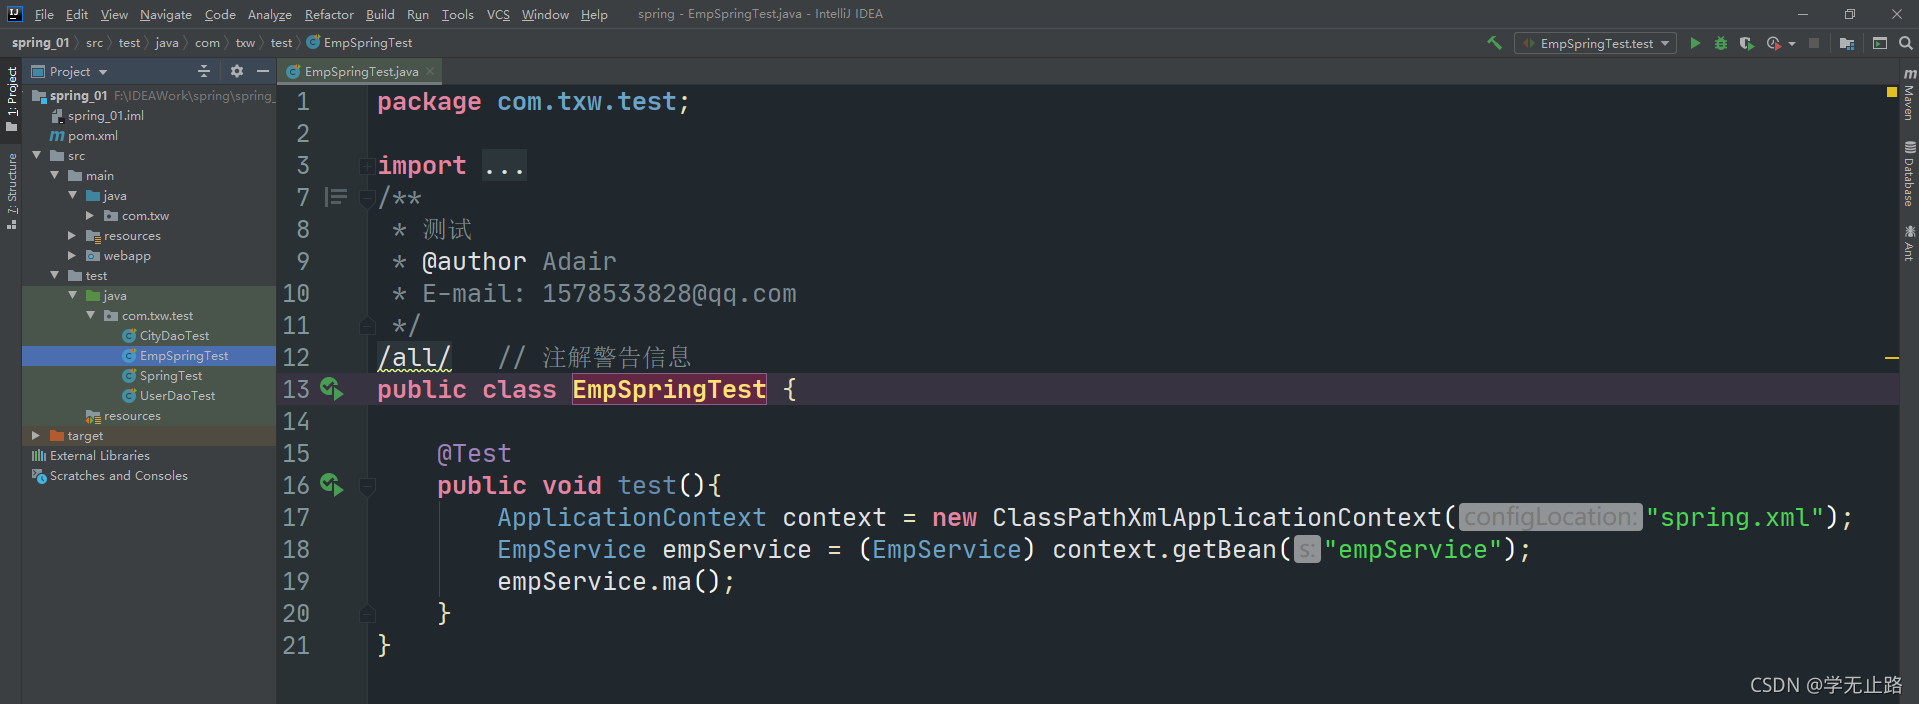
6.编写的EmpSpringTest的代码如下:
package com.txw.test;

import com.txw.service.EmpService;
import org.junit.Test;
import org.springframework.context.ApplicationContext;
import org.springframework.context.support.ClassPathXmlApplicationContext;
/**
 * 测试
 * @author Adair
 * E-mail: 1578533828@qq.com
 */
@SuppressWarnings("all")   // 注解警告信息
public class EmpSpringTest {

    @Test
    public void test(){
        ApplicationContext context = new ClassPathXmlApplicationContext("spring.xml");
        EmpService empService = (EmpService) context.getBean("empService");
        empService.ma();
    }
}
如图所示: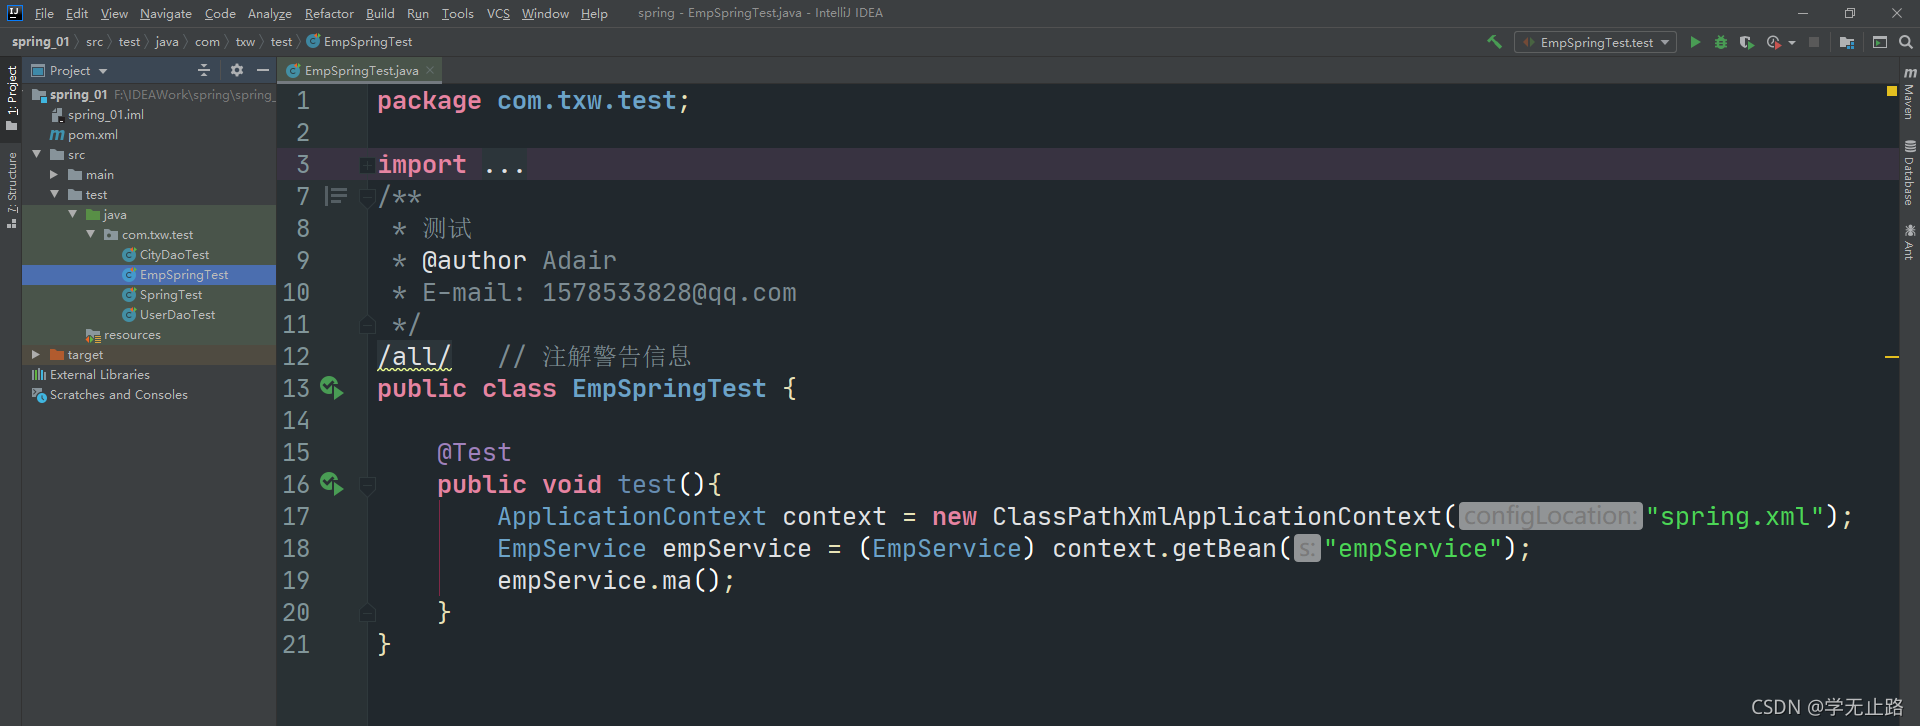
set注入和构造注入的区别,如图所示:
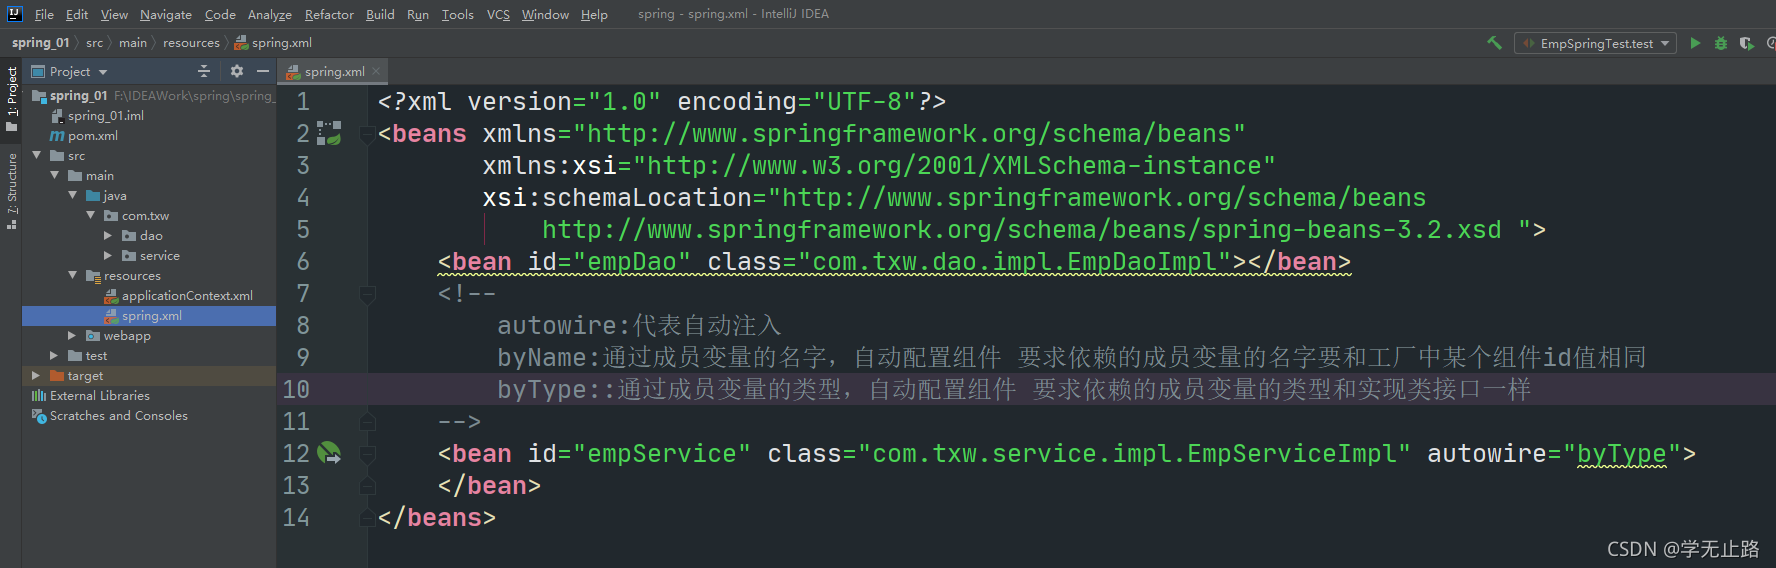
7.自动注入
autowire=”byName”
根据注入的属性名与配置文件中bean的id匹配,一致则注入,不一致报错。
autowire=”byType”
根据注入的属性类型,与配置文件中的类型匹配,类型一致注入(在多个实现类时,会产生歧义)
注意: 无论使用以上那种方式注入都需要为属性提供set方法
EmpServiceImpl的代码,如图所示: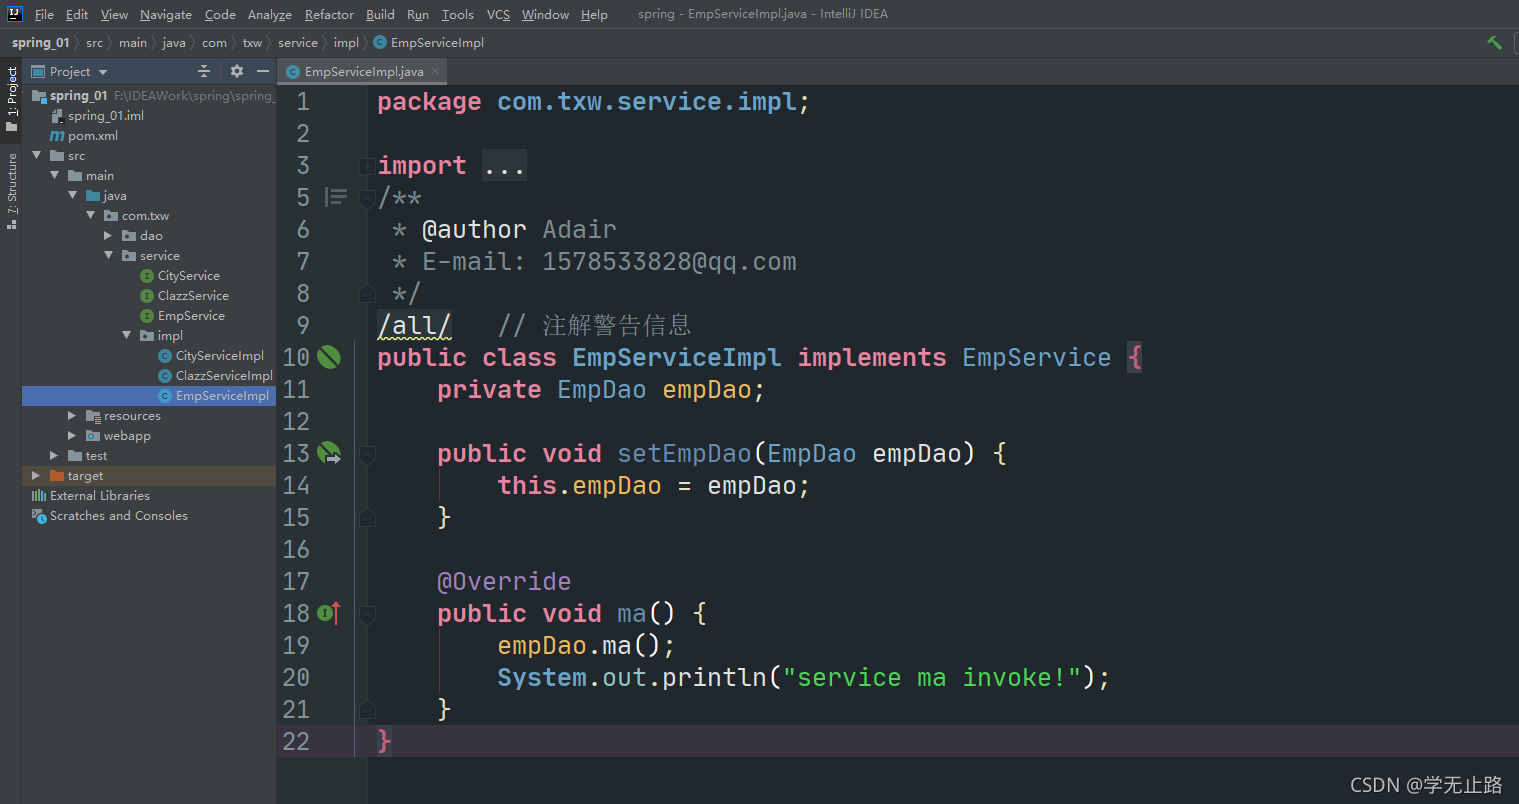
spring.xml的代码,如图所示:
EmpSpringTest的代码,如图所示:
总结,如图所示: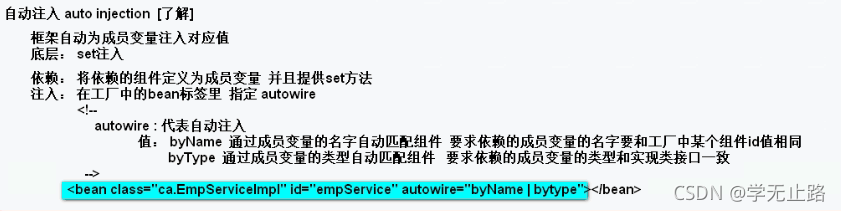
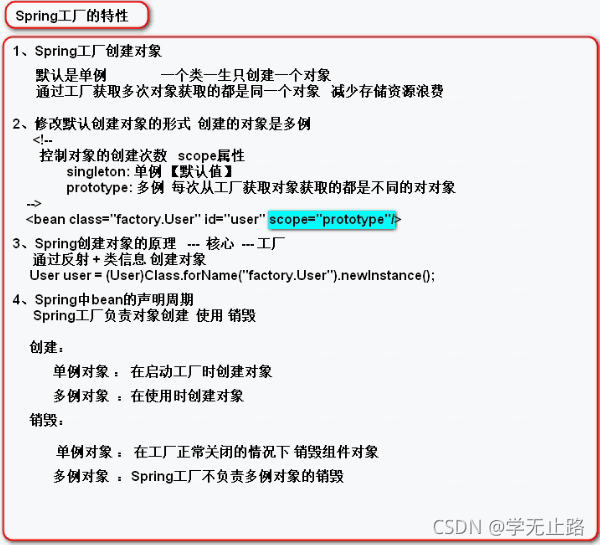
8.bean的创建模式
singleton:单例 默认
在工厂中全局唯一,只创建一次
如图所示: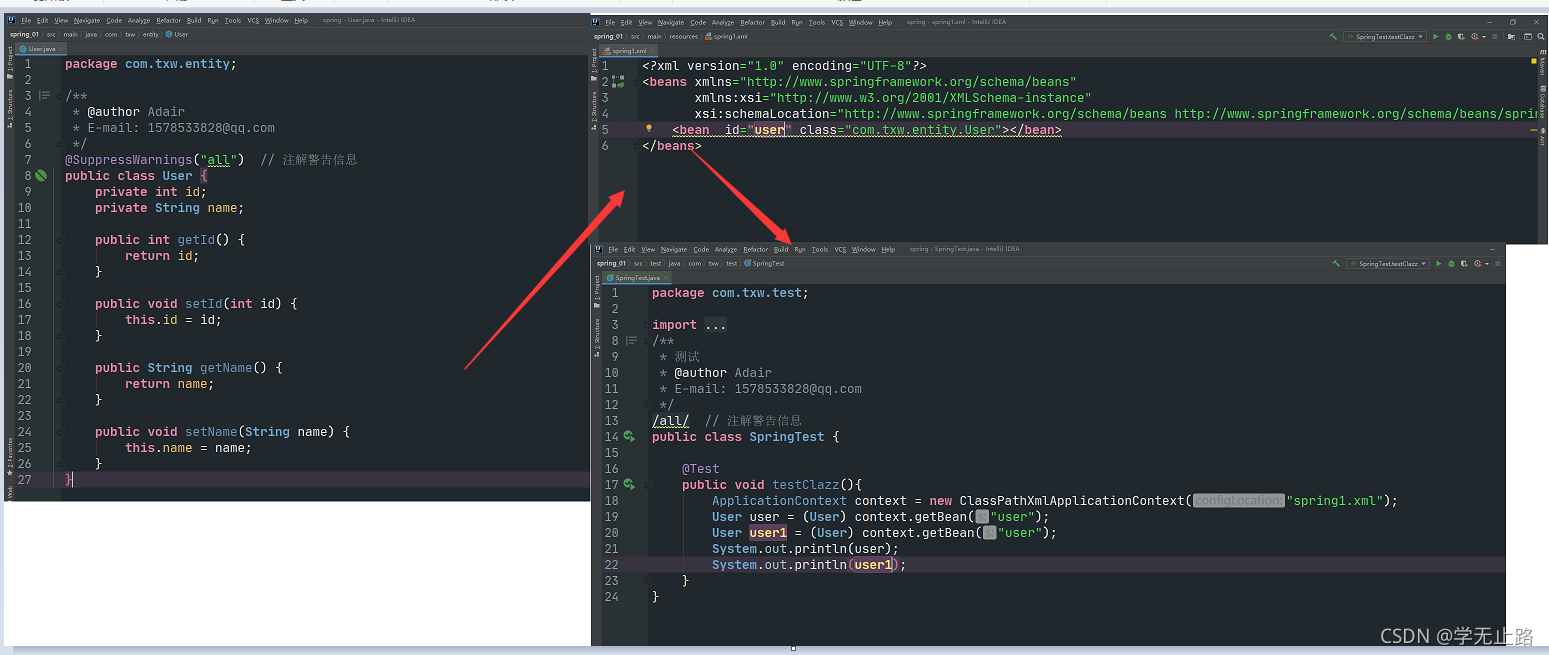
prototype: 多例
全局不唯一,每次使用都会创建一个新的对象。
<bean id="" class="xxxx.userAction" scope="prototype|singleton">
		service,dao    ----->  singleton
		struts2 action -----> prototype
注意:在项目开发中service,dao组件单例,struts2的Action必须为:多例。
如图所示: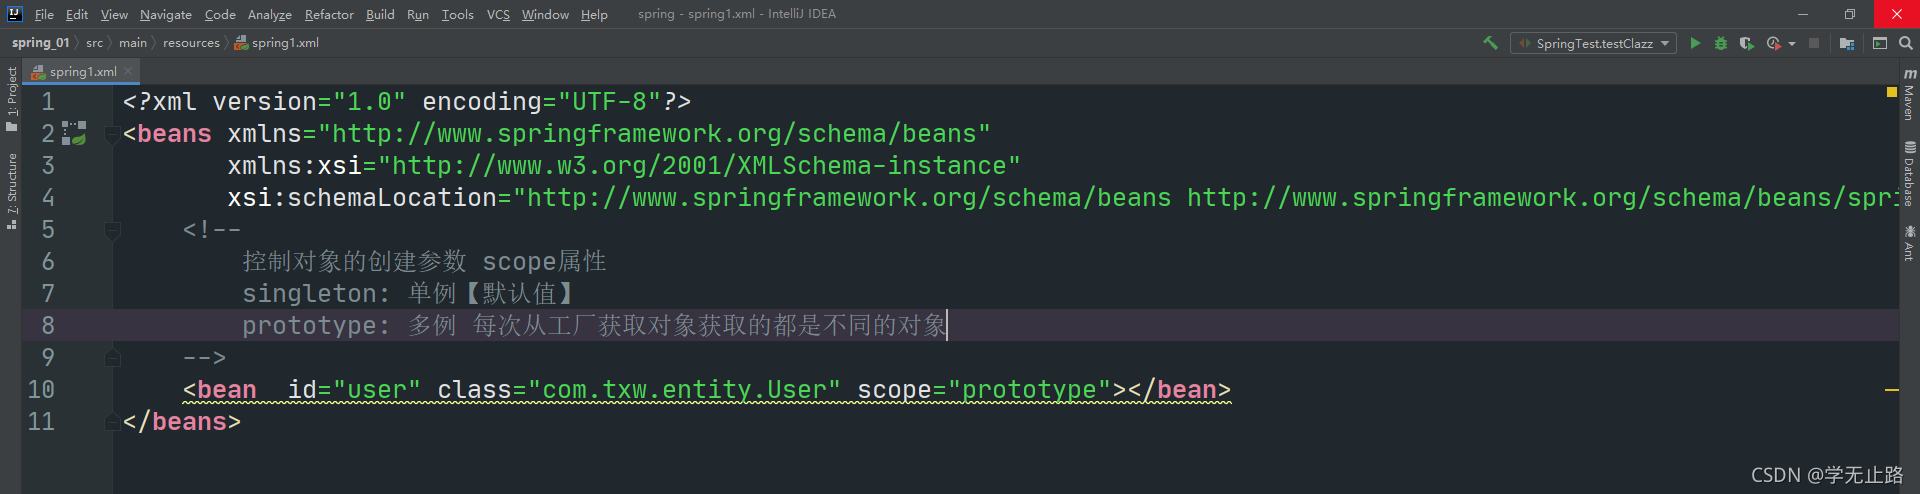
9 bean的生产原理
原理:反射+构造方法
User user = (User) Class.forName("com.txw.entity.User").newInstance();
System.out.println(user);
如图所示: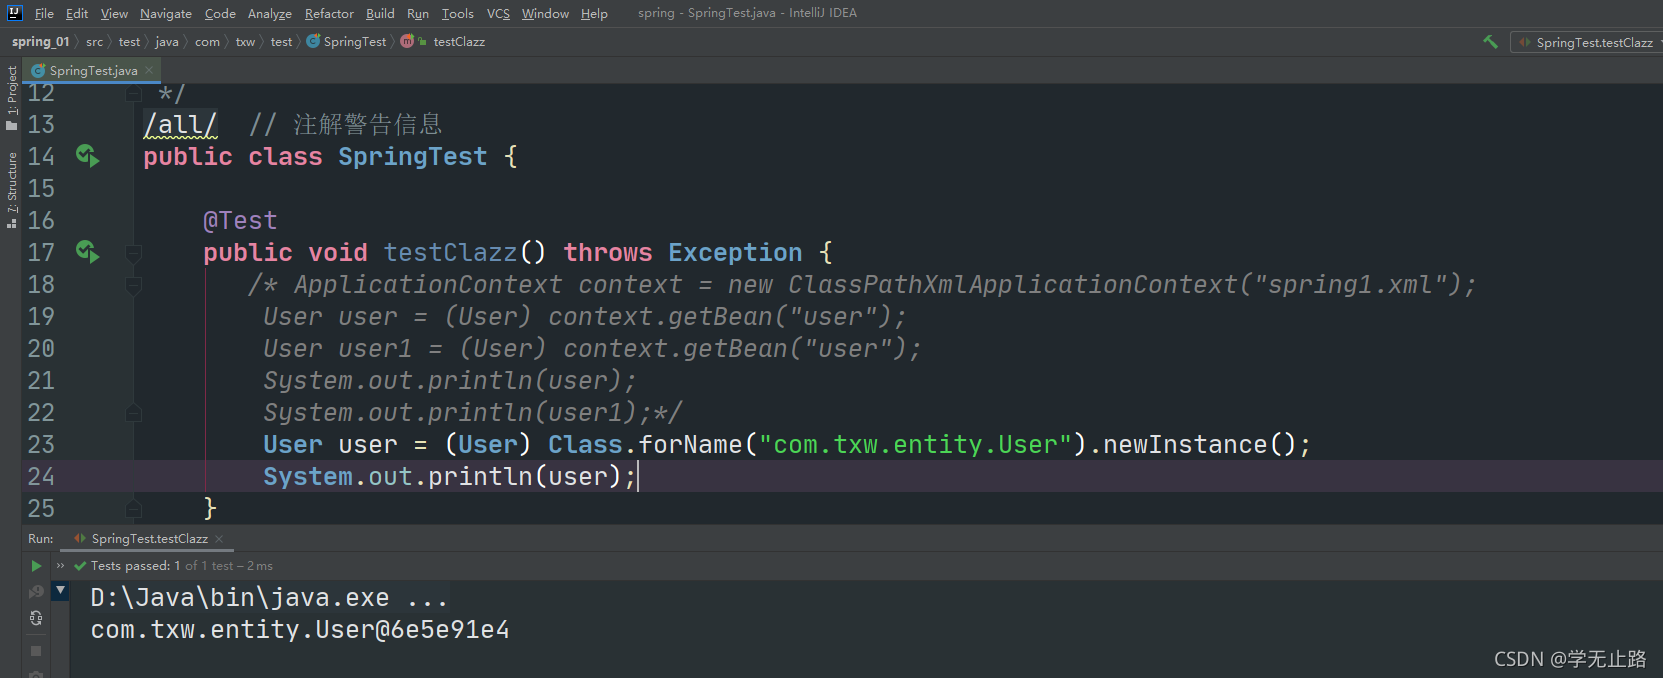
10 bean的生命周期
何时创建
随着工厂启动,所有单例bean随之创建 非单例的bean,每次使用时创建。何时销毁
工厂**关闭,所有bean随之销毁** ( 注意:spring对多例bean管理松散,不会负责多例bean的销毁)。
1.编写User的代码如下:
package com.txw.entity;

/**
 * @author Adair
 * E-mail: 1578533828@qq.com
 */
@SuppressWarnings("all")  // 注解警告信息
public class User {
    private int id;
    private String name;

    /**
     * 监听工厂创建对象
     */
    public void init(){
        System.out.println("组件创建");
    }

    /**
     * 监听工厂销毁对象
     */
    public void destroy(){
        System.out.println("组件销毁");
    }

    public int getId() {
        return id;
    }

    public void setId(int id) {
        this.id = id;
    }

    public String getName() {
        return name;
    }

    public void setName(String name) {
        this.name = name;
    }
}
如图所示: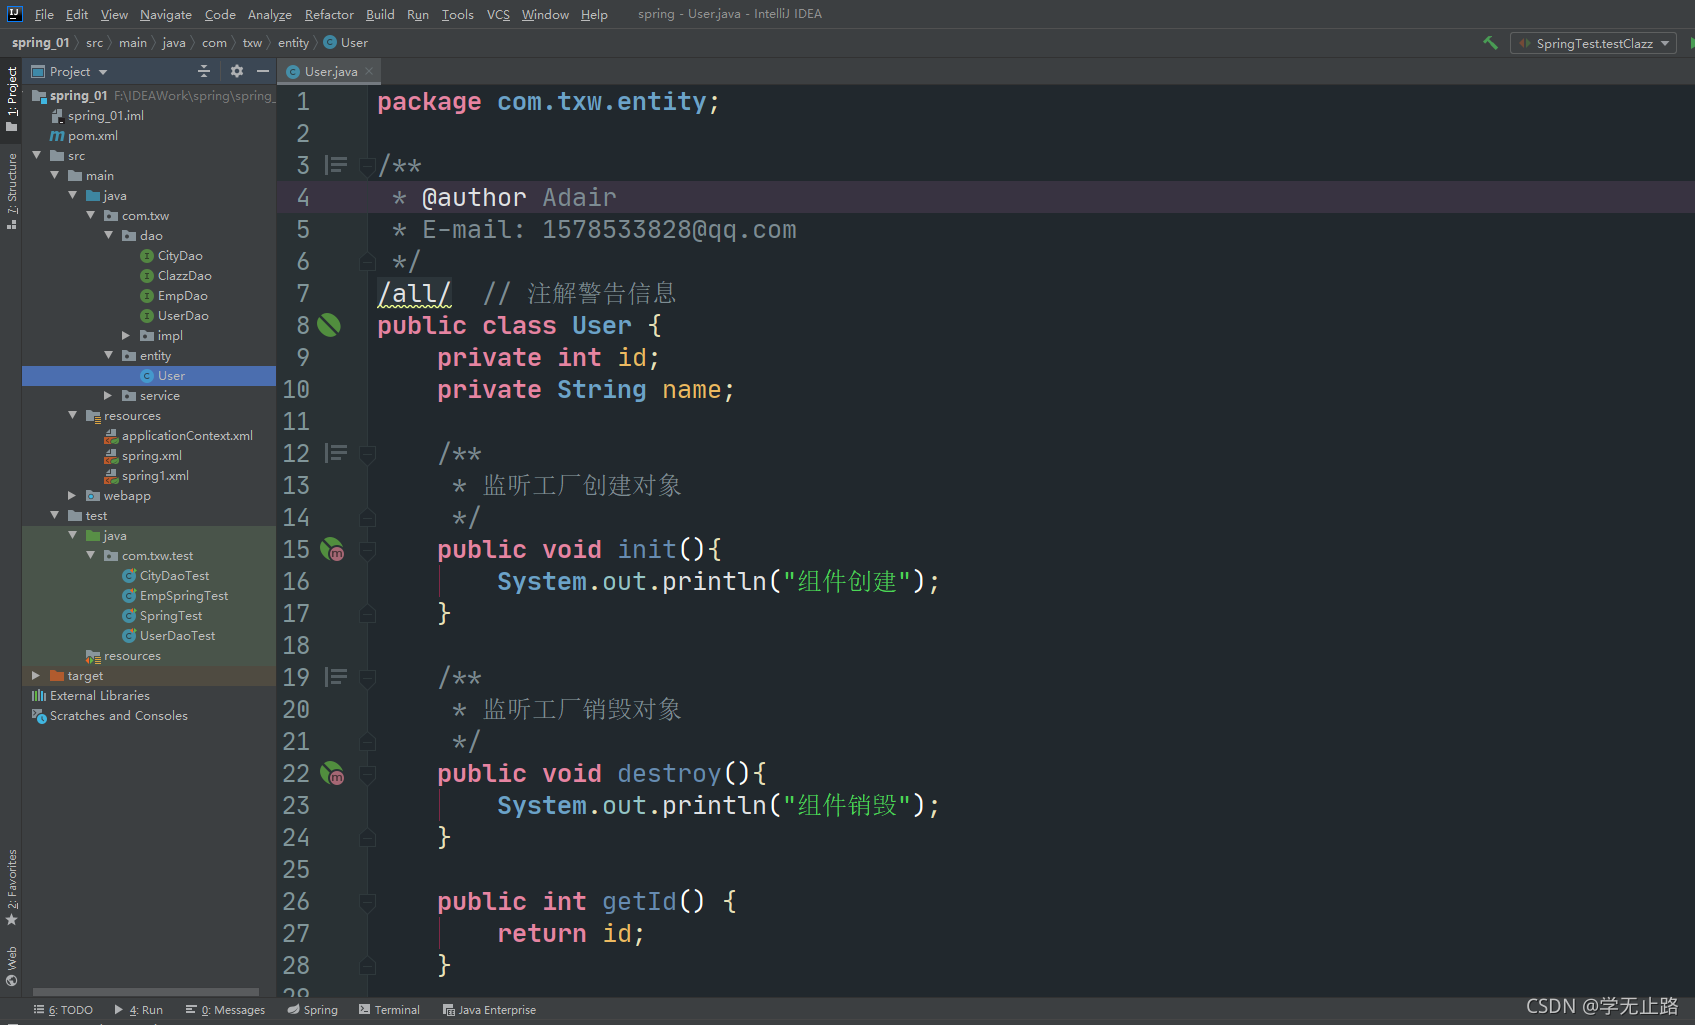
2.在spring1.xml添加的代码如下:
<?xml version="1.0" encoding="UTF-8"?>
<beans xmlns="http://www.springframework.org/schema/beans"
       xmlns:xsi="http://www.w3.org/2001/XMLSchema-instance"
       xsi:schemaLocation="http://www.springframework.org/schema/beans http://www.springframework.org/schema/beans/spring-beans.xsd">
    <!--
        控制对象的创建参数 scope属性
        singleton: 单例【默认值】
        prototype: 多例 每次从工厂获取对象获取的都是不同的对象
        init-method: 监听工厂创建组件 值:组件定义的方法名
        destroy-method:  监听工厂销毁组件   值:组件定义的方法名
    -->
    <bean  id="user" class="com.txw.entity.User" scope="prototype" init-method="init" destroy-method="destroy"></bean>
</beans>
如图所示:
3.编写的SpringTest的代码如下:
package com.txw.test;

import com.txw.entity.User;
import com.txw.service.ClazzService;
import org.junit.Test;
import org.springframework.context.ApplicationContext;
import org.springframework.context.support.ClassPathXmlApplicationContext;
/**
 * 测试
 * @author Adair
 * E-mail: 1578533828@qq.com
 */
@SuppressWarnings("all")  // 注解警告信息
public class SpringTest {

    @Test
    public void testClazz() throws Exception {
        ApplicationContext context = new ClassPathXmlApplicationContext("spring1.xml");
        User user = (User) context.getBean("user");
        System.out.println(user);
    }
}
如图所示: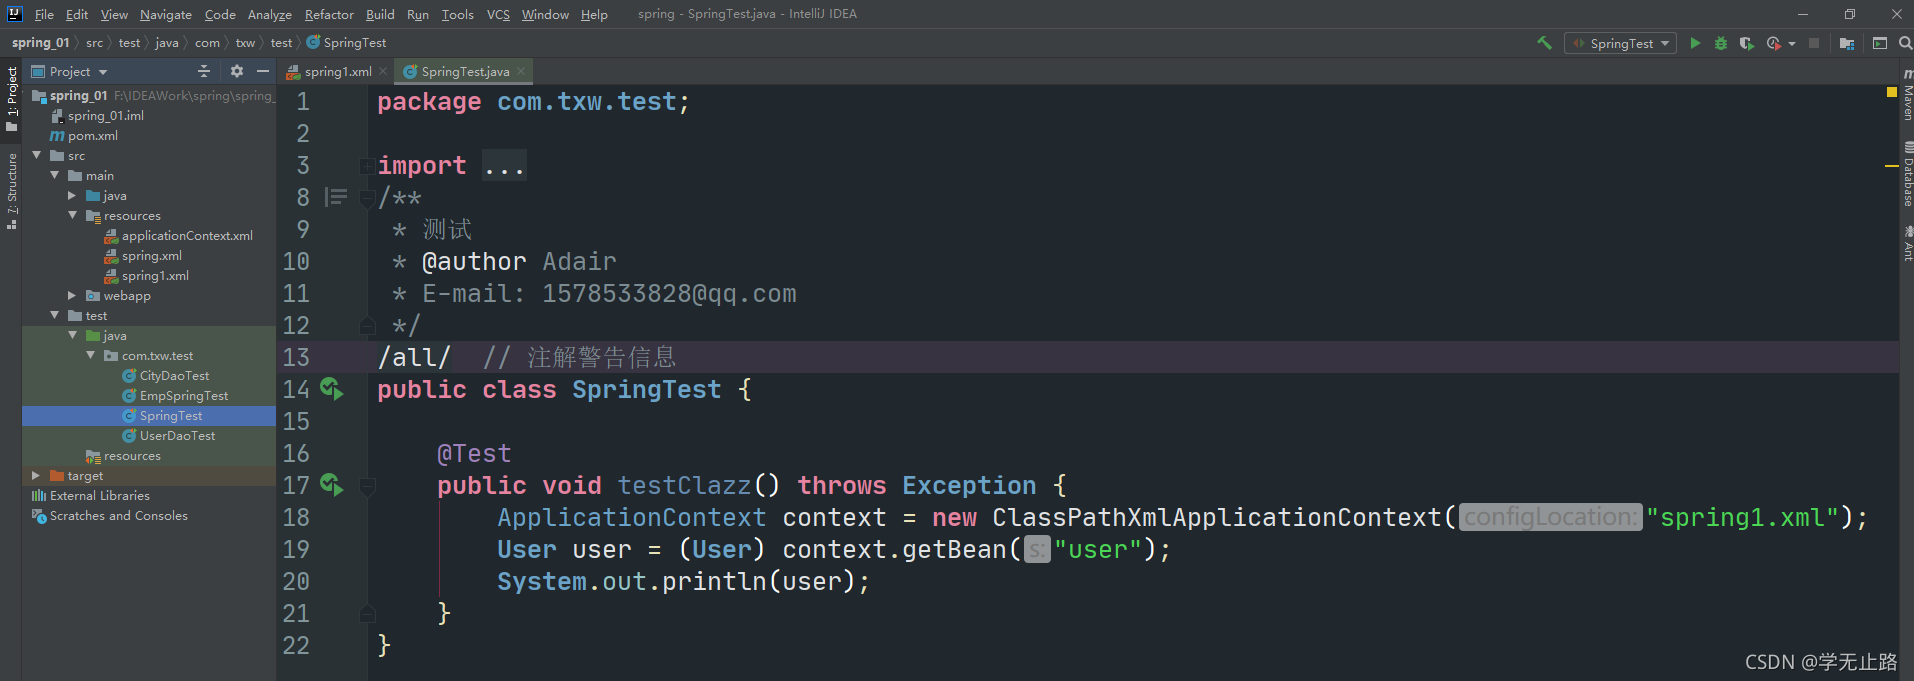
11 bean工厂创建对象的好处
使用配置文件管理java类,再生产环境中更换类的实现时不需要重新部署,修改文件即可。spring默认使用单例的模式创建bean,减少内存的占用。通过依赖注入建立了类与类之间的关系(使java之间关系更为清晰,方便了维护与管理)。
如图所示:


 271
271


 被折叠的 条评论
为什么被折叠?
被折叠的 条评论
为什么被折叠?
 到【灌水乐园】发言


