


1 容器简介
容器,是用来容纳物体、管理物体。生活中,我们会用到各种各样的容器。如锅碗瓢盆、 箱子和包等。如图所示:

程序中的“容器”也有类似的功能,用来容纳和管理数据。比如,如下新闻网站的新闻 列表、教育网站的课程列表就是用“容器”来管理:
视频课程信息也是使用“容器”来管理:

开发和学习中需要时刻和数据打交道,如何组织这些数据是我们编程中重要的内容。我 们一般通过“容器”来容纳和管理数据。事实上,我们前面所学的数组就是一种容器,可以 在其中放置对象或基本类型数据。
数组的优势:是一种简单的线性序列,可以快速地访问数组元素,效率高。如果从效率和类型检查的角度讲,数组是最好的。
数组的劣势:不灵活。容量需要事先定义好,不能随着需求的变化而扩容。比如:我们 在一个用户管理系统中,要把今天注册的所有用户取出来,那么这样的用户有多少个?我们 在写程序时是无法确定的。因此,在这里就不能使用数组。
基于数组并不能满足我们对于“管理和组织数据的需求”,所以我们需要一种更强大、 更灵活、容量随时可扩的容器来装载我们的对象。 这就是我们今天要学习的容器。容器 (Collection)也称之为集合。
2 容器的结构
2.1 结构图
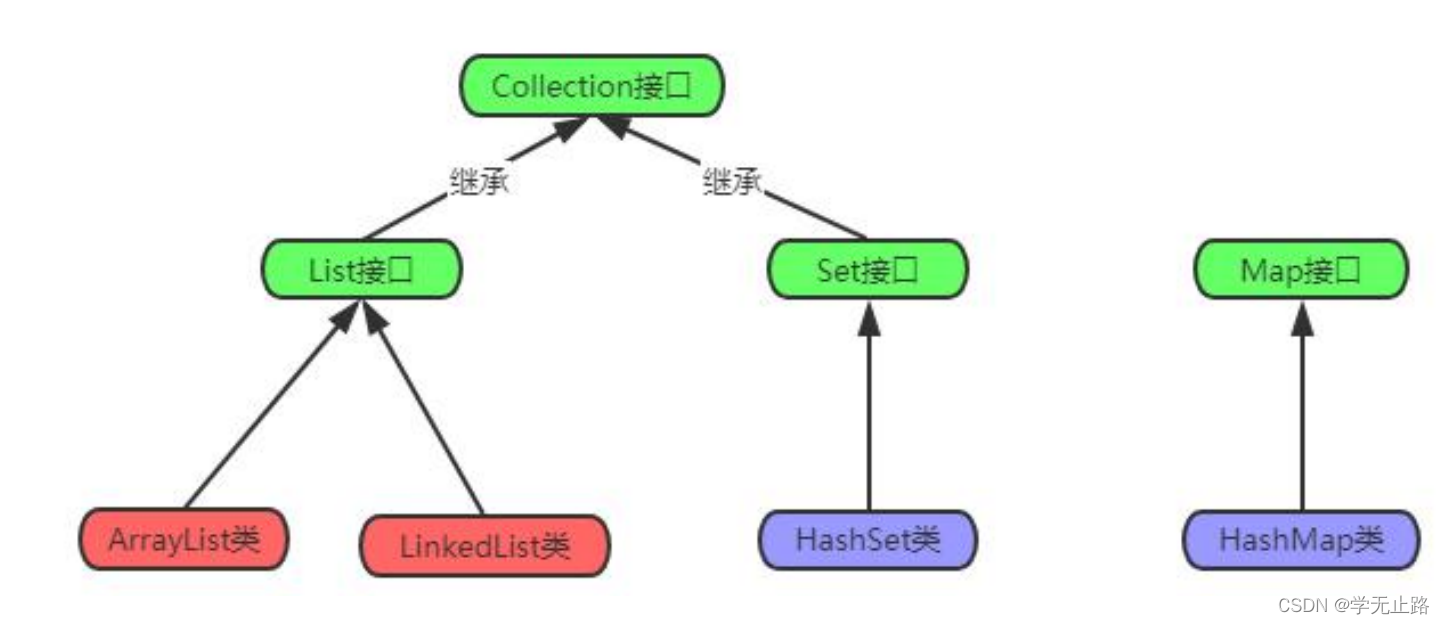
2.1.1 单例集合
单例集合:将数据一个一个的进行存储。如图所示:
2.1.2 双例集合
双例集合:基于 Key 与 Value 的结构存储数据。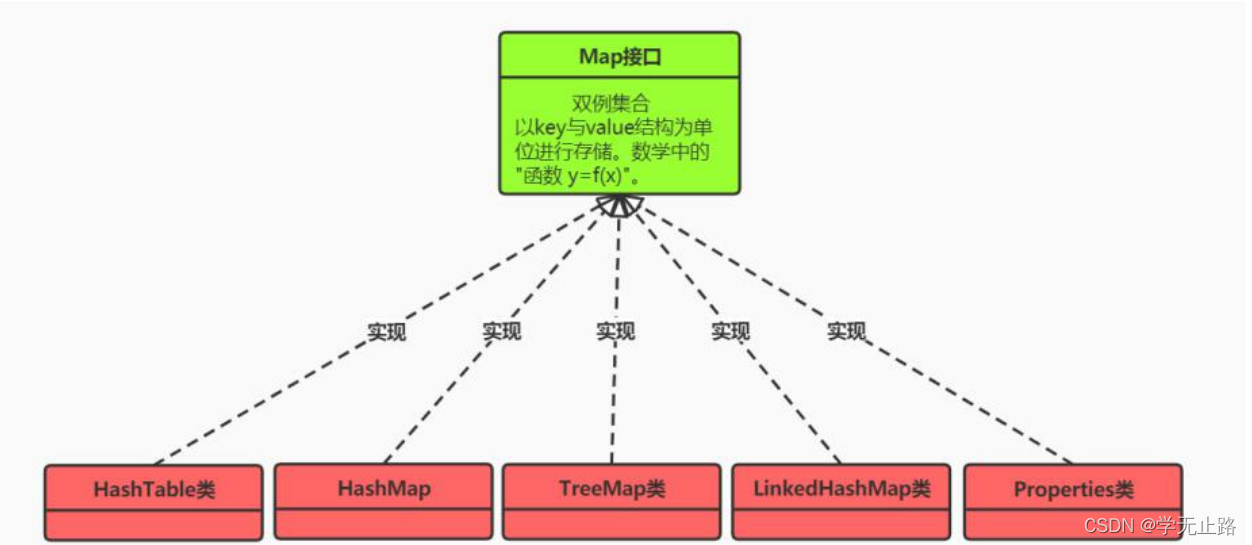
3 单利集合的使用
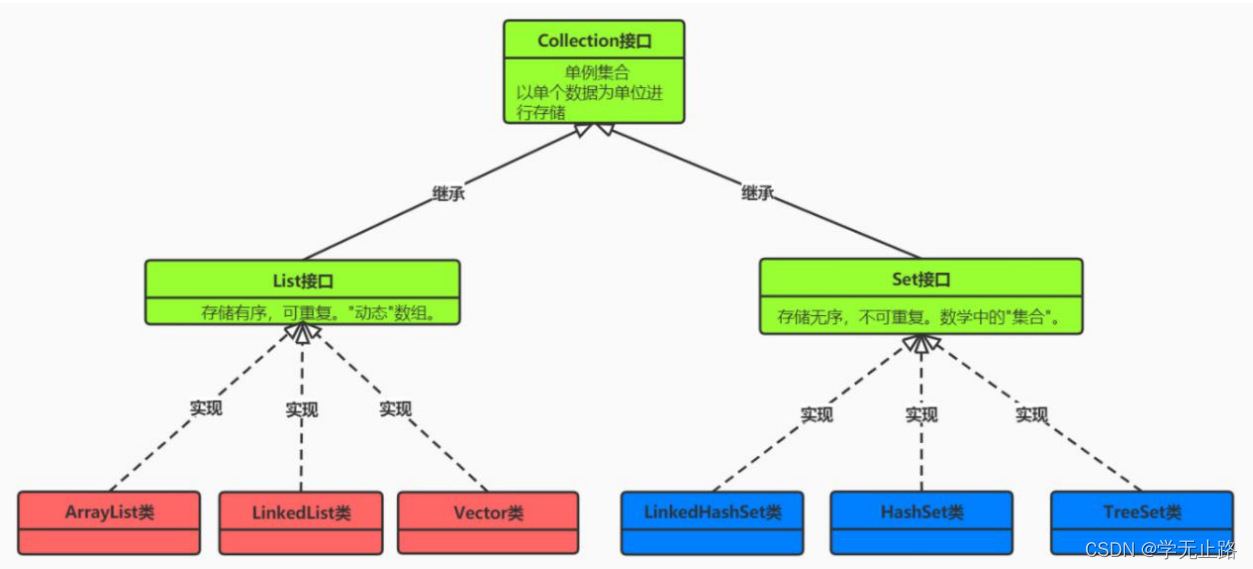
3.1Collection 接口介绍 Collection 是单例集合根接口,它是集中、收集的意思。Collection 接口的两个子接 口是 List、Set 接口。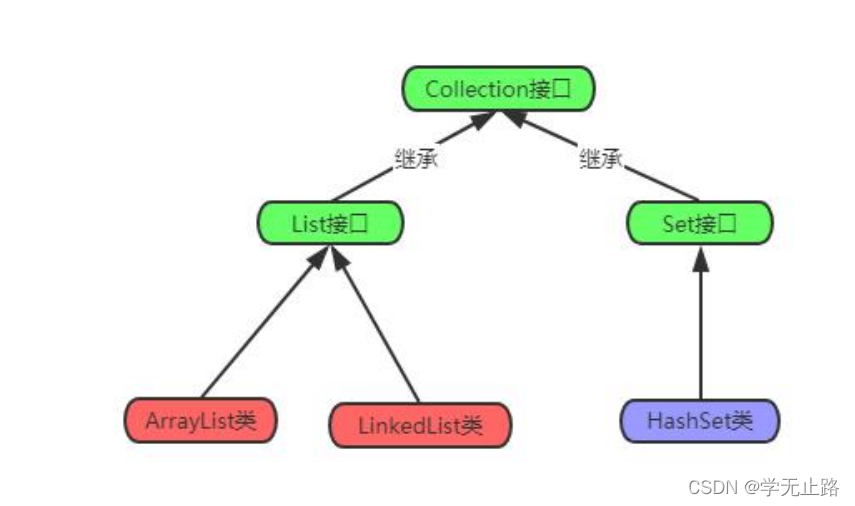
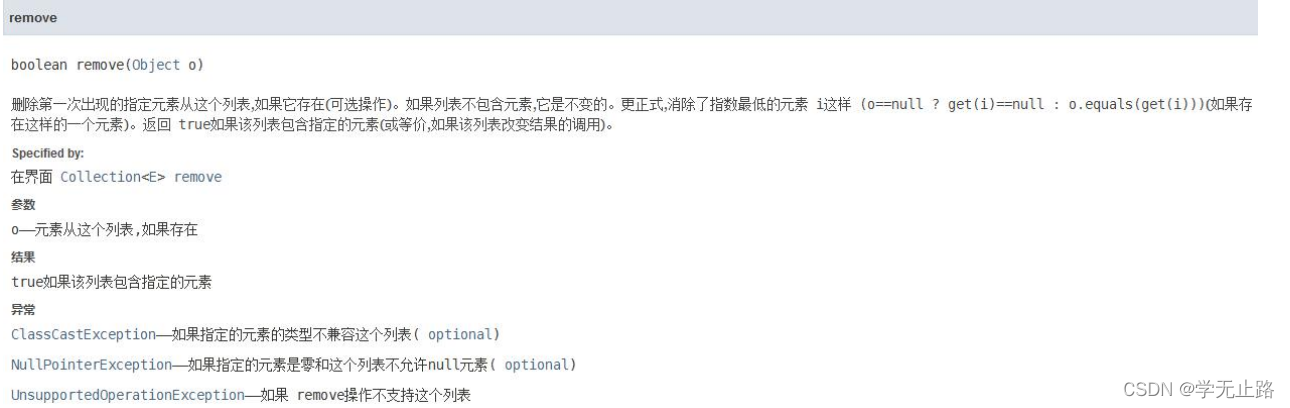
3.2 Collection 接口中的抽象方法
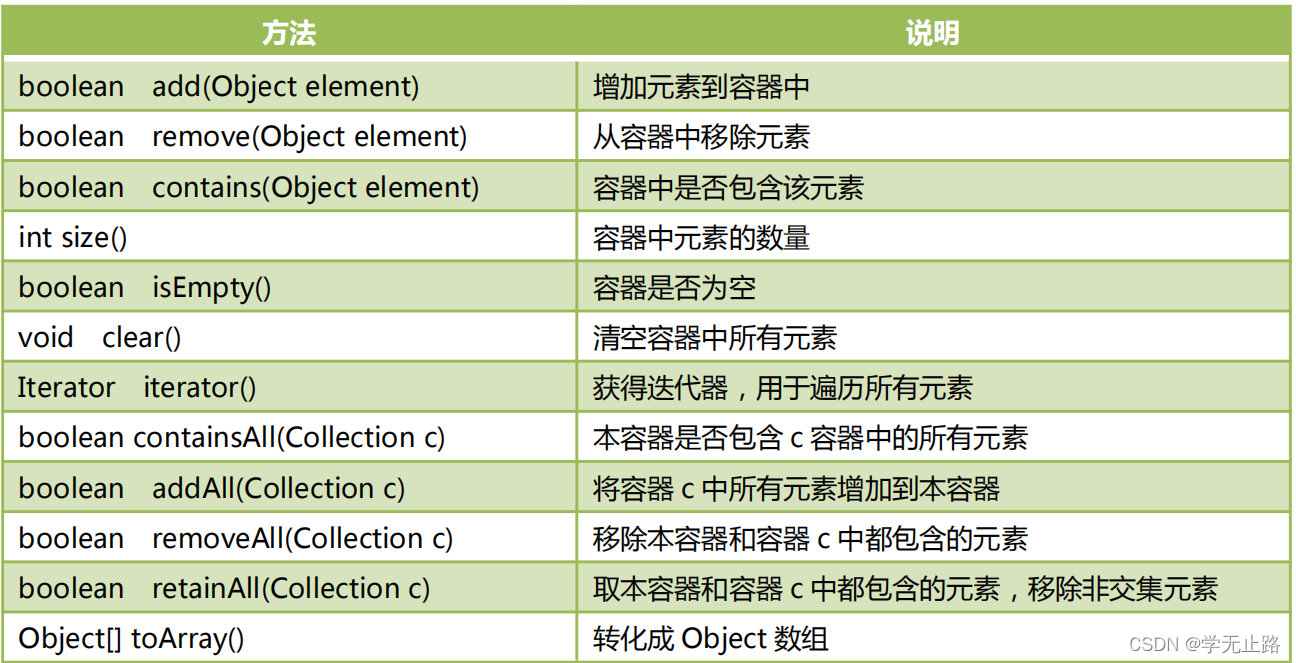
由于 List、Set 是 Collection 的子接口,意味着所有 List、Set 的实现类都有上面的方 法。我们下一节中,通过 ArrayList 实现类来测试上面的方法。
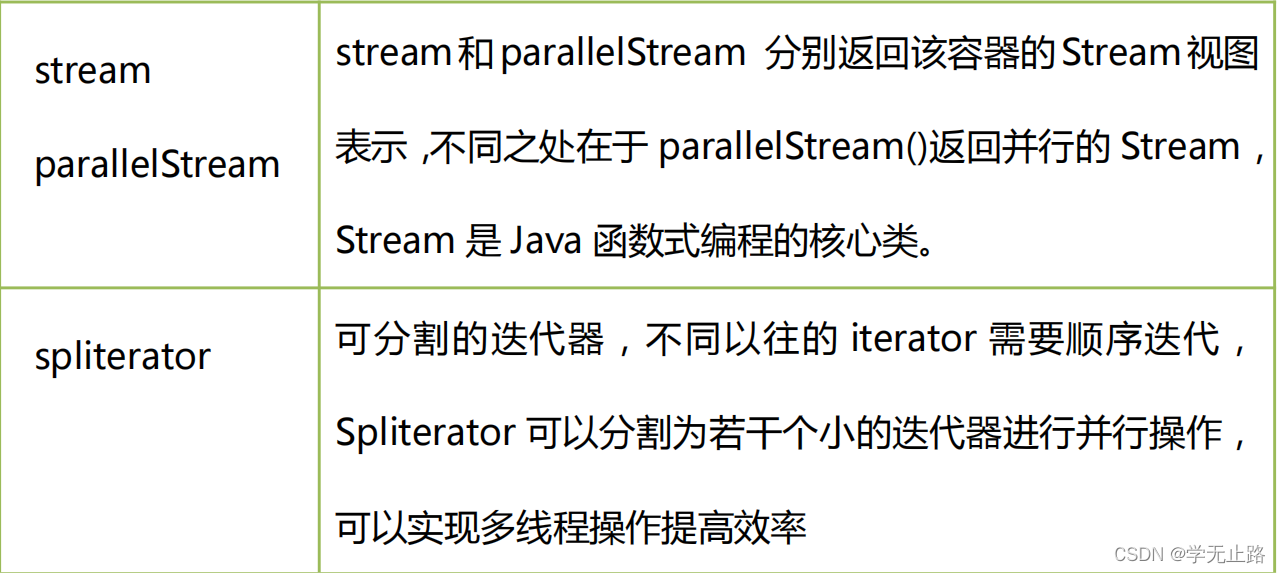
JDK8 之后,Collection 接口新增的方法(将在 JDK 新特性和函数式编程中介绍):
3.3 List 接口介绍
3.3.1 List 接口特点
有序:有序(元素存入集合的顺序和取出的顺序一致)。List 中每个元素都有索引标记。 可以根据元素的索引标记(在 List 中的位置)访问元素,从而精确控制这些元素。
可重复:List 允许加入重复的元素。更确切地讲,List 通常允许满足 e1.equals(e2) 的 元素重复加入容器。
3.3.2 List 的常用方法
除了 Collection 接口中的方法,List 多了一些跟顺序(索引)有关的方法,参见下表: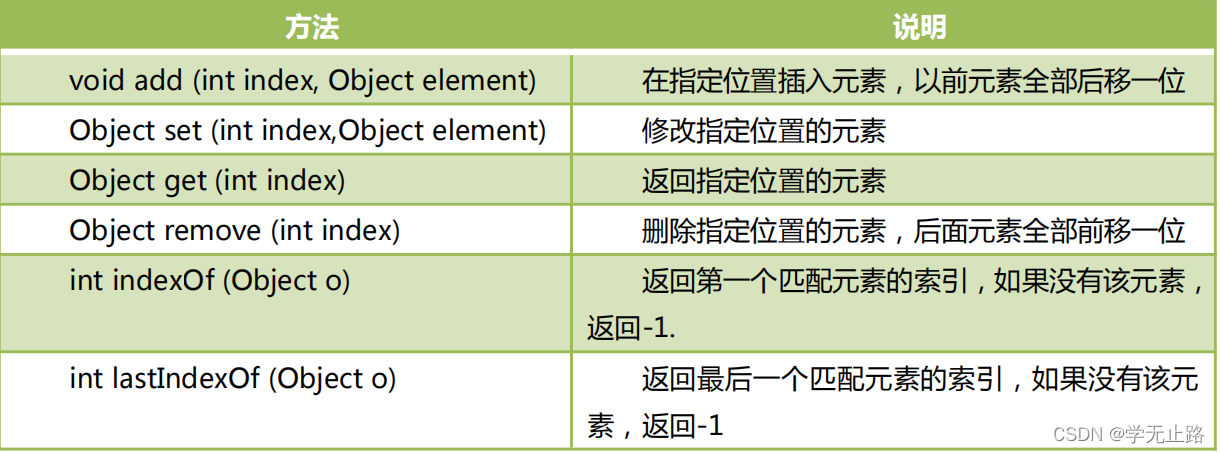
3.4 ArrayList 容器类
ArrayList 是 List 接口的实现类。是 List 存储特征的具体实现。
ArrayList 底层是用数组实现的存储。 特点:查询效率高,增删效率低,线程不安全。
3.4.1 添加元素
演示的代码如下:
package com.txw.arrarylist;

import java.util.ArrayList;
import java.util.List;
/**
 * 添加元素
 * @author Adair
 * @email 1578533828@qq.com
 */
@SuppressWarnings("all")  //注解警告信息
public class ArrayListTest {
    public static void main(String[] args) {
        // 实例化ArrayList容器
        List<String> list = new ArrayList<>();
        // 添加元素
        boolean flag = list.add("Adir");
        boolean flag1 = list.add("Mars");
        System.out.println(flag);
        // 索引的数值不能大于元素的个数。
        list.add(3,"Oldlu");
    }
}
如图所示: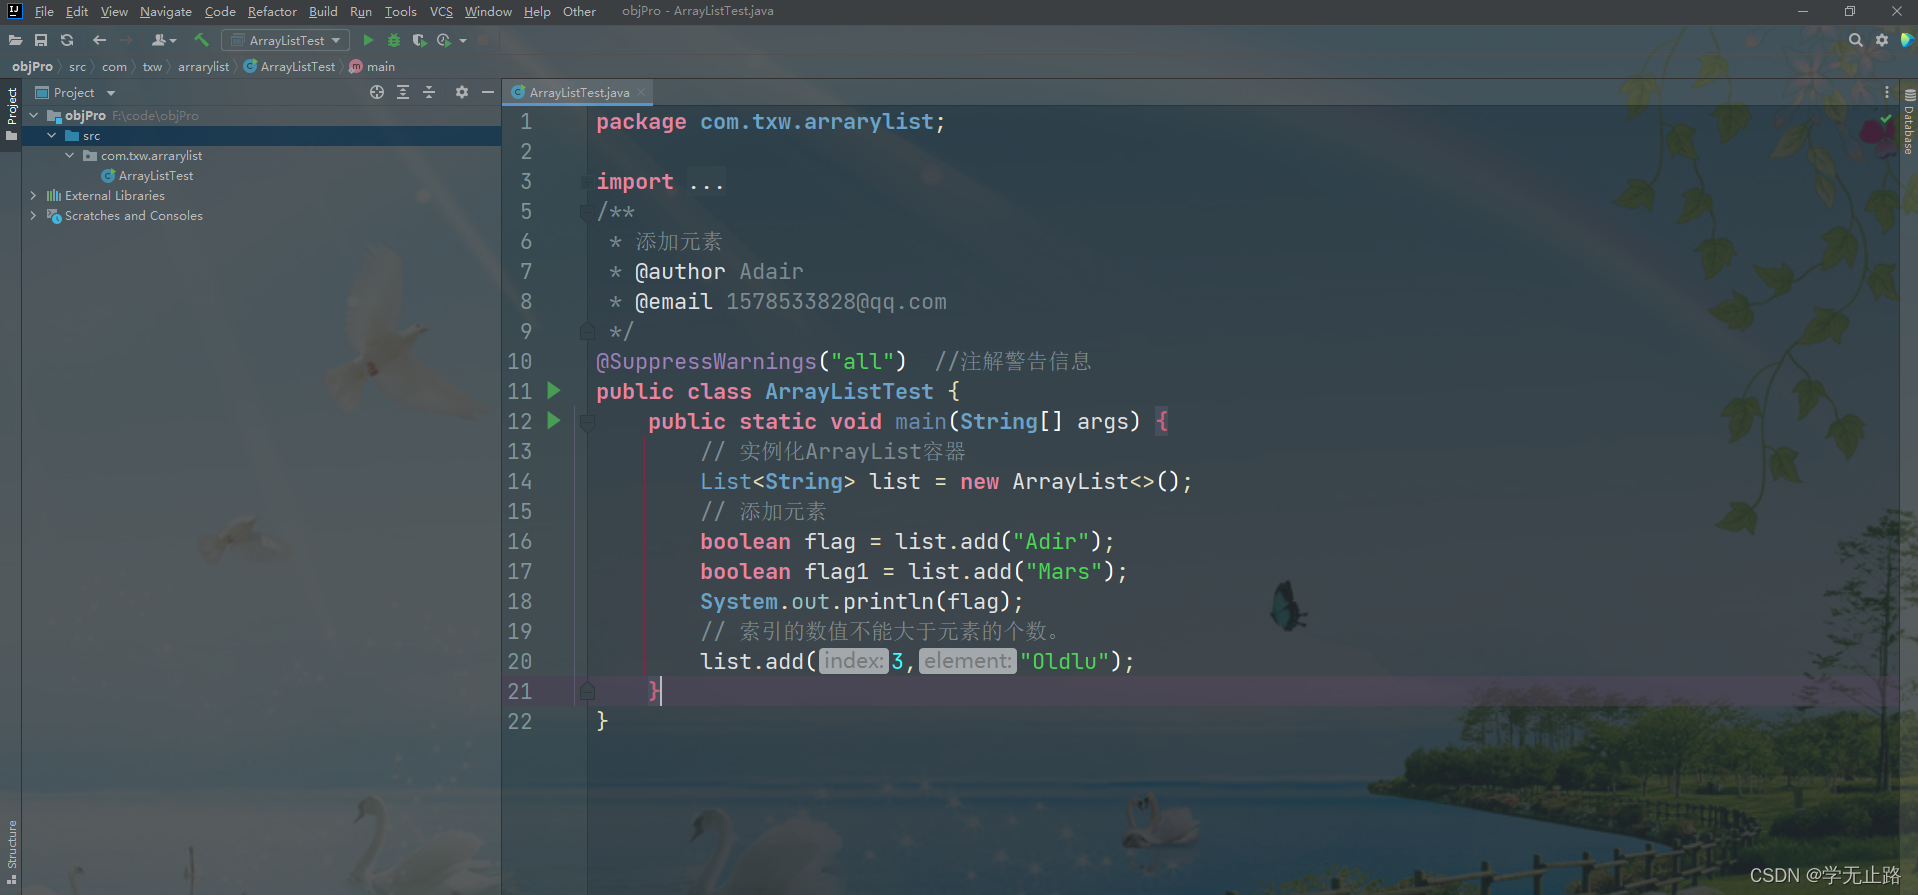
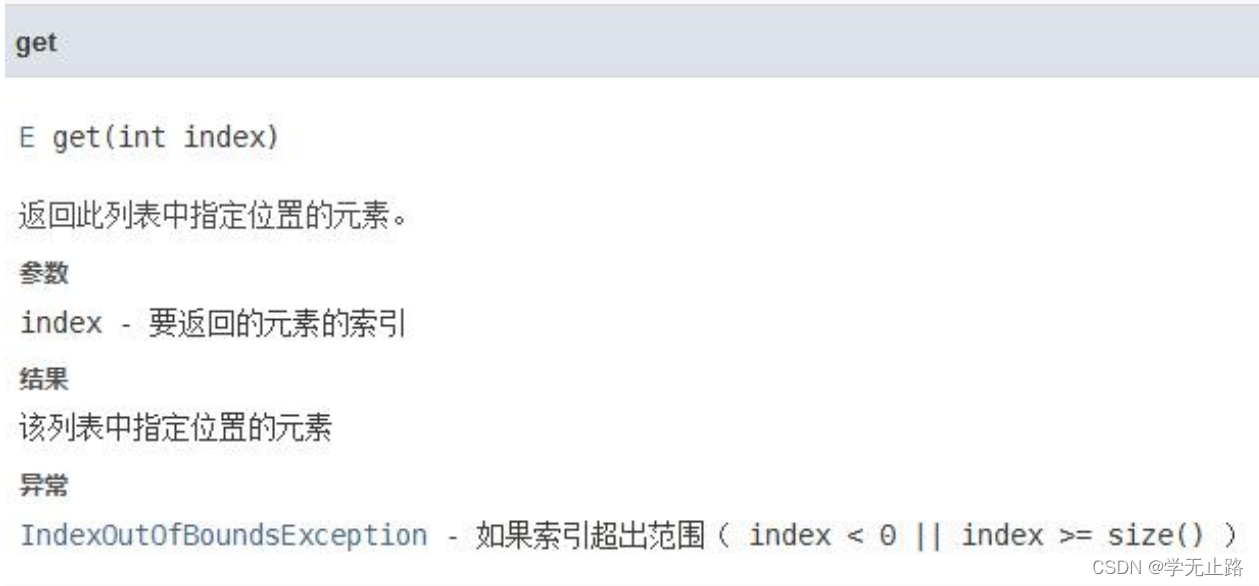
3.4.2 获取元素
演示的代码如下:
package com.txw.arrarylist;
import java.util.ArrayList;
import java.util.List;
/**
* 获取元素
* @author Adair
* @email 1578533828@qq.com
*/
@SuppressWarnings("all") //注解警告信息
public class ArrayListTest {
public static void main(String[] args) {
// 实例化ArrayList容器
List<String> list = new ArrayList<>();
// 添加元素
boolean flag = list.add("Adir");
boolean flag1 = list.add("Mars");
System.out.println(flag);
// 索引的数值不能大于元素的个数。
// list.add(3,"Oldlu");
// 通过指定索引位置获取元素
System.out.println(list.get(0));
System.out.println(list.get(1));
System.out.println("---------------");
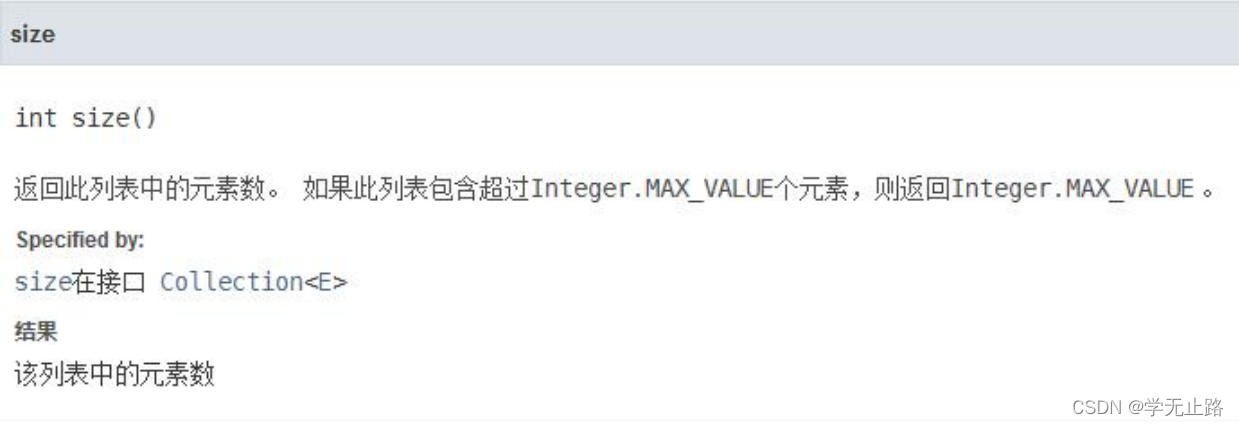
// 通过循环获取集合中所用元素,size():返回集合中元素个数
for(int i=0;i<list.size();i++){
System.out.println(list.get(i));
}
}
}
如图所示: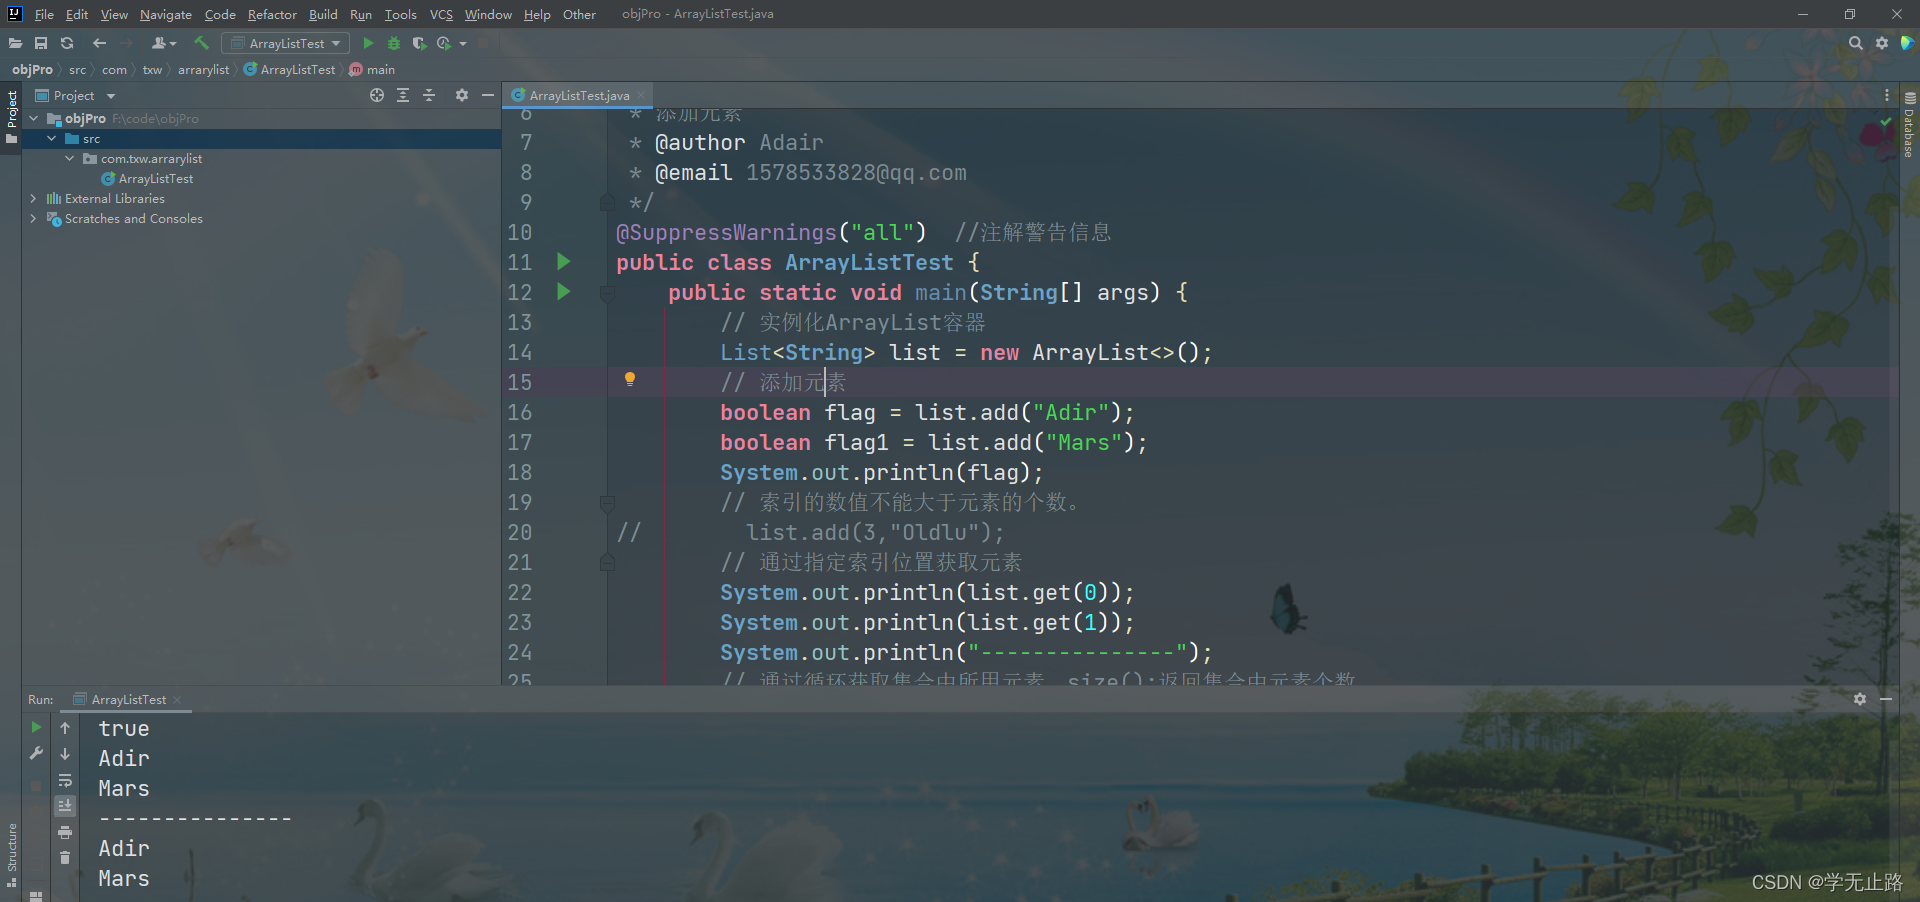
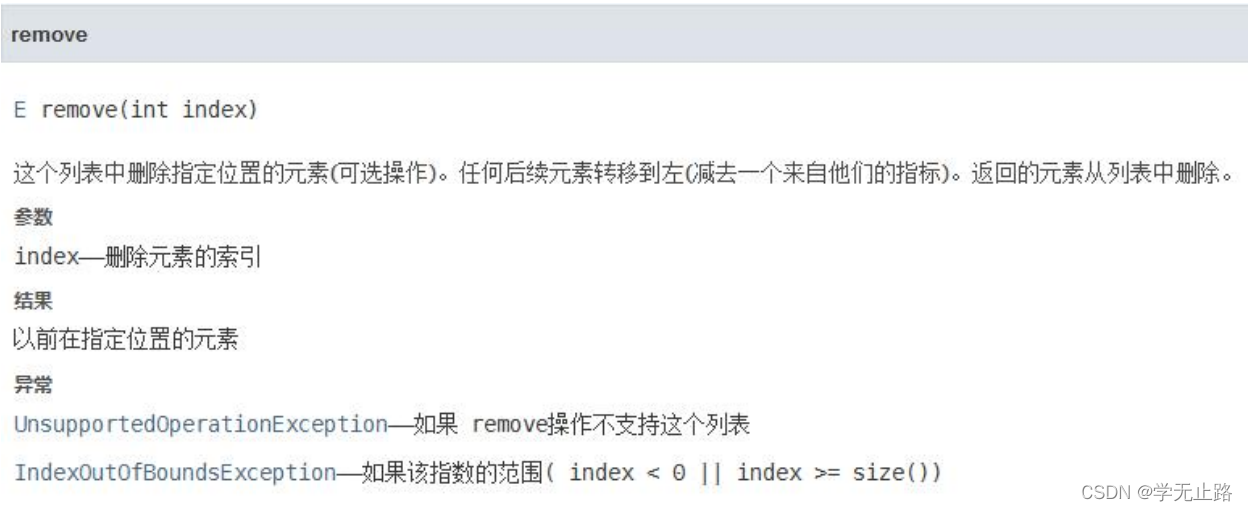
3.4.3 删除元素
3.4.3.1 根据索引删除元素
演示的代码如下:
package com.txw.arrarylist;

import java.util.ArrayList;
import java.util.List;
/**
 * 根据索引位置删除元素
 * @author Adair
 * @email 1578533828@qq.com
 */
@SuppressWarnings("all")  //注解警告信息
public class ArrayListTest {
    public static void main(String[] args) {
        // 实例化ArrayList容器
        List<String> list = new ArrayList<>();
        // 添加元素
        list.add("Adir");
        list.add("Mars");
        list.add("Oldlu");
        // 根据索引位置删除元素
        String value = list.remove(2);
        System.out.println(value);
        for (int i = 0; i < list.size(); i++) {
            System.out.println(list.get(i));
        }
    }
}
如图所示:
3.4.3.2 删除指定元素
演示的代码如下:
package com.txw.arrarylist;

import java.util.ArrayList;
import java.util.List;
/**
 * 删除指定元素
 * @author Adair
 * @email 1578533828@qq.com
 */
@SuppressWarnings("all")  //注解警告信息
public class ArrayListTest {
    public static void main(String[] args) {
        // 实例化ArrayList容器
        List<String> list = new ArrayList<>();
        // 添加元素
        list.add("Adir");
        list.add("Mars");
        list.add("Oldlu");
        //删除指定元素
        boolean flag = list.remove("itbz");
        System.out.println(flag);
        for(int i = 0;i < list.size();i++){
            System.out.println(list.get(i));
        }
    }
}
如图所示: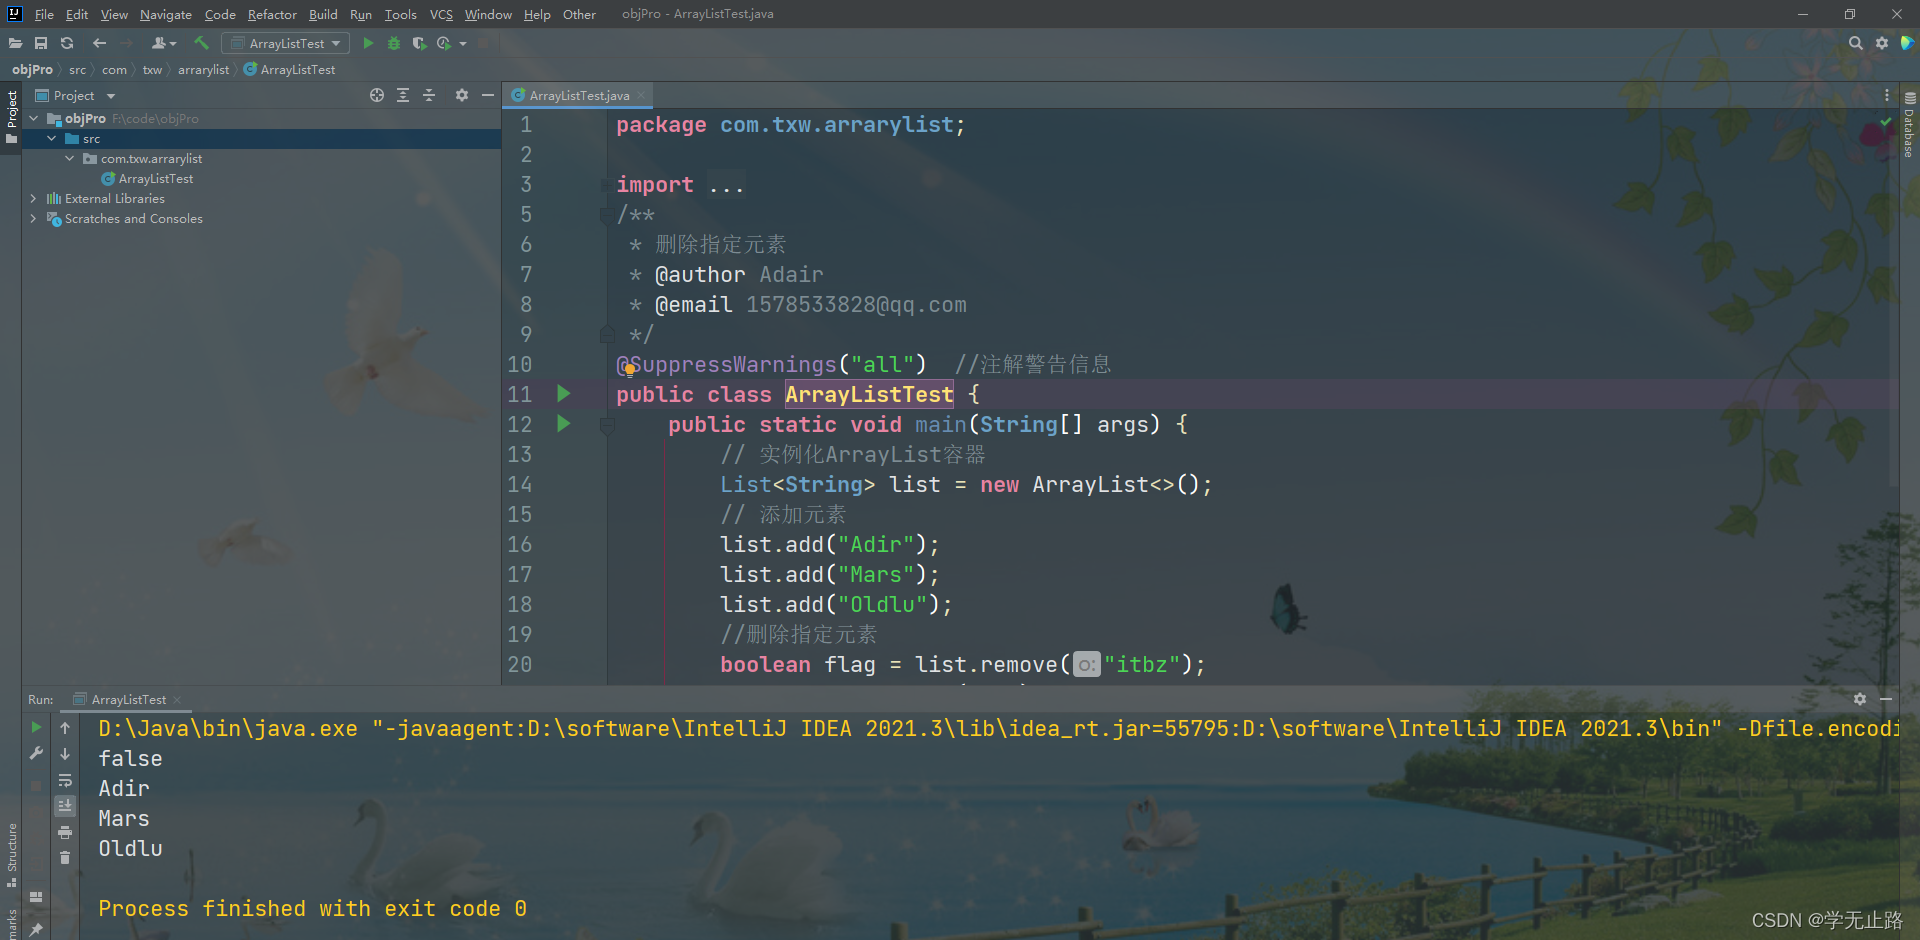
3.4.4 替换元素

演示的代码如下:
package com.txw.arrarylist;

import java.util.ArrayList;
import java.util.List;
/**
 * 替换元素
 * @author Adair
 * @email 1578533828@qq.com
 */
@SuppressWarnings("all")  //注解警告信息
public class ArrayListTest {
    public static void main(String[] args) {
        // 实例化ArrayList容器
        List<String> list = new ArrayList<>();
        // 添加元素
        list.add("Adir");
        list.add("Mars");
        list.add("Oldlu");
        // 替换元素
        String val = list.set(0, "Adair999");
        System.out.println(val);
        for(int i = 0;i < list.size();i++){
            System.out.println(list.get(i));
        }
    }
}
如图所示: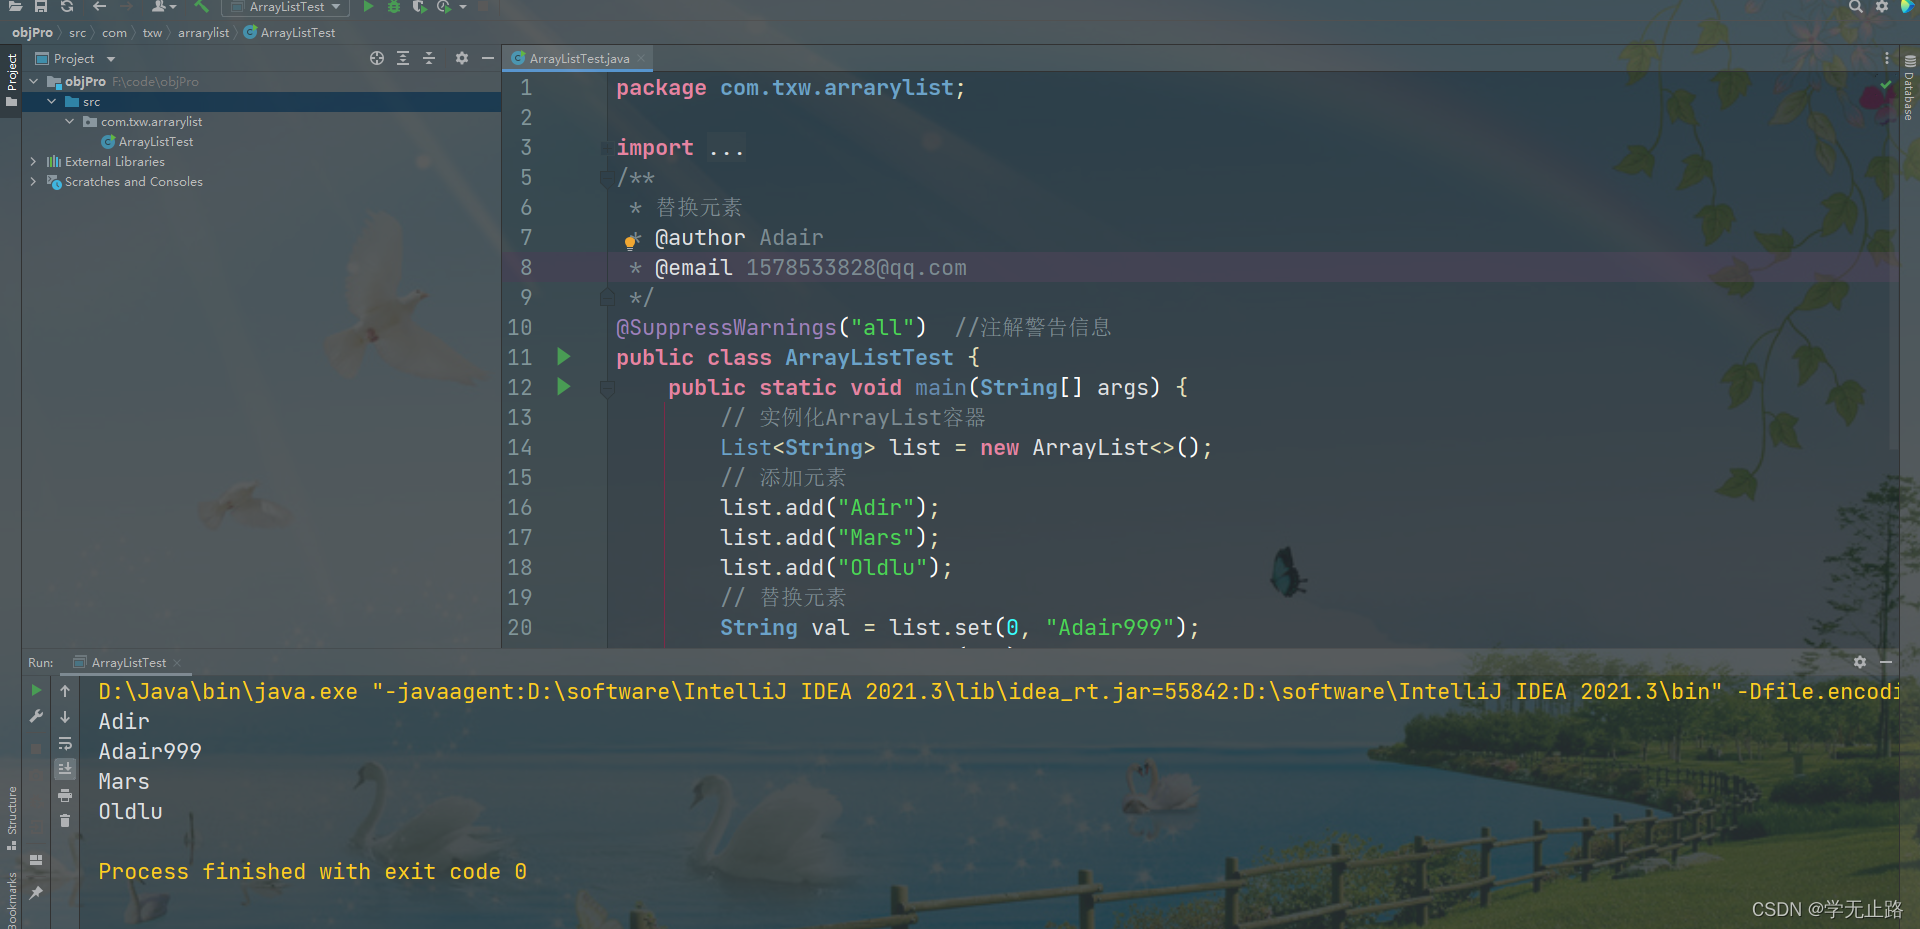
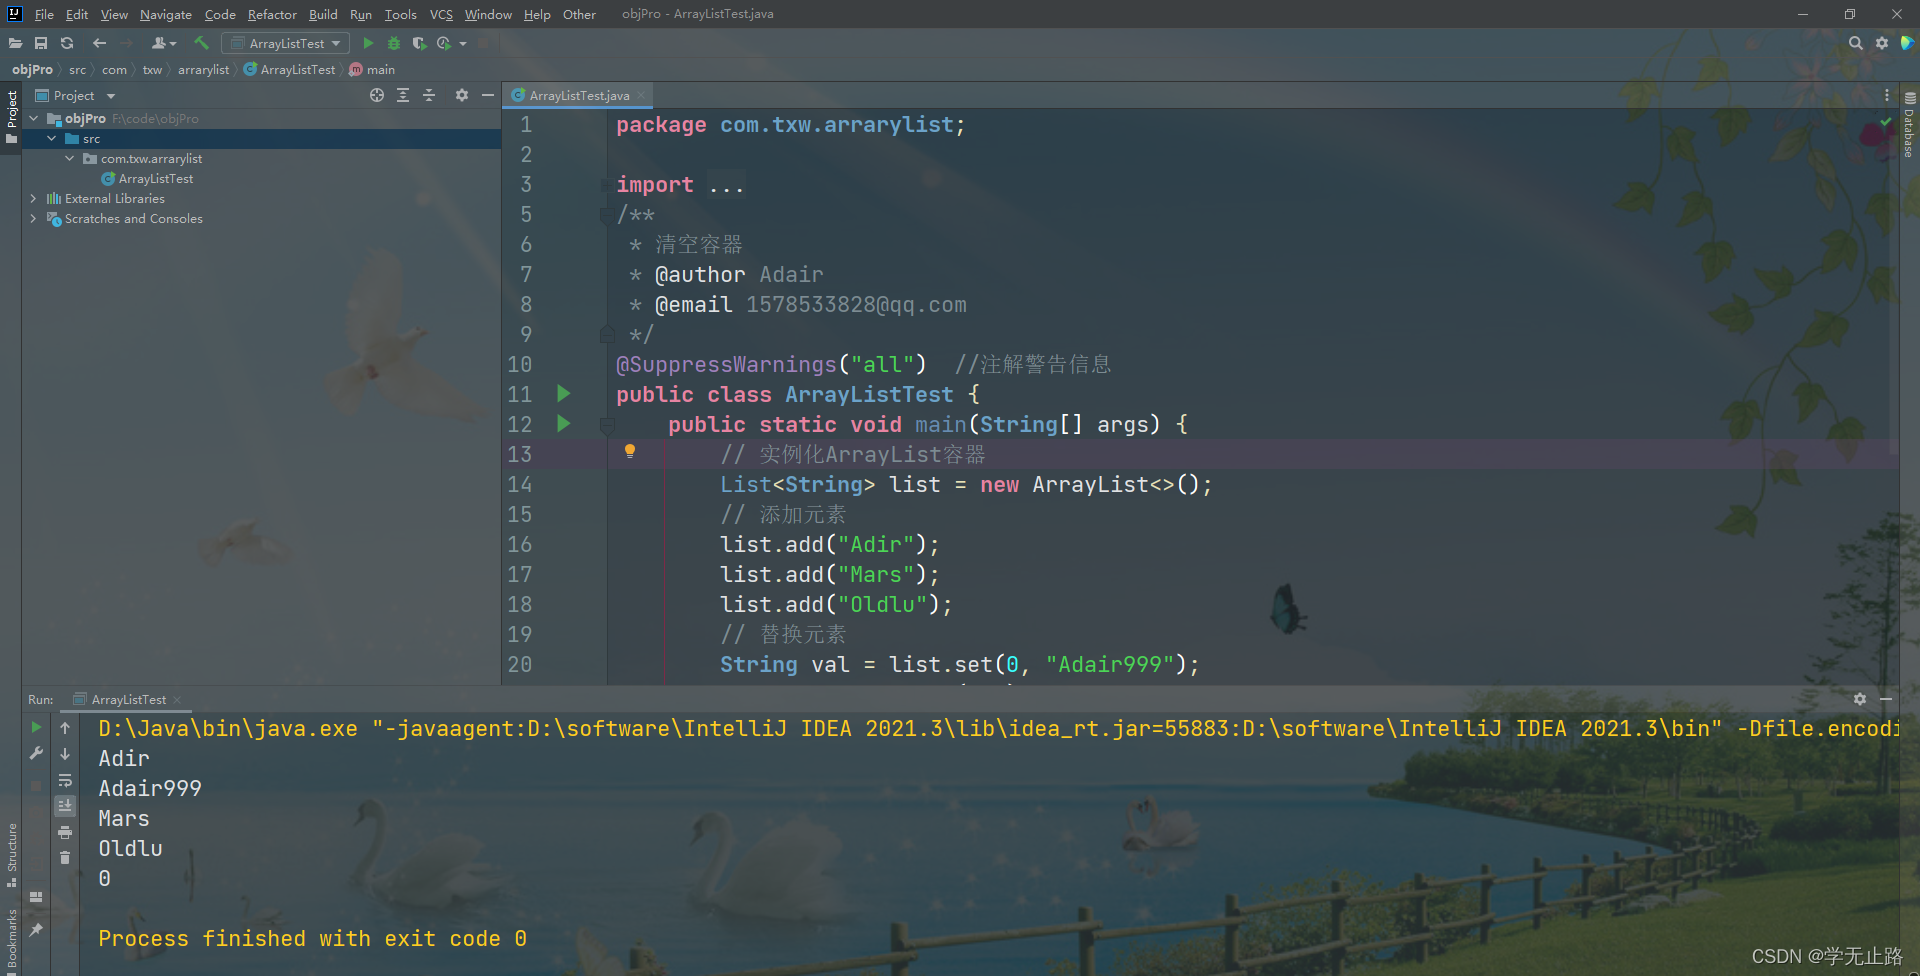
3.4.5 清空容器

演示的代码如下:
package com.txw.arrarylist;

import java.util.ArrayList;
import java.util.List;
/**
 * 清空容器
 * @author Adair
 * @email 1578533828@qq.com
 */
@SuppressWarnings("all")  //注解警告信息
public class ArrayListTest {
    public static void main(String[] args) {
        // 实例化ArrayList容器
        List<String> list = new ArrayList<>();
        // 添加元素
        list.add("Adir");
        list.add("Mars");
        list.add("Oldlu");
        // 替换元素
        String val = list.set(0, "Adair999");
        System.out.println(val);
        for(int i = 0;i < list.size();i++){
            System.out.println(list.get(i));
        }
        // 清空容器
        list.clear();
        System.out.println(list.size());
    }
}
如图所示:
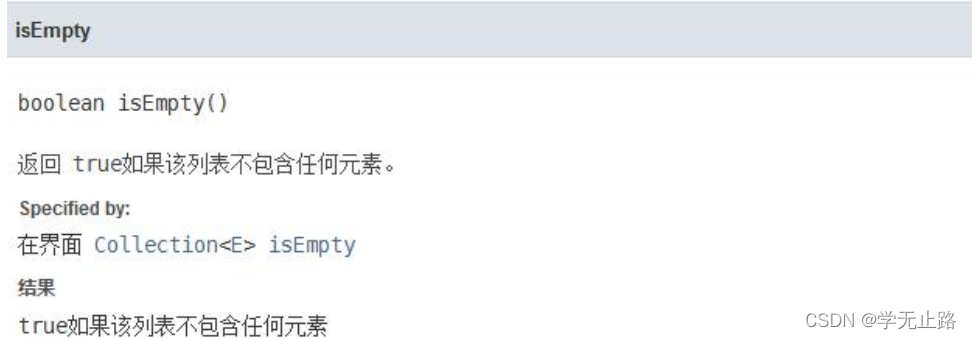
3.4.6 判断容器是否为空
演示的代码如下:
package com.txw.arrarylist;

import java.util.ArrayList;
import java.util.List;
/**
 * 判断容器是否为空
 * @author Adair
 * @email 1578533828@qq.com
 */
@SuppressWarnings("all")  //注解警告信息
public class ArrayListTest {
    public static void main(String[] args) {
        // 实例化ArrayList容器
        List<String> list = new ArrayList<>();
        // 添加元素
        list.add("Adir");
        list.add("Mars");
        list.add("Oldlu");
        // 如果容器为空则返回true,否则返回false
        boolean flag = list.isEmpty();
        System.out.println("flag = " + flag);
    }
}
如图所示: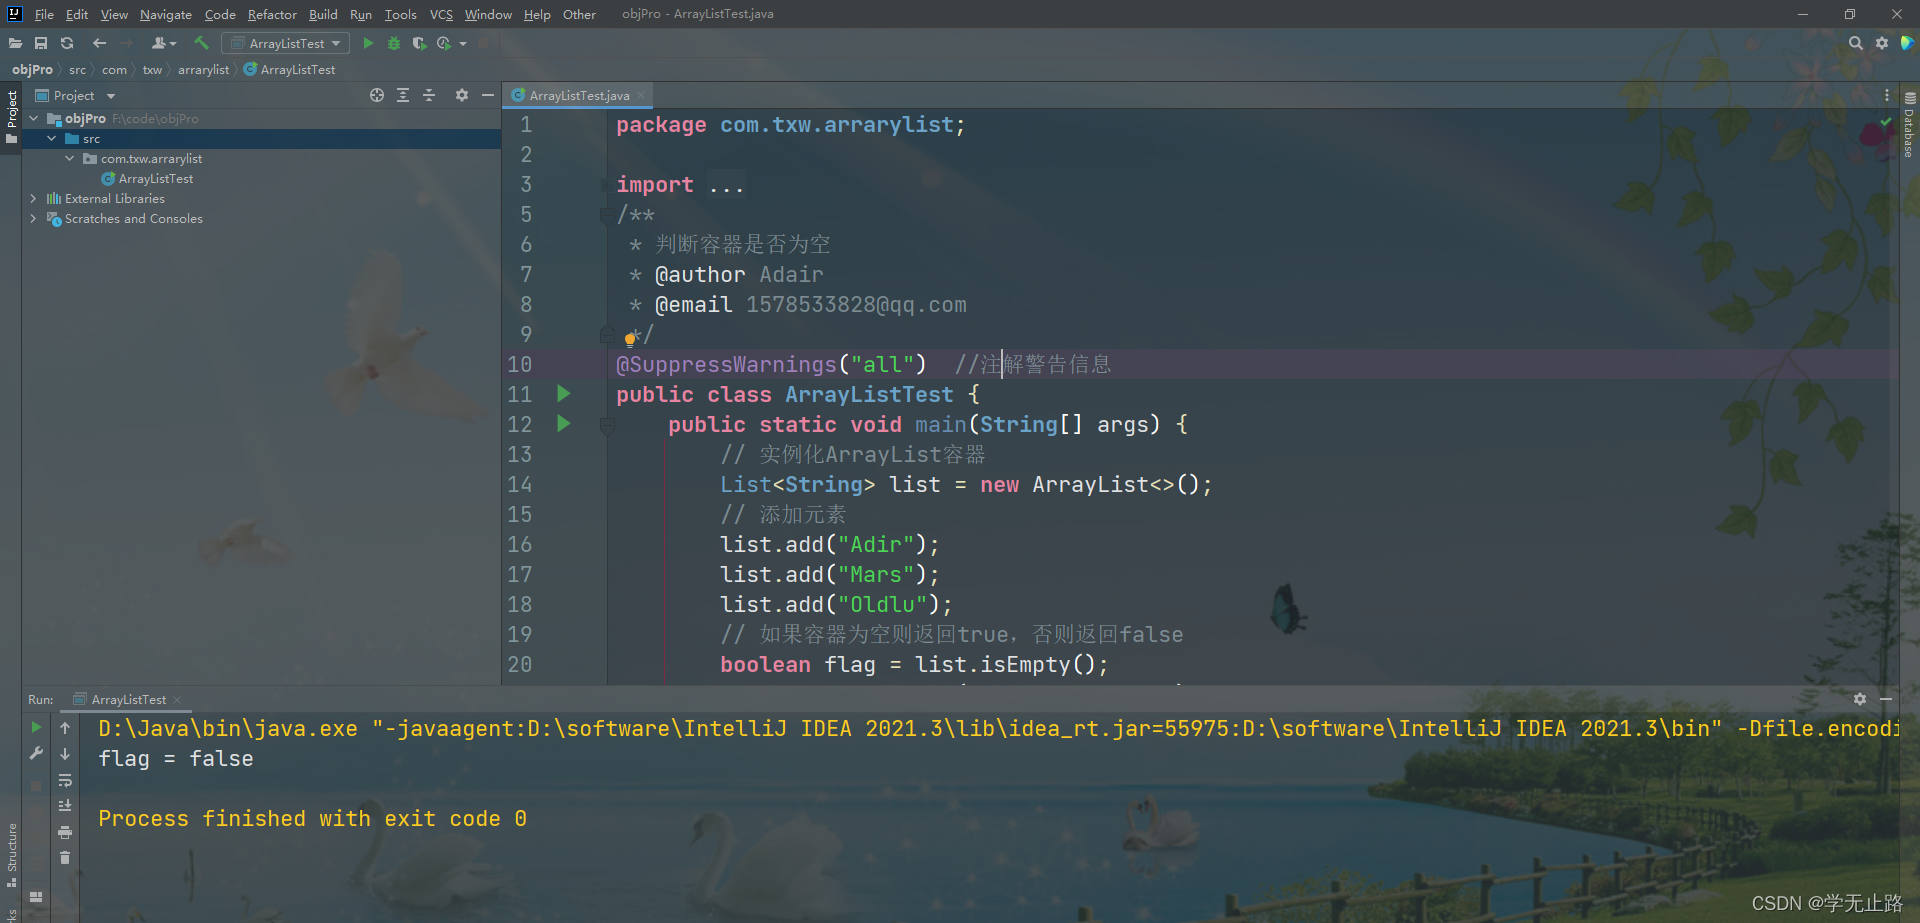
3.4.7 判断容器中是否包含指定元素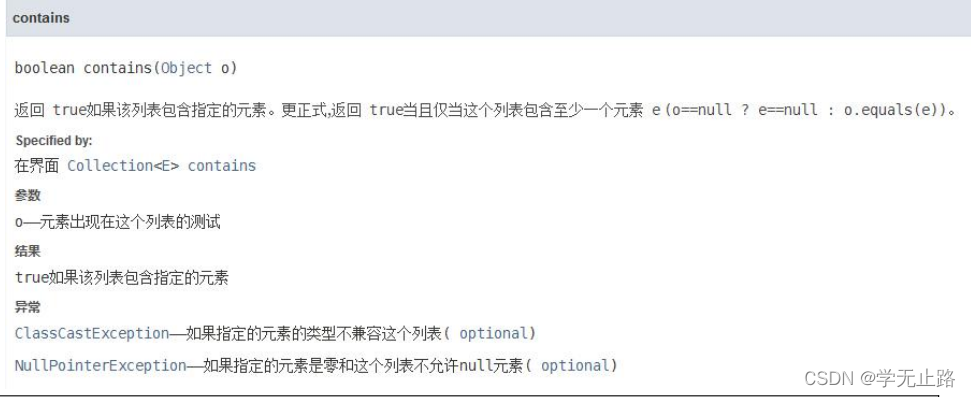
演示的代码如下:
package com.txw.arrarylist;

import java.util.ArrayList;
import java.util.List;
/**
 * 判断容器中是否包含指定元素
 * @author Adair
 * @email 1578533828@qq.com
 */
@SuppressWarnings("all")  //注解警告信息
public class ArrayListTest {
    public static void main(String[] args) {
        // 实例化ArrayList容器
        List<String> list = new ArrayList<>();
        // 添加元素
        list.add("Adir");
        list.add("Mars");
        list.add("Oldlu");
        // 如果在容器中包含指定元素则返回true,否则返回false。
        boolean flag = list.contains("Adair111");
        System.out.println("flag = " + flag);
    }
}
如图所示: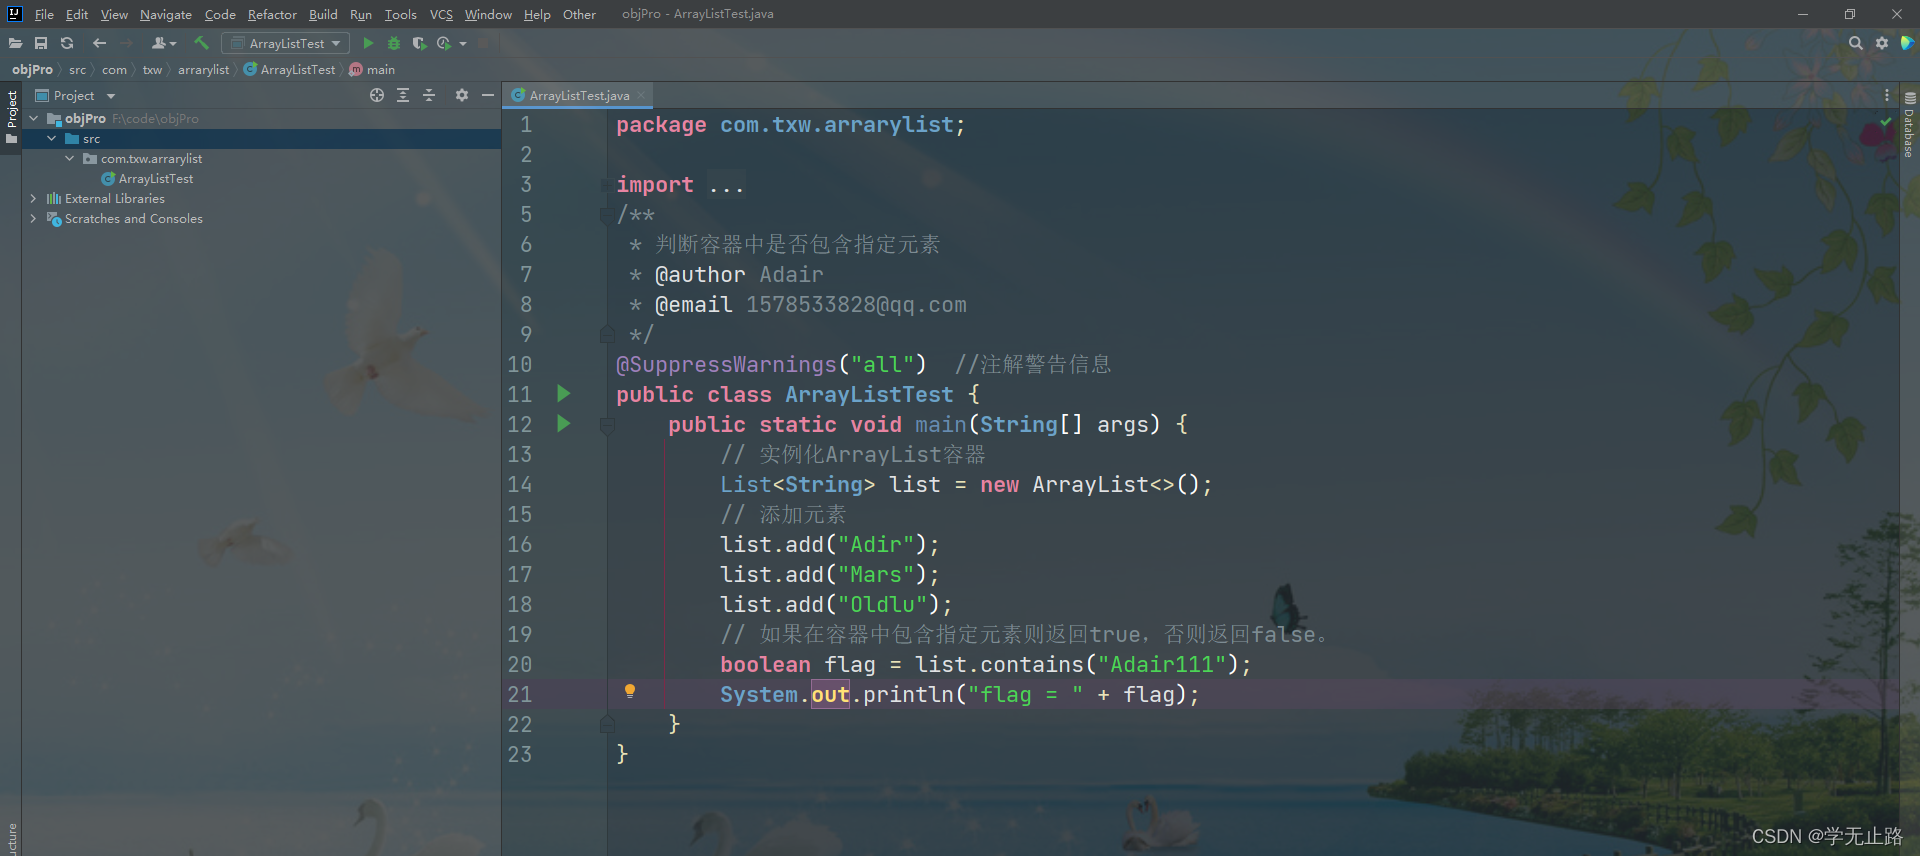
3.4.8 查找元素的位置
3.4.8.1 查找元素第一次出现的位置

演示的代码如下:
package com.txw.arrarylist;

import java.util.ArrayList;
import java.util.List;
/**
 * 查找元素第一次出现的位置
 * @author Adair
 * @email 1578533828@qq.com
 */
@SuppressWarnings("all")  //注解警告信息
public class ArrayListTest {
    public static void main(String[] args) {
        // 实例化ArrayList容器
        List<String> list = new ArrayList<>();
        // 添加元素
        list.add("Adir");
        list.add("Mars");
        list.add("Oldlu");
        // indexOf 方法返回的是元素在容器中第一次出现的位置。
        // 在容器中不存在则返回-1
        int index = list.indexOf("Adair999");
        System.out.println("index = " + index);
    }
}
如图所示: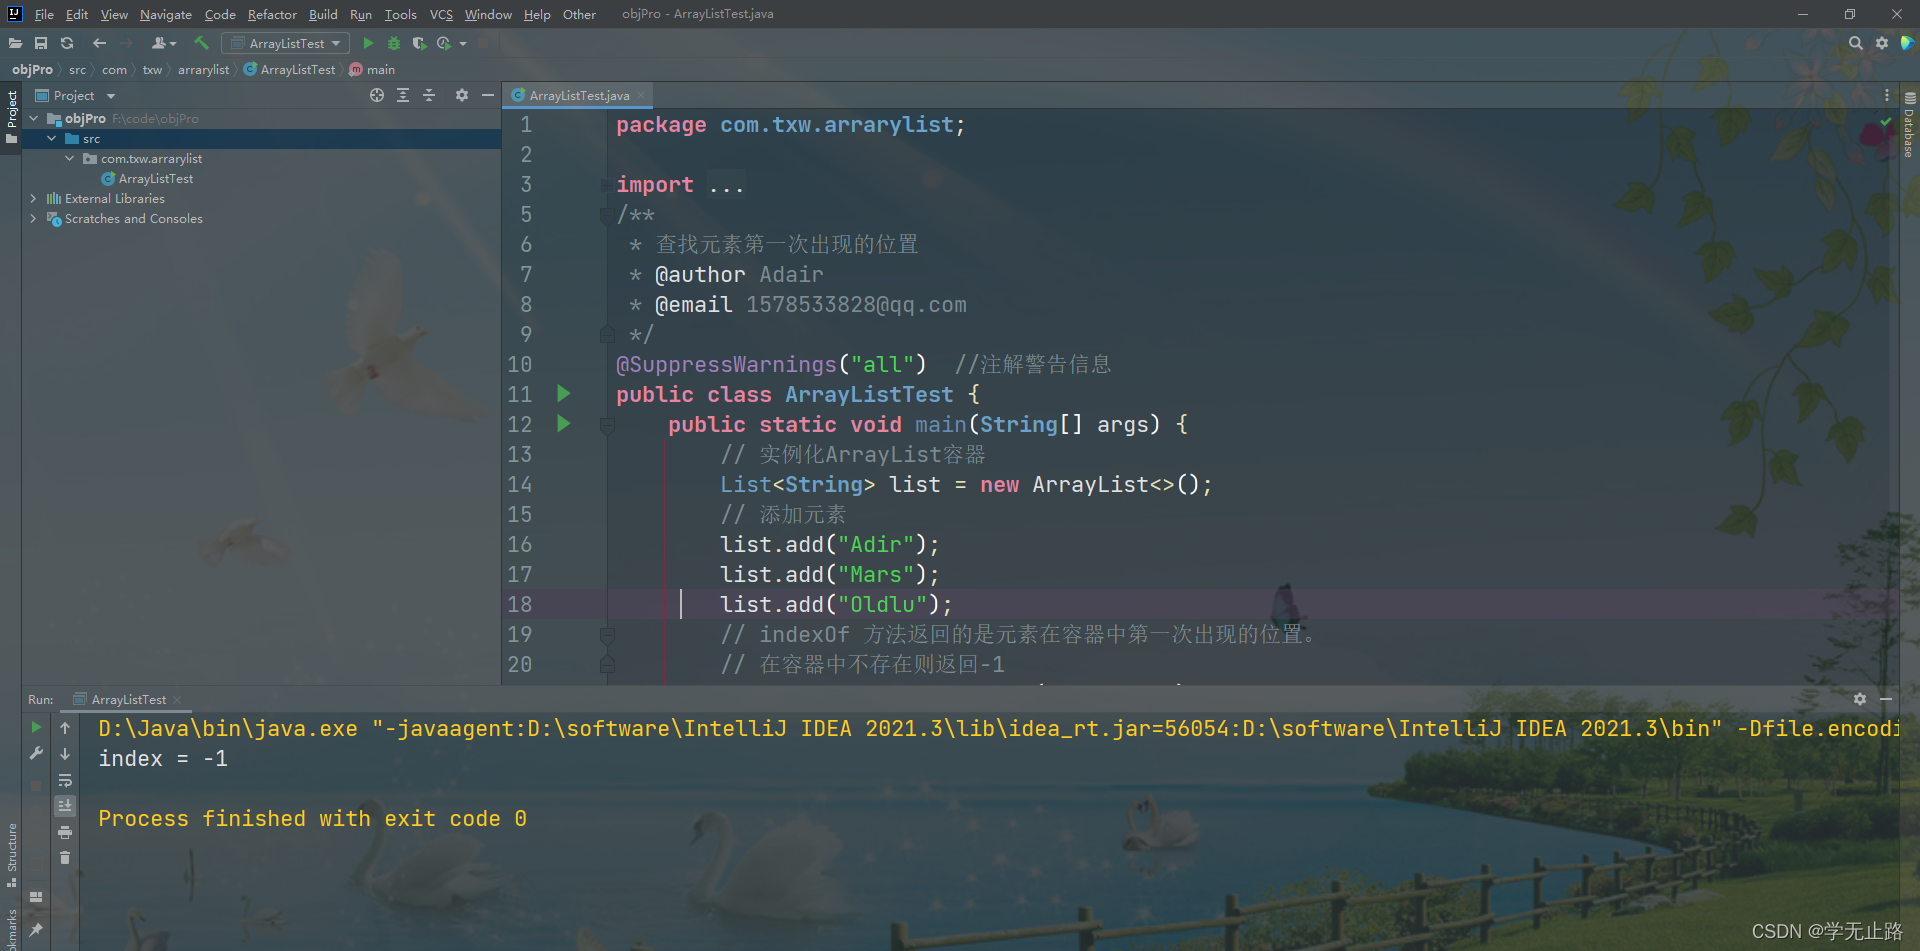
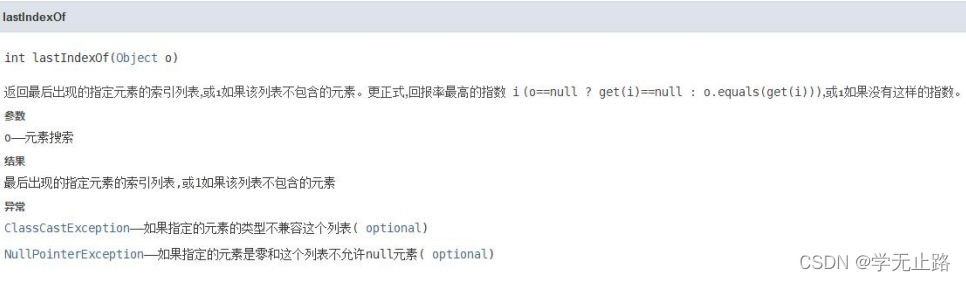
3.4.8.2 查找元素最后一次出现的位置
 演示的代码如下:
package com.txw.arrarylist;

import java.util.ArrayList;
import java.util.List;
/**
 * 查找元素最后一次出现的位置
 * @author Adair
 * @email 1578533828@qq.com
 */
@SuppressWarnings("all")  //注解警告信息
public class ArrayListTest {
    public static void main(String[] args) {
        // 实例化ArrayList容器
        List<String> list = new ArrayList<>();
        // 添加元素
        list.add("Adir");
        list.add("Mars");
        list.add("Oldlu");
        // lastIndexOf 方法返回的是元素在容器中最后一次出现的位置,如果元素
        // 在容器中不存在则返回-1
        int index = list.lastIndexOf("Adair999");
        System.out.println("index = " + index);
    }
}
如图所示: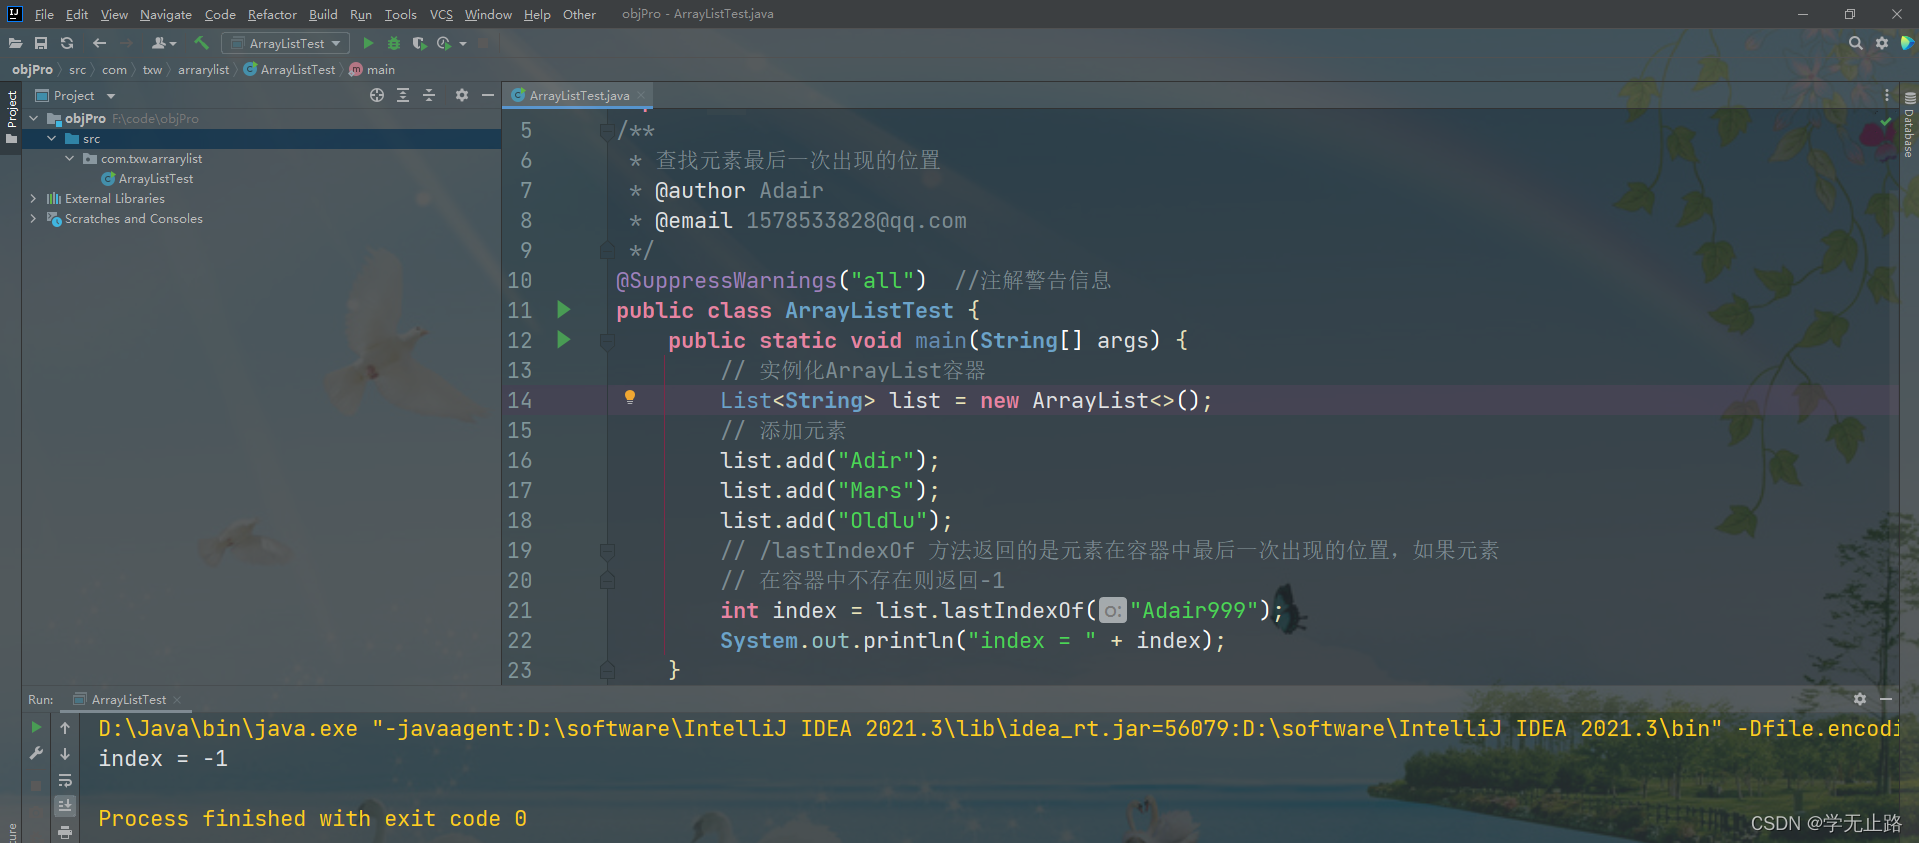
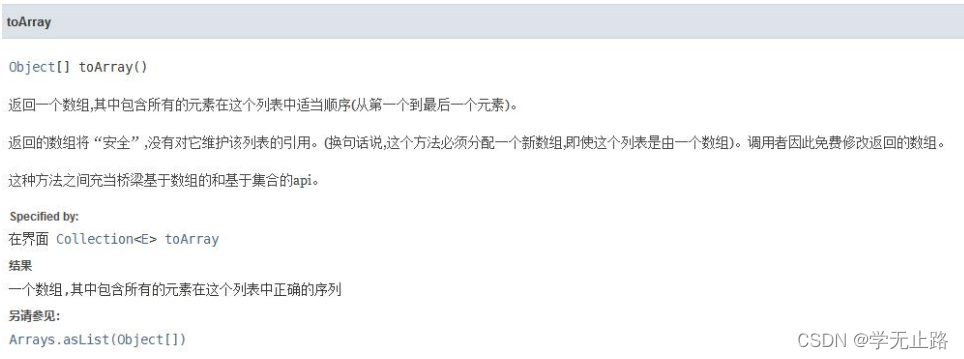
3.4.9 将单例集合转换成数组
3.4.9.1 转换为 Object 数组
演示的代码如下:
package com.txw.arrarylist;

import java.util.ArrayList;
import java.util.List;
/**
 * 转换为Object数组
 * @author Adair
 * @email 1578533828@qq.com
 */
@SuppressWarnings("all")  //注解警告信息
public class ArrayListTest {
    public static void main(String[] args) {
        // 实例化ArrayList容器
        List<String> list = new ArrayList<>();
        // 添加元素
        list.add("Adir");
        list.add("Mars");
        list.add("Oldlu");
        // 将ArrayList转换为Object[]。
        // 但是不能将转换的数组做强制类型转换。
        Object[] arr = list.toArray();
        for (int i = 0; i < arr.length; i++) {
            String  str = (String)arr[i];
            System.out.println(arr);
        }
    }
}
如图所示:
3.4.9.2 转换泛型类型数组
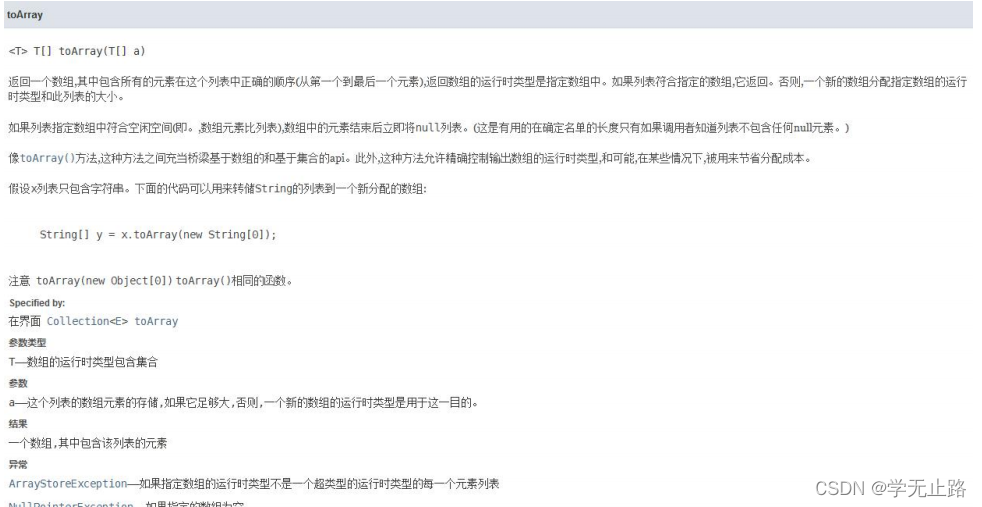
演示的代码如下:
package com.txw.arrarylist;

import java.util.ArrayList;
import java.util.List;
/**
 * 转换泛型类型数组
 * @author Adair
 * @email 1578533828@qq.com
 */
@SuppressWarnings("all")  //注解警告信息
public class ArrayListTest {
    public static void main(String[] args) {
        // 实例化ArrayList容器
        List<String> list = new ArrayList<>();
        // 添加元素
        list.add("Adir");
        list.add("Mars");
        list.add("Oldlu");
        // 可以将单例集合转换为指定类型数组。
        // 但是。类型需要参考泛型中的类型
        String[] arr = list.toArray(new String[list.size()]);
        for (int i = 0; i < arr.length; i++) {
            System.out.println(arr[i]);
        }
    }
}
如图所示: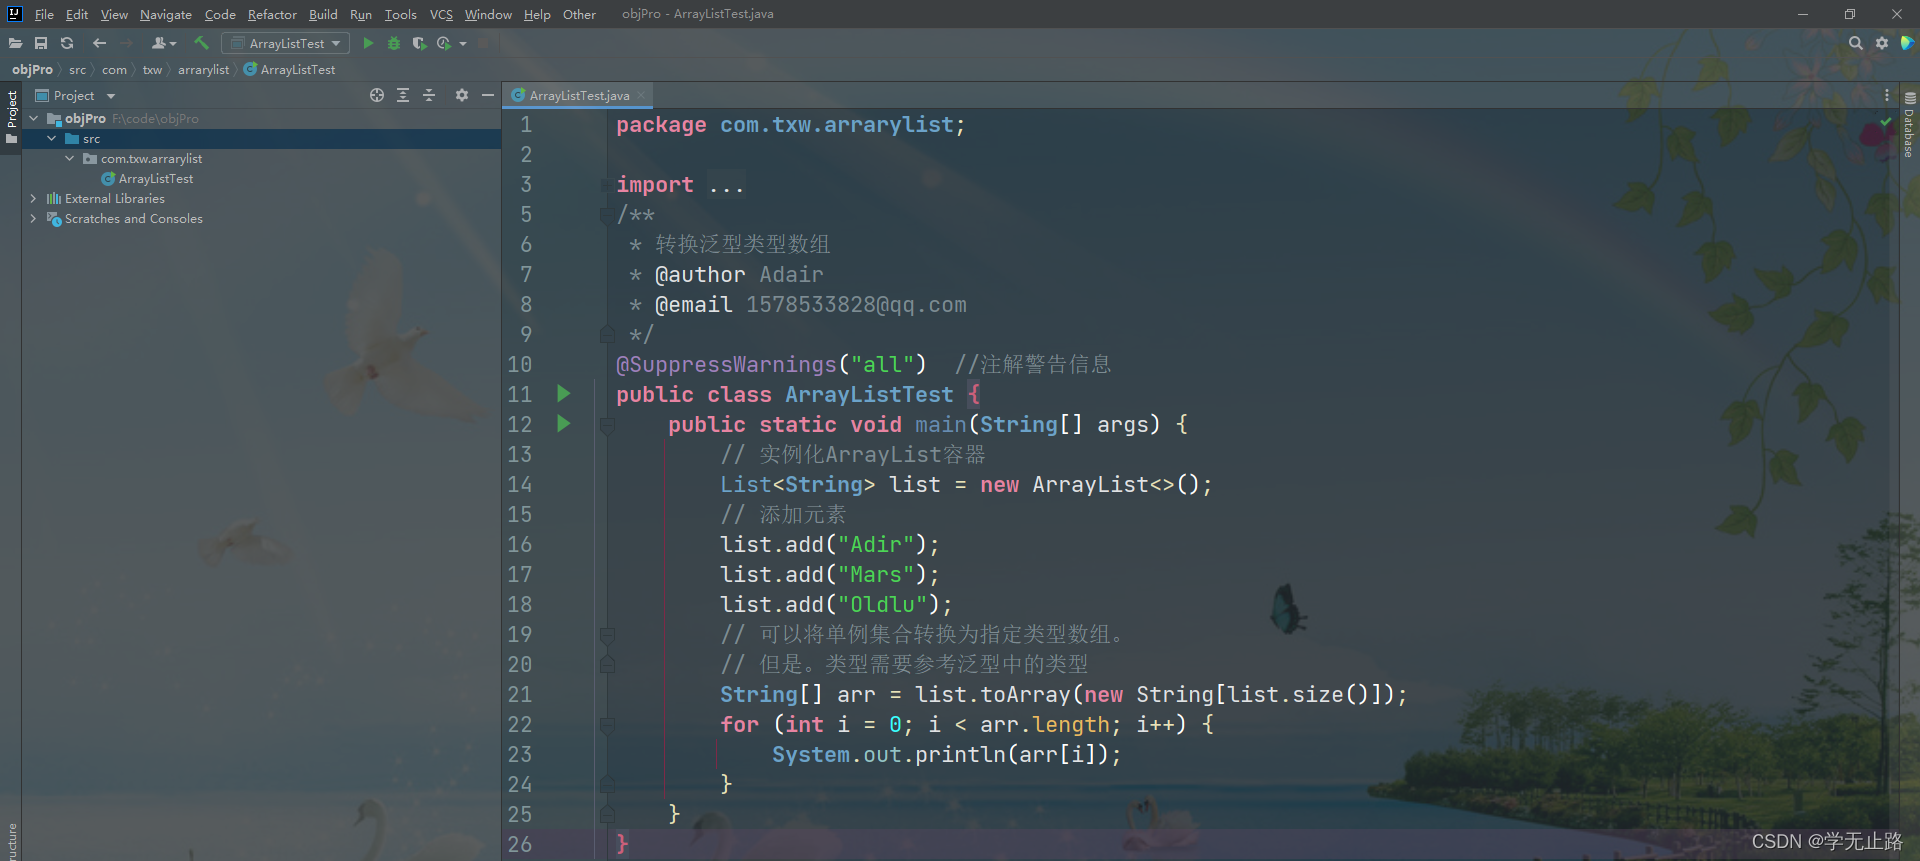
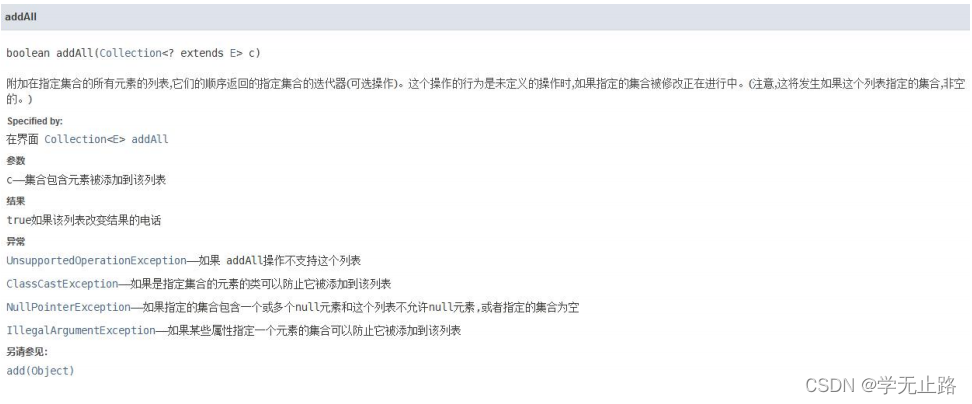
3.4.10 容器的并集操作
演示的代码如下:
package com.txw.arrarylist;

import java.util.ArrayList;
import java.util.List;
/**
 * 容器的并集操作
 * @author Adair
 * @email 1578533828@qq.com
 */
@SuppressWarnings("all")  //注解警告信息
public class ArrayListTest {
    public static void main(String[] args) {
        // 容器的并集操作
        List<String> a = new ArrayList<>();
        a.add("a");
        a.add("b");
        a.add("c");
        List<String> b = new ArrayList<>();
        b.add("b");
        b.add("c");
        b.add("d");
        // a并b
        boolean flag = a.addAll(b);
        System.out.println(flag);
        for (String s : a) {
            System.out.println(s);
        }
    }
}
如图所示: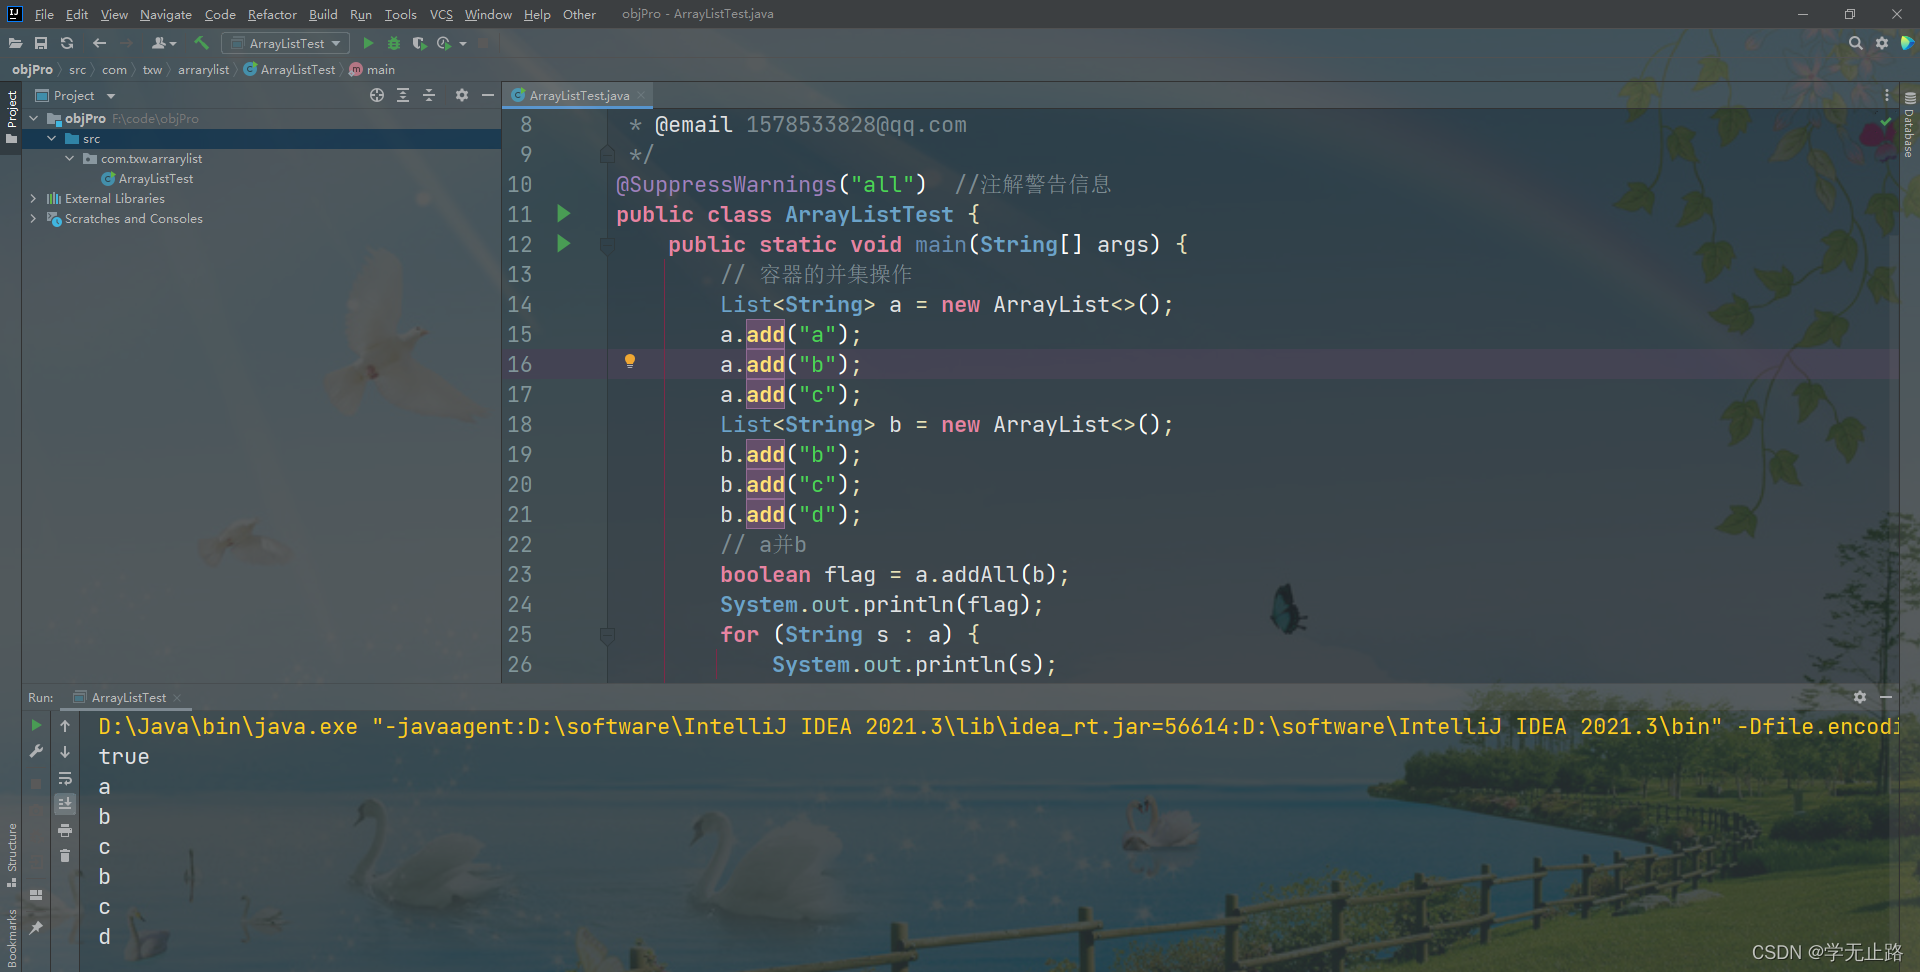
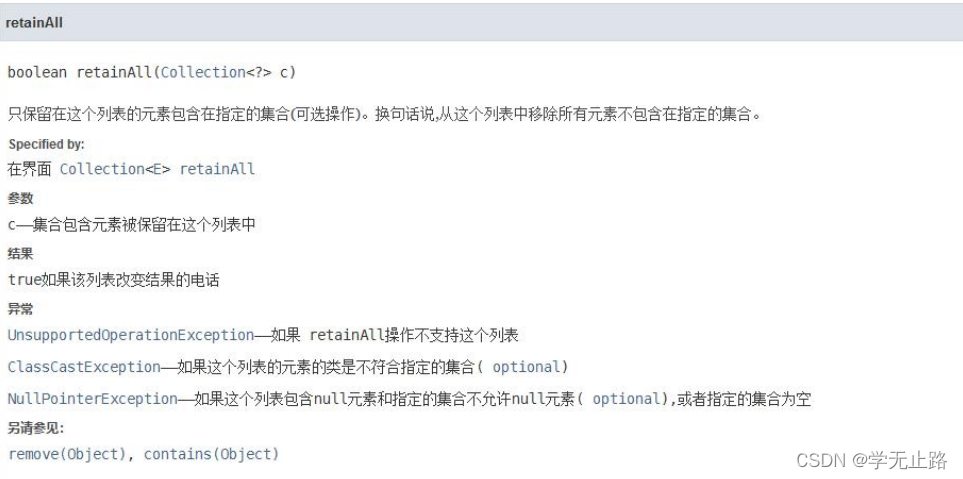
3.4.11 容器的交集操作
演示的代码如下:
package com.txw.arrarylist;

import java.util.ArrayList;
import java.util.List;
/**
 * 容器的交集操作
 * @author Adair
 * @email 1578533828@qq.com
 */
@SuppressWarnings("all")  //注解警告信息
public class ArrayListTest {
    public static void main(String[] args) {
        // 容器的交集操作
        List<String> a = new ArrayList<>();
        a.add("a");
        a.add("b");
        a.add("c");
        List<String> b = new ArrayList<>();
        b.add("b");
        b.add("c");
        b.add("d");
        // a并b
        boolean flag = a.retainAll(b);
        System.out.println(flag);
        for (String s : a) {
            System.out.println(s);
        }
    }
}
如图所示: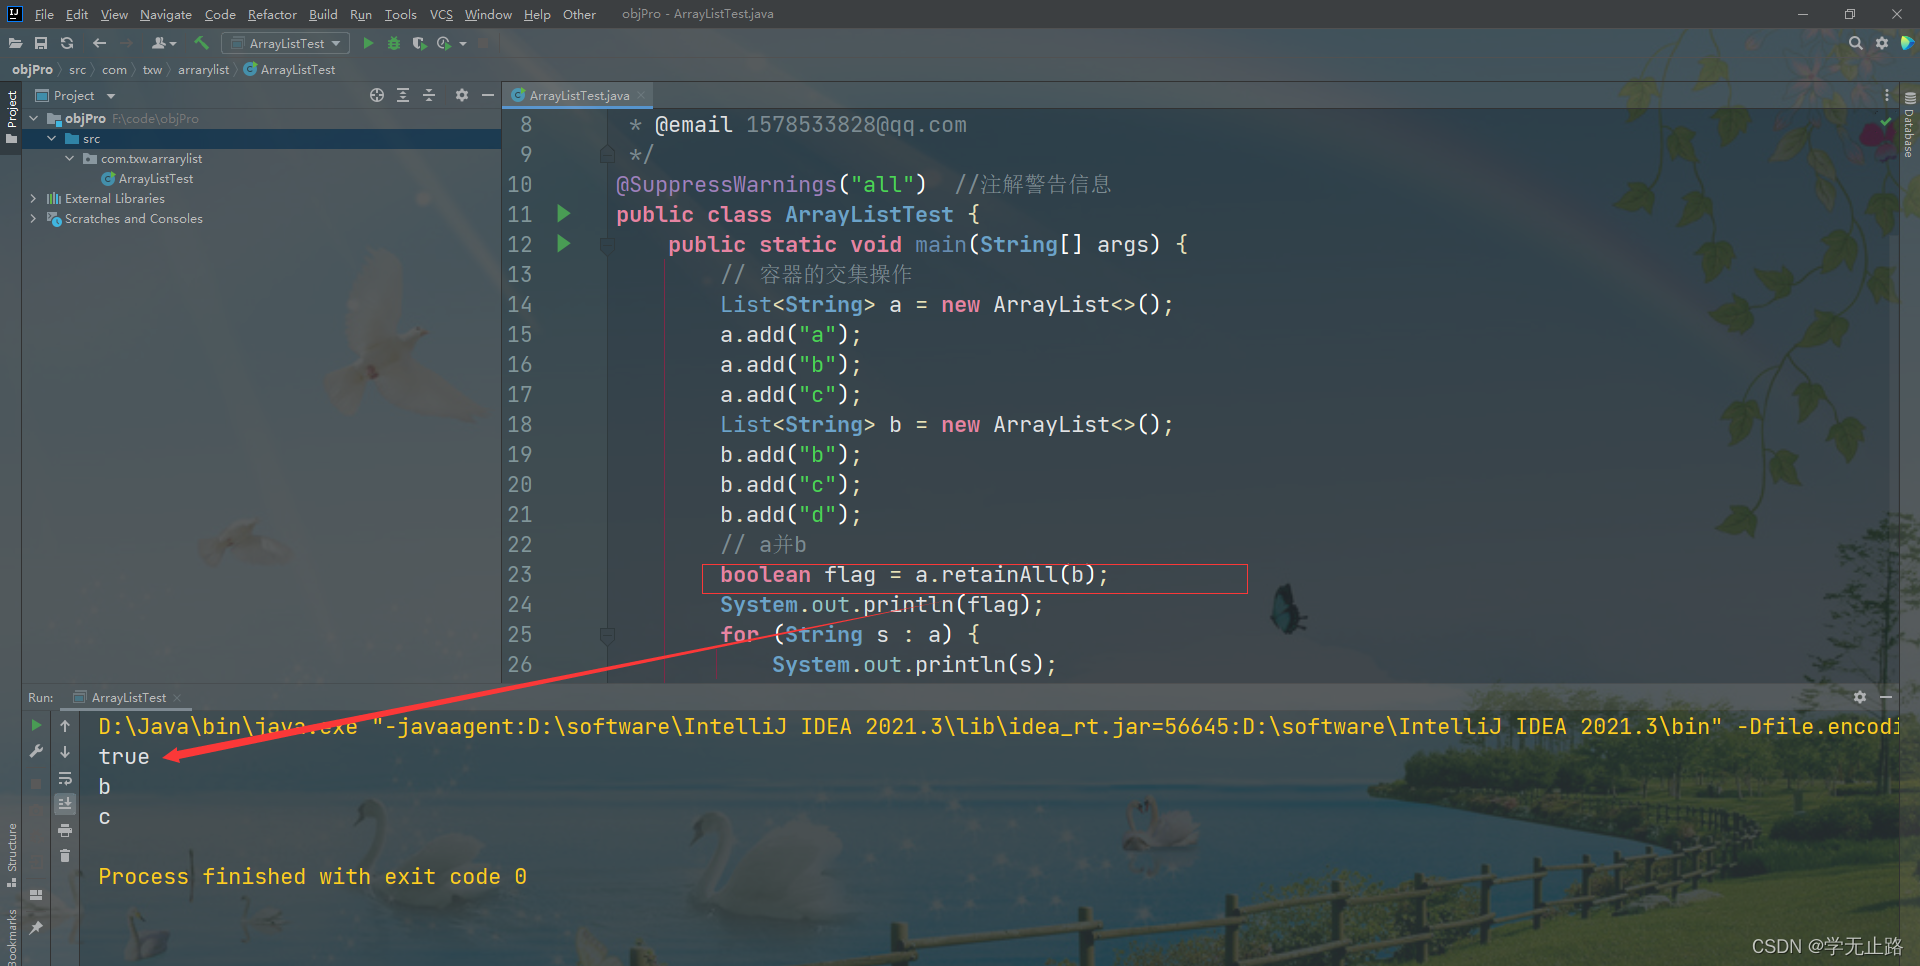
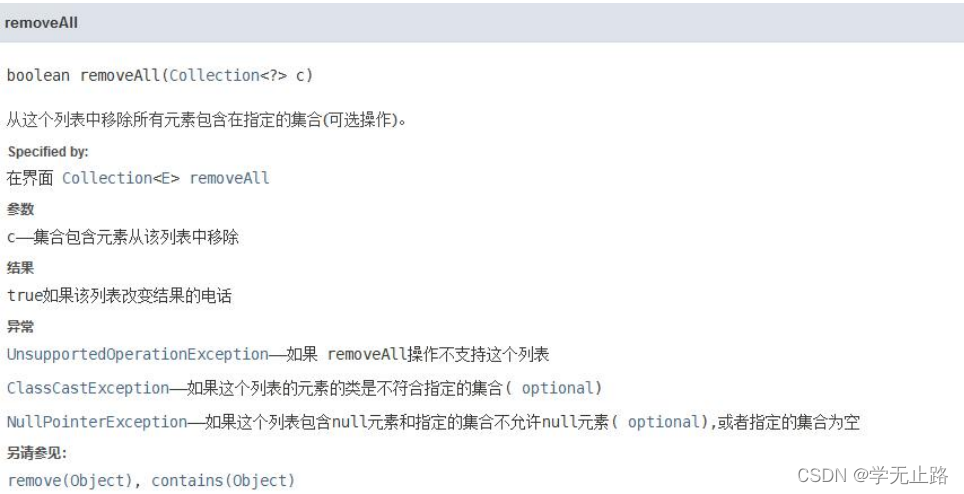
3.4.12 容器的差集操作
演示的代码如下:
package com.txw.arrarylist;

import java.util.ArrayList;
import java.util.List;
/**
 * 容器的差集操作
 * @author Adair
 * @email 1578533828@qq.com
 */
@SuppressWarnings("all")  //注解警告信息
public class ArrayListTest {
    public static void main(String[] args) {
        // 容器的差集操作
        List<String> a = new ArrayList<>();
        a.add("a");
        a.add("b");
        a.add("c");
        List<String> b = new ArrayList<>();
        b.add("b");
        b.add("c");
        b.add("d");
        // a并b
        boolean flag = a.removeAll(b);
        System.out.println(flag);
        for (String s : a) {
            System.out.println(s);
        }
    }
}
如图所示: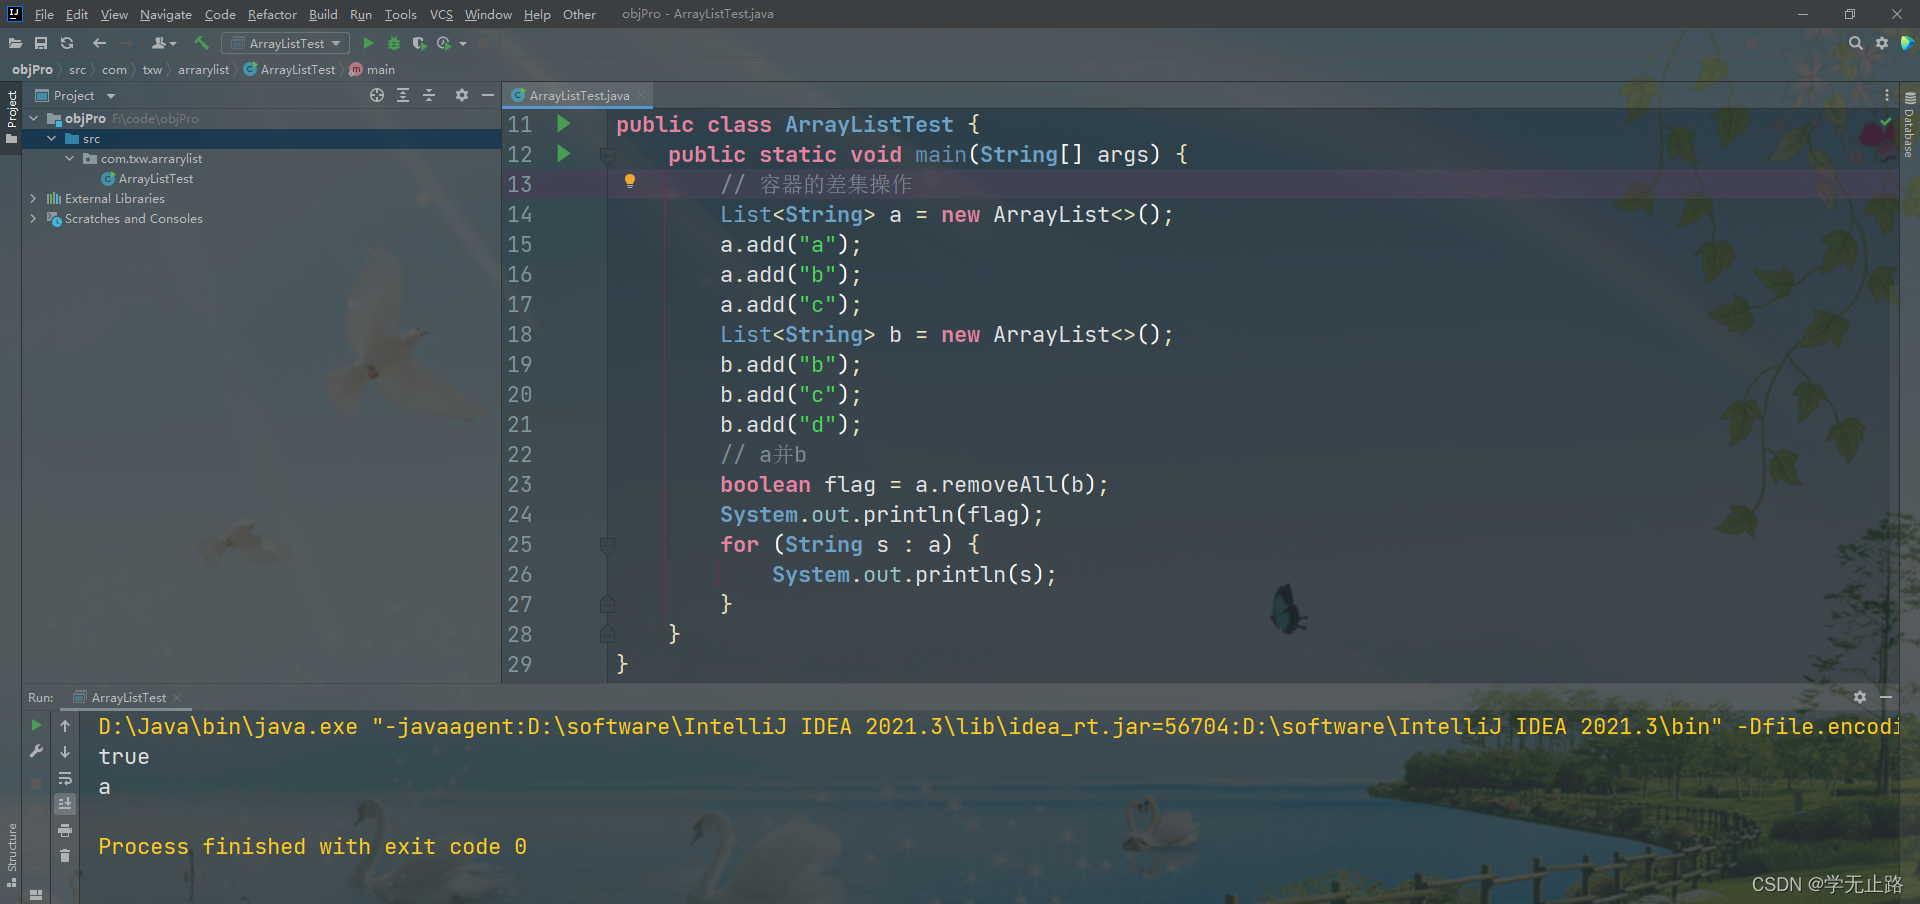
3.4.13 ArrayList 源码分析
3.4.13 ArrayList 源码分析
ArrayList 底层是用数组实现的存储。
    /**
     * Default initial capacity.
     */
    private static final int DEFAULT_CAPACITY = 10;

    /**
     * The array buffer into which the elements of the ArrayList are stored.
     * The capacity of the ArrayList is the length of this array buffer. Any
     * empty ArrayList with elementData == DEFAULTCAPACITY_EMPTY_ELEMENTDATA
     * will be expanded to DEFAULT_CAPACITY when the first element is added.
     */
    transient Object[] elementData; // non-private to simplify nested class access

    /**
     * The size of the ArrayList (the number of elements it contains).
     *
     * @serial
     */
    private int size;
3.4.13.2 初始容量
    /**
     * Default initial capacity.
     */
    private static final int DEFAULT_CAPACITY = 10;
3.4.13.3 添加元素
    /**
     * Appends the specified element to the end of this list.
     *
     * @param e element to be appended to this list
     * @return <tt>true</tt> (as specified by {@link Collection#add})
     */
    public boolean add(E e) {
        ensureCapacityInternal(size + 1);  // Increments modCount!!
        elementData[size++] = e;
        return true;
    }

    /**
     * Inserts the specified element at the specified position in this
     * list. Shifts the element currently at that position (if any) and
     * any subsequent elements to the right (adds one to their indices).
     *
     * @param index index at which the specified element is to be inserted
     * @param element element to be inserted
     * @throws IndexOutOfBoundsException {@inheritDoc}
     */
    public void add(int index, E element) {
        rangeCheckForAdd(index);

        ensureCapacityInternal(size + 1);  // Increments modCount!!
        System.arraycopy(elementData, index, elementData, index + 1,
                         size - index);
        elementData[index] = element;
        size++;
    }
3.4.13.4 数组扩容
// 容量检查
 private void ensureCapacityInternal(int minCapacity) {
        ensureExplicitCapacity(calculateCapacity(elementData, minCapacity));
    }
// 容量确认
private void ensureExplicitCapacity(int minCapacity) {
        modCount++;

        // 判断是否需要扩容,数组中的元素个数-数组长度,如果大于 0 表明需要扩容
        if (minCapacity - elementData.length > 0)
            grow(minCapacity);
    }

    /**
     * Increases the capacity to ensure that it can hold at least the
     * number of elements specified by the minimum capacity argument.
     *
     * @param minCapacity the desired minimum capacity
     */
    private void grow(int minCapacity) {
        // overflow-conscious code
        int oldCapacity = elementData.length;
        // 扩容 1.5 倍
        int newCapacity = oldCapacity + (oldCapacity >> 1);
        if (newCapacity - minCapacity < 0)
            newCapacity = minCapacity;
        if (newCapacity - MAX_ARRAY_SIZE > 0)
            newCapacity = hugeCapacity(minCapacity);
        // minCapacity is usually close to size, so this is a win:
        elementData = Arrays.copyOf(elementData, newCapacity);
    }
3.5 Vector 容器类
Vector 底层是用数组实现的,相关的方法都加了同步检查,因此“线程安全,效率低”。 比如,indexOf 方法就增加了 synchronized 同步标记。
3.5.1 Vector 的使用
Vector 的使用与 ArrayList 是相同的,因为他们都实现了 List 接口,对 List 接口中的抽象 方法做了具体实现。
演示的代码如下:
package com.txw.arrarylist;

import java.util.List;
import java.util.Vector;
/**
 * Vector的使用
 * @author Adair
 * @email 1578533828@qq.com
 */
@SuppressWarnings("all")  //注解警告信息
public class VectorTest {
    public static void main(String[] args) {
        // 实例化Vector
        List<String> v = new Vector<>();
        v.add("a");
        v.add("b");
        v.add("a");
        for (int i = 0; i < v.size(); i++) {
            System.out.println(v.get(i));
        }
        System.out.println("----------------------");
        for (String s : v) {
            System.out.println(s);
        }
    }
}
如图所示:
3.5.2 Vector源码分析
3.5.2.1 初始化容器
    /**
     * The array buffer into which the components of the vector are
     * stored. The capacity of the vector is the length of this array buffer,
     * and is at least large enough to contain all the vector's elements.
     *
     * <p>Any array elements following the last element in the Vector are null.
     *
     * @serial
     */
    protected Object[] elementData;

    /**
     * Constructs an empty vector so that its internal data array
     * has size {@code 10} and its standard capacity increment is
     * zero.
     */
    public Vector() {
        this(10);
    }

    /**
     * Constructs an empty vector with the specified initial capacity and
     * capacity increment.
     *
     * @param   initialCapacity     the initial capacity of the vector
     * @param   capacityIncrement   the amount by which the capacity is
     *                              increased when the vector overflows
     * @throws IllegalArgumentException if the specified initial capacity
     *         is negative
     */
    public Vector(int initialCapacity, int capacityIncrement) {
        super();
        if (initialCapacity < 0)
            throw new IllegalArgumentException("Illegal Capacity: "+
                                               initialCapacity);
        this.elementData = new Object[initialCapacity];
        this.capacityIncrement = capacityIncrement;
    }
3.5.2.2 添加元素
    /**
     * Appends the specified element to the end of this Vector.
     *
     * @param e element to be appended to this Vector
     * @return {@code true} (as specified by {@link Collection#add})
     * @since 1.2
     */
    public synchronized boolean add(E e) {
        modCount++;
        ensureCapacityHelper(elementCount + 1);
        elementData[elementCount++] = e;
        return true;
    }
3.5.2.3 数组扩容
    /**
     * This implements the unsynchronized semantics of ensureCapacity.
     * Synchronized methods in this class can internally call this
     * method for ensuring capacity without incurring the cost of an
     * extra synchronization.
     *
     * @see #ensureCapacity(int)
     */
    private void ensureCapacityHelper(int minCapacity) {
        // 判断是否需要扩容,数组中的元素个数-数组长度,如果大于 0 表明需要扩容
        if (minCapacity - elementData.length > 0)
            grow(minCapacity);
    }

   private void grow(int minCapacity) {
        // overflow-conscious code
        int oldCapacity = elementData.length;
        // 扩容2倍
        int newCapacity = oldCapacity + ((capacityIncrement > 0) ?
                                         capacityIncrement : oldCapacity);
        if (newCapacity - minCapacity < 0)
            newCapacity = minCapacity;
        if (newCapacity - MAX_ARRAY_SIZE > 0)
            newCapacity = hugeCapacity(minCapacity);
        elementData = Arrays.copyOf(elementData, newCapacity);
    }
3.5.3 Stack 容器
3.5.3.1 Stack 容器介绍
Stack 栈容器,是 Vector 的一个子类,它实现了一个标准的后进先出(LIFO:Last In Frist Out) 的栈。
3.5.3.1.1 Stack 特点是
后进先出。它通过 5 个操作方法对 Vector 进行扩展,允许将向量视为堆栈。
3.5.3.1.2 操作栈的方法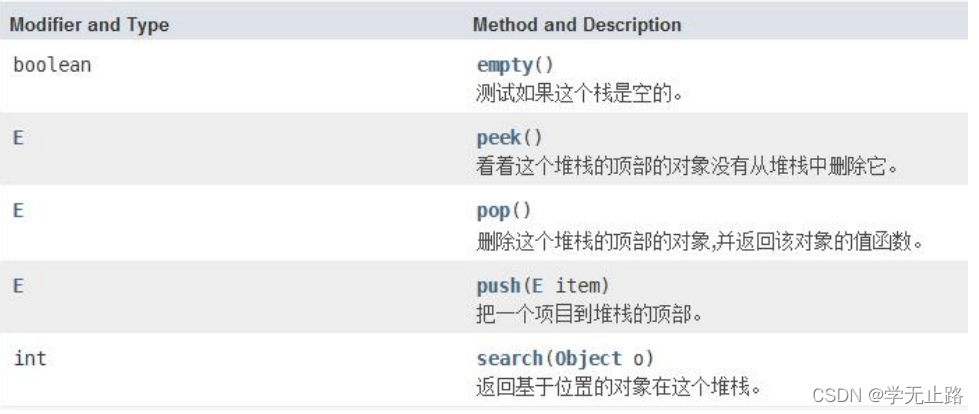
3.5.3.2 Stack 的使用
演示的代码如下:
package com.txw.arrarylist;

import java.util.Stack;
/**
 * Stack的使用
 * @author Adair
 * @email 1578533828@qq.com
 */
@SuppressWarnings("all")  //注解警告信息
public class StackTest {
    public static void main(String[] args) {
        // 实例化栈容器
        Stack<String> stack = new Stack<>();
        // 将元素添加到栈容器中
        stack.push("a");
        stack.push("b");
        stack.push("c");
        // 判断栈容器是否为空
        System.out.println(stack.isEmpty());
        // 查看栈顶元素
        System.out.println(stack.peek());
        // 返回元素在栈容器中的位置
        System.out.println(stack.search("c"));
        // 获取栈容器中的元素
        String p1 = stack.pop();
        System.out.println(p1);
        String p2 = stack.pop();
        System.out.println(p2);
        String p3 = stack.pop();
        System.out.println(p3);
    }
}
如图所示: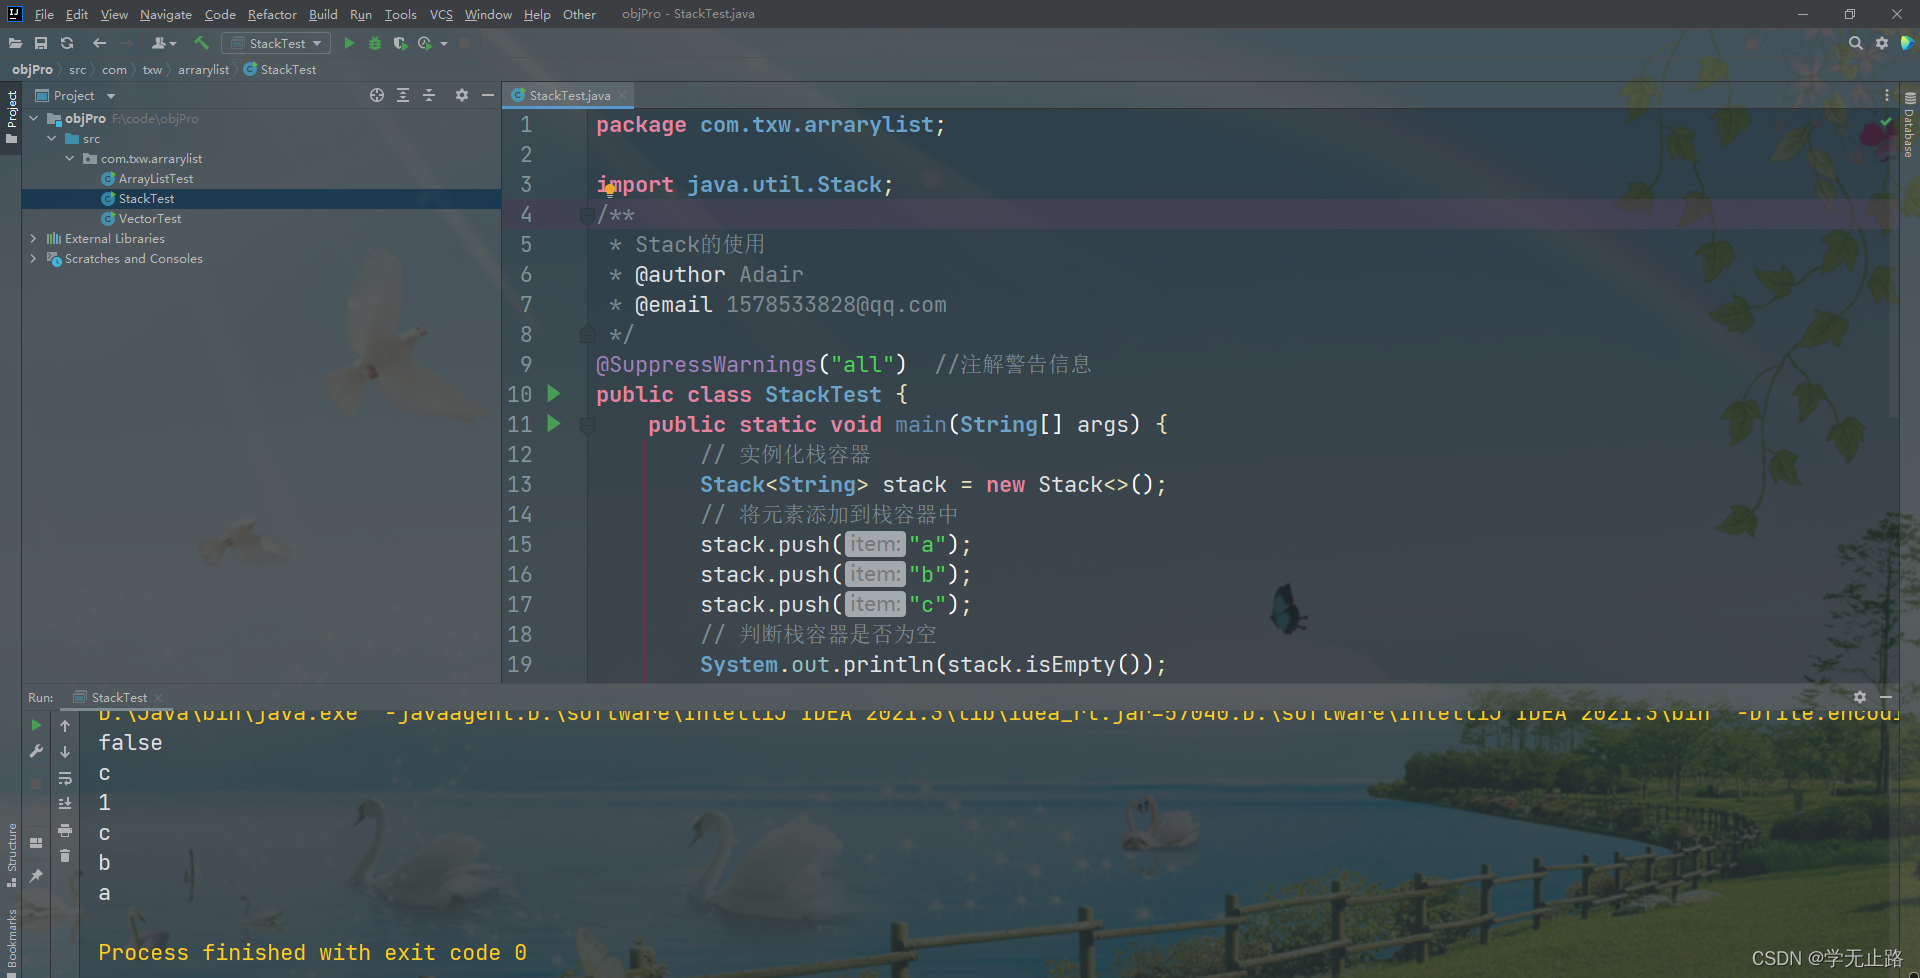
3.5.3.3 Stack的使用案例
代码如下:
package com.txw.arrarylist;

import java.util.Stack;
/**
 * Stack的使用案例
 * @author Adair
 * @email 1578533828@qq.com
 */
@SuppressWarnings("all")  //注解警告信息
public class StackTest {
    public static void main(String[] args) {
        // 判断元素的对称性 String str="...{.....[....(....)...]....}..(....)..[...]...";
        StackTest stackTest = new StackTest();
        stackTest.symmetry();
    }
    // 匹配符号的对称性
    public void symmetry(){
        String str="...{.....[....(....)...]....}..(....)..[...].(.).";
        // 实例化Stack
        Stack<String> stack = new Stack<>();
        // 假设修正法
        // 假设是匹配的
        boolean flag = true;
        // 拆分字符串获取字符
        for (int i = 0; i < str.length(); i++) {
            char c = str.charAt(i);
            if(c == '{'){
                stack.push("}");
            }
            if(c == '['){
                stack.push("]");
            }
            if(c == '('){
                stack.push(")");
            }
            // 判断符号是否匹配
            if(c == '}' || c == ']' || c == ')'){
                if (stack.isEmpty()){
                    // 修正处理
                    flag = false;
                    break;
                }
                String x = stack.pop();
                if(x.charAt(0) != c){
                    // 修正处理
                    flag = false;
                    break;
                }
            }
        }
        if (!stack.isEmpty()){
            // 修正处理
            flag = false;
        }
        System.out.println(flag);
    }
}
如图所示: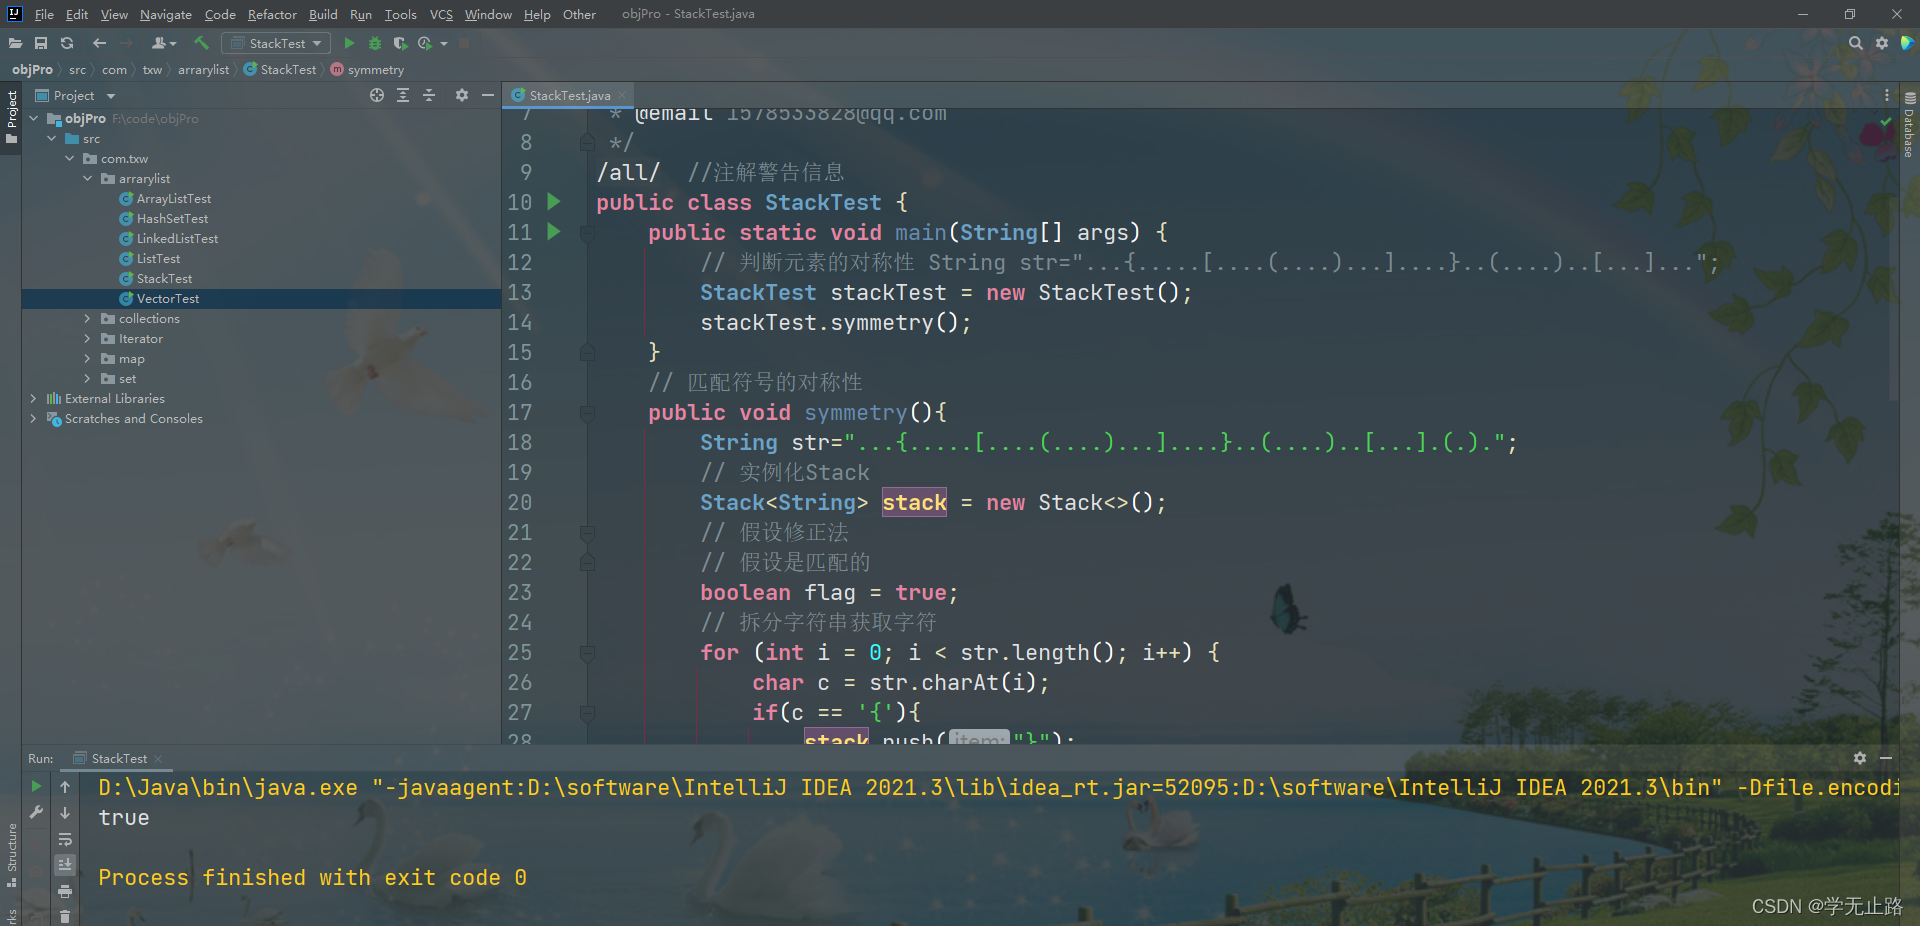
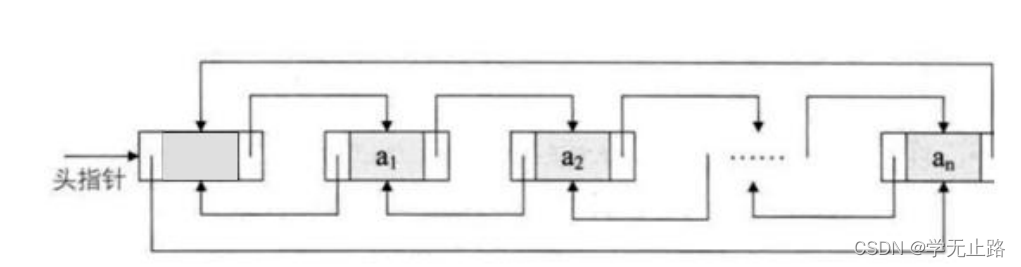
3.6 LinkedList 容器类
LinkedList 底层用双向链表实现的存储。特点:查询效率低,增删效率高,线程不安全。 双向链表也叫双链表,是链表的一种,它的每个数据节点中都有两个指针,分别指向前 一个节点和后一个节点。 所以,从双向链表中的任意一个节点开始,都可以很方便地找到 所有节点。
3.6.1 双向链表介绍
class Node<E> {
    E item;
    Node<E> next;
    Node<E> prev;
}
3.6.2 LinkedList 的使用(List 标准)
LinkedList 实现了 List 接口,所以 LinkedList 是具备 List 的存储特征的(有序,元素有重复)。代码如下:
package com.txw.arrarylist;

import java.util.LinkedList;
import java.util.List;
/**
 * LinkedList的使用
 * @author Adair
 * @email 1578533828@qq.com
 */
@SuppressWarnings("all")  //注解警告信息
public class LinkedListTest {
    public static void main(String[] args) {
        List<String> list = new LinkedList<>();
        // 添加元素
        list.add("a");
        list.add("b");
        list.add("c");
        list.add("a");
        // 获取元素
        for (int i = 0; i < list.size(); i++) {
            System.out.println(list.get(i));
        }
        System.out.println("=========================");
        for (String s : list) {
            System.out.println(s);
        }
    }
}
如图所示:
3.6.3 LinkedList 的使用(非 List 标准)


演示的代码如下:
package com.txw.arrarylist;

import java.util.LinkedList;
/**
 * LinkedList的使用
 * @author Adair
 * @email 1578533828@qq.com
 */
@SuppressWarnings("all")  //注解警告信息
public class LinkedListTest {
    public static void main(String[] args) {
        System.out.println("-------LinkedList-------------");
        LinkedList<String> linkedList1 = new LinkedList<>();
        linkedList1.addFirst("a"); linkedList1.addFirst("b");
        linkedList1.addFirst("c");
        for (String str:linkedList1){
            System.out.println(str);
        }
        System.out.println("----------------------");
        LinkedList<String> linkedList = new LinkedList<>();
        linkedList.addLast("a");
        linkedList.addLast("b");
        linkedList.addLast("c");
        for (String str:linkedList){
            System.out.println(str);
        }
        System.out.println("---------------------------");
        System.out.println(linkedList.getFirst());
        System.out.println(linkedList.getLast());
        System.out.println("-----------------------");
        linkedList.removeFirst();
        linkedList.removeLast();
        for (String str:linkedList){
            System.out.println(str);
        }
        System.out.println("-----------------------");
        linkedList.addLast("c");
        linkedList.pop();
        for (String str:linkedList){
            System.out.println(str);
        }
        System.out.println("-------------------");
        linkedList.push("h");
        for (String str:linkedList){
            System.out.println(str);
        }
        System.out.println(linkedList.isEmpty());
    }
}
如图所示: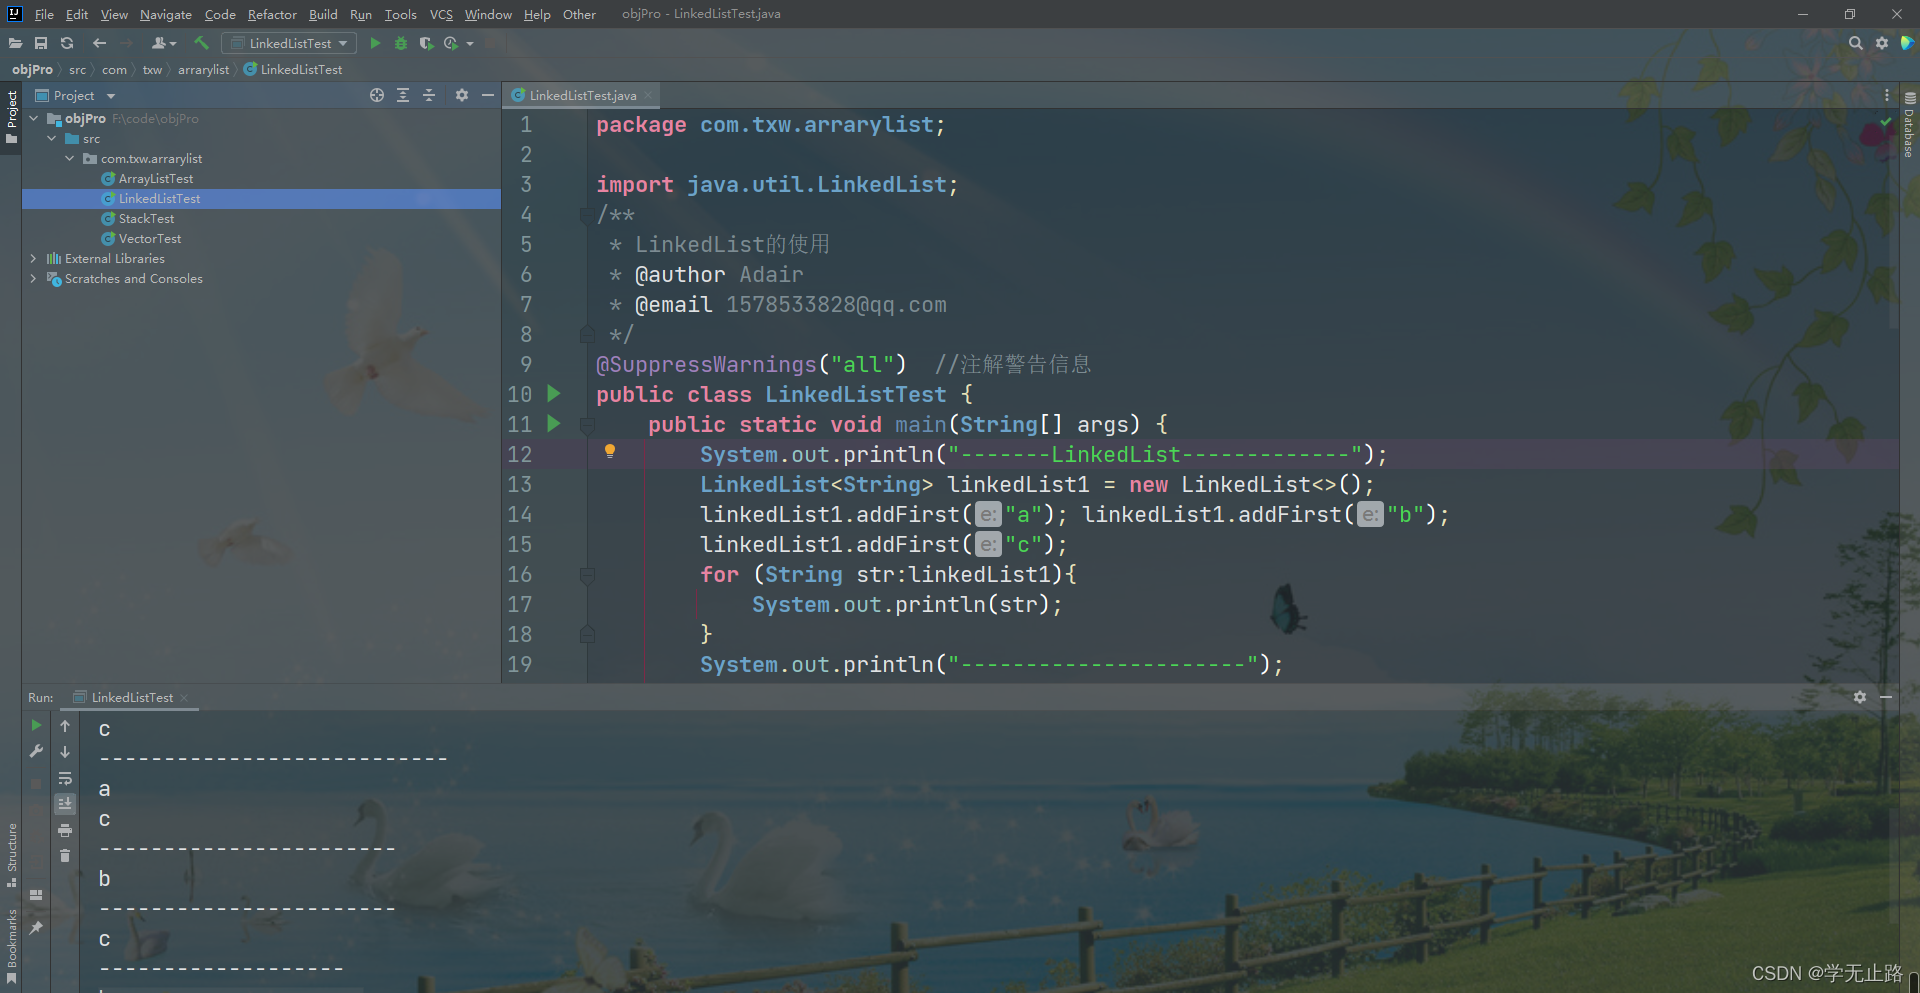
3.6.4 LinkedList 源码分析
3.6.4.1 节点类
private static class Node<E> {
    E item;
    Node<E> next;
    Node<E> prev;
    Node(Node<E> prev, E element, Node<E> next) {
        this.item = element;
        this.next = next;
        this.prev = prev;
    }
}
3.6.4.2 成员变量
    transient int size = 0;

    /**
     * Pointer to first node.
     * Invariant: (first == null && last == null) ||
     *            (first.prev == null && first.item != null)
     */
    transient Node<E> first;

    /**
     * Pointer to last node.
     * Invariant: (first == null && last == null) ||
     *            (last.next == null && last.item != null)
     */
    transient Node<E> last;
3.6.4.3 添加元素
    /**
     * Appends the specified element to the end of this list.
     *
     * <p>This method is equivalent to {@link #addLast}.
     *
     * @param e element to be appended to this list
     * @return {@code true} (as specified by {@link Collection#add})
     */
    public boolean add(E e) {
        linkLast(e);
        return true;
    }


    /**
     * Links e as last element.
     */
    void linkLast(E e) {
        final Node<E> l = last;
        final Node<E> newNode = new Node<>(l, e, null);
        last = newNode;
        if (l == null)
            first = newNode;
        else
            l.next = newNode;
        size++;
        modCount++;
    }
3.6.4.4 头尾添加元素
3.6.4.4.1 addFirst
    /**
     * Inserts the specified element at the beginning of this list.
     *
     * @param e the element to add
     */
    public void addFirst(E e) {
        linkFirst(e);
    }

    /**
      * Links e as first element.
     */
     private void linkFirst(E e) {
        final Node<E> f = first;
        final Node<E> newNode = new Node<>(null, e, f);
        first = newNode;
        if (f == null) last = newNode;
            elsef.prev = newNode;
            size++; modCount++;
        }
    }
3.6.4.4.2 addLast
    /**
     *Appends the specified element to the end of this list.
     *  <p>This method is equivalent to {@link #add}.
     *  @param e the element to add
     */
    public void addLast(E e) {
         linkLast(e);
    }

    /**
     *  Links e as last element.
     */
    void linkLast(E e) {
        final Node<E> l = last;
        final Node<E> newNode = new Node<>(l, e, null);
        last = newNode;
        if (l == null)
            first = newNode;
        else
            l.next = newNode;
        size++;
        modCount++;
    }
3.6.4.5 在指定位置添加元素
   /**
     * Inserts the specified element at the specified position in this list.
     * Shifts the element currently at that position (if any) and any
     * subsequent elements to the right (adds one to their indices).
     * @param index index at which the specified element is to be inserted
     * @param element element to be inserted
     * @throws IndexOutOfBoundsException {@inheritDoc}
     */
    public void add(int index, E element) {
        checkPositionIndex(index);
        if (index == size)
            linkLast(element);
        elselinkBefore(element, node(index));
    }

    private void checkPositionIndex(int index) {
        if (!isPositionIndex(index))
            throw new IndexOutOfBoundsException(outOfBoundsMsg(index));
    }

   /**
     *  Links e as last element.
     */
    void linkLast(E e) {
        final Node<E> l = last;
        final Node<E> newNode = new Node<>(l, e, null);
        last = newNode;
        if (l == null)
            first = newNode;
        else
            l.next = newNode;
        size++;
        modCount++;
    }
 /**
 * Returns the (non-null) Node at the specified element index.
 */
Node<E> node(int index) {
    // assert isElementIndex(index);
    if (index < (size >> 1)) {
        Node<E> x = first;
    for (int i = 0; i < index; i++)
        x = x.next; return x;
    } else {
        Node<E> x = last;
        for (int i = size - 1; i > index; i--)
            x = x.prev;
        return x;
    }

    /**
     * Inserts element e before non-null Node succ.
     */
    void linkBefore(E e, Node<E> succ) {
        // assert succ != null;
        final Node<E> pred = succ.prev;
        final Node<E> newNode = new Node<>(pred, e, succ);
        succ.prev = newNode;
        if (pred == null)
            first = newNode;
        else
            pred.next = newNode;
        size++;
        modCount++;
    }
3.6.4.6 获取元素
    /**
     * Returns the element at the specified position in this list.
     *
     * @param index index of the element to return
     * @return the element at the specified position in this list
     * @throws IndexOutOfBoundsException {@inheritDoc}
     */
    public E get(int index) {
        checkElementIndex(index);
        return node(index).item;
    }

 private void checkElementIndex(int index) {
 	if (!isElementIndex(index))
 	     throw new IndexOutOfBoundsException(outOfBoundsMsg(index));
}

    /**
     * Tells if the argument is the index of an existing element.
     */
    private boolean isElementIndex(int index) {
        return index >= 0 && index < size;
    }

    /**
     * Returns the (non-null) Node at the specified element index.
     */
    Node<E> node(int index) {
        // assert isElementIndex(index);
        /if (index < (size >> 1)) {
            Node<E> x = first;
            for (int i = 0; i < index; i++)
                x = x.next;
            return x;
        } else {
            Node<E> x = last;
            for (int i = size - 1; i > index; i--)
                x = x.prev;
            return x;
        }
    }
3.6.4.7 删除指定位置元素
    /**
     * Removes the element at the specified position in this list.  Shifts any
     * subsequent elements to the left (subtracts one from their indices).
     * Returns the element that was removed from the list.
     *
     * @param index the index of the element to be removed
     * @return the element previously at the specified position
     * @throws IndexOutOfBoundsException {@inheritDoc}
     */
    public E remove(int index) {
        checkElementIndex(index);
        return unlink(node(index));
    }

    private void checkElementIndex(int index) {
        if (!isElementIndex(index))
            throw new IndexOutOfBoundsException(outOfBoundsMsg(index));
    }

    /**
     * Tells if the argument is the index of an existing element.
     */
    private boolean isElementIndex(int index) {
        return index >= 0 && index < size;
    }

    /**
     * Returns the (non-null) Node at the specified element index.
     */
    Node<E> node(int index) {
        // assert isElementIndex(index);
        /if (index < (size >> 1)) {
            Node<E> x = first;
            for (int i = 0; i < index; i++)
                x = x.next;
            return x;
        } else {
            Node<E> x = last;
            for (int i = size - 1; i > index; i--)
                x = x.prev;
            return x;
        }
    }


    /**
     * Unlinks non-null node x.
     */
    E unlink(Node<E> x) {
        // assert x != null;
        final E element = x.item;
        final Node<E> next = x.next;
        final Node<E> prev = x.prev;

        if (prev == null) {
            first = next;
        } else {
            prev.next = next;
            x.prev = null;
        }

        if (next == null) {
            last = prev;
        } else {
            next.prev = prev;
            x.next = null;
        }

        x.item = null;
        size--;
        modCount++;
        return element;
    }
3.7Set 接口介绍
Set 接口继承自 Collection,Set 接口中没有新增方法,方法和 Collection 保持完全一 致。我们在前面通过 List 学习的方法,在 Set 中仍然适用。因此,学习 Set 的使用将没有 任何难度。
3.7.1 Set 接口特点
Set 特点:无序、不可重复。无序指 Set 中的元素没有索引,我们只能遍历查找;不可 重复指不允许加入重复的元素。更确切地讲,新元素如果和 Set 中某个元素通过 equals() 方法对比为 true,则只能保留一个。
Set 常用的实现类有:HashSet、TreeSet 等,我们一般使用 HashSet。
3.7.2 HashSet 容器类
HashSet 是一个没有重复元素的集合,不保证元素的顺序。而且 HashSet 允许有 null 元 素。HashSet 是采用哈希算法实现,底层实际是用 HashMap 实现的(HashSet 本质就是一个 简化版的 HashMap),因此,查询效率和增删效率都比较高。
3.7.2.1 Hash 算法原理
Hash 算法也称之为散列算法。如图所示: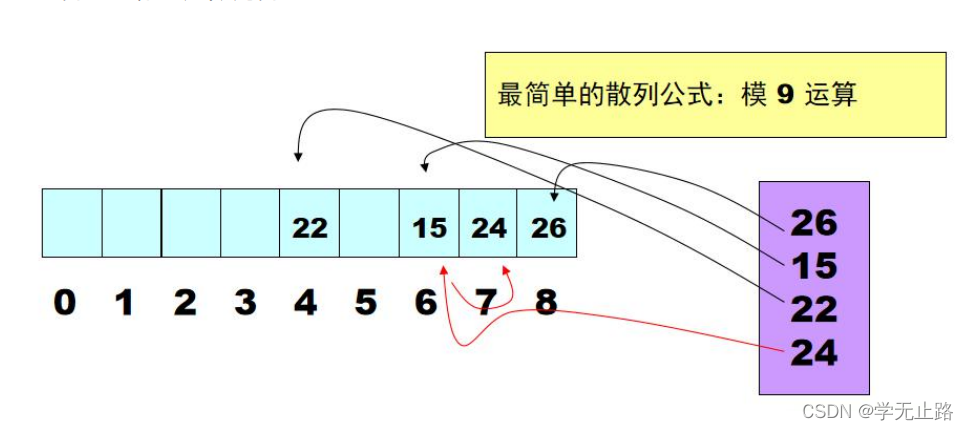
3.7.3 HashSet 的使用
演示的代码如下:
package com.txw.arrarylist;

import java.util.HashSet;
import java.util.Set;
/**
 * HashSet的使用
 * @author Adair
 * @email 1578533828@qq.com
 */
@SuppressWarnings("all")  //注解警告信息
public class HashSetTest {
    public static void main(String[] args) {
        // 实例化HashSet
        Set<String> set = new HashSet<>();
        // 添加元素
        set.add("a");
        set.add("b1");
        set.add("c2");
        set.add("a");
        // 获取元素,在Set容器中没有索引,所以没有对应的 get(int index)方法
        for (String s : set) {
            System.out.println(s);
        }
        System.out.println("--------------------");
        // 删除元素
        boolean flag = set.remove("c2");
        System.out.println(flag);
        for (String s : set) {
            System.out.println(s);
        }
        System.out.println("--------------------");
        int size = set.size();
        System.out.println(size);
    }
}
如图所示:
3.7.4 HashSet 存储特征分析
HashSet 是一个不保证元素的顺序且没有重复元素的集合,是线程不安全的。HashSet 允许有 null 元素。
无序:
在 HashSet 中底层是使用 HashMap 存储元素的。HashMap 底层使用的是数组与链表实 现元素的存储。元素在数组中存放时,并不是有序存放的也不是随机存放的,而是对元素的哈希值进行运算决定元素在数组中的位置。
不重复:
当两个元素的哈希值进行运算后得到相同的在数组中的位置时,会调用元素的 equals() 方法判断两个元素是否相同。如果元素相同则不会添加该元素,如果不相同则会使用单向链 表保存该元素。
3.7.5 通过 HashSet 存储自定义对象
3.7.5 通过 HashSet 存储自定义对象
演示的代码如下:
package com.txw.set;

import java.util.Objects;
/**
 * 用户 {@link Users}
 * @author Adair
 * @email 1578533828@qq.com
 */
@SuppressWarnings("all")  // 注解警告信息
public class Users {
    private String userName;
    private int userAge;

    public Users(String userName, int userAge) {
        this.userName = userName;
        this.userAge = userAge;
    }

    @Override
    public boolean equals(Object o) {
        if (this == o) return true;
        if (o == null || getClass() != o.getClass()) return false;
        Users users = (Users) o;
        return userAge == users.userAge && Objects.equals(userName, users.userName);
    }

    public String getUserName() {
        return userName;
    }

    public void setUserName(String userName) {
        this.userName = userName;
    }

    public int getUserAge() {
        return userAge;
    }

    public void setUserAge(int userAge) {
        this.userAge = userAge;
    }

    @Override
    public String toString() {
        return "Users{" +
                "userName='" + userName + '\'' +
                ", userAge=" + userAge +
                '}';
    }

    @Override
    public int hashCode() {
        int result = userName != null ? userName.hashCode() : 0; result = 31 * result + userAge; return result;
    }
}
如图所示: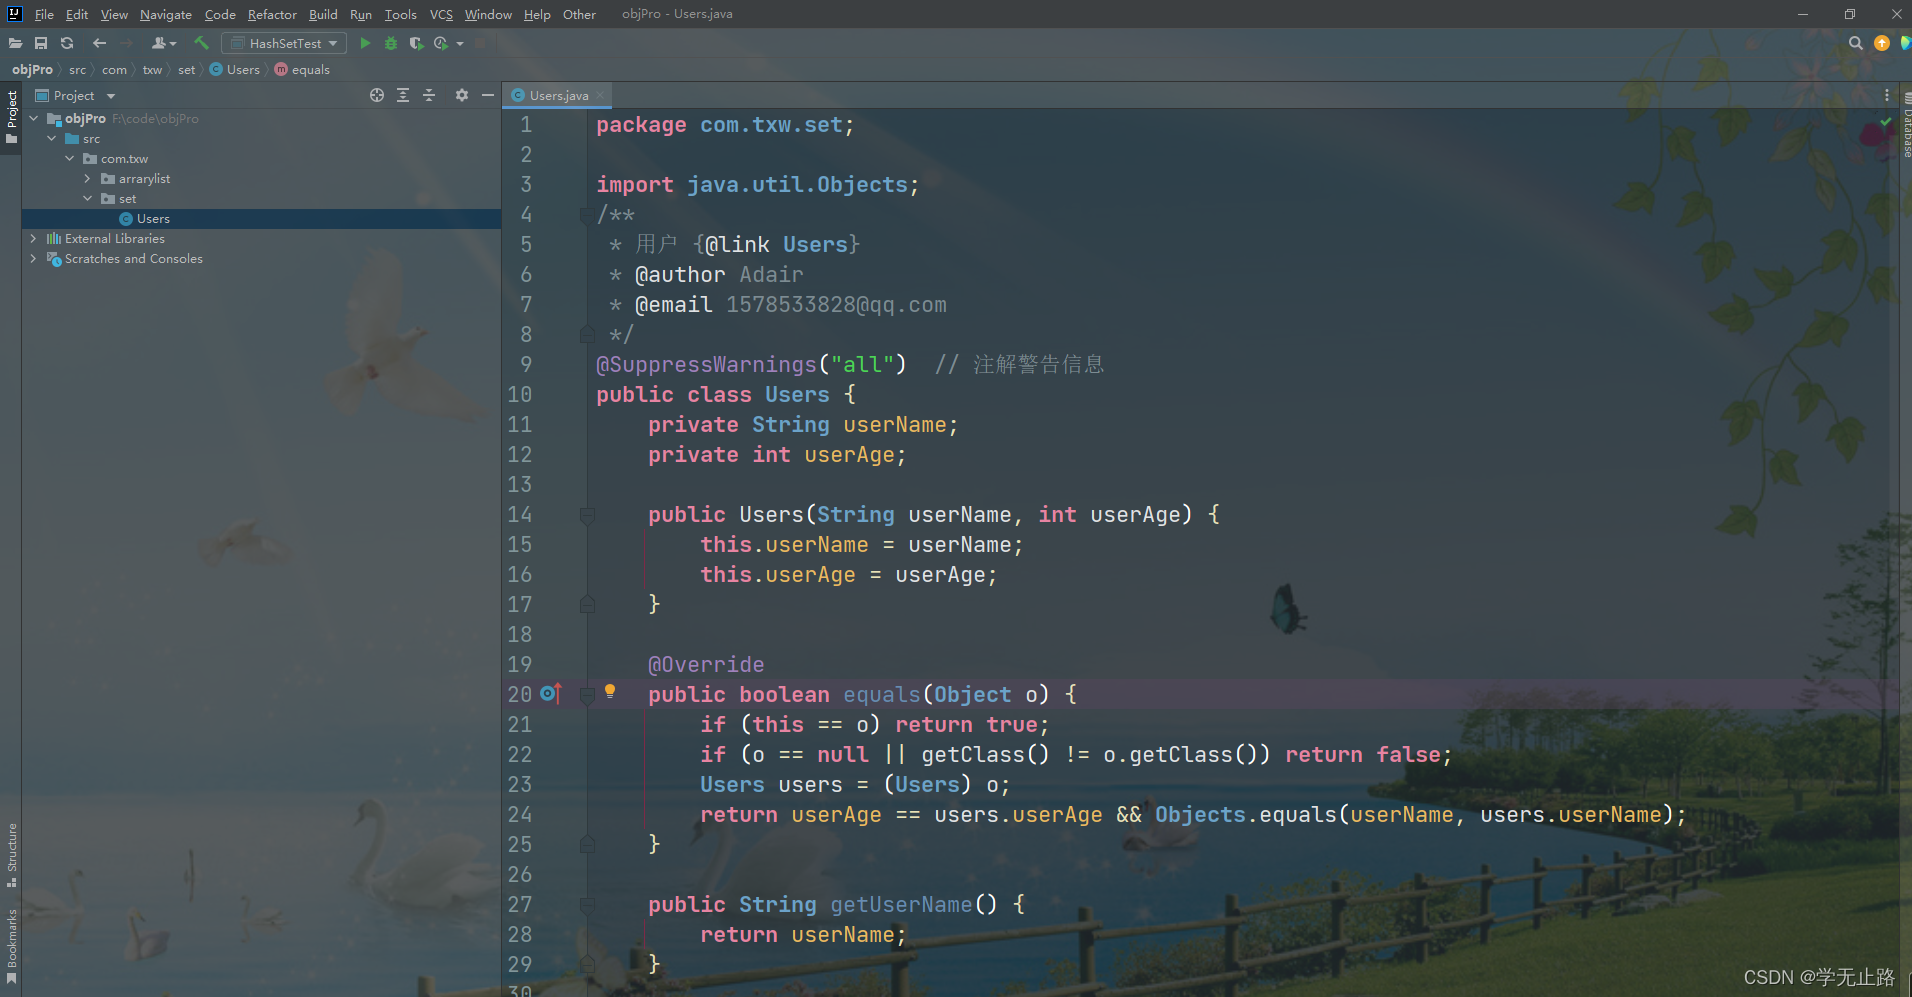
3.7.5.2 在 HashSet 中存储 Users 对象
测试的代码如下:
package com.txw.set;

import java.util.HashSet;
import java.util.Set;
/**
 * 测试在HashSet中存储Users对象
 * @author Adair
 * @email 1578533828@qq.com
 */
@SuppressWarnings("all")  // 注解警告信息
public class Test1 {
    public static void main(String[] args) {
        // 实例化HashSet
        Set<Users> set1 = new HashSet<>();
        Users users = new Users("Adair",25);
        Users users1 = new Users("Adair",18);
        set1.add(users);
        set1.add(users1);
        System.out.println(users.hashCode());
        System.out.println(users1.hashCode());
        for (Users users2 : set1) {
            System.out.println(users2);
        }
    }
}
如图所示:
3.7.6 HashSet 底层源码分析
3.7.6.1 成员变量
private transient HashMap<E,Object> map;

// Dummy value to associate with an Object in the backing Map
private static final Object PRESENT = new Object();
3.7.6.2 添加元素
/**
* Adds the specified element to this set if it is not already present.
* More formally, adds the specified element <tt>e</tt> to this set if
* this set contains no element <tt>e2</tt> such that
* <tt>(e==null ? e2==null : e.equals(e2))</tt>.
* If this set already contains the element, the call leaves the set
* unchanged and returns <tt>false</tt>.
*
* @param e element to be added to this set
* @return <tt>true</tt> if this set did not already contain the specified
* element
*/
public boolean add(E e) {
return map.put(e, PRESENT)==null;
}
3.7.7 TreeSet 容器类
TreeSet 是一个可以对元素进行排序的容器。底层实际是用 TreeMap 实现的,内部维持了一个简化版的 TreeMap,通过 key 来存储 Set 的元素。 TreeSet 内部需要对存储的元 素进行排序,因此,我们需要给定排序规则。
排序规则实现方式:
1.通过元素自身实现比较规则。
2.通过比较器指定比较规则。
3.7.7.1 TreeSet 的使用
演示的代码如下:
package com.txw.set;

import java.util.Set;
import java.util.TreeSet;
/**
 * TreeSet的使用
 * @author Adair
 * @email 1578533828@qq.com
 */
@SuppressWarnings("all")  // 注解警告信息
public class TreeSetTest {
    public static void main(String[] args) {
        // 初始化TreeSet
        Set<String> set = new TreeSet<>();
        // 添加元素
        set.add("c");
        set.add("a");
        set.add("d");
        set.add("b");
        set.add("a");
        // 获取元素
        for (String str : set) {
            System.out.println(str);
        }
    }
}
如图所示: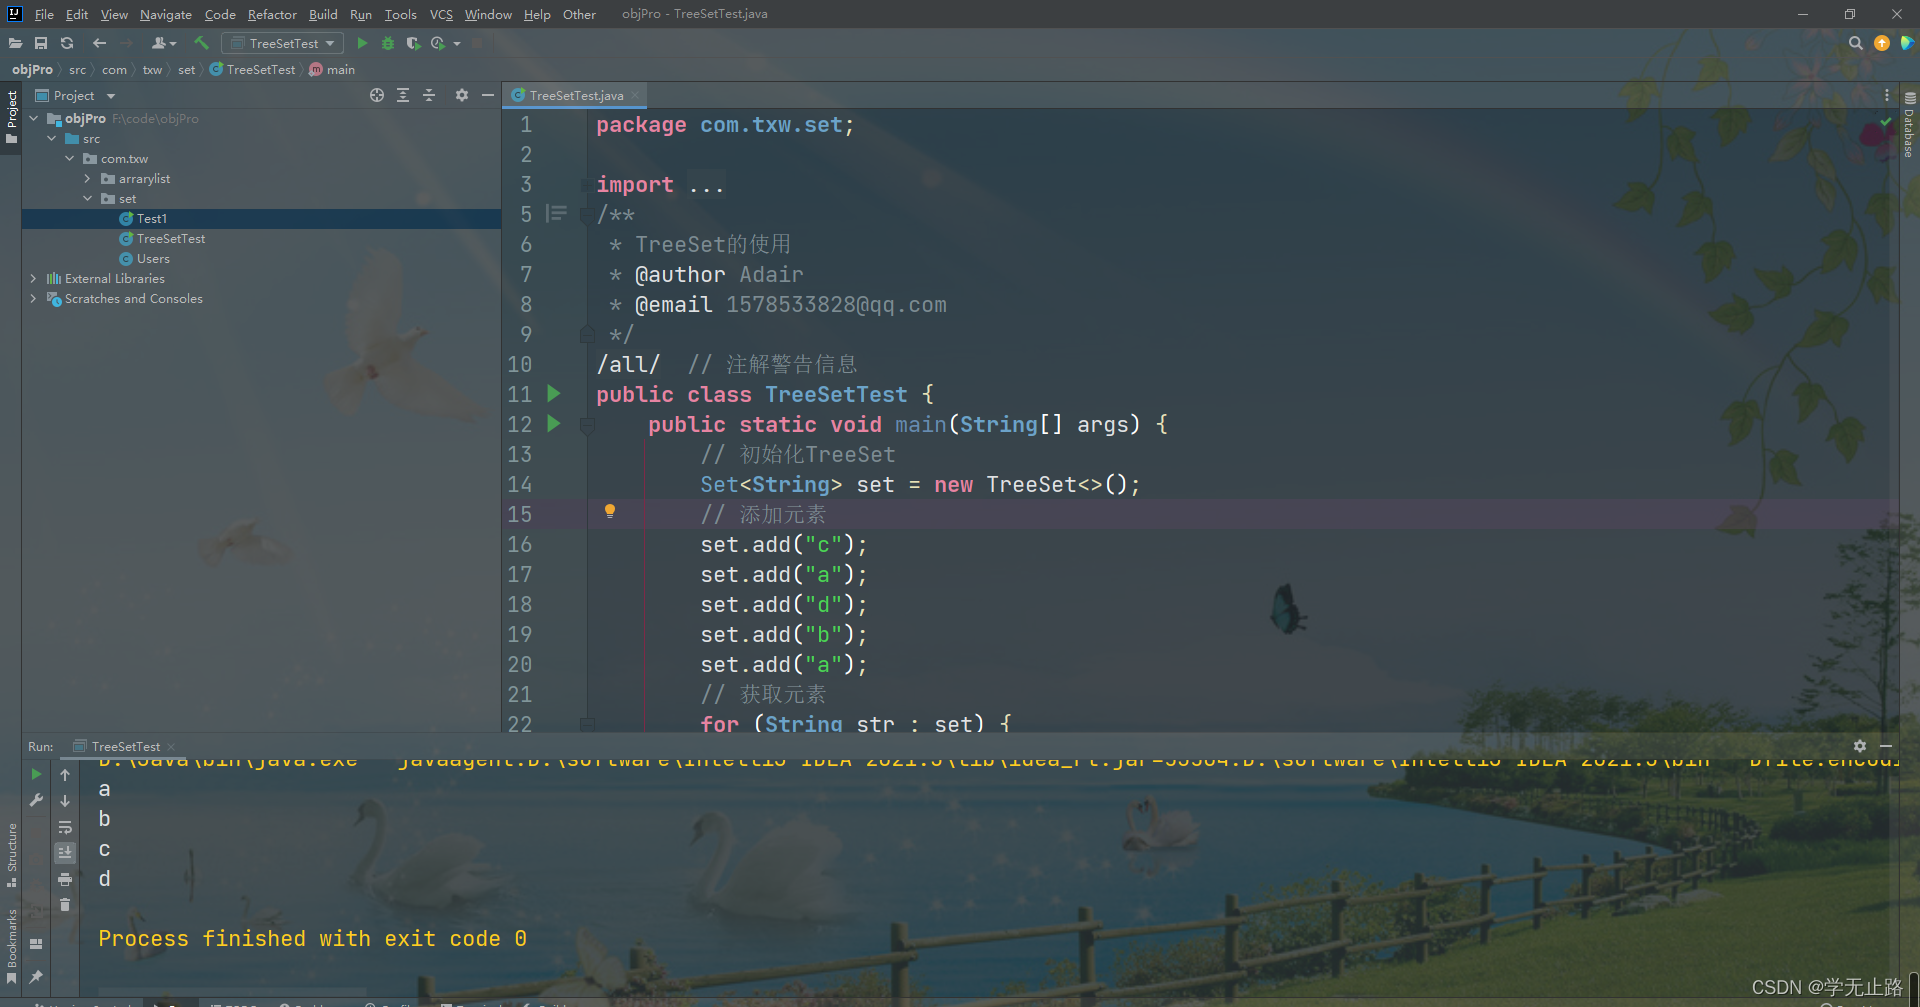
3.7.8 通过元素自身实现比较规则
在元素自身实现比较规则时,需要实现 Comparable 接口中的 compareTo 方法,该方法 中用来定义比较规则。TreeSet 通过调用该方法来完成对元素的排序处理。
3.7.8.1 创建Users类
演示的代码如下:
package com.txw.set;

/**
 * 用户 {@link Users}
 * @author Adair
 * @email 1578533828@qq.com
 */
@SuppressWarnings("all")  // 注解警告信息
public class Users  implements Comparable<Users>{
    private String username;
    private int userage;

    public Users(String username, int userage) {
        this.username = username;
        this.userage = userage;
    }

    public Users() {
    }

    public String getUsername() {
        return username;
    }

    public void setUsername(String username) {
        this.username = username;
    }

    public int getUserage() {
        return userage;
    }

    public void setUserage(int userage) {
        this.userage = userage;
    }

    @Override
    public boolean equals(Object o) {
        if (this == o) return true;
        if (o == null || getClass() != o.getClass()) return false;
        Users users = (Users) o;
        return userage == users.userage && username.equals(users.username);
    }

    @Override public int hashCode() {
        int result = username != null ? username.hashCode() : 0; result = 31 * result + userage; return result;
    }

    @Override
    public String toString() {
        return "Users{" +
                "username='" + username + '\'' +
                ", userage=" + userage +
                '}';
    }

    // 定义比较规则
    // 正数:大,负数:小,0:相等
    @Override
    public int compareTo(Users o){
        if(this.userage > o.getUserage()){
            return 1;
        }
        if(this.userage == o.getUserage()){
            return this.username.compareTo(o.getUsername());
        }
        return -1;
    }
}
如图所示: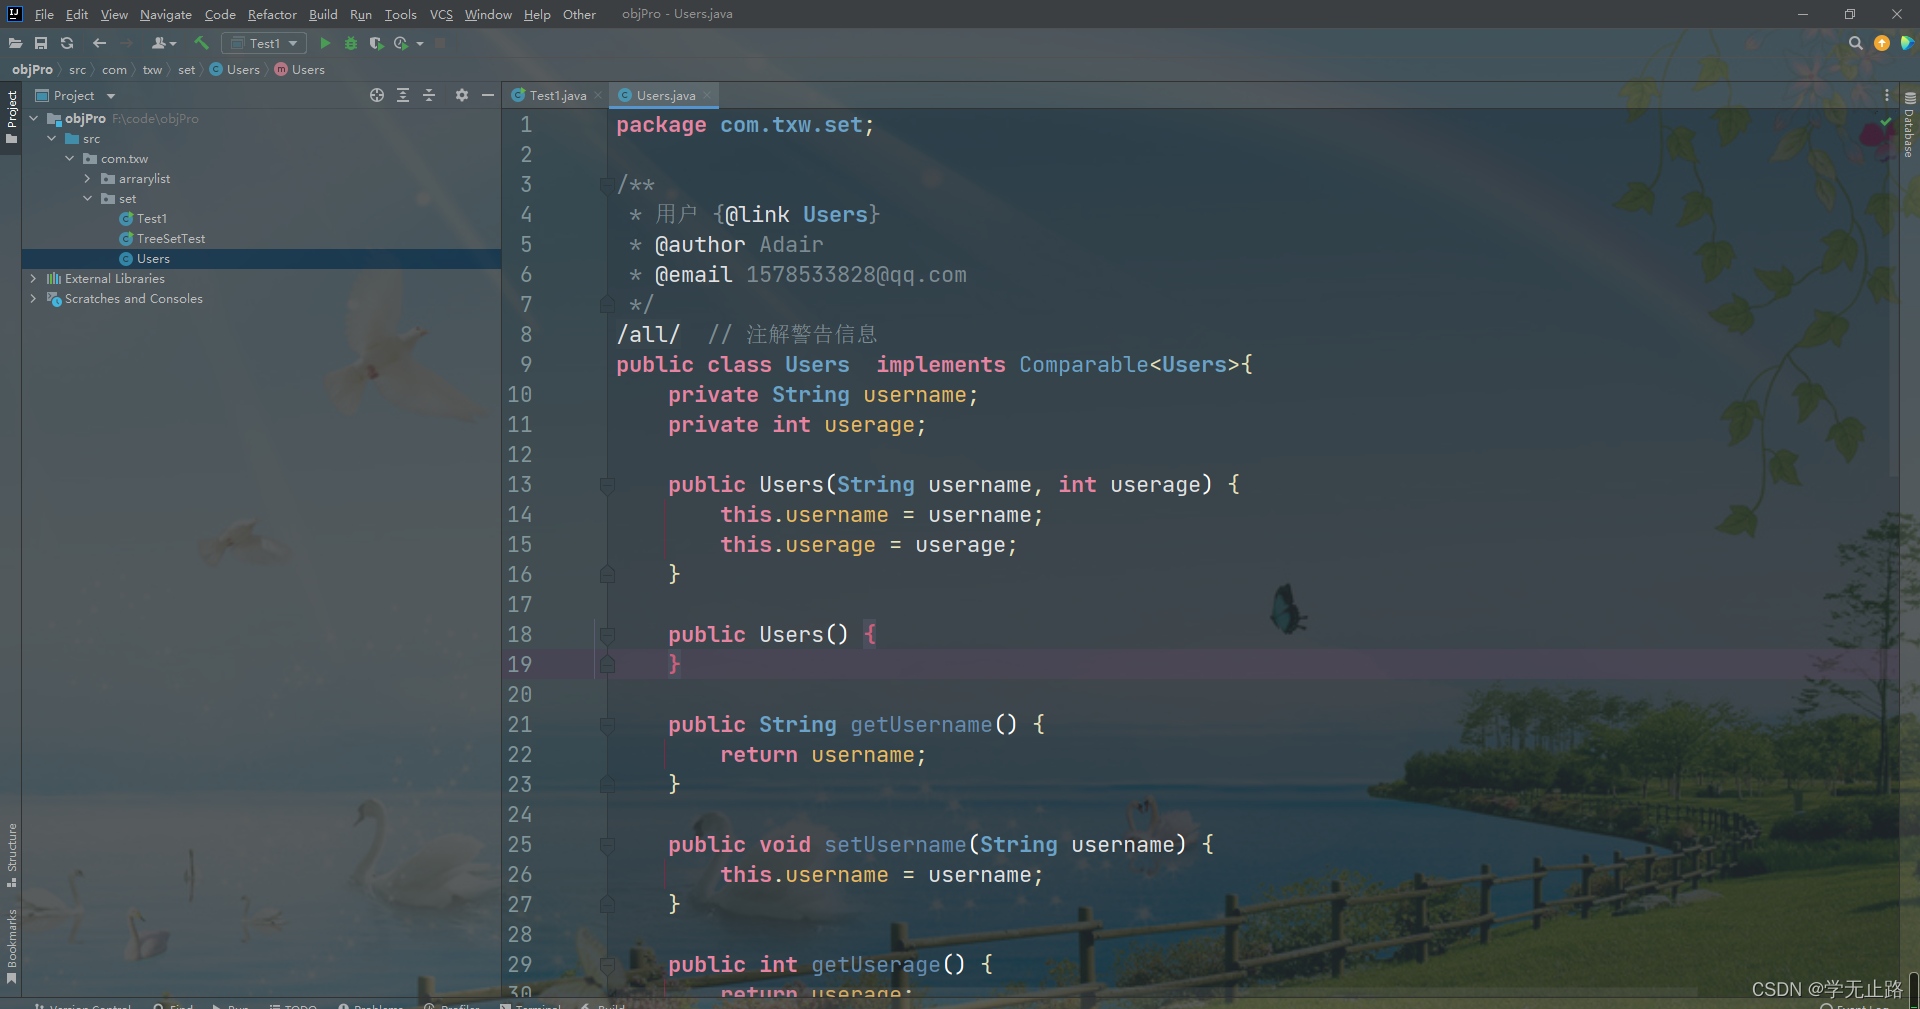
3.7.8.2 在TreeSet中存放Users对象
测试的代码如下:
package com.txw.set;

import java.util.Set;
import java.util.TreeSet;
/**
 * 在TreeSet中存放Users对象
 * @author Adair
 * @email 1578533828@qq.com
 */
@SuppressWarnings("all")  // 注解警告信息
public class Test1 {
    public static void main(String[] args) {
        // 实例化HashSet
        Set<Users> set1 = new TreeSet<>();
        Users users = new Users("Adair",25);
        Users users1 = new Users("Adair",18);
        Users users2 = new Users("Adair",12);
        set1.add(users);
        set1.add(users1);
        set1.add(users2);
        for (Users u : set1) {
            System.out.println(u);
        }
    }
}
如图所示:
3.7.9 通过比较器实现比较规则
通过比较器定义比较规则时,我们需要单独创建一个比较器,比较器需要实现 Comparator 接口中的 compare 方法来定义比较规则。在实例化 TreeSet 时将比较器对象交给 TreeSet 来完成元素的排序处理。此时元素自身就不需要实现比较规则了。
3.7.9.1 创建Student类
演示的代码如下:
package com.txw.set;

/**
 * 学生 {@link Student}
 * @author Adair
 * @email 1578533828@qq.com
 */
@SuppressWarnings("all")  // 注解警告信息
public class Student {
    private String name;
    private int age;

    public Student(String name, int age) {
        this.name = name;
        this.age = age;
    }

    public Student(){

    }

    @Override
    public String toString() {
        return "Student{" +
                "name='" + name + '\'' +
                ", age=" + age +
                '}';
    }

    public String getName() {
        return name;
    }

    public void setName(String name) {
        this.name = name;
    }

    public int getAge() {
        return age;
    }

    public void setAge(int age) {
        this.age = age;
    }

    @Override
    public boolean equals(Object o) {
        if (this == o)
            return true;
        if (o == null || getClass() != o.getClass())
            return false; Student student = (Student) o;
            if (age != student.age)
            return false; return name != null ? name.equals(student.name) : student.name == null;
    }

    @Override
    public int hashCode() {
        int result = name != null ? name.hashCode() : 0;
        result = 31 * result + age;
        return result;
    }
}
如图所示: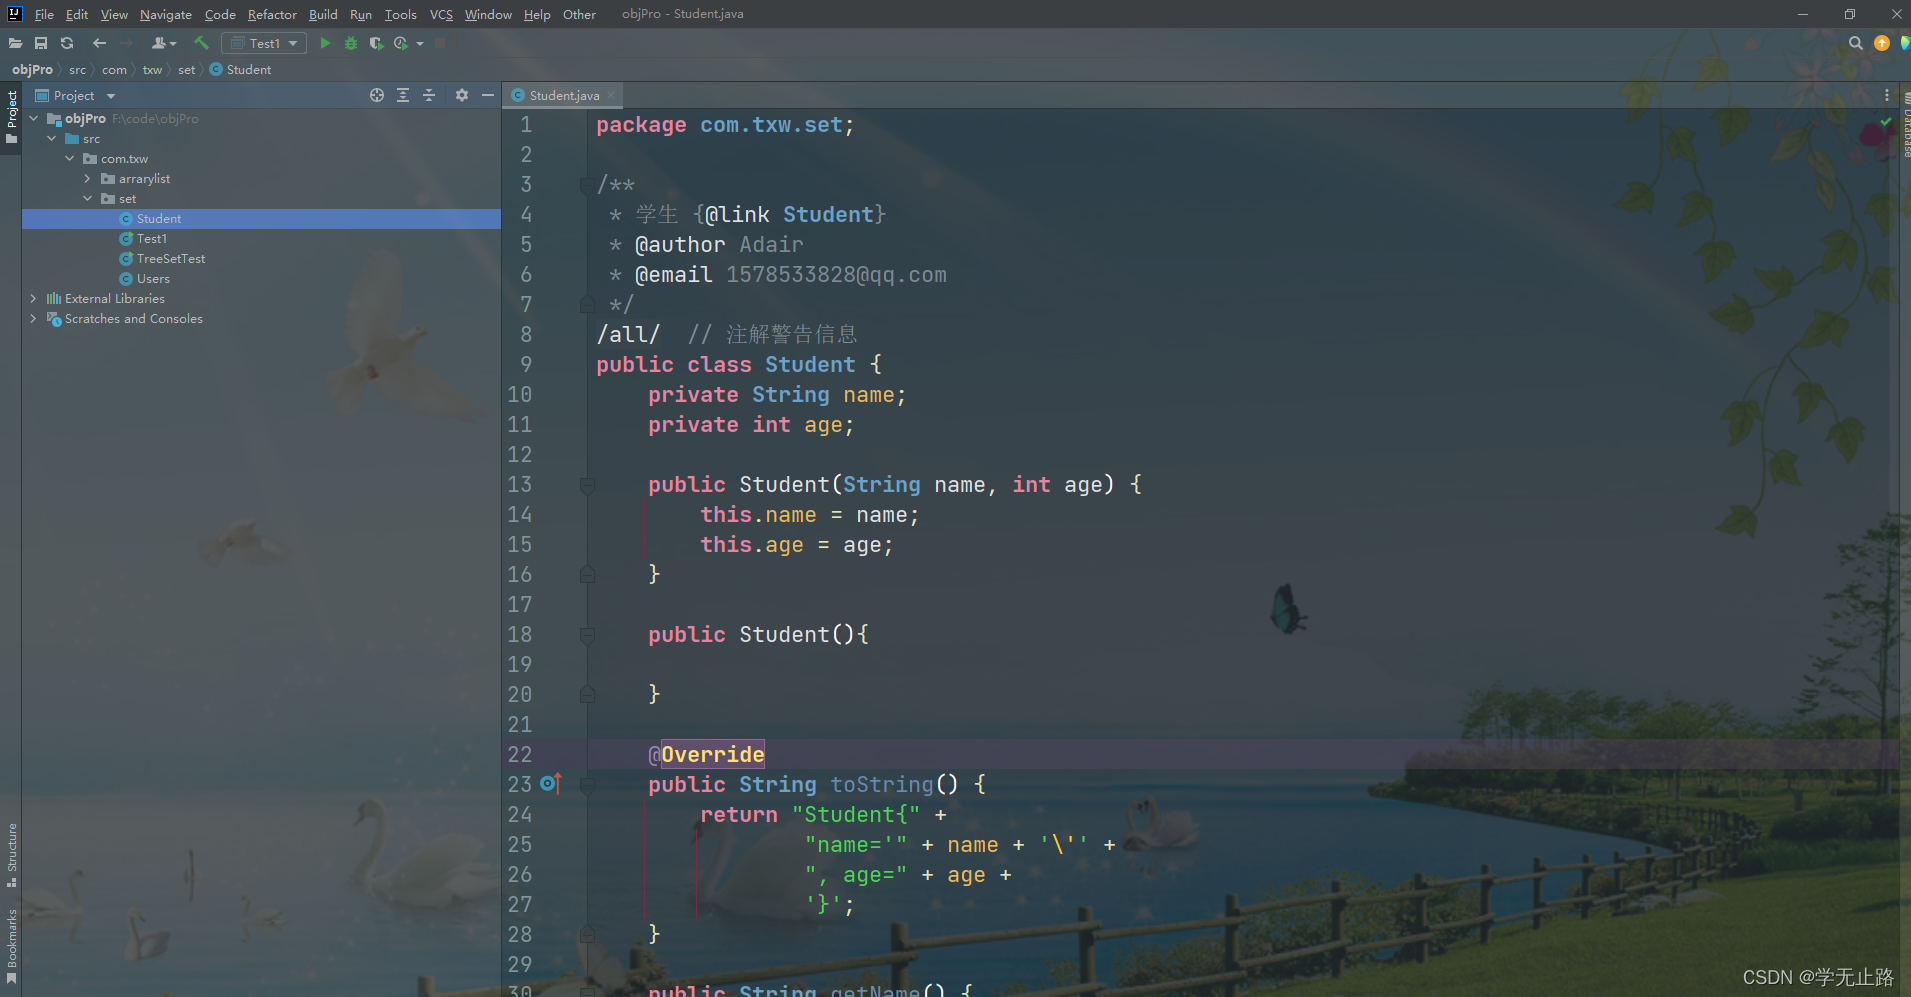
3.7.9.2 创建比较器
演示的代码如下:
package com.txw.set;

import java.util.Comparator;
/**
 * 创建比较器
 * @author Adair
 * @email 1578533828@qq.com
 */
@SuppressWarnings("all")  // 注解警告信息
public class StudentComparator implements Comparator<Student> {

    /**
     * 定义比较规则
     * @param o1
     * @param o2
     * @return
     */
     @Override
     public int compare(Student o1, Student o2) {
         if(o1.getAge() > o2.getAge()){
             return 1;
         }
         if(o1.getAge() == o2.getAge()){
             return o1.getName().compareTo(o2.getName());
         }return -1;
     }
}
如图所示: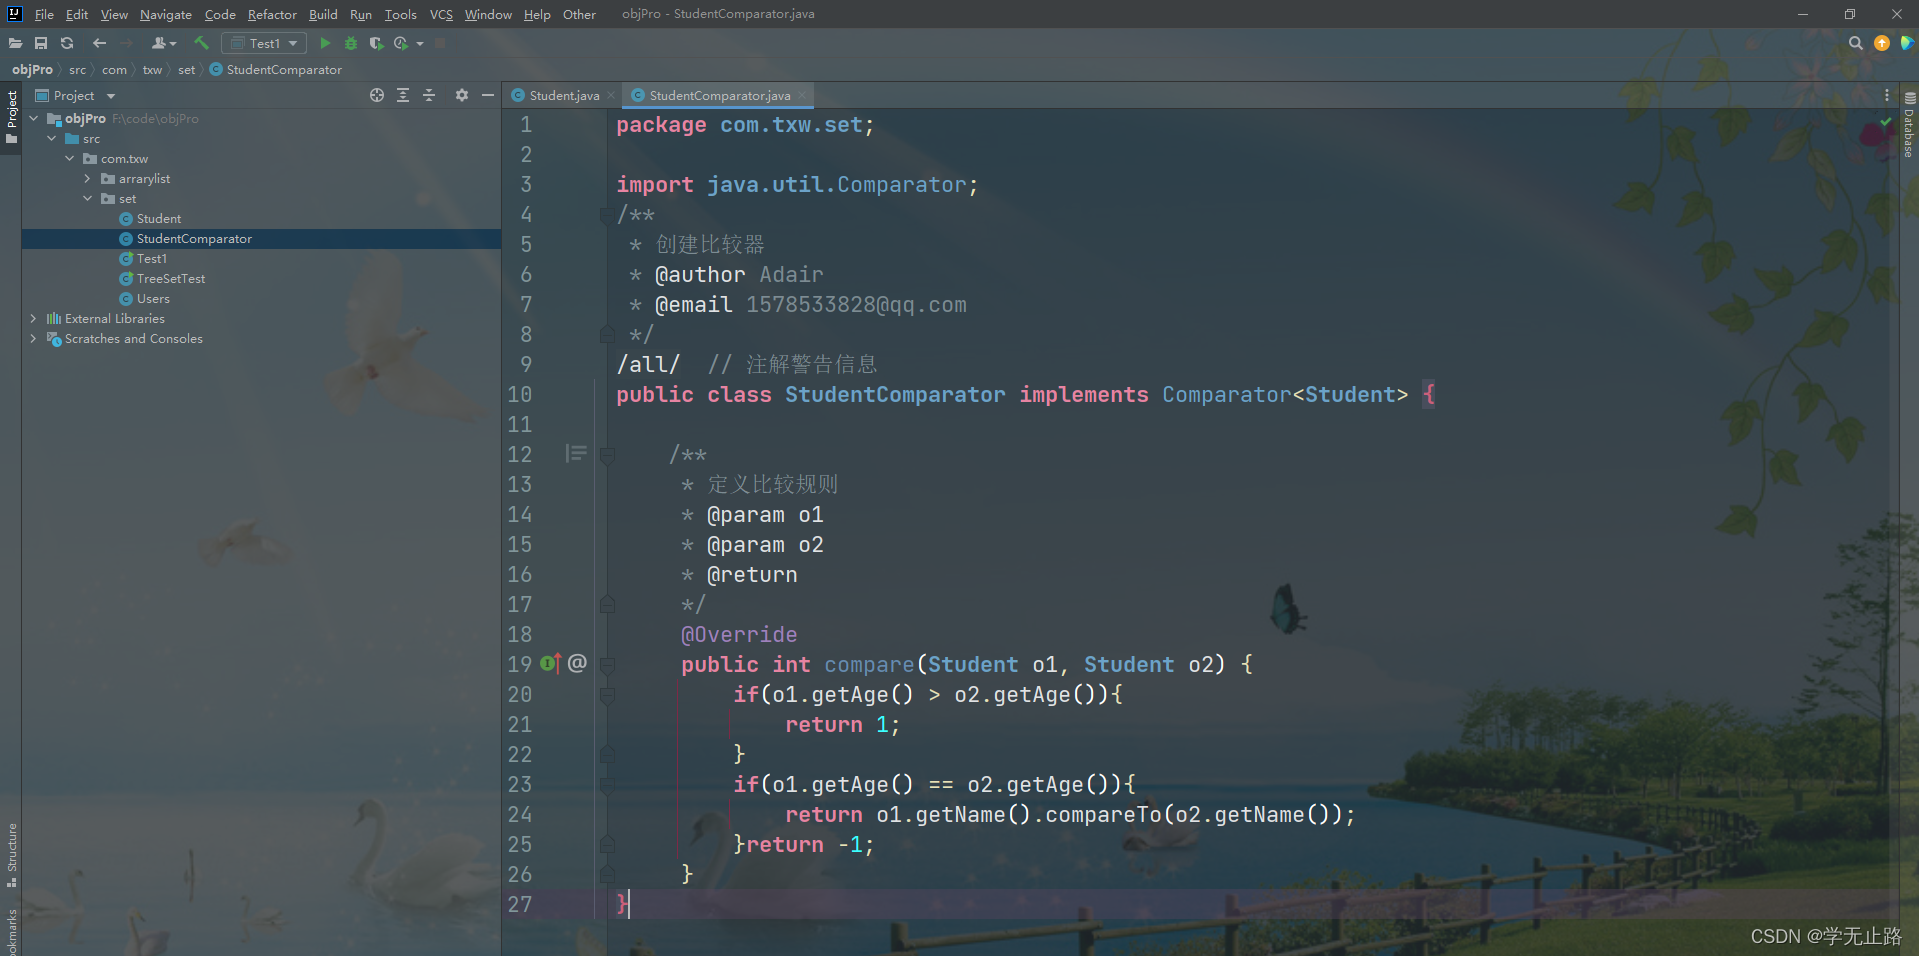
3.7.10 TreeSet 底层源码分析
3.7.10.1 成员变量
    /**
     * The backing map.
     */
    private transient NavigableMap<E,Object> m;

    // Dummy value to associate with an Object in the backing Map
    private static final Object PRESENT = new Object();

	public TreeSet() { this(new TreeMap<E,Object>());

	}
3.7.10.2 添加元素
/**
* Adds the specified element to this set if it is not already present.
* More formally, adds the specified element {@code e} to this set if
* the set contains no element {@code e2} such that
* <tt>(e==null ? e2==null : e.equals(e2))</tt>.
* If this set already contains the element, the call leaves the set
* unchanged and returns {@code false}.
*
* @param e element to be added to this set
* @return {@code true} if this set did not already contain the specified
* element
* @throws ClassCastException if the specified object cannot be compared
* with the elements currently in this set
* @throws NullPointerException if the specified element is null
* and this set uses natural ordering, or its comparator
* does not permit null elements
*/
public boolean add(E e) {
return m.put(e, PRESENT)==null;
}
3.8 单例集合使用案例
需求:
产生 1-10 之间的随机数([1,10]闭区间),将不重复的 10 个随机数放到容器中。
3.8.1 使用 List 类型容器实现
演示的代码如下:
package com.txw.arrarylist;

import java.util.ArrayList;
import java.util.List;
/**
 * 使用List类型容器实现
 * @author Adair
 * @email 1578533828@qq.com
 */
@SuppressWarnings("all")  //注解警告信息
public class ListTest {
    public static void main(String[] args) {
        List<Integer> list = new ArrayList<>();
       while (true){
           // 产生随机数
           int num = (int) (Math.random() * 10 + 1);
           // 判断当前元素在容器中是否存在
           if(!list.contains(num)){
               list.add(num);
           }
           // 结束循环
           if (list.size() == 10){
               break;
           }
       }
        for (Integer i : list) {
            System.out.println(i);
        }
    }
}
如图所示:
3.8.2 使用Set类型容器实现
演示的代码如下:
package com.txw.set;

import java.util.HashSet;
import java.util.Set;
/**
 * 使用Set类型容器实现
 * @author Adair
 * @email 1578533828@qq.com
 */
@SuppressWarnings("all")  // 注解警告信息
public class SetTest {
    public static void main(String[] args) {
        Set<Integer> set = new HashSet<>();
        while (true){
            int num = (int) (Math.random() * 10 +1);
            // 将元素添加容器中,由于Set类型容器是不允许有重复元素的,所以不需要判断
            set.add(num);
            // 结束循环
            if (set.size() == 10){
                break;
            }
        }
        for (Integer i : set) {
            System.out.println(i);
        }
    }
}
如图所示: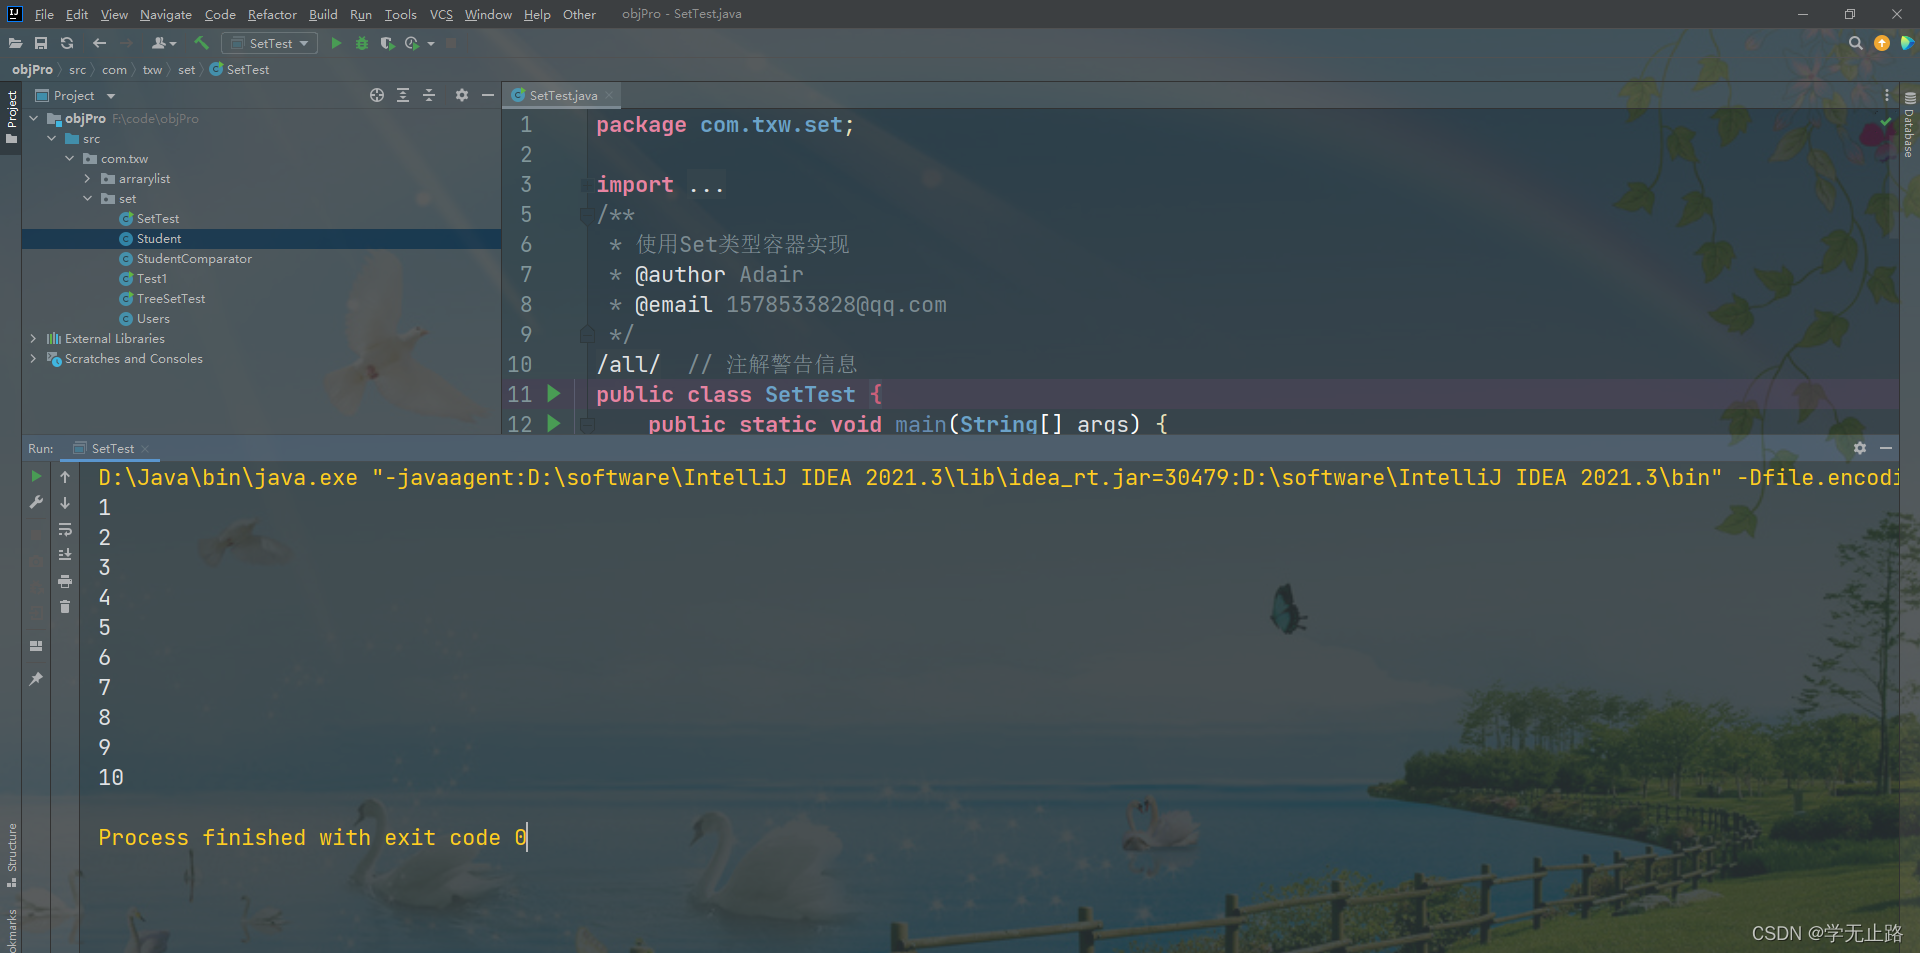
4 双例集合
4.1 Map 接口介绍
4.1.1 Map 接口特点
Map 接口定义了双例集合的存储特征,它并不是 Collection 接口的子接口。双例集合的存储特 征是以 key 与 value 结构为单位进行存储。体现的是数学中的函数 y=f(x)感念。
Map 与 Collecton 的区别:
1.Collection 中的容器,元素是孤立存在的(理解为单身),向集合中存储元素采用一个 个元素的方式存储。
2.Map 中的容器,元素是成对存在的(理解为现代社会的夫妻)。每个元素由键与值两部分 组成,通过键可以找对所对应的值。3.Collection 中的容器称为单列集合,Map 中的容器称为双列集合。
4.Map 中的集合不能包含重复的键,值可以重复;每个键只能对应一个值。
5.Map 中常用的容器为 HashMap,TreeMap 等。
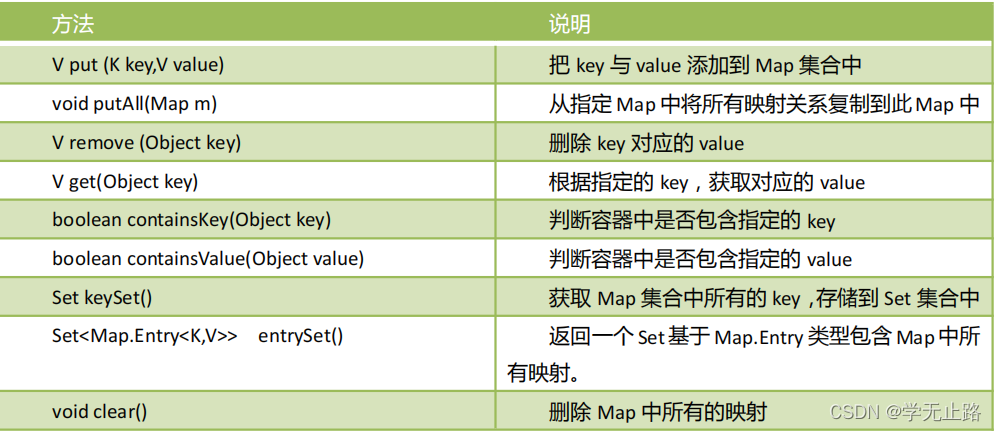
4.1.2 Map 的常用方法
4.2 HashMap 容器类
HashMap 是 Map 接口的接口实现类,它采用哈希算法实现,是 Map 接口最常用的实现类。 由于底层采用了哈希表存储数据,所以要求键不能重复,如果发生重复,新的值 会替换旧的值。 HashMap 在查找、删除、修改方面都有非常高的效率。
4.2.1 添加元素
演示的代码如下:
package com.txw.map;

import java.util.HashMap;
import java.util.Map;
/**
 * 添加元素
 * @author Adair
 * @email 1578533828@qq.com
 */
@SuppressWarnings("all")  //注解警告信息
public class HashMapTest {
    public static void main(String[] args) {
        // 实例化HashMap容器
        Map<String,String> map = new HashMap<>();
        // 添加元素
        map.put("a","A");
        String value = map.put("a", "B");
        System.out.println(value);
    }
}
如图所示: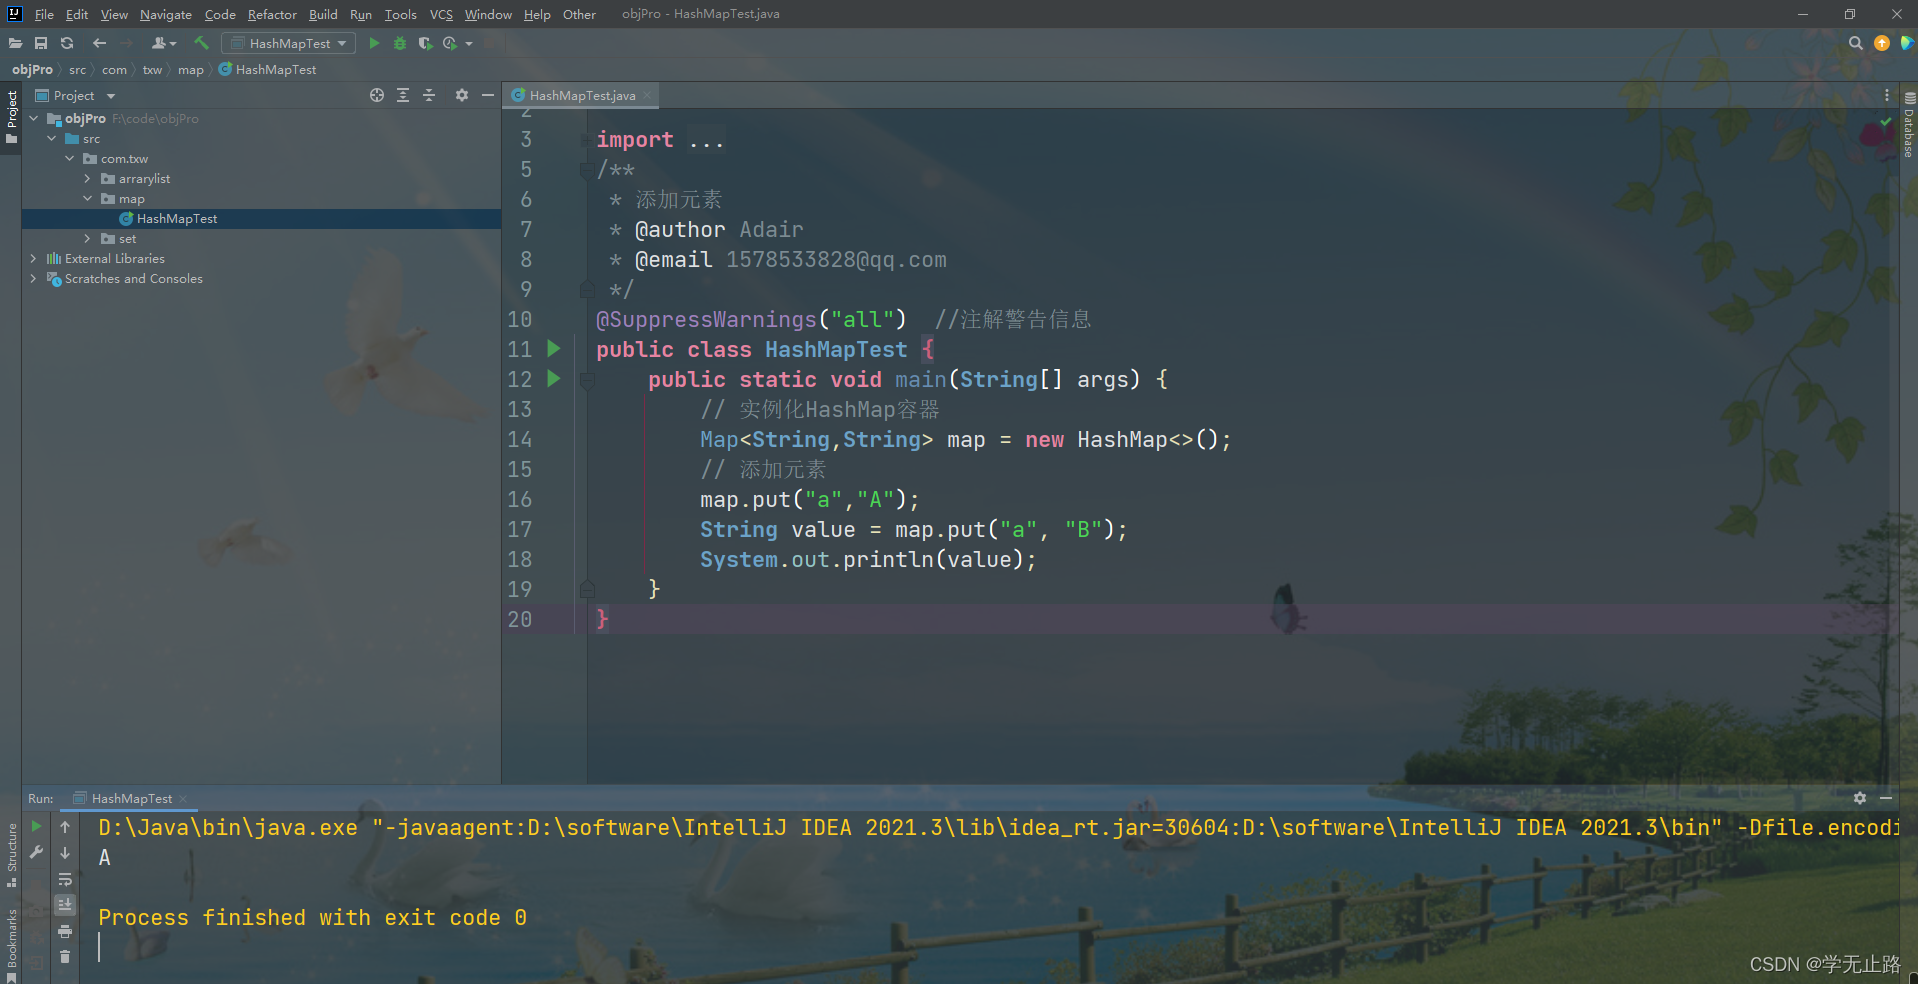
4.2.2 获取元素
4.2.2.1 方式一
通过 get 方法获取元素。
演示的代码如下:
package com.txw.map;

import java.util.HashMap;
import java.util.Map;
/**
 * 获取元素
 * @author Adair
 * @email 1578533828@qq.com
 */
@SuppressWarnings("all")  //注解警告信息
public class HashMapTest {
    public static void main(String[] args) {
        // 实例化HashMap容器
        Map<String,String> map = new HashMap<>();
        // 添加元素
        map.put("a","A");
        String value = map.put("a", "B");
        // 获取元素
        String valu = map.get("a");
        System.out.println(valu);
    }
}
如图所示: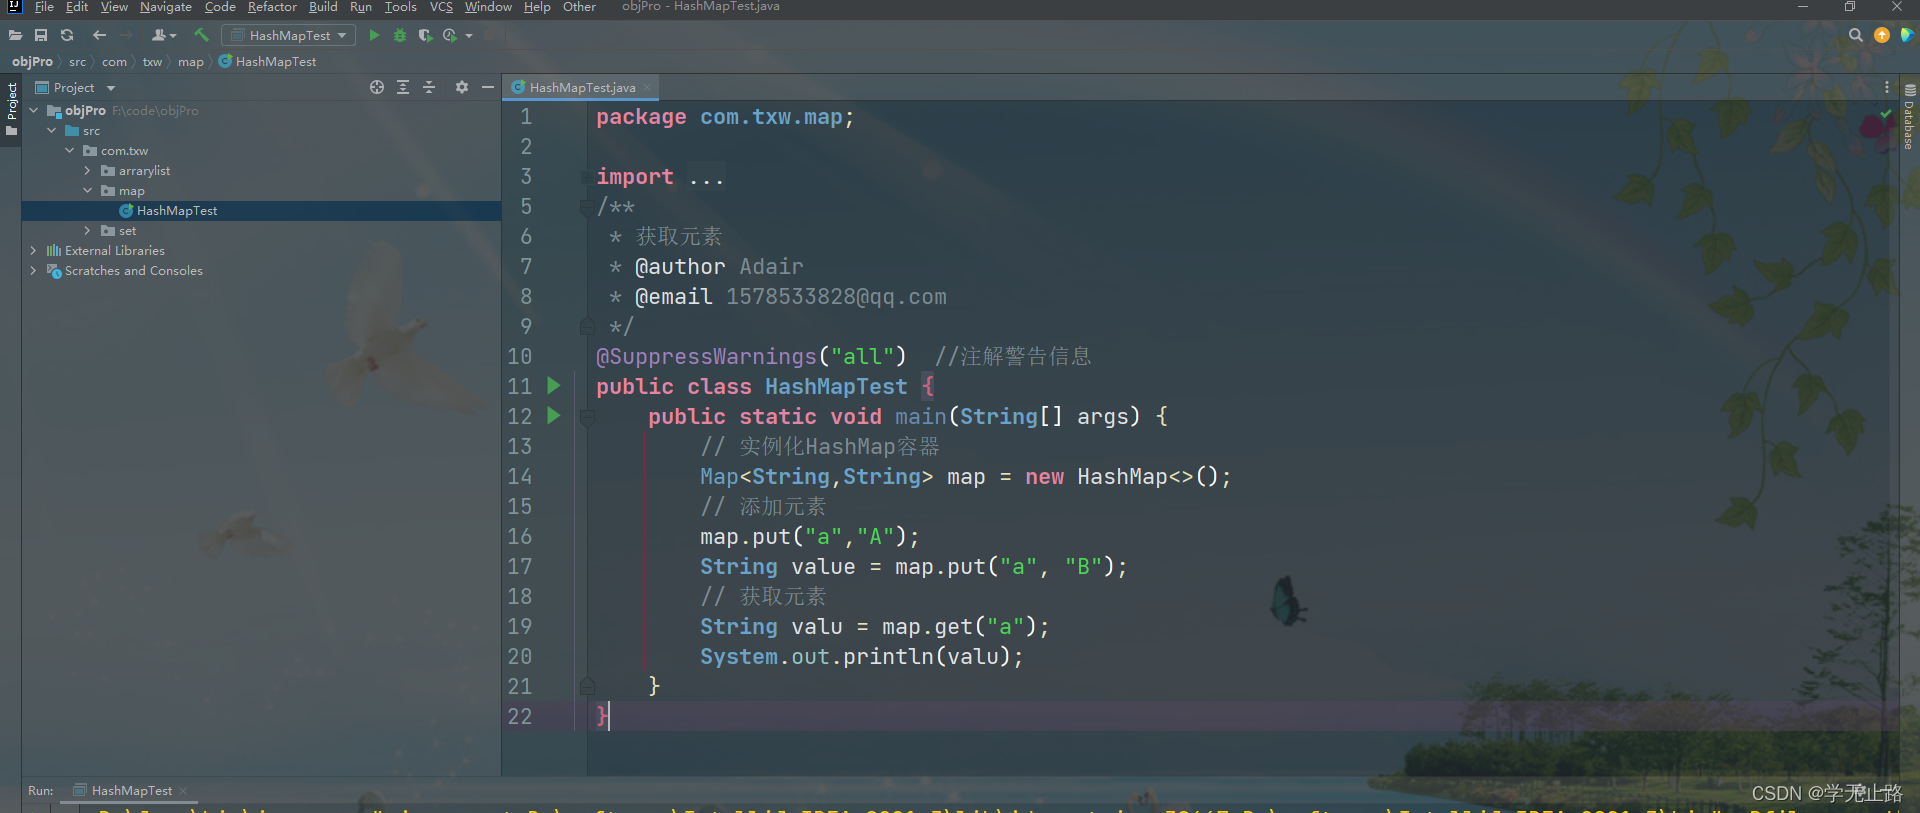
4.2.2.2 方式二
通过 keySet 方法获取元素。
演示的代码如下:
package com.txw.map;

import java.util.HashMap;
import java.util.Map;
import java.util.Set;
/**
 * 获取元素
 * @author Adair
 * @email 1578533828@qq.com
 */
@SuppressWarnings("all")  //注解警告信息
public class HashMapTest {
    public static void main(String[] args) {
        // 实例化HashMap容器
        Map<String,String> map = new HashMap<>();
        // 添加元素
        map.put("a","A");
        String value = map.put("a", "B");
        // 获取HashMap容器中所有的元素,可以使用keySet方法与get方法一并完成。
        Set<String> key = map.keySet();
        for (String keys : key) {
            String vlau = map.get(keys);
            System.out.println(keys + "----------" + vlau);
        }
    }
}
如图所示: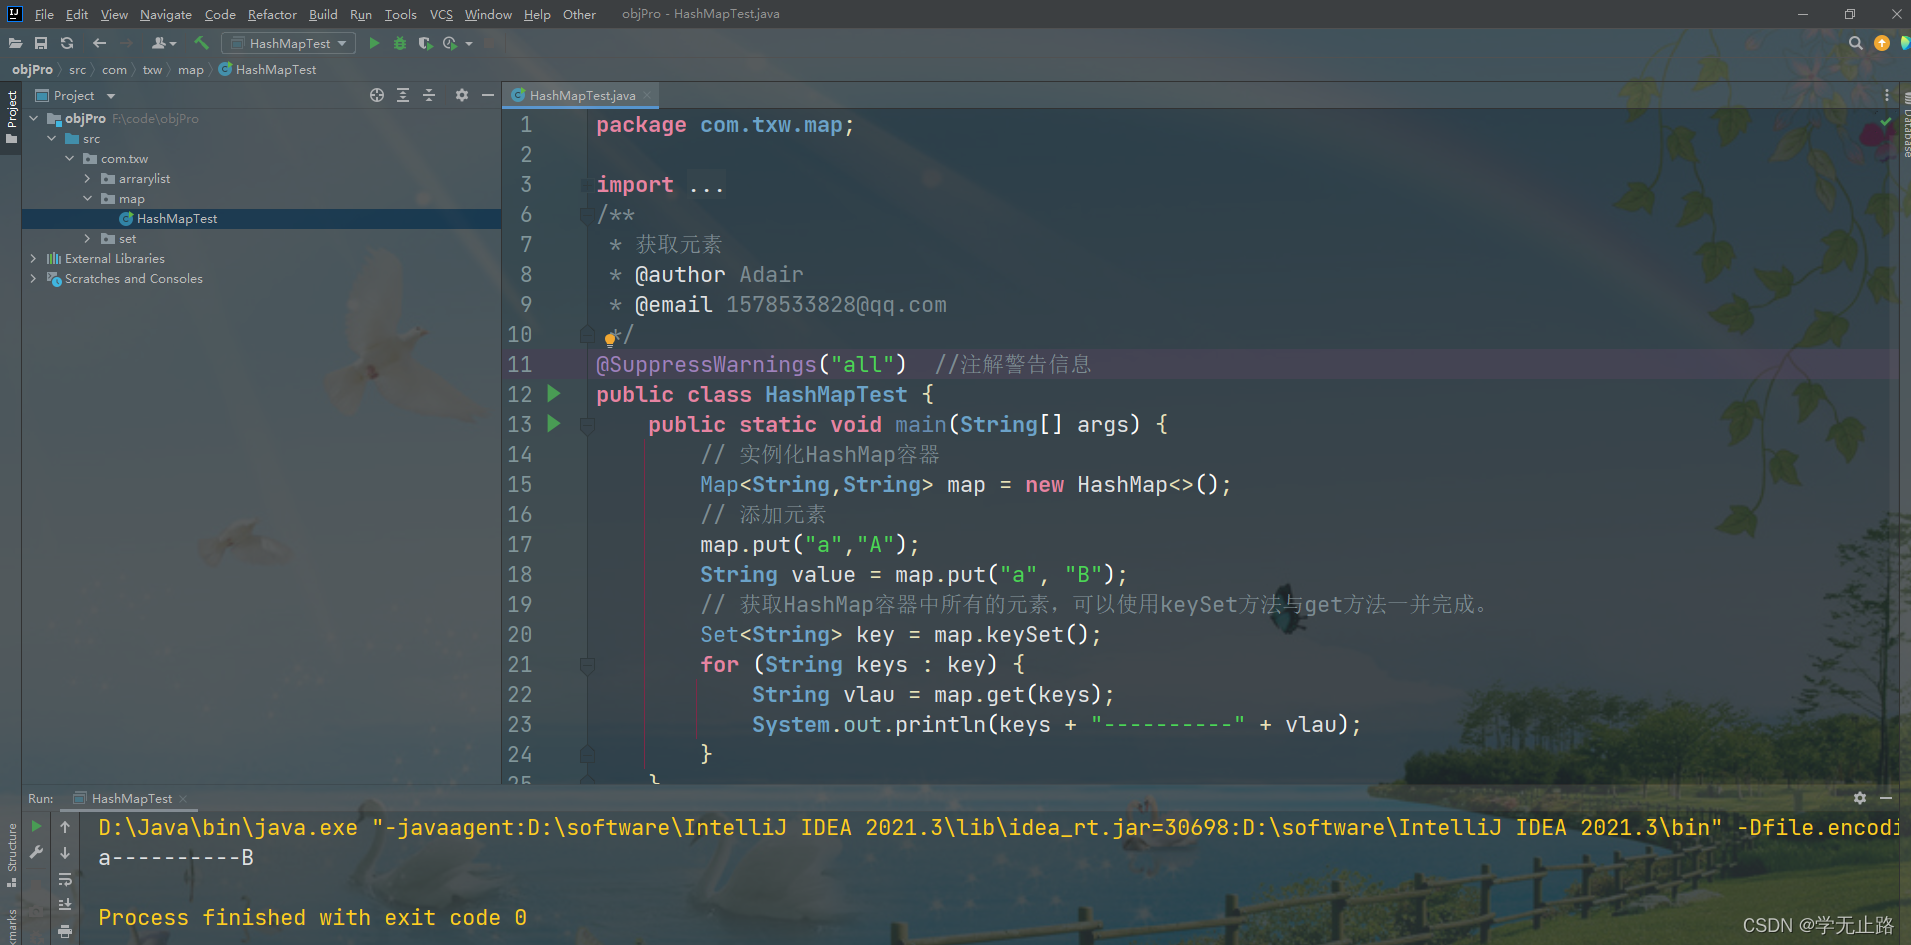
4.2.2.3 方式三
通过 entrySet 方法获取 Map.Entry 类型获取元素
演示的代码如下:
package com.txw.map;

import java.util.HashMap;
import java.util.Map;
import java.util.Set;
/**
 * 获取元素
 * @author Adair
 * @email 1578533828@qq.com
 */
@SuppressWarnings("all")  //注解警告信息
public class HashMapTest {
    public static void main(String[] args) {
        // 实例化HashMap容器
        Map<String,String> map = new HashMap<>();
        // 添加元素
        map.put("a","A");
        map.put("a", "B");
        Set<Map.Entry<String, String>> entries = map.entrySet();
        for (Map.Entry<String, String> entry : entries) {
            String key = entry.getKey();
            String value1 = entry.getValue();
            System.out.println(key + "-------------" + value1);
        }
    }
}
如图所示: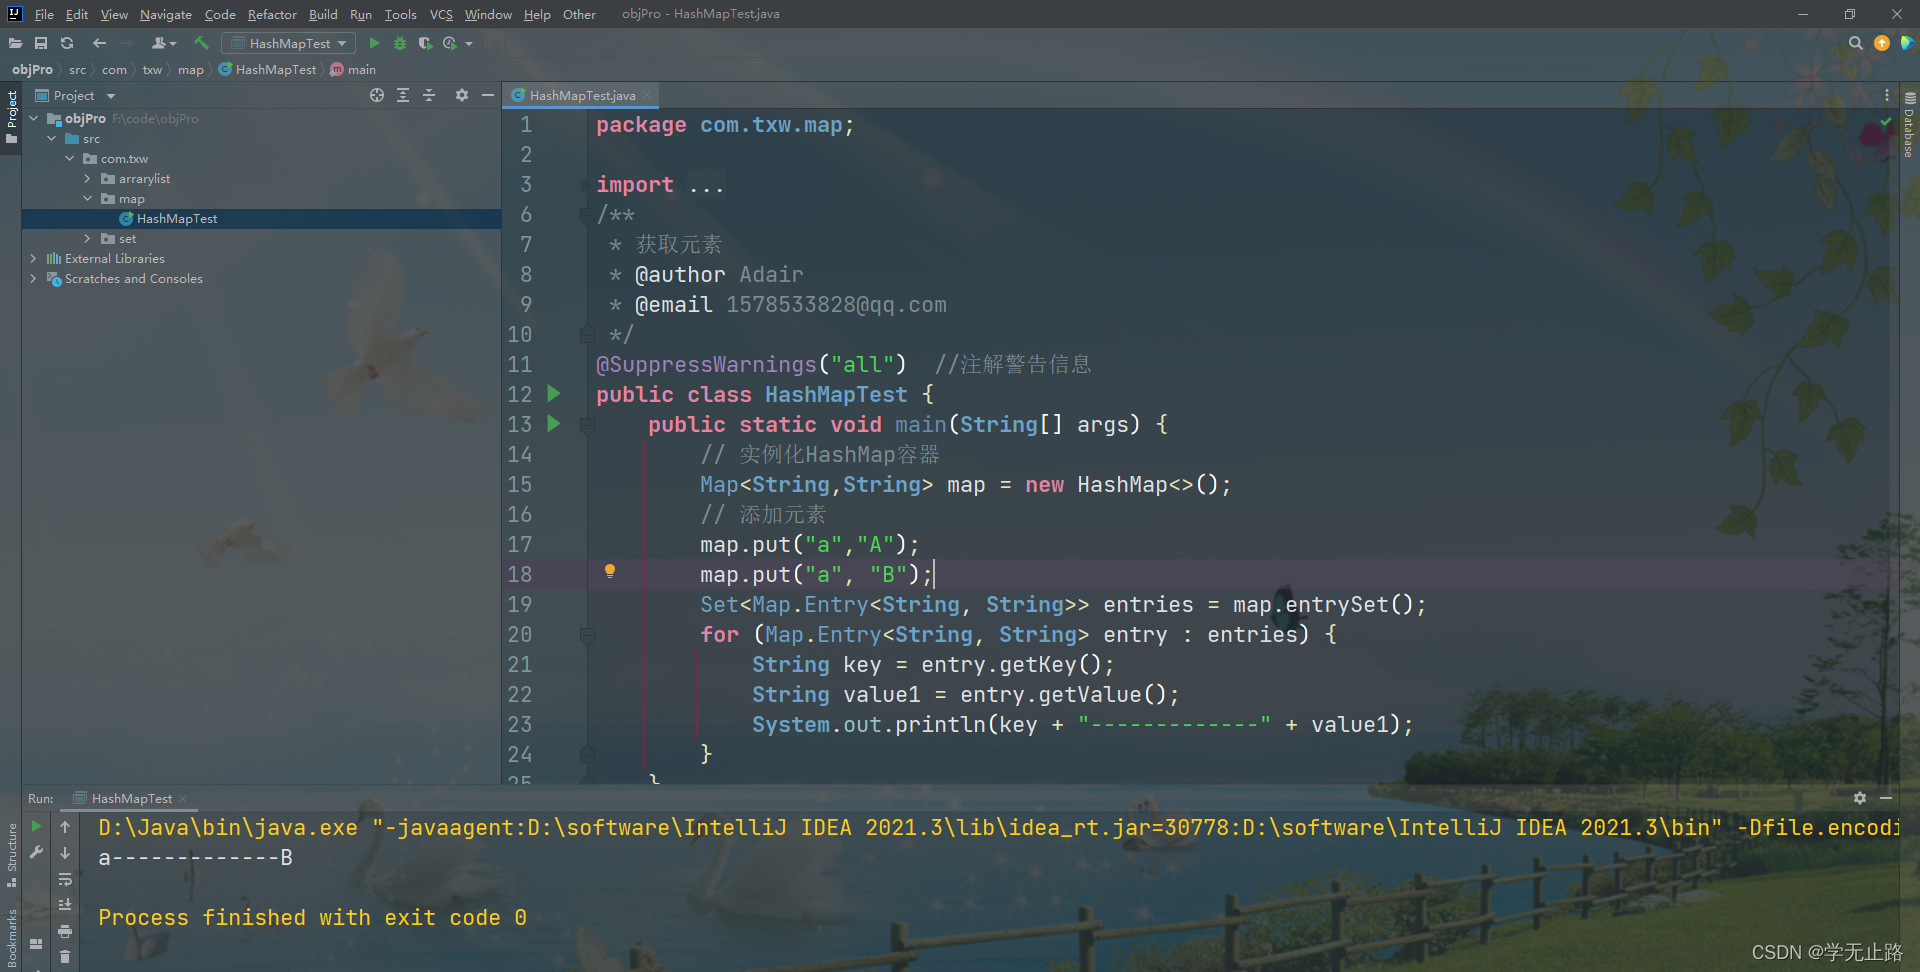
4.2.3 Map容器的并集操作
演示的代码如下:
package com.txw.map;

import java.util.HashMap;
import java.util.Map;
import java.util.Set;
/**
 * Map容器的并集操作
 * @author Adair
 * @email 1578533828@qq.com
 */
@SuppressWarnings("all")  //注解警告信息
public class HashMapTest {
    public static void main(String[] args) {
        // 实例化HashMap容器
        Map<String,String> map = new HashMap<>();
        // 添加元素
        map.put("a","A");
        map.put("a", "B");
        Map<String,String> map2 = new HashMap<>();
        map2.put("f","F");
        map2.put("c","cc");
        map2.putAll(map);
        Set<String> keys2 = map2.keySet();
        for(String key:keys2){
            System.out.println("key: "+key+" Value: "+map2.get(key));
        }
    }
}
如图所示: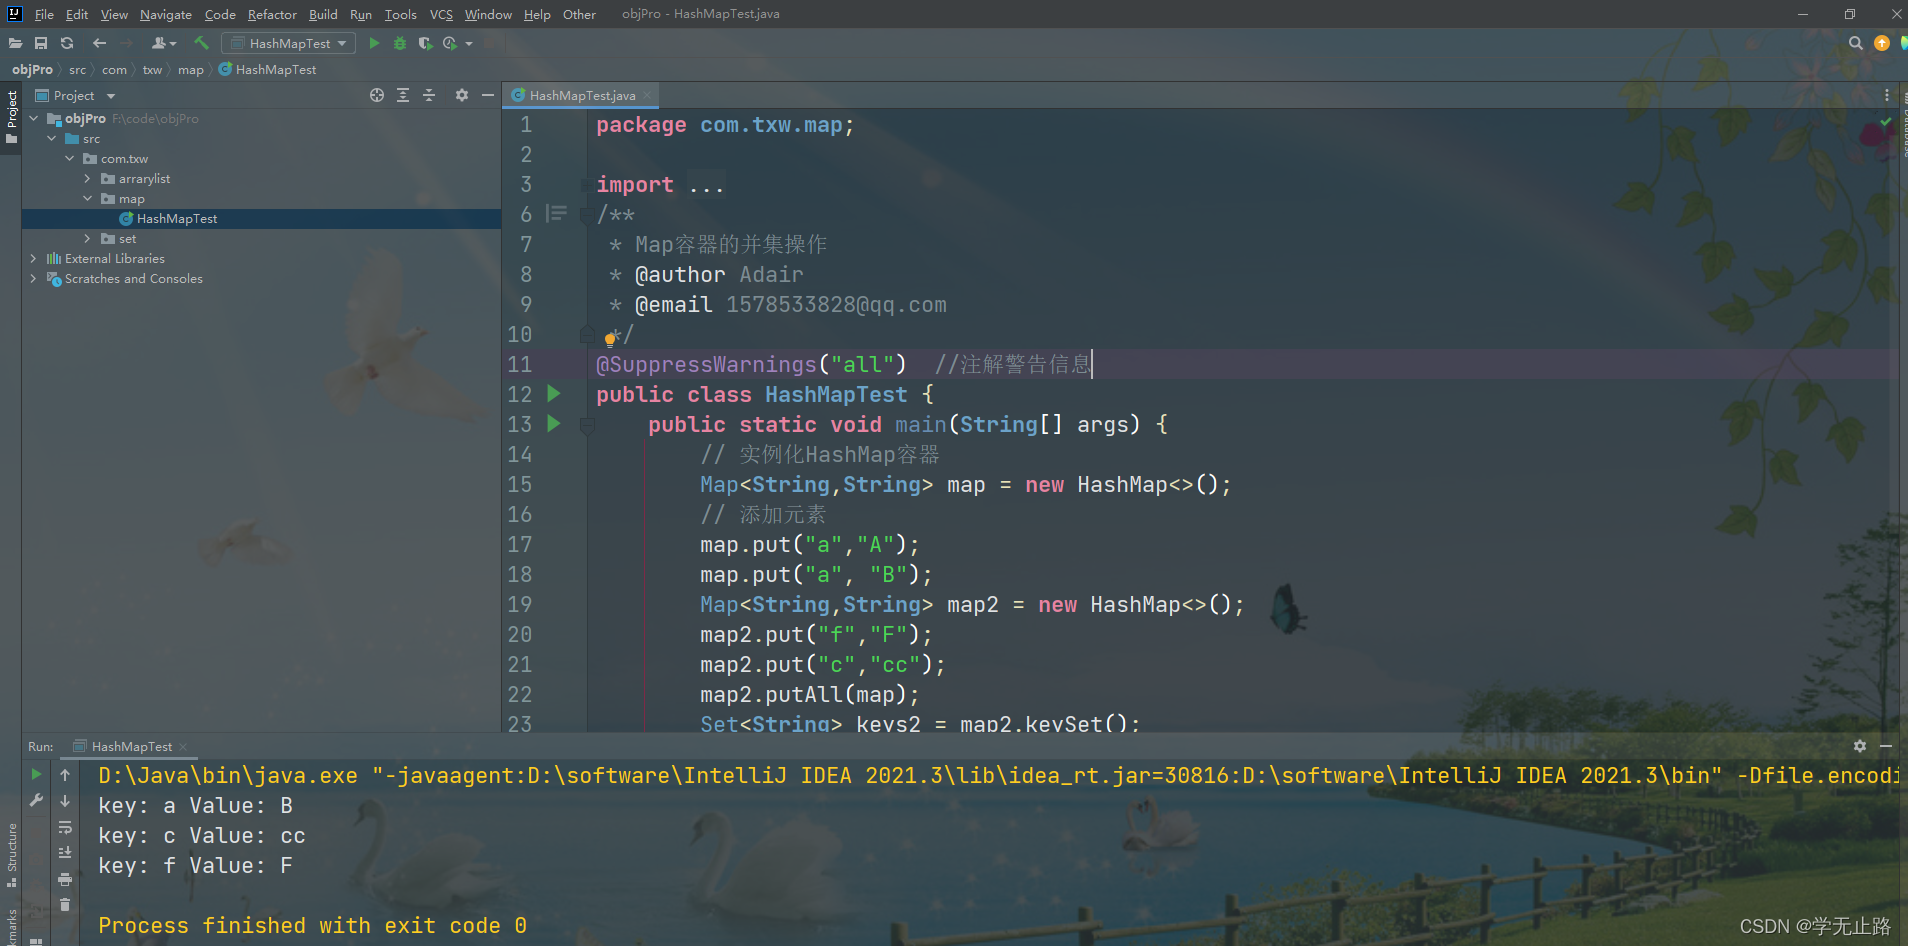
4.2.4 删除元素
演示的代码如下:
package com.txw.map;

import java.util.HashMap;
import java.util.Map;
import java.util.Set;
/**
 * 删除元素
 * @author Adair
 * @email 1578533828@qq.com
 */
@SuppressWarnings("all")  //注解警告信息
public class HashMapTest {
    public static void main(String[] args) {
        // 实例化HashMap容器
        Map<String,String> map = new HashMap<>();
        // 添加元素
        map.put("a","A");
        map.put("b", "B");
        map.put("c", "C");
        map.put("d", "D");
        // 删除元素
        String v = map.remove("c");
        System.out.println(v);
        Set<String> keys = map.keySet();
        for (String key : keys) {
            System.out.println("key: "+key+" Value: "+map.get(key));
        }
    }
}
如图所示: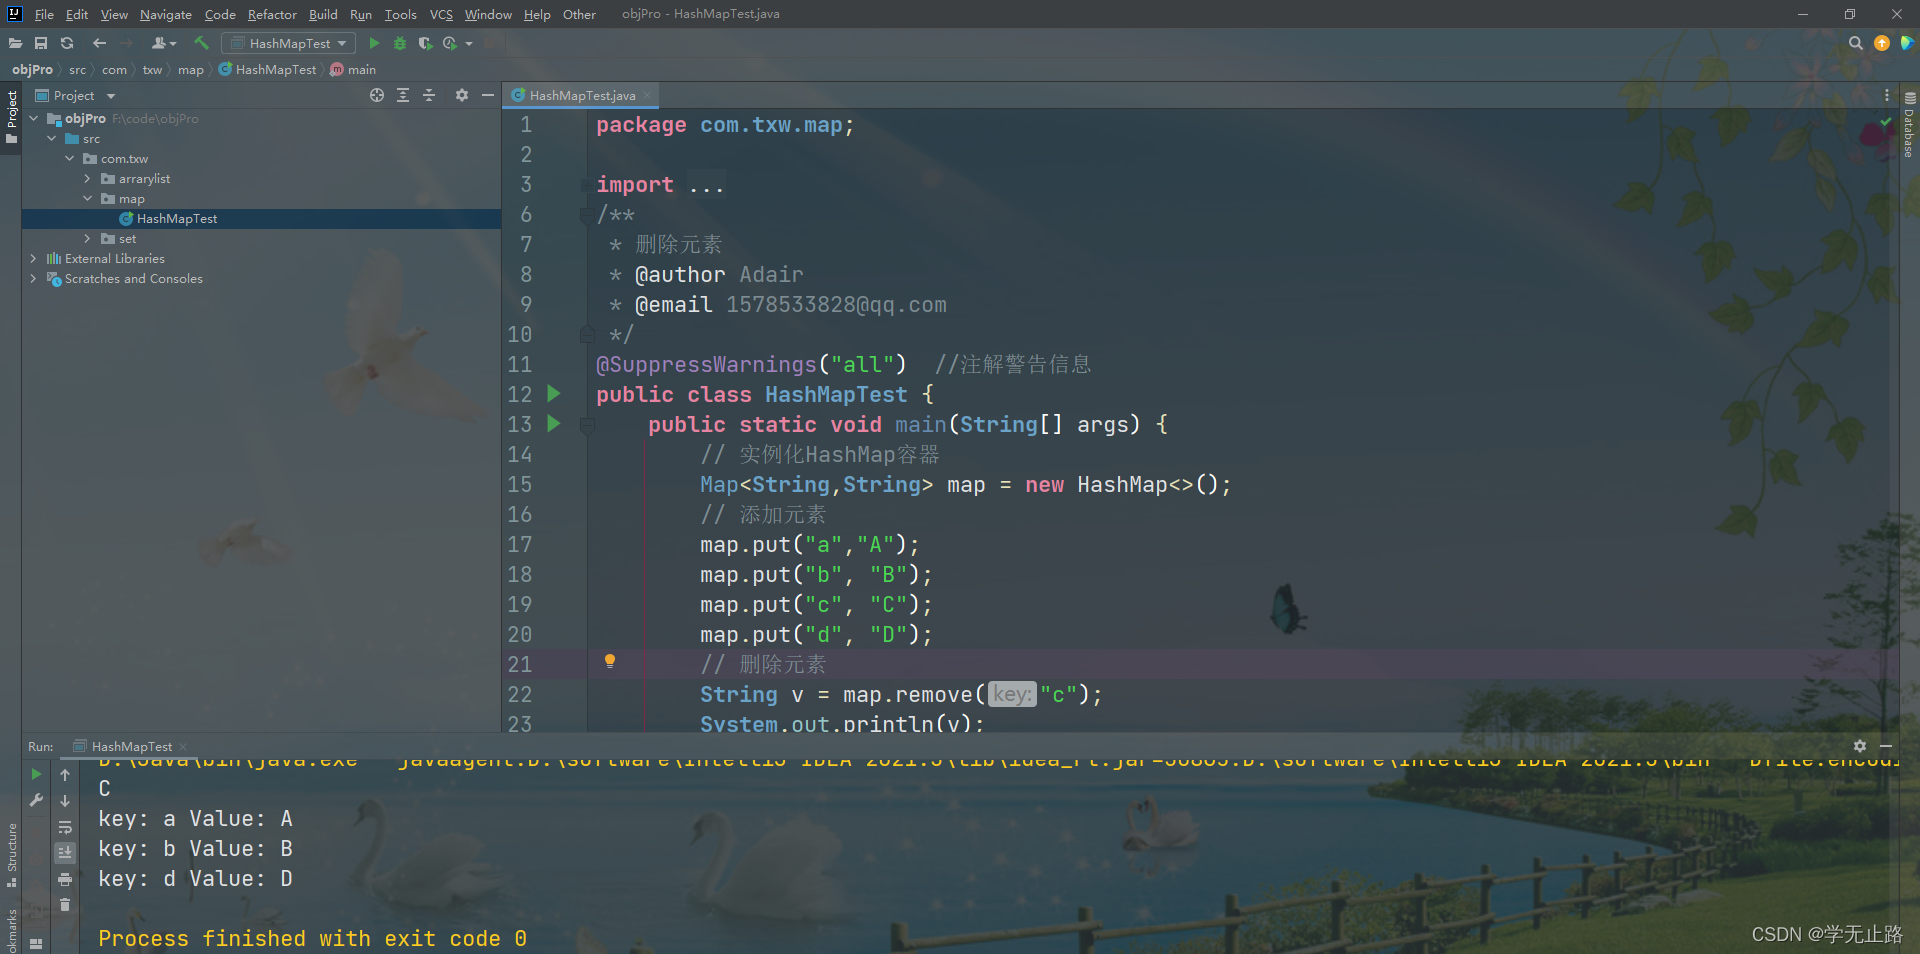
4.2.5 判断 key 或 value 是否存在
4.2.5.1 判断 key 是否存在
boolean flag = map.containsKey("a");
System.out.println(flag);
4.2.5.2 判断 value 是否存在
boolean flag2 = map.containsValue("B");
System.out.println(flag2);
4.2.6 HashMap 的底层源码分析
4.2.6.1 底层存储介绍
HashMap 底层实现采用了哈希表,这是一种非常重要的数据结构。对于我们以后理解 很多技术都非常有帮助,因此,非常有必要让大家详细的理解。
数据结构中由数组和链表来实现对数据的存储,他们各有特点。
(1) 数组:占用空间连续。 寻址容易,查询速度快。但是,增加和删除效率非常低。
(2) 链表:占用空间不连续。 寻址困难,查询速度慢。但是,增加和删除效率非常高。
那么,我们能不能结合数组和链表的优点(即查询快,增删效率也高)呢? 答案就是 “哈希表”。 哈希表的本质就是“数组+链表”。 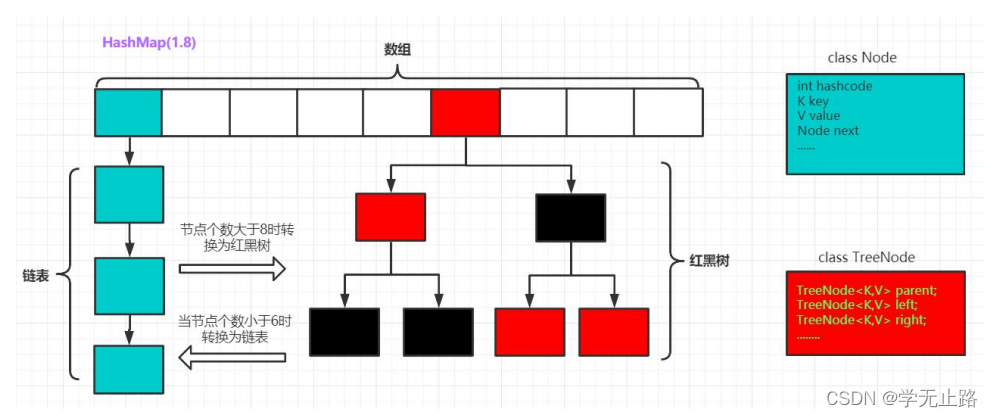
4.2.6.2 成员变量
    /**
     * The default initial capacity - MUST be a power of two.
     */
    static final int DEFAULT_INITIAL_CAPACITY = 1 << 4; // aka 16

    /**
     * The maximum capacity, used if a higher value is implicitly specified
     * by either of the constructors with arguments.
     * MUST be a power of two <= 1<<30.
     */
    static final int MAXIMUM_CAPACITY = 1 << 30;

    /**
     * The load factor used when none specified in constructor.
     */
    static final float DEFAULT_LOAD_FACTOR = 0.75f;

    /**
     * The bin count threshold for using a tree rather than list for a
     * bin.  Bins are converted to trees when adding an element to a
     * bin with at least this many nodes. The value must be greater
     * than 2 and should be at least 8 to mesh with assumptions in
     * tree removal about conversion back to plain bins upon
     * shrinkage.
     */
    static final int TREEIFY_THRESHOLD = 8;

    /**
     * The bin count threshold for untreeifying a (split) bin during a
     * resize operation. Should be less than TREEIFY_THRESHOLD, and at
     * most 6 to mesh with shrinkage detection under removal.
     */
    static final int UNTREEIFY_THRESHOLD = 6;

    /**
     * The smallest table capacity for which bins may be treeified.
     * (Otherwise the table is resized if too many nodes in a bin.)
     * Should be at least 4 * TREEIFY_THRESHOLD to avoid conflicts
     * between resizing and treeification thresholds.
     */
    static final int MIN_TREEIFY_CAPACITY = 64;
    /**
     * The number of key-value mappings contained in this map.
     */
    transient int size;

    /**
     * The table, initialized on first use, and resized as
     * necessary. When allocated, length is always a power of two.
     * (We also tolerate length zero in some operations to allow
     * bootstrapping mechanics that are currently not needed.)
     */
    transient Node<K,V>[] table;
4.2.6.3 HashMap 中存储元素的节点类型
    static class Node<K,V> implements Map.Entry<K,V> {
        final int hash;
        final K key;
        V value;
        Node<K,V> next;

        Node(int hash, K key, V value, Node<K,V> next) {
            this.hash = hash;
            this.key = key;
            this.value = value;
            this.next = next;
        }

        public final K getKey()        { return key; }
        public final V getValue()      { return value; }
        public final String toString() { return key + "=" + value; }

        public final int hashCode() {
            return Objects.hashCode(key) ^ Objects.hashCode(value);
        }

        public final V setValue(V newValue) {
            V oldValue = value;
            value = newValue;
            return oldValue;
        }

        public final boolean equals(Object o) {
            if (o == this)
                return true;
            if (o instanceof Map.Entry) {
                Map.Entry<?,?> e = (Map.Entry<?,?>)o;
                if (Objects.equals(key, e.getKey()) &&
                    Objects.equals(value, e.getValue()))
                    return true;
            }
            return false;
        }
    }
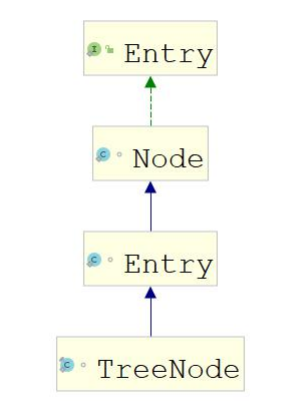
4.2.6.3.2 TreeNode 类
    /**
     * Entry for Tree bins. Extends LinkedHashMap.Entry (which in turn
     * extends Node) so can be used as extension of either regular or
     * linked node.
     */
    static final class TreeNode<K,V> extends LinkedHashMap.Entry<K,V> {
        TreeNode<K,V> parent;  // red-black tree links
        TreeNode<K,V> left;
        TreeNode<K,V> right;
        TreeNode<K,V> prev;    // needed to unlink next upon deletion
        boolean red;
        TreeNode(int hash, K key, V val, Node<K,V> next) {
            super(hash, key, val, next);
        }

        /**
         * Returns root of tree containing this node.
         */
        final TreeNode<K,V> root() {
            for (TreeNode<K,V> r = this, p;;) {
                if ((p = r.parent) == null)
                    return r;
                r = p;
            }
        }
4.2.6.3.3 它们的继承关系
4.2.6.4 数组初始化
在 JDK1.8 的 HashMap 中对于数组的初始化采用的是延迟初始化方式。通过 resize 方法 实现初始化处理。resize 方法既实现数组初始化,也实现数组扩容处理。
    /**
     * Initializes or doubles table size.  If null, allocates in
     * accord with initial capacity target held in field threshold.
     * Otherwise, because we are using power-of-two expansion, the
     * elements from each bin must either stay at same index, or move
     * with a power of two offset in the new table.
     *
     * @return the table
     */
    final Node<K,V>[] resize() {
        Node<K,V>[] oldTab = table;
        int oldCap = (oldTab == null) ? 0 : oldTab.length;
        int oldThr = threshold;
        int newCap, newThr = 0;
        if (oldCap > 0) {
            if (oldCap >= MAXIMUM_CAPACITY) {
                threshold = Integer.MAX_VALUE;
                return oldTab;
            }
            else if ((newCap = oldCap << 1) < MAXIMUM_CAPACITY &&
                     oldCap >= DEFAULT_INITIAL_CAPACITY)
                newThr = oldThr << 1; // double threshold
        }
        else if (oldThr > 0) // initial capacity was placed in threshold
            newCap = oldThr;
        else {               // zero initial threshold signifies using defaults
            newCap = DEFAULT_INITIAL_CAPACITY;
            newThr = (int)(DEFAULT_LOAD_FACTOR * DEFAULT_INITIAL_CAPACITY);
        }
        if (newThr == 0) {
            float ft = (float)newCap * loadFactor;
            newThr = (newCap < MAXIMUM_CAPACITY && ft < (float)MAXIMUM_CAPACITY ?
                      (int)ft : Integer.MAX_VALUE);
        }
        threshold = newThr;
        @SuppressWarnings({"rawtypes","unchecked"})
        Node<K,V>[] newTab = (Node<K,V>[])new Node[newCap];
        table = newTab;
        if (oldTab != null) {
            for (int j = 0; j < oldCap; ++j) {
                Node<K,V> e;
                if ((e = oldTab[j]) != null) {
                    oldTab[j] = null;
                    if (e.next == null)
                        newTab[e.hash & (newCap - 1)] = e;
                    else if (e instanceof TreeNode)
                        ((TreeNode<K,V>)e).split(this, newTab, j, oldCap);
                    else { // preserve order
                        Node<K,V> loHead = null, loTail = null;
                        Node<K,V> hiHead = null, hiTail = null;
                        Node<K,V> next;
                        do {
                            next = e.next;
                            if ((e.hash & oldCap) == 0) {
                                if (loTail == null)
                                    loHead = e;
                                else
                                    loTail.next = e;
                                loTail = e;
                            }
                            else {
                                if (hiTail == null)
                                    hiHead = e;
                                else
                                    hiTail.next = e;
                                hiTail = e;
                            }
                        } while ((e = next) != null);
                        if (loTail != null) {
                            loTail.next = null;
                            newTab[j] = loHead;
                        }
                        if (hiTail != null) {
                            hiTail.next = null;
                            newTab[j + oldCap] = hiHead;
                        }
                    }
                }
            }
        }
        return newTab;
    }
4.2.6.5 计算 Hash 值
(1) 获得 key 对象的 hashcode 首先调用 key 对象的 hashcode()方法,获得 key 的 hashcode 值。
(2) 根据 hashcode 计算出 hash 值(要求在[0, 数组长度-1]区间) hashcode 是一个整数,我们需要将它转化成[0, 数组长度-1]的范围。我们要求转化后的 hash 值尽量均匀地分布在[0,数组长度-1]这个区间,减少“hash 冲突”
i. 一种极端简单和低下的算法是:
hash 值 = hashcode/hashcode;
也就是说,hash 值总是1。意味着,键值对对象都会存储到数组索引1位置,这样就形成一个非常长的链表。相当于每存储一个对象都会发生“hash 冲突”,HashMap 也退化成了一个“链表”。
ii. 一种简单和常用的算法是(相除取余算法):
hash 值 = hashcode%数组长度
这种算法可以让 hash 值均匀的分布在[0,数组长度-1]的区间。但是,这 种算法由于使用了“除法”,效率低下。JDK 后来改进了算法。首先约定数 组长度必须为 2 的整数幂,这样采用位运算即可实现取余的效果:hash 值 = hashcode&(数组长度-1)。
    /**
     * Associates the specified value with the specified key in this map.
     * If the map previously contained a mapping for the key, the old
     * value is replaced.
     *
     * @param key key with which the specified value is to be associated
     * @param value value to be associated with the specified key
     * @return the previous value associated with <tt>key</tt>, or
     *         <tt>null</tt> if there was no mapping for <tt>key</tt>.
     *         (A <tt>null</tt> return can also indicate that the map
     *         previously associated <tt>null</tt> with <tt>key</tt>.)
     */
    public V put(K key, V value) {
        return putVal(hash(key), key, value, false, true);
    }

    static final int hash(Object key) {
        int h;
        return (key == null) ? 0 : (h = key.hashCode()) ^ (h >>> 16);
    }

    /**
     * Implements Map.put and related methods.
     *
     * @param hash hash for key
     * @param key the key
     * @param value the value to put
     * @param onlyIfAbsent if true, don't change existing value
     * @param evict if false, the table is in creation mode.
     * @return previous value, or null if none
     */
    final V putVal(int hash, K key, V value, boolean onlyIfAbsent,
                   boolean evict) {
        Node<K,V>[] tab; Node<K,V> p; int n, i;
        if ((tab = table) == null || (n = tab.length) == 0)
            n = (tab = resize()).length;
        if ((p = tab[i = (n - 1) & hash]) == null)
            tab[i] = newNode(hash, key, value, null);
        else {
            Node<K,V> e; K k;
            if (p.hash == hash &&
                ((k = p.key) == key || (key != null && key.equals(k))))
                e = p;
            else if (p instanceof TreeNode)
                e = ((TreeNode<K,V>)p).putTreeVal(this, tab, hash, key, value);
            else {
                for (int binCount = 0; ; ++binCount) {
                    if ((e = p.next) == null) {
                        p.next = newNode(hash, key, value, null);
                        if (binCount >= TREEIFY_THRESHOLD - 1) // -1 for 1st
                            treeifyBin(tab, hash);
                        break;
                    }
                    if (e.hash == hash &&
                        ((k = e.key) == key || (key != null && key.equals(k))))
                        break;
                    p = e;
                }
            }
            if (e != null) { // existing mapping for key
                V oldValue = e.value;
                if (!onlyIfAbsent || oldValue == null)
                    e.value = value;
                afterNodeAccess(e);
                return oldValue;
            }
        }
        ++modCount;
        if (++size > threshold)
            resize();
        afterNodeInsertion(evict);
        return null;
    }
4.2.6.6 添加元素
    /**
     * Associates the specified value with the specified key in this map.
     * If the map previously contained a mapping for the key, the old
     * value is replaced.
     *
     * @param key key with which the specified value is to be associated
     * @param value value to be associated with the specified key
     * @return the previous value associated with <tt>key</tt>, or
     *         <tt>null</tt> if there was no mapping for <tt>key</tt>.
     *         (A <tt>null</tt> return can also indicate that the map
     *         previously associated <tt>null</tt> with <tt>key</tt>.)
     */
    public V put(K key, V value) {
        return putVal(hash(key), key, value, false, true);
    }

    /**
     * Implements Map.put and related methods.
     *
     * @param hash hash for key
     * @param key the key
     * @param value the value to put
     * @param onlyIfAbsent if true, don't change existing value
     * @param evict if false, the table is in creation mode.
     * @return previous value, or null if none
     */
    final V putVal(int hash, K key, V value, boolean onlyIfAbsent,
                   boolean evict) {
        Node<K,V>[] tab; Node<K,V> p; int n, i;
        if ((tab = table) == null || (n = tab.length) == 0)
            n = (tab = resize()).length;
        if ((p = tab[i = (n - 1) & hash]) == null)
            tab[i] = newNode(hash, key, value, null);
        else {
            Node<K,V> e; K k;
            if (p.hash == hash &&
                ((k = p.key) == key || (key != null && key.equals(k))))
                e = p;
            else if (p instanceof TreeNode)
                e = ((TreeNode<K,V>)p).putTreeVal(this, tab, hash, key, value);
            else {
                for (int binCount = 0; ; ++binCount) {
                    if ((e = p.next) == null) {
                        p.next = newNode(hash, key, value, null);
                        if (binCount >= TREEIFY_THRESHOLD - 1) // -1 for 1st
                            treeifyBin(tab, hash);
                        break;
                    }
                    if (e.hash == hash &&
                        ((k = e.key) == key || (key != null && key.equals(k))))
                        break;
                    p = e;
                }
            }
            if (e != null) { // existing mapping for key
                V oldValue = e.value;
                if (!onlyIfAbsent || oldValue == null)
                    e.value = value;
                afterNodeAccess(e);
                return oldValue;
            }
        }
        ++modCount;
        if (++size > threshold)
            resize();
        afterNodeInsertion(evict);
        return null;
    }
4.2.6.7 数组扩容
    /**
     * Implements Map.put and related methods.
     *
     * @param hash hash for key
     * @param key the key
     * @param value the value to put
     * @param onlyIfAbsent if true, don't change existing value
     * @param evict if false, the table is in creation mode.
     * @return previous value, or null if none
     */
    final V putVal(int hash, K key, V value, boolean onlyIfAbsent,
                   boolean evict) {
        Node<K,V>[] tab; Node<K,V> p; int n, i;
        if ((tab = table) == null || (n = tab.length) == 0)
            n = (tab = resize()).length;
        if ((p = tab[i = (n - 1) & hash]) == null)
            tab[i] = newNode(hash, key, value, null);
        else {
            Node<K,V> e; K k;
            if (p.hash == hash &&
                ((k = p.key) == key || (key != null && key.equals(k))))
                e = p;
            else if (p instanceof TreeNode)
                e = ((TreeNode<K,V>)p).putTreeVal(this, tab, hash, key, value);
            else {
                for (int binCount = 0; ; ++binCount) {
                    if ((e = p.next) == null) {
                        p.next = newNode(hash, key, value, null);
                        if (binCount >= TREEIFY_THRESHOLD - 1) // -1 for 1st
                            treeifyBin(tab, hash);
                        break;
                    }
                    if (e.hash == hash &&
                        ((k = e.key) == key || (key != null && key.equals(k))))
                        break;
                    p = e;
                }
            }
            if (e != null) { // existing mapping for key
                V oldValue = e.value;
                if (!onlyIfAbsent || oldValue == null)
                    e.value = value;
                afterNodeAccess(e);
                return oldValue;
            }
        }
        ++modCount;
        if (++size > threshold)
            resize();
        afterNodeInsertion(evict);
        return null;
    }

    /**
     * Initializes or doubles table size.  If null, allocates in
     * accord with initial capacity target held in field threshold.
     * Otherwise, because we are using power-of-two expansion, the
     * elements from each bin must either stay at same index, or move
     * with a power of two offset in the new table.
     *
     * @return the table
     */
    final Node<K,V>[] resize() {
        Node<K,V>[] oldTab = table;
        int oldCap = (oldTab == null) ? 0 : oldTab.length;
        int oldThr = threshold;
        int newCap, newThr = 0;
        if (oldCap > 0) {
            if (oldCap >= MAXIMUM_CAPACITY) {
                threshold = Integer.MAX_VALUE;
                return oldTab;
            }
            else if ((newCap = oldCap << 1) < MAXIMUM_CAPACITY &&
                     oldCap >= DEFAULT_INITIAL_CAPACITY)
                newThr = oldThr << 1; // double threshold
        }
        else if (oldThr > 0) // initial capacity was placed in threshold
            newCap = oldThr;
        else {               // zero initial threshold signifies using defaults
            newCap = DEFAULT_INITIAL_CAPACITY;
            newThr = (int)(DEFAULT_LOAD_FACTOR * DEFAULT_INITIAL_CAPACITY);
        }
        if (newThr == 0) {
            float ft = (float)newCap * loadFactor;
            newThr = (newCap < MAXIMUM_CAPACITY && ft < (float)MAXIMUM_CAPACITY ?
                      (int)ft : Integer.MAX_VALUE);
        }
        threshold = newThr;
        @SuppressWarnings({"rawtypes","unchecked"})
        Node<K,V>[] newTab = (Node<K,V>[])new Node[newCap];
        table = newTab;
        if (oldTab != null) {
            for (int j = 0; j < oldCap; ++j) {
                Node<K,V> e;
                if ((e = oldTab[j]) != null) {
                    oldTab[j] = null;
                    if (e.next == null)
                        newTab[e.hash & (newCap - 1)] = e;
                    else if (e instanceof TreeNode)
                        ((TreeNode<K,V>)e).split(this, newTab, j, oldCap);
                    else { // preserve order
                        Node<K,V> loHead = null, loTail = null;
                        Node<K,V> hiHead = null, hiTail = null;
                        Node<K,V> next;
                        do {
                            next = e.next;
                            if ((e.hash & oldCap) == 0) {
                                if (loTail == null)
                                    loHead = e;
                                else
                                    loTail.next = e;
                                loTail = e;
                            }
                            else {
                                if (hiTail == null)
                                    hiHead = e;
                                else
                                    hiTail.next = e;
                                hiTail = e;
                            }
                        } while ((e = next) != null);
                        if (loTail != null) {
                            loTail.next = null;
                            newTab[j] = loHead;
                        }
                        if (hiTail != null) {
                            hiTail.next = null;
                            newTab[j + oldCap] = hiHead;
                        }
                    }
                }
            }
        }
        return newTab;
    }
4.3 TreeMap 容器类
TreeMap 和 HashMap 同样实现了 Map 接口,所以,对于 API 的用法来说是没有区 别的。HashMap 效率高于 TreeMap;TreeMap 是可以对键进行排序的一种容器,在需要 对键排序时可选用 TreeMap。TreeMap 底层是基于红黑树实现的。
在使用 TreeMap 时需要给定排序规则:
1.元素自身实现比较规则
2.通过比较器实现比较规则
4.3.1 元素自身实现比较规则
演示的代码如下:
package com.txw.map;

/**
 * 用户 {@link Users}
 * @author Adair
 * @email 1578533828@qq.com
 */
@SuppressWarnings("all")  // 注解警告信息
public class Users implements Comparable<Users>{
    private String username;
    private int userage;

    public Users(String username, int userage) {
        this.username = username;
        this.userage = userage;
    }

    public Users() {
    }

    public String getUsername() {
        return username;
    }

    public void setUsername(String username) {
        this.username = username;
    }

    public int getUserage() {
        return userage;
    }

    public void setUserage(int userage) {
        this.userage = userage;
    }

    @Override
    public boolean equals(Object o) {
        System.out.println("equals...");
        if (this == o) return true;
        if (o == null || getClass() != o.getClass())
            return false; Users users = (Users) o;
            if (userage != users.userage)
                return false;
            return username != null ? username.equals(users.username) : users.username == null;
    }

    @Override public int hashCode() {
        int result = username != null ? username.hashCode() : 0;
        result = 31 * result + userage;
        return result;
    }

    @Override
    public String toString() {
        return "Users{" +
                "username='" + username + '\'' +
                ", userage=" + userage +
                '}';
    }

    // 定义比较规则
    // 正数:大,负数:小,0:相等
    @Override
    public int compareTo(Users o){
        if(this.userage > o.getUserage()){
            return 1;
        }
        if(this.userage == o.getUserage()){
            return this.username.compareTo(o.getUsername());
        }
        return -1;
    }
}
如图所示: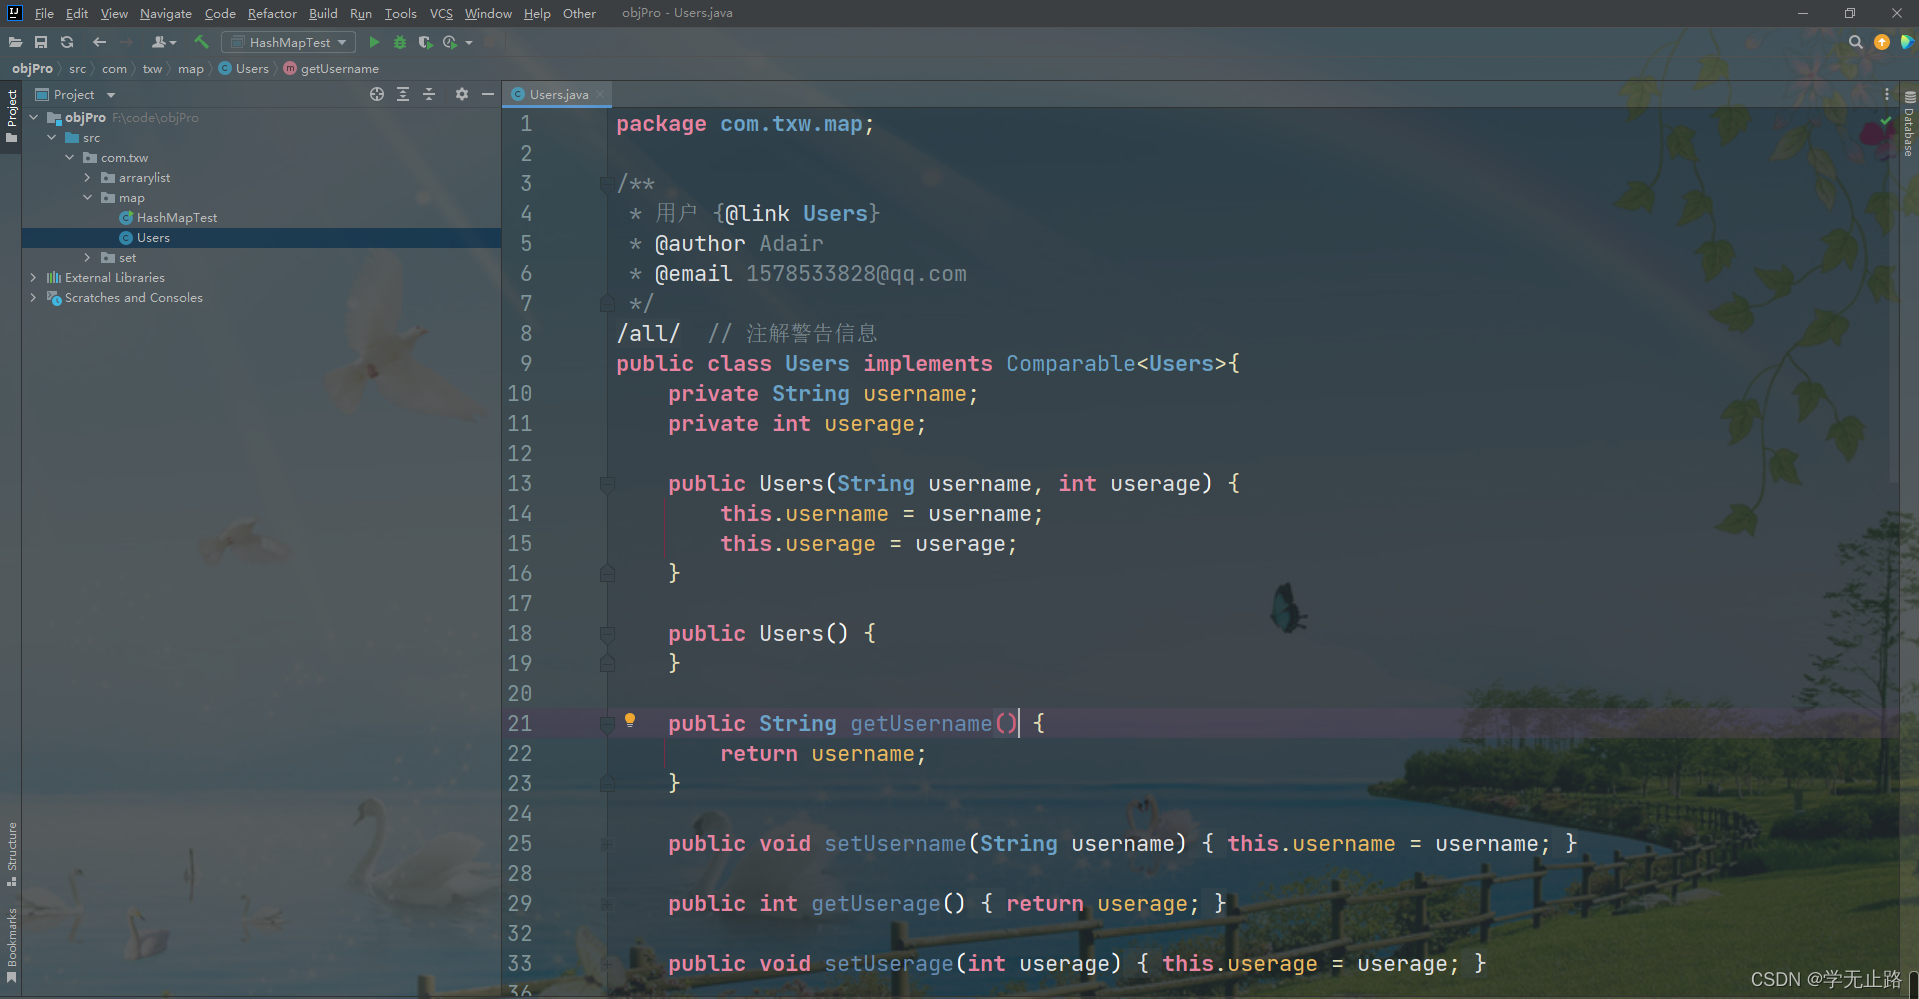
演示的代码如下:
package com.txw.map;

import java.util.Map;
import java.util.Set;
import java.util.TreeMap;
/**
 * 测试
 * @author Adair
 * @email 1578533828@qq.com
 */
@SuppressWarnings("all")  //注解警告信息
public class TreeMapTest {
    public static void main(String[] args) {
        // 实例化TreeMap
        Map<Users,String> map = new TreeMap<>();
        Users u1 = new Users("Adair",25);
        Users u2 = new Users("Mars",27);
        Users u3 = new Users("Adair666",26);
        map.put(u1,"Adair");
        map.put(u2,"Mars");
        map.put(u3,"Adair666");
        Set<Users> keys = map.keySet();
        for(Users key :keys){
            System.out.println(key+" --------- "+map.get(key));
        }
    }
}
如图所示: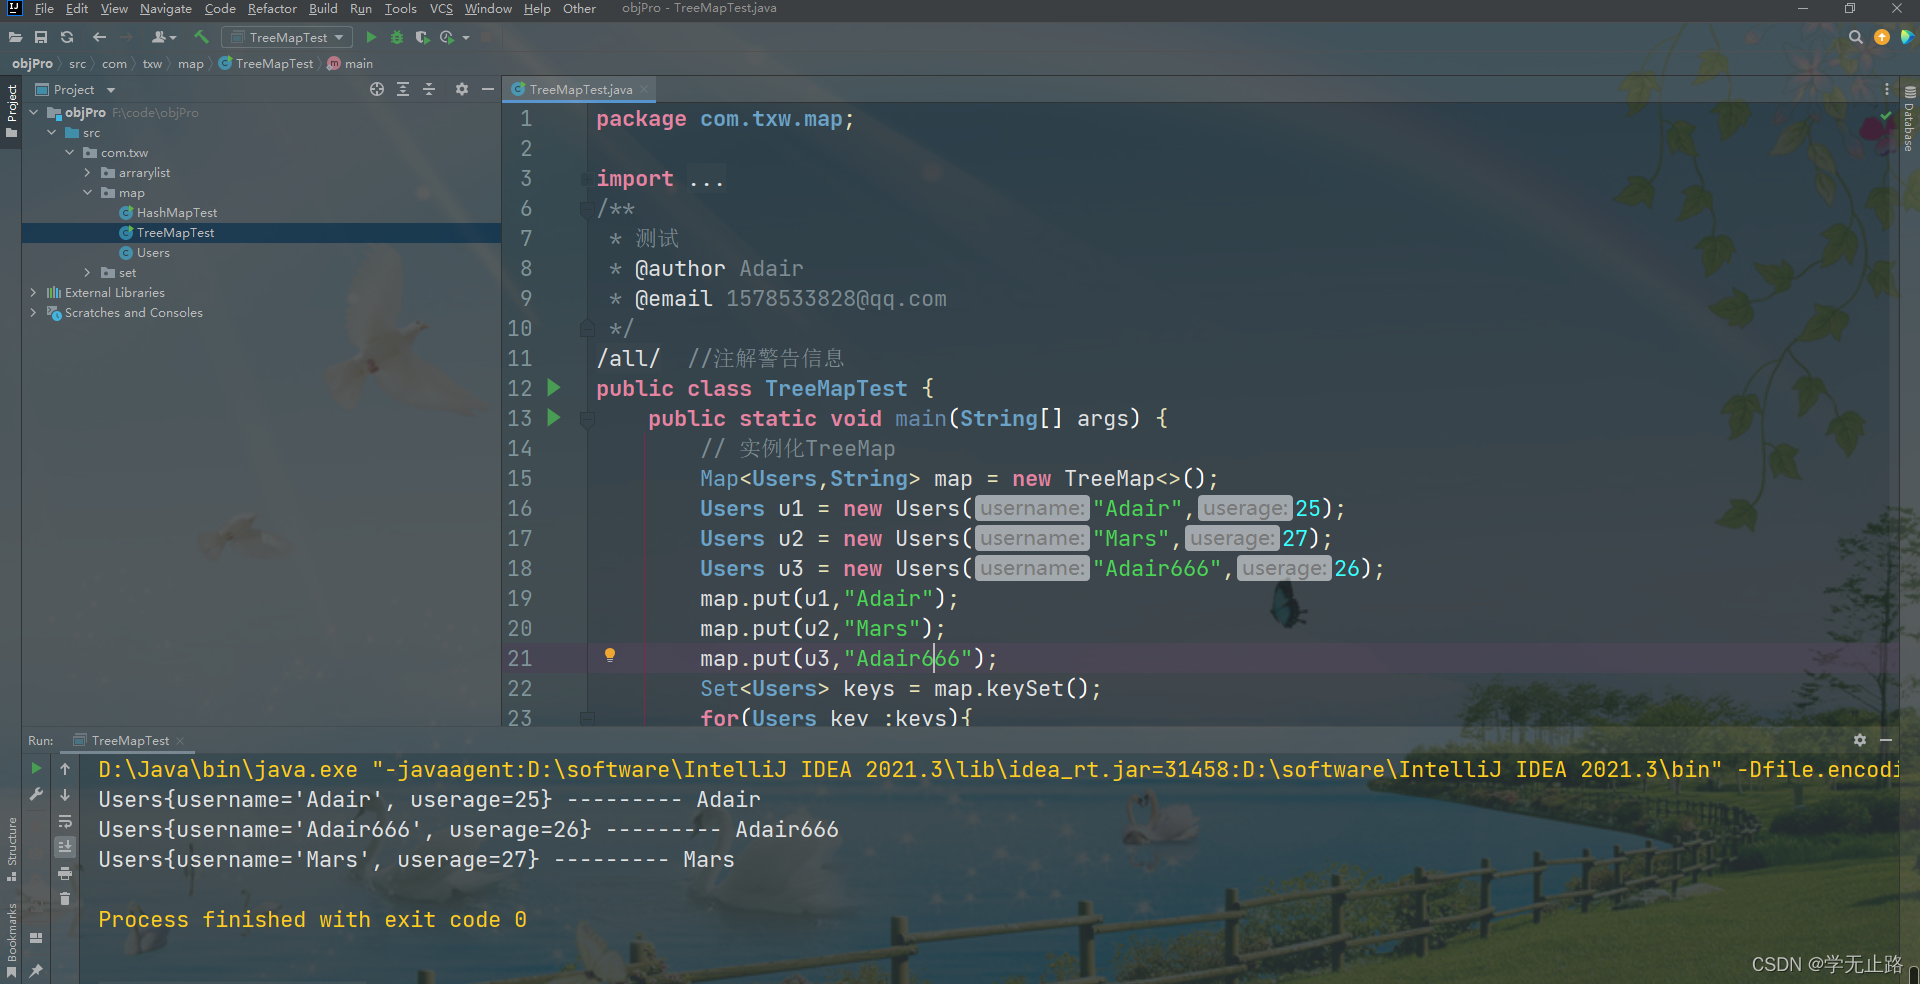
4.3.2 通过比较器实现比较规则
演示的代码如下:
package com.txw.map;

/**
 * 学生 {@link Student}
 * @author Adair
 * @email 1578533828@qq.com
 */
@SuppressWarnings("all")  // 注解警告信息
public class Student {
    private String name;
    private int age;

    public Student(String name, int age) {
        this.name = name;
        this.age = age;
    }

    public Student(){

    }

    @Override
    public String toString() {
        return "Student{" +
                "name='" + name + '\'' +
                ", age=" + age +
                '}';
    }

    public String getName() {
        return name;
    }

    public void setName(String name) {
        this.name = name;
    }

    public int getAge() {
        return age;
    }

    public void setAge(int age) {
        this.age = age;
    }

    @Override
    public boolean equals(Object o) {
        if (this == o)
            return true;
        if (o == null || getClass() != o.getClass())
            return false; Student student = (Student) o;
            if (age != student.age)
            return false; return name != null ? name.equals(student.name) : student.name == null;
    }

    @Override
    public int hashCode() {
        int result = name != null ? name.hashCode() : 0;
        result = 31 * result + age;
        return result;
    }
}
如图所示: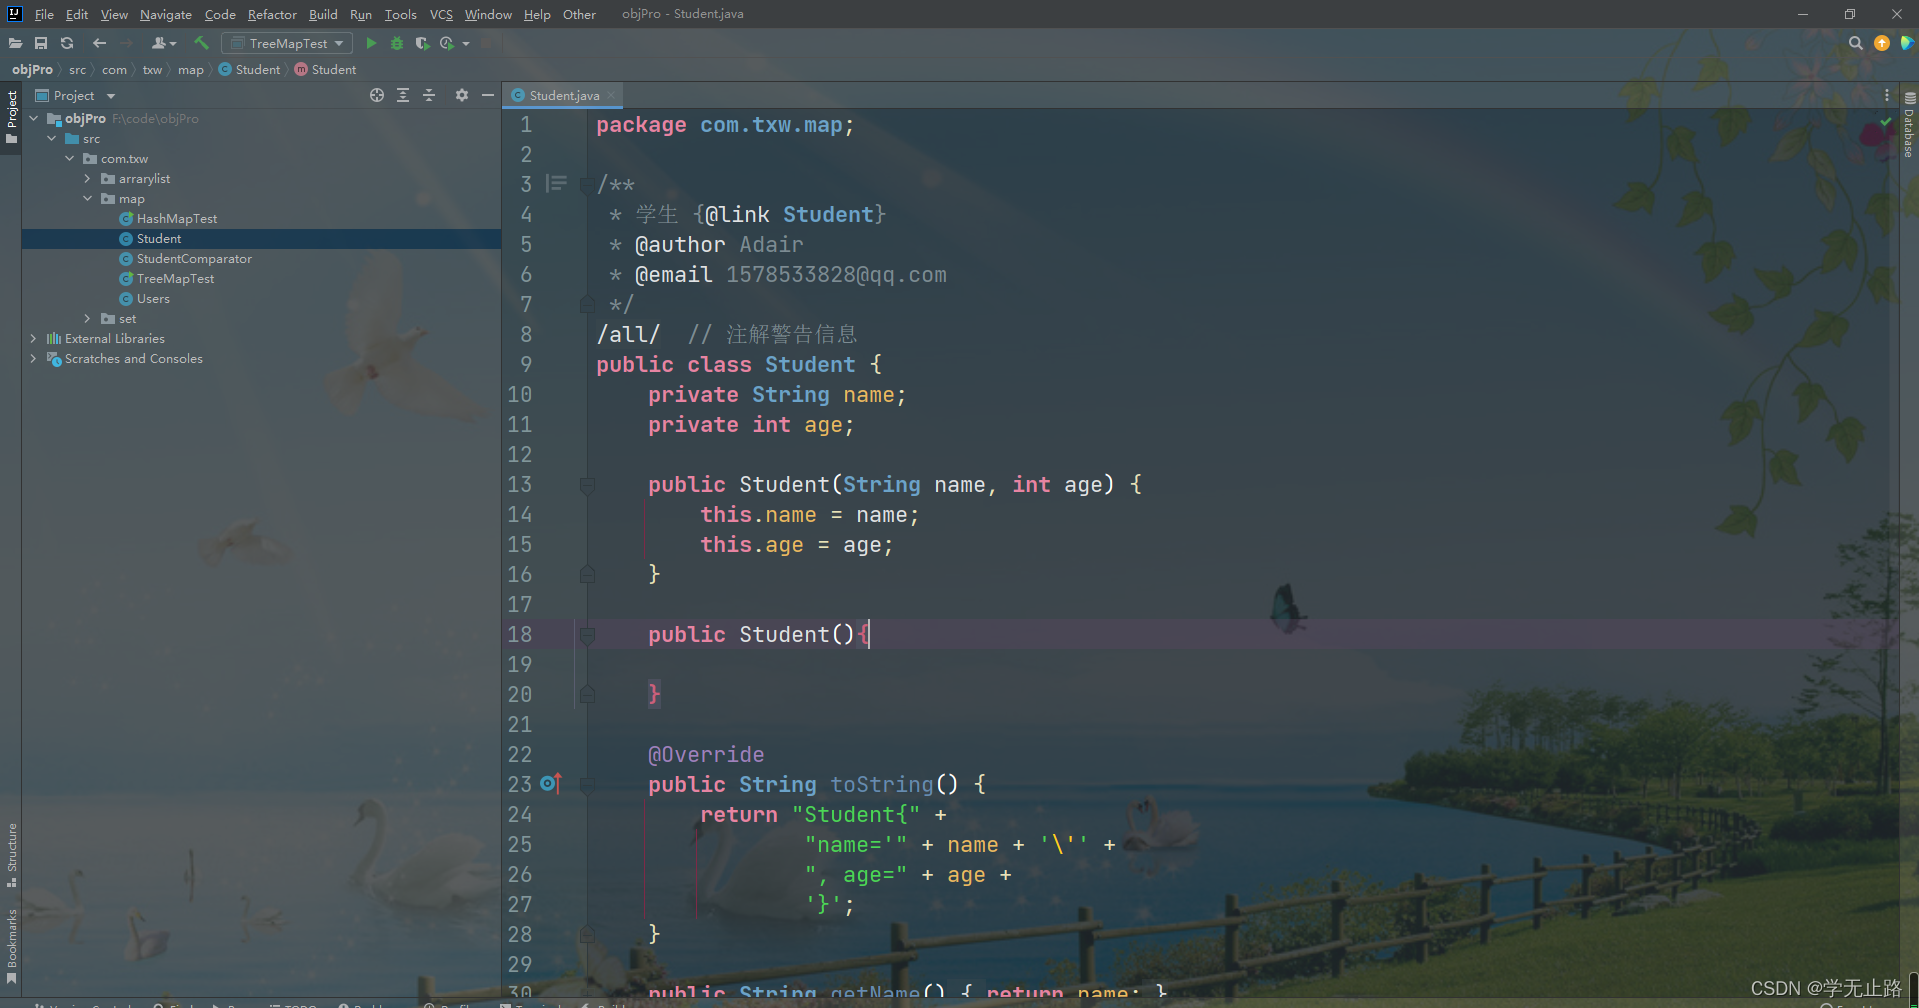
演示的代码如下:
package com.txw.map;

import java.util.Comparator;
/**
 * 创建比较器
 * @author Adair
 * @email 1578533828@qq.com
 */
@SuppressWarnings("all")  // 注解警告信息
public class StudentComparator implements Comparator<Student> {

    /**
     * 定义比较规则
     * @param o1
     * @param o2
     * @return
     */
     @Override
     public int compare(Student o1, Student o2) {
         if(o1.getAge() > o2.getAge()){
             return 1;
         }
         if(o1.getAge() == o2.getAge()){
             return o1.getName().compareTo(o2.getName());
         }return -1;
     }
}
如图所示: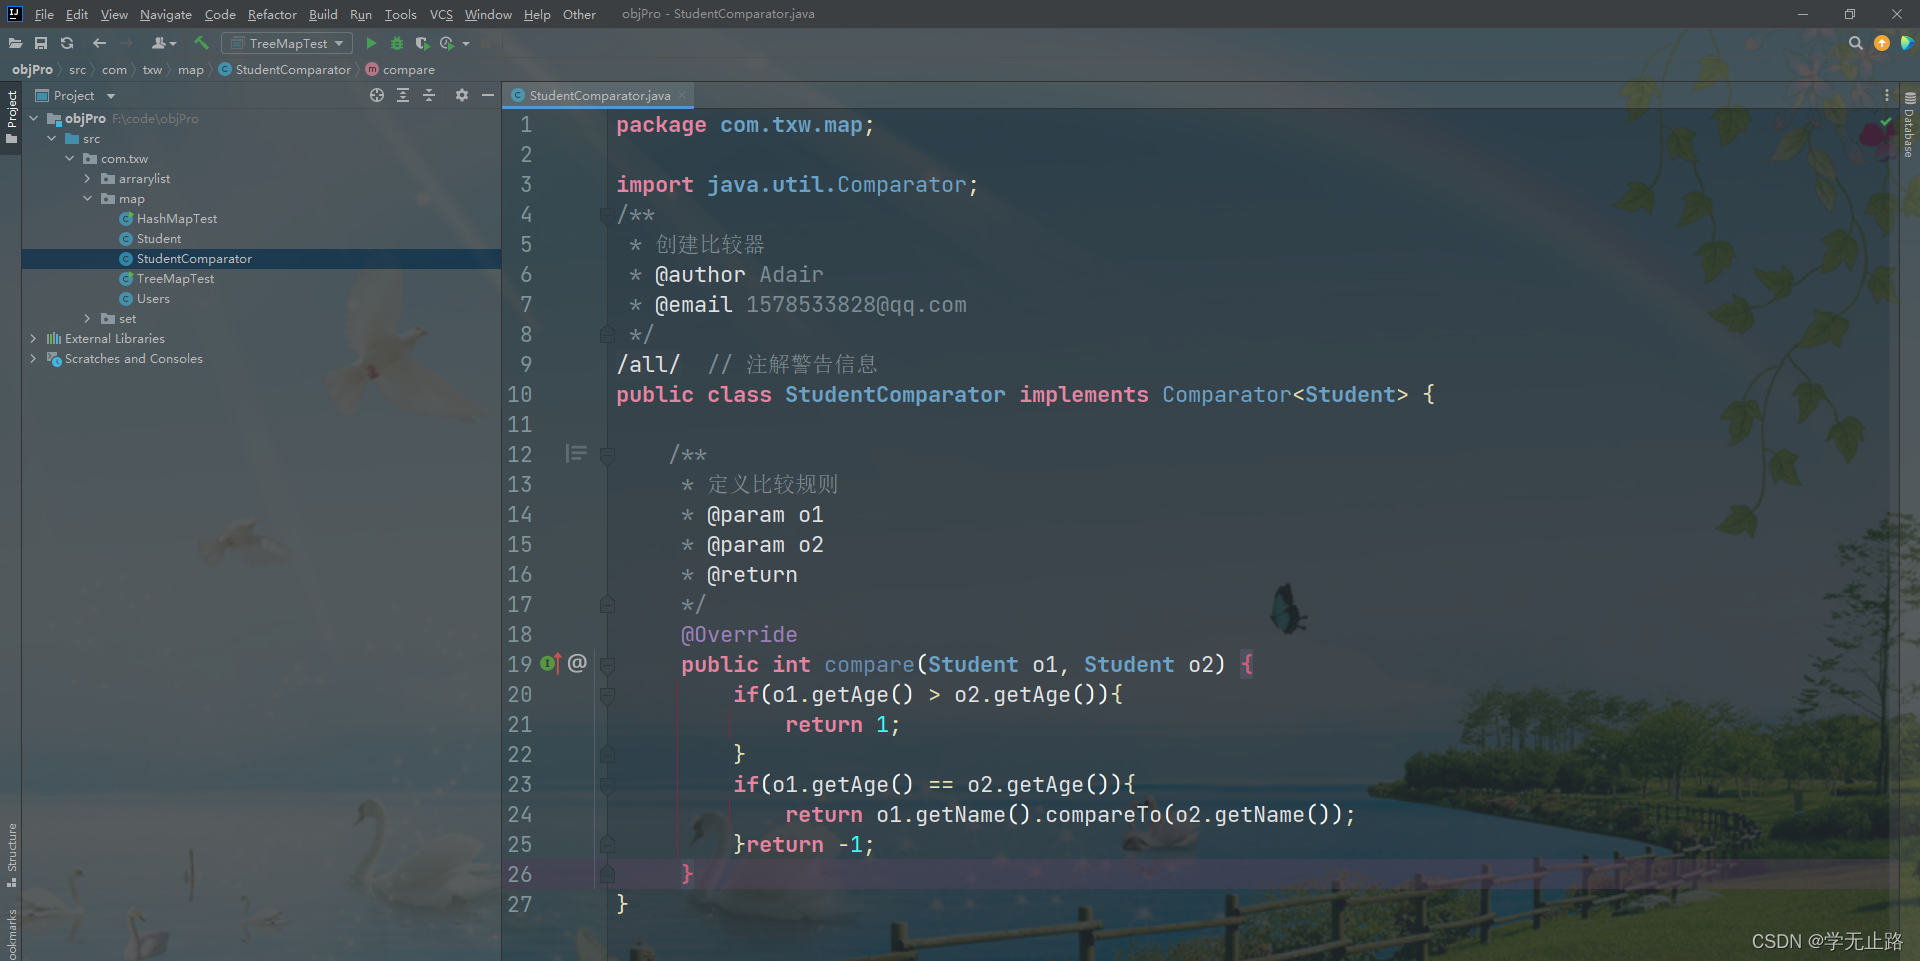
演示的代码如下:
package com.txw.map;

import java.util.Map;
import java.util.Set;
import java.util.TreeMap;
/**
 * 测试
 * @author Adair
 * @email 1578533828@qq.com
 */
@SuppressWarnings("all")  //注解警告信息
public class TreeMapTest {
    public static void main(String[] args) {
        // 实例化TreeMap
        Map<Student,String> map = new TreeMap<>(new StudentComparator());
        Student s1 = new Student("Adair",25);
        Student s2 = new Student("Mars",27);
        Student s3 = new Student("Adair666",26);
        map.put(s1,"Adair");
        map.put(s2,"Mars");
        map.put(s3,"Adair666");
        Set<Student> keys = map.keySet();
        for(Student key :keys){
            System.out.println(key+" --------- "+map.get(key));
        }
    }
}
如图所示: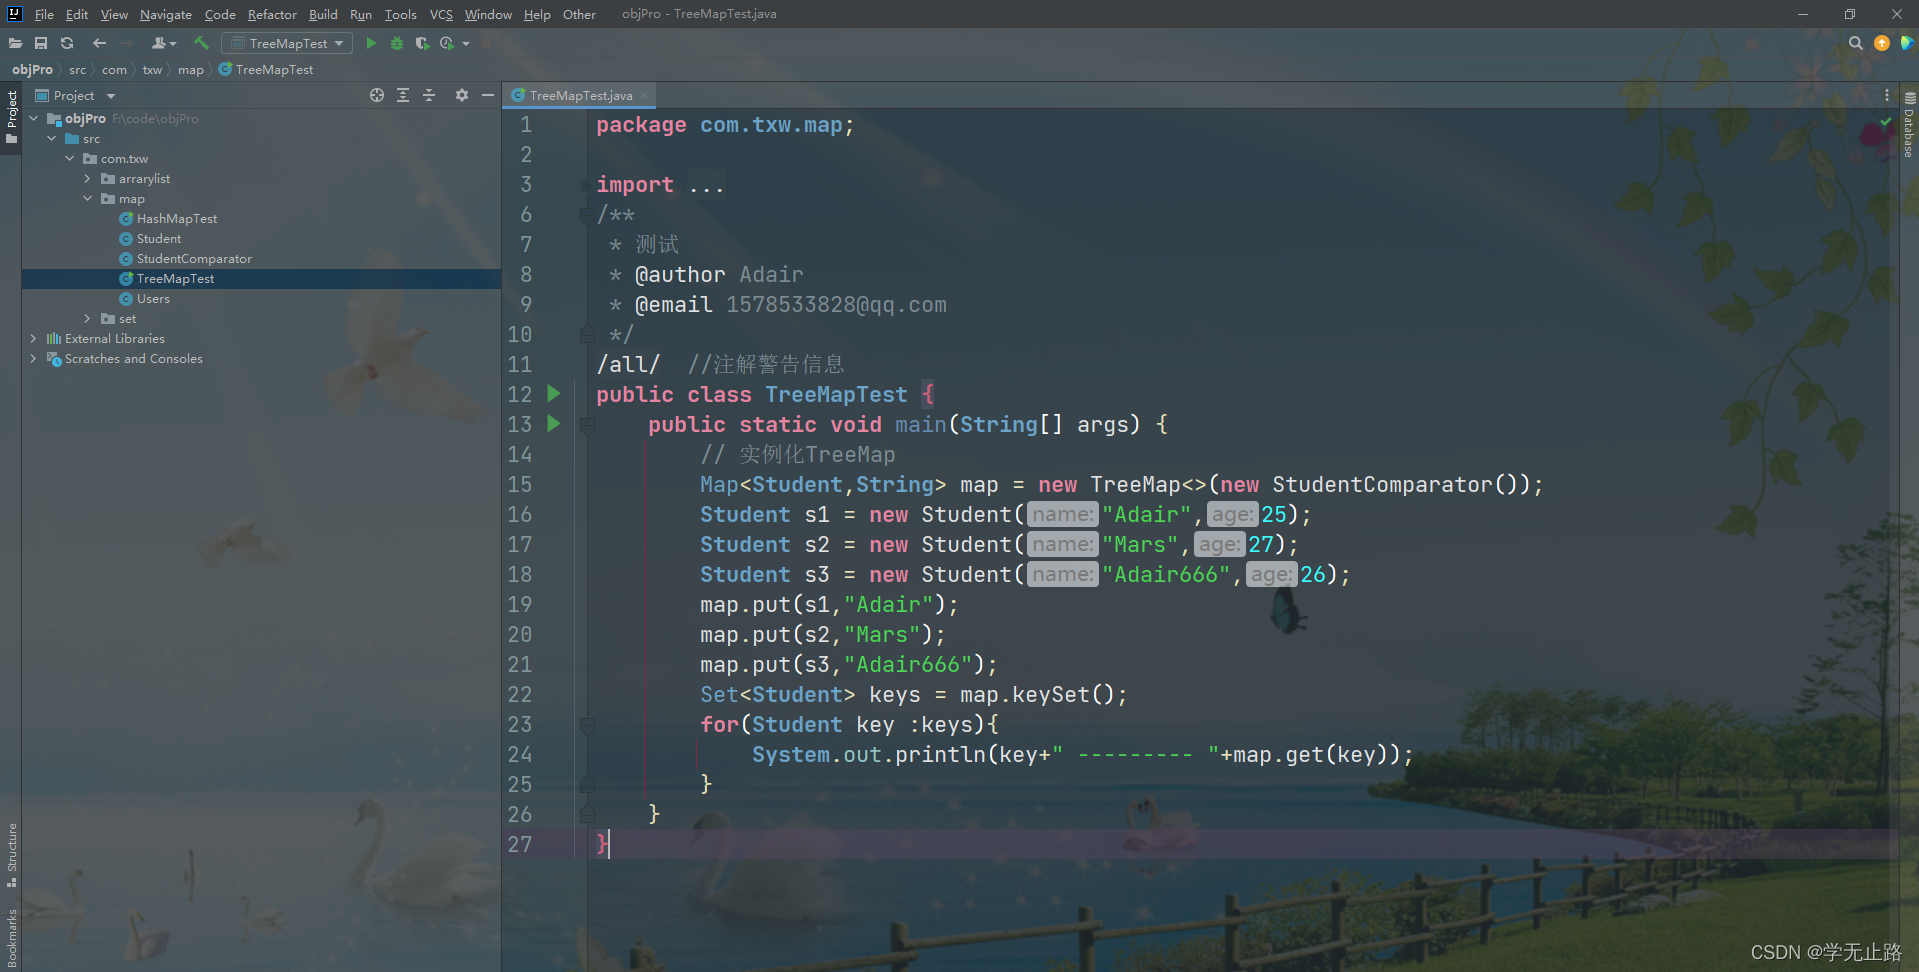
5 Iterator 迭代器
5.1 Iterator迭代器接口介绍
Collection接口继承了Iterable接口,在该接口中包含一个名为iterator的抽象方法,所 有实现了Collection接口的容器类对该方法做了具体实现。iterator方法会返回一个Iterator 接口类型的迭代器对象,在该对象中包含了三个方法用于实现对单例容器的迭代处理。
Iterator对象的工作原理:
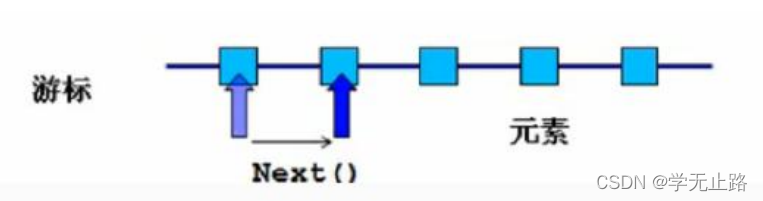
Iterator接口定义了如下方法:
1.boolean hasNext(); //判断游标当前位置是否有元素,如果有返回true,否则返 回false;
2.Object next(); //获取当前游标所在位置的元素,并将游标移动到下一个位置;
3.void remove(); //删除游标当前位置的元素,在执行完next后该操作只能执行 一次;
5.2 迭代器的使用
5.2.1 使用Iterator 迭代List接口类型容器
演示的代码如下:
package com.txw.Iterator;

import java.util.ArrayList;
import java.util.Iterator;
import java.util.List;
/**
 * 使用Iterator迭代List接口类型容器
 * @author Adair
 * @email 1578533828@qq.com
 */
@SuppressWarnings("all")  //注解警告信息
public class IteratorListTest {
    public static void main(String[] args) {
        // 实例化容器
        List<String> list = new ArrayList<>();
        list.add("a");
        list.add("b");
        list.add("c");
        // 获取元素
        // 获取迭代器对象
        Iterator<String> iterator = list.iterator();
        // 方式一:在迭代器中,通过while循环获取元素
        while (iterator.hasNext()){
            String value = iterator.next();
            System.out.println(value);
        }
        System.out.println("-------------------------------");
        // 方法二:在迭代器中,通过for循环获取元素
        for(Iterator<String> it = list.iterator();it.hasNext();){
            String value = it.next();
            System.out.println(value);
        }
    }
}
如图所示: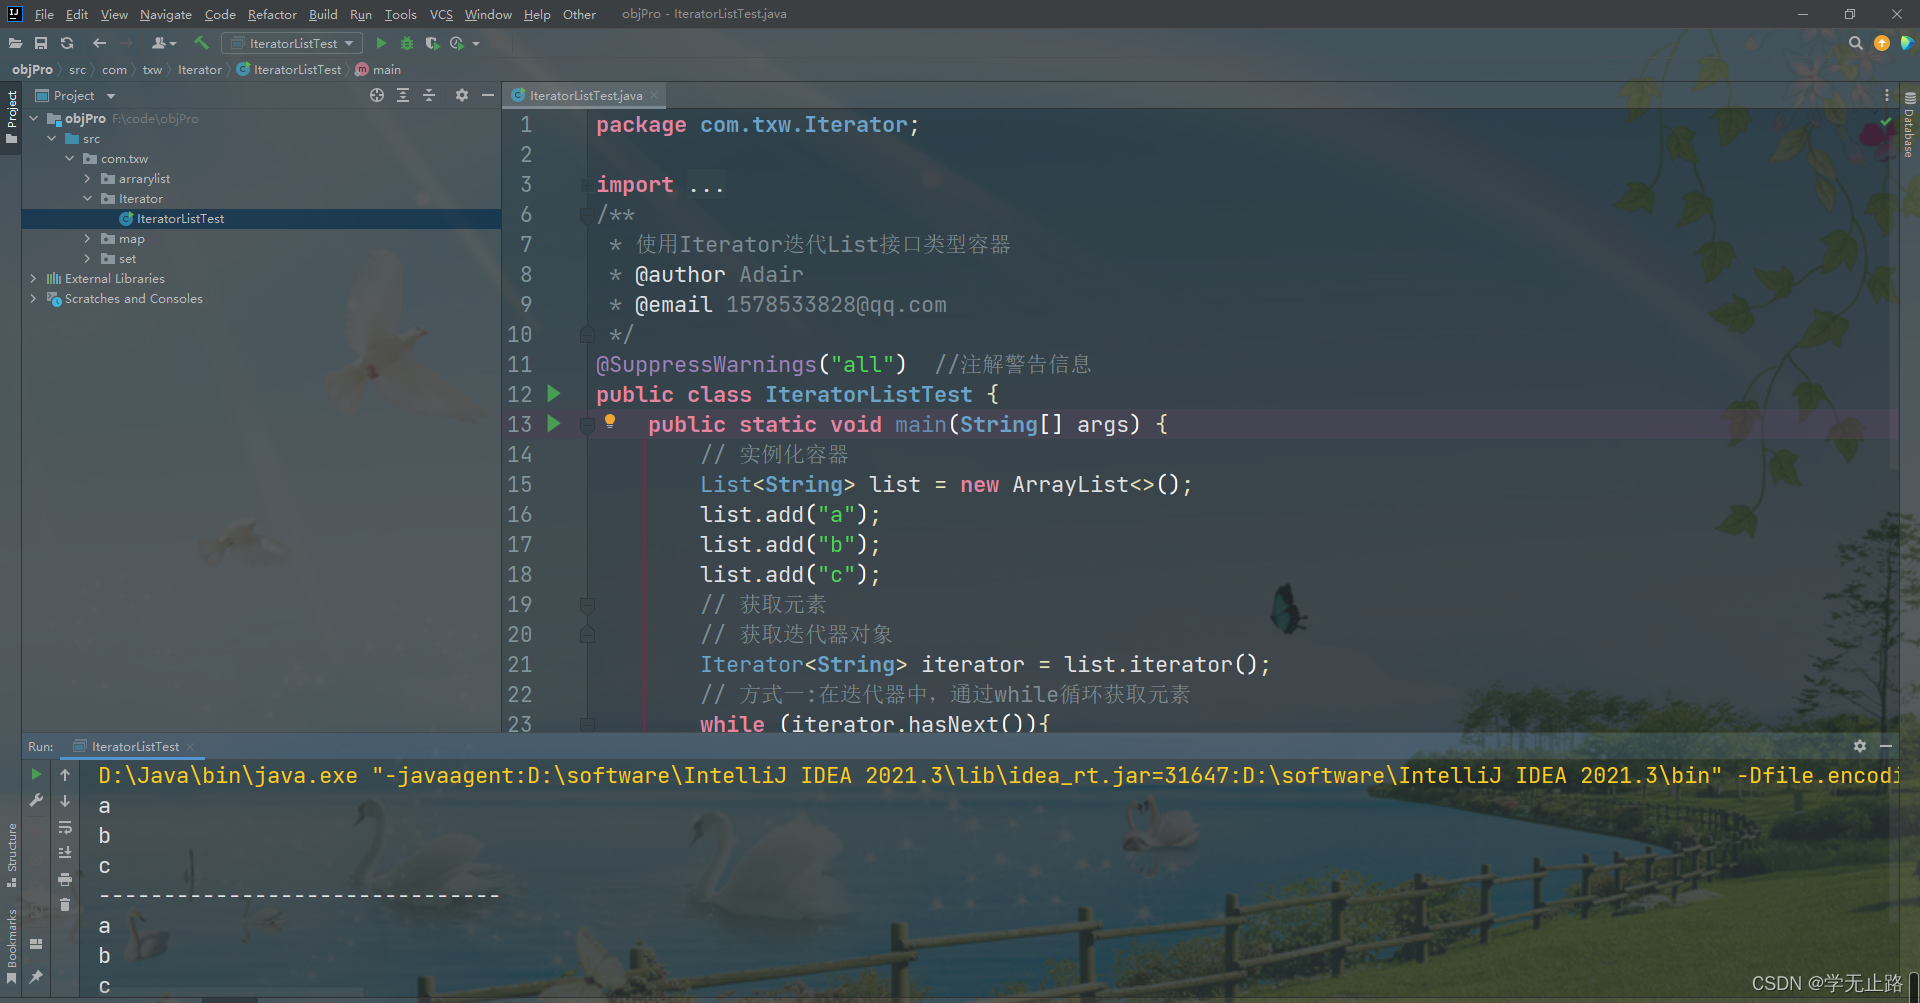
5.2.2 使用Iterator迭代Set接口类型容器
演示的代码如下:
package com.txw.Iterator;

import java.util.HashSet;
import java.util.Iterator;
import java.util.Set;
/**
 * 使用Iterator迭代Set接口类型容器
 * @author Adair
 * @email 1578533828@qq.com
 */
@SuppressWarnings("all")  //注解警告信息
public class IteratorSetTest {
    public static void main(String[] args) {
        // 实例化Set类型的容器
        Set<String> set = new HashSet<>();
        set.add("a");
        set.add("b");
        set.add("c");
        // 方式一:通过while循环
        // 获取迭代器对象
        Iterator<String> iterator = set.iterator();
        while (iterator.hasNext()){
            String value = iterator.next();
            System.out.println(value);
        }
        System.out.println("-------------------------");
        // 方式二:通过for循环
        for(Iterator<String> it = set.iterator();it.hasNext();){
            String value = it.next();
            System.out.println(value);
        }
    }
}
如图所示: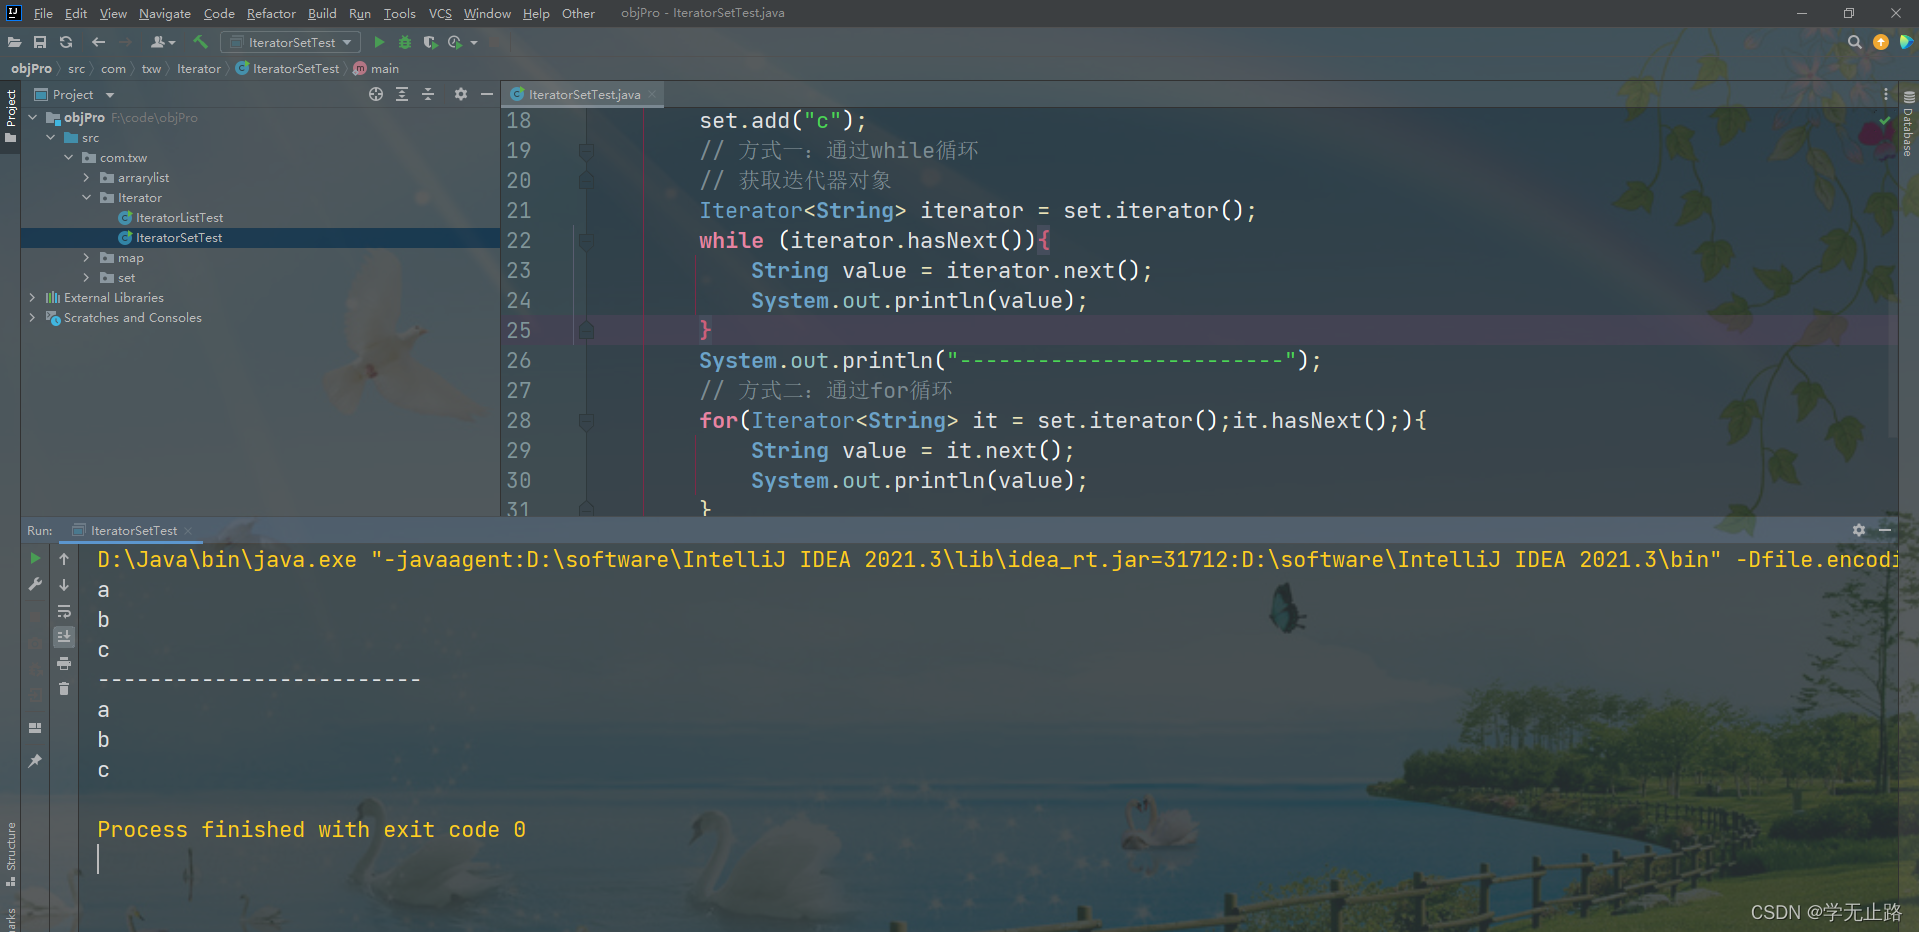
5.2.3 在迭代器中删除元素
演示的代码如下:
package com.txw.Iterator;

import java.util.ArrayList;
import java.util.Iterator;
import java.util.List;
/**
 * 在迭代器中删除元素
 * @author Adair
 * @email 1578533828@qq.com
 */
@SuppressWarnings("all")  //注解警告信息
public class IteratorRemoveTest {
    public static void main(String[] args) {
        // 实例化容器
        List<String> list = new ArrayList<>();
        list.add("a");
        list.add("b");
        list.add("c");
        list.add("d");
        Iterator<String> iterator = list.iterator();
        while (iterator.hasNext()){
            //不要在一次循环中多次调用next方法。
            String value = iterator.next();
            if ("c".equals(value)){
                iterator.remove();
            }
        }
        System.out.println("----------------");
        for(Iterator<String> it = list.iterator();it.hasNext();){
            // System.out.println(it.next());
            list.add("dddd");
        }
    }
}
如图所示: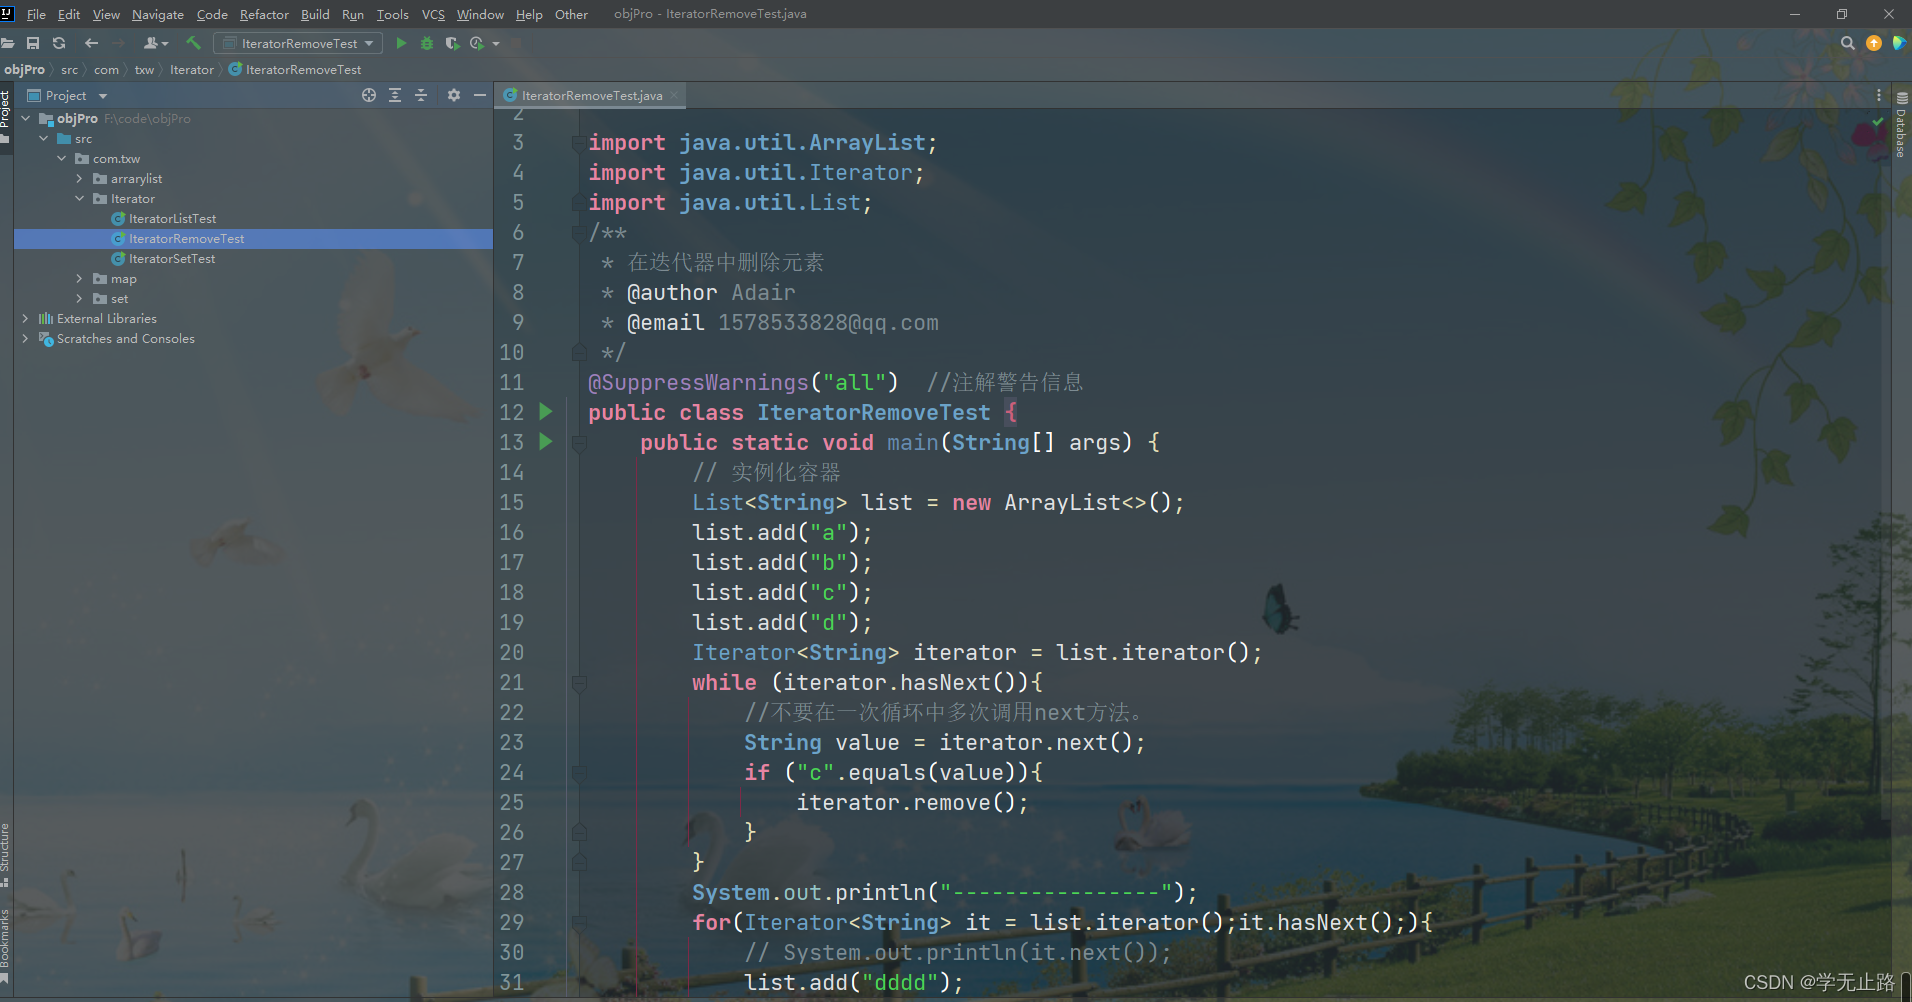
6 Collections 工具类
Collections 是一个工具类,它提供了对 Set、List、Map 进行排序、填充、查找元素 的辅助方法。该类中所有的方法都为静态方法。
常用方法:
1.void sort(List) //对 List 容器内的元素排序,排序的规则是按照升序进行排序。
2.void shuffle(List) //对 List 容器内的元素进行随机列。
3.void reverse(List) //对 List 容器内的元素进行逆续排列 。
4.void fill(List, Object) //用一个特定的对象重写整个 List 容器。
5.int binarySearch(List, Object)//对于顺序的 List 容器,采用折半查找的方法查找 特定对象。
6.1 对List类型容器进行排序处理
演示的代码如下:
package com.txw.collections;

import java.util.ArrayList;
import java.util.Collections;
import java.util.List;
/**
 * 对List类型容器进行排序处理
 * @author Adair
 * @email 1578533828@qq.com
 */
@SuppressWarnings("all")  //注解警告信息
public class CollectionsSortTest {
    public static void main(String[] args) {
        List<String> list = new ArrayList<>();
        list.add("c");
        list.add("b");
        list.add("d");
        list.add("a");
        // 通过Collections工具类中的sort方法完成排序
        Collections.sort(list);
        for (String s : list) {
            System.out.println(s);
        }
    }
}
如图所示: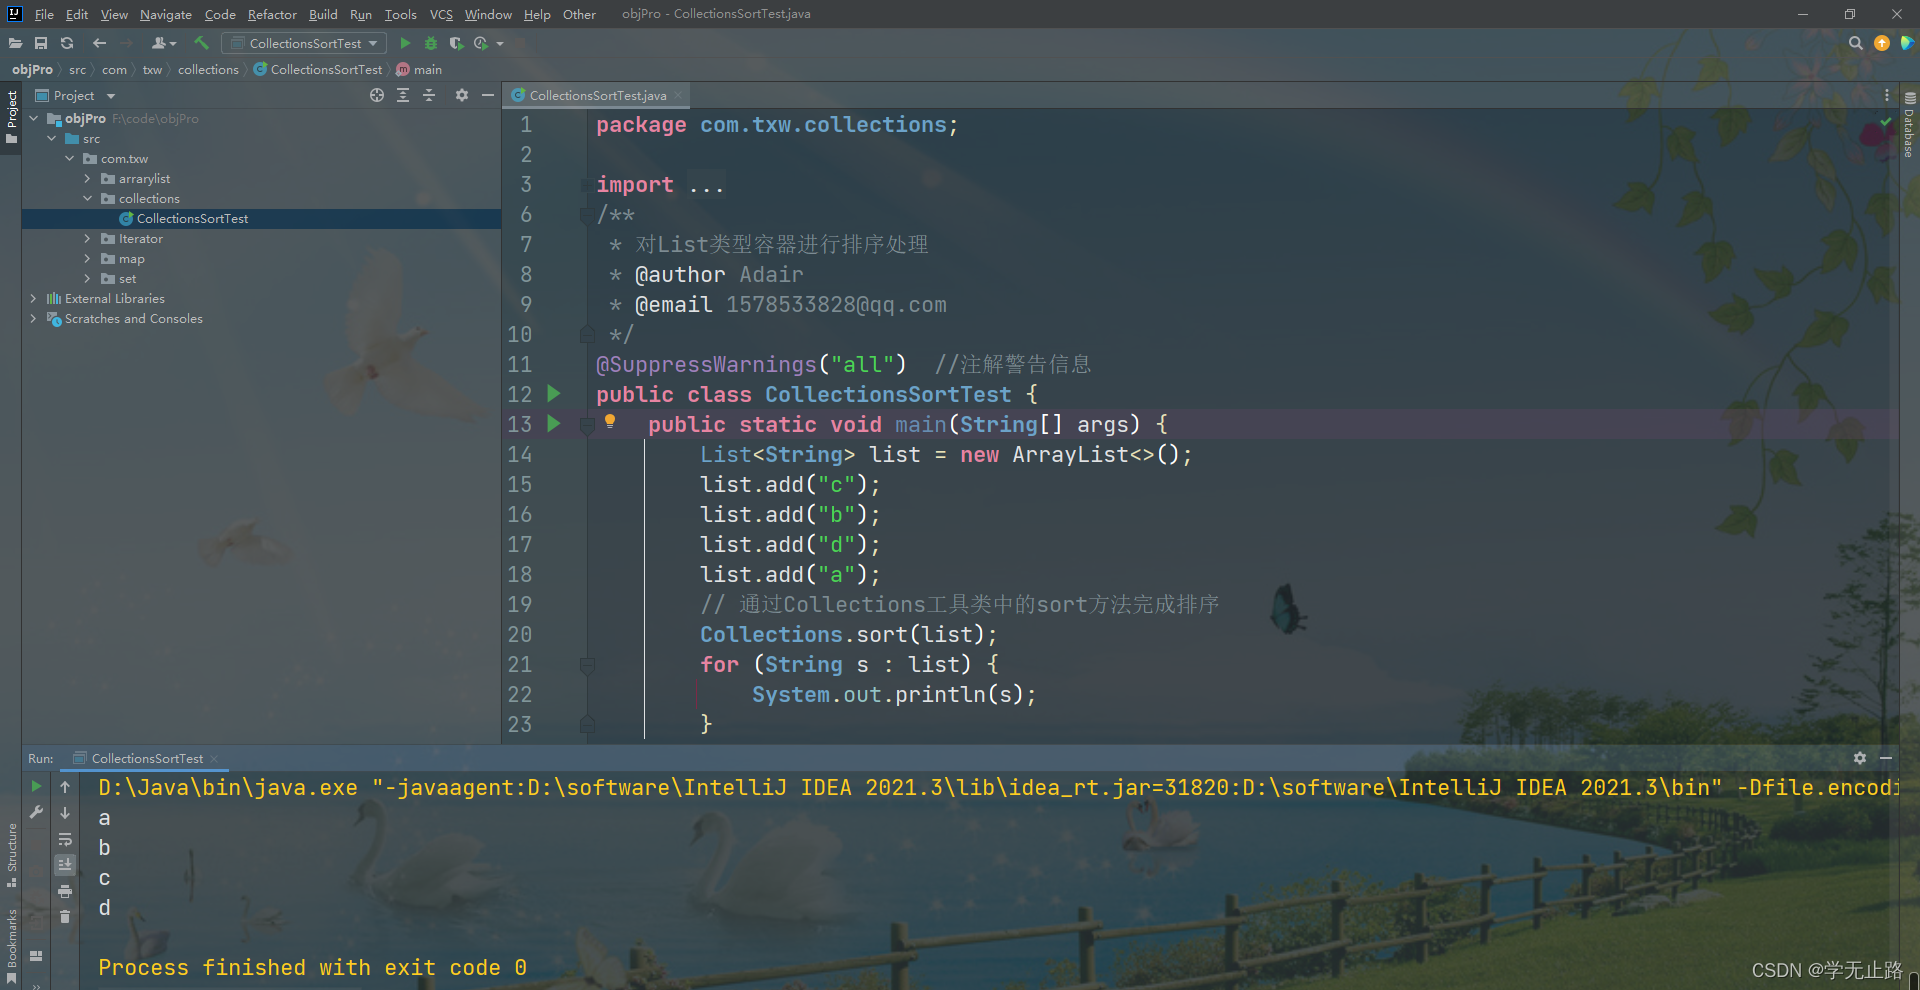
6.2 对List类型容器进行随机排序
演示的代码如下:
package com.txw.collections;

import java.util.ArrayList;
import java.util.Collections;
import java.util.List;
/**
 * 对List类型容器进行随机排序
 * @author Adair
 * @email 1578533828@qq.com
 */
@SuppressWarnings("all")  //注解警告信息
public class CollectionsShuffleTest{
    public static void main(String[] args) {
        List<String> list = new ArrayList<>();
        list.add("c");
        list.add("b");
        list.add("d");
        list.add("a");
        Collections.shuffle(list);
        for (String s : list) {
            System.out.println(s);
        }
    }
如图所示: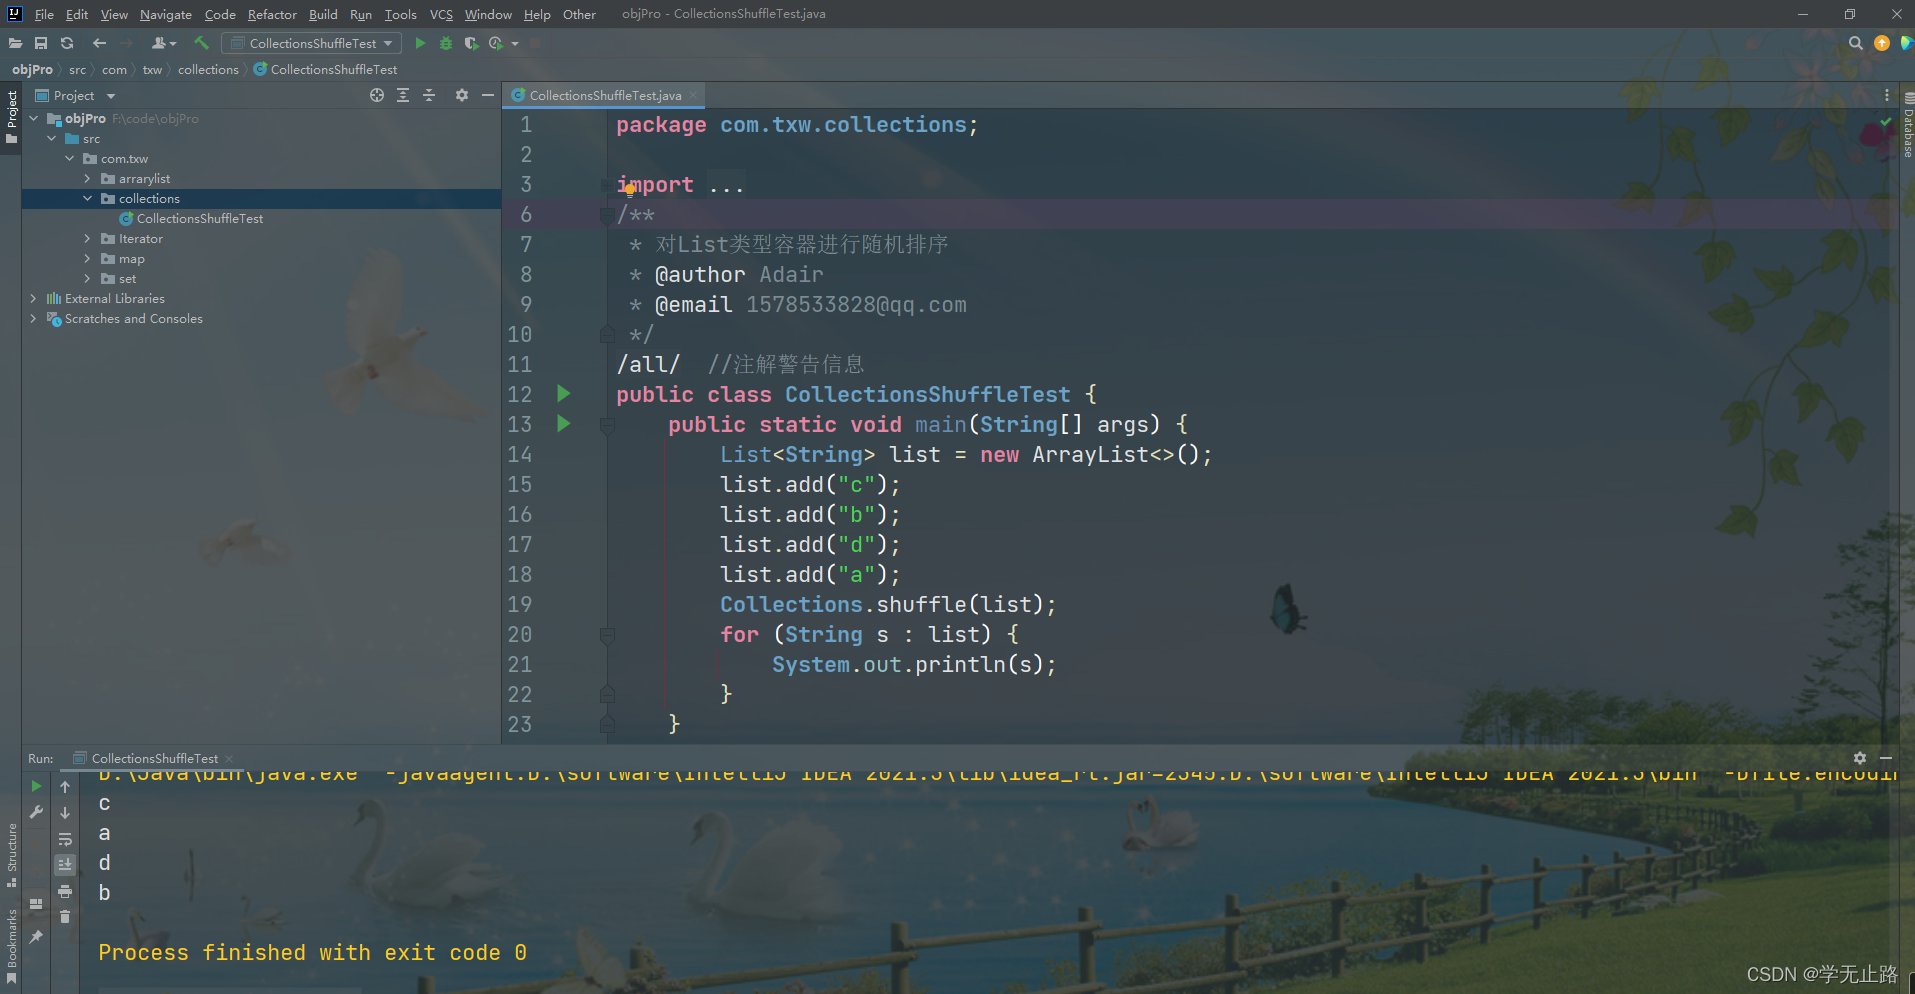


 被折叠的 条评论
为什么被折叠?
被折叠的 条评论
为什么被折叠?
 到【灌水乐园】发言


