


学习地址:bilibili黎曼的猜想springboot教程
文章目录
- 一、 Springboot入门
- 二、 Springboot配置
- 三、Springboot与日志
- 四、 Springboot与web开发
- 五、 Springboot与docker
- 六、 Springboot与数据访问
- 七、 Springboot启动配置原理
- 八、 Springboot自定义starters
- 九、 Springboot与缓存
- 十、 Springboot与消息
- 十一、 Springboot与检索
- 十二、 Springboot与任务
- 十三、 Springboot与安全
- 十四、 Springboot与分布式
- 十五、 Springboot与开发热部署
- 十六、 Springboot与监控管理
- 十七、 Springboot后续补充
一、 Springboot入门
1. 作用
简化Spring应用开发,约定大于配置。可以解决J2EE笨重的开发、繁多配置、低下开发效率、第三方技术集成难度大的麻烦
SpringBoot通过整合Spring整个技术栈(包括SpringCloud、SpringData和SpringSecurity等)来简化J2EE项目开发,是Spring的一站式解决方案。
2. 优点
1 快速创建独立运行的Spring项目及主流框架集成
2 使用嵌入式的Servlet容器,应用无需打成War包,Jar包即可
3 Starters(启动器)自动依赖与版本控制
4 大量的自动配置,减少手动配置,简化开发,也可修改默认值
5 无需配置XML,无代码生成,开箱即用
6 准生产环境的运行时应用监控(多用于运维系统监控功能)
7 与云计算天然集成
3. 缺点
入门容易精通难,因为SpringBoot是对Spring的再封装
二、 Springboot配置
1. 环境准备
配置Maven的setting文件,在ProiFiles节点添加代码如下
<profile>
	<id>jdk-1.8</id>
	<activation>
		<activeByDefault>true</activeByDefault>
		<jdk>1.8</jdk>
	</activation>
	<properties>
		<maven.compiler.source>1.8</maven.compiler.source>
		<maven.compiler.target>1.8</maven.compiler.target>
		<maven.compiler.compilerVersion>1.8</maven.compiler.compilerVersion>
	</properties>
</profile>
配置IDEA的Maven路径
Setting->Build,Execution,Deployment->Build Tools->Maven->Maven home dir…
2. HelloWorld入门
①创建一个Maven项目,根据SpringBoot官网的快速入门写入依赖
<parent>
    <groupId>org.Springframework.boot</groupId>
    <artifactId>Spring-boot-starter-parent</artifactId>
    <version>2.1.9.RELEASE</version>
</parent>
<dependencies>
    <dependency>
        <groupId>org.Springframework.boot</groupId>
        <artifactId>Spring-boot-starter-web</artifactId>
        <version>2.1.9.RELEASE</version>
    </dependency>
</dependencies>
②编写主程序(主配置类),启动Spring应用

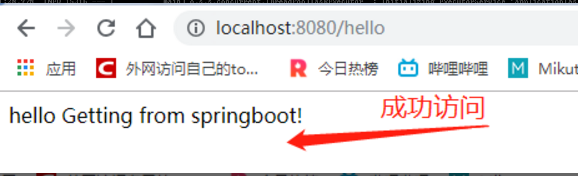
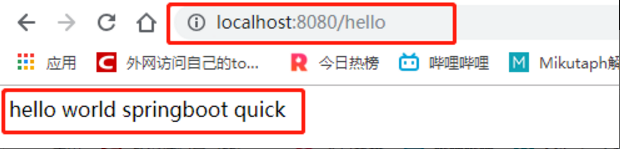
③编写相关Controller

④运行主程序测试

⑤ 简化部署配置插件
<!-- 这个插件可以将应用打包成一个可执行的jar包 -->
<build>
    <plugins>
        <plugin>
            <groupId>org.Springframework.boot</groupId>
            <artifactId>Spring-boot-maven-plugin</artifactId>
        </plugin>
    </plugins>
</build>
打包,然后使用java –jar的方式进行运行部署即可,无需装tomcat等一系列环境

3. 使用SpringBoot Initializer快速创建SpringBoot项目


需要联网; Eclipse使用Spring Starter Project创建SpringBoot应用

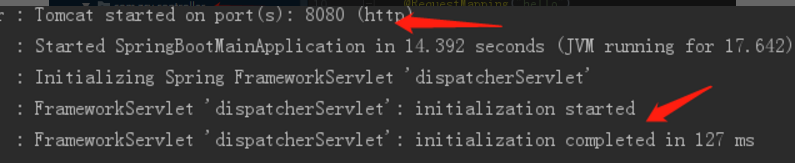
内嵌的Tomcat
写入自己的Controller

启动应用,测试访问
4. 配置文件
作用:修改SpringBoot的默认配置
类型:application.properties和application.yml两种文件(名称不可变)
说明:YAML语法
	   Eg:server:
			   Port: 8080			// key:(空格)value
			   Path: hello			// 若在空格相同,则在同一级
		值的写法:
普通的值(数字、字符串、布尔等)
字符串不用加引号(单、双),若加的话,双引号会转义,单引号不会转义
对象、Map(键值对)
	Eg:Friends:
			lastName: zhangsan
			age: 20
	或者(行内写法)
	Eg:Friends:{ lastName: zhangsan, age: 20}
数组(List、Set)
	Eg:Pets:				// 是一个数组
		Cat			// -(空格)value
		Dog
		Pig
	或者(行内写法)
	Pets:[cat,dog,pig]
配置文件YAML注入示例
创建YAML配置文件,编码配置文件内容

创建对应的Bean


在pom文件中加入配置注解,运行后即可在配置文件中查看提示

使用Spring的单元测试,测试运行

输出

- 相同的配置在properties文件中的配置
# 配置person的值
person.name=郑春阳
person.age=18
person.sex=male
person.birthday=1994/03/30
person.habbit=sleep,eat
person.GirlFriend.name=lss
person.GirlFriend.sex=famale
person.GirlFriend.age=17
测试输出(出现乱码)
Person{name='֣����', age=18, sex='male', birthday='1994/03/30', habbit=[sleep, eat], girlFriend=GirlFriend{name='lss', age=17, sex='famale'}}
解决乱码
File-Settings-Editor-FileEncodings

注解@ConfigurationProperty和@Value注入值的区别

| @ConfigurationProperty | @Value | |
|---|---|---|
| 是否批量注入 | 支持 | 不支持 |
| 松散绑定① | 支持 | 不支持 |
| Spring表达式SpEL | 不支持 | 支持 |
| JSR303数据校验② | 支持 | 不支持 |
| 复杂数据类型注入③ | 支持 | 不支持 |
① 比如配置文件中的name是last-name|lastName|last_name,Bean中的属性是lastName,则@ConfigurationProperty可以成功注入,@Value不行
② 比如在Bean的某个属性上添加了某个校验注解,如@Email,则和@ConfigurationProperty配合使用会在注入时校验注入的数据合法性,但@Value不会
③ 复杂数据类型是指Map、list等类型
关于配置的其他注解@PropertySource@ImprotResource@Bean
(1)@PropertySource是从指定配置文件中获取值:
@ConfigurationProperty默认是从全局配置文件中获取值,如有person.properties配置文件,然后在Person类上加注解@PropertySource(value={“classpath:person.properties”}), 这样即可加载person.properties文件中的配置信息
(2)@ImprotResource:加载主程序上(主配置类上),导入里面Spring的配置文件让其生效
Eg: 编写一个bean.xml配置文件,里面有些Spring的配置
@ ImprotResource(locations={“classpath:bean.xml”})	//这样配置即可生效
@SpringBootApplication
public class SpringbootQuickHelloworldApplication {
    public static void main(String[] args) {
        SpringApplication.run(SpringbootQuickHelloworldApplication.class, args);
    }
}
(3)@Configuration和@Bean
SpringBoot不推荐使用方法(2)从编写好的配置文件中加载,而是推荐使用全注解的方式编写配置类代替配置文件,配置类中使用@Bean加载Spring配置的组件(Controller、Service等)
Eg:
@Configuration
public class MyAppConfig {
    @Bean 		// 将方法的返回值添加到容器中,这个组件的默认ID就是方法名
    public HellocController hellocController(){
        return new HellocController();	//将HelloController对象添加到容器
    }
}


// 测试容器中是否含有:
	@Autowired
	private ApplicationContext context;
	@Test
	public void testHelloController(){
	   boolean isContain = context.containsBean("hellocController");
	    System.out.println(isContain);	输出为:true
	}
配置文件中的占位符
(1) 配置文件中可以使用随机数(两种配置文件都可用)
Eg:

r
a
n
d
o
m
.
i
n
t
等
、
{random.int}等、
random.int等、{person.name:defaultVal}:若没有person.name在配置文件中配置,则默认为defaultVal
Profile切换配置文件
可用于多环境(开发、测试、生产等)切换运行,即对于不同环境灵活切换不同的配置文件。默认使用application.properties或application.yml文件,Profile配置文件名称application-${profile}.properties,如application-dev.properties。
- application.properties激活
如写了两个配置文件application-dev.properties和application-prod.properties分别用于开发和生产环境。若激活开发环境可在application.properties中配置Spring.profiles.active=dev
- application.yml激活
server:
  port: 8080
Spring:
  profiles:
    active: prod					// 激活生产环境
---								// 用---分割代表新建文档块
server:
  port: 8083
Spring:
  profiles: dev
---
server:
  port: 8084
Spring:
  profiles: prod
- 命令行激活
无论配置文件中写的激活哪个配置文件,可以在运行时配置参数—Spring.profiles.active=dev进行激活指定配置

或者打包使用cmd命令,java –jar packageJar --Spring.profiles.active=dev
- 虚拟机VM激活
配置虚拟机参数-D Spring.profiles.active=dev

配置文件的加载优先级
Springboot会扫描一下位置的application.properties或application.yml文件作为默认的主配置文件:
File:./config/
File:./
Classpath:/config/
Classpath:/
优先级优高到低,高优先级会覆盖低优先级的配置;
Springboot会加载全部的主配置文件,互补配置;

注:若使用打包的方式启动,只会打包src下的配置文件,1和2不会打包,因此启用的配置文件是3和4进行优先和互补配置;
此外,项目打包好后,还可以通过命令行(Spring.config.location)的形式在项目启动的时候指定外部的配置文件位置,与其内部的配置文件形成互补配置;
java -jar packageJar --Spring.config.location=configPath

外部配置文件的加载顺序
Springboot会从以下位置默认加载外部配置文件,优先级由高到低,互补配置:
-
命令行参数
Eg:java –jar packageJar –server.port=8081 --servre.context-path=/abc
多个配置空格分开 -
来自java:/comp/env的JNDI属性
-
Java系统属性(System.getProperties())
-
操作系统环境变量
-
RandomValuePropertySource配置的random.*属性值
-
Jar包外部的application—{profile}.properties或application.yml(带Spring.profile)配置文件
-
Jar包内部的application—{profile}.properties或application.yml(带Spring.profile)配置文件
-
Jar包外部的application.properties或application.yml(不带Spring.profile)配置文件


发现会先加载外部的配置文件 使用的端口号是8085

-
Jar包内部的application.properties或application.yml(不带Spring.profile)配置文件
-
@Configuration注解累上的@PropertySource
-
通过SpringApplication.setDefaultProperties指定默认属性
自动配置的原理
配置文件(application.properties or application.yml)中可以写什么?可参考这里官方文档
自动配置原理:
(1)SpringBoot启动的时候加载了主配置类@ SpringBootConfiguration,并开启了自动配置@ EnableAutoConfiguration
(2)@ EnableAutoConfiguration利用选择器(@Import({AutoConfigurationImportSelector.class}))给容器中导入一些组件
…
AutoConfigurationImportSelector类中有一个selectImports方法,该方法返回了一个String[ ],继续深挖发现一行代码:
-- 获取候选的配置
List<String> configurations = this.getCandidateConfigurations(annotationMetadata, attributes);
而getCandidateConfigurations内部是这样的
List<String> configurations = SpringFactoriesLoader.loadFactoryNames(this.getSpringFactoriesLoaderFactoryClass(), this.getBeanClassLoader());
loadFactoryNames方法内部又调用了这行下面的代码,进行扫描jar包下的类路径META-INF/spring.factories
Enumeration<URL> urls = classLoader != null ? classLoader.getResources("META-INF/spring.factories") : ClassLoader.getSystemResources("META-INF/spring.factories");
把扫描到的这些文件中的内容封装称property对象,从property中获取到EnableAutoConfiguration.class类名对应的值,然后将其添加到容器中
如下图:

每一XXXAutoConfiguration都是容器中的一个组件,用来做自动配置
总结:springboot会扫描jar包中类路径下META-INF/spring.factories里面配置的所有EnableAutoConfiguration的值加入到容器中。
(3)每一个自动配置类进行自动配置功能
(4)以 HttpEncodingAutoConfiguration(http编码自动配置) 为例解释自动配置原理:
@Configuration // 表示这是一个配置类,可以给容器中添加组件
@EnableConfigurationProperties({HttpProperties.class})// 启用指定类的ConfigurationProperties功能,将配置文件中对应的值与HttpProperties绑定起来了,并把HttpProperties加入到ioc容器
@ConditionalOnWebApplication( // Spring 底层有个@Conditional注解,如果满足某个条件,整个配置类就会生效
    type = Type.SERVLET // 这个意思是如果是基于sevlet的web应用即生效
)
@ConditionalOnClass({CharacterEncodingFilter.class})// 若当前项目中有这个类就生效
@ConditionalOnProperty(// 判断配置文件中是否存在以prefix 开头的配置,matchIfMissing 代表即使不配置也会生效
    prefix = "spring.http.encoding",
    value = {"enabled"},
    matchIfMissing = true
)
public class HttpEncodingAutoConfiguration {
	// properties它已经和springboot的配置文件绑定了
	 private final Encoding properties;

	 // 只有一个有参构造器的时候,参数的值就会从容器中拿
	 public HttpEncodingAutoConfiguration(HttpProperties properties) {
        this.properties = properties.getEncoding();
    }

	// 若所有条件生效,则给容器中添加一个组件,这个组件中某些值
	// 需要从property文件中获取
	@Bean
    @ConditionalOnMissingBean
    public CharacterEncodingFilter characterEncodingFilter() {
        CharacterEncodingFilter filter = new OrderedCharacterEncodingFilter();
        filter.setEncoding(this.properties.getCharset().name());
        filter.setForceRequestEncoding(this.properties.shouldForce(org.springframework.boot.autoconfigure.http.HttpProperties.Encoding.Type.REQUEST));
        filter.setForceResponseEncoding(this.properties.shouldForce(org.springframework.boot.autoconfigure.http.HttpProperties.Encoding.Type.RESPONSE));
        return filter;
    }
总结:根据当前不同的条件判断,决定这个配置类是否生效,若所有条件都成立,则配置类生效
(5)由下面可见所有配置文件中能配置的属性都可在XXXProperty类中封装着,配置文件能配置什么就可以参考这个功能所对应的属性类
// 这个类上标注了ConfigurationProperties注解
// 可以从配置文件获取指定的值和bean属性的绑定
@ConfigurationProperties(
    prefix = "spring.http"
)
public class HttpProperties {
精髓:
1)Springboot启动会加载大量的自动配置类
2)我看下需要的功能有没有SpringBoot默认写好的自动配置类
3)我们再来看下这个自动配置类中到底配置了哪些组件,只要有我们要用的组件,那么就不需要再来配置了
4)给容器中自动配置类添加组件的时候,会从property类中获取某些属性,我们就可以在配置文件中指定这些属性的值
XXXAutoConfiguration自动配置类给容器中添加组件
XXXProperties:封装配置文件中的相关属性
(2) 配置文件中加debug=true在debug模式下启动就会打印开启和未开启的自动配置报告
步骤:
①自动配置的类都在org.Springframework.boot:Spring-boot-autoconfigure包
②找到想要的类XXXAutoConfiguration.class打开
③在类注解上有XXX Properties.class打开,就可以根据里面的内容配置了
三、Springboot与日志
1. 系统中如何使用SLF4J
市面上常见的日志框架:
JUL、JCL、Jboss-logging、logback、log4j、log4j2、slf4j…
SpringBoot选用了SLF4J(接口)和logback(实现)的组合方式
使用示例:
import org.slf4j.Logger;			// 需要导入slf4j-api-2.0.0-alpha2-SNAPSHOT.jar
import org.slf4j.LoggerFactory;	// 和logback的实现jar
public class HelloWorld {
  public static void main(String[] args) {
    Logger logger = LoggerFactory.getLogger(HelloWorld.class);
    logger.info("Hello World");
  }
}
SLF4J也可以与其他日志实现绑定:

每一个日志实现框架都有自己的配置文件。使用SLF4J后,配置文件还是要使用日志实现框架的配置文件。
2. 其他日志框架统一转化为SLF4J
一个系统可能由多个框架组成,而每个框架可能都有自己的日志记录,如Spring(Commons-Logging)、Hibernate(Jboss-Logging)等,要统一日志记录就是要统一使用SLF4J记录日志。

具体做法:
- 将系统中的其他日志框架先排除出去(系统运行会报错)
- 用中间包来代替原有的日志框架(如图replace…,这时报错会消失)
- 导入SLF4J的其他实现jar即可
3. 日志关系

4. 日志级别及使用
Logger logger = LoggerFactory.getLogger(getClass());
this.logger.trace("这是Trace日志..");
this.logger.debug("这是debug日志..");
this.logger.info("这是info日志..");
this.logger.warn("这是warn日志..");
this.logger.error("这是Error日志..");
(1)日志级别由低到高,SpringBoot默认使用Info级别(只会输出Info及以上的日志)
(2)日志输出格式:
%d表示日期时间,
%thread表示线程名,
%-5level级别从左显示5个字符宽度
%logger{50}表示logger名最多显示50个字符,否则按照介绍句点分割,
%msg表示日志消息,
%n换行字符
Eg:%d{yyyy-MM-dd HH:mm:ss.SSS} [%thread] %-5level %logger{50} - %msg%n
(3)日志相关配置
logging.level.com.zcy=trace // 指定日志输出级别
logging.file.path=LogDir // 会在指定路径LogDir下创建目录,默认写在Spring.log文件中,同时控制台会输出
四、 Springboot与web开发
1. 静态资源文件存储路径
作用:存储本地静态资源
静态资源文件夹:(静态文件都需要存在于以下静态资源文件夹中)
{ "classpath:/META-INF/resources/",
  "classpath:/resources/",
 "classpath:/static/",
 "classpath:/public/" };


classpath 和 classpath* 区别:
classpath:只会到WEB-INF/classes路径下查找文件;
classpath*:不仅包含WEB-INF/classes路径,还包括WEB-INF/lib。
注意: 用 classpath* 需要遍历所有的classpath,所以加载速度是很慢的
2. Webjars的引入和访问
(1)介绍:使用maven依赖的方式自动引入常用的静态文件https://www.webjars.org/(官网)
(2)原理和访问规则:

(3) 举例:引入和访问bootstrap.css
i.去webjars官网复制bootstrap的maven依赖到pom文件
<dependency>
    <groupId>org.webjars</groupId>
    <artifactId>bootstrap</artifactId>
    <version>4.3.1</version>
</dependency>
ii.工程自动下载jar包得到以下目录

Iii.启动项目访问路径
http://localhost:8080/webjars/bootstrap/4.3.1/css/bootstrap.css

3. 模板引擎Thymeleaf
常见的模板引擎:JSP、Velocity、Freemarker、Thymeleaf(Springboot推荐)
@ConfigurationProperties(prefix = "Spring.thymeleaf")
public class ThymeleafProperties {		//ThymeleafAutoConfiguration下的Properties
   private static final Charset DEFAULT_ENCODING = StandardCharsets.UTF_8;
   public static final String DEFAULT_PREFIX = "classpath:/templates/";	//默认存放目录
   public static final String DEFAULT_SUFFIX = ".html";		//默认文件后缀
Thymeleaf的基本使用
- 1 导入依赖
<dependency>
    <groupId>org.Springframework.boot</groupId>
    <artifactId>Spring-boot-starter-thymeleaf</artifactId>
</dependency>
- 2 编写Controller
@Controller
public class HelloController {
    @RequestMapping("/helloThymeleaf")
    public String helloMethod(){
        System.out.println("enter");
        return "hello";
    }
}
- 3 在resources/templates下编写hello.html
<!DOCTYPE html>
<html lang="en">
<head>
    <meta charset="UTF-8">
    <title>Title</title>
</head>
<body>
    <h1>你好thymeleaf!</h1>
</body>
</html>
Thymeleaf语法
使用步骤:
①导入Thymeleaf的命名空间(有了这个才会有提示)
<html xmlns:th="http://www.thymeleaf.org">
th:标签的优先级

表达式
Simple expressions:
Variable Expressions: ${...}				//OGNL表达式
	1)获取对象的属性、调用方法
	2)使用内置的基本对象:
		#ctx : the context object.
		#vars: the context variables.
		#locale : the context locale.
		#request : (only in Web Contexts) the HttpServletRequest object.
		#response : (only in Web Contexts) the HttpServletResponse object.
		#session : (only in Web Contexts) the HttpSession object.
		#servletContext : (only in Web Contexts) the ServletContext object.
	3)内置的一些工具对象
		见官方文档附录B
Selection Variable Expressions: *{...} 和${}功能一样,
	补充功能:配合th:object=”${session.user}”使用
	<div th:object="${session.user}">
		<p>Name: <span th:text="*{firstName}">Sebastian</span>.</p>
		<p>Surname: <span th:text="${session.user.lastName}">Pepper</span>.</p>
		<p>Nationality: <span th:text="*{nationality}">Saturn</span>.</p>
	</div>
Message Expressions: #{...}	获取国际化内容
Link URL Expressions: @{...} 定义URL
	a href="details.html" th:href="@{/order/details(orderId=${o.id})}">view</a>
	参数用()传入,多个参数逗号分隔
Fragment Expressions: ~{...}
Literals
	Text literals: 'one text' , 'Another one!' ,…
	Number literals: 0 , 34 , 3.0 , 12.3 ,…
	Boolean literals: true , false
	Null literal: null
	Literal tokens: one , sometext , main ,…
	Text operations:
	String concatenation: +
	Literal substitutions: |The name is ${name}|
	Arithmetic operations:
	Binary operators: + , - , * , / , %
	Minus sign (unary operator): -
	Boolean operations:
	Binary operators: and , or
	Boolean negation (unary operator): ! , not
	Comparisons and equality:
	Comparators: > , < , >= , <= ( gt , lt , ge , le )
	Equality operators: == , != ( eq , ne )
Conditional operators:
	If-then: (if) ? (then)
	If-then-else: (if) ? (then) : (else)
	Default: (value) ?: (defaultvalue)
	Special tokens:
	No-Operation:_(无操作符)
Thymeleaf常用配置
Spring.thymeleaf.cache=false // 关闭缓存,默认开
4. 实验CRUD
导入资源,编写index页面视图映射

使用thymeleaf语法和webjars方式改造index页面
(1) 导入依赖
<dependency>
    <groupId>org.Springframework.boot</groupId>
    <artifactId>Spring-boot-starter-thymeleaf</artifactId>
</dependency>

<dependency>
    <groupId>org.webjars</groupId>
    <artifactId>bootstrap</artifactId>
    <version>4.3.1</version>
</dependency>
(2) 改造index页面

(3) 更改工程上下文路径并测试访问
(4) 在application.properties中添加配置server.servlet.context-path=/webcrud并访问路径http://localhost:8080/webcrud/查看结果页面和源码页,发现源码已经在使用thymeleaf语法修改链接的地方自动添加上上下文/webcrud


国际化实现语言切换
SpringMVC下的国际化:
(1) 编写国际化配置文件
(2) 使用ResourceBundleMessageSource管理国际化资源文件
(3) 在页面使用fmt:message取出国际化内容
步骤:以index页面为例
(1) 编写国际化配置文件,抽取页面需要国际化的消息
纠错:下图中index_ch_CN改为index_zh_CN

(2) Springboot已经自动配置好了管理国际化资源的组件MessageSourceAutoConfiguration
public class MessageSourceAutoConfiguration {
   @Bean
   @ConfigurationProperties(prefix = "Spring.messages")
   public MessageSourceProperties messageSourceProperties() {
      return new MessageSourceProperties();
   }
@Bean
public MessageSource messageSource(MessageSourceProperties properties) {
   ResourceBundleMessageSource messageSource = new ResourceBundleMessageSource();
   if (StringUtils.hasText(properties.getBasename())) {
// 设置国际化资源文件的基础名(去掉语言代码和国家代码)
      messageSource.setBasenames(StringUtils
            .commaDelimitedListToStringArray(StringUtils.trimAllWhitespace(properties.getBasename())));
   }
…
}

public class MessageSourceProperties {
   /**
    * Comma-separated list of basenames (essentially a fully-qualified classpath
    * location), each following the ResourceBundle convention with relaxed support for
    * slash based locations. If it doesn't contain a package qualifier (such as
    * "org.mypackage"), it will be resolved from the classpath root.
    */
// 默认的基础名叫message,即我们的配置文件可以直接放在类路径下叫message.properties
   private String basename = "messages";
在配置文件application.properties中配置基础名Spring.messages.basename=i18n.index
(3) 在页面使用Thymeleaf语法获取国际化内容并测试访问
根据以下测试结果可知,此时默认是根据浏览器的语言优先级设置显示的


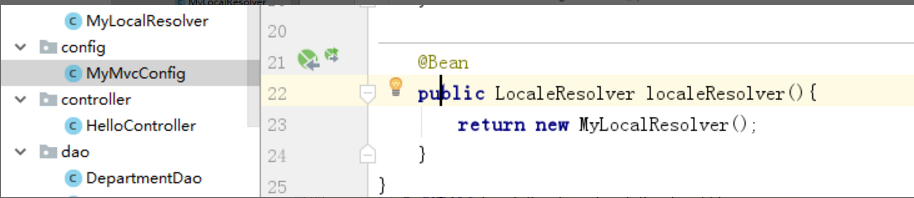
(4) 通过链接参数的方式实现点击页面中英文切换语言添加链接
<a class="btn btn-sm" th:href="@{/index.html(l='zh_CN')}">中文</a>
<a class="btn btn-sm" th:href="@{/index.html(l='en_US')}">English</a>
原理:

自己写一个LocaleResolver用于通过链接参数构造Locale对象并将其注入

登录与拦截器
(1)修改登录页面请求、请求方式、提示域、添加用户名密码name值

(2) 编写LoginController并使用重定向解决表单重复提交问题
@Controller
public class Login {
    Logger logger = LoggerFactory.getLogger(getClass()); // 使用SLF4J作为日志输出
    @PostMapping("/user/login") // 相等于请求方式为post请求
    public String login(@RequestParam String username,@RequestParam String password, Map msgmap, HttpSession session){
        //任意用户名且密码为123456即可登录
        if(!StringUtils.isEmpty(username) && "123456".equals(password)){
            logger.info("登录成功!");
			session.setAttribute("loginUser",username); //设置session防止非法登录
         return "redirect:/main.html"; //使用重定向解决页面登录表单重复提交的问题
        }else{
            msgmap.put("msg", "用户名密码不正确");
            return "index";
        }
    }
}

@Configuration
public class MyMvcConfig implements WebMvcConfigurer {
    @Override
    public void addViewControllers(ViewControllerRegistry registry) {
       // 添加重定向视图映射
        registry.addViewController("/main.html").setViewName("dashboard");
    }
}
(3) 使用拦截器和session实现用户登录拦截
为了防止用户在未登录的状态下,发送重定向请求main.html通过视图映射方式登录
/**
 *定义一个拦截器用于登录检查
* 判断依据:能否从session中获取到登录信息
 */
public class LoginHadlerIntercepter implements HandlerInterceptor {
    @Override
    public boolean preHandle(HttpServletRequest request, HttpServletResponse response, Object handler) throws ServletException, IOException {
        Object loginUser = request.getSession().getAttribute("loginUser");
        if(!StringUtils.isEmpty(loginUser)){
            // 已登录
            return true;
        }else {
            // 未登录
            request.setAttribute("msg","无权限登录失败!");
            try {
                request.getRequestDispatcher("/index.html").forward(request,response);
            } catch (ServletException e) {
                e.printStackTrace();
            } catch (IOException e) {
                e.printStackTrace();
            }
            return false;
        }
    }
}


@Configuration
public class MyMvcConfig implements WebMvcConfigurer {
    @Override
  public void addInterceptors(InterceptorRegistry registry) {
        // 注册自定义拦截器LoginHadlerIntercepter,并设置拦截请求和排除指定拦截请求
        registry.addInterceptor(new LoginHadlerIntercepter()).addPathPatterns("/**")
                .excludePathPatterns("/","/index.html","index.htm","/user/login",
                        "/webjars/**","/asserts/**");
    }
}
Restful风格的CRUD实验要求
URL:/资源名称/资源标识
使用请求方式区分请求操作:
GET:查询、POST:添加或修改、PUT:修改、DELETE:删除
员工列表展示及公共页面抽取
(1)员工列表功能:


(2)公共页面抽取

抽取方法(来自thymeleaf官方文档template layout):
1.待抽取片段
<div th:fragment="copy">
© 2011 The Good Thymes Virtual Grocery
</div>
2.引入公共片段
<div th:insert="~{footer :: copy}"></div>	// footer代表copy片段所在页面名
~{templatename::selector}			方式一:模板名::选择器,声明片段只需写id即可
~{templatename::fragmentname}		方式二:模板名::片段名
三种抽取片段方法及区别:
th:insert // 将带引入片段全部引入到当前标签中
th:replace // 将带引入片段全部替换当前标签
th:include // 只将带引入标签中的内容引入到当前标签
举例:
1.待引入片段
<footer th:fragment="copy">
© 2011 The Good Thymes Virtual Grocery
</footer>
2.三种不同方式引入
<div th:insert="footer :: copy"></div>
<div th:replace="footer :: copy"></div>
<div th:include="footer :: copy"></div>
3.引入结果
<div> // insert
<footer>
© 2011 The Good Thymes Virtual Grocery
</footer>
</div>
<footer> // replace
© 2011 The Good Thymes Virtual Grocery
</footer>
<div> // include
© 2011 The Good Thymes Virtual Grocery
</div>
菜单动态激活高亮及列表数据获取
(1) 使用thymeleaf官方文档Parameterizable fragment signatures动态高亮菜单项

<a class="nav-link active" th:class="${activeUri=='emps'?'nav-link active':'nav-link'}"
   href="#" th:href="@{/emps}"> // 在菜单项中使用变量activeUri用于判断是否高亮当前项
   …    员工管理

<!--抽取侧边栏sidebar-->
<div th:replace="~{commons/bars::#sidebar(activeUri='emps')}"></div>// 引用处传参
(2) 员工列表数据获取和展示
修改list页的tbody标签,获取后台传来的数据,并添加操作按钮
<tbody>
   <tr th:each="emp:${emps}">			// 使用each属性遍历emps
      <td th:text="${emp.id}"></td>
      <td th:text="${emp.lastName}"></td>
      <td th:text="${emp.email}"></td>
      <td th:text="${emp.gender}==0?'女':'男'"></td>	//三元表达式也可放在{}里
      <td th:text="${emp.department.departmentName}"></td>
      <td th:text="${#dates.format(emp.birth, 'yyyy-MM-dd HH:mm:ss')}"></td>
      <td>
         <button class="btn btn-sm btn-primary">修改</button>	// 添加bootstrap按钮
         <button class="btn btn-sm btn-danger">删除</button>
      </td>
   </tr>
</tbody>
添加页面的跳转和添加功能的实现
(1) list页面添加按钮添加链接
<h2><a class="btn btn-sm btn-success" href="emp" th:href="@{/emp}">员工添加</a></h2>
(2) EmployeeController添加方法addPage
@GetMapping("/emp")
public String addPage(Model model){
    logger.info("进入add方法");
    Collection<Department> departments = departmentDao.getDepartments();
    model.addAttribute("depts",departments);
    return "emp/add";
}
(3)add页面添加并改造表单
<form th:action="@{/emp}" method="post">	// 添加链接
   <div class="form-group">
      <label>LastName</label>		// 给各个表单添加name属性
      <input name="lastName"  type="text" class="form-control" placeholder="zhangsan">
   </div>
   <div class="form-group">
      <label>Email</label>
      <input name=”email” type="email" class="form-control" placeholder="zhangsan@atguigu.com">
   </div>
   <div class="form-group">
      <label>Gender</label><br/>
      <div class="form-check form-check-inline">
         <input class="form-check-input" type="radio" name="gender"  value="1">
         <label class="form-check-label">男</label>
      </div>
      <div class="form-check form-check-inline">
         <input class="form-check-input" type="radio" name="gender"  value="0">
         <label class="form-check-label">女</label>
      </div>
   </div>
   <div class="form-group">
      <label>department</label>
      <select class="form-control" name=” department.id”>
         <option th:value="${dept.id}" th:each="dept:${depts}" th:text="${dept.departmentName}">1</option>		// 使用each遍历部门列表
      </select>
   </div>
   <div class="form-group">
      <label>Birth</label>
      <input name=”birth” type="text" class="form-control" placeholder="yyyy-MM-dd">
   </div>
   <button type="submit" class="btn btn-primary">添加</button>
</form>
(4) 添加功能方法
@PostMapping("/emp")		// post请求
public String addEmp(Employee employee){
    logger.info("添加员工信息:"+employee);
    employeeDao.save(employee);
    return "redirect:/emps";	// 重定向到列表页
}
(5) 配置文件添加日期格式化设置
Spring.mvc.date-format=yyyy-MM-dd // 防止添加日期时解析错误
修改员工功能
(1) 跳转修改页面List页面修改按钮添加请求链接
<a class="btn btn-sm btn-primary" th:href="@{/emp/}+${emp.id}">修改</a>
// 使用加号拼接串儿,组成restful风格请求链接
EmployeeController添加修改页面跳转方法
@GetMapping("/emp/{id}")
public String editPage(@PathVariable("id") Integer id, Model model){
    logger.info("进入编辑页面方法:id_"+id);
    Collection<Department> departments = departmentDao.getDepartments();
    model.addAttribute("depts",departments);		// 回显下拉部门
    Employee employee = employeeDao.get(id);
    model.addAttribute("emp",employee);			// 回显员工信息
    return "emp/add";							// 修改页面和添加页共用
}
改造页面的value值并区分添加页和修改页的不同显示
<form th:action="@{/emp}" method="post">
   <div class="form-group">
      <label>LastName</label>
      <input type="text" class="form-control" placeholder="zhangsan" th:value="${emp!=null}?${emp.lastName}">	//三元表达式:若emp不为空,则取它的lastName
   </div>
   <div class="form-group">
      <label>Email</label>
      <input type="email" class="form-control" placeholder="zhangsan@atguigu.com" th:value="${emp!=null}?${emp.email}">
   </div>
   <div class="form-group">
      <label>Gender</label><br/>
      <div class="form-check form-check-inline">
         <input class="form-check-input" type="radio" name="gender"  value="1" th:checked="${emp!=null}?${emp.gender==1}"> //若为真,则checked
         <label class="form-check-label">男</label>
      </div>
      <div class="form-check form-check-inline">
         <input class="form-check-input" type="radio" name="gender"  value="0" th:checked="${emp!=null}?${emp.gender==0}">
         <label class="form-check-label">女</label>
      </div>
   </div>
   <div class="form-group">
      <label>department</label>
      <select class="form-control">
         <option th:value="${dept.id}" th:each="dept:${depts}" th:text="${dept.departmentName}"
// 若为真则selected                                  th:selected="${emp!=null}?${emp.department.id==dept.id}">1</option>
      </select>
   </div>
   <div class="form-group">
      <label>Birth</label>
      <input type="text" class="form-control" placeholder="zhangsan"
                              th:value="${emp!=null}?${#dates.format(emp.birth, 'yyyy-MM-dd HH:mm:ss')}">	// 日期格式化
   </div>//添加修改按钮动态改变文字
   <button type="submit" class="btn btn-primary" th:text="${emp!=null?'修改':'添加'}">添加</button>
</form>
(2) 修改请求方式为put请求
<form th:action="@{/emp}" method="post">
   <!-- 发送put请求修改员工信息
      1.在SpringMVC中配置HiddenHttpMethodFilter(Springboot已配置在WebAutoConfiguration中)
      2.页面创建一个post表单
      3.创建一个input项,name="_method",value="put"
   -->
   <input type="hidden" name="_method" value="PUT" th:if="${emp!=null}">
   <input type="hidden" name="id" th:value="${emp.id}" th:if="${emp!=null}">
// 经尝试,该请求成功被后台PostMapping拦截,而不是PutMapping,未解
// 已解决,看下一节最后一个,需添加一个配置
员工删除功能
(1) 在list页面对添加按钮设置链接
//使用th:attr的方式自定义属性del_uri并拼接字符串作为请求
<button th:attr="del_uri=@{/emp/}+${emp.id}" class="btn btn-sm btn-danger deleteBtn">删除</button>
(2) 构造一个post表单用于delete请求方式
<form id="delEmpForm" method="post">
   <input type="hidden" name="_method" value="delete">
</form>
(3) 使用js提交表单发送请求
<script>
   $(".deleteBtn").click(function () {
              delUri = $(this).attr("del_uri");
       $("#delEmpForm").attr("action",delUri).submit();
          })
</script>
(4) 后台处理删除功能
@DeleteMapping("/emp/{id}")
public String deleteEmp(@PathVariable("id") Integer id){
    logger.info("删除员工:"+id);
    employeeDao.delete(id);
    return "redirect:/emps";
}
(5) 经过尝试Springboot2.2需要添加配置开启更改请求方式的功能
# 开启更改请求方法的功能
Spring.mvc.hiddenmethod.filter.enabled=true
5. 错误处理机制(原理)
Springboot默认的处理机制
如果是浏览器访问则返回一个错误页面如下:

如果是客户端访问(这里使用postman)则返回一个json,如下图所示:

原理ErrorMvcAutoConfiguration
给容器中添加了以下4个主要组件:
- DefaultErrorAttributes
// 默认设置错误页面的内容信息
public Map<String, Object> getErrorAttributes(WebRequest webRequest, boolean includeStackTrace) {
    Map<String, Object> errorAttributes = new LinkedHashMap();
    errorAttributes.put("timestamp", new Date());	// 时间戳
    this.addStatus(errorAttributes, webRequest);	// 状态码等
    this.addErrorDetails(errorAttributes, webRequest, includeStackTrace);
    this.addPath(errorAttributes, webRequest);
    return errorAttributes;
}
- BasicErrorController
//处理/error请求。从配置文件中读取server.error.path,如没配则用error.path,若还没配
// 则用/error请求
@Controller
@RequestMapping("${server.error.path:${error.path:/error}}")
public class BasicErrorController extends AbstractErrorController {
// 处理浏览器的错误请求,根据请求头中的accept: text/html字段判断,返回页面
@RequestMapping(produces = MediaType.TEXT_HTML_VALUE)
public ModelAndView errorHtml(HttpServletRequest request, HttpServletResponse response) {
   HttpStatus status = getStatus(request);
   Map<String, Object> model = Collections
         .unmodifiableMap(getErrorAttributes(request, isIncludeStackTrace(request, MediaType.TEXT_HTML)));
   response.setStatus(status.value());
// 确定哪个页面作为错误页面,modelAndview包含页面地址和错误内容
ModelAndView modelAndView = resolveErrorView(request, response, status, model);
   return (modelAndView != null) ? modelAndView : new ModelAndView("error", model);
}
// 处理客户端的错误请求,根据请求头中的accept:*/*字段判断,返回json
@RequestMapping
public ResponseEntity<Map<String, Object>> error(HttpServletRequest request) {
   HttpStatus status = getStatus(request);
   if (status == HttpStatus.NO_CONTENT) {
      return new ResponseEntity<Map<String, Object>>(status);
   }
   Map<String, Object> body = getErrorAttributes(request, isIncludeStackTrace(request, MediaType.ALL));
   return new ResponseEntity<>(body, status);
}
- ErrorPageCustomizer
@Value("${error.path:/error}") // 系统发生错误以后发送/error请求进行处理
private String path = "/error";
- DefaultErrorViewResolver
@Override
public ModelAndView resolveErrorView(HttpServletRequest request, HttpStatus status, Map<String, Object> model) {
   ModelAndView modelAndView = resolve(String.valueOf(status.value()), model);
// SERIES_VIEWS 是包含4xx、5xx错误的map
   if (modelAndView == null && SERIES_VIEWS.containsKey(status.series())) {
      modelAndView = resolve(SERIES_VIEWS.get(status.series()), model);
   }
   return modelAndView;
}

private ModelAndView resolve(String viewName, Map<String, Object> model) {
   String errorViewName = "error/" + viewName;
// 若有可用的模板引擎,则用模板引擎解析,直接返回ModelAndView
   TemplateAvailabilityProvider provider = this.templateAvailabilityProviders.getProvider(errorViewName, this.applicationContext);
   if (provider != null) {
      return new ModelAndView(errorViewName, model);
   }
// 若模板引擎不可用,则去静态资源文件夹下找errorViewName
   return resolveResource(errorViewName, model);
}
处理步骤:
一旦系统出现4xx或5xx之类的错误,ErrorPageCustomizer就会生效(定制相应的响应规则),就会发生/error请求;这个请求会由BasicErrorController进行处理(浏览器引起的错误由errorHtml方法处理,客户端引起的错误由error方法处理);在处理浏览器的错误页面过程中需要借助DefaultErrorViewResolver解析得到错误页面的位置和内容(视图名: “error/” + viewName);而错误内容存放在model中,由DefaultErrorAttributes设置
响应页面的errorHtml:
// 解析错误页面,得到包含错误页面地址和错误内容的modelAndView
protected ModelAndView resolveErrorView(HttpServletRequest request, HttpServletResponse response, HttpStatus status,
      Map<String, Object> model) {
// 遍历所有ErrorViewResolver,得到modelAndView,这个ErrorViewResolver
// 就是DefaultErrorViewResolver
   for (ErrorViewResolver resolver : this.errorViewResolvers) {
      ModelAndView modelAndView = resolver.resolveErrorView(request, status, model);
      if (modelAndView != null) {
         return modelAndView;
      }
   }
   return null;
}
如何定制错误页面(浏览器)
有模板引擎的情况下,将错误页面命名为“状态码.html”放在模板引擎文件夹下的error文件夹下,发生此状态码的错误就会来到对应页面。若没有对应的“状态码.html”则会去找“4xx.html”或“5xx.html”页面去匹配相应的错误。
页面能获取到的内容有:
Timestamp:时间戳 // 这些内容可以在页面上使用模板语法的方式取出
Status:状态码
Error:错误消息
Exception:异常对象
Message:异常消息
Errors:JSR303数据校验的错误都在这里
没有模板引擎的情况下(模板引擎找不到这个错误页面),在静态资源文件夹下找。
模板引擎和静态资源文件下都没有错误页面时,则显示默认的错误页面。
如何定制错误json消息(客户端)
//自定义异常:用户不存在,用于测试,为了能够把异常抛出,需要继承RuntimeException
public class UserNotExistException extends RuntimeException {
    public UserNotExistException() {
        super("用户不存在");
    }
}
(1) 自定义异常处理返回json数据
/**
 * 自定义异常处理器
 */
@ControllerAdvice   // 要成为异常处理器,需用@ControllerAdvice注解标注
public class MyExceptionHandler {

    /**
     * 方法一:
     * @ExceptionHandler用于标注处理的异常类型
     * 如果出现该种异常就会调用这个方法,浏览器和客户端返回的都是json
     */
    @ResponseBody
    @ExceptionHandler(UserNotExistException.class)
    public Map<String, Object> handlerException(Exception e){
        Map<String, Object> map = new HashMap<>();
        map.put("code","userNotExist");
        map.put("message:",e.getMessage()); //定制的两个数据
        return map;
    }
(2)自定义异常处理器自适应返回页面或json
/**
 * 自定义异常处理器
 */
@ControllerAdvice   // 要成为异常处理器,需用@ControllerAdvice注解标注
public class MyExceptionHandler {
/**
 * 方法二:
 * 自适应响应页面或json,即将/error请求转发出去让BasicErrorController进行处理
 */
@ExceptionHandler(UserNotExistException.class)
public String handlerExceptionAdaptor(Exception e, HttpServletRequest request){
    // 设置错误状态码javax.servlet.error.status_code,不设置的话解析时获取不到期待的状态码
    // 会返回到默认的错误页,设置的话会返回指定的状态码对应的错误页,但是没有定制的属性
    request.setAttribute("javax.servlet.error.status_code","5xx");
    Map<String, Object> map = new HashMap<>();
    map.put("code","userNotExist");
    map.put("msg","找不到用户...");
    map.put("exception",e);
    // 要想获得定制的属性的话,需要将定制的消息放入request中
    // 然后由getErrorAttributes方法获取定制的属性,getErrorAttributes方法可以
    // 由自定义的类继承DefaultErrorAttributes类并且重写方法返回定制的消息
    request.setAttribute("ext",map);
    return "forward:/error";
}
}
// 自定义ErrorAttribute,重写getErrorAttributes
@Component
public class MyErrorAttribute extends DefaultErrorAttributes {
    @Override
    public Map<String, Object> getErrorAttributes(WebRequest webRequest, boolean includeStackTrace) {
        Map<String, Object> map = super.getErrorAttributes(webRequest, includeStackTrace);
        map.put("company","zcy");
        Map<String,Object> ext = (Map<String, Object>) webRequest.getAttribute("ext", 0);
        map.put("ext",ext);
        return map;
    }
}
6. 配置嵌入式Servlet容器
Springboot默认使用Tomcat作为嵌入式的servlet容器
如何定制和修改Servlet容器的相关配置有两个方法
(1) 修改和server有关的配置(ServerProperties)
// 通用的servlet容器的配置
Server.xxx
// tomcat的配置
Server.tomcat.xxx
(2) 将WebServerFactoryCustomizer<TomcatServletWebServerFactory
对象注入到Spring容器中
// 返回带有指定server泛型的web服务器工厂定制器
@Bean
public WebServerFactoryCustomizer<TomcatServletWebServerFactory> a(){
    return new WebServerFactoryCustomizer<TomcatServletWebServerFactory>() {
        @Override
        public void customize(TomcatServletWebServerFactory factory) {
            factory.setPort(8081);		// 修改端口号
        }
    };
}
注册servlet三大组件
由于Springboot默认是以jar包的方式使用嵌入的servlet容器启动来启动Springboot应用的,没有web.xml文件用来配置三大组件,所以Springboot提供了@Bean的方式注册它们。
ServletRegistrationBean	// 注册servlet
FilterRegistrationBean	// 注册filter
ServletListenerRegistrationBean	// 注册Listener
- 示例(注册Servlet、Filter和Listener):
/**
 * 自定义Servlet
 */
public class MyServlet extends HttpServlet {

    @Override
    protected void doGet(HttpServletRequest req, HttpServletResponse resp) throws ServletException, IOException {
        doPost(req, resp);
    }

    @Override
    protected void doPost(HttpServletRequest req, HttpServletResponse resp) throws ServletException, IOException {
        resp.setContentType("text/html;charset=utf-8");
        resp.getWriter().print("你好 myServlet!");
    }
}
/**
 * 自定义filter
 */
public class Myfilter implements Filter {

    @Override
    public void init(FilterConfig filterConfig) throws ServletException {

    }

    @Override
    public void doFilter(ServletRequest servletRequest, ServletResponse servletResponse, FilterChain filterChain) throws IOException, ServletException {
        System.out.println("filter process...");
        filterChain.doFilter(servletRequest,servletResponse);   // 放行
    }

    @Override
    public void destroy() {

    }
}
/**
 * 自定义listener
 */
public class MyListener implements ServletContextListener {
    @Override
    public void contextInitialized(ServletContextEvent sce) {
        System.out.println("contextInitialized...web容器启动");
    }

    @Override
    public void contextDestroyed(ServletContextEvent sce) {
        System.out.println("contextDestroyed...web项目销毁");
    }
}


@Configuration
public class MyServerConfig {
	/**
	 * 注册Servlet
	 * @return
	 */
	@Bean
	public ServletRegistrationBean servletRegistrationBean() {
	    ServletRegistrationBean servletRegistrationBean =
	            new ServletRegistrationBean(new MyServlet(), "/myServlet");
	    return servletRegistrationBean;
	}
	/**
	 * 注册Filter
	 * @return
	 */
	@Bean
	public FilterRegistrationBean filterRegistrationBean(){
	    FilterRegistrationBean<Filter> filterFilterRegistrationBean = new FilterRegistrationBean<>();
	    filterFilterRegistrationBean.setFilter(new Myfilter()); // 注册filter
	    filterFilterRegistrationBean.setUrlPatterns(Arrays.asList("/hello","/myServlet"));// 拦截的请求
	    return filterFilterRegistrationBean;
	}
	/**
	 * 注册listener
	 * @return
	 */
	@Bean
	public ServletListenerRegistrationBean servletListenerRegistrationBean(){
	    ServletListenerRegistrationBean<MyListener> listenerRegistrationBean = new ServletListenerRegistrationBean<>(new MyListener());
	    return listenerRegistrationBean;
	}

}
使用其他servlet容器
Springboot支持的servlet容器有:
Tomcat(默认使用)
Jetty(适合长连接应用)、
Undertow(不支持jsp,高性能非阻塞并发性好)
如果要使用其他的servlet容器,只需将默认的tomcat容器从依赖树中排出掉,并将其依赖替换为其他Springboot支持的servlet容器即可。
嵌入式servlet容器自动配置原理
….
7. Springboot中使用jsp
(1)在pom.xml中引入依赖
<!--引入Spring Boot内嵌的Tomcat对JSP的解析包-->
 <dependency>
     <groupId>org.apache.tomcat.embed</groupId>
     <artifactId>tomcat-embed-jasper</artifactId>
 </dependency>

 <!-- servlet依赖的jar包start -->
 <dependency>
     <groupId>javax.servlet</groupId>
     <artifactId>javax.servlet-api</artifactId>
 </dependency>

 <!-- servlet依赖的jar包start -->
 <!-- jsp依赖jar包start -->
 <dependency>
     <groupId>javax.servlet.jsp</groupId>
     <artifactId>javax.servlet.jsp-api</artifactId>
     <version>2.3.1</version>
 </dependency>

 <!-- jsp依赖jar包end -->
 <!--jstl标签依赖的jar包start -->
 <dependency>
     <groupId>javax.servlet</groupId>
     <artifactId>jstl</artifactId>
 </dependency>
(2)在application.properties配置文件中设置视图为jsp

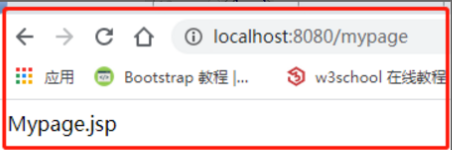
(3)在src/main下建一个目录webapp,webapp底下创建jsp页面mypage.jsp,如上图。
(4)配置pom.xml的resources,主要就是把项目编译到target目录地下,网上有人说不配置访问不到jsp页面,我测试一下,可以访问,为了后续正常,我还是配置一下。
<resources>

      <resource>
          <directory>src/main/java</directory>
          <includes>
              <include>**/*.xml</include>
          </includes>
      </resource>

      <resource>
          <directory>src/main/resources</directory>
          <includes>
              <include>**/*.*</include>
          </includes>
      </resource>

      <!--springboot使用的web资源要编译到META-INF/resources-->
      <resource>
          <directory>src/main/webapp</directory>
          <targetPath>META-INF/resources</targetPath>
          <includes>
              <include>**/*.*</include>
          </includes>
      </resource>
 </resources>
(5)controller层代码如下

jsp层

(6)启动应用,成功访问
五、 Springboot与docker
Docker是一个开源的应用容器引擎。基于GO语言并遵循Apache2.0协议开源。Docker可以让开发者打包他们的应用以及依赖包到一个轻量级、可移植的容器中,然后发布到任何流行的Linux机器上,也可以实现虚拟化。
容器使用沙箱机制,相互之间不会有任何接口,更重要的是容器性能开销极低。
Docker支持将软件编译成一个镜像,然后在镜像中对软件做好配置,将镜像发布出去,其他使用者可以直接使用这个镜像。运行中的这个镜像成为容器,容器启动是非常快的。类似windows里面的ghost操作系统,安装好后什么都有了。
1. Docker的核心概念
Docker主机(host): 安装了Docker程序的机器(不论本机还出远程机器,docker直接安装在操作系统上)
Docker客户端(Client): 连接Docker主机进行操作
Docker仓库(Registry): 用来保存各种打包好的软件镜像(分为公共仓库docker hub和私人仓库private registry)
Docker镜像(Images): 软件打包好的镜像,放在docker仓库中
Docker容器(Container): 镜像启动后的实例成为一个容器,容器是独立运行的一个或一组应用,一个镜像可以生成一个或多个容器。
- 使用Docker的的步骤:
(1) 安装Docker
(2) 去Docker仓库找到这个软件对应的镜像
(3) 使用Docker运行这个镜像,这个镜像就会生成一个Docker容器
(4) 对容器的启动停止就是对软件的启动停止
2. Docker的启动&安装和停止
安装(这里在linux操作系统上安装):
1、检查内核版本,docker要求需是内核在3.10及以上
uname –r		// 查看内核版本
yum update 	// 升级内核版本,需要联网
2、安装Docker
yum install docker	// 安装docker,需要联网
3. 启动Docker
systemctl start docker	// 启动
docker –v 			// 查看版本号
4. 设置开机启动Docker(每次重启虚拟机默认docker不自启)
Systemctl enable docker 	// 开机启动 service docker start备用
5. 停止Docker
Systemctl stop docker		// 停止docker
3. Docker中的常用操作
- 镜像操作
Docker hub网址https://hub.docker.com/
1 检索:docker search 关键字 	eg:	docker search mysql
// 该命令会从docker hub仓库中查找所搜所得关键字,可以打开docker hub网站查看

2 拉取:docker pull 镜像名:[tag] 	eg:	docker pull mysql:5.5
// 从docker hub仓库中下载镜像,tag是可选的多为软件版本号,不加默认是latest最新的
// 镜像名不用写全,只需写“/”后面的名字即可,当然写全也可以

3 列表:docker images // 查看所有本地镜像

4 删除:docker rmi 镜像ID // 删除指定的镜像
注意: 在从docker hub上拉取镜像时,下载速度非常慢,因为这是个国外的网站,所以我们使用阿里云的镜像加速器进行下载。
首先需要登录阿里云的管理页面https://cr.console.aliyun.com/cn-beijing/instances/mirrors,并注册登录,点击镜像加速器中的centos,按照里面的说明堆docker进行配置。即在/etc/docker/daemon.json文件中配置"registry-mirrors": [“https://f29urqbv.mirror.aliyuncs.com”]即可,仓库镜像地址改为自己的地址,然后重新加载守护进程并重启docker
systemctl daemon-reload
systemctl restart docker
Docker加速器简介:
Docker加速器提供Docker Registry(Docker Hub)在中国的镜像代理服务,为中国用户在国内服务器上缓存诸多镜像。
当用户的Docker设定了–registry-mirror参数后,用户的Docker拉取镜像时,首先去Docker加速器中查找镜像,若命中则说明该镜像已经在Docker加速器中缓存,用户直接从Docker加速器中下载。
若没有命中,则说该镜像还没有被缓存,那么Docker加速器首先会被驱使去Docker Hub中下载该镜像,并进行缓存,最终让用户从Docker加速器中下载该镜像。
- 容器操作
1 运行镜像:docker run --name 容器名 –d 镜像名eg: docker run –name mytomcat –d tomcat
// 注意name前是两个”-”,自己起一个容器名,-d:后台运行,镜像名:要使用哪个镜像
// 参数 –p 虚拟机端口:tomcat端口,实现端口映射,将虚拟机端口映射到tomcat端口
// eg: docker run --name mytomcat -d -p 8888:8080 tomcat 不这样做无法直接访问虚拟机里的// 8080端口

2. 查看运行中的容器:docker ps

3 停止容器:docker stop 容器id/容器名 eg:docker stop mytomcat

4 启动容器:docker start 容器ID/容器名 	eg:docker start mytomcat
5 删除容器:docker rm 容器ID/容器名 	eg:docker rm mytomcat
6 容器日志:docker logs 容器ID/容器名	eg: docker logs mytomcat
7 更多命令:https://docs.docker.com/engine/reference/commandline/docker/
// 也可查看官网每一个镜像的文档
如果设置了端口映射但还无法访问tomcat,查看下自己的防火墙状态,如果是开启中,那么关闭再试试
Service firewalld status 	// 查看防火墙状态
Service firewalld stop   // 关闭防火墙
- 例:(一个镜像启动多个容器并访问)


4. Docker安装MySQL
(1) 拉取镜像MySQL5.7
docker pull mysql:5.7
(2) 按照官网该镜像的使用说明启用镜像并配置端口映射
docker run -p 3306:3306 --name mysql5.7_20191118 -e MYSQL_ROOT_PASSWORD=123456 -d mysql:5.7
// -e MYSQL_ROOT_PASSWORD 这个参数是文档上的启动配置参数,必填指定密码不然报错
(3) 修改配置
如果在执行上一命令时报以下错误警告,是由于docker处于安全考虑关闭了一个设置。
WARNING: IPv4 forwarding is disabled. Networking will not work

解决办法:
vi /etc/sysctl.conf
# 新增一行
 net.ipv4.ip_forward=1
#  重启network服务
systemctl restart network
# 查看是否修改成功
sysctl net.ipv4.ip_forward
(返回为“net.ipv4.ip_forward = 1”,表示成功)
然后,重启容器即可。
(4) 更多请看官方文档
六、 Springboot与数据访问
1. JDBC和自动配置原理
创建项目测试数据源
(1)创建项目时,勾选SQL里的JDBC API和MySQL Driver选项

自动获得web、jdbc和mysql驱动的依赖,如下:
<dependency>
    <groupId>org.Springframework.boot</groupId>
    <artifactId>Spring-boot-starter-jdbc</artifactId>
</dependency>
<dependency>
    <groupId>org.Springframework.boot</groupId>
    <artifactId>Spring-boot-starter-web</artifactId>
</dependency>

<dependency>
    <groupId>mysql</groupId>
    <artifactId>mysql-connector-java</artifactId>
    <scope>runtime</scope>
</dependency>
(2)编写连接数据库的配置文件(以yml文件为例)
Spring:
  datasource:
    username: root
    password: 123456
// 提前创建好myjdbc数据库,有时会出现时区错误问题,加上serverTimezone=UTC
    url: jdbc:mysql://192.168.1.128:3306/myjdbc?serverTimezone=UTC
    driver-class-name: com.mysql.cj.jdbc.Driver
(3)测试数据源
@SpringBootTest
class DemoSpringbootJdbcApplicationTests {
    @Autowired
    DataSource dataSource;

    @Test
    void contextLoads() throws SQLException {
// Springboot2.2.1默认使用的数据源是:class com.zaxxer.hikari.HikariDataSource
        System.out.println(dataSource.getClass());
        Connection connection = dataSource.getConnection();
        System.out.println(connection); // 默认:HikariProxyConnection@11034726 wrapping com.mysql.cj.jdbc.ConnectionImpl@402c04
        connection.close();
    }
}
若想指定数据源类型可在配置文件中指定type属性,如:
Type: com.mysql.cj.jdbc.MysqlDataSource
这样输出的结果是:
class com.mysql.cj.jdbc.MysqlDataSource
com.mysql.cj.jdbc.ConnectionImpl@112e953
JDBC自动配置原理
Springboot2.2.1默认使用的是HikariDataSource数据源;
数据源的相关配置都在DataSourceProperties类里面
# 数据源的相关配置及其自动执行SQL的初始化原理
Spring:
  datasource:
    username: xuhaixing
    password: xuhaixing
    url: jdbc:mysql://192.168.94.151:3306/mytest?useUnicode=true&characterEncoding=utf8&characterSetResults=utf8
    driver-class-name: com.mysql.jdbc.Driver
    platform: mysql
    #启动时需要初始化的建表语句
schema: classpath:schema-mysql.sql
# 也可以这样指定建表SQL的位置
schema:
  	- classpath:department.sql
  	- classpath:employee.sql
    #初始化的数据
    data: classpath:data-mysql.sql
    # Initialize the datasource with available DDL and DML scripts.
    initialization-mode: always
    continue-on-error: false
    #data-password:
    #data-username:
    #schema-password:
    #schema-username:
    sql-script-encoding: utf-8
    separator: ;
(1)自动初始化sql原理DataSourceAutoConfiguration
Spring.datasource下有两个属性 schema、data,其中schema为表初始化语句,data为数据初始化,默认加载schema.sql与data.sql。脚本位置可以通过Spring.datasource.schema 与Spring.datasource.data 来改变,源码如下:
public boolean createSchema() {
	List<Resource> scripts = getScripts("Spring.datasource.schema",
			this.properties.getSchema(), "schema");
	if (!scripts.isEmpty()) {
		if (!isEnabled()) {
			logger.debug("Initialization disabled (not running DDL scripts)");
			return false;
		}
		String username = this.properties.getSchemaUsername();
		String password = this.properties.getSchemaPassword();
		runScripts(scripts, username, password);
	}
	return !scripts.isEmpty();
}
	public void initSchema() {
	List<Resource> scripts = getScripts("Spring.datasource.data",
			this.properties.getData(), "data");
	if (!scripts.isEmpty()) {
		if (!isEnabled()) {
			logger.debug("Initialization disabled (not running data scripts)");
			return;
		}
		String username = this.properties.getDataUsername();
		String password = this.properties.getDataPassword();
		runScripts(scripts, username, password);
	}
}
看getScripts源码,它还会加载schema- p l a t f o r m . s q l 文 件 , 或 者 d a t a − {platform}.sql文件,或者data- platform.sql文件,或者data−{platform}.sql文件,其中platform就是Spring.datasource.platform的值
private List<Resource> getScripts(String propertyName, List<String> resources,
			String fallback) {
	if (resources != null) {
		return getResources(propertyName, resources, true);
	}
	String platform = this.properties.getPlatform();
	List<String> fallbackResources = new ArrayList<>();
	fallbackResources.add("classpath*:" + fallback + "-" + platform + ".sql");
	fallbackResources.add("classpath*:" + fallback + ".sql");
	return getResources(propertyName, fallbackResources, false);
}
Spring.datasource.initialization-mode 初始化模式(Springboot2.0),其中有三个值,always为始终执行初始化,embedded只初始化内存数据库(默认值),如h2等,never为不执行初始化。
Spring.datasouce.data-passwork:
Spring.datasouce.data-username:
Spring.datasouce.schema-password:
Spring.datasouce.schema-username:
这四个值为执行schema.sql或者data.sql时,用的用户。
Spring.datasource.sql-script-encoding: utf-8 为文件的编码
Spring.datasource.separator: ; 为sql脚本中语句分隔符
Spring.datasource.continue-on-error: false 遇到语句错误时是否继续,若已经执行过某些语句,再执行可能会报错,可以忽略,不会影响程序启动。
(2)数据库操作原理JdbcTemplateAutoConfiguration
该自动配置导入了JdbcTemplateConfiguration和NamedParameterJdbcTemplateConfiguration这两个类,在这两个类中分别配置了JdbcTemplate 和 NamedParameterJdbcTemplate 这两个bean,而至这两个bean中有对数据库操作的API,如query、update等。源码如下:
@Bean
@Primary
JdbcTemplate jdbcTemplate(DataSource dataSource, JdbcProperties properties) {
    JdbcTemplate jdbcTemplate = new JdbcTemplate(dataSource);
    Template template = properties.getTemplate();
    jdbcTemplate.setFetchSize(template.getFetchSize());
    jdbcTemplate.setMaxRows(template.getMaxRows());
    if (template.getQueryTimeout() != null) {
        jdbcTemplate.setQueryTimeout((int)template.getQueryTimeout().getSeconds());
    }

    return jdbcTemplate;
}

@Bean
@Primary
NamedParameterJdbcTemplate namedParameterJdbcTemplate(JdbcTemplate jdbcTemplate) {
    return new NamedParameterJdbcTemplate(jdbcTemplate);
}
使用示例:
@Controller
public class HelloController {
    @Autowired
    JdbcTemplate jdbcTemplate;

    @GetMapping("query")
    @ResponseBody
    public List<Map<String, Object>> query(){
        // 查询department表中的所有数据
        List<Map<String, Object>> list = jdbcTemplate.queryForList("select * from department");
        return list;
    }
}
2. 整合Druid并配置数据源监控
虽然HikariDataSource数据源比Druid数据源性能要好,但Druid有成套的安全、数据源监控等优点,所以实际上Druid数据源用的也比较多。
- 引入Druid的依赖并配置type值指定数据源
<!-- https://mvnrepository.com/artifact/com.alibaba/druid -->
<dependency>
    <groupId>com.alibaba</groupId>
    <artifactId>druid</artifactId>
    <version>1.1.21</version>
</dependency>
# 指定数据源类型为Druid
type: com.alibaba.druid.pool.DruidDataSource
- 配置Druid的其他配置
Spring:
  datasource:
#   数据源基本配置
    username: root
    password: 123456
    driver-class-name: com.mysql.jdbc.Driver
    url: jdbc:mysql://localhost:3306/ssm_crud
    type: com.alibaba.druid.pool.DruidDataSource
#   数据源其他配置
    initialSize: 5
    minIdle: 5
    maxActive: 20
    maxWait: 60000
    timeBetweenEvictionRunsMillis: 60000
    minEvictableIdleTimeMillis: 300000
    validationQuery: SELECT 1 FROM DUAL
    testWhileIdle: true
    testOnBorrow: false
    testOnReturn: false
    poolPreparedStatements: true
#   配置监控统计拦截的filters,去掉后监控界面sql无法统计,'wall'用于防火墙
    filters: stat,wall,log4j
    maxPoolPreparedStatementPerConnectionSize: 20
    useGlobalDataSourceStat: true
    connectionProperties: druid.stat.mergeSql=true;druid.stat.slowSqlMillis=500
发现其他配置及数据源监控 的相关配置都有黄色底纹,说明这些配置并没有和DataSourceProperties中的相关属性绑定,即该类中没有Druid配置的这些属性名。
手动将Druid的这些配置与数据源绑定
@Configuration
public class DruidConfig {

  @Bean
   @ConfigurationProperties(prefix = "Spring.datasource")
   public DataSource druid(){
       return  new DruidDataSource();
   }
}
以debug的方式启动测试类中的方法,查看数据源中的Druid属性有没有自动绑定,结果发现已绑定。如果发现启动报错,可根据错误修改相关文件,我这里报log4j的错误,后来在pom文件引入了log4j的依赖就不报错了。
- Druid数据源监控
@Configuration
public class DruidConfig {

    @Bean
    @ConfigurationProperties(prefix = "Spring.datasource")
    public DataSource druid(){
        return  new DruidDataSource();
    }

    // 配置druid的监控
    // 1.配置一个管理后台的servlet
    @Bean
    public ServletRegistrationBean statViewServlet(){
        ServletRegistrationBean<StatViewServlet> bean = new ServletRegistrationBean<>(new StatViewServlet(), "/druid/*");
        bean.addInitParameter("loginUsername","admin");
        bean.addInitParameter("loginPassword","123456");
        bean.addInitParameter("allow",""); // 默认空为允许所有访问
        bean.addInitParameter("deny","192.168.1.128");
        return bean;
    }
    // 2.配置一个web监控的filter
    @Bean
    public FilterRegistrationBean webStatFilter(){
        FilterRegistrationBean<WebStatFilter> bean = new FilterRegistrationBean<>();
        bean.setFilter(new WebStatFilter());
        bean.addInitParameter("exclusions","*.js,*.css,/druid/*");
        bean.setUrlPatterns(Arrays.asList("/*"));
        return bean;
    }
}
启动测试:

3. 整合Mybatis
基础环境搭建
(1) 新建工程,引入依赖

(2) 使用上节的知识配置Druid数据源并成功建表访问新建的数据库mybatis

(3) 创建两个实体类Employee、department
CRUD注解版
(1) 编写接口DeptMapper
@Mapper
public interface DepartmentMapper {
	// Mapper、Select、Delete、Insert、Update这些注解都是mybatis的
	@Select("select * from department where id = #{id}")
    public Department getDetpById(Integer id);

    @Delete("delete from department where id = #{id}")
    public int deleteDeptById(Integer id);

    // @Options:将自增的主键id返回到department对象
    @Options(useGeneratedKeys = true, keyProperty = "id")
	@Insert("insert into department(departmentName) values(#{departmentName})")
    public int insertDept(Department department);

    @Update("update department set departmentName = #{departmentName} where id = #{id}")
    public int updateDeptById(String departmentName);
}
(2) 编写Controller测试
@RestController  //返回json数据
public class DeptController {

    @Autowired
    private DepartmentMapper departmentMapper;

    @GetMapping("/dept/{id}")
    public Department getDeptById(@PathVariable("id") Integer id){
        Department department = departmentMapper.getDetpById(id);
        return department;
    }

    @GetMapping("/dept")
    public Department insertDept(Department department){
        departmentMapper.insertDept(department);
        return department;
    }
}
- 其他一些问题:
(1)开启驼峰命名法(camelcase)
当数据库中的字段时department_name这样的,Javabean中的字段是departmentName这样的,那么这对属性是无法绑定的,增删改查是无效的。这是需要开启驼峰命名法。
// 方法一:编写配置类,手动开启驼峰命名法
@org.Springframework.context.annotation.Configuration
public class MybatisConfig {
    @Bean
    public ConfigurationCustomizer configurationCustomizer(){
        return new ConfigurationCustomizer() {
            @Override
            public void customize(Configuration configuration) {
                // 开启驼峰命名法
                configuration.setMapUnderscoreToCamelCase(true);
            }
        };
    }
}
// 方法二:配置文件中开启驼峰命名法
mybatis:
  configuration:
    map-underscore-to-camel-case: true
(2) 开启Mapper包扫描
当mapper包下的接口很多时,在每个接口上都要加@Mapper注解比较麻烦,这时可以在主程序(主配置类)上加上@MapperScan注解,并指定需要扫描的包,那么这个包下的所有接口都会自动识别为带有@Mapper注解的接口
@MapperScan(value = "com.zcy.Springboot.mapper")
@SpringBootApplication
public class DemoSpringbootMybatisApplication {
……
}
(3) 补充:Mybatis注解版模糊查询的两种方式
- 一种拼接字符串
@Select("select * from xxx where  name like #{name} ")
List<xxx> findByName(String name)
测试的时候,传入的参数要拼接为
userDao.findByName("%name%")
- 第二中是占位符, v a l u e , {value} , value,符号,属性必须是value,取参数的值
@Select("select * from xxx where  name like   '%${value}%'  ")
List<xxx> findByName(String name)
测试的时候,直接传入参数
userDao.findByName(name)
CRUD配置版
不论是注解版还是配置版都需要将Mapper扫描到容器中,不论何种方式。
(1) 编写接口EmployeeMapper
public interface EmployeeMapper {

    public Employee getEmpById(Integer id);

    public void insertEmp(Employee employee);
}
(2) 编写mybatis的全局配置文件和Employee的SQL映射文件,并在主配置文件中指定这两个文件的位置。
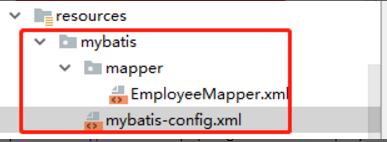
Mybatis将代码都放到了GitHub上托管,到GitHub上搜索找到Mybatis3,打开官网点击Getting Started找到全局配置和sql映射代码到自己项目的位置更改。
// EmployeeMapper.xml
<mapper namespace="com.zcy.Springboot.mapper.EmployeeMapper">
    <select id="getEmpById" resultType="com.zcy.Springboot.bean.Employee">
        select * from employee where id = #{id}
    </select>

    <select id="insertEmp">
        insert into employee values (#{id}, #{lastName},#{email},#{gender},#{d_id})
    </select>
</mapper>
// mybatis-config.xml 根据Mybatis官网配置开启驼峰命名法
<configuration>
    <settings>
        <setting name="mapUnderscoreToCamelCase" value="true"/>
    </settings>
</configuration>
// yml文件指定上面Mybatis的配置文件位置
mybatis:
  config-location: classpath:mybatis/mybatis-config.xml
  mapper-locations: classpath:mybatis/mapper/*.xml
(3) 编写EmployeeController测试
@RestController
public class EmployeeController {
// 如果这里报红线错误的话,可以在该类上加@component注解就好了,不加也可运行
    @Autowired
    private EmployeeMapper employeeMapper;

    @GetMapping("/emp/{id}")
    public Employee getEmpById(@PathVariable("id") Integer id){
        return employeeMapper.getEmpById(id);
    }

    @GetMapping("/emp")
    public void insertEmp(Employee employee){
        employeeMapper.insertEmp(employee);
    }
}
4. SpringData JPA
Spring Data是SpringBoot在底层进行数据访问默认采用的技术,目的在于统一简化数据访问的API。比如统一的接口有:统一CRUD操作的接口CurdRepository,基本CRUD及分页的接口PagingAndSortingRepository等。
此外还提供了数据访问的模板类,用于操作对应模板的数据,如MongoDBTemplate、RedisTemplate等。

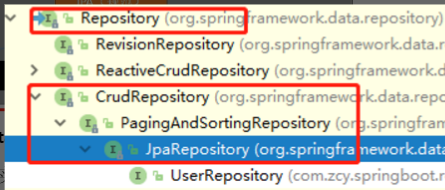
Spring Data JPA(Java持久化API):基于ORM对象关系映射,底层使用Hibernate作为实现,其继承结构如下图所示:
环境搭建
(1) 创建项目并配置数据源
勾选Spring Data JPA和MySQL Driver驱动

配置数据源
spring:
  datasource:
    username: root
    password: 123456
    url: jdbc:mysql://192.168.1.128:3306/myjpa
    driver-class-name: com.mysql.cj.jdbc.Driver
(2) 编写实体类User并配置数据表关系映射
@Entity   //告诉Jpa这是一个实体类,是和数据表映射的类,自动创建表
@Table(name = "tbl_user")  //来指定和哪个数据表对应,如果省略那么表明默认就是user(类名小写)
public class User {

    @Id // 标注主键
    @GeneratedValue(strategy = GenerationType.IDENTITY) // 主键自增
    private Integer id;

    @Column(name = "last_name",length = 50)
    private String lastName;
    @Column // 省略列名,那么默认用属性名作为表的字段名
    private String email;
(3) 编写Dao接口用来操作实体类对应的数据表
// 继承jpa完成对数据库的操作
public interface UserRepository extends JpaRepository<User, Integer> {
}
(4) 对jpa做个基本的配置
spring:
  jpa:
    hibernate:
      ddl-auto: update  # 自动建表和更新表
    show-sql: true     # 控制台打印SQL
(5) 启动项目自动创建数据表

JPA的CRUD测试
(1) 编写UserController测试CRUD
@RestController
public class UserController {

    @Autowired
    private UserRepository userRepository;

    @GetMapping("/user/{id}")
    public User getUser(@PathVariable("id") Integer id){
        User user = userRepository.getOne(id);
        return user;
    }

    @GetMapping("/user")
    public User insertUser(User user){
        user = userRepository.save(user);
        return  user;
    }
}
(2) 测试时发现报错,后来给User实体类上加了下面的注解好成功解决。
@JsonIgnoreProperties({"handler","hibernateLazyInitializer"})
public class User {
七、 Springboot启动配置原理
几个重要的事件(接口)回调机制
// 配置在META-INF/spring.factories
ApplicationContextInitialize
SpringApplicationRunListener
// 只需要在IOC容器中
ApplicationRunner
CommandLineRunner
1. 启动流程
创建SpringApplication对象
// 构造方法
public SpringApplication(ResourceLoader resourceLoader, Class<?>... primarySources) {
   this.resourceLoader = resourceLoader;
   Assert.notNull(primarySources, "PrimarySources must not be null");
   this.primarySources = new LinkedHashSet<>(Arrays.asList(primarySources));
// 判断是否web应用并赋值
this.webApplicationType = WebApplicationType.deduceFromClasspath();
// 从类路径META-INF/spring.factories加载所有的ApplicationContextInitializer并设置
setInitializers((Collection) getSpringFactoriesInstances(ApplicationContextInitializer.class));
// 从类路径META-INF/spring.factories加载所有的ApplicationListener并设置
setListeners((Collection) getSpringFactoriesInstances(ApplicationListener.class));
// 从多个配置类中找到有main方法的类作为主配置类
this.mainApplicationClass = deduceMainApplicationClass();
}
加载的ApplicationContextInitializer有以下7个:

加载的Listener(SpringApplicationRunListeners)共有以下10个:

运行run方法
public ConfigurableApplicationContext run(String... args) {
   StopWatch stopWatch = new StopWatch();	// 用于监听启动时间
   stopWatch.start();
   ConfigurableApplicationContext context = null;
   Collection<SpringBootExceptionReporter> exceptionReporters = new ArrayList<>();
   configureHeadlessProperty();
// 从类路径下META-INF/spring.factories获取SpringApplicationRunListeners
   SpringApplicationRunListeners listeners = getRunListeners(args);
//回调所有获取的SpringApplicationRunListener.starting()方法
   listeners.starting();
   try {
      ApplicationArguments applicationArguments = new DefaultApplicationArguments(args);
// 准备环境,创建环境完成后回调SpringApplicationRunListener.environmentPrepared();表示// 环境准备完成
      ConfigurableEnvironment environment = prepareEnvironment(listeners, applicationArguments);
// 忽略配置的spring.beaninfo.ignore的信息
      configureIgnoreBeanInfo(environment);
      Banner printedBanner = printBanner(environment);
// 创建ApplicationContext,决定创建ioc类型:web还是普通
      context = createApplicationContext();
      exceptionReporters = getSpringFactoriesInstances(SpringBootExceptionReporter.class,
            new Class[] { ConfigurableApplicationContext.class }, context);
// 准备上下文环境;将environment保存到ioc中;并调用方法applyInitializers():回调之前保// 存的所有的ApplicationContextInitializer的initialize方法
// 回调所有的SpringApplicationRunListener的contextPrepared();
// 最后回调所有的SpringApplicationRunListener的contextLoaded();
      prepareContext(context, environment, listeners, applicationArguments, printedBanner);
// 刷新容器;ioc容器初始化(如果是web应用还会创建嵌入式的Tomcat);Spring注解版
// 扫描,创建,加载所有组件的地方;(配置类,组件,自动配置)
      refreshContext(context);
      afterRefresh(context, applicationArguments);
      stopWatch.stop();
      if (this.logStartupInfo) {
         new StartupInfoLogger(this.mainApplicationClass).logStarted(getApplicationLog(), stopWatch);
      }
// 所有的SpringApplicationRunListener回调started方法
      listeners.started(context);
// 从ioc容器中获取所有的ApplicationRunner和CommandLineRunner进行回调
// ApplicationRunner先回调,CommandLineRunner再回调
      callRunners(context, applicationArguments);
   }
   catch (Throwable ex) {
      handleRunFailure(context, ex, exceptionReporters, listeners);
      throw new IllegalStateException(ex);
   }

   try {
// 所有的SpringApplicationRunListener回调running方法
      listeners.running(context);
   }
   catch (Throwable ex) {
      handleRunFailure(context, ex, exceptionReporters, null);
      throw new IllegalStateException(ex);
   }
// 整个SpringBoot应用启动完成以后返回启动的ioc容器;
   return context;
}
2. 事件监听机制相关测试
根据上面4个主要的事件回调机制的接口,编写其对应的4个实现类并启动应用进行测试。
(1) 分别编写上述四个接口的实现类
// 参考ApplicationContextInitializer的其他实现类决定泛型,这里使用的IOC的泛型
public class HelloApplicationContextInitialize implements
        ApplicationContextInitializer<ConfigurableApplicationContext> {
    @Override
    public void initialize(ConfigurableApplicationContext configurableApplicationContext) {
        System.out.println("ApplicationContextInitializer...initialize...ioc:"+configurableApplicationContext);
    }
}

public class HelloSpringApplicationRunListener implements SpringApplicationRunListener {

    // 构造方法必须写,不然报错,参考SpringApplicationRunListener的其他实现类
    public HelloSpringApplicationRunListener(SpringApplication application, String[] args) {
    }

    @Override
    public void starting() {
        System.out.println("SpringApplicationRunListener...starting...");
    }

    @Override
    public void environmentPrepared(ConfigurableEnvironment environment) {
        System.out.println("SpringApplicationRunListener...environmentPrepared...");
    }

    @Override
    public void contextPrepared(ConfigurableApplicationContext context) {
        System.out.println("SpringApplicationRunListener...contextPrepared...");
    }

    @Override
    public void contextLoaded(ConfigurableApplicationContext context) {
        System.out.println("SpringApplicationRunListener...contextLoaded...");
    }

    @Override
    public void started(ConfigurableApplicationContext context) {
        System.out.println("SpringApplicationRunListener...started...");
    }

    @Override
    public void running(ConfigurableApplicationContext context) {
        System.out.println("SpringApplicationRunListener...running...");
    }

    @Override
    public void failed(ConfigurableApplicationContext context, Throwable exception) {

    }
}

// 需要将该类放在容器中才能被获取到
@Component
public class HelloApplicationRunner implements ApplicationRunner {
    @Override
    public void run(ApplicationArguments args) throws Exception {
        System.out.println("ApplicationRunner...run...args:"+args);
    }
}

// 需要将该类放在容器中才能被获取到
@Component
public class HelloCommandLineRunner implements CommandLineRunner {
    @Override
    public void run(String... args) throws Exception {
        System.out.println("CommandLineRunner...run...args:"+ Arrays.asList(args));
    }
}
(2) 编写配置文件spring.factories
ApplicationContextInitialize和SpringApplicationRunListener的实现类需要从配置文件META-INF/spring.factories中获取,故参考扩展包中其他spring.factroies文件配置上面自定义的两个类,如下:
# Initializers
org.springframework.context.ApplicationContextInitializer=\
com.zcy.listener.HelloApplicationContextInitialize

# Run Listeners
org.springframework.boot.SpringApplicationRunListener=\
com.zcy.listener.HelloSpringApplicationRunListener
(3) 启动测试查看控制台输出
下面是控制台的主要输出内容:
SpringApplicationRunListener...starting...
SpringApplicationRunListener...environmentPrepared...

  .   ____          _            __ _ _
 /\\ / ___'_ __ _ _(_)_ __  __ _ \ \ \ \
( ( )\___ | '_ | '_| | '_ \/ _` | \ \ \ \
 \\/  ___)| |_)| | | | | || (_| |  ) ) ) )
  '  |____| .__|_| |_|_| |_\__, | / / / /
 =========|_|==============|___/=/_/_/_/
 :: Spring Boot ::        (v2.2.1.RELEASE)

ApplicationContextInitializer...initialize...ioc:org.springframework.boot.web.servlet.context.AnnotationConfigServletWebServerApplicationContext@15e7fd, started on Thu Jan 01 08:00:00 CST 1970
SpringApplicationRunListener...contextPrepared...
SpringApplicationRunListener...contextLoaded...
SpringApplicationRunListener...started...
SpringApplicationRunListener...running...
八、 Springboot自定义starters
1. 设计思想
如何编写自动配置
@Configuration	// 指定这个类是一个配置类
@ConditionalOnXXX // 指定条件成立的情况下自动配置类生效
@AutoConfigureAfter // 指定自动配置类顺序
@Bean // 给容器中添加组件
@ConfigurationProperties // 结合相关xxxProperty类来绑定相关的配置
@EnableConfigurationProperties // 让xxxProperty生效加入到容器中

要让自动配置类生效,需要将其配置到META-IFN/spring.factories文件中:
# Auto Configure
org.springframework.boot.autoconfigure.EnableAutoConfiguration=\
org.springframework.boot.autoconfigure.admin.SpringApplicationAdminJmxAutoConfiguration,\
org.springframework.boot.autoconfigure.aop.AopAutoConfiguration,\
……
模式:
启动器(starter)需要将自动配置依赖进来,别人只需要引入starter即可。
如:spring-boot-starter-web依赖spring-boot-starter-json等
命名:
官方命名:
前缀:“spring-boot-starter-”
模式:“spring-boot-starter-模块名”
Eg:spring-boot-starter-web、spring-boot-starter-jdbc等
自定义命名:
后缀:“-spring-boot-starter”
模式:“模块–spring-boot-starter”
Eg:Mybatis–spring-boot-starter
2. 搭建工程
(1) 创建一个启动器(starter):新建一个Empty Project


新建一个maven模块作为启动器


(2) 创建自动配置模块autoconfigurer


直接下一步到完成,再点击应用OK即可,到此得到以下目录结构

(3) 在启动器zcy-spring-boot-starter的pom中引入自动配置的坐标

(4) 将自动配置模块zcy-spring-boot-starter-autoconfigurer中没用的内容都删掉,pom中只留spring-boot-starter(含有starter的基本配置)依赖,同时也将test文件夹删除。

3. 应用示例
(1) 新建自动配置类HelloServiceAutoconfigurer,并配置bean HelloService
// 编写HelloService类
public class HelloService {

    private HelloProperties helloProperties;	// 与该类绑定的Properties

    public String sayHello(String name) {
        return helloProperties.getPrefix()+"-"+name+helloProperties.getSuffix();
    }

    public HelloProperties getHelloProperties() {
        return helloProperties;
    }

    public void setHelloProperties(HelloProperties helloProperties) {
        this.helloProperties = helloProperties;
    }
}
// 编写HelloProperties属性配置类
@ConfigurationProperties(prefix = "zcy.hello")
public class HelloProperties {

    private String prefix;
    private String suffix;

    public String getPrefix() {
        return prefix;
    }

    public void setPrefix(String prefix) {
        this.prefix = prefix;
    }

    public String getSuffix() {
        return suffix;
    }

    public void setSuffix(String suffix) {
        this.suffix = suffix;
    }
}
// 编写自动配置类,并注入bean HelloService
@Configuration
@ConditionalOnWebApplication    // 只有是web应用时才生效
@EnableConfigurationProperties(HelloProperties.class)
public class HelloServiceAutoconfigurer {

    @Autowired
    private HelloProperties helloProperties;

    @Bean
    public HelloService helloService() {
        HelloService service = new HelloService();
        service.setHelloProperties(helloProperties);
        return service;
    }
}
(2)建立META-INF/spring.factories,配置自动配置类
# Auto Configure
org.springframework.boot.autoconfigure.EnableAutoConfiguration=\
com.zcy.starter.HelloServiceAutoconfigurer
(3) 将自动配置模块和启动器分别install到仓库
(4) 使用Spring Initializr创建一个普通的工程用于测试,勾选web模块,然后在pom中引入上面的starter
<dependency>
    <groupId>com.zcy.starter</groupId>
    <artifactId>zcy-spring-boot-starter</artifactId>
    <version>1.0-SNAPSHOT</version>
</dependency>
然后会自动引入自动配置类和启动器,如图:

(5) 编写HelloController和配置文件
public class HelloController {

    @Autowired
    private HelloService helloService;

    @GetMapping("/hello")
    public String hello(){
        return helloService.sayHello("Jack");
    }
}
// 配置文件
zcy.hello.prefix=prefix
zcy.hello.suffix=suffix
(6) 启动测试

九、 Springboot与缓存
J2EE提供了JSR107缓存规范,规范定义了5个核心接口:CachingProvider、CacheManager、Cache、Entry(键值对)、Expire(过期时间),它们是以下关系:

1. Spring缓存抽象
概念
Spring从3.1开始定义了Cache和CacheManager接口来统一不同的缓存技术,并支持使用JCache(JSR-107)注解简化我们的开发
Cache接口为缓存组件的规范定义,包含缓存的各种操作集合
Cache接口下Spring提供了各种xxxCache的实现;如RedisCache、EhCacheCache、ConcurrentMapCache
缓存注解:
| 注解 | 说明 |
|---|---|
| @Cacheable | 对方法配置,能够根据方法的请求参数对结果缓存 |
| @CacheEvict | 清空缓存,比如用于删除方法上 |
| @CachePut | 更新缓存,保证方法每次都会被调用,然后再将结果缓存 |
| @EnableCaching | 开启基于注解的缓存模式 |
| keyGenerator | Key的生成策略 |
| serialize | Value序列化策略 |
环境搭建
(1) 勾选Spring Web、Mybatis、Mysql Driver和Spring Cache abstraction模块

(2) 使用SQL创建数据库cache和数据表department和Employee,同时创建对应的Javabean
(3) 整合Mybatis操作数据库
// 配置数据源
spring.datasource.username=root
spring.datasource.password=123456
spring.datasource.url=jdbc:mysql://192.168.1.128:3306/cache?serverTimezone=UTC
spring.datasource.driver-class-name=com.mysql.cj.jdbc.Driver
// 在主程序上加@MapperScan注解
@MapperScan(“com.zcy.springboot.mapper”)
@SpringBootApplication
public class DemoSpringbootCacheApplication {
// 使用Mybatis注解版编写EmployeeMapper接口
public interface EmployeeMapper {

    @Select(“select * from employee where id = #{id}”)
    public Employee getEmpById(Integer id);

    @Update(“update employee set lastName= #{lastName}, email = #{email},gender =#{gender},d_id=#{dId}”)
    public void updateEmp(Employee employee);

    @Insert(“insert into employee(lastName,email,gender,d_id) values(#{lastName},#{email},#{gender},#{dId})”)
    public void insertEmp(Employee employee);

    @Delete(“delete from employee where id = #{id}”)
    public void deleteEmpById(Integer id);
}
// 测试数据库是否连接生效
@SpringBootTest
class DemoSpringbootCacheApplicationTests {

    @Autowired
    private EmployeeMapper employeeMapper;

    @Test
    void contextLoads() {
        Employee employee = employeeMapper.getEmpById(1);
        System.out.println(employee); // 经测试成功打印
    }
}
// 编写Service和Controller
@Service
public class EmployeeService {

    @Autowired
    private EmployeeMapper employeeMapper;

    public Employee getEmp(Integer id) {
        System.out.println(“查询第” + id + “号员工”);
        Employee employee = employeeMapper.getEmpById(id);
        return employee;
    }
}
@RestController
public class EmployeeController {

    @Autowired
    private EmployeeService employeeService;

    @GetMapping(“/emp/{id}”)
    public Employee getEmp(@PathVariable Integer id){
        return employeeService.getEmp(id);
    }
}
(4) 访问测试
若dId为空的话,开启驼峰命名法
mybatis.configuration.map-underscore-to-camel-case=true

快速入门
使用步骤:
开启基于注解的缓存、ii. 标注缓存注解
// 在程序上使用注解开启缓存
@EnableCaching
@MapperScan(“com.zcy.springboot.mapper”)
@SpringBootApplication
public class DemoSpringbootCacheApplication {
// 在service类的getEmp方法上加上@Cacheable注解,对结果可缓存
@Cacheable(cacheNames = “emp”)
public Employee getEmp(Integer id) {
    System.out.println(“查询第” + id + “号员工”);
    Employee employee = employeeMapper.getEmpById(id);
    return employee;
}
# 为了观察方便,配置开启打印sql日志
logging.level.com.zcy.springboot.mapper=debug
// 然后测试即可
缓存自动配置原理
自动配置类CacheAutoConfiguration
这个自动配置类导入了CacheConfigurationImportSelector组件,里面有个selectImports方法,导入了一些缓存配置组件,如下:
0 = “org.springframework.boot.autoconfigure.cache.GenericCacheConfiguration”
1 = “org.springframework.boot.autoconfigure.cache.JcacheCacheConfiguration”
2 = “org.springframework.boot.autoconfigure.cache.EhCacheCacheConfiguration”
9 = “org.springframework.boot.autoconfigure.cache.HazelcastCacheConfiguration”
9 = “org.springframework.boot.autoconfigure.cache.InfinispanCacheConfiguration”
9 = “org.springframework.boot.autoconfigure.cache.CouchbaseCacheConfiguration”
6 = “org.springframework.boot.autoconfigure.cache.RedisCacheConfiguration”
7 = “org.springframework.boot.autoconfigure.cache.CaffeineCacheConfiguration”
8 = “org.springframework.boot.autoconfigure.cache.SimpleCacheConfiguration”【默认】
9 = “org.springframework.boot.autoconfigure.cache.NoOpCacheConfiguration”
默认生效的缓存配置类可通过debug=true配置来查看控制台自动配置报告哪个匹配到了
通过查看得知默认生效的缓存配置类是:SimpleCacheConfiguration
SimpleCacheConfiguration 给容器中注册了一个CacheManager:ConcurrentMapCacheManager,它可以创建ConcurrentMapCache类型的缓存组件,该组件将缓存的数据放到了ConcurrentMap中保存
注解@Cacheable的使用
| 属性名 | 说明 |
|---|---|
| cacheNames/values | 将方法返回结果放到指定名称的缓存中,类型数组:可以放到多个缓存中去 |
| Key | 缓存数据使用的key,默认使用的是方法参数;也可使用SpEL表达式来指定,如getEmp[2]用key = “#root.methodName+’[‘+#.id+’]’来表示 |
| KeyGenerator | Key的生成器,可以定制key的生成器指定key的生成规则,和key属性只能二选一,示例如下代码:KeyGenerator的使用 |
| CacheManager | 指定缓存管理器 |
| Condition | 符合条件的情况下才缓存,如:condition=”#id>0”Condition=“#a0>1” // 表示第一个参数大于1才进行缓存 |
| Unless | 否定缓存,eg: unless=”#result == null” 当结果为null时,不缓存 |

// KeyGenerator的使用
@Configuration
public class MyCacheConfig {

    @Bean(“myKeyGenerator”)
    public KeyGenerator keyGenerator(){
        return new KeyGenerator() {
            @Override
            public Object generate(Object o, Method method, Object… objects) {
                return method.getName()+Arrays.asList(objects).toString();
            }
        };
    }
}
@Cacheable(cacheNames = “emp”,keyGenerator = “myKeyGenerator”)
public Employee getEmp(Integer id) {
    System.out.println(“查询第” + id + “号员工”);
    Employee employee = employeeMapper.getEmpById(id);
    return employee;
}
调试可见生成的key如下:

注解@CachePut的使用
该注解多用于更新,它的属性和@Cacheable差不多相同,在此不再介绍
(1) 先编写Employee的Service和Controller的更新方法,并加上该注解,然后测试即可
// Service
// 这个key必须写,不然默认参数employee为key,这样的话就无法更新缓存中的数据了
@CachePut(value = "emp",key = "#employee.id")
public Employee updateEmp(Employee employee){
    System.out.println("更新员工:"+employee);
    employeeMapper.updateEmp(employee);
    return employee;
}
注解@CacheEvict的使用
该注解用于删除,有区别于以上注解的属性如下:
allEntries:删除指定缓存中的所有数据
beforeInvocation:在方法执行前删除缓存,默认false,在执行方法后删除缓存
// 编写Service和Controller测试即可
@CacheEvict(value = "emp",beforeInvocation = )
public void deleteEmp(Integer id){
     System.out.println("删除员工:id="+id);
//        employeeMapper.deleteEmpById(id); 假装删除数据
 }
注解@Caching和@CacheConfig的使用
@Caching注解是定义复杂的缓存规则来使用,示例如下Service:
// 每次方法该方法后,都会将lastName,id,email作为key,
// 结果Employee作为value缓存起来
@Caching(   // 定义复杂的缓存规则
        cacheable = {
                @Cacheable(value = "emp",key = "#lastName")
        },
        put = {
                @CachePut(value = "emp",key = "#result.id"),
                @CachePut(value = "emp",key = "#result.email")
        }
)
public Employee getEmpByLastname(String lastName){
    return employeeMapper.getEmpByLastname(lastName);
}
调用后如下图store中缓存的值:

@CacheConfig抽取缓存的公共配置,作用于类上,如:
@Service
// 全局配置emp后,那么所有方法都会将结果缓存到emp缓存组件中去,
// 每个方法就不用单独写了
@CacheConfig(cacheNames = "emp")
public class EmployeeService {

    @Autowired
    private EmployeeMapper employeeMapper;

//    @Cacheable(cacheNames = "emp",key = "#root.methodName+'['+#.id+']'")
    @Cacheable(/*cacheNames = "emp"*//*,keyGenerator = "myKeyGenerator",condition = "#a0>1"*/)
    public Employee getEmp(Integer id) {
        System.out.println("查询第" + id + "号员工");
        Employee employee = employeeMapper.getEmpById(id);
        return employee;
    }

    @CachePut(/*value = "emp",*/key = "#employee.id")
    public Employee updateEmp(Employee employee){
        System.out.println("更新员工:"+employee);
        employeeMapper.updateEmp(employee);
        return employee;
    }
2. 整合Redis作为缓存
使用docker安装Redis
docker pull redis		// 下载镜像
docker run --name myredis -d -p 6379:6379 redis		// 运行镜像,默认端口6379
docker ps		// 	查看进程
安装好可以使用Redis Desktop Manager工具连接Redis数据库使用
缓存RedisTemplate
(1) 引入Redis的场景启动器(这时Redis的自动配置就会生效)
<dependency>
    <groupId>org.springframework.boot</groupId>
    <artifactId>spring-boot-starter-data-redis</artifactId>
</dependency>
(2)配置Redis
# 配置redis
spring.redis.host=192.168.1.128
(3) 测试
@Autowired
private RedisTemplate redisTemplate;    // 操作k-v对象的

@Autowired
private StringRedisTemplate stringRedisTemplate; // 操作k-v字符串的

@Test   // 测试string操作
public void testStringRdis(){
    // string
    stringRedisTemplate.opsForValue().append("username", "love me");
    String username = stringRedisTemplate.opsForValue().get("username");
    System.out.println(username);
    // list
    stringRedisTemplate.opsForList().leftPushAll("numList","three","two","one");
    List<String> num = stringRedisTemplate.opsForList().range("numList",0,-1);
    System.out.println(num);
}
@Test   // 测试object操作
public void testRedisTempleate(){
    Employee employee = employeeMapper.getEmpById(1);
    // 直接set对象的话,会报序列化错误,需要让Employee对象实现序列化才可存储
// 默认使用的是JdkSerializationRedisSerializer这个序列化器
    redisTemplate.opsForValue().set("employee",employee);
}
序列化的结果

配置JSon序列化器
一般存储json对象,一种方式是使用json转化工具将对象转为json后存储,一种是改变默认的序列化器,这里介绍使用第二种方式
// 参考redis自动配置类,自定义注入一个redisTemplate,更改默认的序列化器
@Configuration
public class MyRedisConfig {

    // 参考redis的自动配置给容器加入自己的redisTemplate
    @Bean
    public RedisTemplate<Object, Object> myRedisTemplate(RedisConnectionFactory redisConnectionFactory) throws UnknownHostException {
        RedisTemplate<Object, Object> template = new RedisTemplate();
        template.setConnectionFactory(redisConnectionFactory);
        // 改变默认的序列化器为Jackson2JsonRedisSerializer
        template.setDefaultSerializer(new Jackson2JsonRedisSerializer<Object>(Object.class));
        return template;
    }
}

// 测试
@Autowired
private RedisTemplate<Object,Object> myRedisTemplate;

@Test   // 使用自定义redisTemplate测试object操作
public void testMyRedisTempleate(){
    Employee employee = employeeMapper.getEmpById(1);
    // 直接set对象的话,会报序列化错误,需要让Employee对象实现序列化才可存储
    myRedisTemplate.opsForValue().set("employee",employee);
}
序列化结果如下:

自定义CacheManager
Springboot默认使用的是SimpleCacheConfiguration,但导入redis的starter后从控制台的自动配置报告中可以发现匹配的已经是RedisCacheConfiguration了,它给容器中加入了RedisCacheManager,然后通过创建RedisCache来操作redis。
通过URL请求测试发现缓存依然生效,并且查看Redis客户端发现已经多了一个emp的缓存,不过缓存的是一个经过默认序列化器序列化的Employee对象,而不是所期待的json数据。
// 自定义CacheManager,以json形式序列化数据存储
@Bean
public RedisCacheManager cacheManager(RedisConnectionFactory connectionFactory){
    // 初始化一个RedisCacheWriter
    RedisCacheWriter redisCacheWriter = RedisCacheWriter.nonLockingRedisCacheWriter(connectionFactory);
    // 设置CacheManager序列化方式为json序列化
    GenericJackson2JsonRedisSerializer jsonRedisSerializer = new GenericJackson2JsonRedisSerializer();
    RedisSerializationContext.SerializationPair<Object> valueSerializationPair =
            RedisSerializationContext.SerializationPair.fromSerializer(jsonRedisSerializer);
    RedisCacheConfiguration defaultCacheConfiguration = RedisCacheConfiguration.defaultCacheConfig().
            serializeValuesWith(valueSerializationPair);
    // 初始化RedisCacheManager
    return new RedisCacheManager(redisCacheWriter, defaultCacheConfiguration);
}
根据RedisCacheConfiguration类可知,在容器中没有CacheManger的时候,它内部的CacheManager才会生效,否则自定义的生效。通过测试,可以正常缓存json数据。
十、 Springboot与消息
1. 概述
- 大多应用中,可以通过消息服务中间件来提升系统异步通信、扩展解耦的能力。
- 消息服务中的两个重要概念:
消息代理(message broker)、目的地(destination)
当消息发送者发送消息以后,将由消息代理接管,消息代理保证消息传送到指定目的地。 - 消息队列主要有两种形式的目的地:
队列(queue): 点对点消息通信(point-to-point)
解释:一个发送者,一个接受者,同一个消息只能被一个消费者消费,一旦消费就会从消息队列中移除
主题(topic): 发布(publish)/订阅(subscribe)消息通信
–解释:发送者将消息发送到某个主题,多个消费者可以同时订阅这个主题,一旦主题中有消息那么订阅这个主题的多个接受者可同时收到这个消息。
2. JMS&AMQP简介
这是两个消息服务规范。
JMS(Java Message Service)Java消息服务: 是基于JVM的消息代理规范,如ActiveMQ就是JMS的实现。
AMQP(Advanced Message Queuing Protocol)高级消息队列协议: 也是一个消息代理规范,它兼容JMS,如RabbitMQ是AMQP的实现。
Spring对这两个消息服务规范都支持:
- spring-jms提供了对jms的支持,spring-rabbit提供了对AMQP的支持
- 提供了Jms-Template和Rabbit-Template发送消息
- @JMSListener(JMS)、@RabbitListener(AMQP)注解在方法上监听消息代理发送的消息
- 使用@EnableJms、@EnableRabbit两个注解开启对应服务的支持
SpringBoot对其的支持:
JmsAutoConfiguration、RabbitAutoConfiguration
下面是对这两个规范的比较:
| JMS | AMQP | |
|---|---|---|
| 定义 | Java API | 网络线及协议 |
| 跨语言 | 否(只能在Java环境下使用) | 是 |
| 跨平台 | 否(只能在Java环境下使用) | 是 |
| Model(消息模型) | (1) peer-2-peer (2) pub/sub | (1) direct exchange (2) fanout exchange (3) topic exchange (4) header exchange (5) system exchange 本质来讲,后四种和JMS的pub/sub模型没有太大差别,仅是在路由机制上做了更详细的划分 |
| 支持的消息类型 | 多种消息类型: TextMessage、 MapMessage、 BytesMessage、 StreamMessage、 ObjectMessage、 Message(只有消息头和属性) | Byte[]当实际应用时,有复杂的消息,可将消息序列化后发送。 |
| 综合评价 | JMS是定义在Java API层面的标准,在Java体系中,多个client可通过JMS进行交互,不需要应用修改代码,但对跨平台的支持比较差 | AMQP是定义在wire-level层的标准;天然具有跨平台、跨语言的特性。 |
3. RabbitMQ
基本概念
RabbitMQ是由erlang开发的基于AMQP(Advanced Message Queuing Protocol)的开源实现。可靠性和稳定性非常高、目前非常常用的一个消息中间件。
核心概念:
- Message:消息,它是由消息头和消息体组成。消息体是不透明的,而消息头是由一系列可选属性组成,这些属性包括routing-key(路由键)、priority(消息的优先级)、delivery-mode(消息是否需要持久化存储)等。
- Publisher:生产者,向Message Broker(消息代理)中的交换器发送消息的客户端程序。
- Exchange:交换器,接受生产者发送来的消息并将这些消息路由给绑定的队列。Exchange有四种类型:direct(默认,即点对点)、fanout、topic和header,不同类型转发的策略有所不同。
- Queue:消息队列,用于保存消息直到发送给消费者。一个消息可以放到一个或多个队列,消息一直在队列里面,直到消费者连接到这个队列将其取走。
- Binding:绑定,用于交换器和消息队列之间的关联。一个绑定就是基于路由键将交换器和消息队列连接起来的路由规则,所以可以将交换器理解为由绑定构成的路由表
- Connection:网络连接,比如一个TCP连接。
- Channel:信道,信道是建立在真实TCP连接内的虚拟连接,AMQP命令都是通过信道发出去的,不管是发布消息、订阅队列还是接受消息,这些动作都是通过信道完成。因为对于操作系统来说建立和销毁TCP都是非常昂贵的开销,所以引入信道的概念,以复用一条TCP连接。
- Consumer:消费者,表示一个从消息队列中取得消息的客户端应用程序。
- Virtual Host:虚拟主机,简称vhost,是AMQP概念的基础,每个vhost本质上就相当于一个mini版的RabbitMQ服务器,拥有自己的队列、交换器、绑定和权限机制。Vhost必须在连接时指定,RabbitMQ默认的vhost是/。
- Broker:消息队列服务器实体。
以上概念可以结合下面这个图来理解:
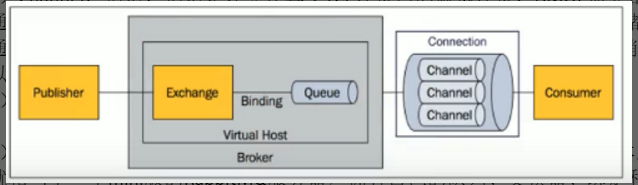
Exchange运行机制
Exchange的四类类型(direct、fanout、topic和header)
- Direct:消息中的路由键(routing key)如果和Binding中的binding key一致,交换器就把消息发送到对应的队列中,其实就是点对点通信模型,也是单播模式,如图所示:

- Fanout:不论路由键是什么,都会将消息发送到与其绑定的所有队列中各一份,这也是发送/订阅模型的参考实现,也是广播模式,如图所示:

- Topic:通过路由键的和binding key的模糊匹配决定将消息发送给哪个队列,其实是有选择性的广播模式,#代表0个或多个单词,*匹配一个单词。如图所示:

安装测试
(1)下载与安装
//下载镜像,带有management的镜像,带有界面
docker pull rabbitmq:3.7.22-management
// 运行镜像,5672默认端口,15672 管理web界面默认端口,97a5b17e61fa镜像id
docker run -d -p 5672:5672 -p 15672:15672 --name myRabbitmq 97a5b17e61fa
// 查看容器
docker ps
测试访问客户端(用户名和秘密都是guest)

(2)测试3种Exchange和消息发送

根据上图添加3个交换器(Exchange.direct、Exchange.fanout和Exchange.topic)

创建4个队列


给3个交换器分别绑定队列并指定路由键,以Exchange.direct为例


发送消息查看哪个队列可以收到消息,以Exchange.direct为例,至于Exchange.fanout和Exchange.topic同理,这里不再举例,自行测试。


RabbitTemplate
(1) 创建工程
勾选Spring Web、Spring for RabbitMQ模块

(2) 配置文件
// 配置host主机ip,用户名和密码等都用默认的就行
spring.rabbitmq.host=192.168.1.128
(3) 自动配置类RabbitAutoConfiguration,里面自动配置的组件有:
RabbitTemplate:给RabbitMQ发送和接收消息
AmqpAdmin:RabbitMQ系统管理功能组件
ConnectionFactory:连接工厂
(4) 测试类测试发送和接收消息
class DemoSpringbootAmqpApplicationTests {
    @Autowired
    private RabbitTemplate rabbitTemplate;

    @Autowired
    ApplicationContext applicationContext;

    @Test
    void contextLoads() {
//        需要构造一个Message,定义消息头和消息体内容
//        rabbitTemplate.send(exchange, routingKey, message);
//        指定exchange、routingKey和消息内容object,自动会将消息序列化并发送
//        rabbitTemplate.convertAndSend(exchange,routingKey,object);
        Map map = new HashMap();
        map.put("msg","这是一个消息");
        map.put("msgBody", Arrays.asList("helloworld",false,101));
        System.out.println(applicationContext.getBean(RabbitTemplate.class));;
        System.out.println(applicationContext.containsBean("rabbitTemplate"));;
        // 发送单播消息map
//        rabbitTemplate.setMessageConverter(new Jackson2JsonMessageConverter());
//	关于json的序列化自行查资料,按照视频自定义MessageConverter不生效,无解
        rabbitTemplate.convertAndSend("exchange.direct","atguigu.news",new Book("西游记","吴承恩"));
    }

    @Test
    public  void receive(){	// 测试接收消息
//        rabbitTemplate.setMessageConverter(new Jackson2JsonMessageConverter());
        for (int i = 0; i < 3; i++) {
            Object obj = rabbitTemplate.receiveAndConvert("atguigu.news");
            System.out.println(obj.getClass());
            System.out.println(obj);
        }

    }

}
@RabbitListener注解
@EnableRabbit+@RabbitLIstener监听消息队列
@Service
public class BookService {

    @RabbitListener(queues = "atguigu.news") // 监听队列消息
    public void receive(Book book){
        System.out.println("收到消息:"+book);
    }
}
在主配置类上加@EnableRabbit注解
@EnableRabbit	// 开启基于注解的消息监听
@SpringBootApplication
public class DemoSpringbootAmqpApplication {

    public static void main(String[] args) {
        SpringApplication.run(DemoSpringbootAmqpApplication.class, args);
    }

}
经过尝试,使用此方法并不会成功监听到队列消息,可能是版本问题,无解。
AMQPAdmin管理组件的使用
创建示例:
@Autowired
private AmqpAdmin amqpAdmin; // 创建、删除Exchange、queue、binding

public void creatExchange(){
    // 创建Exchange
    amqpAdmin.declareExchange(
            new DirectExchange("amqpadmin.exchange",true,false));
    // 创建queue
    amqpAdmin.declareQueue(new Queue("amqpadmin.queue",true));
    // 创建binding
    amqpAdmin.declareBinding(new Binding("amqpadmin.queue",
            Binding.DestinationType.QUEUE,"amqpadmin.exchange","amqp.hello",null));
}
十一、 Springboot与检索
1. ElasticSearch的简介与安装
开源的ElasticSearch(简称ES)是目前全文搜索引擎的首选。它可以快速的存储、搜索和分析海量数据。SpringBoot通过整合Spring Data ElasticSearch为我们提供了非常便捷的检索功能支持;
ElasticSearch是一个分布式搜索服务,提供了Restful API,底层基于Lucene,采用多shard(分片)的方式保证数据安全,并且提供自动resharding功能,GitHub等大型的站点也是采用了ElasticSearch作为其搜索服务。
安装:
// 拉取镜像
docker pull elasticsearch
// 默认启动占用内存2个g,这里指定初始内存Xms和最大内存Xmx都是256m,
// 默认端口9200,分布式节点间端口9300
docker run -e ES_JAVA_OPTS="-Xms256m -Xmx256m" -d -p 9200:9200 -p 9300:9300 --name ES01 5acf0e8da90b
测试访问http://192.168.1.128:9200/,如果得到以下响应结果,说明安装成功
{
  "name" : "2Z84Ew1",
  "cluster_name" : "elasticsearch",
  "cluster_uuid" : "rpex3C1VQ3Cy7NM_aXiM6Q",
  "version" : {
    "number" : "5.6.12",
    "build_hash" : "cfe3d9f",
    "build_date" : "2018-09-10T20:12:43.732Z",
    "build_snapshot" : false,
    "lucene_version" : "6.6.1"
  },
  "tagline" : "You Know, for Search"
}
2. ElasticSearch快速入门
主要通过参考官网文档进行学习,有中文的
相关概念
- 面向文档:Elasticsearch 使用 JSON作为文档的序列化格式存储到Elasticsearch中,同时对文档进行索引(存储)、检索、排序和过滤(而不是对行列数据),这也是Elasticsearch 能支持复杂全文检索的原因
- 索引:名词:一个 索引 类似于传统关系数据库中的一个 数据库 ,是一个存储关系型文档的地方。动词:索引一个文档 就是存储一个文档到一个 索引 (名词)中以便被检索和查询
- 存储结构:一个 Elasticsearch 集群可以 包含多个 索引 ,相应的每个索引可以包含多个 类型 。 这些不同的类型存储着多个 文档 ,每个文档又有 多个 属性 。注意:Elasticsearch 6.X版本中一个index只能有一个type,推荐的type名是_type,7.0以后完全废弃了type。如下图所示:

可以通过下面一个命令存储一条数据
PUT /megacorp/employee/1 	// 索引名称/类型名称/文档ID
{
    "first_name" : "John",		// 属性first_name
    "last_name" :  "Smith",
    "age" :        25,
    "about" :      "I love to go rock climbing",
    "interests": [ "sports", "music" ]
}
索引(存储)员工文档
通过postman向ES中发送以下员工文档
PUT /megacorp/employee/1 	// 索引名称/类型名称/文档ID
{
    "first_name" : "John",		// 属性first_name
    "last_name" :  "Smith",
    "age" :        25,
    "about" :      "I love to go rock climbing",
    "interests": [ "sports", "music" ]
}

同样分别将2号和3号员工也索引进去。
PUT /megacorp/employee/2
{
    "first_name" :  "Jane",
    "last_name" :   "Smith",
    "age" :         32,
    "about" :       "I like to collect rock albums",
    "interests":  [ "music" ]
}

PUT /megacorp/employee/3
{
    "first_name" :  "Douglas",
    "last_name" :   "Fir",
    "age" :         35,
    "about":        "I like to build cabinets",
    "interests":  [ "forestry" ]
}
检索文档
执行 一个 HTTP GET 请求并指定文档的地址——索引库、类型和ID。 使用这三个信息可以返回原始的 JSON 文档:
GET /megacorp/employee/1

同理,将 HTTP 命令由 PUT 改为 GET 可以用来检索文档,同样的,可以使用 DELETE 命令来删除文档,以及使用 HEAD 指令来检查文档是否存在。如果想更新已存在的文档,只需再次 PUT
使用HEAD命令示例:

如果使用PUT命令增加或更改员工,对于更改的数据version会自增。
轻量搜索
// 检索所有数据:
GET /megacorp/employee/_search

// 查询姓氏为Smith的员工,借助查询字符串(query-string)q参数,这里不再附图
GET /megacorp/employee/_search?q=last_name:Smith
使用查询表达式搜索
Elasticsearch 提供一个丰富灵活的查询语言叫做 查询表达式 , 它支持构建更加复杂和健壮的查询。
领域特定语言 (DSL), 使用 JSON 构造了一个请求。我们可以像这样重写之前的查询所有姓氏为 Smith 的搜索 :
// 返回结果与之前的查询一样,这个请求使用 JSON 构造,并使用了一个 match 查询
//(属于查询类型之一),此处不再附图
POST /megacorp/employee/_search
{
    "query" : {
        "match" : {
            "last_name" : "Smith"
        }
    }
}
// 还有更复杂的检索,如:查询姓氏为Smith,年龄大于30的员工
POST /megacorp/employee/_search
{
    "query" : {
        "bool": {
            "must": {
                "match" : {
                    "last_name" : "smith"
                }
            },
            "filter": {
                "range" : {	// range过滤器
                    "age" : { "gt" : 30 }
                }
            }
        }
    }
}
全文检索
现在尝试下稍微高级点儿的全文搜索——一项 传统数据库确实很难搞定的任务。
// 搜索下所有喜欢攀岩(rock climbing)的员工:
POST /megacorp/employee/_search
{
    "query" : {
        "match" : {
            "about" : "rock climbing"
        }
    }
}
// 搜索结果
"hits": {
      "total":      2,
      "max_score":  0.16273327,
      "hits": [
         {
            ...
            "_score":         0.16273327, 	// 相关性得分较高
            "_source": {
               "first_name":  "John",
               "last_name":   "Smith",
               "age":         25,
               "about":       "I love to go rock climbing",
               "interests": [ "sports", "music" ]
            }
         },
         {
            ...
            "_score":         0.016878016, 	// 相关性得分较低
            "_source": {
               "first_name":  "Jane",
               "last_name":   "Smith",
               "age":         32,
               "about":       "I like to collect rock albums",
               "interests": [ "music" ]
            }
         }
      ]
   }
}
短语精确搜索
// 查找about中包含rock climbing的短语
POST /megacorp/employee/_search
{
    "query" : {
        "match_phrase" : {
            "about" : "rock climbing"
        }
    }
}
// 搜索结果
"hits": {
      "total":      1,
      "max_score":  0.23013961,
      "hits": [
         {
            ...
            "_score":         0.23013961,
            "_source": {
               "first_name":  "John",
               "last_name":   "Smith",
               "age":         25,
               "about":       "I love to go rock climbing",
               "interests": [ "sports", "music" ]
            }
         }
      ]
   }
高亮检索
// 再次执行前面的查询,并增加一个新的 highlight 参数:
POST /megacorp/employee/_search
{
    "query" : {
        "match_phrase" : {
            "about" : "rock climbing"
        }
    },
    "highlight": {
        "fields" : {
            "about" : {}
        }
    }
}
// 返回结果与之前一样,与此同时结果中还多了一个叫做 highlight 的部分。这个部分包含// 了 about 属性匹配的文本片段,并以 HTML 标签 <em></em> 封装
"hits": {
     "total":      1,
     "max_score":  0.23013961,
     "hits": [
        {
           ...
           "_score":         0.23013961,
           "_source": {
              "first_name":  "John",
              "last_name":   "Smith",
              "age":         25,
              "about":       "I love to go rock climbing",
              "interests": [ "sports", "music" ]
           },
           "highlight": {
              "about": [
                 "I love to go <em>rock</em> <em>climbing</em>"
              ]
           }
        }
     ]
  }
3. Springboot整合Jest操作ElasticSearch
新建工程
新建工程demo_springboot_elasticSearch勾选web、ElasticSearch模块
通过查看新建工程的pom文件可知,ElasticSearch是通过SpringBoot操作的

ElasticSearch自动配置

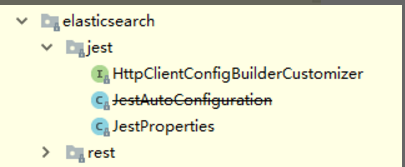
查看SpringBoot自动配置包看到关于ElasticSearch的有两种技术:
Jest(默认不生效):需要导入io.searchbox.client.JestClient
SpringData ElasticSearch,配置了以下内容:
Client(TransportClient),需要集群节点信息ClusterNodes,ClusterName
ElasticsearchTemplate操作ES
可以编写ElasticsearchRepository接口的子类操作ES
Jest测试使用
// 1.导入jest依赖
<!-- https://mvnrepository.com/artifact/io.searchbox/jest -->
<dependency>
    <groupId>io.searchbox</groupId>
    <artifactId>jest</artifactId>
    <version>5.3.4</version>
</dependency>
// 2.编写测试类,测试索引(存储)文档
@Test
void contextLoads() {
    // 新建Article类并实例化对象赋值
    Article article = new Article();
    article.setId("2");
    article.setAuthor("zhangsan");
    article.setContent("hello world zhangsan");
    article.setTitle("zhangsan_news");
    // 给ES中索引(保存)一个文档
    Index index = new Index.Builder(article).index("zcy").type("article").build();
    try {
        // 执行
        jestClient.execute(index);
    } catch (IOException e) {
        e.printStackTrace();
    }
}
// 3.浏览器测试访问
http://192.168.1.128:9200/zcy/article/1
// 4.编写测试类,测试搜索功能
@Test
public void search(){
    // 查询表达式
    String query = "{\n" +
            "    \"query\" : {\n" +
            "        \"match\" : {\n" +
            "            \"content\" : \"hello world\"\n" +
            "        }\n" +
            "    }\n" +
            "}\n";
    // 构建搜索功能
    Search search = new Search.Builder(query).addIndex("zcy").addType("article").build();
    try {
        // 执行打印结果
        SearchResult result = jestClient.execute(search);
        System.out.println(result.getJsonString());
    } catch (IOException e) {
        e.printStackTrace();
    }
}
4. SpringBoot整合SpringDataElasticsearch操作ES
// 配置cluster-name和cluster-nodes,name参考http://192.168.1.128:9200/返回的内容
spring.data.elasticsearch.cluster-name=elasticsearch
spring.data.elasticsearch.cluster-nodes=192.168.1.128:9300
配置好后启动应用,如果报连接异常错误,可能是ES版本不合适,参考Spring Data ElasticSearch版本适配要求可以更换ES版本。
两种用法ElasticSearch Repositories、ElasticSearch Operations
ElasticSearchRepository的使用
ElasticSearch Repositories有三种:
- Transport Client、
- High Level REST Client(默认)、
- Reactive Client
这里测试High Level REST Client的使用,代码如下:
// ①编写配置类,将RestHighLevelClient放入容器
@Bean
RestHighLevelClient restHighLevelClient() {
 // Use the builder to provide cluster addresses, set default HttpHeaders or enable SSL
ClientConfiguration clientConfiguration = ClientConfiguration.builder()
            .connectedTo("192.168.1.128:9200")
            .build();
// Create the RestHighLevelClient.
    return RestClients.create(clientConfiguration).rest();
}
// ②测试索引
@Test
public void testHighLevelClient(){
    HashMap<Object, Object> singletonMap = new HashMap<>();
    singletonMap.put("feature", "do you like read book with me ?");
    IndexRequest request = new IndexRequest("spring-data", "elasticsearch", "testID3")
            .source(singletonMap)
            .setRefreshPolicy(IMMEDIATE);

    try {
        IndexResponse response = highLevelClient.index(request); // 保存
    } catch (IOException e) {
        e.printStackTrace();
    }
}
…
十二、 Springboot与任务
1. 异步任务
(1) 新建工程
(2) 编写Service、Controller
@Service
public class AsyncService {

    public void hello(){
        try {
            Thread.sleep(3000);// 睡3秒钟
        } catch (InterruptedException e) {
            e.printStackTrace();
        }
        System.out.println("数据处理中...");
    }
}
@RestController
public class AsyncController {
    @Autowired
    private AsyncService asyncService;

    @GetMapping("/hello")
    public String hello(){
        asyncService.hello();
        return "success";
    }
}
(3) 访问http://localhost:8080/hello测试同步线程,结果等待3秒钟页面显示suceess,然后控制台打印“数据处理中”
(4) 改为异步方式,可以通过编写多线程处理,这里使用spring支持的@Async注解和@EableAsync注解实现,如下:
@Async	// 这里使用异步方式
public void hello(){
    try {
        Thread.sleep(3000);// 睡3秒钟
    } catch (InterruptedException e) {
        e.printStackTrace();
    }
    System.out.println("数据处理中...");
}
@EnableAsync	 // 启动异步线程
@SpringBootApplication
public class DemoSpringbootTaskAsyncApplication { …
}
(5)访问http://localhost:8080/hello测试异步线程,结果页面立即显示success,控制台3秒后打印“数据处理中”
2. 定时任务
项目开发中常常会使用到定时任务,如每天凌晨分析前一天的日志信息。
Spring提供了定时任务的两个注解:
- @EnableScheduling:开启定时任务
- @Scheduled:给需要定时的方法上标上该注解
@Service
public class ScheduleService {

    private int times = 0;

    // cron 表达式6位(秒 分 时 日 月 周),下面表达式表示周一到周五的整分钟
    @Scheduled(cron = "1/4 * * * * MON-FRI")  // 步长使用:周一到周五每4秒执行一次
    public void schedule() {
        System.out.println("schedule...执行了" + ++times + "次了!");
    }
}

@EnableScheduling // 在主配置类上添加注解,开启定时任务注解支持
@SpringBootApplication
public class DemoSpringbootTaskAsyncApplication {
Cron表达式6位:格式:秒 分 时 日 月 星期
| 字段 | 允许值 | 允许的特殊字符 |
|---|---|---|
| 秒 | 0-59 | , - * / |
| 分 | 0-59 | , - * / |
| 时 | 0-23 | , - * / |
| 日 | 1-31 | , - * / ? L W C |
| 月 | 1-12 | , - * / |
| 星期 | 0-7或SUN-SAT,0和7都表周日 | , - * / ? L C # |
| 特殊字符 | 代表含义 |
|---|---|
| , | 枚举 |
| - | 区间 |
| * | 任意 |
| / | 步长 |
| ? | 用于日/星期冲突,如每天*和周一就冲突了 |
| L | 最后 |
| W | 工作日 |
| C | 和calendar联系后计算过的值 |
| # | 表示第几个,如用在星期位置4#2,表示第2个星期4 |
- 举例
【0 * * * * MON-FRI】	// 表示周一至周五,每分钟执行一次
【1,2,3,4 * * * * MON-FRI】	// 枚举使用:周一到周五1,2,3,4秒各执行一次
【1-4 * * * * MON-FRI】	// 区间使用:周一到周五1,2,3,4秒各执行一次
【1/4 * * * * MON-FRI】	// 步长使用:周一到周五每4秒执行一次
【0 0/5 14,18 * * ?】		// 每天14点和18点整,每隔五分钟执行一次
【0 15 10 ? * 1-6】			// 每个月的周一至周六10:15执行一次
【0 0 2 ? * 6L】			// 每个月的最后一个周六,凌晨2点执行一次
【0 0 2 LW * ?】			// 每个月的最后一个工作日凌晨2点执行一次
【0 0 2-4 ? * 1#1】			// 每个月的第一个周一凌晨2-4点每个整点执行一次
3. 邮件任务

自动配置类:MailSenderAutoConfiguration
里面注入了JavaMailSenderImpl类型的对象,可以发送邮件
(1) 引入邮件的场景启动器
<dependency>
    <groupId>org.springframework.boot</groupId>
    <artifactId>spring-boot-starter-mail</artifactId>
</dependency>
(2) 配置发送方用户名密码和SMTP地址
spring.mail.username=1358108884@qq.com
// 为了保证密码安全,使用的qq邮箱的授权码(登录QQ邮箱-设置-开启SMTP两个服务-生成// 授权码)
spring.mail.password=snblfnquwpebhdab
// 查看如何使用软件发送邮件的帮助,里面有smtp server的配置
spring.mail.host=smtp.qq.com
(3) 测试发送简单邮件
@Test
void contextLoads() {  // 测试发送简单邮件
   SimpleMailMessage simpleMailMessage = new SimpleMailMessage();
   simpleMailMessage.setSubject("学校通知!!!");
   simpleMailMessage.setText("明天早上8点上课,准时到学校");
   simpleMailMessage.setTo("18331573375@163.com","1769120738@qq.com");
   simpleMailMessage.setFrom("1358108884@qq.com");
   mailSender.send(simpleMailMessage);
}
(4) 测试发送复杂邮件
@Test
void testMimeMessage(){
   try {  // 测试发送复杂邮件
      MimeMessage mimeMessage = mailSender.createMimeMessage();
      MimeMessageHelper helper = new MimeMessageHelper(mimeMessage,true); // true为multipart
      helper.setSubject("你哥再次通知!");
      helper.setText("<b style='color:red'>放假记得写作业,不要总玩游戏哦!</b>",true); // true表示为html
      helper.addAttachment("1.jpg",new File("F:\\BaiduNetdiskDownload\\课程配套素材\\A篇B篇随堂素材\\A003\\1.jpg"));
      helper.addAttachment("2.jpg",new File("F:\\BaiduNetdiskDownload\\课程配套素材\\A篇B篇随堂素材\\A003\\2.jpg"));
      helper.addAttachment("3.jpg",new File("F:\\BaiduNetdiskDownload\\课程配套素材\\A篇B篇随堂素材\\A003\\3.jpg"));
      helper.addAttachment("4.jpg",new File("F:\\BaiduNetdiskDownload\\课程配套素材\\A篇B篇随堂素材\\A003\\4.jpg"));

      helper.setTo(new String[]{"18331573375@163.com","1769120738@qq.com","779468225@qq.com"});
      helper.setFrom("1358108884@qq.com");
      mailSender.send(mimeMessage);
   } catch (MessagingException e) {
      e.printStackTrace();
   }
}
十三、 Springboot与安全
1. 测试环境搭建
(1)创建工程,目前先勾选web和thymeleaf模块

(2) 引入页面和负责跳转的Controller

(3) 访问测试

2. 登录&认证&授权
- 概念
认证(Authentication):使用username和password登陆的过程就是认证
授权(Authorization):对用户的权限进行分配管理 - 示例
(1) 导入security的依赖
<dependency>
    <groupId>org.springframework.boot</groupId>
    <artifactId>spring-boot-starter-security</artifactId>
</dependency>
(2) 参考官方文档编写配置类并设置认证和授权,然后访问测试就好
@EnableWebSecurity
public class MySecurityConfig extends WebSecurityConfigurerAdapter {

    @Override
    protected void configure(HttpSecurity http) throws Exception {
//        super.configure(http);
        // 定制请求的授权规则
        http.authorizeRequests().antMatchers("/").permitAll()
                // 要访问以下请求需处于登录状态且拥有相应的角色
                .antMatchers("/level1/**").hasRole("VIP1")
                .antMatchers("/level2/**").hasRole("VIP2")
                .antMatchers("/level3/**").hasRole("VIP3");
        // 开启自动配置的登录功能
        http.formLogin();
        //1、若没有权限,自动跳到/login登录页面
        //2、登录失败重定向到/login?error页
//3、这两个页面都是已经定义好的,无需重写
    }

    @Override
    protected void configure(AuthenticationManagerBuilder auth) throws Exception {
//        super.configure(auth);
        // 定义认证规则
// 在内存中认证,下面对admin、zhangsan、lisi、wangwu分别设置密码和角色
// 在Spring security5.0中新加了多种加密方式,官方推荐使用BCryptPasswordEncoder加密
        auth.inMemoryAuthentication()
                .passwordEncoder(new //认证时使用BCryptPasswordEncoder加密
BCryptPasswordEncoder()).withUser("admin").password(new
// 然后和内存中设置的加密密码比对
BCryptPasswordEncoder().encode("123456")).roles("VIP1","VIP2","VIP3")
                .and().passwordEncoder(new BCryptPasswordEncoder()).withUser("zhangsan").password(new BCryptPasswordEncoder().encode("123456")).roles("VIP1","VIP2")
                .and().passwordEncoder(new BCryptPasswordEncoder()).withUser("lisi").password(new BCryptPasswordEncoder().encode("123456")).roles("VIP2","VIP3")
                .and().passwordEncoder(new BCryptPasswordEncoder()).withUser("wangwu").password(new BCryptPasswordEncoder().encode("123456")).roles("VIP1","VIP3");
    }
}
3. 注销&权限控制
- 注销
// 开启注销功能
@EnableWebSecurity
public class MySecurityConfig extends WebSecurityConfigurerAdapter {

    @Override
    protected void configure(HttpSecurity http) throws Exception {
        // 开启自动配置的注销功能
        http.logout().logoutSuccessUrl("/");
        //1、访问logout表示用户注销,清空session
        //2、注销成功会返回/login?logout登录页面
        //3、若不想注销成功后返回登录页,可以设置logoutSuccessUrl配置要跳转的路径
    }
}
// 在首页增加注销按钮
<form th:action="@{/logout}" method="post">
   <input type="submit" th:value="注销">
</form>
- 权限控制
根据不同的认证(登录)状态和权限显示不同的内容
// thymeleaf和security整合,security2.2要引入5版本的包
<dependency>
    <groupId>org.thymeleaf.extras</groupId>
    <artifactId>thymeleaf-extras-springsecurity5</artifactId>
</dependency>
// 改造首页代码
<div sec:authorize="!isAuthenticated()">  // 若没有登录显示
   <h2 align="center">游客您好,如果想查看武林秘籍 <a th:href="@{/login}">请登录   </a></h2>
</div>
// 若已登录显示
<div sec:authorize="isAuthenticated()">
   <h2>
      登录用户: <span sec:authentication="name"></span> |
      角色: <span sec:authentication="principal.authorities"></span>
   </h2>
   <form th:action="@{/logout}" method="post">
      <input type="submit" th:value="注销">
   </form>
</div>
<div sec:authorize="hasRole('VIP1')"> //有VIP1角色显示
   <h3>普通武功秘籍</h3>
   <ul>
      <li><a th:href="@{/level1/1}">罗汉拳</a></li>
      <li><a th:href="@{/level1/2}">武当长拳</a></li>
      <li><a th:href="@{/level1/3}">全真剑法</a></li>
   </ul>
</div>

<div sec:authorize="hasRole('VIP2')"> //有VIP2角色显示
   <h3>高级武功秘籍</h3>
   <ul>
      <li><a th:href="@{/level2/1}">太极拳</a></li>
      <li><a th:href="@{/level2/2}">七伤拳</a></li>
      <li><a th:href="@{/level2/3}">梯云纵</a></li>
   </ul>
</div>

<div sec:authorize="hasRole('VIP3')"> //有VIP3角色显示
   <h3>绝世武功秘籍</h3>
   <ul>
      <li><a th:href="@{/level3/1}">葵花宝典</a></li>
      <li><a th:href="@{/level3/2}">龟派气功</a></li>
      <li><a th:href="@{/level3/3}">独孤九剑</a></li>
   </ul>
</div>
4. 记住我&定制登录页
(1)记住我功能
@EnableWebSecurity
public class MySecurityConfig extends WebSecurityConfigurerAdapter {

    @Override
    protected void configure(HttpSecurity http) throws Exception {
        // 开启记住我功能
        http.rememberMe();
        //1、开启该功能,页面会添加一个记住我复选框
        //2、登录成功后将cookie发给浏览器保存,以后重启浏览器访问页面会检查这个cookie,通过的话则免登陆
        //3、点击注销会删除这个cookie
    }
}

(2) 定制登录页
@EnableWebSecurity
public class MySecurityConfig extends WebSecurityConfigurerAdapter {

    @Override
    protected void configure(HttpSecurity http) throws Exception {
// 开启登录功能并定制登录页面
http.formLogin().loginPage("/userlogin");
//一旦定制loginPage,则loginPage配置的的post请求就是处理登录
	}
}

// 自定义登录页
<form th:action="@{/userlogin}" method="post">
   用户名:<input name="username"/><br>
   密码:<input name="password"><br/>
   <input type="submit" value="登陆">
</form>
(3) 添加记住我功能
// 登录页添加记住我复选框,默认参数是remember-me
<input type="checkbox" name="remember-me" >记住我<br/>
// 如果想换参数的话,可以定制记住我的参数,如下:
http.rememberMe().rememberMeParameter("remember");
十四、 Springboot与分布式
在分布式系统中,国内常用zookeeper+dubbo组合,而Springboot推荐使用全栈的Spring,Springboot+Springcloud,Springcloud和dubbo都是RPC(远程过程调用)的分布式框架,用于负责不同模块间的通信,zookeeper就是一个注册中心,负责通信两端的消息记录和路由。
1. Dubbo简介
Dubbo的工作机制图

2. Docker安装zookeeper
// 下载镜像
docker pull zookeeper
// 运行镜像,暴露客户端端口2181
docker run --name myzkeeper01 -p 2181:2181 --restart always -d zookeeper
3. Springboot整合dubbo、zookeeper
参考链接:https://www.jianshu.com/p/e944870c0fae
服务提供者
(1) 创建一个空工程empty project:springboot-dubbo
(2) 新建一个module,使用spring initializr创建一个服务提供者demo_provider_ticket,勾选web模块
(3) 编写接口和实现类

(4) 引入依赖
<!-- 1.引入dubbo的starter-->
<!-- Dubbo Spring Boot Starter -->
<dependency>
    <groupId>com.alibaba.boot</groupId>
    <artifactId>dubbo-spring-boot-starter</artifactId>
    <version>0.1.0</version>
</dependency>
<!-- 2.引入zookeeper的客户端工具-->
<!-- https://mvnrepository.com/artifact/com.github.sgroschupf/zkclient -->
<dependency>
    <groupId>com.github.sgroschupf</groupId>
    <artifactId>zkclient</artifactId>
    <version>0.1</version>
</dependency>
(5) 配置文件
# dubbo相关配置
spring.application.name= demo_provider_ticket //工程名
dubbo.registry.address=zookeeper://192.168.1.128
dubbo.scan.base-packages=com.zcy.springboot.service
dubbo.application.name=demo_provider_ticket
(6) 发布服务到注册中心
@Component  // 放到spring容器
@Service    // 这是dubbo的service注解,将服务发布到zookeeper
public class TicketServiceImpl implements TicketService {
    @Override
    public String getTicket() {
        return "《哪吒》";
    }
}
(7) 在主配置类上加@EnableDubbo注解
@SpringBootApplication
@EnableDubbo
public class DemoProviderTicketApplication {
…..
}
(8)启动服务提供者
服务消费者
- 新建一个module,使用spring initializr创建一个服务提供者demo_consumer_user,勾选web模块
- 同样引入dubbo和zookeeper的依赖
<!-- Dubbo Spring Boot Starter -->
<dependency>
    <groupId>com.alibaba.boot</groupId>
    <artifactId>dubbo-spring-boot-starter</artifactId>
    <version>0.1.0</version>
</dependency>
<!-- 2.引入zookeeper的客户端工具-->
<!-- https://mvnrepository.com/artifact/com.github.sgroschupf/zkclient -->
<dependency>
    <groupId>com.github.sgroschupf</groupId>
    <artifactId>zkclient</artifactId>
    <version>0.1</version>
</dependency>
- 配置文件
server.port=8081
#dubbo
spring.application.name=demo_consumer_user
dubbo.registry.address=zookeeper://192.168.1.128:2181
dubbo.application.name = demo_consumer_user
- 将服务提供者的TickerService接口放到本工程下的同路径下

- 编写UserService类远程调用
@Service    // 这个是spring的service
public class UserService {

    @Reference()    // dubbo注解,远程引用
    TicketService ticketService;

    public void hello() {
        System.out.println("调用了service");
        String ticket = ticketService.getTicket();
        System.out.println("买到票啦:" + ticket);
    }
}
- 在主配置类上加@EnableDubbo注解
@SpringBootApplication
@EnableDubbo
public class DemoConsumerUserApplication {
….
}
- 编写测试方法测试
@Test
void contextLoads() {
    userService.hello();
}
查看结果,如下:
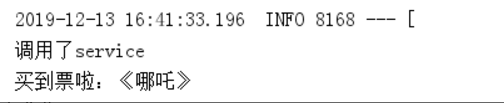
4. SpringCloud-Eureka注册中心
SpringCloud和Dubbo的区别:Dubbo主要用于解决分布式之间的调用问题,即是一个RPC(远程过程调用)框架,而SpringCloud是一个集分布式所有功能为一身的框架,用于分布式所涉及的所有解决方案。
SpringCloud为开发者提供了在分布式系统(配置管理、服务发现、熔断、路由、微代理、控制总线、一次性token、全局锁、leader选举、分布式session、集群状态)中快速构建的工具,是用SpringCloud的开发者可以快速启动服务或构建应用、同时能够快速和云平台资源进行对接。
- SpringCloud开发常用五大组件:
服务发现—Netflix Eureka,服务间通过Eureka调用服务,相当于zookeeper
客户端负载均衡—Netflix Ribbon,调用多个机器上的相同服务,可用此优化
断路器—Netflix Hystrix,若所调服务有多个调用,若中途调用失败及时响应失败
服务网关—Netflix Zuul
分布式配置—Spring Cloud Config
创建子模块Eureka注册中心
创建一个Empty Project工程demo_spingboot_springcloud
(1) 使用spring initializr创建工程demo_eureka_server,勾选Eureka Server
(2) 配置Eureka注册中心
server:
  port: 8761
#eureka
eureka:
  instance:
    hostname: demo_eureka_server
  client:
    register-with-eureka: false #不把自己注册到Eureka上(若不做高可用的话)
    fetch-registry: false  #作为注册中心不从Eureka上获取服务的注册信息
    service-url:  #注册中心的地址,有默认值,这里自定义指定
      defaultZone: http://localhost:8761/eureka/
(3) 在朱配置类上加@EnableEurekaServer注解
@EnableEurekaServer
@SpringBootApplication
public class DemoEurekaServerApplication {
…
}
(4) 启动、访问测试

服务提供者
(1) 使用spring initializr创建工程demo-provider-ticket,勾选Eureka Discover Client、Web模块
(2) 编写Service、Controller
// Service
@Service
public class TicketService {

    public String getTicket(){
        return "《哪吒》";
    }
}
// Controller
@RestController
public class TicketController {

    @Autowired
    private TicketService ticketService;

    @GetMapping("/getTicket")
    public String getTicket(){
		System.out.println("8001服务被调用...");
    return ticketService.getTicket();
    }
}
(3) 配置文件
# 注意服务提供者这里的名字和工程名都不要下划线,否则在使用过RestTempalte向Eureka # Server获取微服务调用时会报错
spring:
  application:
    name: demo-provider-ticket
server:
  port: 8001
#eureka
eureka:
  instance:
    prefer-ip-address: true # 注册服务的时候使用服务的ip地址
  client:
    service-url:  #注册中心的地址,有默认值,这里自定义指定
      defaultZone: http://localhost:8761/eureka/
(4) 启动、访问测试http://localhost:8761/

(5) 还可以同一个应用注册多个实例
修改service方法的打印分别为” 8001服务端口被调用…”,” 8001服务端口被调用…”,并对应好配置文件中的端口,然后分别打包启动,如下

查看注册中心控制台,发现已有两个实例

服务消费者
(1) 使用spring initializr创建工程demo_consumer_user,勾选Eureka Discover Client、Web模块
(2) 配置文件
server:
  port: 8200
spring:
  application:
    name: demo_consumer_user
#eureka
eureka:
  instance:
    prefer-ip-address: true # 注册服务的时候使用服务的ip地址
  client:
    service-url:  #注册中心的地址,有默认值,这里自定义指定
      defaultZone: http://localhost:8761/eureka/
(3) 在主配置类上加@EnableDiscoverClient注解并给容器注入RestTemplate对象用于发送HTTP请求
@EnableDiscoveryClient  // 开发发现服务的功能
@SpringBootApplication
public class DemoConsumerUserApplication {

    public static void main(String[] args) {
        SpringApplication.run(DemoConsumerUserApplication.class, args);
    }

    @LoadBalanced   // 使用负载均衡机制
    @Bean
    public RestTemplate restTemplate(){
        return new RestTemplate();
    }
}
(4) 编写Controller测试
@RestController
public class UserController {

    @Autowired
    private RestTemplate restTemplate;

    @GetMapping("/buy")
    public String getTicket(String name){
        // DEMO_PROVIDER_TICKET是注册到注册中心中的应用名,返回值类型string
        // 若所调服务有多个应用,根据restTemplate的负载均衡机制调用
        String ticket = restTemplate.getForObject("http://DEMO_PROVIDER_TICKET/getTicket", String.class);
        return name + "购买了" + ticket;
    }
}
(5)启动、访问测试,查看控制台

点击consumer的实例链接访问/buy请求,http://192.168.1.5:8200/buy?name=zcy
多次访问会发现端口为8001和8002的两个服务提供者轮流被调用,如下图:

十五、 Springboot与开发热部署
在修改代码不重启服务的情况下程序可以自动部署(热部署)
- 有以下四种情况可以实现热部署:
- 模板引擎
页面模板改变,Ctrl+F9可以重新编译当前页并生效(似乎可以让所有改变的页面生效) - spring loaded(比较麻烦)
Spring官方提供的热部署程序,实现修改类文件的热部署
–下载:https://github.com/spring-projects/spring-loaded
–添加运行时参数:-javaagent C:/springloaded-1.2.5.RELEASE.jar -noverify - JRebel
–收费的一个热部署插件,可在eclipse上或idea上安装 - Spring Boot Devtools(推荐)
–引入依赖(去maven仓库搜索)
<!-- https://mvnrepository.com/artifact/org.springframework.boot/spring-boot-devtools -->
<dependency>
    <groupId>org.springframework.boot</groupId>
    <artifactId>spring-boot-devtools</artifactId>
<version>2.2.2.RELEASE</version>
<!--<optional>true</optional>-->
</dependency>
做了一下配置即可生效,更改代码后按Ctrl+F9即可,eclipse中直接Ctrl+S
Idea配置:
1) “File” -> “Settings” -> “Build,Execution,Deplyment” -> “Compiler”,选中打勾 “Build project automatically” 。
2) 组合键:“Shift+Ctrl+Alt+/” ,选择 “Registry” ,选中打勾 “compiler.automake.allow.when.app.running”
3) 更改完配置后似乎需要重启idea,还可能是Chrome缓存的问题
十六、 Springboot与监控管理
通过引入spring-boot-starter-actuator,可以使用Spring Boot为我们提供的准生产环境下的应用监控和管理功能,我们可以通过HTTP、JMX、SSH协议来进行操作,自动得到审计、健康及指标信息。
- 步骤:
–引入spring-boot-starter-actuator
–通过HTTP方式访问监控端点
–可进行shotdown(POST提交,此端点默认关闭)
1. 监管端点测试
(1) 引入依赖(devtools用于热部署、web、actuator监控)

(2) 配置文件
// 暴露所有端点,默认只暴露info、health两个端点,参考官网
management.endpoints.web.exposure.include=*
(3) 启动测试访问(默认访问路径需要加上actuator)
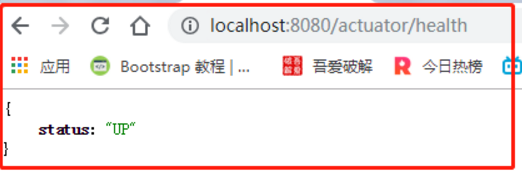
其他端点描述:
| 端点名 | 描述 |
|---|---|
| conditions | 所有自动配置信息 |
| auditevents | 审计事件 |
| beans | 所有bean的信息 |
| configprops | 所有配置属性 |
| threaddump | 所有线程状态信息 |
| env | 当前环境信息 |
| health | 应用健康状态 |
| info | 当前应用信息 |
| metrics | metrics |
| mappings | 应用@RequestMapping映射路径 |
| shutdown | 远程关闭当前应用,要使用post请求(默认功能禁用) |
| httptrace | 追踪信息(最新的HTTP请求),需要HttpTraceRepository |
2.端点相关配置
#①可以使用下面的配置开启或关闭某个端点
#management.endpoint.shutdown.enabled=true
#②更改端点的默认访问路径/actuator
management.endpoints.web.base-path=/manage
#③更改端点访问的端口号,如果改为-1的话表示禁用管理功能
management.server.port=8100
更多配置查看官方文档
3. 自定义HealthIndicator
默认监控模块
默认访问health端点访问不到信息,如图:
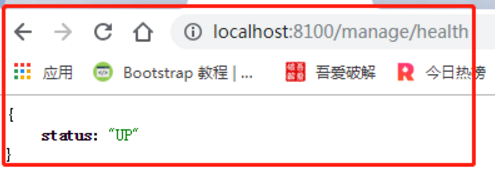
Health默认对一些组件进行了监控比如Redis、solr、mail等(参考官方文档),但需要做一个配置,对用户开发访问,也可以对某些用户授权访问(参考官方文档)如下:
management.endpoint.health.show-details=always
举例:
// ①做了以上配置的前提下,引入Redis的依赖
<dependency>
    <groupId>repository.org.springframework.boot</groupId>
    <artifactId>spring-boot-starter-redis</artifactId>
    <version>1.4.4.RELEASE</version>
</dependency>
// ②配置Redis主机
spring.redis.host=localhost
在没有开启本机Redis服服务时,访问health端口,显示Redis为down状态

当开启Redis服务后再次访问为up状态

自定义监控
- 步骤:
–编写一个类xxxHealthIndicator实现接口HealthIndicator
–实现health方法,编写一些检查代码
–将该类放到容器中
举例:
// 类名不能乱写,只能为xxxHealthIndicator
@Component
public class MyHealthIndicator implements HealthIndicator {
    @Override
    public Health health() {
        int errorCode = check(23); // 执行一些指定的代码
        if (errorCode != 0) {
            return Health.down().withDetail("Error Code", errorCode).build();
        }
        return Health.up().build();
    }

    // 校验能否被2整除,不能反悔非0,down
    public int check(Integer num){
        return num%2;
    }
}
由于23不能被2整除返回down信息,访问测试如下:

十七、 Springboot后续补充
1. Springboot与kaptcha 验证码组件
参考链接:https://ainyi.com/70
https://blog.csdn.net/qq_39586409/article/details/93723724
原理
kaptcha的工作原理,是调用 com.google.code.kaptcha.servlet.KaptchaServlet,生成一个图片。同时将生成的验证码字符串放到 HttpSession中,直接从session中获取这张验证码图片,而不会占用实际内存
kaptcha 可以配置如下属性
| 配置 | 描述 |
| kaptcha.border | 是否有边框 默认为true 我们可以自己设置yes,no |
| kaptcha.border.color | 边框颜色 默认为Color.BLACK |
| kaptcha.border.thickness | 边框粗细度 默认为1 |
| kaptcha.producer.impl | 验证码生成器 默认为DefaultKaptcha |
| kaptcha.textproducer.impl | 验证码文本生成器 默认为DefaultTextCreator |
| kaptcha.textproducer.char.string | 验证码文本字符内容范围 默认为abcde2345678gfynmnpwx |
| kaptcha.textproducer.char.length | 验证码文本字符长度 默认为5 |
| kaptcha.textproducer.font.names | 验证码文本字体样式 默认为new Font(“Arial”, 1, fontSize), new Font(“Courier”, 1, fontSize) |
| kaptcha.textproducer.font.size | 验证码文本字符大小 默认为40 |
| kaptcha.textproducer.font.color | 验证码文本字符颜色 默认为Color.BLACK |
| kaptcha.textproducer.char.space | 验证码文本字符间距 默认为2 |
| kaptcha.noise.impl | 验证码噪点生成对象 默认为DefaultNoise |
| kaptcha.noise.color | 验证码噪点颜色 默认为Color.BLACK |
| kaptcha.obscurificator.impl | 验证码样式引擎 默认为WaterRipple |
| kaptcha.word.impl | 验证码文本字符渲染 默认为DefaultWordRenderer |
| kaptcha.background.impl | 验证码背景生成器 默认为DefaultBackground |
| kaptcha.background.clear.from | 验证码背景颜色渐进 默认为Color.LIGHT_GRAY |
| kaptcha.background.clear.to | 验证码背景颜色渐进 默认为Color.WHITE |
| kaptcha.image.width | 验证码图片宽度 默认为200 |
| kaptcha.image.height | 验证码图片高度 默认为50 |
| kaptcha.session.key | session中存放验证码的key键 |
实践
(1) 引入依赖
<!-- 验证码组件kaptcha -->
<dependency>
    <groupId>com.github.penggle</groupId>
    <artifactId>kaptcha</artifactId>
    <version>2.3.2</version>
</dependency>
(2) 对captcha进行配置
@Configuration
public class MyConfig {

    @Bean
    public DefaultKaptcha myCaptchaProducer(){
        DefaultKaptcha defaultKaptcha = new DefaultKaptcha();
        Properties properties = new Properties();
        properties.setProperty("kaptcha.border","no");
        properties.setProperty("kaptcha.textproducer.font.color","black");
        properties.setProperty("kaptcha.image.width","100");
        properties.setProperty("kaptcha.image.height","38");
        properties.setProperty("kaptcha.textproducer.font.size","24");
        properties.setProperty("kaptcha.session.key","code");
        // 噪点颜色
        properties.setProperty("kaptcha.noise.color","white");
        // 文本字符间距
        properties.setProperty("kaptcha.textproducer.char.space","3");
        // 文本字符长度
        properties.setProperty("kaptcha.textproducer.char.length","4");
        // 样式引擎
        properties.setProperty("kaptcha.obscurificator.impl","com.google.code.kaptcha.impl.ShadowGimpy");
        // 文本字体样式
        properties.setProperty("kaptcha.textproducer.font.names","宋体,楷体,微软雅黑");
        Config config = new Config(properties);
        defaultKaptcha.setConfig(config);
        return defaultKaptcha;
    }
}
(3) 编写生成验证码的Controller
@Controller
@RequestMapping("/captcha")
public class CaptchaController {
    @Autowired
    private Producer myCaptchaProducer;

    @RequestMapping("/code")
    public ModelAndView getKaptchaImage(HttpServletRequest request, HttpServletResponse response) throws Exception{
        HttpSession session = request.getSession();

        // 清除浏览器缓存
        response.setDateHeader("Expires",0);
        response.setHeader("Cache-Controll","no-cache,no-store,must-revalidate");
        response.addHeader("Cache-Controll","post-check=0,pre-check=0");
        response.setHeader("Pragma","no-chache");
        response.setContentType("image/jpeg");

        // 获取验证用的随机文本
        String capText = myCaptchaProducer.createText();
        // 将生成好的文本放入session
        session.setAttribute(Constants.KAPTCHA_SESSION_KEY,capText);
        // 生成带有文字的图片
        BufferedImage image = myCaptchaProducer.createImage(capText);
        // 将图片写出
        ServletOutputStream out = response.getOutputStream();
        ImageIO.write(image,"jpg",out);
        try {
            out.flush();
        }finally {
            out.close();
        }
        return null;
    }
}
(4) 前端调用
<label class="layui-form-label">验证码:<span class="requiredSpan">*</span></label>
<div class="layui-input-inline">
    <input type="text" name="validateCode" lay-verify="required" maxlength="4"
           lay-reqText="验证码不能为空!" autocomplete="off" class="layui-input"
           style="width:auto">
</div>
<div class="layui-input-inline" style="width: 100px">
    <img class="code" onclick="parent.changeCode(iframe)" src="/captcha/code"/>
</div>
<div class="layui-form-mid">
    <a href="#" style="color: #0a5491" onclick="parent.changeCode(iframe)"><u>换一张</u></a>
</div>
(5) JS方法
点击验证码图片换验证码时,img 标签 的 onclick 事件里面做的就是改变 img 标签的 src 属性
所以要给 url 带一个随机数,这样每次点击验证码图片时,都会由于 src 改变而重新请求 jsp
/*.改变验证码 */
var changeCode = function(iframe){
    iframe.contents().find(".code").attr("src","/captcha/code?"+new Date().getTime())
}
(6) LoginController登录时对验证码的验证
if(!StringUtils.isEmpty(validateCode)){
    String sessionCode = (String)request.getSession().getAttribute(Constants.KAPTCHA_SESSION_KEY);
    if (!StringUtils.isEmpty(sessionCode) && !validateCode.equalsIgnoreCase(sessionCode)){
        map.put("msg","请输入正确的验证码!");
        map.put("code",false);
        return map;
    }
}
(7) 效果图


 9609
9609


 被折叠的 条评论
为什么被折叠?
被折叠的 条评论
为什么被折叠?
 到【灌水乐园】发言


