


ApplicationContext获取对象
阶段目标
当前阶段任务,实现ApplicationContext 加载配置文件,实现对配置的包扫描,获取其字节码文件,查看是否包含注需要Spring管理,以及实现单例或者多例获取Bean对象
- 实现配置文件
config,在其上添加注解ComponentScan扫描包 - 创建注解类
Component、ComponentScan、ScopeComponent是否交给Spring管理ComponentScan扫描包的路径,一般在配置文件进行配置Scope单例还是多例获取对象
- 创建
BeanDefinition这个类来辅助保存需要Spring管理的Bean信息- 单例 多例
- Class
当前框架
我们先完善流程的一个大致框架,之后往里面填充内容
Test.Java
主要是要实现获取User 类啦
public class Test {

    public static void main(String[] args) {

        ApplicationContext applicationContext = new ApplicationContext(Config.class);
        Useruser= (User) applicationContext.getBean("User");

    }
}
Config.java及@ComponentScan 、Component 、Scope 注解
@Retention(RetentionPolicy.RUNTIME)指定了注解的保留期为运行时。这意味着,注解的信息将被保留到程序运行时,并且可以通过Java反射API在运行时获取和处理注解信息。@Target(ElementType.TYPE)指定了注解的目标元素类型为类、接口或枚举类型。这意味着,该注解只能应用于类、接口或枚举类型的声明上,不能应用于方法、字段或其他类型的声明上
@ComponentScan("com.yqyang.service")
public class Conifg {
}
@Retention(RetentionPolicy.RUNTIME)
@Target(ElementType.TYPE)
public @interface ComponentScan {
    String value() default "";
}

@Retention(RetentionPolicy.RUNTIME)
@Target(ElementType.TYPE)
public @interface Component {
    String value() default "";
}


@Retention(RetentionPolicy.RUNTIME)
@Target(ElementType.TYPE)
public @interface Scope {
    String value() default "singleton";
}
ApplicationContext
这里需要注意我们用Class 来修饰配置类
package com.yqyang.spring;

import java.lang.annotation.Annotation;
import java.net.URL;
import java.util.Enumeration;

/*
*
* Spring
*  */
public class ApplicationContext {
    private Class conifgClass;

    public ApplicationContext(Class conifgClass) {
        this.conifgClass = conifgClass;
        // 扫描--->BeanDefinition-->beanDefinitionMap

    }

    public void getBean(String user) {
    }
}
完善ApplicationContext获取Bean对象
当前的流程
-
根据配置类
ComponentScan注解获取要加载的包 -
获取包的字节码文件绝对路径
-
加载包的各个文件,查看是否包含
Component包含,继续查看是否包含
Scope及其值为单例还是多例,获取类信息保存到BeanDefinition,使用beanDefinitionMap用来保存beanName及其对应的BeanDefinition信息 -
最后懒汉式加载单例的对象到
ConcurrentHashMap<String, Object> singletonObjects如果是单例,获取其对象时,是提前创建好的
如果是多例,获取其对象时,是刚刚创建的
- 我们同时需要创建
BeanDefinition这个类来辅助保存信息- 单例 多例
- Class
beanDefinitionMap用来保存beanName及其对应的BeanDefinition信息- key<
String> - value<
BeanDefinition>
- key<
package com.yqyang.spring;

import java.io.File;
import java.lang.reflect.InvocationTargetException;
import java.net.URL;
import java.util.concurrent.ConcurrentHashMap;

/*
*
* Spring
*  */
public class ApplicationContext {
    private Class conifgClass; // 加载配置类
    private ConcurrentHashMap<String, BeanDefinition> beanDefinitionMap = new ConcurrentHashMap<>();
    private ConcurrentHashMap<String, Object> singletonObjects = new ConcurrentHashMap<>();


    public ApplicationContext(Class conifgClass) {
        this.conifgClass = conifgClass;

        // 包 -> 包字节码路径 -> 加载class -> 是否包含注解component ——
        if (conifgClass.isAnnotationPresent(ComponentScan.class)){
            ComponentScan componentScan = (ComponentScan) conifgClass.getAnnotation(ComponentScan.class);
            String path = componentScan.value(); // com.yqyang.service

            path = path.replace(".","/"); // com/yqyang/service


            ClassLoader classLoader = ApplicationContext.class.getClassLoader();   // 通过ClassLoader获取编译后字节码绝对路径,以便加载
            URL resource = classLoader.getResource(path);
            File file=new File(resource.getFile()); /// D:/WorkSpace/JavaWorkSpace/spring-yqyang/target/classes/com/yqyang/service
            if (file.isDirectory()){
                File[] files = file.listFiles();
                for (File f : files) {
                    String fName = f.getAbsolutePath();
                    if(fName.endsWith(".class")){ // 我们只需要字节码文件

                        String className = fName.substring(fName.indexOf("com"), fName.indexOf(".class"));
                        className = className.replace("\\", ".");

                        try {
                            Class<?> clazz = classLoader.loadClass(className);
                            if(clazz.isAnnotationPresent(Component.class)){
                                Component component = clazz.getAnnotation(Component.class);// 获得注解value值 bean规定的名称
                                String beanName = component.value();

                                // beanName == 空 省略

                                BeanDefinition beanDefinition=new BeanDefinition();
                                beanDefinition.setType(clazz);

                                if(clazz.isAnnotationPresent(Scope.class)){
                                    Scope scope = clazz.getAnnotation(Scope.class);
                                    beanDefinition.setScope(scope.value());
                                } else {
                                    beanDefinition.setScope("singleton");
                                }
                                beanDefinitionMap.put(beanName, beanDefinition);


                            }
                        } catch (ClassNotFoundException e) {
                            throw new RuntimeException(e);
                        }

                    }


                }
            }

            // 获取 bean 单例对象
            for (String beanName : beanDefinitionMap.keySet()) {
                BeanDefinition beanDefinition = beanDefinitionMap.get(beanName);
                if (beanDefinition.getScope().equals("singleton")){
                    Object o = creatBean(beanDefinition.getType());
                    singletonObjects.put(beanName, o);
                }
            }


        }
    }

    private Object creatBean(Class clazz) {
        try {
            Object instance = clazz.getConstructor().newInstance();
            return instance;
        } catch (InstantiationException e) {
            throw new RuntimeException(e);
        } catch (IllegalAccessException e) {
            throw new RuntimeException(e);
        } catch (InvocationTargetException e) {
            throw new RuntimeException(e);
        } catch (NoSuchMethodException e) {
            throw new RuntimeException(e);
        }

    }

    public Object getBean(String beanName) {
        BeanDefinition beanDefinition = beanDefinitionMap.get(beanName);
        if (beanDefinition.getScope().equals("singleton")){
            Object bean = singletonObjects.get(beanName);
            if (bean==null){
                Object o = creatBean(beanDefinition.getType());
                singletonObjects.put(beanName, o);
            }
            return bean;
        }else {
            return creatBean(beanDefinition.getType());
        }

    }
}
package com.yqyang.spring;

public class BeanDefinition {
    private Class type;   //
    private String scope; // 单例多例

    public Class getType() {
        return type;
    }

    public void setType(Class type) {
        this.type = type;
    }

    public String getScope() {
        return scope;
    }

    public void setScope(String scope) {
        this.scope = scope;
    }
}
测试
单例:
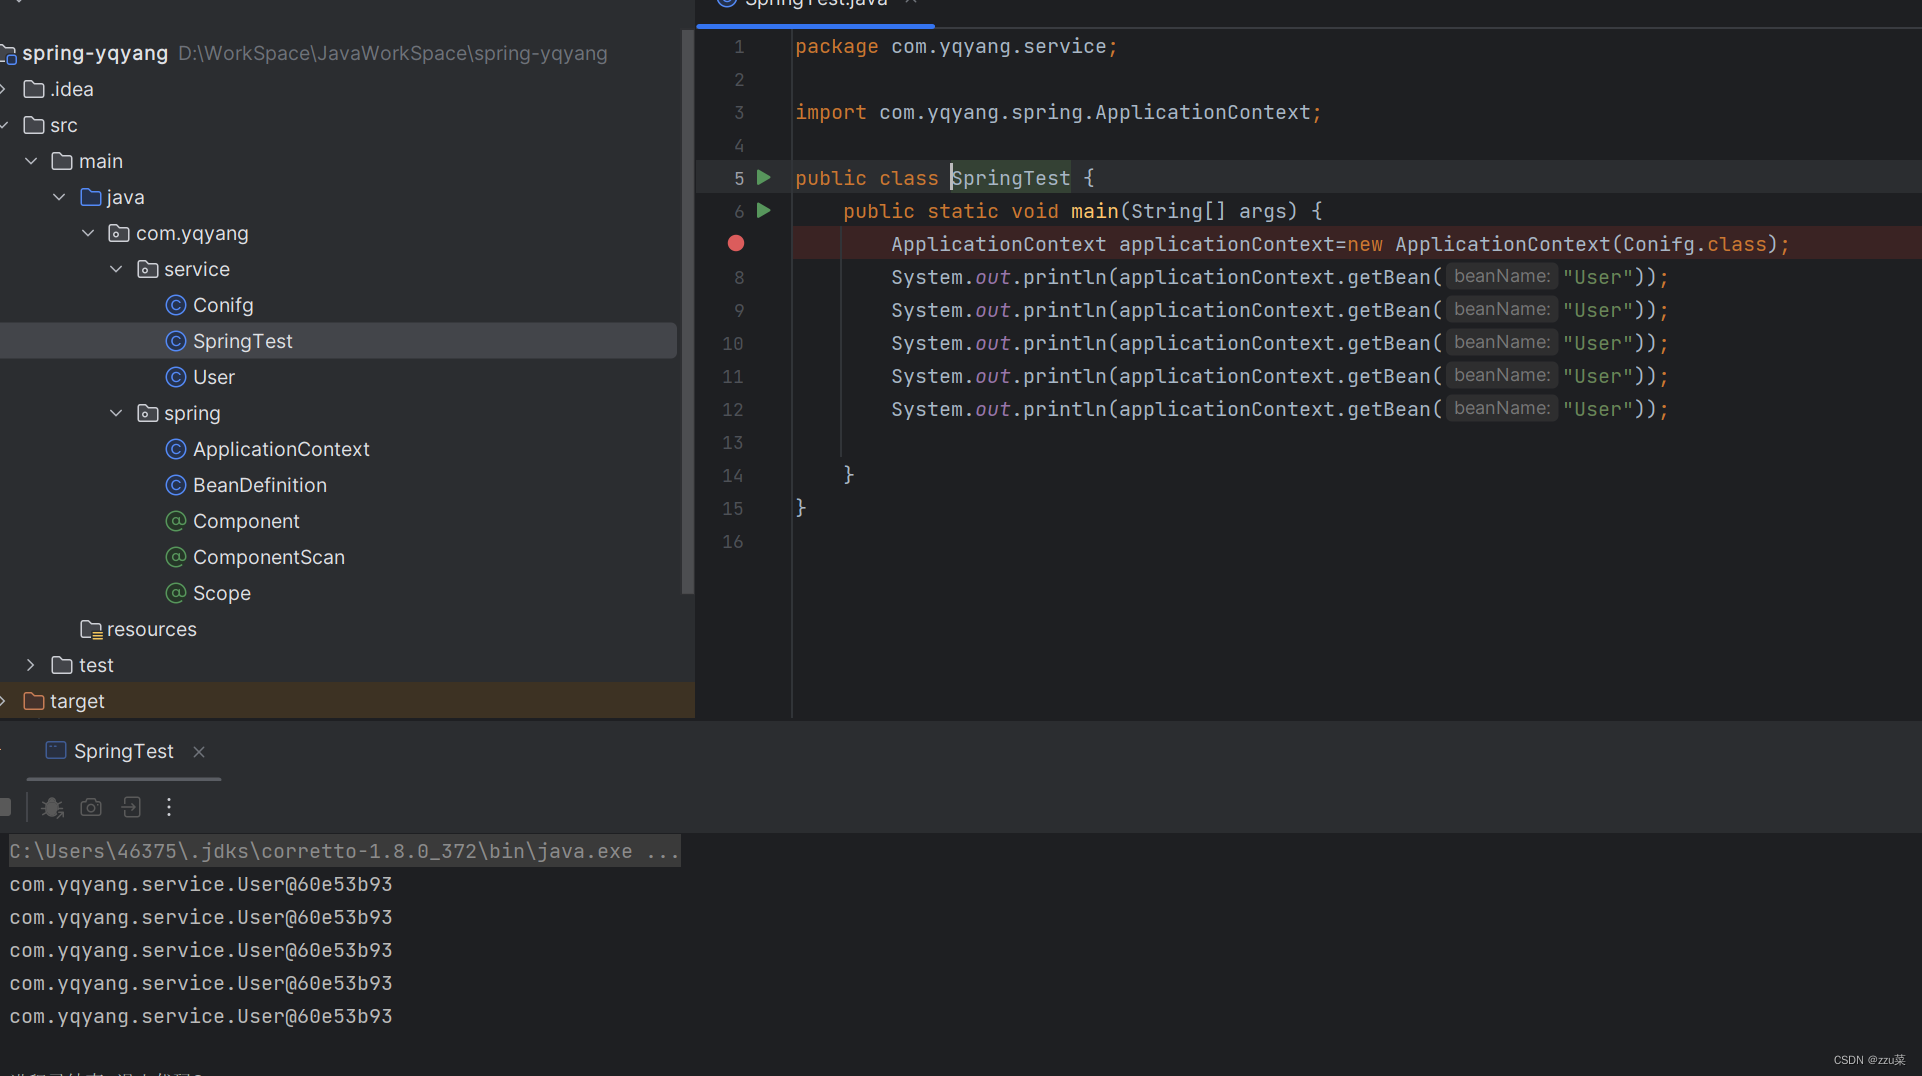
多例
![[外链图片转存失败,源站可能有防盗链机制,建议将图片保存下来直接上传(img-ILdA6OMO-1689235265472)(https://secure2.wostatic.cn/static/2riaLfRtgMaoZ2TwWE4kDY/image.png?auth_key=1689234689-8GbA3uYTkzo2T5xuybZMn8-0-d5af610d7cce60ff83ee1f7d26ba7261)]](https://img-blog.csdnimg.cn/77217b30aa5942308a502aeb2406d86a.png)


 1683
1683


 被折叠的 条评论
为什么被折叠?
被折叠的 条评论
为什么被折叠?
 到【灌水乐园】发言


