


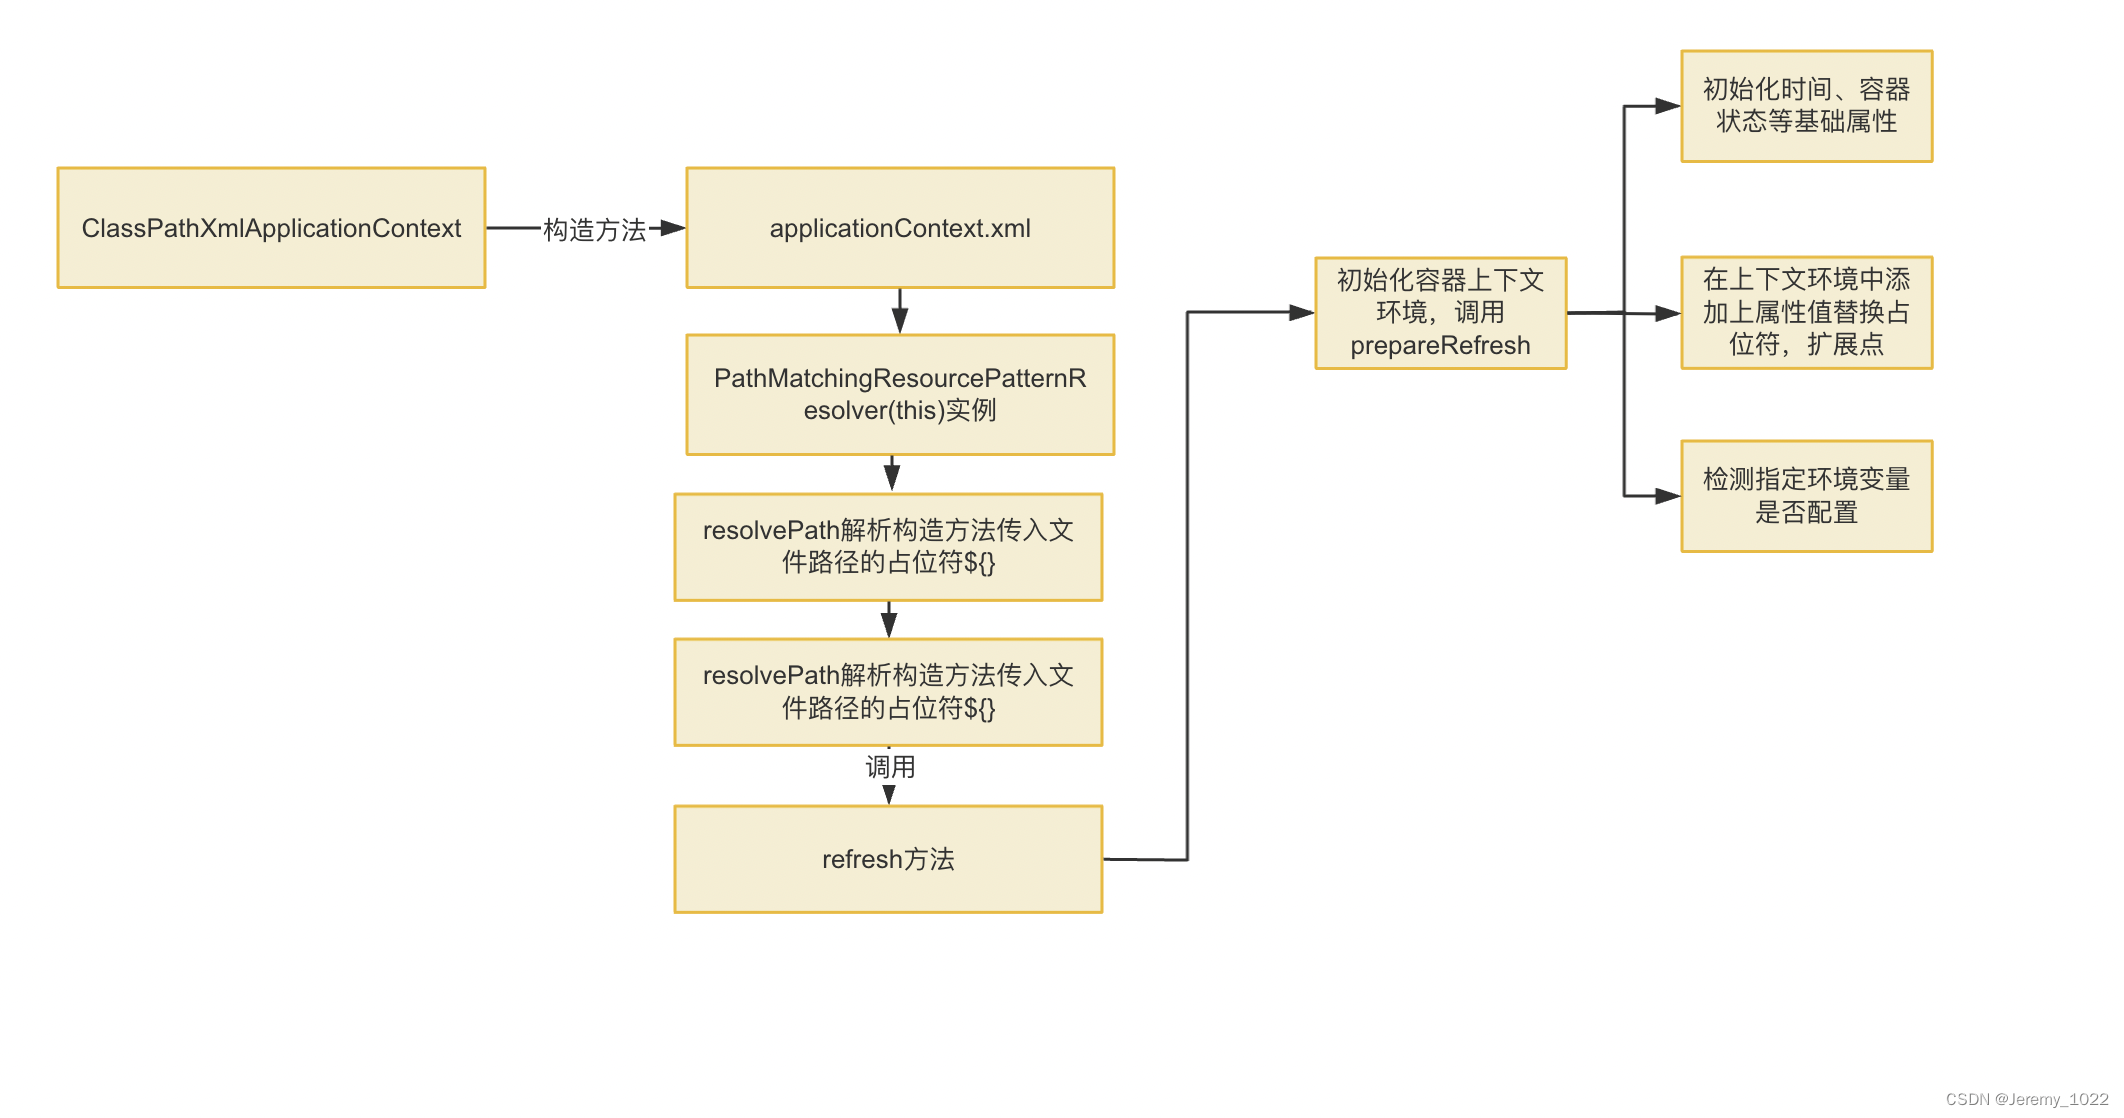
上一篇我们通过如下一段基础代码作为切入点,最终找到核心的处理是refresh方法,从今天开始正式进入refresh方法的解读。
public class Main {
	public static void main(String[] args) {
		ApplicationContext context = new ClassPathXmlApplicationContext("applicationContext.xml");
		JmUser jmUser = (JmUser)context.getBean("jmUser");
		System.out.println(jmUser.getName());
		System.out.println(jmUser.getAge());

	}
}
初始化容器上下文
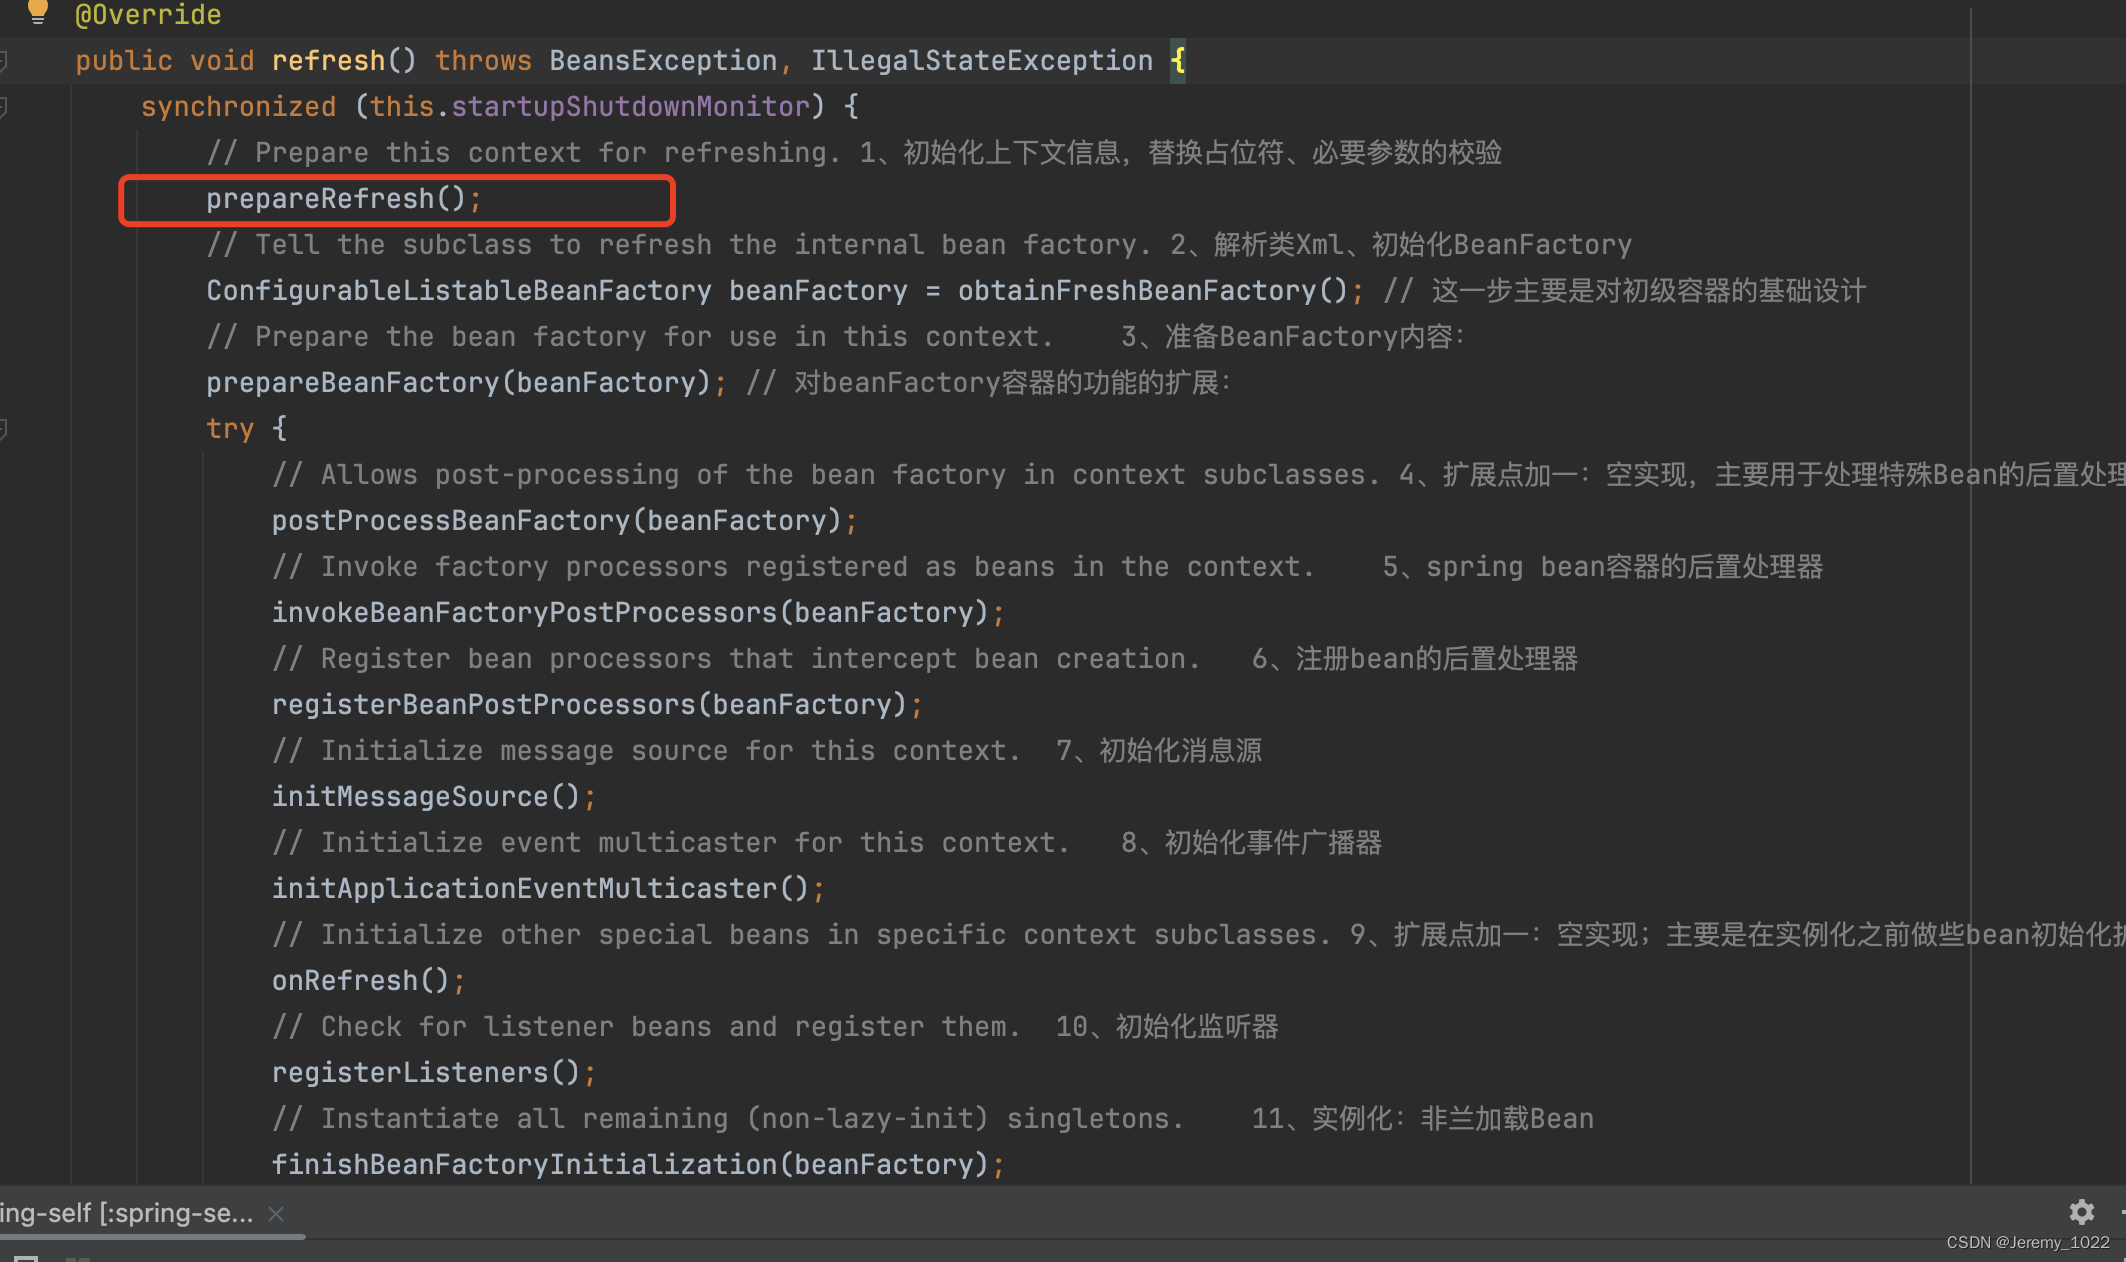
首先还是整体看下refresh方法
	@Override
	public void refresh() throws BeansException, IllegalStateException {
		synchronized (this.startupShutdownMonitor) {
			// Prepare this context for refreshing. 1、初始化上下文信息,替换占位符、必要参数的校验
			prepareRefresh();
			// Tell the subclass to refresh the internal bean factory. 2、解析类Xml、初始化BeanFactory
			ConfigurableListableBeanFactory beanFactory = obtainFreshBeanFactory(); // 这一步主要是对初级容器的基础设计
			// Prepare the bean factory for use in this context. 	3、准备BeanFactory内容:
			prepareBeanFactory(beanFactory); // 对beanFactory容器的功能的扩展:
			try {
				// Allows post-processing of the bean factory in context subclasses. 4、扩展点加一:空实现,主要用于处理特殊Bean的后置处理器
				postProcessBeanFactory(beanFactory);
				// Invoke factory processors registered as beans in the context. 	5、spring bean容器的后置处理器
				invokeBeanFactoryPostProcessors(beanFactory);
				// Register bean processors that intercept bean creation. 	6、注册bean的后置处理器
				registerBeanPostProcessors(beanFactory);
				// Initialize message source for this context.	7、初始化消息源
				initMessageSource();
				// Initialize event multicaster for this context.	8、初始化事件广播器
				initApplicationEventMulticaster();
				// Initialize other special beans in specific context subclasses. 9、扩展点加一:空实现;主要是在实例化之前做些bean初始化扩展
				onRefresh();
				// Check for listener beans and register them.	10、初始化监听器
				registerListeners();
				// Instantiate all remaining (non-lazy-init) singletons.	11、实例化:非兰加载Bean
				finishBeanFactoryInitialization(beanFactory);
				// Last step: publish corresponding event.	 12、发布相应的事件通知
				finishRefresh();
			}

			catch (BeansException ex) {
				if (logger.isWarnEnabled()) {
					logger.warn("Exception encountered during context initialization - " +
							"cancelling refresh attempt: " + ex);
				}

				// Destroy already created singletons to avoid dangling resources.
				destroyBeans();

				// Reset 'active' flag.
				cancelRefresh(ex);

				// Propagate exception to caller.
				throw ex;
			}

			finally {
				// Reset common introspection caches in Spring's core, since we
				// might not ever need metadata for singleton beans anymore...
				resetCommonCaches();
			}
		}
	}
首先将目标聚焦在第一个方法prepareRefresh方法上,根据方法名称和注释,我们大概可以猜测到该方法是在容器初始化前做些准备工作。
有了这个想法我来具体看下这个方法到底干了什么?
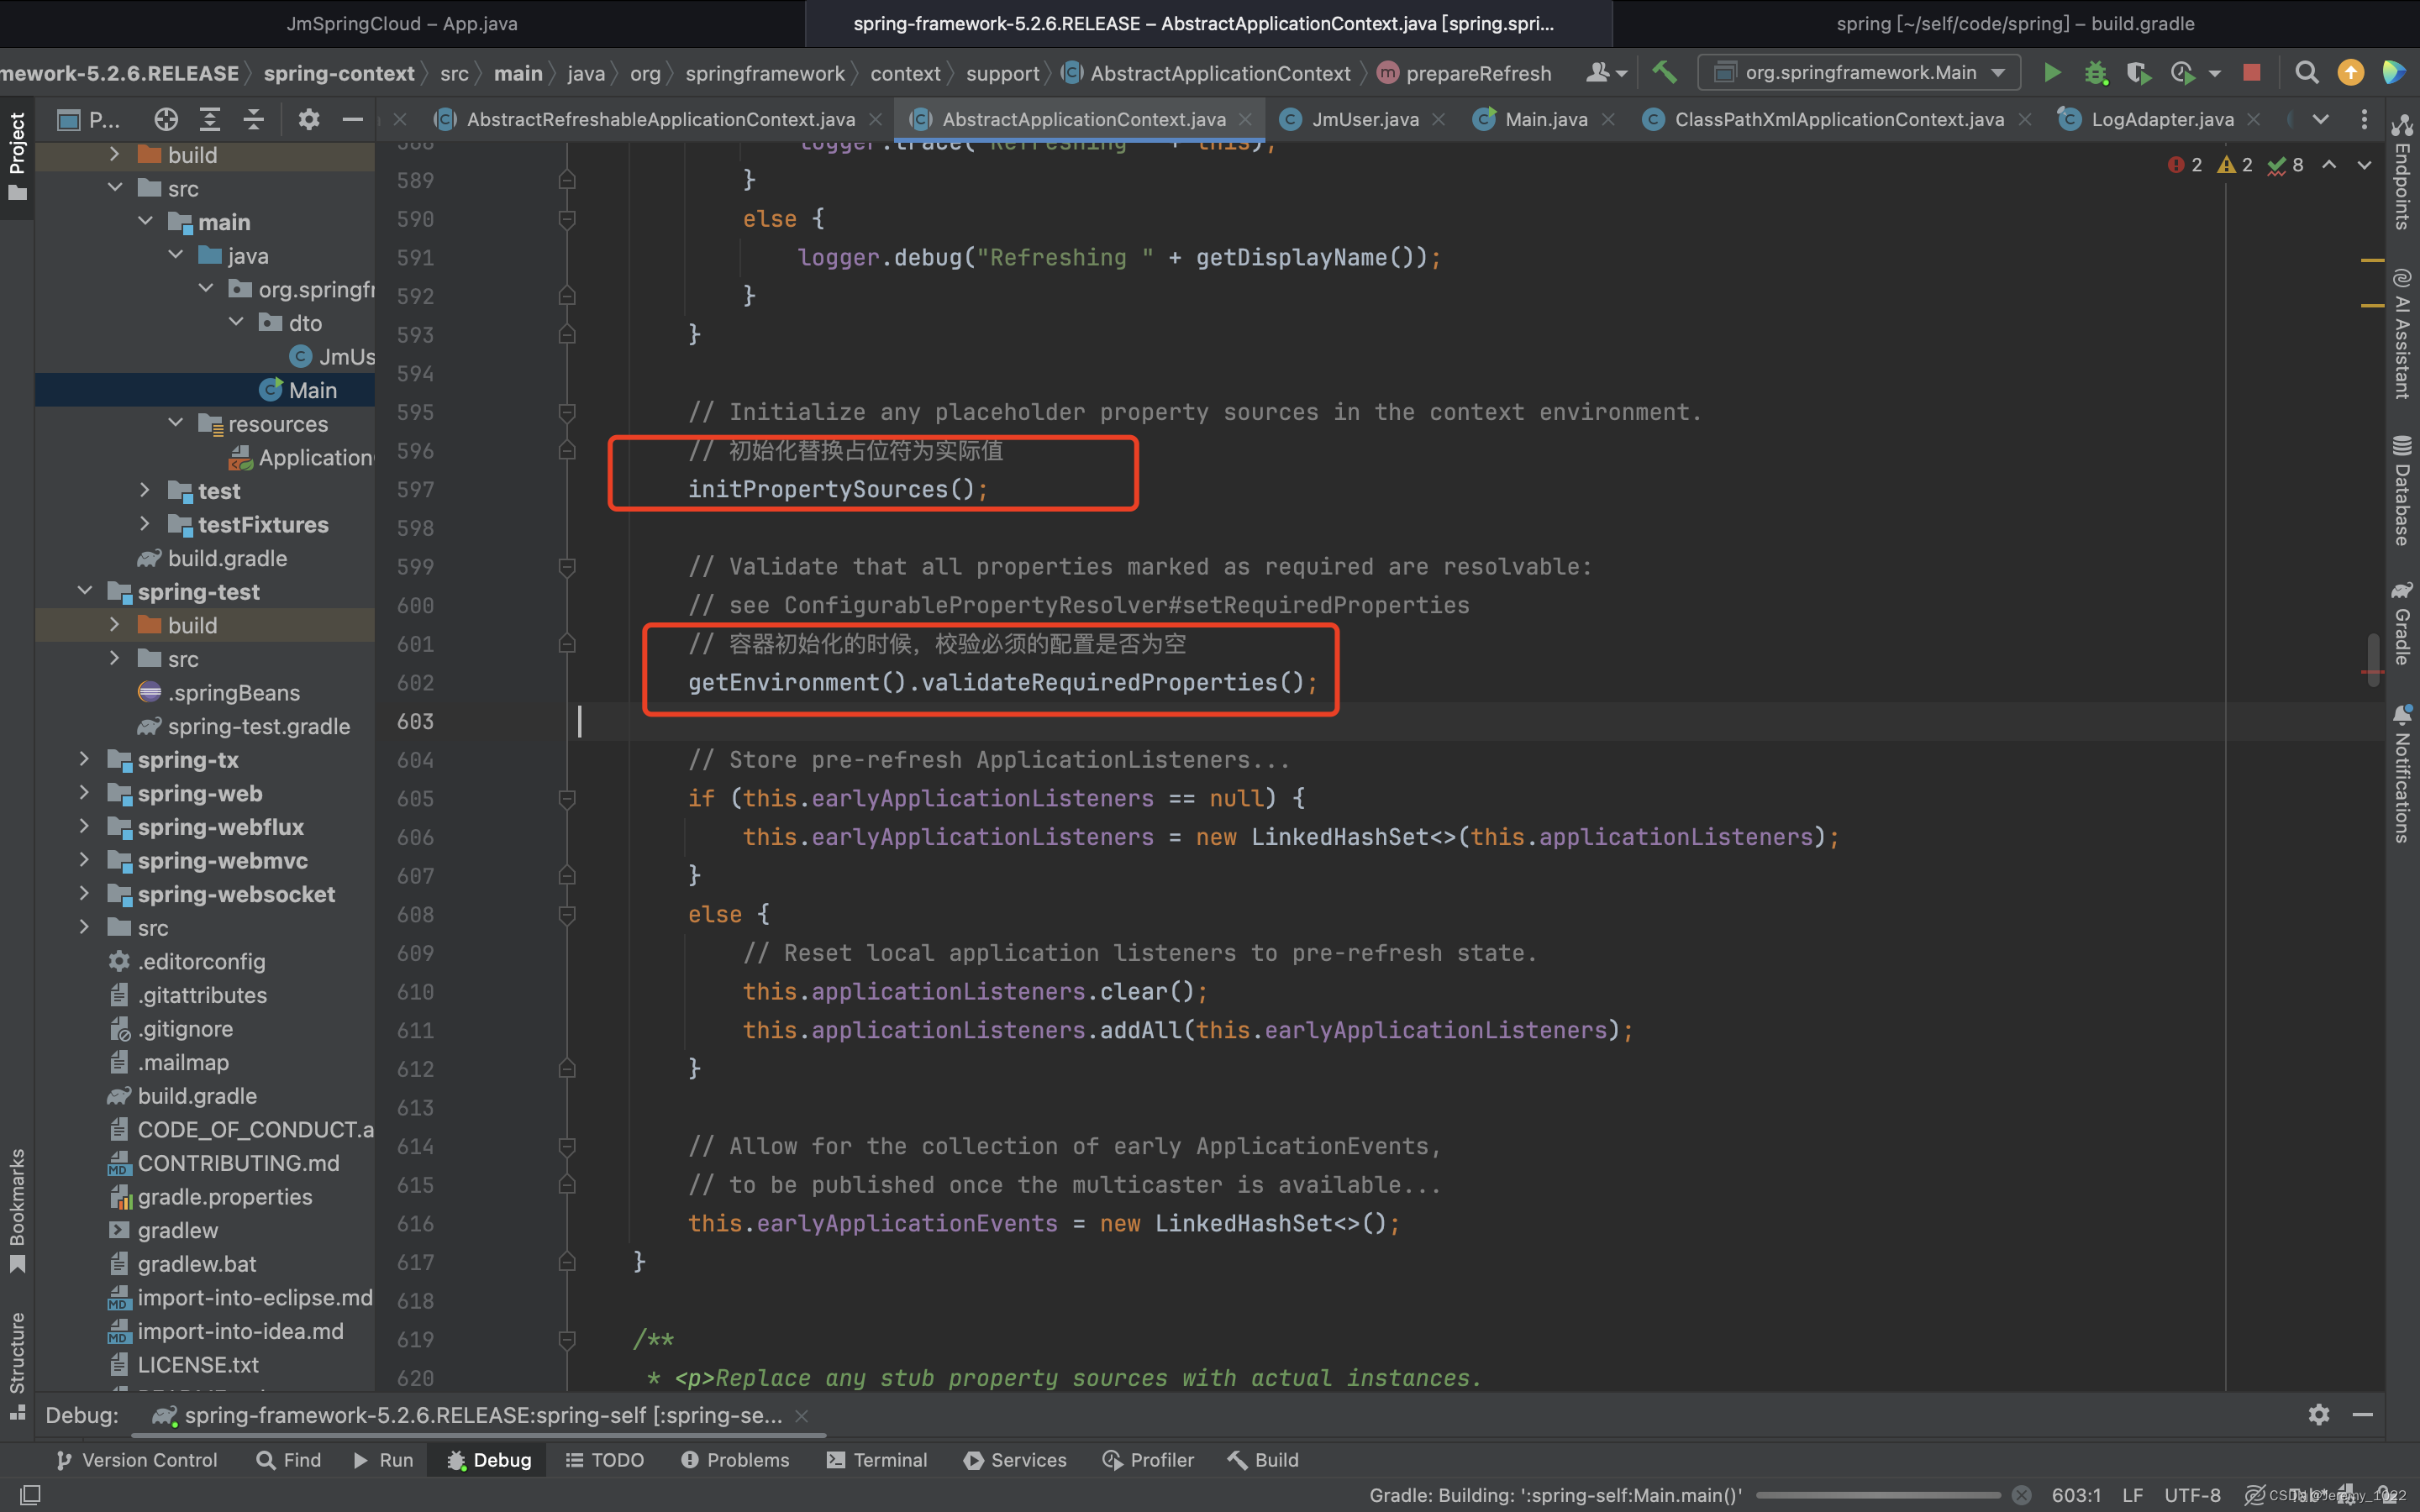
/**
	 * Prepare this context for refreshing, setting its startup date and
	 * active flag as well as performing any initialization of property sources.
	 * 一些初始化设置如:设置容器开始事件、容器状态active设置激活】初始化配置源等。
	 * 1.1、其中关注初始化配置源:这个也是留给子类自己实现,扩展点加一
	 * 1.2、容器初始化的时候,校验必须的配置是否为空,当我们自己对原框架修改的时候,可以通过这个属性加上必要的配置判断
	 *
	 */
	protected void prepareRefresh() {
		// Switch to active.
		this.startupDate = System.currentTimeMillis();
		this.closed.set(false);
		this.active.set(true);

		if (logger.isDebugEnabled()) {
			if (logger.isTraceEnabled()) {
				logger.trace("Refreshing " + this);
			}
			else {
				logger.debug("Refreshing " + getDisplayName());
			}
		}

		// Initialize any placeholder property sources in the context environment.
		// 初始化替换占位符为实际值
		initPropertySources();

		// Validate that all properties marked as required are resolvable:
		// see ConfigurablePropertyResolver#setRequiredProperties
		// 容器初始化的时候,校验必须的配置是否为空
		getEnvironment().validateRequiredProperties();

		// Store pre-refresh ApplicationListeners...
		if (this.earlyApplicationListeners == null) {
			this.earlyApplicationListeners = new LinkedHashSet<>(this.applicationListeners);
		}
		else {
			// Reset local application listeners to pre-refresh state.
			this.applicationListeners.clear();
			this.applicationListeners.addAll(this.earlyApplicationListeners);
		}

		// Allow for the collection of early ApplicationEvents,
		// to be published once the multicaster is available...
		this.earlyApplicationEvents = new LinkedHashSet<>();
	}
可以看到,该方法大部分时间只是做了初始化的设置如开始时间、容器状态初始化等,聚焦下
initPropertySources方法
	/**
	 * <p>Replace any stub property sources with actual instances.
	 * @see org.springframework.core.env.PropertySource.StubPropertySource
	 * @see org.springframework.web.context.support.WebApplicationContextUtils#initServletPropertySources
	 */
	protected void initPropertySources() {
		// For subclasses: do nothing by default.
	}
Spring最经典的设计之一,空实现方法方法的权限级别为protected。给子类自己实现,扩展点加一。这里单独提出来和大家看看,因为后面我们能看到很多类似的代码。这也是Spring是一个易扩展框架的原因之一。
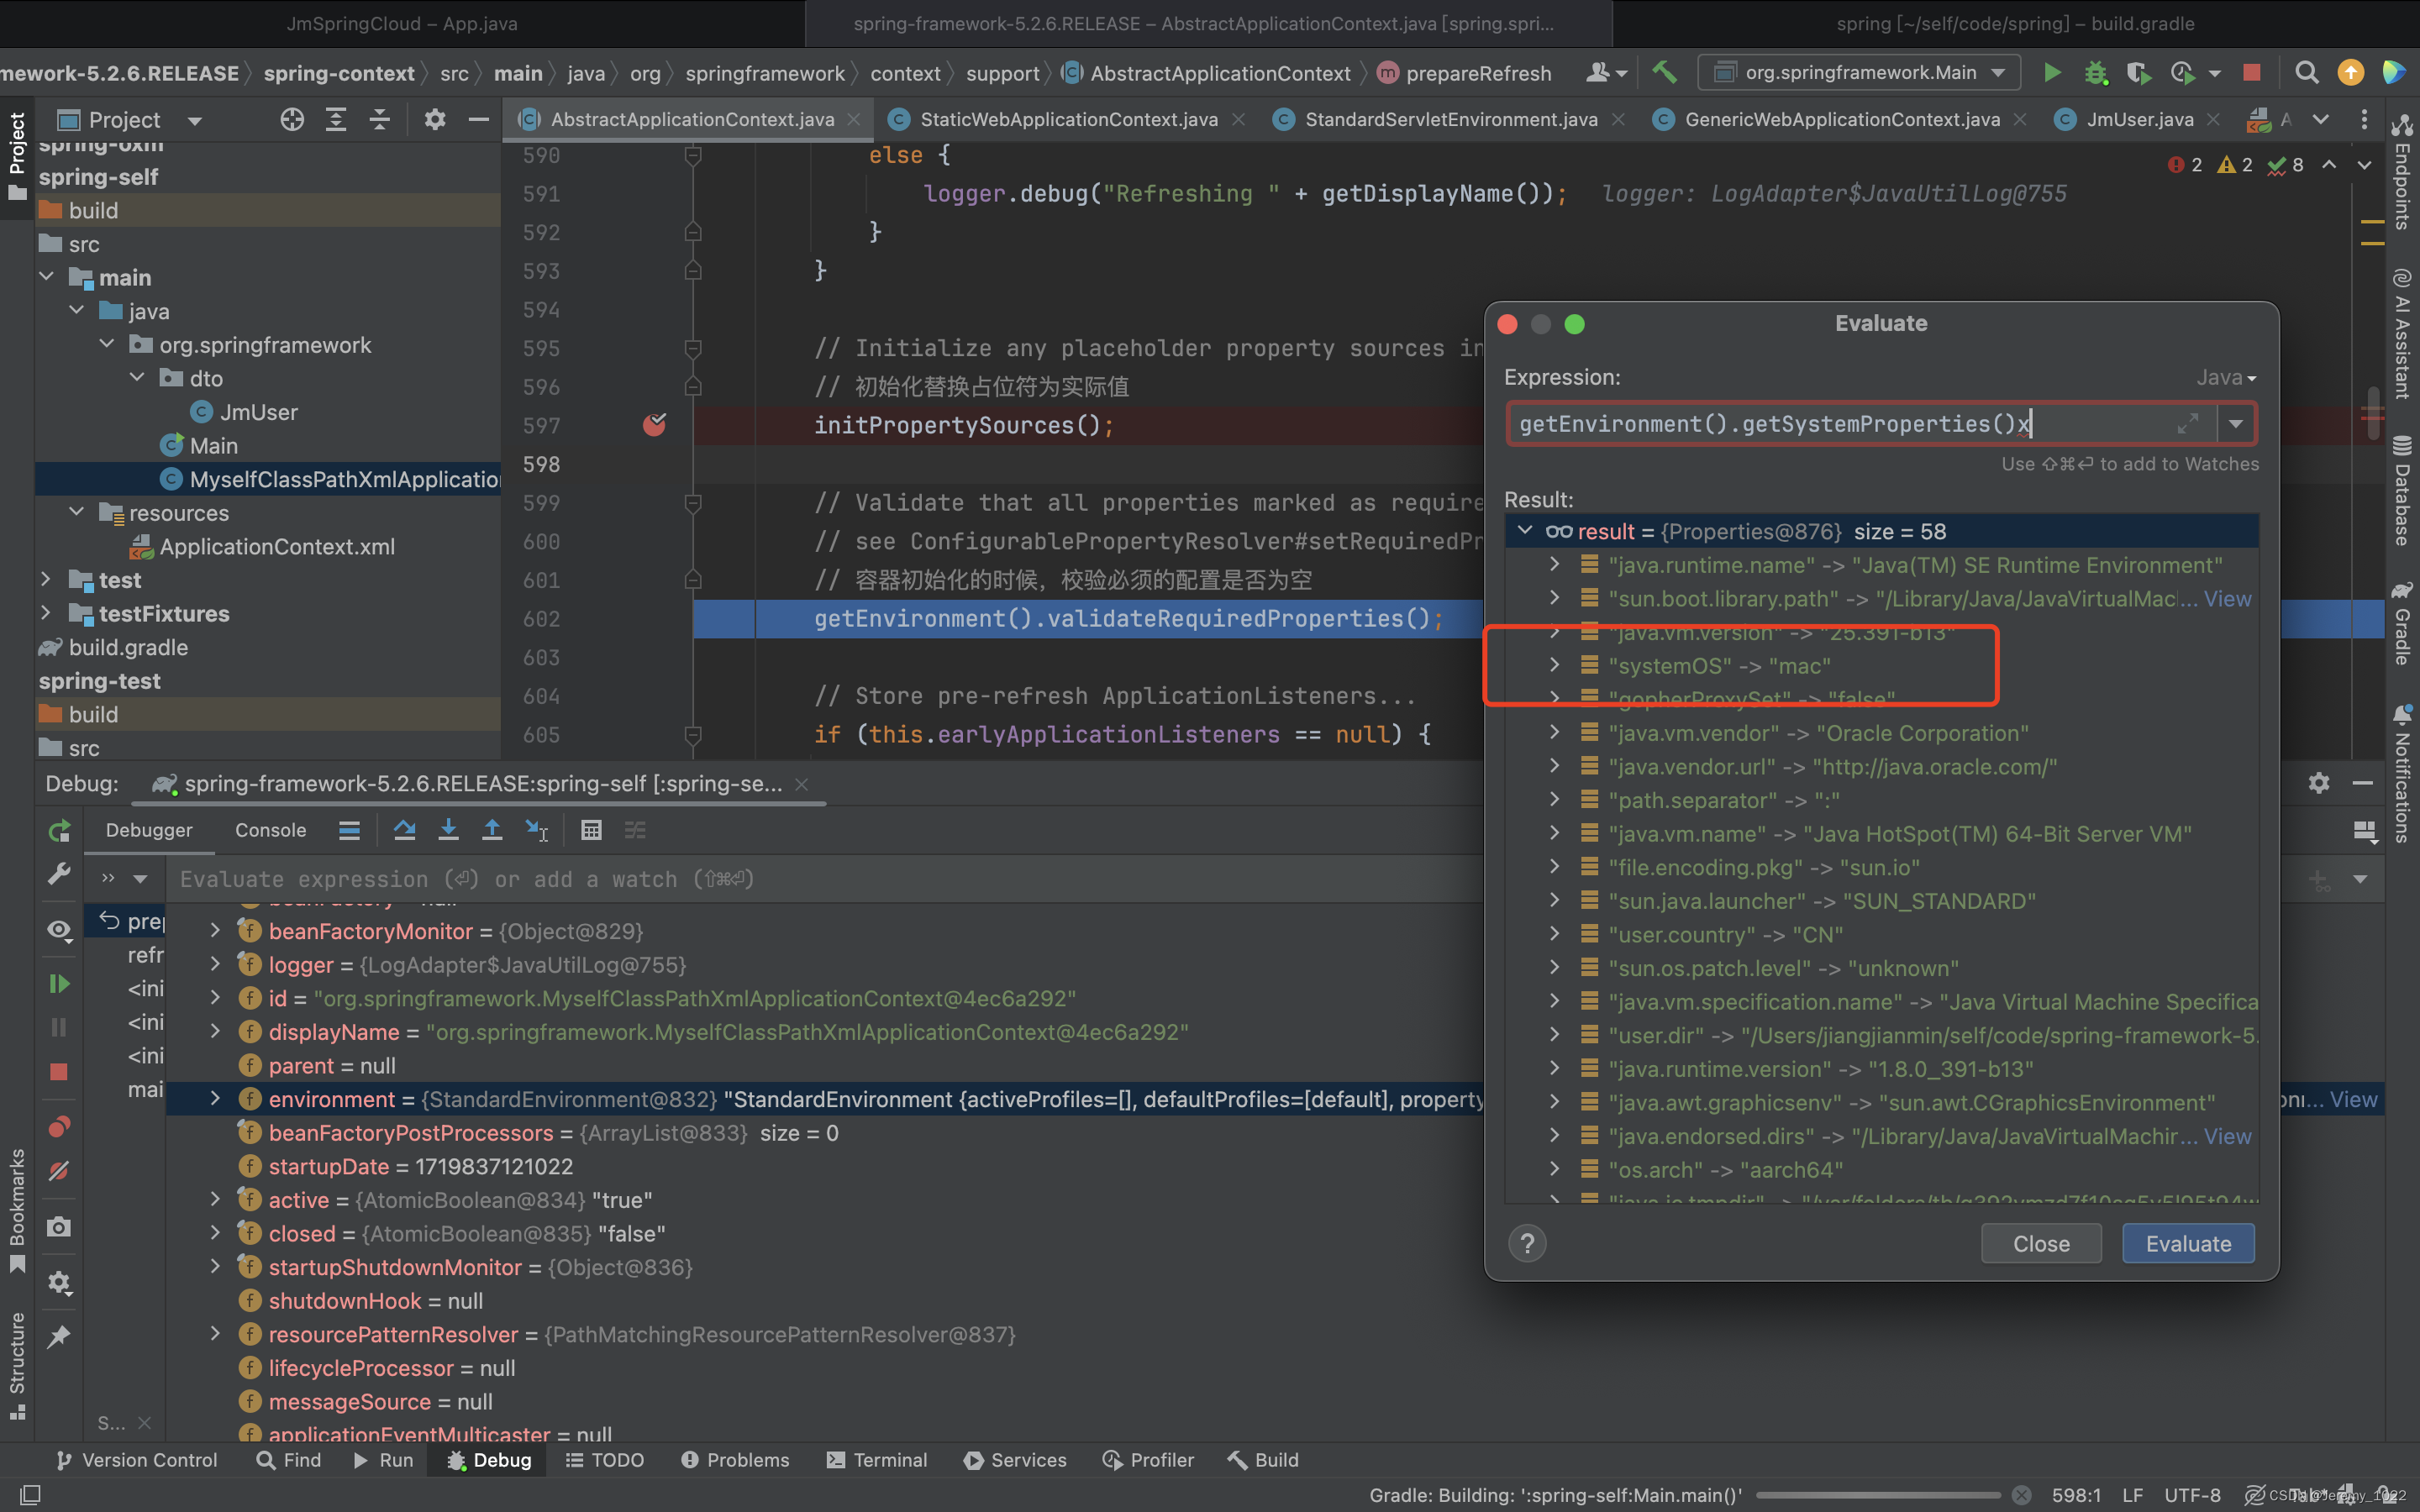
说完这个方法的设计,下面再来看看这个方法具体干了什么。看注释说是为了替换占位符。既然这样我们自己来重写这个方法试试看就知道啦。重写代码如下:
public class MyselfClassPathXmlApplicationContext extends ClassPathXmlApplicationContext {
	/**
	 * Create a new ClassPathXmlApplicationContext, loading the definitions
	 * from the given XML file and automatically refreshing the context.
	 * @param configLocations resource location
	 * @throws BeansException if context creation failed
	 */
	public MyselfClassPathXmlApplicationContext(String... configLocations) throws BeansException {
		super(configLocations);
	}

	@Override
	protected void initPropertySources() {
		System.out.println("自定义 initPropertySources");
		getEnvironment().getSystemProperties().put("systemOS", "mac");
	}


public class Main {
	public static void main(String[] args) {
		ApplicationContext context = new MyselfClassPathXmlApplicationContext("applicationContext.xml");
		JmUser jmUser = (JmUser)context.getBean("jmUser");
		System.out.println(jmUser.getName());
		System.out.println(jmUser.getAge());

	}
}
执行完initPropertySources方法以后,发现环境变量多了我们设置的代码systemOS,后续在需要的地方可以替换成我们所需要的值。
 接着我们来看prepareRefresh下一个方法:
getEnvironment().validateRequiredProperties();
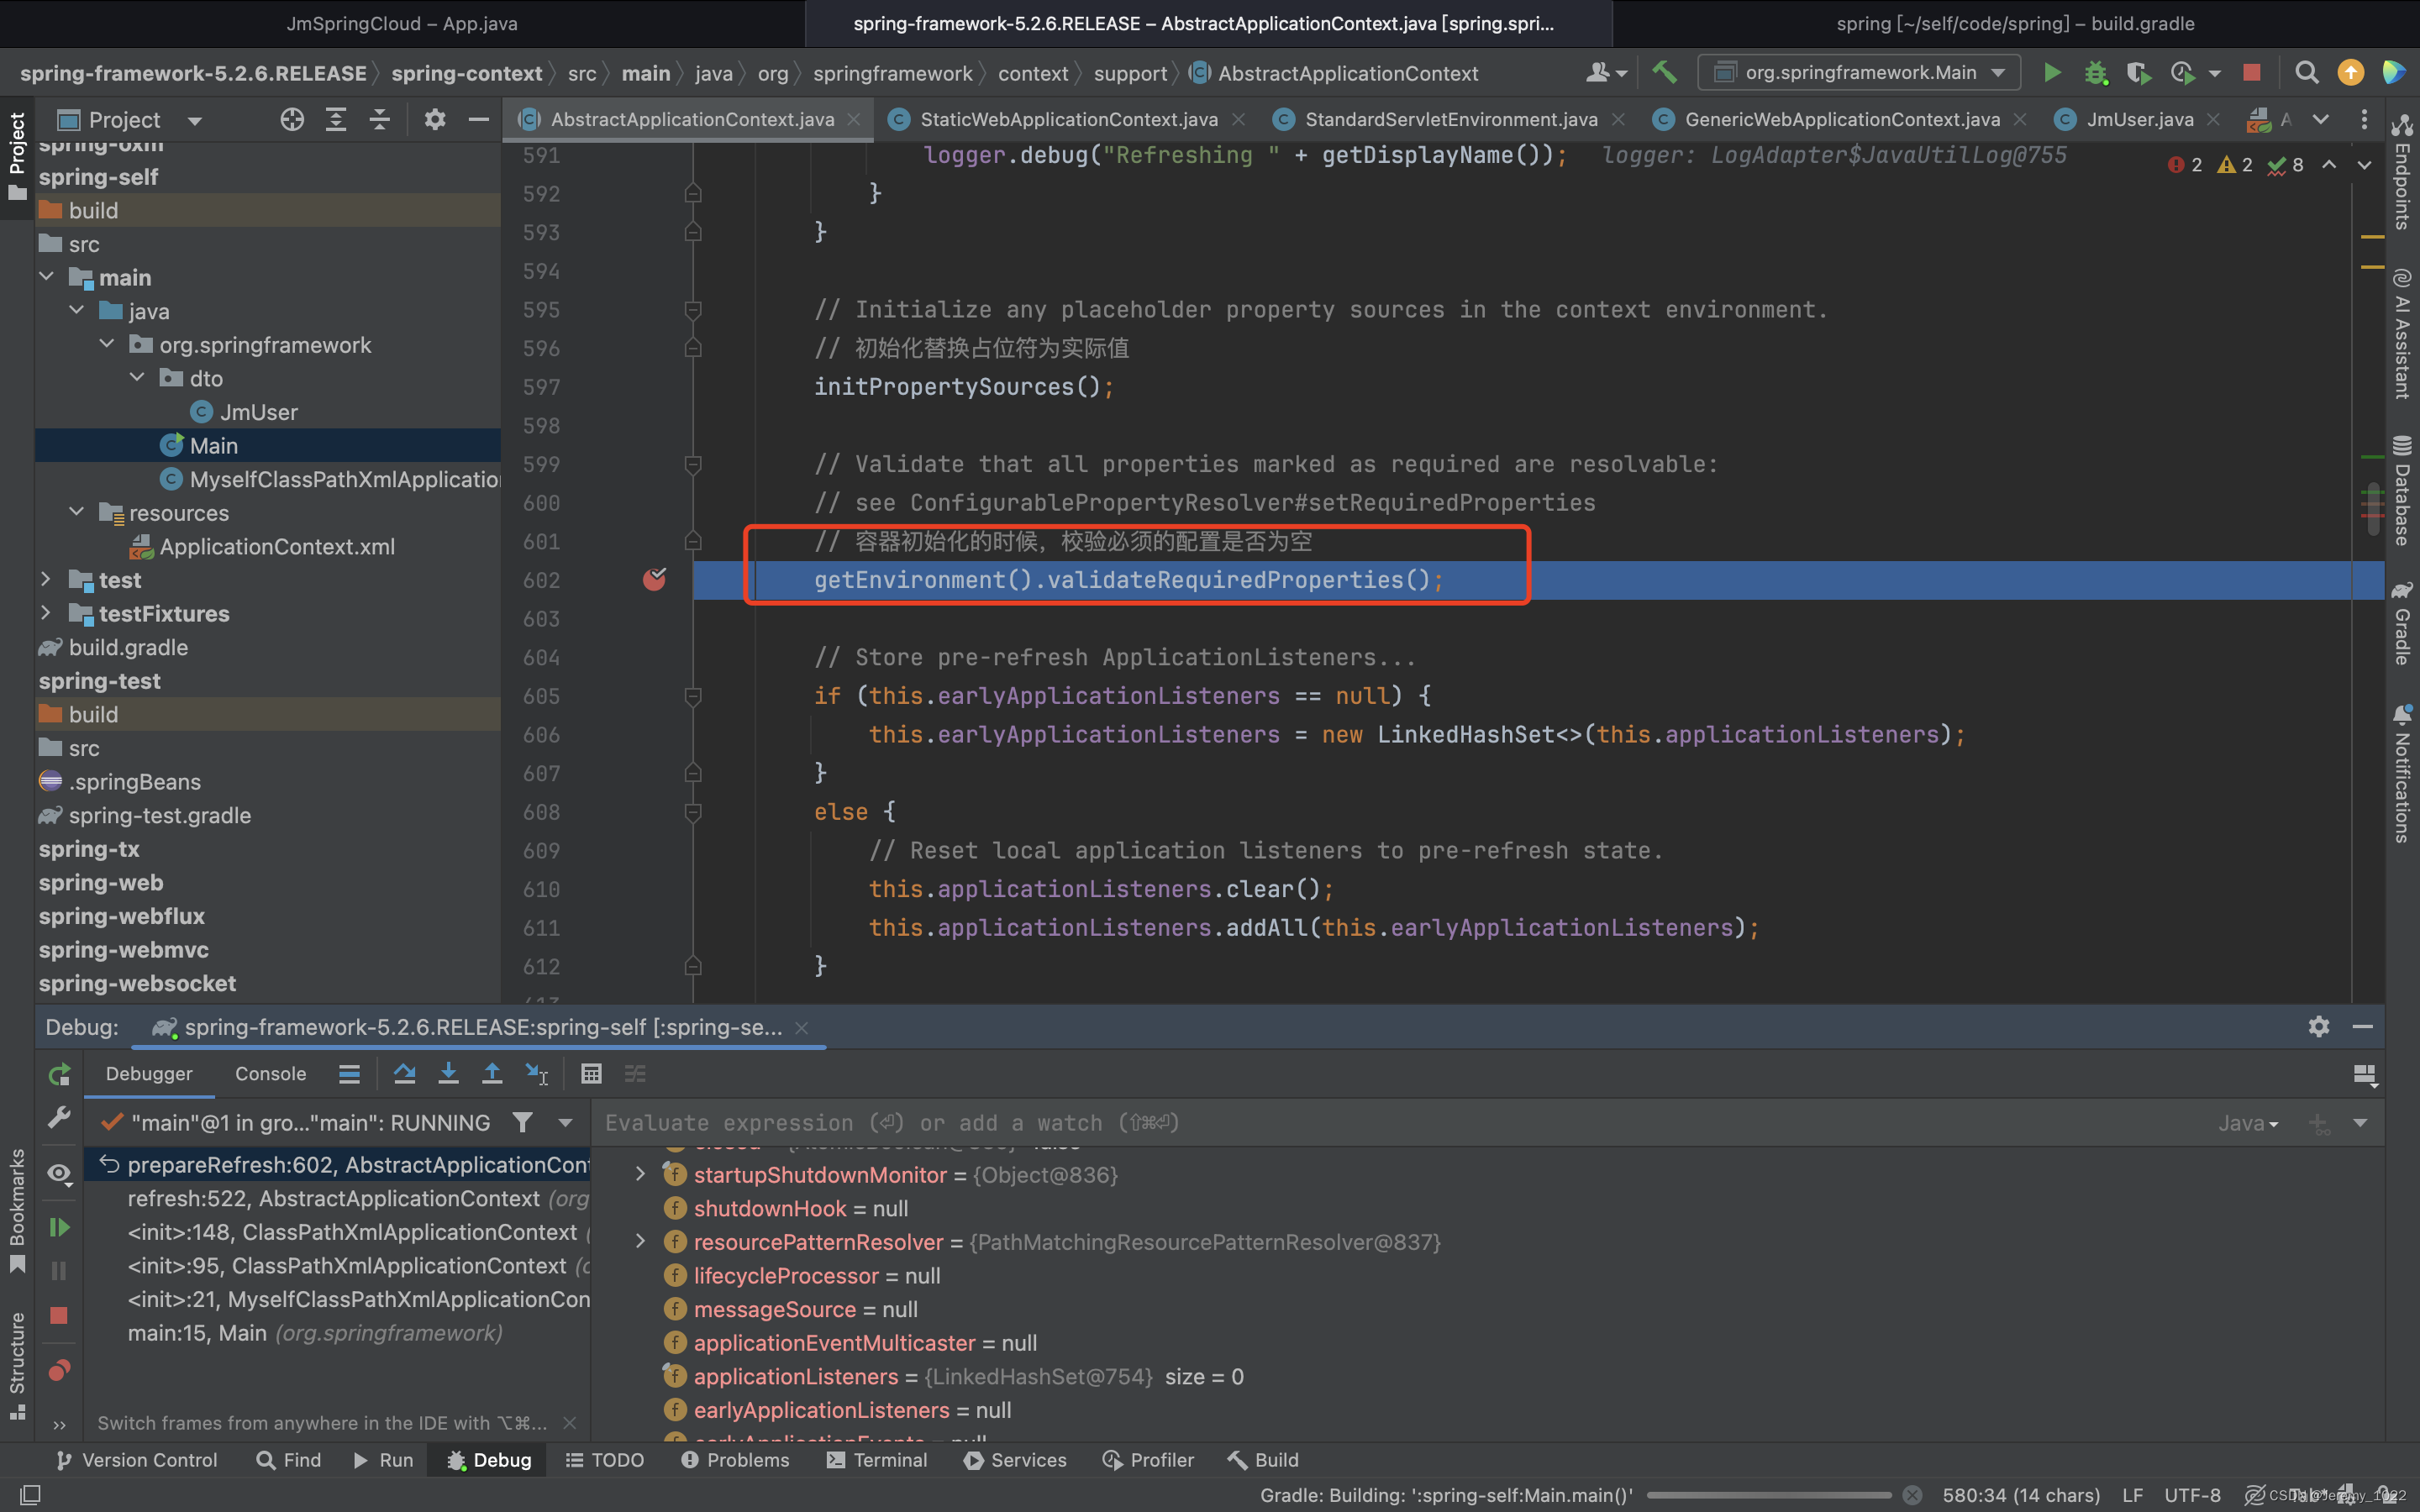
老样子根据注释和方法名称简答猜测一下,应该是用来校验是否需要检验某个必须的属性。猜测后进入代码验证一波。
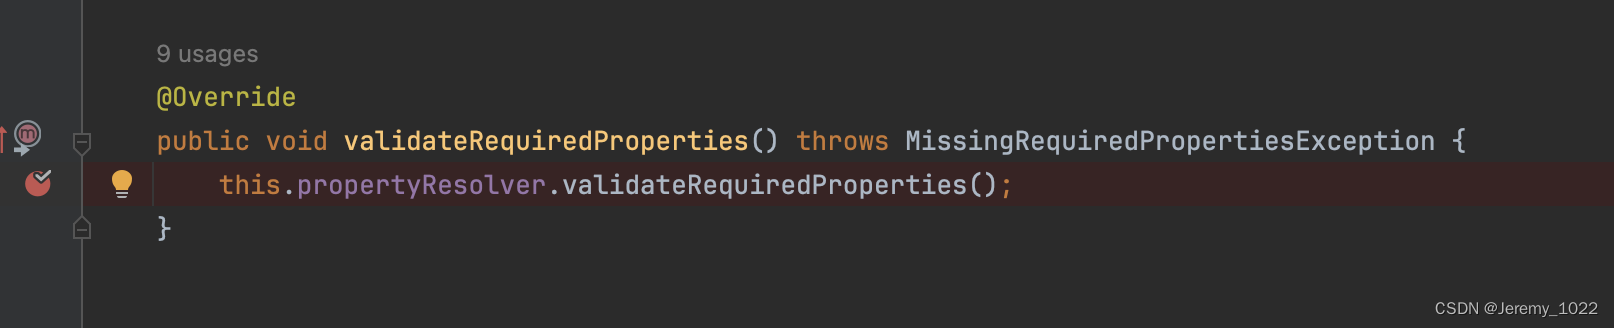
看代码是自己的成员属性propertyResolver进行调用的,在进入方法看下:
	@Override
	public void validateRequiredProperties() {
		MissingRequiredPropertiesException ex = new MissingRequiredPropertiesException();
		for (String key : this.requiredProperties) {
			if (this.getProperty(key) == null) {
				ex.addMissingRequiredProperty(key);
			}
		}
		if (!ex.getMissingRequiredProperties().isEmpty()) {
			throw ex;
		}
	}
上述代码主要是遍历requirePrpperties属性,将不存在的key存入ex中,待循环结束以后抛出异常。目前我们的代码属性为空。我们再改写下上述代码看看。
package org.springframework;

import org.springframework.beans.BeansException;
import org.springframework.context.support.ClassPathXmlApplicationContext;

/**
 * @author Jeremy
 * @version 1.0
 * @description: 自定义容器
 * @date 2024/7/1 20:17
 */
public class MyselfClassPathXmlApplicationContext extends ClassPathXmlApplicationContext {
	/**
	 * Create a new ClassPathXmlApplicationContext, loading the definitions
	 * from the given XML file and automatically refreshing the context.
	 * @param configLocations resource location
	 * @throws BeansException if context creation failed
	 */
	public MyselfClassPathXmlApplicationContext(String... configLocations) throws BeansException {
		super(configLocations);
	}

	@Override
	protected void initPropertySources() {
		System.out.println("自定义 initPropertySources");
//		getEnvironment().getSystemProperties().put("systemOS", "mac");
		getEnvironment().setRequiredProperties("systemOS");
	}
}
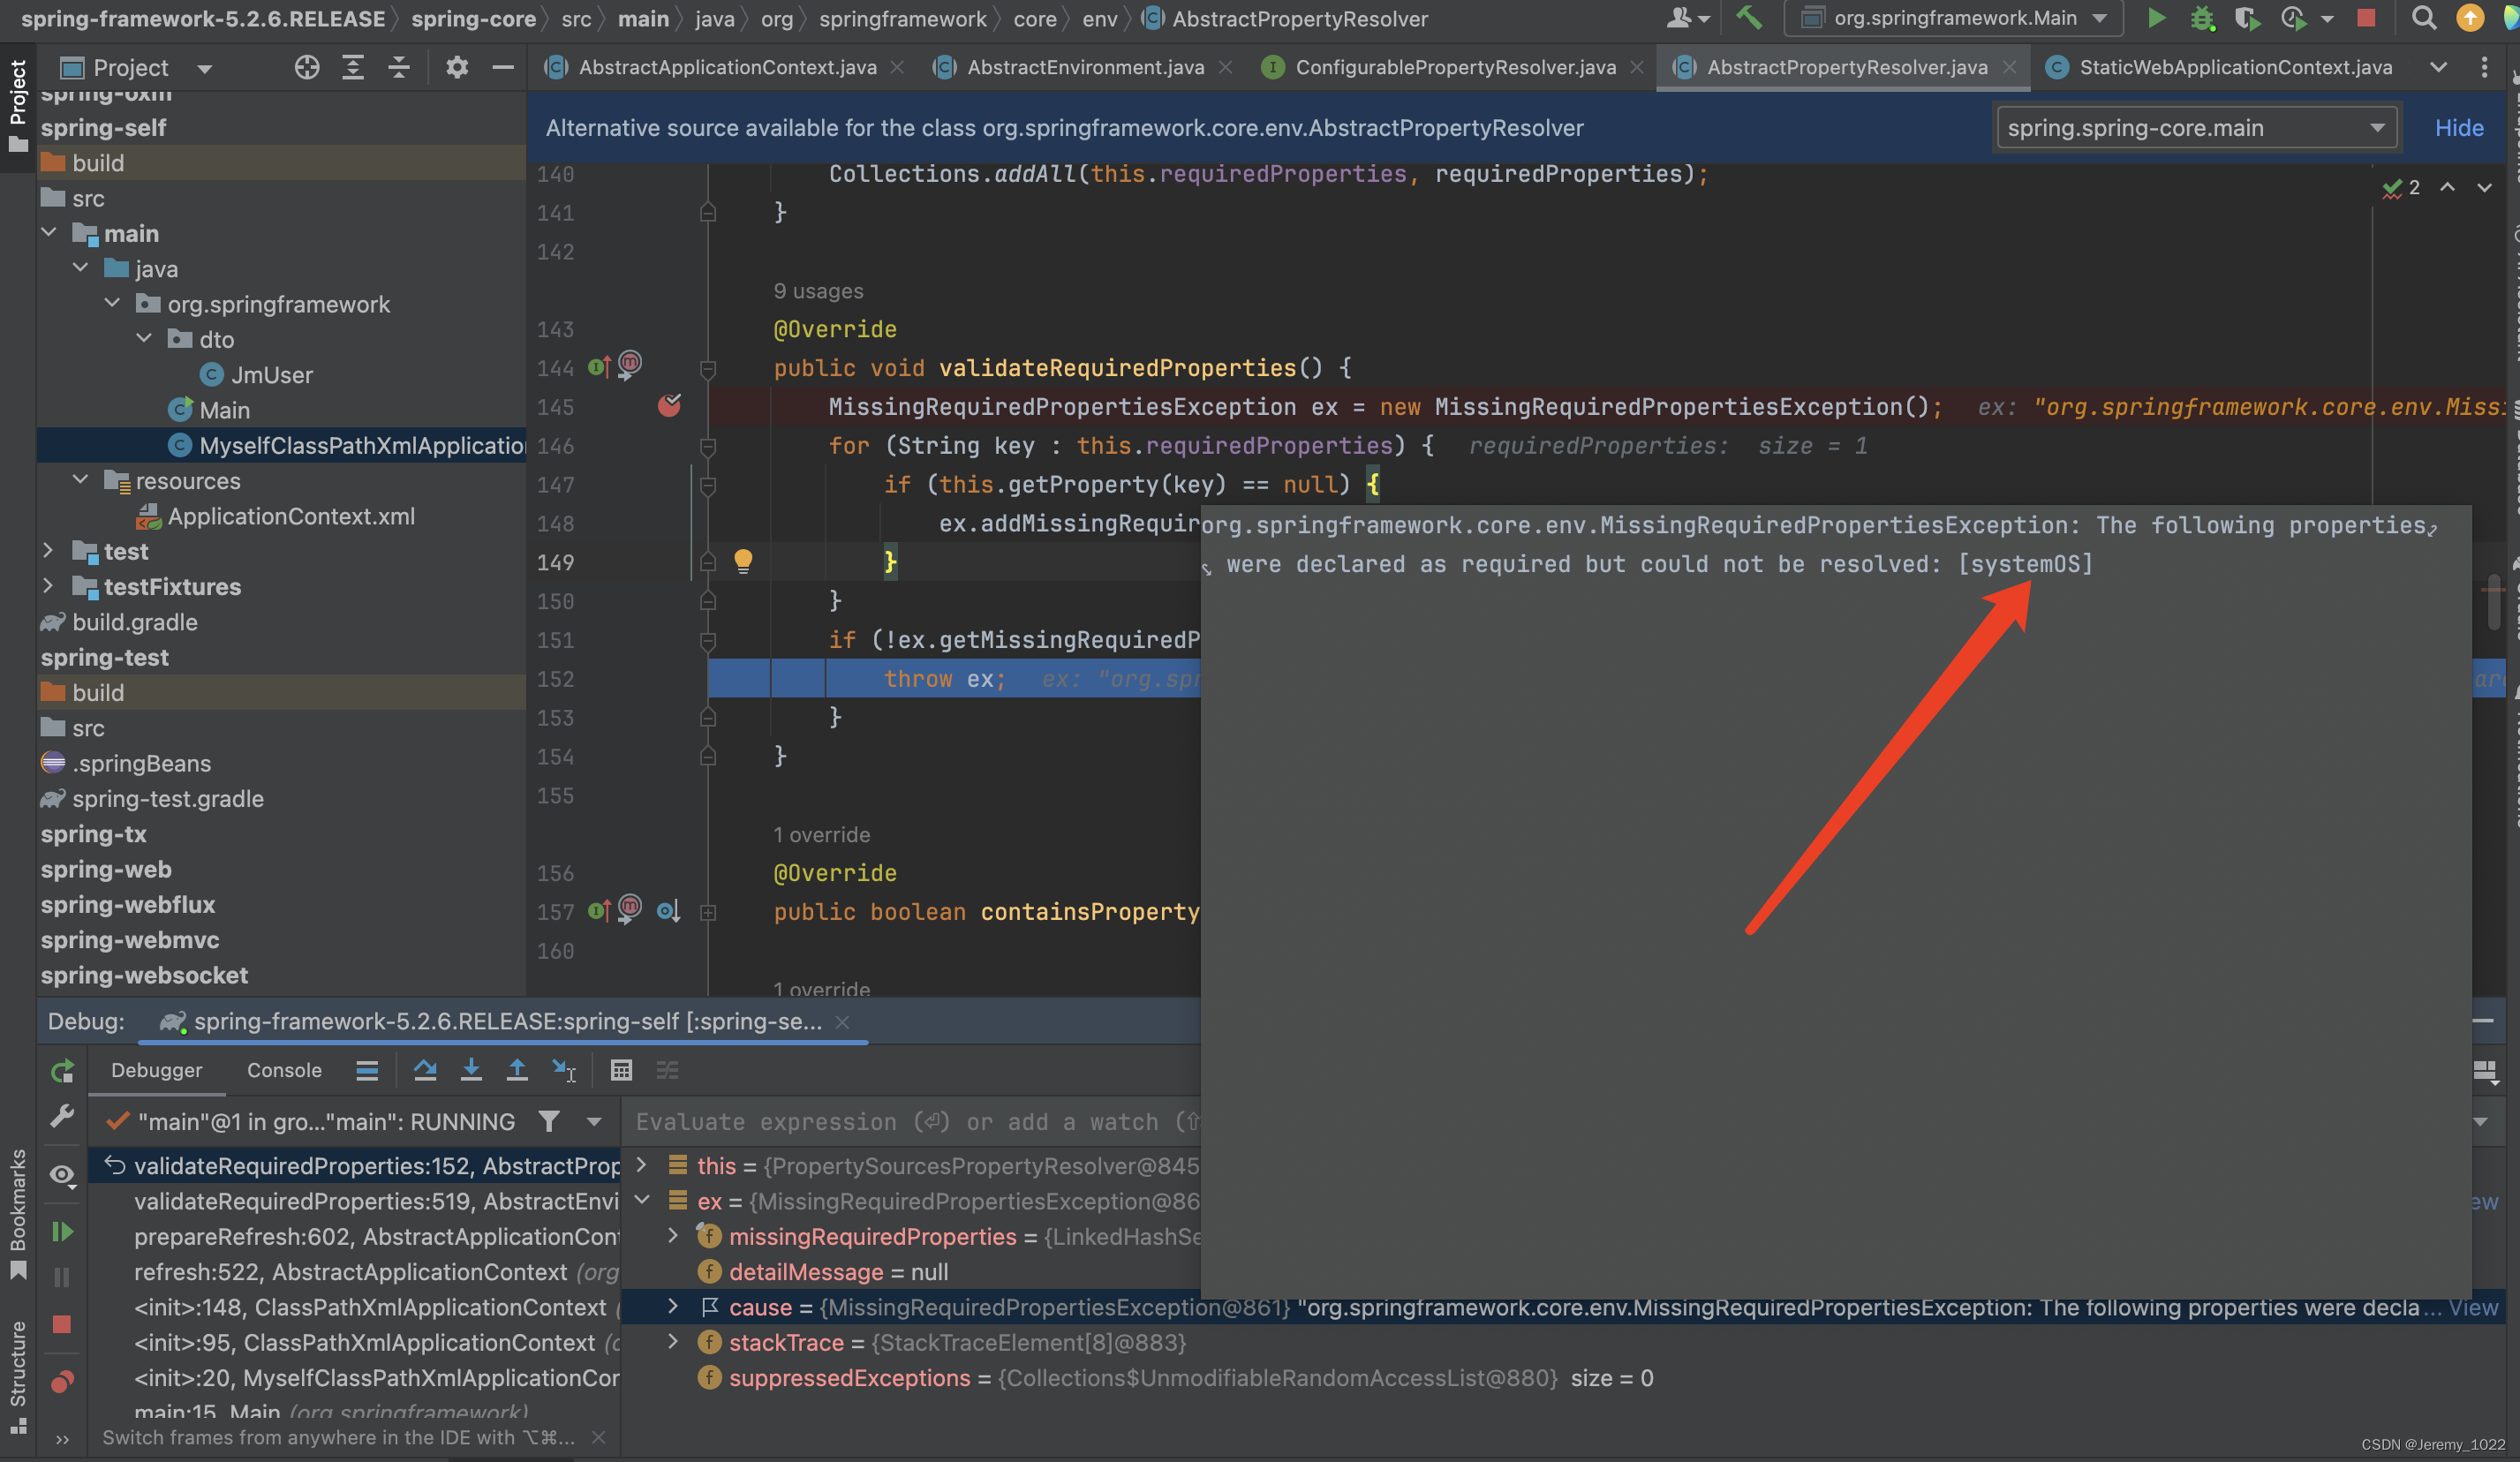
堆栈日志如下
自定义 initPropertySources
Disconnected from the target VM, address: 'localhost:50403', transport: 'socket'
Exception in thread "main" org.springframework.core.env.MissingRequiredPropertiesException: The following properties were declared as required but could not be resolved: [systemOS]
at org.springframework.core.env.AbstractPropertyResolver.validateRequiredProperties(AbstractPropertyResolver.java:145)
at org.springframework.core.env.AbstractEnvironment.validateRequiredProperties(AbstractEnvironment.java:519)
at org.springframework.context.support.AbstractApplicationContext.prepareRefresh(AbstractApplicationContext.java:602)
at org.springframework.context.support.AbstractApplicationContext.refresh(AbstractApplicationContext.java:522)
at org.springframework.context.support.ClassPathXmlApplicationContext.<init>(ClassPathXmlApplicationContext.java:148)
at org.springframework.context.support.ClassPathXmlApplicationContext.<init>(ClassPathXmlApplicationContext.java:95)
at org.springframework.MyselfClassPathXmlApplicationContext.<init>(MyselfClassPathXmlApplicationContext.java:20)
at org.springframework.Main.main(Main.java:15)
放开上面注释:正常运行。通过上述两个简单的实例我们可以通过重写上述代码为我们Spring容器提供基础的校验和设置对应的值。方便后续开发。到这里我们初始化容器上下文prepareRefresh方法告一段落。
总结
目前我们代码进程如下图所示:
下一节我们正式进入初始化容器,看看众所周知的Bean Factory到底怎么来的。


 916
916

 被折叠的 条评论
为什么被折叠?
被折叠的 条评论
为什么被折叠?
 到【灌水乐园】发言


