


【springboot集成xxl-job】
一.gitee地址
直接下载可用 https://gitee.com/shawsongyue/aurora.git
模块:aurora_xxl_job
二.mysql安装教程
参考我的另一篇文章:https://blog.csdn.net/weixin_40736233/article/details/135582926?spm=1001.2014.3001.5501
三.集成xxl-job-admin管理页面步骤
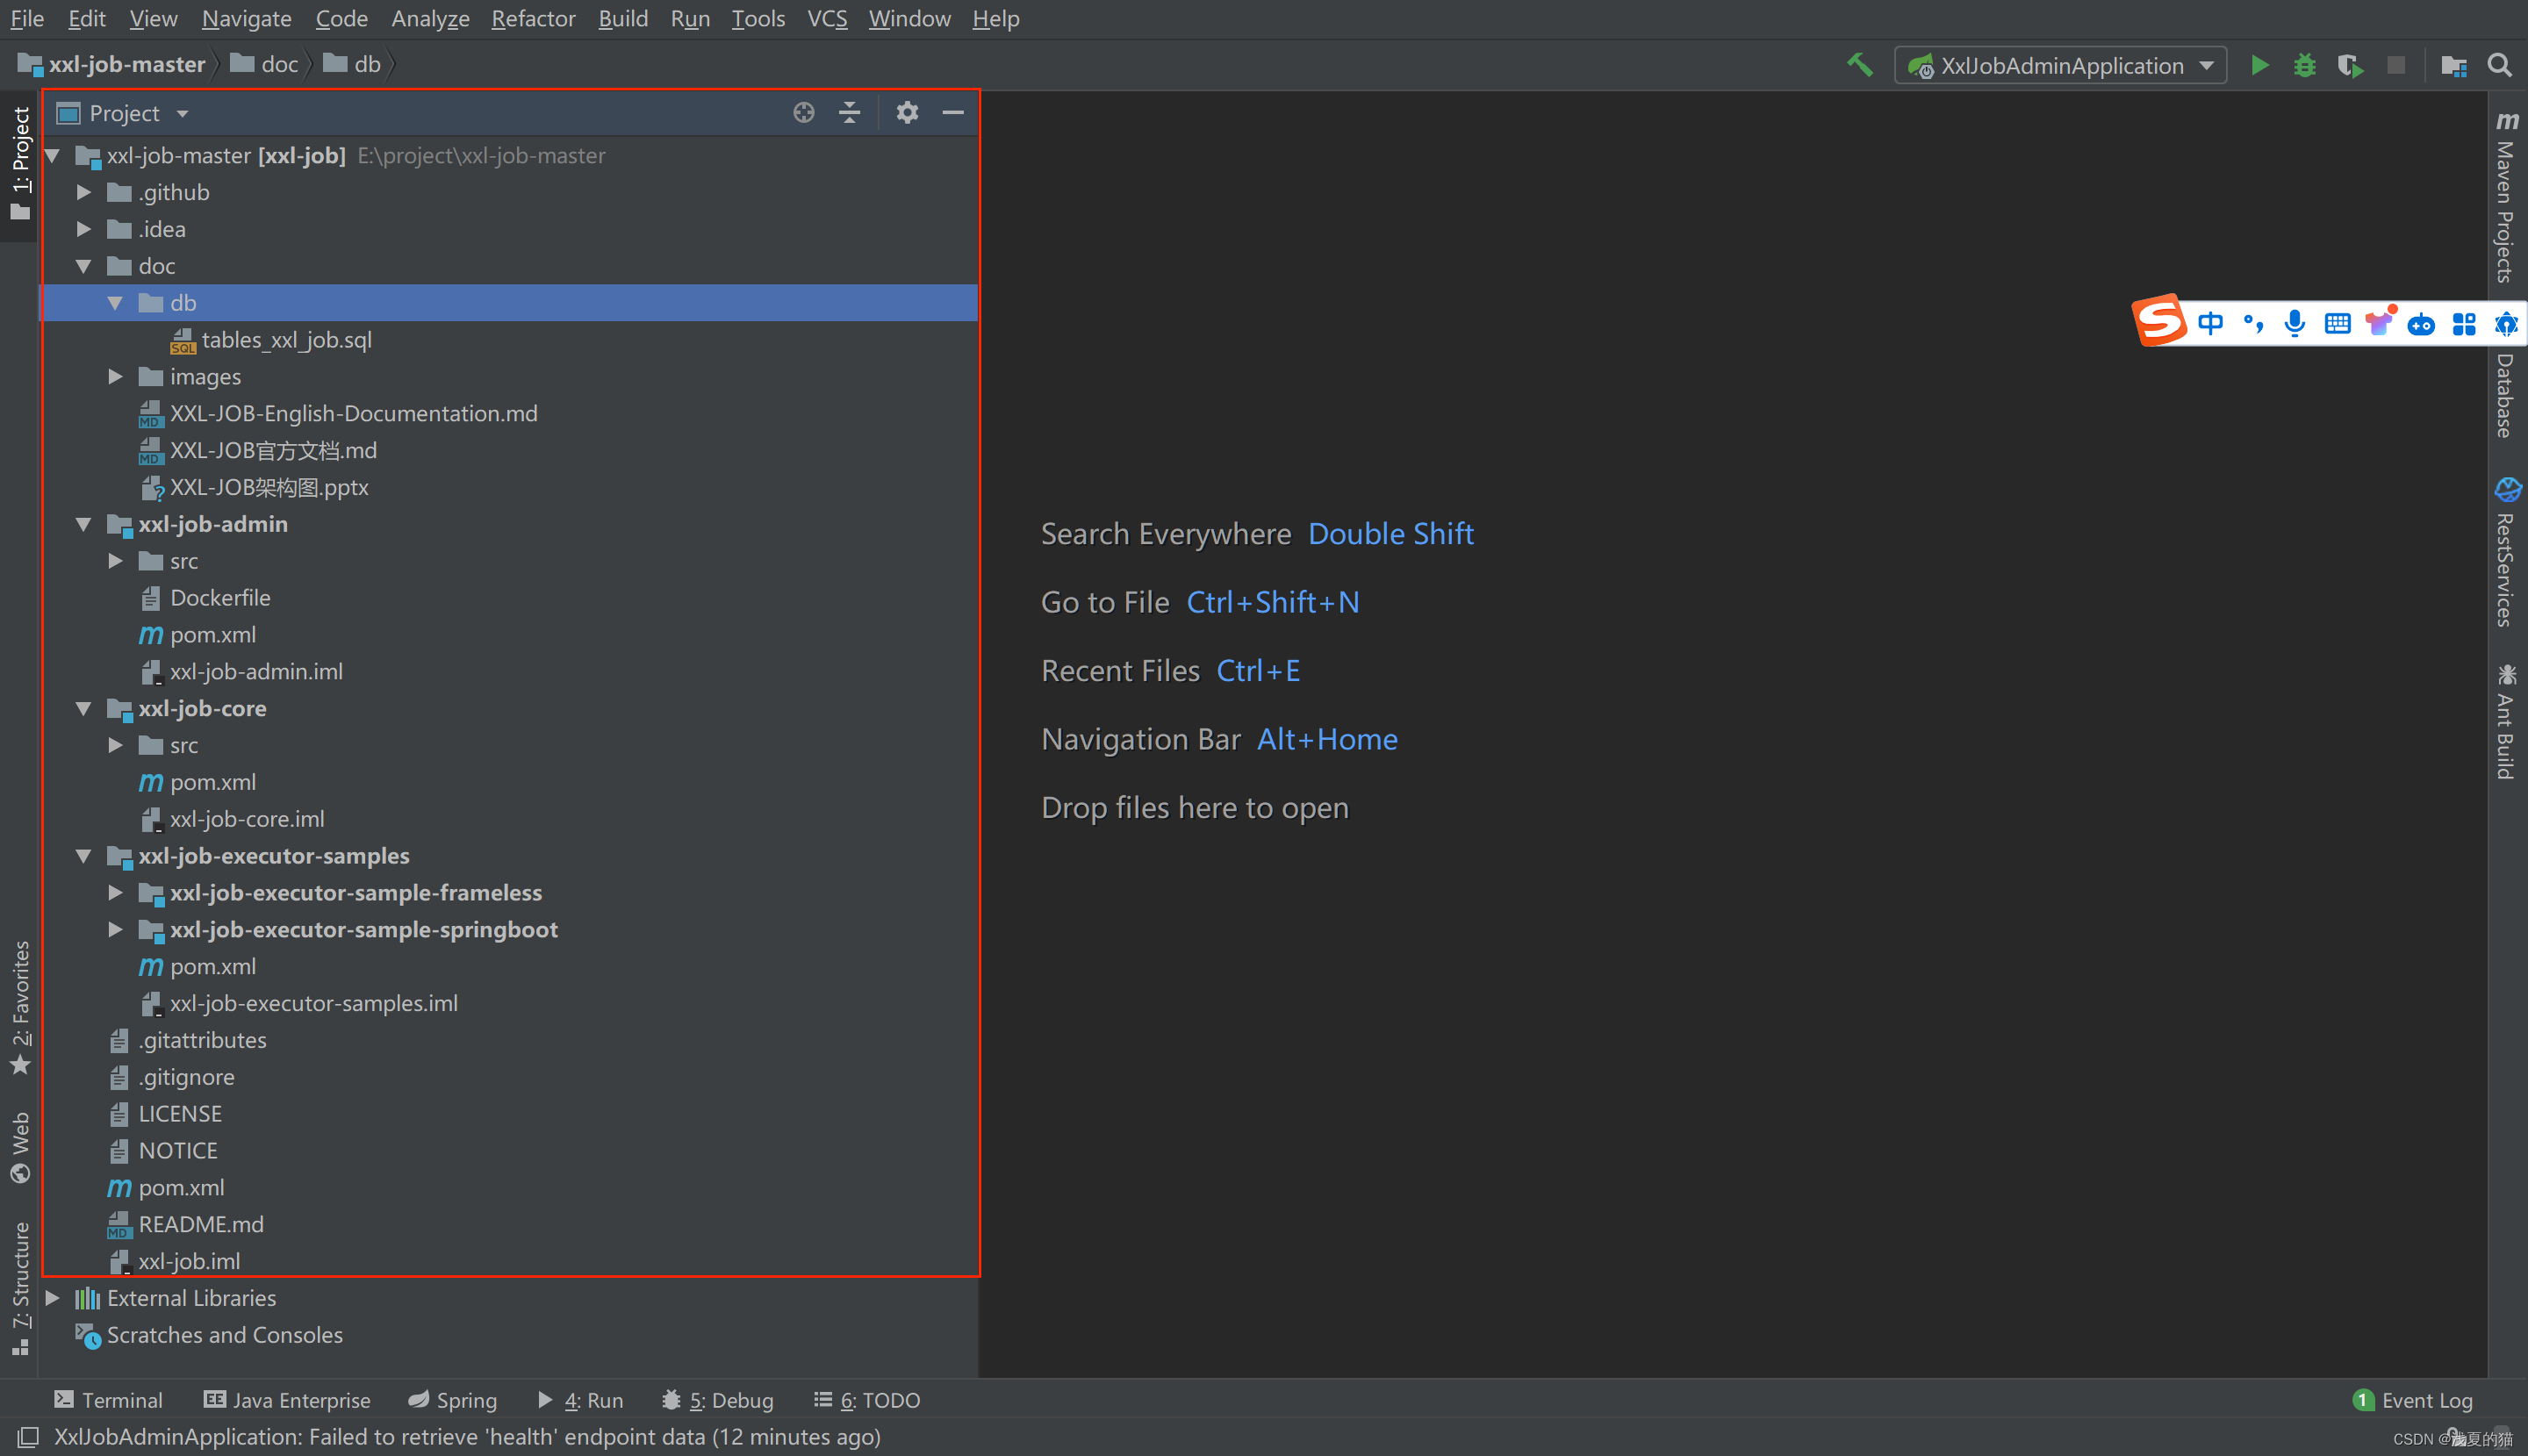
1.下载xxl-job-admin源码
#1.下载源码,解压后用idea打开xxl-job项目,如下图
GitHub地址:http://github.com/xuxueli/xxl-job
Gitee地址:https://gitee.com/xuxueli0323/xxl-job
2.创建数据库以及相关表
执行源码ddl路径: /doc/db/tables_xxl_job.sql
3.修改xxl-job-admin相关配置
源码配置路径: /xxl-job/xxl-job-admin/src/main/resources/application.properties
#修改为你自己的数据库以及账号密码
spring.datasource.url=jdbc:mysql://127.0.0.1:3306/xxl_job?useUnicode=true&characterEncoding=UTF-8&autoReconnect=true&serverTimezone=Asia/Shanghai
spring.datasource.username=root
spring.datasource.password=xiaosongyue.1997
4.直接启动服务
xxl-job-admin模块下的主启动类:XxlJobAdminApplication.class
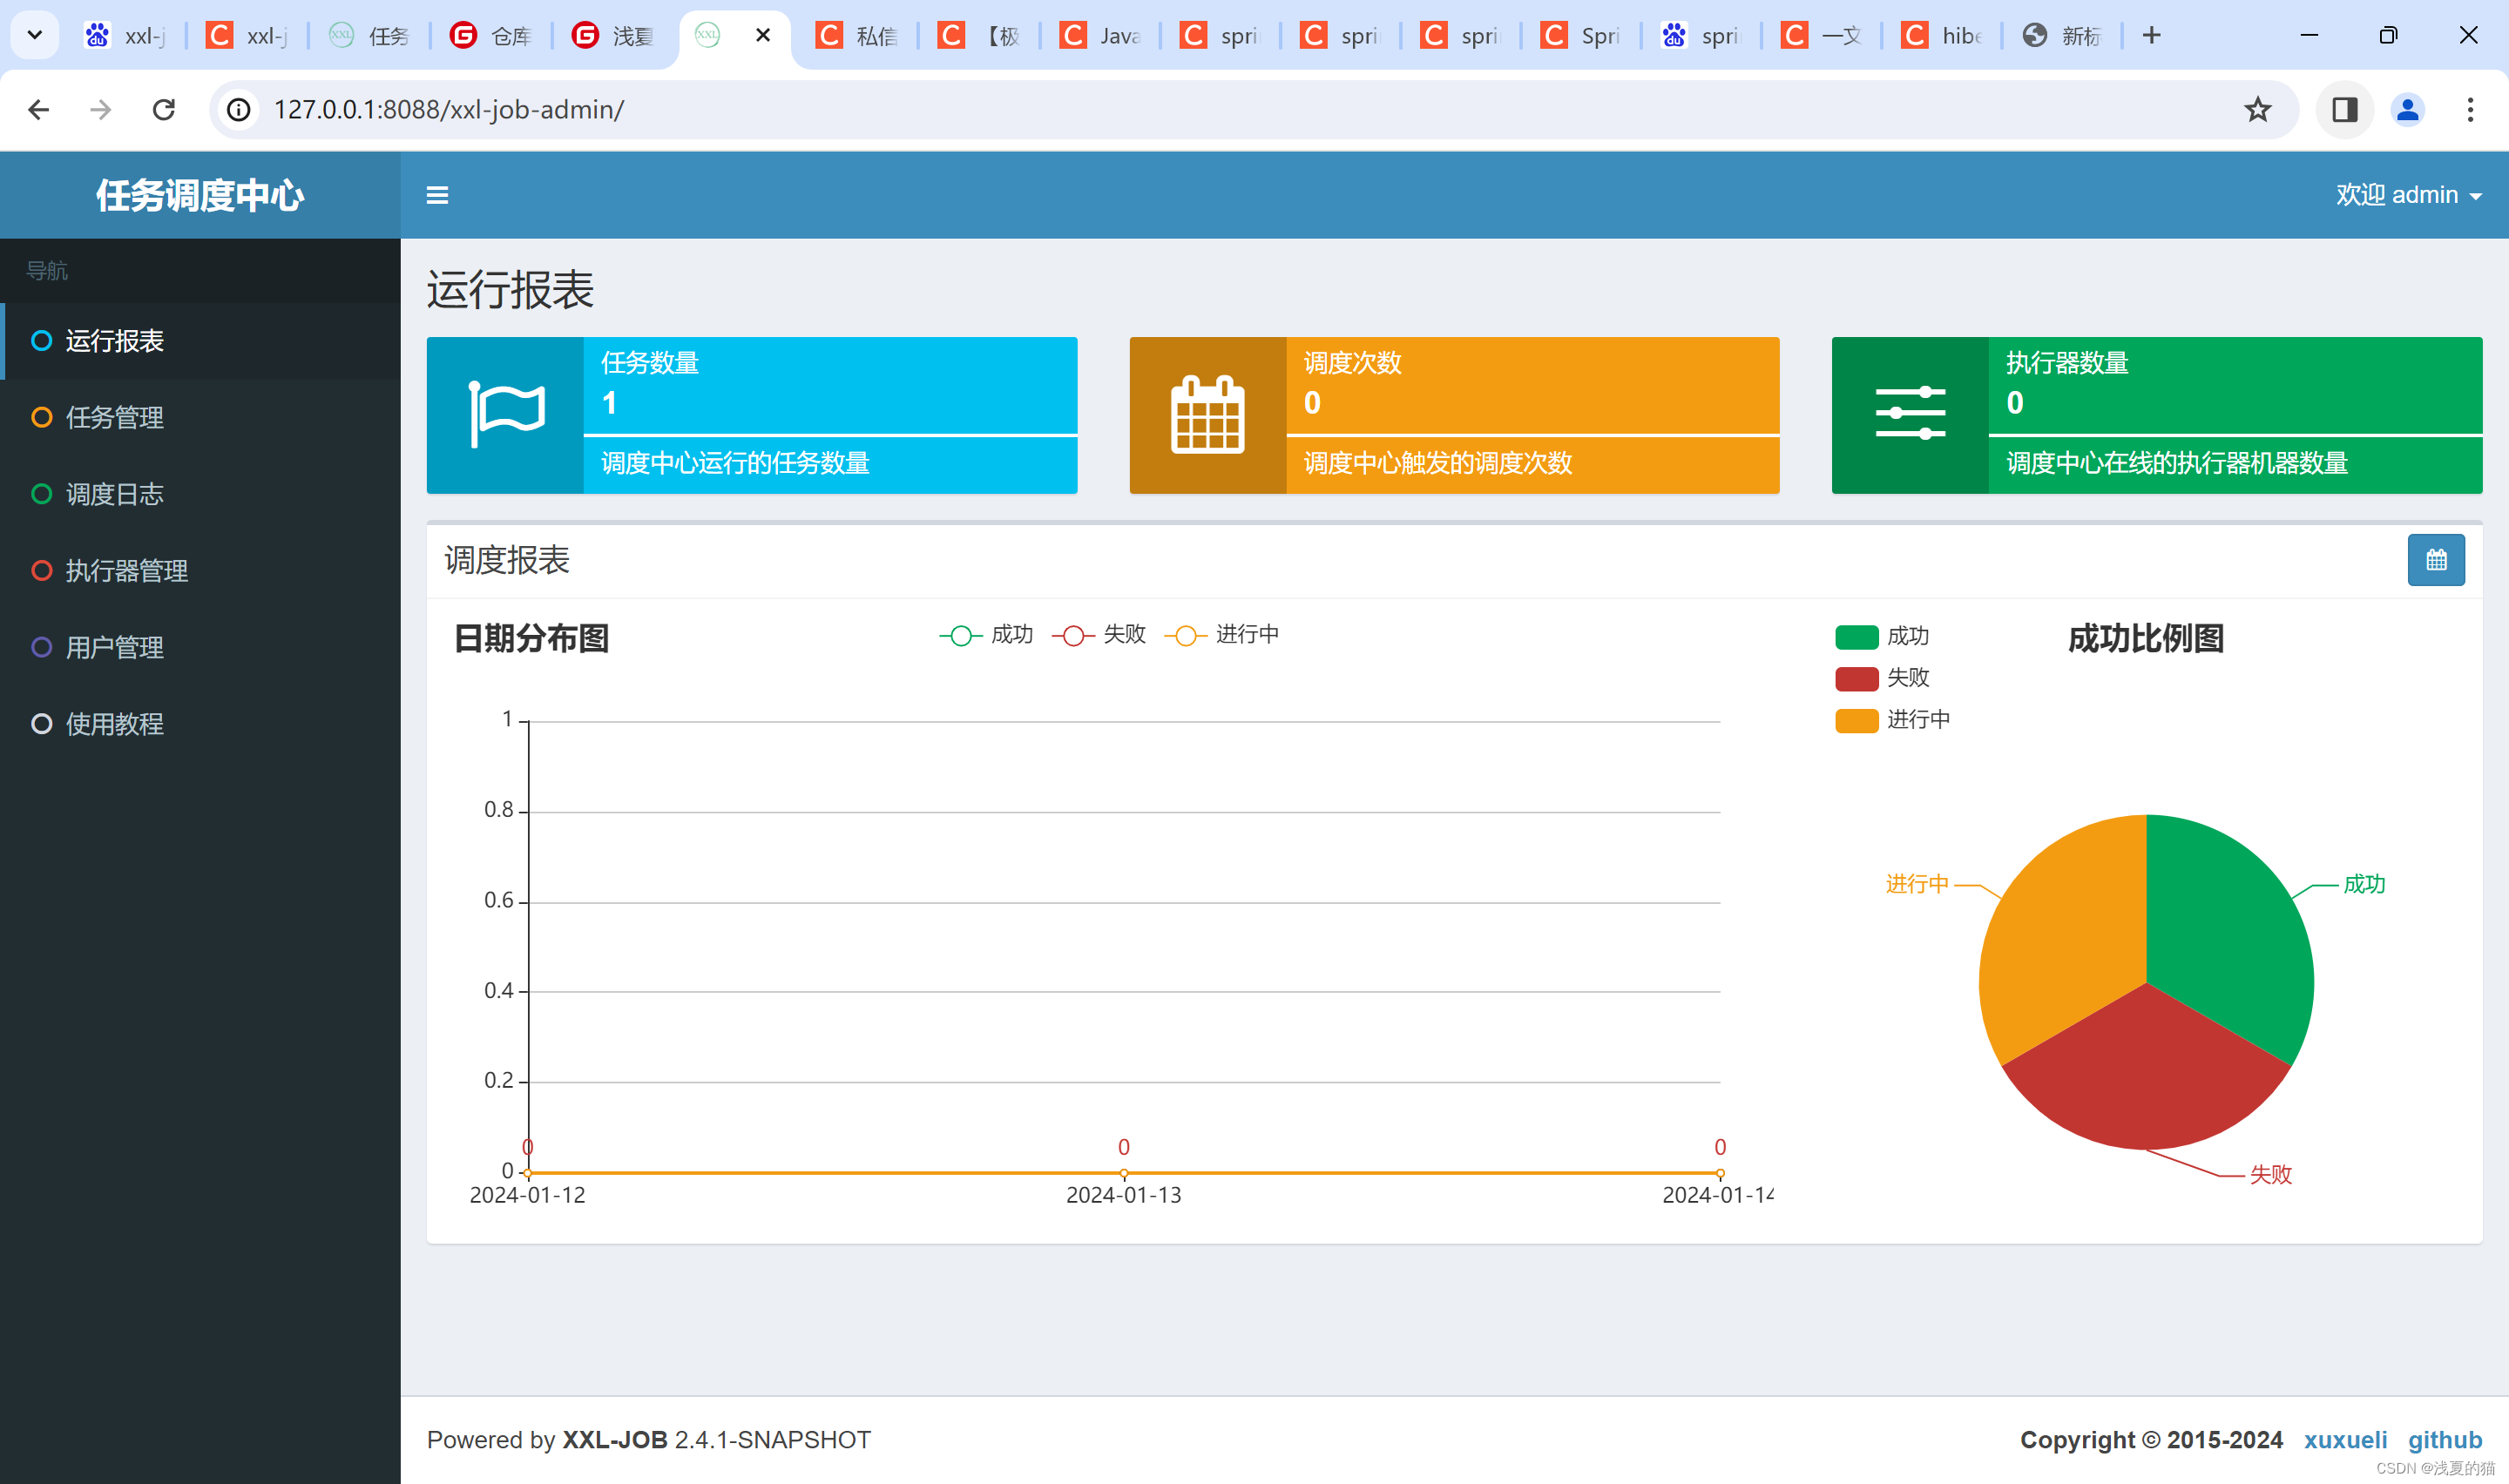
5.访问管理页面
地址:http://127.0.0.1:8088/xxl-job-admin
tips:默认账号admin,密码123456
四.项目集成xxl-job任务步骤
1.引入pom.xml依赖
<?xml version="1.0" encoding="UTF-8"?>
<project xmlns="http://maven.apache.org/POM/4.0.0"
         xmlns:xsi="http://www.w3.org/2001/XMLSchema-instance"
         xsi:schemaLocation="http://maven.apache.org/POM/4.0.0 http://maven.apache.org/xsd/maven-4.0.0.xsd">
    <modelVersion>4.0.0</modelVersion>

    <groupId>com.xsy</groupId>
    <artifactId>aurora_xxl_job</artifactId>
    <version>1.0-SNAPSHOT</version>

    <!--基础SpringBoot依赖-->
    <parent>
        <groupId>org.springframework.boot</groupId>
        <artifactId>spring-boot-starter-parent</artifactId>
        <version>2.3.5.RELEASE</version>
    </parent>

    <!--属性设置-->
    <properties>
        <!--java_JDK版本-->
        <java.version>1.8</java.version>
        <!--maven打包插件-->
        <maven.plugin.version>3.8.1</maven.plugin.version>
        <!--编译编码UTF-8-->
        <project.build.sourceEncoding>UTF-8</project.build.sourceEncoding>
        <!--输出报告编码UTF-8-->
        <project.reporting.outputEncoding>UTF-8</project.reporting.outputEncoding>
        <!--json数据格式处理工具-->
        <fastjson.version>1.2.75</fastjson.version>
        <!--json数据格式处理工具-->
        <xxljob.version>2.3.0</xxljob.version>
    </properties>

    <!--通用依赖-->
    <dependencies>

        <dependency>
            <groupId>org.springframework.boot</groupId>
            <artifactId>spring-boot-starter-web</artifactId>
        </dependency>

        <dependency>
            <groupId>org.springframework.boot</groupId>
            <artifactId>spring-boot-starter-test</artifactId>
            <scope>test</scope>
        </dependency>

        <!-- Lombok -->
        <dependency>
            <groupId>org.projectlombok</groupId>
            <artifactId>lombok</artifactId>
        </dependency>

        <!-- json -->
        <dependency>
            <groupId>com.alibaba</groupId>
            <artifactId>fastjson</artifactId>
            <version>${fastjson.version}</version>
        </dependency>

        <dependency>
            <groupId>com.xuxueli</groupId>
            <artifactId>xxl-job-core</artifactId>
            <version>${xxljob.version}</version>
        </dependency>

    </dependencies>

    <!--编译打包-->
    <build>
        <finalName>${project.name}</finalName>
        <!--资源文件打包-->
        <resources>
            <resource>
                <directory>src/main/resources</directory>
            </resource>
            <resource>
                <directory>src/main/java</directory>
                <includes>
                    <include>**/*.xml</include>
                </includes>
            </resource>
        </resources>

        <!--插件统一管理-->
        <pluginManagement>
            <plugins>
                <!--maven打包插件-->
                <plugin>
                    <groupId>org.springframework.boot</groupId>
                    <artifactId>spring-boot-maven-plugin</artifactId>
                    <version>${spring.boot.version}</version>
                    <configuration>
                        <fork>true</fork>
                        <finalName>${project.build.finalName}</finalName>
                    </configuration>
                    <executions>
                        <execution>
                            <goals>
                                <goal>repackage</goal>
                            </goals>
                        </execution>
                    </executions>
                </plugin>

                <!--编译打包插件-->
                <plugin>
                    <artifactId>maven-compiler-plugin</artifactId>
                    <version>${maven.plugin.version}</version>
                    <configuration>
                        <source>${java.version}</source>
                        <target>${java.version}</target>
                        <encoding>UTF-8</encoding>
                        <compilerArgs>
                            <arg>-parameters</arg>
                        </compilerArgs>
                    </configuration>
                </plugin>
            </plugins>
        </pluginManagement>
    </build>

    <!--配置Maven项目中需要使用的远程仓库-->
    <repositories>
        <repository>
            <id>aliyun-repos</id>
            <url>https://maven.aliyun.com/nexus/content/groups/public/</url>
            <snapshots>
                <enabled>false</enabled>
            </snapshots>
        </repository>
    </repositories>

    <!--用来配置maven插件的远程仓库-->
    <pluginRepositories>
        <pluginRepository>
            <id>aliyun-plugin</id>
            <url>https://maven.aliyun.com/nexus/content/groups/public/</url>
            <snapshots>
                <enabled>false</enabled>
            </snapshots>
        </pluginRepository>
    </pluginRepositories>

</project>
2.修改配置application.yml
#服务配置
server:
  #端口
  port: 7003

#spring配置
spring:
  #应用配置
  application:
    #应用名
    name: aurora_xxl_job

#xxl-job
xxl:
  job:
    admin:
      #管理页面地址,需要鱼xxl-job-admin管理页面访问地址一样
      addresses: http://127.0.0.1:8088/xxl-job-admin
    #执行器
    executor:
      #需要平台页面配置一样
      appname: aurora-job-executor
      ip:
      port: 9003
      logpath: /data/applogs/xxl-job/aurora-job-executor
      logretentiondays: -1
    #token,必须配置,否则当前项目无法连接服务端
    accessToken: default_token
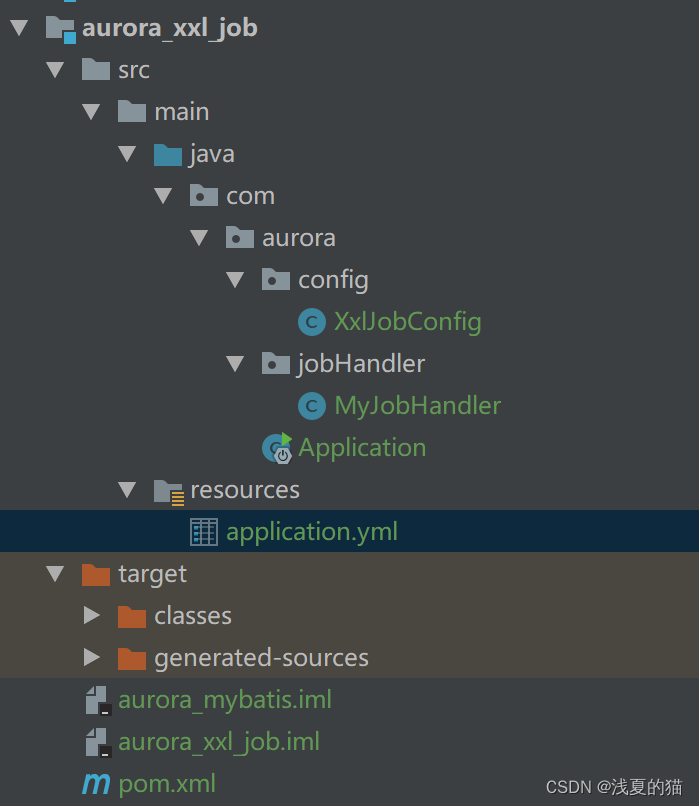
3.包结构如下
4.创建主启动类
package com.aurora;

import org.springframework.boot.SpringApplication;
import org.springframework.boot.autoconfigure.SpringBootApplication;

/**
 * @author 浅夏的猫
 * @description 主启动类
 * @date 22:46 2024/1/13
 */
@SpringBootApplication
public class Application {
    public static void main(String[] args) {
        SpringApplication.run(Application.class, args);
    }
}
5.创建xxl-job配置类
package com.aurora.config;

import com.xxl.job.core.executor.impl.XxlJobSpringExecutor;
import lombok.extern.slf4j.Slf4j;
import org.springframework.beans.factory.annotation.Value;
import org.springframework.context.annotation.Bean;
import org.springframework.context.annotation.Configuration;

@Slf4j
@Configuration
public class XxlJobConfig {

    @Value("${xxl.job.admin.addresses}")
    private String adminAddresses;

    @Value("${xxl.job.executor.appname}")
    private String appName;

    @Value("${xxl.job.executor.ip}")
    private String ip;

    @Value("${xxl.job.executor.port}")
    private int port;

    @Value("${xxl.job.accessToken}")
    private String accessToken;

    @Value("${xxl.job.executor.logpath}")
    private String logPath;

    @Value("${xxl.job.executor.logretentiondays}")
    private int logRetentionDays;

    @Bean
    public XxlJobSpringExecutor xxlJobExecutor() {
        XxlJobSpringExecutor xxlJobSpringExecutor = new XxlJobSpringExecutor();
        xxlJobSpringExecutor.setAdminAddresses(adminAddresses);
        xxlJobSpringExecutor.setAppname(appName);
        xxlJobSpringExecutor.setIp(ip);
        xxlJobSpringExecutor.setPort(port);
        xxlJobSpringExecutor.setAccessToken(accessToken);
        xxlJobSpringExecutor.setLogPath(logPath);
        xxlJobSpringExecutor.setLogRetentionDays(logRetentionDays);
        return xxlJobSpringExecutor;
    }

}
6.创建一个任务执行器验证
package com.aurora.jobHandler;
import com.xxl.job.core.biz.model.ReturnT;
import com.xxl.job.core.context.XxlJobHelper;
import com.xxl.job.core.handler.annotation.XxlJob;
import lombok.extern.slf4j.Slf4j;
import org.slf4j.Logger;
import org.slf4j.LoggerFactory;
import org.springframework.stereotype.Component;
@Slf4j
@Component
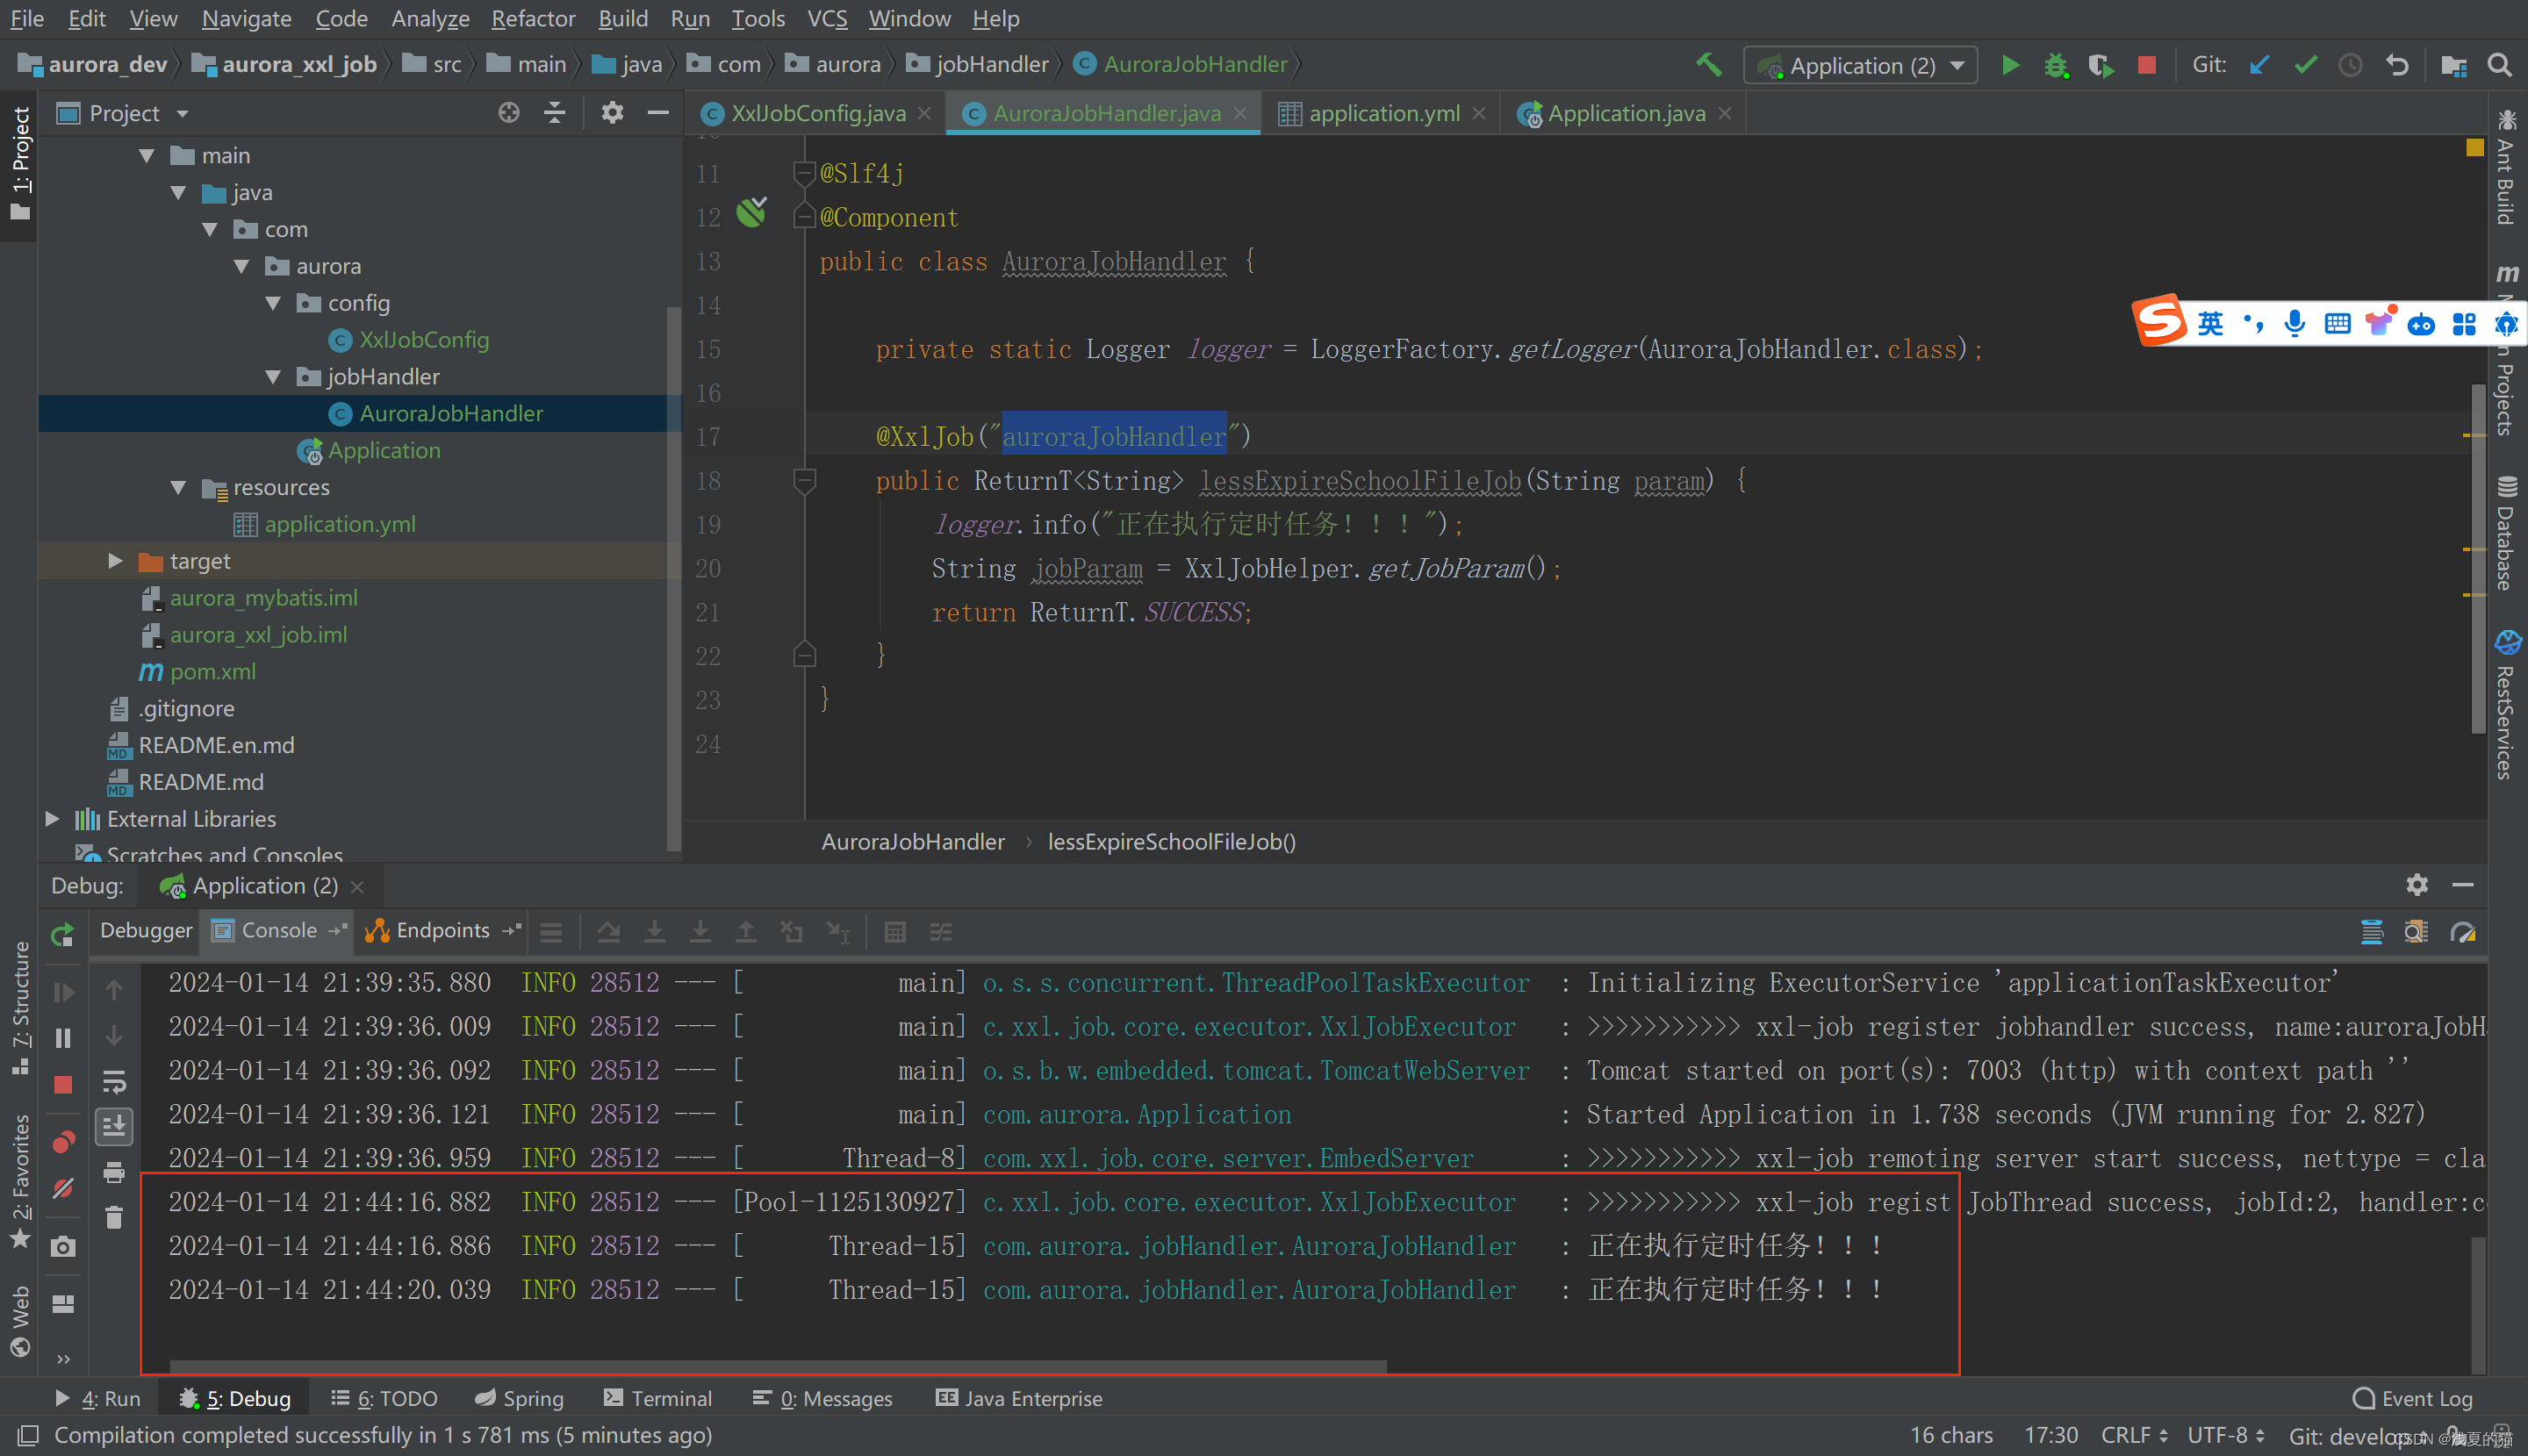
public class AuroraJobHandler {
private static Logger logger = LoggerFactory.getLogger(AuroraJobHandler.class);
@XxlJob("auroraJobHandler")
public ReturnT<String> lessExpireSchoolFileJob(String param) {
logger.info("正在执行定时任务!!!");
String jobParam = XxlJobHelper.getJobParam();
return ReturnT.SUCCESS;
}
}
7.启动当前项目,验证是否正常注册到服务端
(1)新增对应的执行器,执行器名称与你项目配置的appname需要一样
(2)新增以后启动本地服务,观察是否可以正常注册
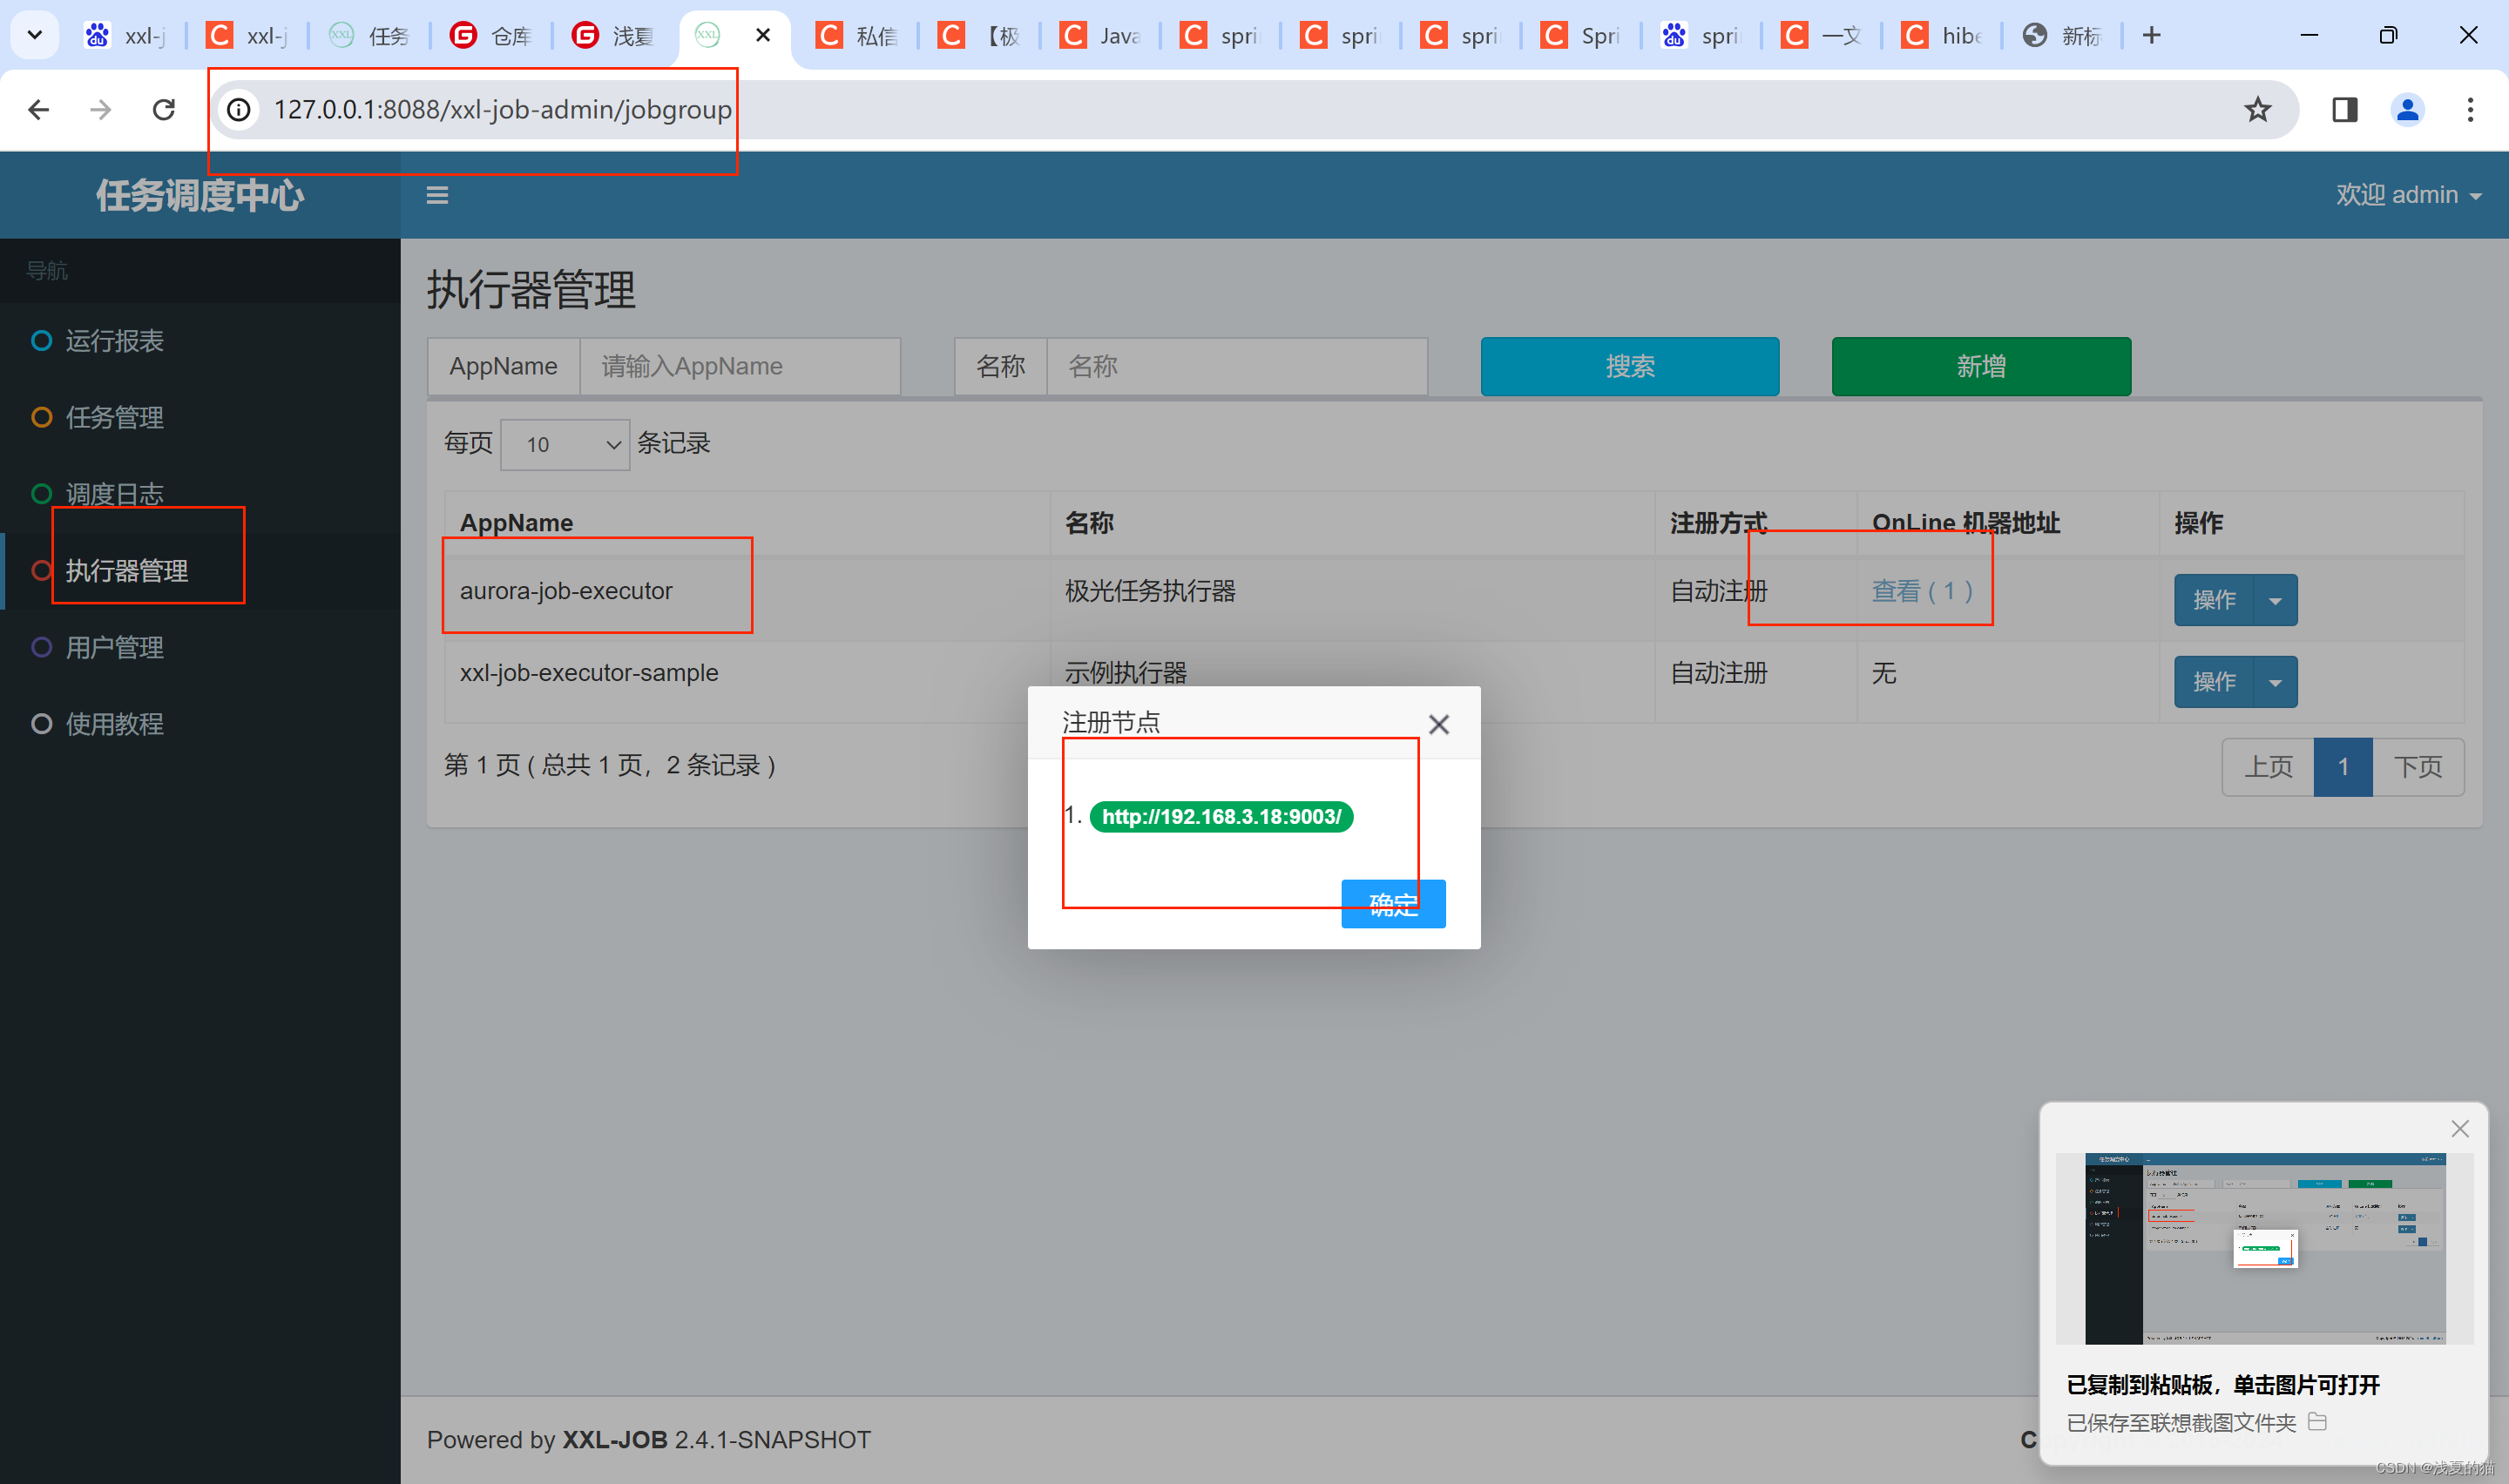
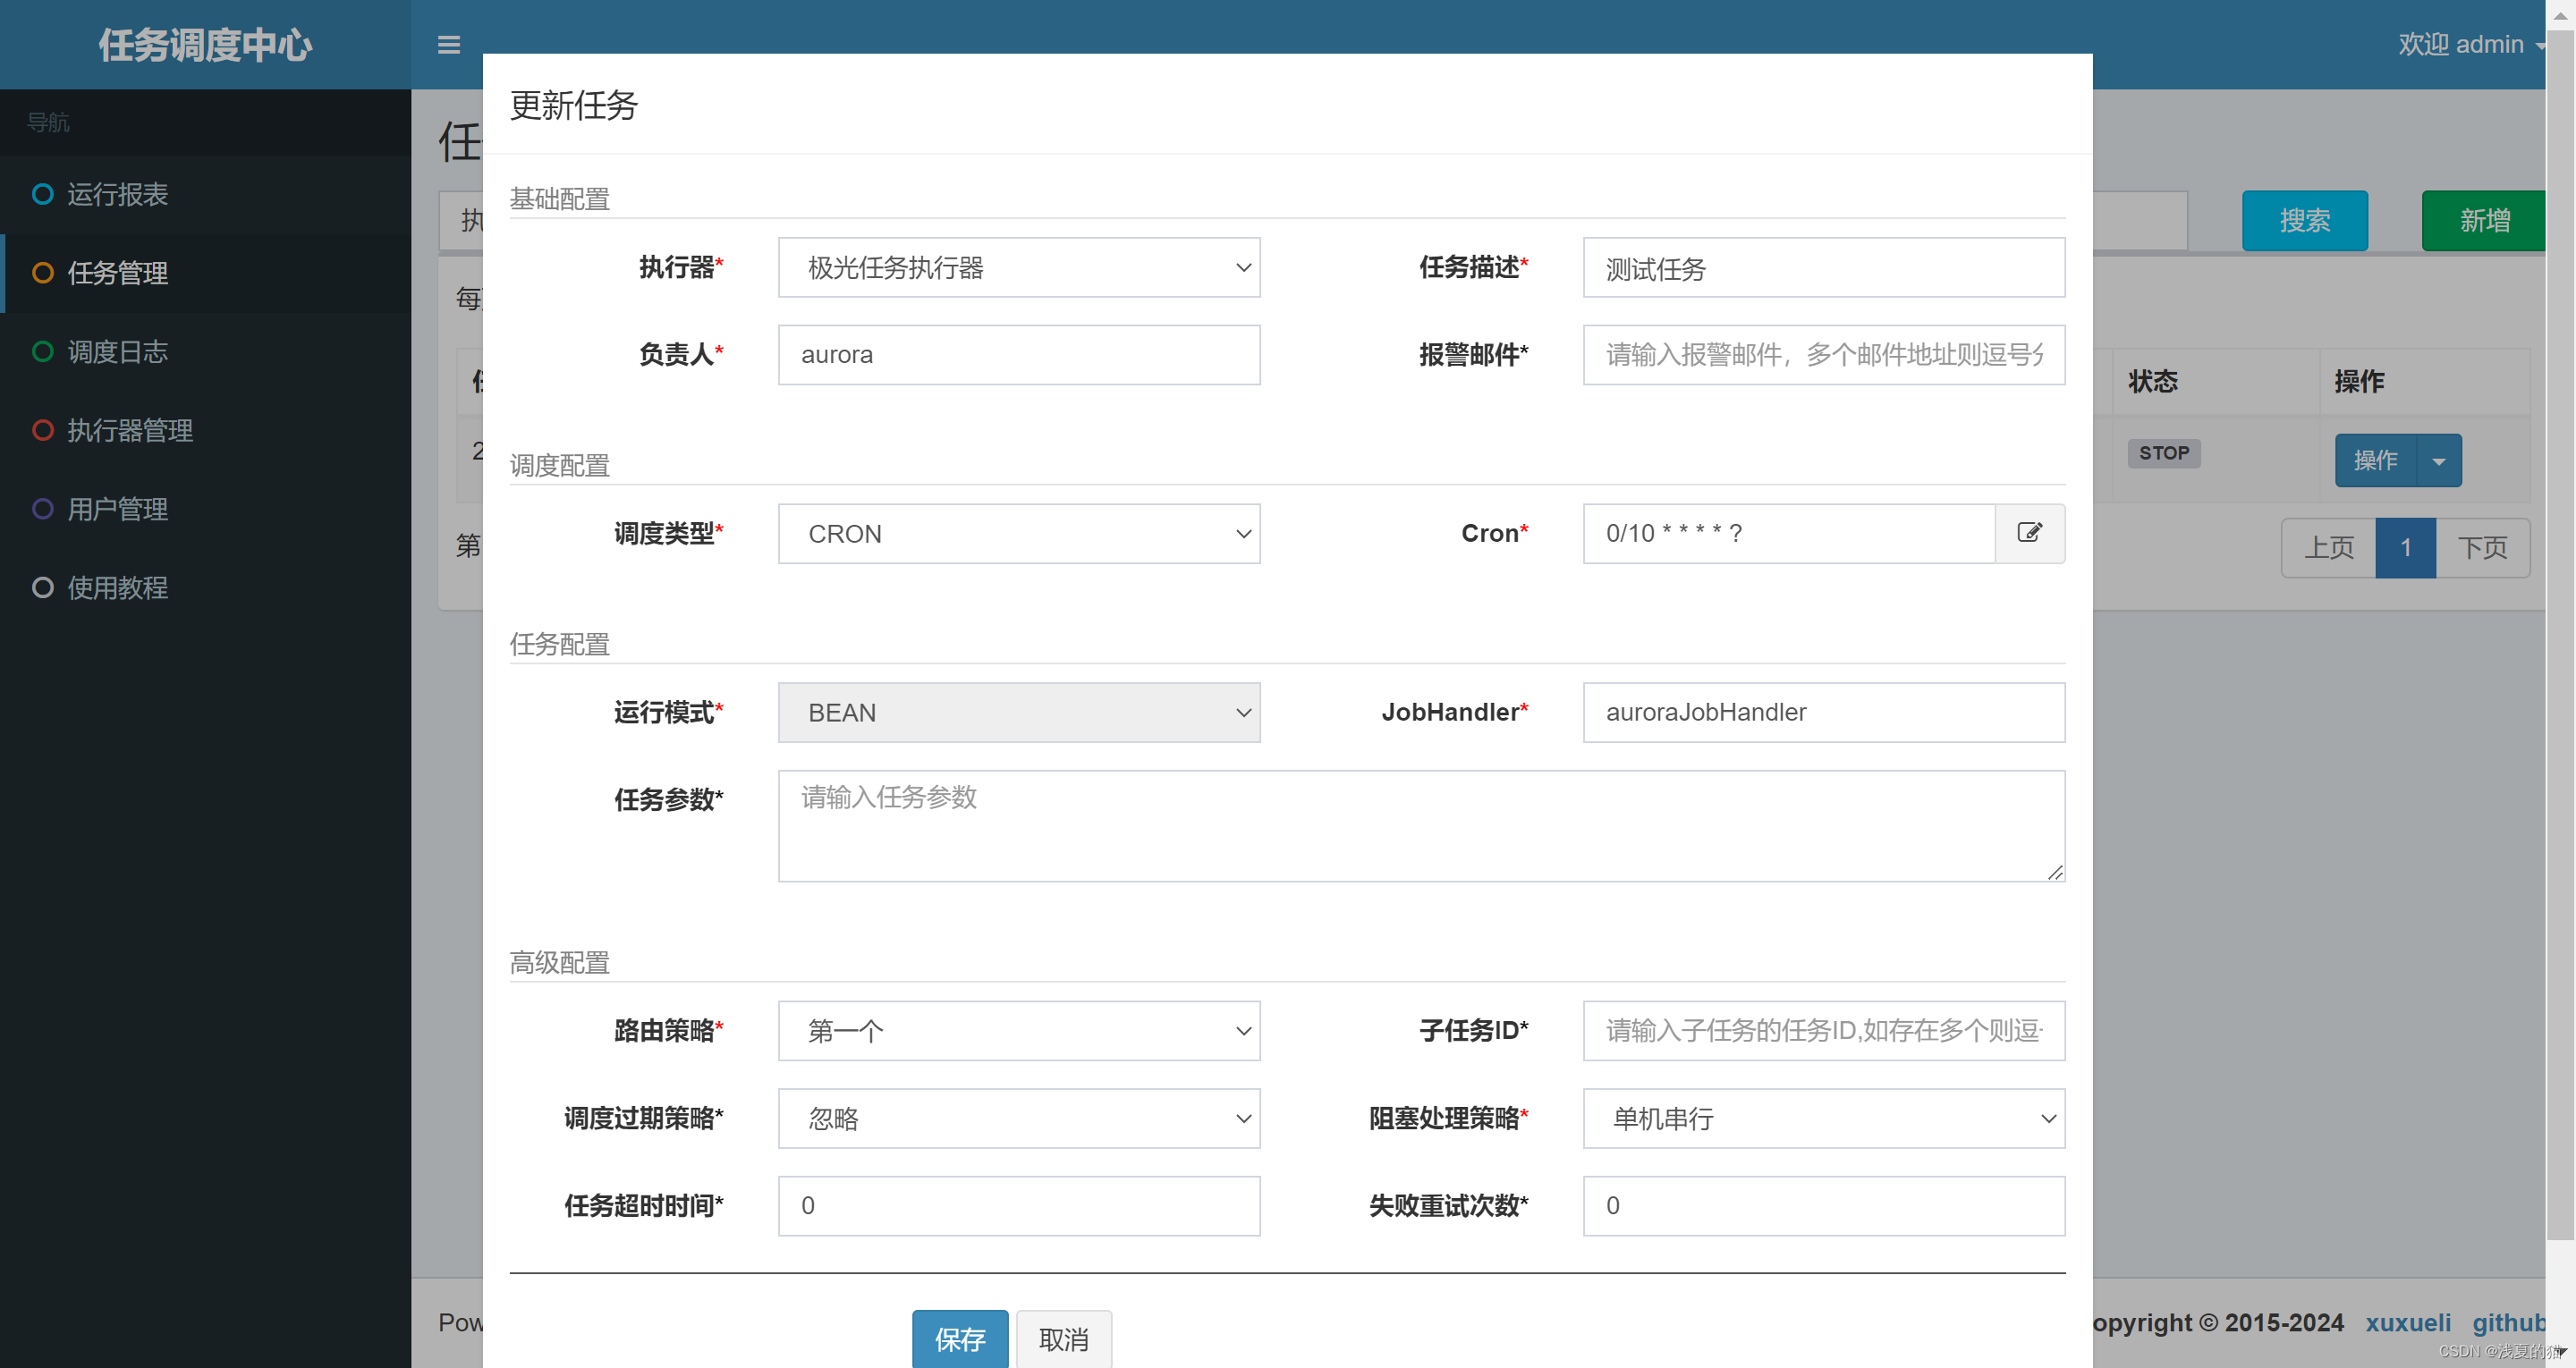
8.验证调度任务
tips:任务管理器–选择上面创建的极光任务管理器–新增调度任务,创建以后,点击右边的操作,执行一次,观察项目服务器日志


 1446
1446


 被折叠的 条评论
为什么被折叠?
被折叠的 条评论
为什么被折叠?
 到【灌水乐园】发言


