


文章目录
一、以服务运行
在生产环境中我们需要配置nexus以服务运行,保证服务器重新启动后nexus可以启动。
1. 编写配置
cd /etc/systemd/system
vim nexus.service
写环岛编辑模式i
添加内容:
[Unit]
Description=nexus service
After=network.target

[Service]
Type=forking
LimitNOFILE=65536
ExecStart=/app/nexus3/nexus-3.31.1/bin/nexus start
ExecStop=/app/nexus3/nexus-3.31.1/bin/nexus stop
User=nexus
Restart=on-abort
TimeoutSec=600

[Install]
WantedBy=multi-user.target
2. 赋予可执行权限
chmod +x nexus.service
3. 配置自启动
systemctl daemon-reload
systemctl enable nexus.service
输出:Created symlink from /etc/systemd/system/multi-user.target.wants/nexus.service to /etc/systemd/system/nexus.service.

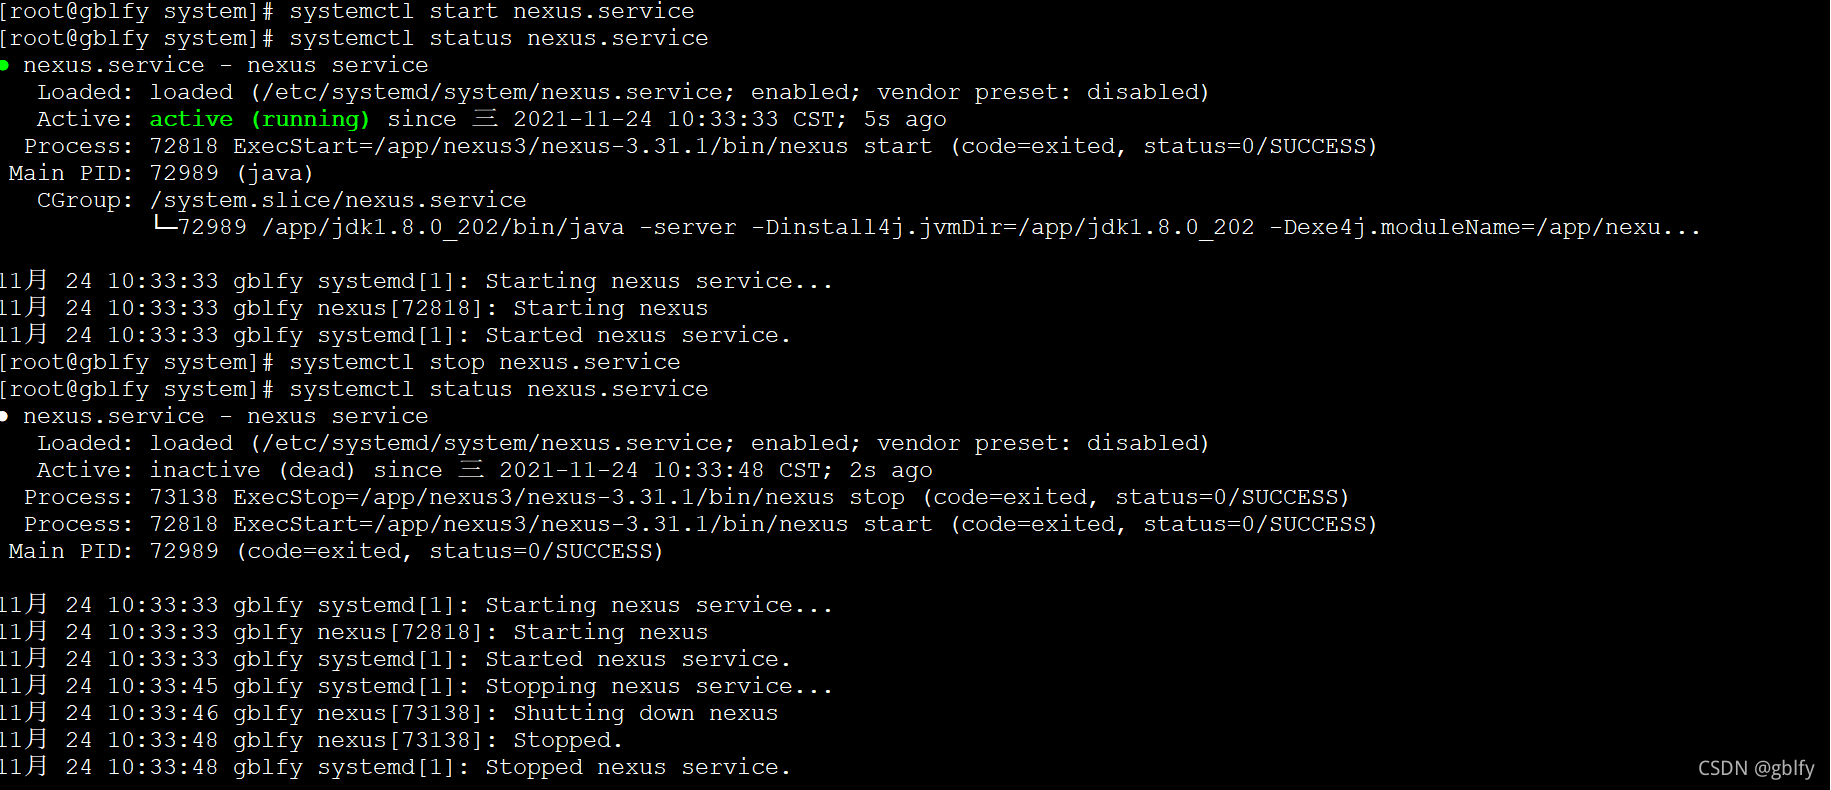
4. 启动nexus
systemctl start nexus.service
5. 监控状态
systemctl status nexus.service
6. 停止服务
systemctl stop nexus.service
执行截图:
二、配置文件说明
修改nexux安装目录
/bin/nexus.vmoptions文件,调整JVM参数,的目录/app/nexus3/nexus-3.31.1/bin/nexus.vmoptions
2.1. JAVA配置
修改Nexus 3安装目录/bin/nexus.vmoptions 文件,比如修改内存
cd  /app/nexus3/nexus-3.31.1/bin/
vim nexus.vmoptions
根据服务器配置自定义调配
-Xms2703m
-Xmx2703m
-XX:MaxDirectMemorySize=2703m
如果修改请拷贝
nexus-default.properties到Nexus 3工作路径/etc/nexus.properties,
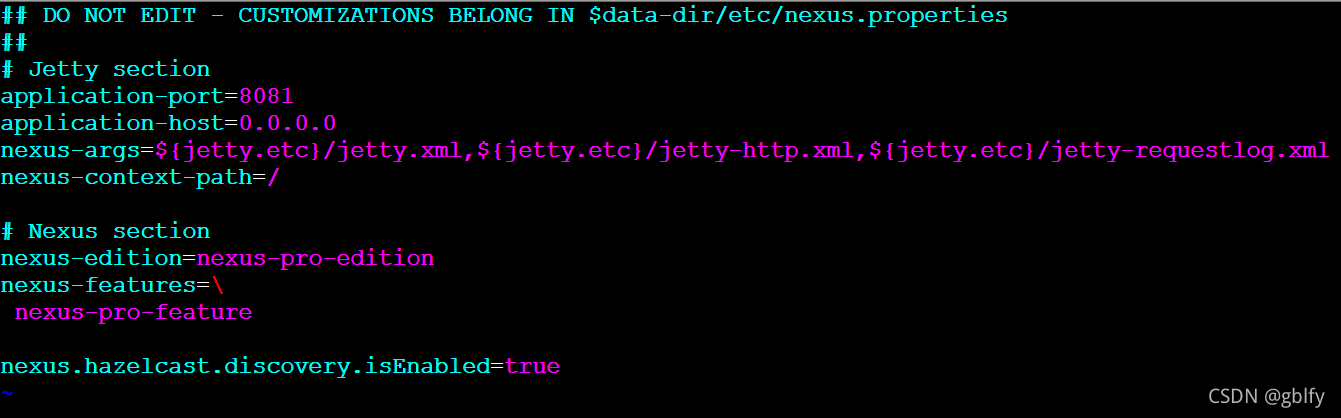
2.2. 自定义配置
端口、访问前缀、请求host等配置,修改工作路径/etc/nexus.properties
cd /app/nexus3/nexus-3.31.1/etc
mv nexus-default.properties nexus.properties
2.3. 工作/日志 目录修改
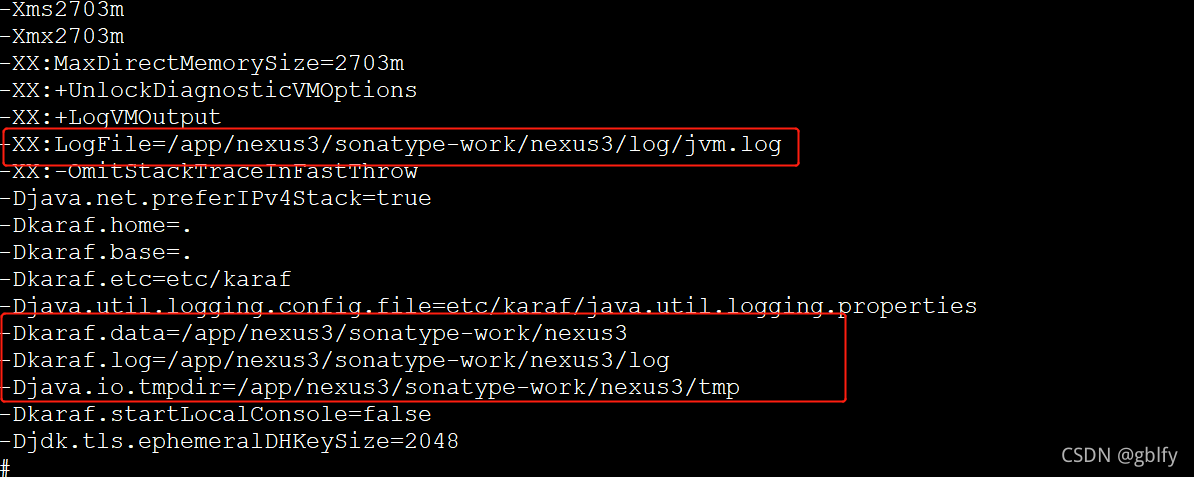
修改安装目录/bin/nexus.vmoptions 文件
cd  /app/nexus3/nexus-3.31.1/bin/
vim nexus.vmoptions
-XX:LogFile=/app/nexus3/sonatype-work/nexus3/log/jvm.log
-Dkaraf.data=/app/nexus3/sonatype-work/nexus3
-Dkaraf.log=/app/nexus3/sonatype-work/nexus3/log
-Djava.io.tmpdir=/app/nexus3/sonatype-work/nexus3/tmp
三、使用nginx代理
安装nginx参考博客:nginx 1.9.9 Linux 环境安装
3.1. HTTP
vim /usr/local/nginx/conf/nginx.conf
添加内容:
worker_processes  1;

events {
    worker_connections  1024;
}


http {

    proxy_read_timeout 300;
    proxy_buffering    off;
    proxy_request_buffering off;
    keepalive_timeout  55;
    tcp_nodelay        on;

  server {
    listen   *:80;
    server_name  nexus3.com;

    client_max_body_size 1G;

    location / {
      proxy_pass http://127.0.0.1:8081/;
      proxy_set_header Host $host;
      proxy_set_header X-Real-IP $remote_addr;
      proxy_set_header X-Forwarded-For $proxy_add_x_forwarded_for;
    }
  }
}
3.2. HTTPS
vim /usr/local/nginx/conf/nginx.conf
添加内容:
http {

  proxy_send_timeout 120;
  proxy_read_timeout 300;
  proxy_buffering    off;
  proxy_request_buffering off;
  keepalive_timeout  5 5;
  tcp_nodelay        on;

  server {
    listen   *:443;
    server_name  repo.example.com;

    # allow large uploads of files
    client_max_body_size 1G;

    # optimize downloading files larger than 1G
    #proxy_max_temp_file_size 2G;

    ssl on;
    ssl_certificate      example.pem;
    ssl_certificate_key  example.key;

    location / {
      # Use IPv4 upstream address instead of DNS name to avoid attempts by nginx to use IPv6 DNS lookup
      proxy_pass http://127.0.0.1:8081/;
      proxy_set_header Host $host;
      proxy_set_header X-Real-IP $remote_addr;
      proxy_set_header X-Forwarded-For $proxy_add_x_forwarded_for;
      proxy_set_header X-Forwarded-Proto "https";
    }
  }
}
四、其他配置
4.1. 配置匿名访问
关闭用户匿名访问。登陆系统 》点击齿轮图标 》Security 》Anonymous Access,取消Allow anonymous users to access the server 勾选

4.2. 更改管理员电子邮件地址
登陆系统 》点击齿轮图标 》Security 》Users 点击admin账户 出现如下界面

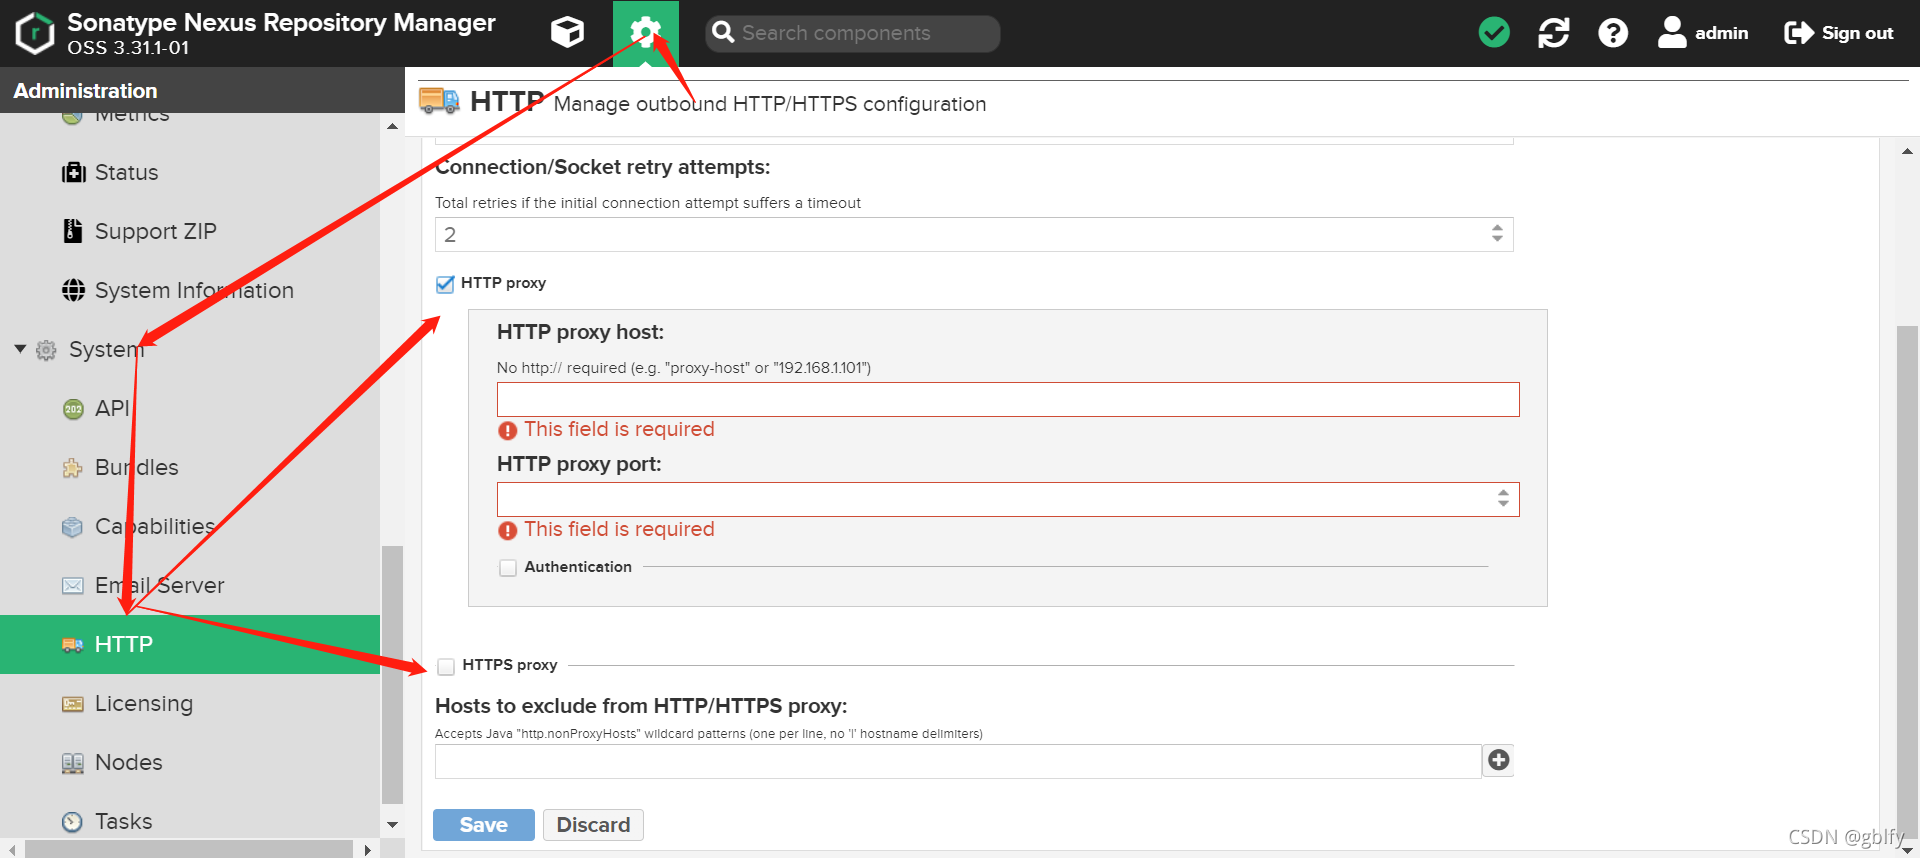
4.3. 配置SMTP设置
配置默认的HTTP和HTTPS代理设置
登陆系统 》点击齿轮图标 》System 》HTTP
五、常见错误
Connect to sonatype-download.global.ssl.fastly.net:443
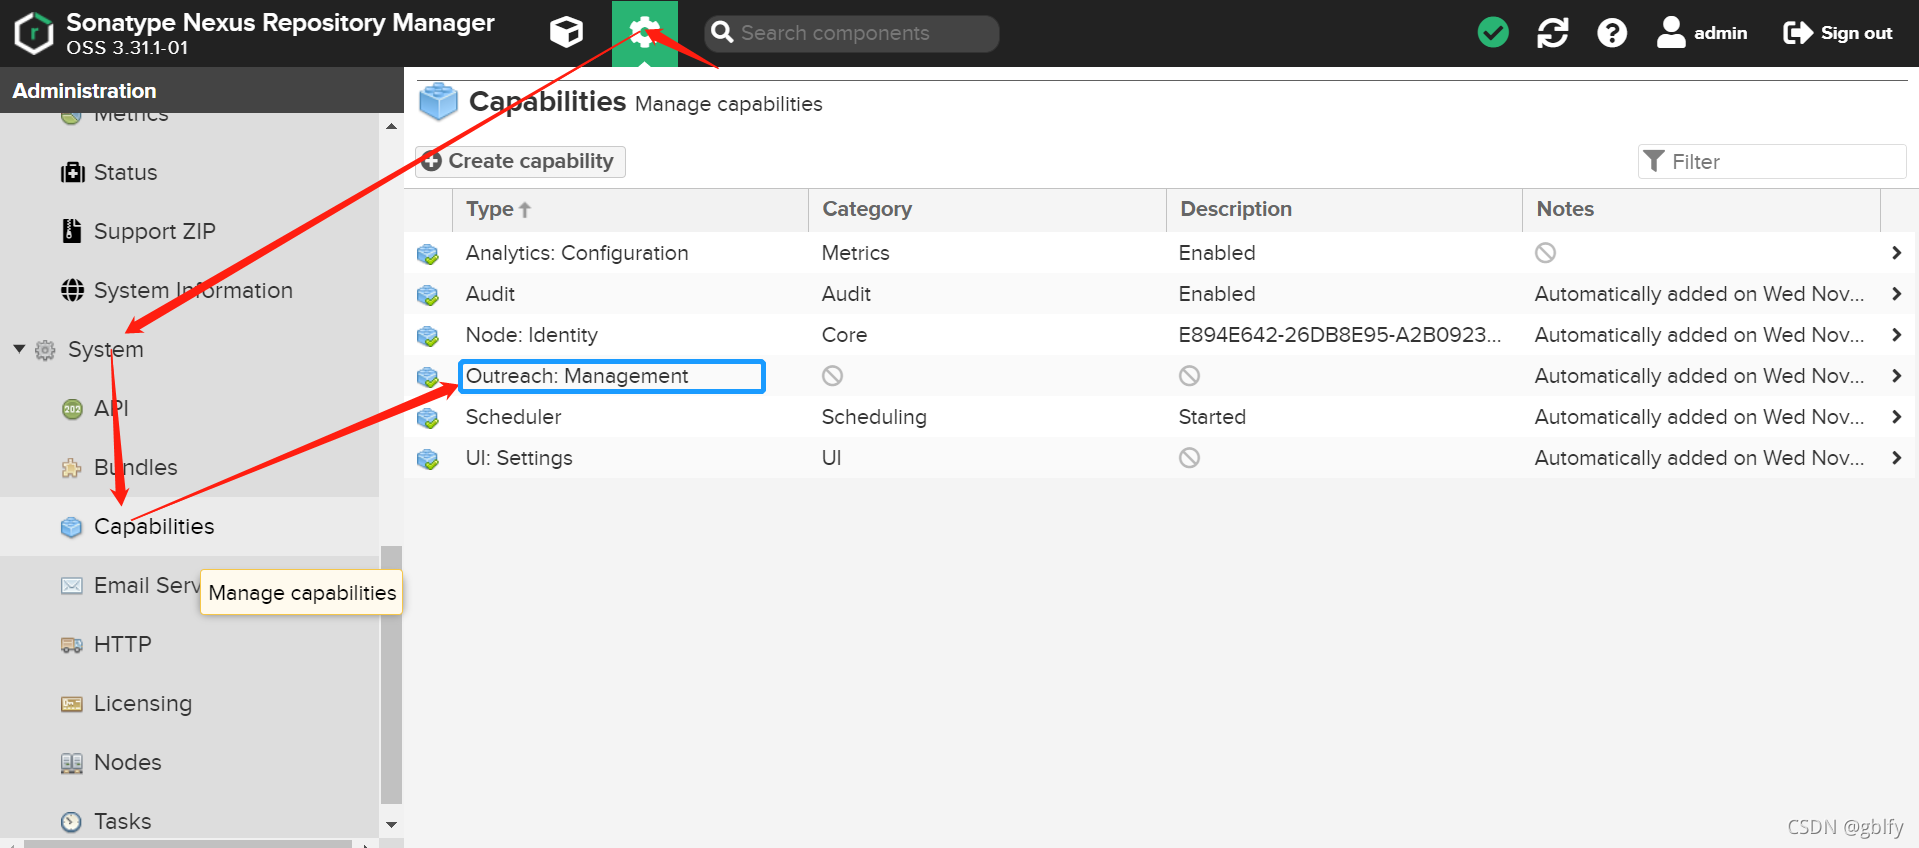
登陆系统》点击齿轮图标》System 》Capabilities 点击“Outreach:Management”
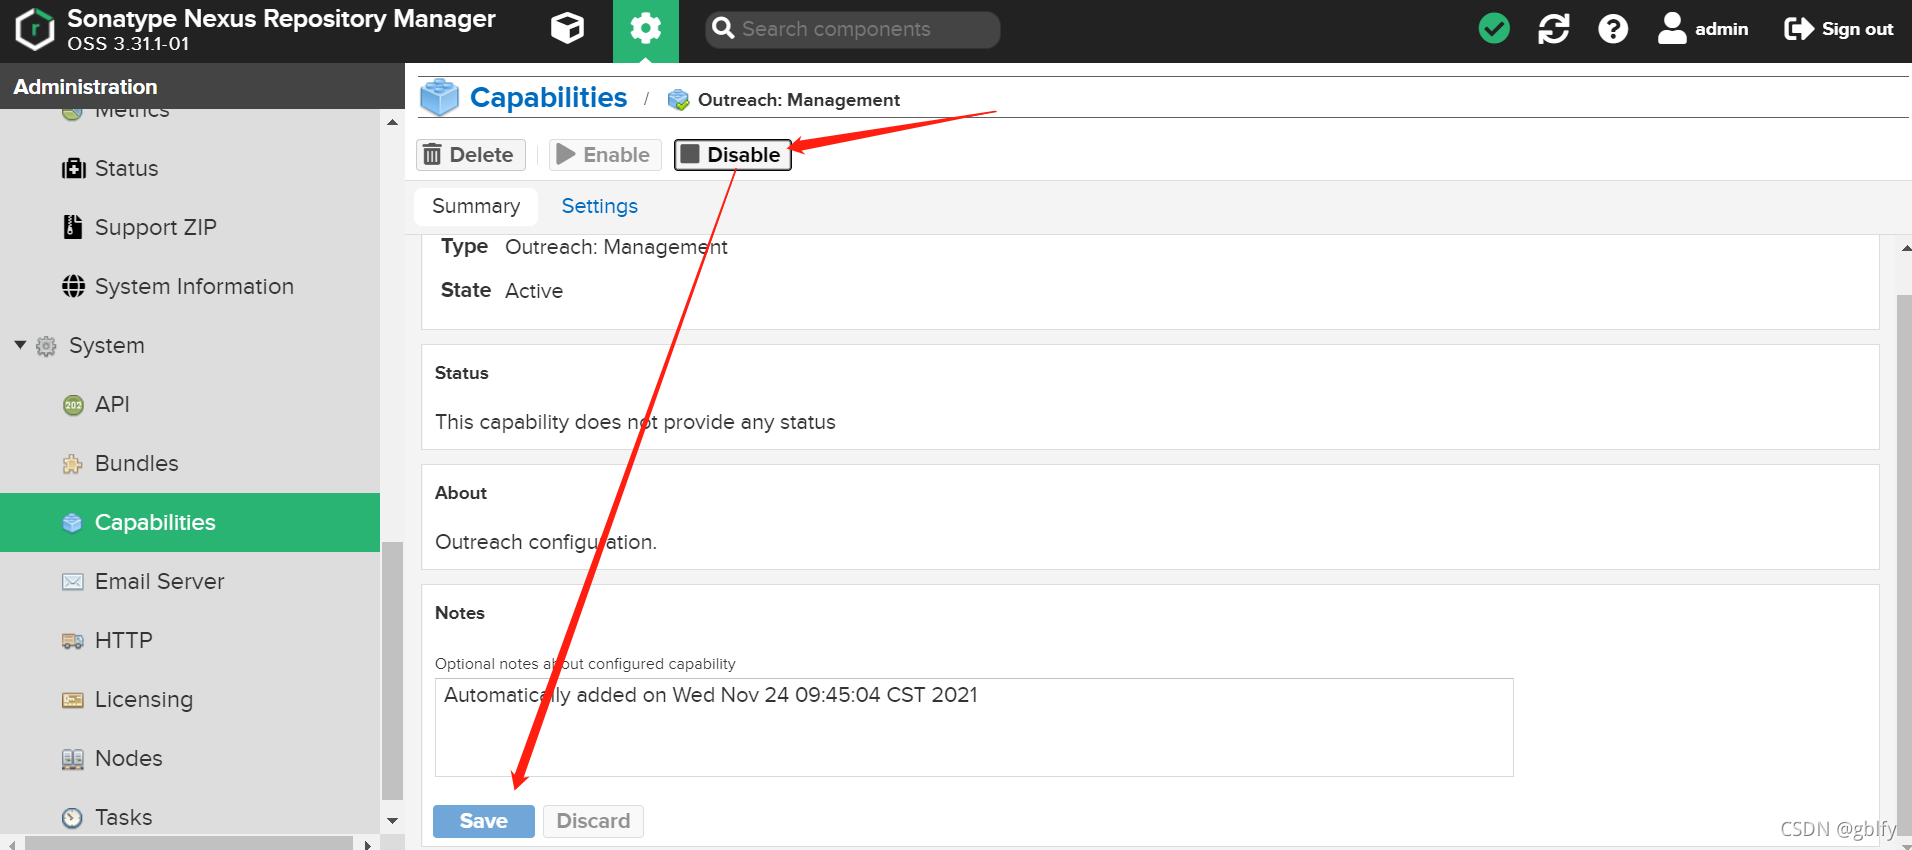
点击 “Disable”,之后重启 nexus
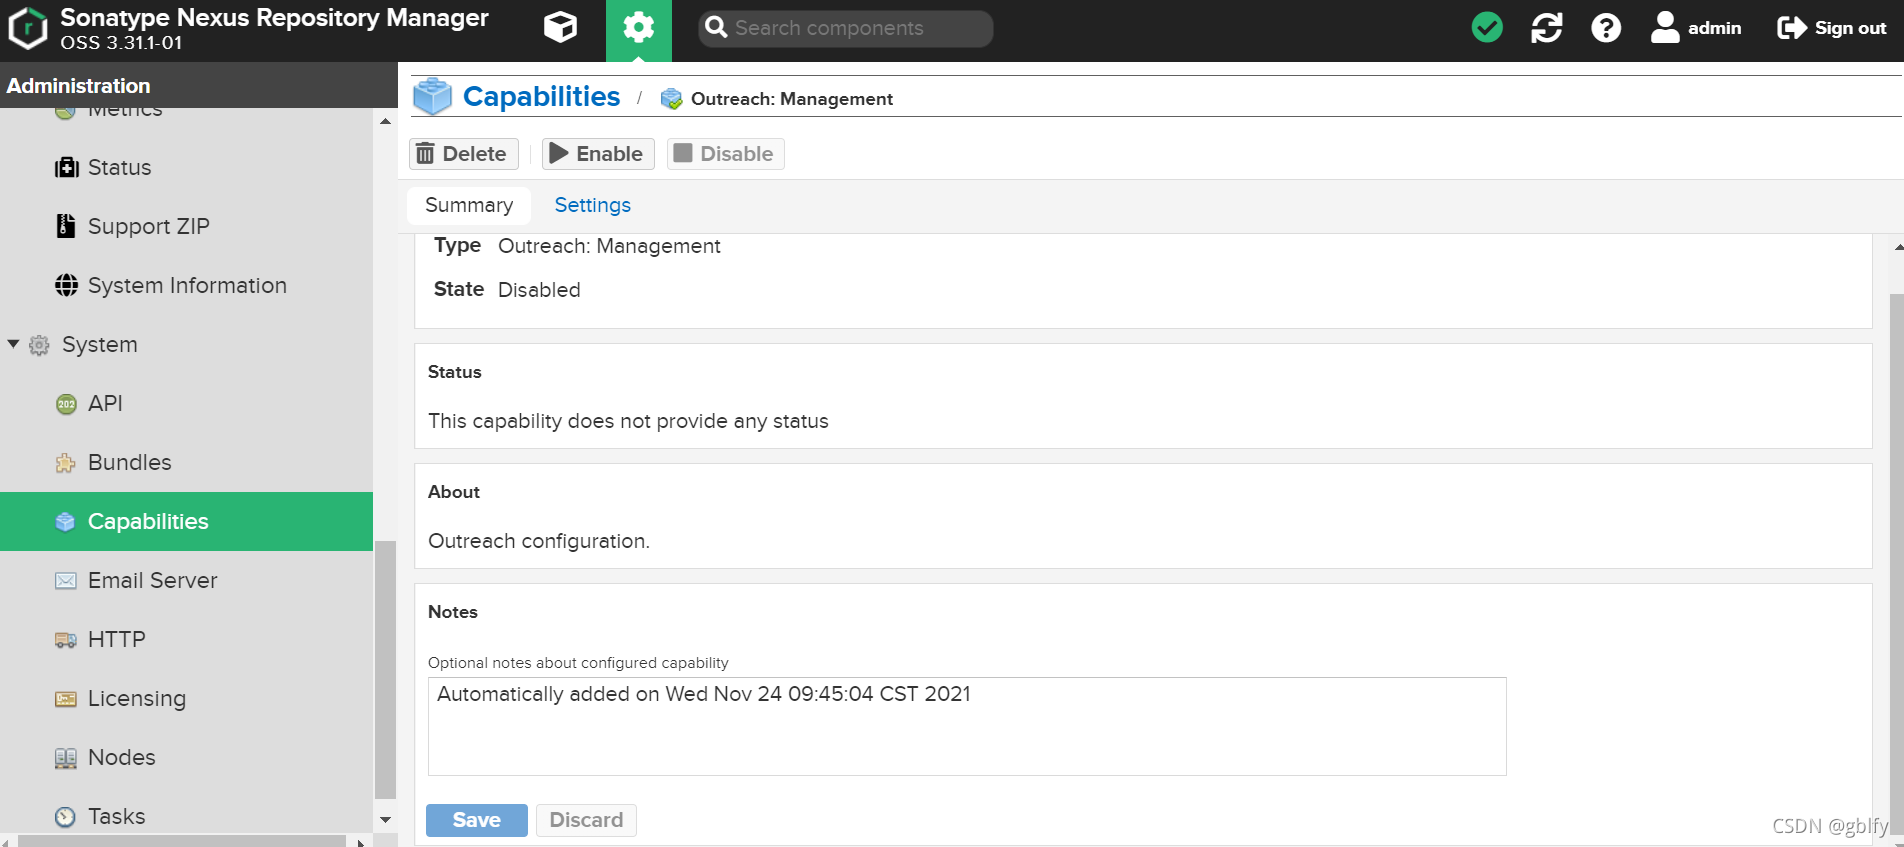
执行后效果图,按钮已置灰


 被折叠的 条评论
为什么被折叠?
被折叠的 条评论
为什么被折叠?
 到【灌水乐园】发言


