


原文地址:springboot集成腾讯云的短信验证码,有手就行,一步到位_springboot腾讯云短信依赖_玛卡巴咖的博客-CSDN博客
1、依赖引入:
    <dependencies>
        <dependency>
            <groupId>com.tencentcloudapi</groupId>
            <artifactId>tencentcloud-sdk-java</artifactId>
            <version>3.1.460</version>
        </dependency>
    </dependencies>
下载过程比较慢,我花了十几分钟才下载完依赖
2、编写一个工具类用来写入腾讯云的配置
package com.laoyang.utils;

import org.springframework.beans.factory.InitializingBean;
import org.springframework.beans.factory.annotation.Value;
import org.springframework.stereotype.Component;

/**
 * @author:Kevin
 * @create: 2022-10-05 11:38
 * @Description:
 */


//实现InitializingBean接口,当spring进行初始化bean时,会执行afterPropertiesSet方法
@Component
public class MsmConstantUtils implements InitializingBean {
    @Value("${tencent.msm.id}")
    private String secretID ;

    @Value("${tencent.msm.secret}")
    private String secretKey ;

    @Value("${tencent.msm.appId}")
    private String appId;

    @Value("${tencent.msm.signName}")
    private String signName;

    @Value("${tencent.msm.templateId}")
    private String templateId;
    //六个相关的参数
    public static String SECRET_ID;
    public static String SECRET_KEY;
    public static String APP_ID;
    public static String SIGN_NAME;
    public static String TEMPLATE_ID;

    @Override
    public void afterPropertiesSet() throws Exception {
        SECRET_ID = secretID;
        SECRET_KEY = secretKey;
        APP_ID = appId;
        SIGN_NAME = signName;
        TEMPLATE_ID = templateId;
    }
}
3、在springboot的配置文件中引入,这些数据都在腾讯云的短信控制台能找到
tencent:
  msm:
    id: 填入自己的访问秘钥,位置在右上角点击个人头像->选择访问管理->新建秘钥
    secret: 同上, 这个是secretkey
    appId: 短信控制台页面->左侧应用管理->应用列表的 SDKAppId
    signName: 短信控制台页面->左侧国内短信->签名管理 签名内容
    templateId: 短信控制台页面->左侧国内短信->正文模板管理 Id
4、接着创建一个随机验证码工具类
package com.laoyang.utils;

import java.text.DecimalFormat;
import java.util.ArrayList;
import java.util.HashMap;
import java.util.List;
import java.util.Random;

/**
 * @author:Kevin
 * @create: 2022-10-05 11:11
 * @Description:    获取随机数
 */
public class RandomUtil {

    private static final Random random = new Random();

    private static final DecimalFormat fourdf = new DecimalFormat("0000");

    private static final DecimalFormat sixdf = new DecimalFormat("000000");

    public static String getFourBitRandom() {
        return fourdf.format(random.nextInt(10000));
    }

    public static String getSixBitRandom() {
        return sixdf.format(random.nextInt(1000000));
    }

    /**
     * 给定数组,抽取n个数据
     * @param list
     * @param n
     * @return
     */
    public static ArrayList getRandom(List list, int n) {

        Random random = new Random();

        HashMap<Object, Object> hashMap = new HashMap<Object, Object>();

        // 生成随机数字并存入HashMap
        for (int i = 0; i < list.size(); i++) {

            int number = random.nextInt(100) + 1;

            hashMap.put(number, i);
        }

        // 从HashMap导入数组
        Object[] robjs = hashMap.values().toArray();

        ArrayList r = new ArrayList();

        // 遍历数组并打印数据
        for (int i = 0; i < n; i++) {
            r.add(list.get((int) robjs[i]));
            System.out.print(list.get((int) robjs[i]) + "\t");
        }
        System.out.print("\n");
        return r;
    }
}
5、编写一个发送验证码controller
package com.laoyang.Controller;

import com.laoyang.CommonUtils.R;
import com.laoyang.Service.MsmService;
import com.laoyang.utils.RandomUtil;
import org.springframework.beans.factory.annotation.Autowired;
import org.springframework.data.redis.core.RedisTemplate;
import org.springframework.util.StringUtils;
import org.springframework.web.bind.annotation.*;

import java.util.concurrent.TimeUnit;

/**
 * @author:Kevin
 * @create: 2022-10-05 10:40
 * @Description:
 */
@RequestMapping("/edumsm/msm")
@CrossOrigin
@RestController
public class MsmController {

    @Autowired
    private MsmService msmService;

    @Autowired
    private RedisTemplate<String,String> redisTemplate;

    @GetMapping("/send/{phone}")
    public R send(@PathVariable String phone){
        //从redis获取,取不到再阿里云发送
        String code = redisTemplate.opsForValue().get(phone);
        if (!StringUtils.isEmpty(code)){
            return R.ok();
        }

        code = RandomUtil.getSixBitRandom();
        if (msmService.send(phone,code)){
            //发送成功就把验证码放在redis中,并设置时间5分钟
            redisTemplate.opsForValue().set(phone,code,5, TimeUnit.MINUTES);
            return R.ok("短信发送成功");
        }
        return R.error("短信发送失败");
    }

}
6、编写一个验证码service类
package com.laoyang.Service;

public interface MsmService {
    /**
     * 发送验证码
     * @param phone
     * @param code
     * @return
     */
    boolean send(String phone,String code);
}
7、发送短信验证码的实现类
package com.laoyang.Service.Impl;
import com.laoyang.Service.MsmService;
import com.laoyang.utils.MsmConstantUtils;
import com.tencentcloudapi.common.Credential;
import com.tencentcloudapi.common.exception.TencentCloudSDKException;
import com.tencentcloudapi.common.profile.ClientProfile;
import com.tencentcloudapi.common.profile.HttpProfile;
import com.tencentcloudapi.sms.v20210111.SmsClient;
import com.tencentcloudapi.sms.v20210111.models.SendSmsRequest;
import com.tencentcloudapi.sms.v20210111.models.SendSmsResponse;
import lombok.extern.slf4j.Slf4j;
import org.springframework.stereotype.Service;
import org.springframework.util.StringUtils;
/**
* @author:Kevin
* @create: 2022-10-05 10:42
* @Description:
*/
@Service
@Slf4j
public class MsmServiceImpl implements MsmService {
@Override
public boolean send(String phone,String code) {
//判断手机是否为null
if (StringUtils.isEmpty(phone)){
return false;
}
try {
/* 必要步骤:
* 实例化一个认证对象,入参需要传入腾讯云账户密钥对 secretId 和 secretKey
* 本示例采用从环境变量读取的方式,需要预先在环境变量中设置这两个值
* 您也可以直接在代码中写入密钥对,但需谨防泄露,不要将代码复制、上传或者分享给他人
* CAM 密钥查询:https://console.cloud.tencent.com/cam/capi
*/
Credential cred = new Credential(MsmConstantUtils.SECRET_ID, MsmConstantUtils.SECRET_KEY);
// 实例化一个http选项,可选的,没有特殊需求可以跳过
HttpProfile httpProfile = new HttpProfile();
httpProfile.setEndpoint("sms.tencentcloudapi.com");
// 实例化一个client选项,可选的,没有特殊需求可以跳过
ClientProfile clientProfile = new ClientProfile();
clientProfile.setHttpProfile(httpProfile);
// 实例化要请求产品的client对象,clientProfile是可选的
SmsClient client = new SmsClient(cred, "ap-guangzhou", clientProfile);
// 实例化一个请求对象,每个接口都会对应一个request对象
SendSmsRequest req = new SendSmsRequest();
String[] phoneNumberSet1 = {phone};
req.setPhoneNumberSet(phoneNumberSet1);
req.setSmsSdkAppId(MsmConstantUtils.APP_ID);
req.setSignName(MsmConstantUtils.SIGN_NAME);
req.setTemplateId(MsmConstantUtils.TEMPLATE_ID);
// 这里根据你配置的模板内容,有的不需要时间
String[] templateParamSet1 = {code, "30"};
req.setTemplateParamSet(templateParamSet1);
// 返回的resp是一个SendSmsResponse的实例,与请求对象对应
SendSmsResponse resp = client.SendSms(req);
// 输出 JSON 格式的字符串回包
System.out.println(SendSmsResponse.toJsonString(resp));
return true;
} catch (TencentCloudSDKException e) {
e.printStackTrace();
}
return false;
}
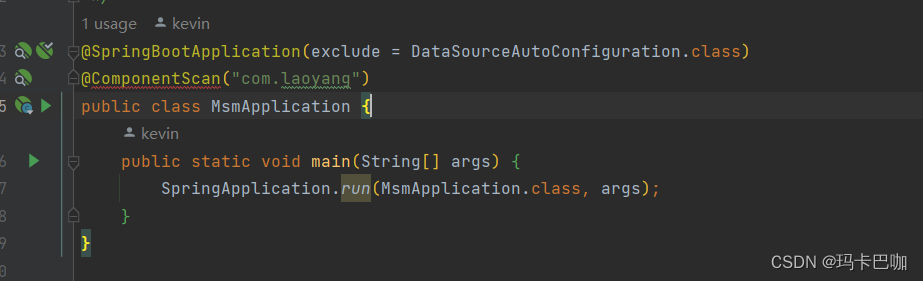
}最终创建启动类启动,就可以了


 1188
1188


 被折叠的 条评论
为什么被折叠?
被折叠的 条评论
为什么被折叠?
 到【灌水乐园】发言


