Springboot +spring security,认证方式---Form表单认证的实现(三)

一.简介

这篇文章来学习下security的认证方式其中的Form表单认证

二.Spring Security的认证方式

2.1什么是认证

认证:
就是用来判断系统中是否存在某用户,并判断该用户的身份是否合法的过程,解决的其实是用户登录的问题。认证的存在,是为了保护系统中的隐私数据与资源,只有合法的用户才可以访问系统中的资源。

2.2认证的方式

在Spring Security中,常见的认证方式可以分为HTTP层面和表单层面,常见的认证方式如下:

  1. HTTP基本认证;
  2. Form表单认证
  3. HTTP摘要认证;

这篇文章先讲HTTP基本认证

三. Form表单认证

3.1Form表单认证简介

对于表单认证,其实在SpringBoot开发环境中,只要添加了Spring Security的依赖包,就会自动实现表单认证。先看下源码,在WebSecurityConfigurerAdapter类的config(HttpSecurity http)方法中,可以看到如下实现,截图如下:
在这里插入图片描述
所以在SpringBoot环境中,默认支持的就是表单认证方式。

3.2表单认证效果

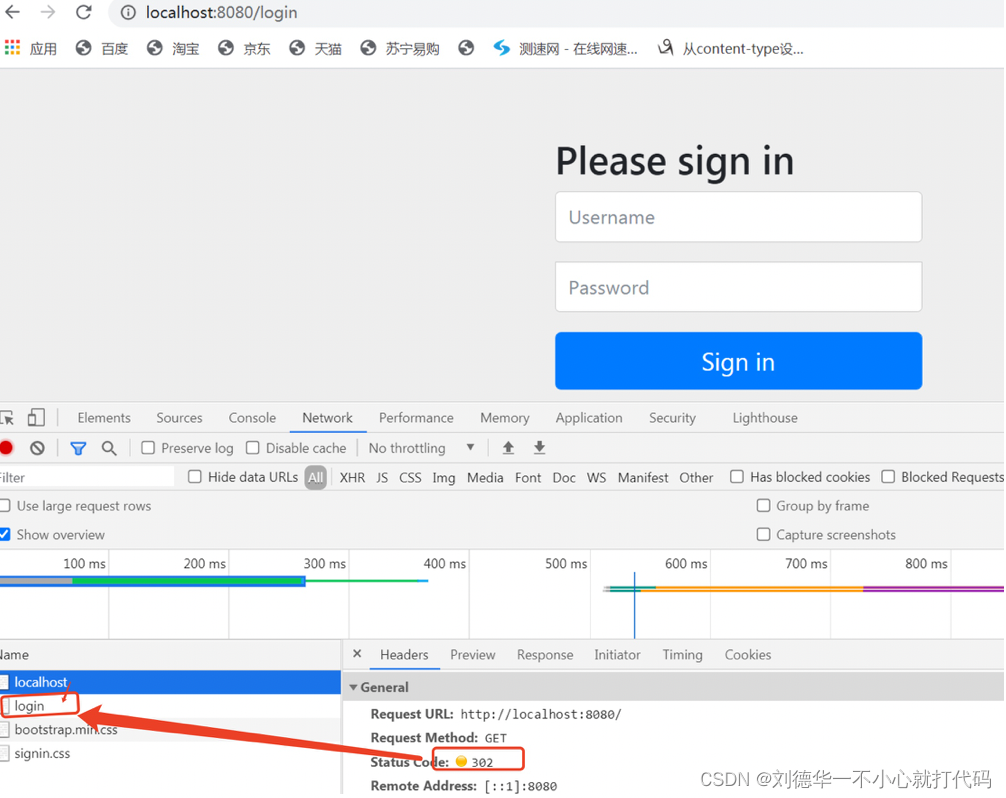
我们在访问某个Web接口之前,都会重定向到一个Security自带的login登录页面上,这个登录页面,就是表单认证的效果。截图如下:
在这里插入图片描述

3.3表单认证中的预置url和页面

为什么表单认证会有以上效果?这是因为在默认的formLogin配置中,自动配置了一些url和页面:

  1. /login(get): get请求时会跳转到这个页面,只要我们访问任意一个需要认证的请求时,都会跳转到这个登录界面。
  2. /login(post): post请求时会触发这个接口,在登录页面点击登录时,默认的登录页面表单中的action就是关联这个login接口。
  3. /login?error: 当用户名或密码错误时,会跳转到该页面。
  4. /: 登录成功后,默认跳转到该页面,如果配置了index.html页面,则 ”/“ 会重定向到index.html页面,当然这个页面要由我们自己实现。
  5. /logout: 注销页面。
  6. /login?logout: 注销成功后跳转到的页面。

由此可见,SpringSecurity默认有两个login,即登录页面和登录接口的地址都是 /login:

  1. GET http://localhost:8080/login
  2. POST http://localhost:8080/login

如果是 GET 请求,表示你想访问登录页面;如果是 POST 请求,表示你想提交登录数据。

四. 创建SpringSecurity项目

参考之前的文章,这边不做叙述。

五.代码实现

5.1创建SecurityConfig配置类

创建SecurityConfig类,继承自WebSecurityConfigurerAdapter父类,该类的作用如下:

  1. 验证所有请求;
  2. 允许用户使用表达登录进行身份验证;
  3. 允许用户使用Http基本认证。

代码如下:

import org.springframework.security.config.annotation.web.builders.HttpSecurity;
import org.springframework.security.config.annotation.web.configuration.EnableWebSecurity;
import org.springframework.security.config.annotation.web.configuration.WebSecurityConfigurerAdapter;

@EnableWebSecurity
public class SecurityConfi
  • 1
    点赞
  • 2
    收藏
    觉得还不错? 一键收藏
  • 0
    评论
好的,下面是一个简的基于 SpringBootSpring Security 的登录拦截 Demo: 1. 首先,需要添加 SpringBootSpring Security 的依赖,例如在 Maven 中添加以下依赖: ```xml <dependency> <groupId>org.springframework.boot</groupId> <artifactId>spring-boot-starter-security</artifactId> </dependency> ``` 2. 在 SpringBoot 主类中,添加 `@EnableWebSecurity` 注解和继承 `WebSecurityConfigurerAdapter` 类,并实现其中的 `configure(HttpSecurity http)` 方法,例如: ```java @EnableWebSecurity public class SecurityConfig extends WebSecurityConfigurerAdapter { @Override protected void configure(HttpSecurity http) throws Exception { http.authorizeRequests() .antMatchers("/secure/**").authenticated() .anyRequest().permitAll() .and() .formLogin().loginPage("/login").defaultSuccessURL("/secure/home").permitAll() .and() .logout().logoutUrl("/logout").logoutSuccessUrl("/login").permitAll(); } @Override protected void configure(AuthenticationManagerBuilder auth) throws Exception { auth.inMemoryAuthentication() .withUser("admin").password("{noop}123456").roles("USER"); } } ``` 上面的代码中,`@EnableWebSecurity` 注解开启了 Spring Security 的 Web 安全功能。`configure(HttpSecurity http)` 方法定义了 HTTP 请求的安全配置,`.antMatchers("/secure/**").authenticated()` 定义了需要认证的 URL,`.formLogin().loginPage("/login").defaultSuccessURL("/secure/home").permitAll()` 定义了登录页面的 URL 和登录成功后的默认页面,`.logout().logoutUrl("/logout").logoutSuccessUrl("/login").permitAll()` 定义了退出登录后的跳转页面。`configure(AuthenticationManagerBuilder auth)` 方法定义了用户认证方式,这里使用了内存中的用户信息。 3. 添加登录页面和安全页面: 在 `login.html` 中,添加登录: ```html <form method="post" action="/login"> <input type="text" name="username" placeholder="Username" /> <input type="password" name="password" placeholder="Password" /> <button type="submit">Login</button> </form> ``` 在 `home.html` 中,添加安全页面的内容。 4. 在 application.properties 中添加用户名和密码加密方式: ```properties spring.security.user.password.encoder=noop ``` 这样就完成了一个简的基于 SpringBootSpring Security 的登录拦截 Demo。

“相关推荐”对你有帮助么?

  • 非常没帮助
  • 没帮助
  • 一般
  • 有帮助
  • 非常有帮助
提交
评论
添加红包

请填写红包祝福语或标题

红包个数最小为10个

红包金额最低5元

当前余额3.43前往充值 >
需支付:10.00
成就一亿技术人!
领取后你会自动成为博主和红包主的粉丝 规则
hope_wisdom
发出的红包
实付
使用余额支付
点击重新获取
扫码支付
钱包余额 0

抵扣说明:

1.余额是钱包充值的虚拟货币,按照1:1的比例进行支付金额的抵扣。
2.余额无法直接购买下载,可以购买VIP、付费专栏及课程。

余额充值