


Centos7安装SDWebui
1.nvidia显卡驱动安装
#查看显卡编号
lspci | grep -i vga
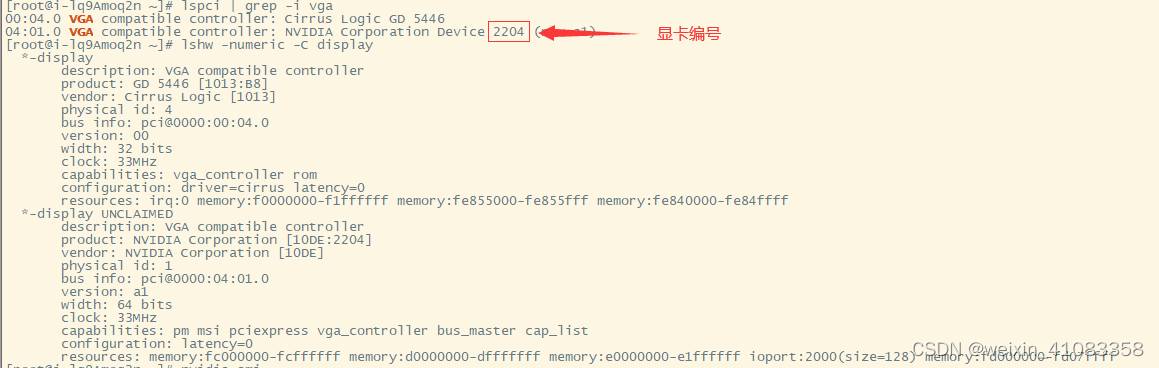
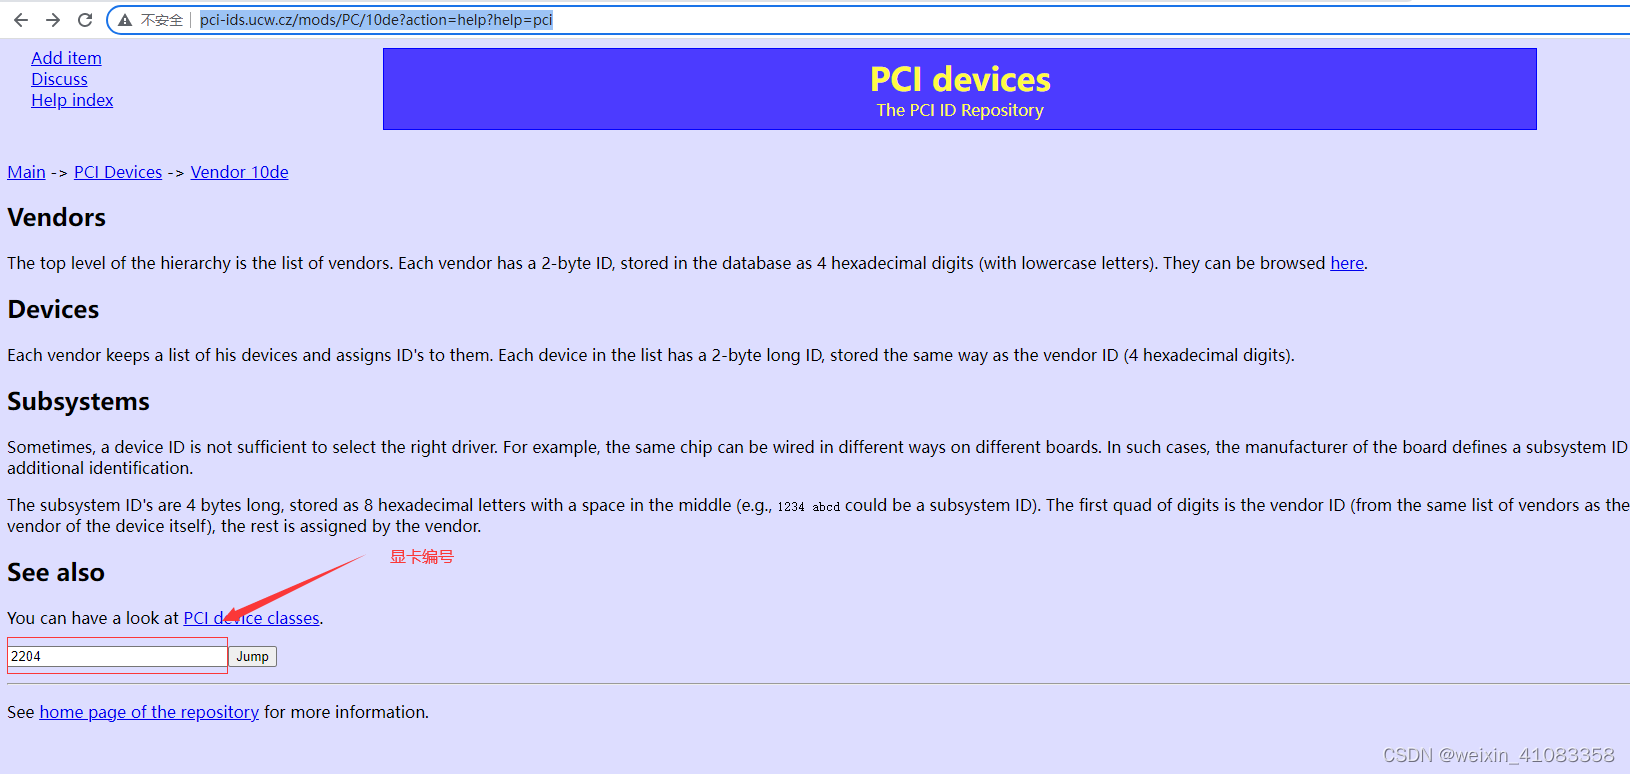
#查询显卡型号
http://pci-ids.ucw.cz/mods/PC/10de?action=help?help=pci
#安装依赖包
yum install kernel-devel gcc -y
#查看nouveau是否已禁用,如果有内容说明没有禁用
lsmod | grep nouveau
#如果没有禁用,则执行如下操作
#修改dist-blacklist.conf文件
vi /lib/modprobe.d/dist-blacklist.conf
#将nvidiafb注释掉
#blacklist nvidiafb
#添加以下语句
blacklist nouveau
options nouveau modeset=0
#重建initramfs image
mv /boot/initramfs-$(uname -r).img /boot/initramfs-$(uname -r).img.bak
dracut /boot/initramfs-$(uname -r).img $(uname -r)
#修改运行级别为文本模式
systemctl set-default multi-user.target
#重启
reboot
#查看nouveau是否禁用成功
lsmod | grep nouveau
#下载显卡驱动
https://www.nvidia.cn/Download/index.aspx?lang=cn

#安装驱动
chmod +x NVIDIA-Linux-x86_64-535.54.03.run
#查看显卡信息
nvidia-smi
2.软件安装
#安装python3.10.6以及openssl
#安装git
#下载webui.sh
wget https://github.com/AUTOMATIC1111/stable-diffusion-webui/blob/v1.4.0/webui.sh
#修改webui.sh配置
#在https://github.com/AUTOMATIC1111/stable-diffusion-webui.git前面加上https://ghproxy.com/
https://gh-proxy.com/https://github.com/AUTOMATIC1111/stable-diffusion-webui.git
#修改launch_utils.py文件
#在prepare_environment()中以https://github.com开头的url前面加上https://ghproxy.com/
gfpgan_package = os.environ.get('GFPGAN_PACKAGE', "https://gh-proxy.com/https://github.com/TencentARC/GFPGAN/archive/8d2447a2d918f8eba5a4a01463fd48e45126a379.zip")
clip_package = os.environ.get('CLIP_PACKAGE', "https://gh-proxy.com/https://github.com/openai/CLIP/archive/d50d76daa670286dd6cacf3bcd80b5e4823fc8e1.zip")
openclip_package = os.environ.get('OPENCLIP_PACKAGE', "https://gh-proxy.com/https://github.com/mlfoundations/open_clip/archive/bb6e834e9c70d9c27d0dc3ecedeebeaeb1ffad6b.zip")
stable_diffusion_repo = os.environ.get('STABLE_DIFFUSION_REPO', "https://gh-proxy.com/https://github.com/Stability-AI/stablediffusion.git")
k_diffusion_repo = os.environ.get('K_DIFFUSION_REPO', 'https://gh-proxy.com/https://github.com/crowsonkb/k-diffusion.git')
codeformer_repo = os.environ.get('CODEFORMER_REPO', 'https://gh-proxy.com/https://github.com/sczhou/CodeFormer.git')
blip_repo = os.environ.get('BLIP_REPO', 'https://gh-proxy.com/https://github.com/salesforce/BLIP.git')
#修改webui-user.sh文件优化出图速度,具体参数查看https://github.com/AUTOMATIC1111/stable-diffusion-webui/wiki/Optimizations
export COMMANDLINE_ARGS="--opt-sdp-no-mem-attention"
source webui-user.sh
#切换显卡,0为第一张显卡
./webui.sh --device-id 1 或者 HIP_VISIBLE_DEVICES=1 ./webui.sh >output.log
#如果ERROR: This script must not be launched as root, aborting...
#注释掉webui.sh如下内容:
## Do not run as root
#if [[ $(id -u) -eq 0 ]]
#then
#    printf "\n%s\n" "${delimiter}"
#    printf "\e[1m\e[31mERROR: This script must not be launched as root, aborting...\e[0m"
#    printf "\n%s\n" "${delimiter}"
#    exit 1
#else
#    printf "\n%s\n" "${delimiter}"
#    printf "Running on \e[1m\e[32m%s\e[0m user" "$(whoami)"
#    printf "\n%s\n" "${delimiter}"
#fi
#git: 'remote-http' is not a git command. See 'git --help'
#安装 libcurl-devel、curl-devel ,然后重新编译 git :
yum install libcurl-devel
yum install curl-devel
#如果在Installing gfpgan卡住
/home/sdwebui/stable-diffusion-webui/venv/bin/python3 -m pip install https://ghproxy.com/https://github.com/TencentARC/GFPGAN/archive/8d2447a2d918f8eba5a4a01463fd48e45126a379.zip --prefer-binary
#如果在Installing requirements卡住,用以下方式换国内镜像
/home/sdwebui/stable-diffusion-webui/venv/bin/python3 -m pip install -r requirements.txt -i http://mirrors.aliyun.com/pypi/simple/ --trusted-host mirrors.aliyun.com
/home/sdwebui/stable-diffusion-webui/venv/bin/python3 -m pip install -r requirements_versions.txt -i http://mirrors.aliyun.com/pypi/simple/ --trusted-host mirrors.aliyun.com
#如果出现错误ImportError: libXext.so.6
yum install libXext
#汉化
#在https://jihulab.com/hunter0726/stable-diffusion-webui-localization-zh_CN的localizations文件夹下下载zh_CN.json,并将文件放到/home/sdwebui/stable-diffusion-webui/localizations下,重启即可

#TypeError: __init__() got an unexpected keyword argument 'socket_options'
#错误消息表明AsyncConnectionPool.init()方法收到了意外的关键字参数'socket_options'。这可能是由于httpx库的版本不兼容或存在错误
#使用以下命令将httpx库更新到最新版本:
pip install --upgrade httpx
#如果更新库后仍无法解决问题,你可以尝试降级到httpx库的先前版本,以查看是否可以解决问题
pip install httpx==<version>
#OSError: Can't load tokenizer for 'openai/clip-vit-large-patch14'
#下载如下地址内容,在stable-diffusion-webui目录下创建openai文件夹,将下载内容放到openai文件夹下
https://huggingface.co/openai/clip-vit-large-patch14/tree/main
#修改stable-diffusion-stability-ai/ldm/modules/encoders/modules.py文件,将openai开头的路径替换为上面创建的文件地址
3.pip国内的几个源
#阿里云
http://mirrors.aliyun.com/pypi/simple/
#中国科技大学
https://pypi.mirrors.ustc.edu.cn/simple/
#豆瓣
http://pypi.douban.com/simple/
#清华大学
https://pypi.tuna.tsinghua.edu.cn/simple/
#查看源下面软件版本
/home/sd/stable-diffusion-webui/venv/bin/python3 -m pip install tb-nightly==
#修改源地址
python.exe -m pip config set global.index-url https://mirrors.aliyun.com/pypi/simple
python.exe -m pip config set install.trusted-host mirrors.aliyun.com
4.插件安装设置
4.1外挂VAE、Clip skip
1.依次点击 settings->show all pages
2.快速查找 “Quicksettings list”
3.依次添加 sd_vae,CLIP_stop_at_last_layers
4.依次点击 apply settings,Reload UI
4.2安装controlnet(离线安装)
1.下载 https://github.com/Mikubill/sd-webui-controlnet的源码包
2.解压到 stable-diffusion-webui\extensions\sd-webui-controlnet目录
3.下载requirements.txt依赖
4.查看stable-diffusion-webui/venv/lib/python3.9/site-packages/ifnude/detector.py文件,找到detector.onnx文件地址下载并放到/root/.ifnude/detector.onnx处,找到classes地址并下载classes文件到/root/.ifnude/classes处
5.从https://huggingface.co/lllyasviel/ControlNet-v1-1/tree/main下载模型,并将模型放到stable-diffusion-webui/extensions/sd-webui-controlnet/models下
6.依次点击 settings->Reload UI
4.3安装additional-networks(离线安装)
1.下载 https://github.com/kohya-ss/sd-webui-additional-networks的源码包
2.解压到 stable-diffusion-webui\extensions\sd-webui-additional-networks目录
3.依次点击 settings->Reload UI
4.4安装adetailer(离线安装)
1.下载 https://github.com/Bing-su/adetailer的源码包
2.解压到 stable-diffusion-webui\extensions\adetailer目录
3.依次点击 settings->Reload UI
4.5安装/stable-diffusion-webui-two-shot(离线安装)
1.下载 https://github.com/ashen-sensored/stable-diffusion-webui-two-shot的源码包
2.解压到 stable-diffusion-webui\extensions\stable-diffusion-webui-two-shot目录
3.依次点击 settings->Reload UI
4.6安装sd-webui-roop(离线安装)
1.下载 https://github.com/s0md3v/sd-webui-roop的源码包
2.解压到 stable-diffusion-webui\extensions\sd-webui-roop目录
3.下载requirements.txt依赖(如果包有冲突,则将包里面的版本改为环境已有的版本)
4.打开install.py文件,找到里面需要下载的model_url(源地址已经没有该文件了,需要找其它下载地址,找到之后先自行备份),将inswapper_128.onnx文件先下载下来放到models/roop目录下
5.打开stable-diffusion-webui/extensions/sd-webui-roop/scripts/swapper.py,找到buffalo_l文件地址并下载,之后放到/root/.insightface/models/buffalo_l文件夹下
4.依次点击 settings->Reload UI
5.部分插件兼容版本清单
| 组件 | 版本 |
|---|---|
| sdwebui | 1.6.0 |
| python | 3.9.12 |
| torch | 1.13.1 |
| protobuf | 3.20.2 |
| additional-networks | 0.5.0 |
| adetailer | 23.11.0 |
| sd-webui-roop | 0.0.2以上版本(0.0.2不支持,目前为主线版本) |
| opencv-python | 4.8.0.76 |
| onnx | 1.14.1 |


 2513
2513


 被折叠的 条评论
为什么被折叠?
被折叠的 条评论
为什么被折叠?
 到【灌水乐园】发言


