


上一篇讲了 spring-boot跟nacos-config整合的相关逻辑。(相当于前期准备工作)
这里开始从springboot启动开始,看看nacos-config是怎么参与到springboot中的。
springboot启动流程(只讲跟nacos-config相关的)
1:SpringApplication.run()
2:prepareContext
	该方法的applyInitializers()会去遍历ApplicationContextInitializer的实现类
	其中有一个类:PropertySourceBootstrapConfiguration
protected void applyInitializers(ConfigurableApplicationContext context) {
		for (ApplicationContextInitializer initializer : getInitializers()) {
			Class<?> requiredType = GenericTypeResolver.resolveTypeArgument(initializer.getClass(),
					ApplicationContextInitializer.class);
			Assert.isInstanceOf(requiredType, context, "Unable to call initializer.");
			initializer.initialize(context);
		}
	}
PropertySourceBootstrapConfiguration.initialize()方法:
扩展点:propertySourceLocators接口
public void initialize(ConfigurableApplicationContext applicationContext) {
		List<PropertySource<?>> composite = new ArrayList<>();
		//propertySourceLocators这个接口的实现类:NacosPropertySourceLocator
		//这里很关键,跟之前d.3对接上了。
		AnnotationAwareOrderComparator.sort(this.propertySourceLocators);
		boolean empty = true;
		ConfigurableEnvironment environment = applicationContext.getEnvironment();
		for (PropertySourceLocator locator : this.propertySourceLocators) {
		//这个locateCollection很关键。
			Collection<PropertySource<?>> source = locator.locateCollection(environment);
			if (source == null || source.size() == 0) {
				continue;
			}
			List<PropertySource<?>> sourceList = new ArrayList<>();
			for (PropertySource<?> p : source) {
				if (p instanceof EnumerablePropertySource) {
					EnumerablePropertySource<?> enumerable = (EnumerablePropertySource<?>) p;
					sourceList.add(new BootstrapPropertySource<>(enumerable));
				}
				else {
					sourceList.add(new SimpleBootstrapPropertySource(p));
				}
			}
			logger.info("Located property source: " + sourceList);
			composite.addAll(sourceList);
			empty = false;
		}
		if (!empty) {
			MutablePropertySources propertySources = environment.getPropertySources();
			String logConfig = environment.resolvePlaceholders("${logging.config:}");
			LogFile logFile = LogFile.get(environment);
			for (PropertySource<?> p : environment.getPropertySources()) {
				if (p.getName().startsWith(BOOTSTRAP_PROPERTY_SOURCE_NAME)) {
					propertySources.remove(p.getName());
				}
			}
			insertPropertySources(propertySources, composite);
			reinitializeLoggingSystem(environment, logConfig, logFile);
			setLogLevels(applicationContext, environment);
			handleIncludedProfiles(environment);
		}
	}
locator.locateCollection(environment);会跳转到NacosPropertySourceLocator.locate();
nacosConfigManager,nacosConfigProperties对象 已在上一篇中讲解。
public PropertySource<?> locate(Environment env) {
		nacosConfigProperties.setEnvironment(env);
		//这里是获取NacosConfigService
		ConfigService configService = nacosConfigManager.getConfigService();

		if (null == configService) {
			log.warn("no instance of config service found, can't load config from nacos");
			return null;
		}
		long timeout = nacosConfigProperties.getTimeout();
		nacosPropertySourceBuilder = new NacosPropertySourceBuilder(configService,
				timeout);
		String name = nacosConfigProperties.getName();

		String dataIdPrefix = nacosConfigProperties.getPrefix();
		if (StringUtils.isEmpty(dataIdPrefix)) {
			dataIdPrefix = name;
		}

		if (StringUtils.isEmpty(dataIdPrefix)) {
			dataIdPrefix = env.getProperty("spring.application.name");
		}

		CompositePropertySource composite = new CompositePropertySource(
				NACOS_PROPERTY_SOURCE_NAME);
		//主要解析:pring.cloud.nacos.config.shared-configs[0],这里不做详解
		loadSharedConfiguration(composite);
		//主要解析:	 * spring.cloud.nacos.config.extension-configs[0]=xxx
		loadExtConfiguration(composite);
		loadApplicationConfiguration(composite, dataIdPrefix, nacosConfigProperties, env);

		return composite;
	}
loadApplicationConfiguration()详解
优先级为3>2>1.会覆盖 这里就是dataId的生成过程,
private void loadApplicationConfiguration(
			CompositePropertySource compositePropertySource, String dataIdPrefix,
			NacosConfigProperties properties, Environment environment) {
		String fileExtension = properties.getFileExtension();
		String nacosGroup = properties.getGroup();
		// load directly once by default
		//1.加载应用名,${spring.application.name}
		loadNacosDataIfPresent(compositePropertySource, dataIdPrefix, nacosGroup,
				fileExtension, true);
		// load with suffix, which have a higher priority than the default
		//2.加载应用名.扩展名称,${spring.application.name}.${fileExtension}
		loadNacosDataIfPresent(compositePropertySource,
				dataIdPrefix + DOT + fileExtension, nacosGroup, fileExtension, true);
		// Loaded with profile, which have a higher priority than the suffix
		//3.加载${spring.application.name}-${spring.profile.active}.${fileExtension}
		for (String profile : environment.getActiveProfiles()) {
			String dataId = dataIdPrefix + SEP1 + profile + DOT + fileExtension;
			loadNacosDataIfPresent(compositePropertySource, dataId, nacosGroup,
					fileExtension, true);
		}

	}
loadNacosDataIfPresent();这一块是请求nacosService的核心点。
这里直接贴出关键方法,具体代码不贴了,篇幅太长了。
nacosPropertySourceBuilder.build->
loadNacosData()-> //从方法名可以看出来,加载Nacos数据。
configService.getConfig(dataId, group, timeout)-> //这个configService很熟悉了,就是NacosConfigService类
getConfigInner()->
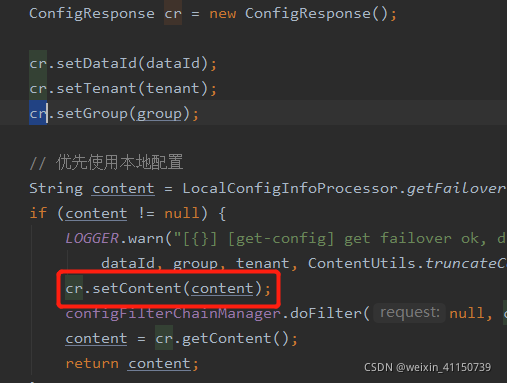
分支1:String content = LocalConfigInfoProcessor.getFailover(agent.getName(), dataId, group, tenant);-> //优先使用本地缓存配置 这个agent就是MetricsHttpAgent对象了,也跟前面的对上了
分支2:String[] ct = worker.getServerConfig(dataId, group, tenant, timeoutMs); -> //当本地配置没有的时候,去请求nacos服务拿取配置,这里的worker就是ClientWorker对象,也跟前面的对上了。去请求路径为ip+端口+nacos/v1/cs/config?dataId=xxxxx&group=XXXX&tenant=namespace。在后面就是nacos服务端接收请求后的逻辑,这里不做记录。
//这里请求到数据以后把数据存放到 ConfigResponse对象中。暂时不知道是做什么用,先记录
3:listeners.running(context);
这里就是发布了ApplicationReadyEvent事件。
@Override
	public void running(ConfigurableApplicationContext context) {
		context.publishEvent(new ApplicationReadyEvent(this.application, this.args, context));
	}

publishEvent(event, null);->
getApplicationEventMulticaster().multicastEvent(applicationEvent, eventType);->
getApplicationListeners(event, type)->//这里会获取到NacosContenxtRefresher监听器。与之前也对上了。
NacosContextRefresher.onApplicationEvent(ApplicationReadyEvent event)
// many Spring context
if (this.ready.compareAndSet(false, true)) {//这里用了CAS处理并发
	this.registerNacosListenersForApplications();
}
1.registerNacosListenersForApplications->

private void registerNacosListenersForApplications() {
		if (isRefreshEnabled()) { //这里对应这是否刷新的配置
			for (NacosPropertySource propertySource : NacosPropertySourceRepository
					.getAll()) { //这里猜测(没仔细去看了):这里的值应该是上面加载到属性以后,存储到这个NacosPropertySource,一个dataId对应一个对象。
				if (!propertySource.isRefreshable()) {
					continue;
				}
				String dataId = propertySource.getDataId();
				registerNacosListener(propertySource.getGroup(), dataId);
			}
		}
	}

2.registerNacosListener(propertySource.getGroup(), dataId);-> //注册Nacos监听器。

private void registerNacosListener(final String groupKey, final String dataKey) {
		String key = NacosPropertySourceRepository.getMapKey(dataKey, groupKey);
		Listener listener = listenerMap.computeIfAbsent(key,
				lst -> new AbstractSharedListener() {
					@Override
					public void innerReceive(String dataId, String group,
							String configInfo) {
						refreshCountIncrement();
						nacosRefreshHistory.addRefreshRecord(dataId, group, configInfo);//添加历史记录。
						// todo feature: support single refresh for listening
						//发布RefreshEvent事件。
						applicationContext.publishEvent(
								new RefreshEvent(this, null, "Refresh Nacos config"));
						if (log.isDebugEnabled()) {
							log.debug(String.format(
									"Refresh Nacos config group=%s,dataId=%s,configInfo=%s",
									group, dataId, configInfo));
						}
					}
				});
		try {
			//上面是准备监听器,添加到nacosConfigService中。
			//这里面会生成CacheData对象,并于监听器绑定起来。
			configService.addListener(dataKey, groupKey, listener);
		}
		catch (NacosException e) {
			log.warn(String.format(
					"register fail for nacos listener ,dataId=[%s],group=[%s]", dataKey,
					groupKey), e);
		}
	}
到这里好像就结束了,记住这里,添加了AbstractSharedListene
在回到springboot整合nacos-config-源码分析2的NacosConfigService中的ClientWorker的定时任务,checkConfigInfo()方法 ,然后到LongPollingRunnable.run();
LongPollingRunnable.run()->
checkUpdateDataIds(cacheDatas, inInitializingCacheList)->//向nacosService发送请求,返回更新的数据。
getServerConfig()->//向服务器请求新的数据,
cacheData.checkListenerMd5();//这里会去调用之前注册的监听器处理更新。
safeNotifyListener().run()->
listener.receiveConfigInfo(contentTmp);//这里就会找到实现类:AbstractSharedListene,就会调上面。
AbstractSharedListener.innerReceive()->
applicationContext.publishEvent(new RefreshEvent(this, null, "Refresh Nacos config"))->//这里发布了一个RefreshEvent事件。
RefreshEventListener.onApplicationEvent()-> //然后就会到这里
ContextRefresher.refresh()->// 刷新,这里有两个分子,如下:
public synchronized Set<String> refresh() {
		Set<String> keys = refreshEnvironment();  //刷新Environment
		this.scope.refreshAll();//刷新有@RefreshScope的bean,
		return keys;
	}
这里先讲refreshEnvironment();
public synchronized Set<String> refreshEnvironment() {
		Map<String, Object> before = extract(this.context.getEnvironment().getPropertySources());
		addConfigFilesToEnvironment();
		Set<String> keys = changes(before,
				extract(this.context.getEnvironment().getPropertySources())).keySet();
				//这里发布了EnvironmentChangeEvent事件,去刷新Environment
		this.context.publishEvent(new EnvironmentChangeEvent(this.context, keys));
		return keys;
	}
this.scope.refreshAll();//刷新有@RefreshScope的bean,
@ManagedOperation(description = "Dispose of the current instance of all beans "
			+ "in this scope and force a refresh on next method execution.")
	public void refreshAll() {
		super.destroy();
		this.context.publishEvent(new RefreshScopeRefreshedEvent()); //这里发布了RefreshScopeRefreshedEvent事件,从而使@RefreshScope生效。
	}
接下来讲解@RefreshScope生效原理:


 425
425

 被折叠的 条评论
为什么被折叠?
被折叠的 条评论
为什么被折叠?
 到【灌水乐园】发言


