


1、在windows以管理员身份运行cmd,输入如下命令生成证书
keytool -genkey -alias myhttps -keyalg RSA -keysize 2048 -validity 36500 -keystore "D:/tmp/ssl/myhttps.keystore"
注释
命令:keytool -genkey -alias testhttps -keyalg RSA -keysize 2048 -validity 36500 -keystore  "D:/tmp/ssl/testhttps.keystore"

命令解释:
• -genkey 表示要创建一个新的密钥。

• -alias 表示 keystore 的别名。

• -keyalg 表示使用的加密算法是 RSA。

• -keysize 表示密钥的长度.。

• -keystore 表示生成的密钥存放位直。

• -validity 表示密钥的有效时间,单位为天。
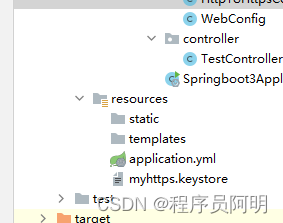
2、将目录下的myhttps.keystore文件移动到resource下面
3、配置文件
server:
  port: 9987
  non-ssl-port: 8089

# 用于 非ssl请求 强制转成 ssl 请求
# 当使用 访问地址:http://127.0.0.1:8089/hello 访问时 后台会 将请求 转换成 https://127.0.0.1:9987/hello
#  servlet:
#    context-path: /ssl-service

  ssl:
    key-store: classpath:myhttps.keystore  #类路径下的自签证书
    key-alias: myhttps # 证书别名
    key-store-password: 123456 #证书密码
    key-store-type: JKS # 证书类型
    enabled: true  # 开启证书验证
4、配置http强制跳转https配置类
package com.example.springboot3.config;

import org.apache.catalina.Context;
import org.apache.catalina.connector.Connector;
import org.apache.tomcat.util.descriptor.web.SecurityCollection;
import org.apache.tomcat.util.descriptor.web.SecurityConstraint;
import org.springframework.beans.factory.annotation.Value;
import org.springframework.boot.web.embedded.tomcat.TomcatServletWebServerFactory;
import org.springframework.context.annotation.Bean;
import org.springframework.context.annotation.Configuration;

/**
 * @author oukele
 * http 请求 强制跳转成 https
 */
@Configuration
public class HttpToHttpsConfig {
    /**
     * 项目指定的端口号
     */
    @Value("${server.port}")
    private int serverPort;

    /**
     * 用于 非ssl请求 强制转成 ssl 请求 的端口号
     */
    @Value("${server.non-ssl-port}")
    private int port;

    @Bean
    public TomcatServletWebServerFactory servletContainerFactory() {
        TomcatServletWebServerFactory tomcat = new TomcatServletWebServerFactory() {
            @Override
            protected void postProcessContext(Context context) {
                //设置安全性约束
                SecurityConstraint securityConstraint = new SecurityConstraint();
                securityConstraint.setUserConstraint("CONFIDENTIAL");
                //设置约束条件
                SecurityCollection collection = new SecurityCollection();
                //拦截所有请求
                collection.addPattern("/*");
                securityConstraint.addCollection(collection);
                context.addConstraint(securityConstraint);
            }
        };
        Connector connector = new Connector("org.apache.coyote.http11.Http11NioProtocol");
        //设置将分配给通过此连接器接收到的请求的方案
        connector.setScheme("http");

        //true: http使用http, https使用https;
        //false: http重定向到https;
        connector.setSecure(false);

        //设置监听请求的端口号,这个端口不能其他已经在使用的端口重复,否则会报错
        connector.setPort(port);

        //重定向端口号(非SSL到SSL)
        connector.setRedirectPort(serverPort);

        tomcat.addAdditionalTomcatConnectors(connector);
        return tomcat;
    }
}
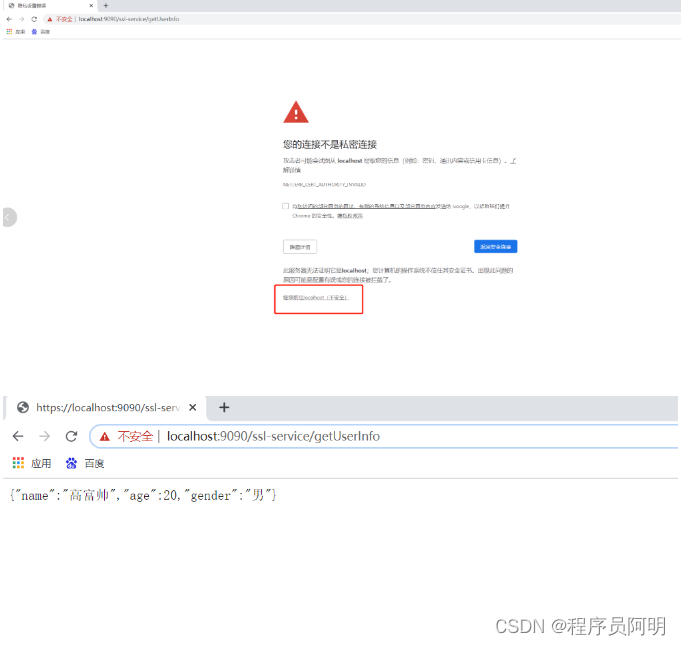
5、在浏览器中测试


 1201
1201


 被折叠的 条评论
为什么被折叠?
被折叠的 条评论
为什么被折叠?
 到【灌水乐园】发言


