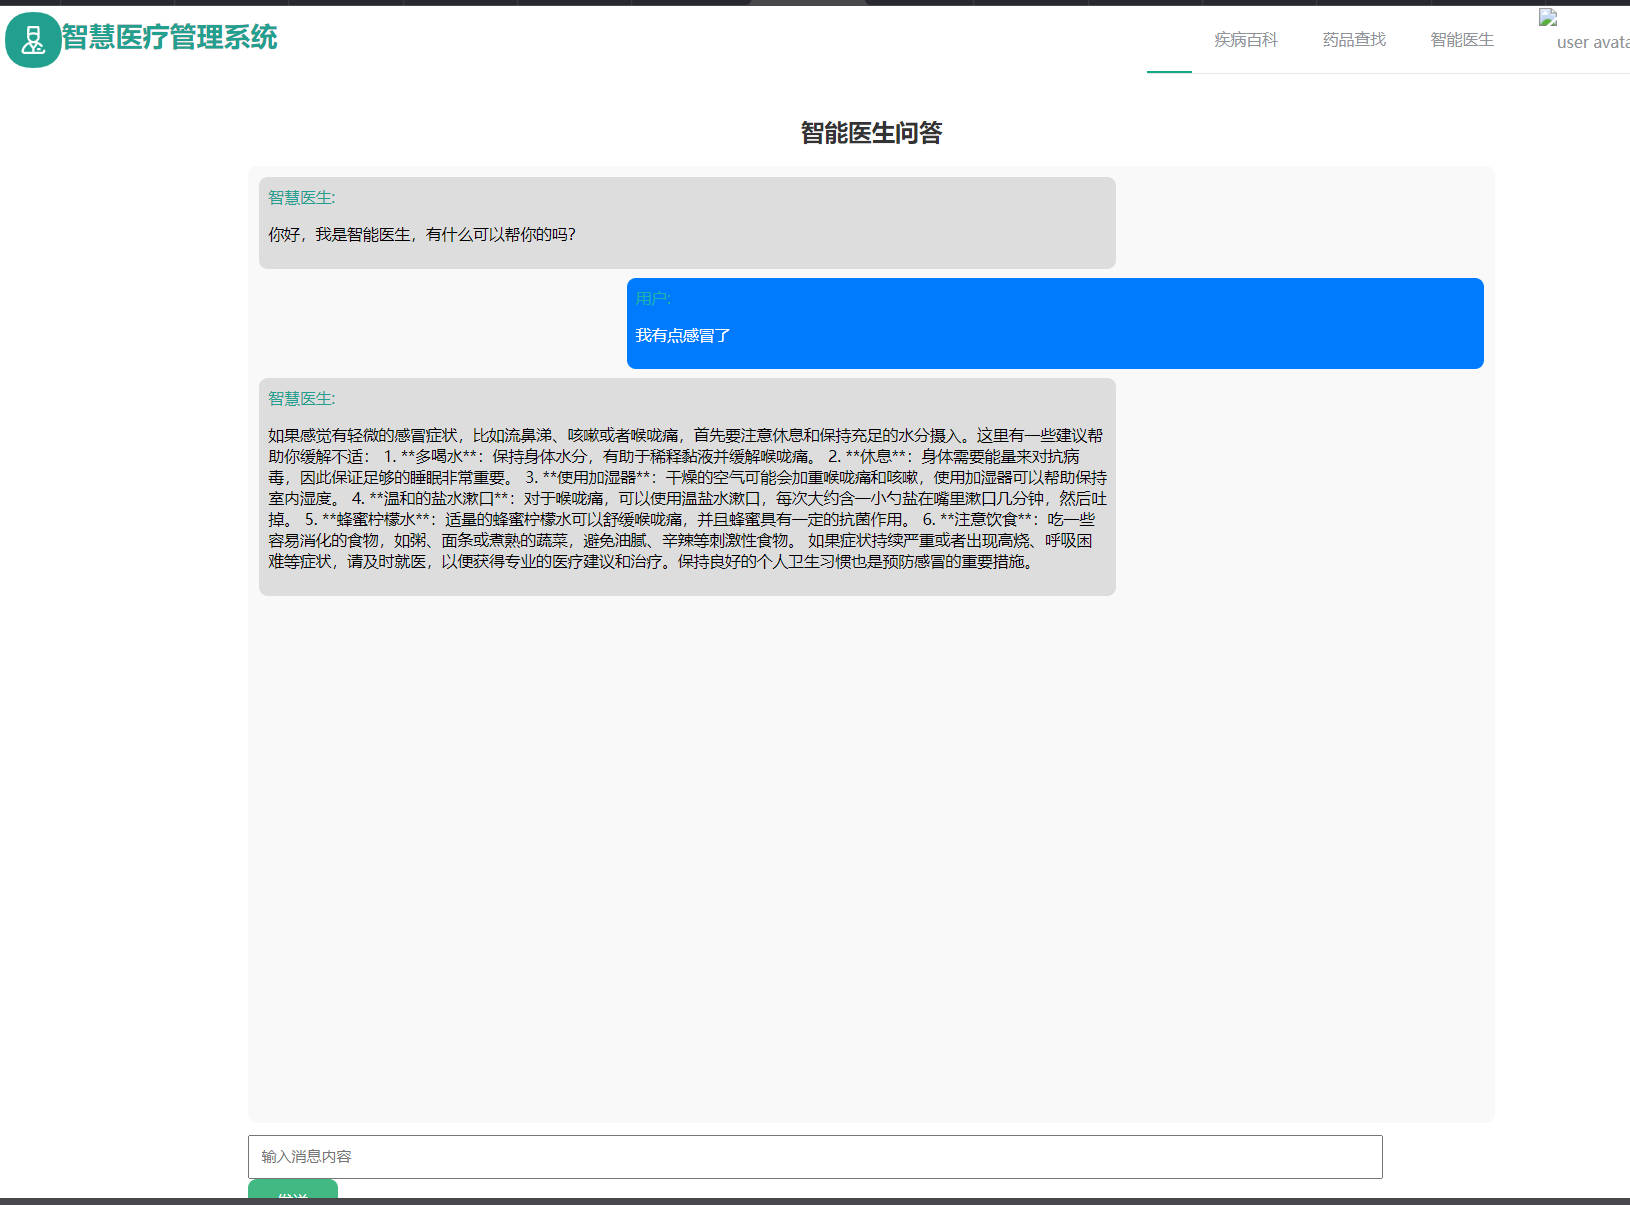
效果图

Vue前端
<template>
  <div class="chat-container">
    <h1 style="text-align: center">智能医生问答</h1>
    <div class="chat-box" ref="chatBox">
      <!-- 消息列表 -->
      <div
          v-for="(msg, index) in messages"
          :key="index"
          class="message"
          :class="{ 'my-message': msg.isMine }"
      >
        <!-- 显示用户信息 -->


        <!-- 消息文本 -->
        <div class="message-content">
          <!-- 显示智慧医生或用户 -->
          <div class="sender-name" v-if="msg.isMine" style="color: lightseagreen">用户:</div>
          <div class="sender-name" v-else style="color: #2D8CF0">智慧医生:</div>

          <!-- 使用 transition 包裹消息文本,并控制显示 -->
          <transition name="typewriter" type="text" v-show="msg.showText">
            <p class="text-wrapper">{{ msg.text }}</p>
          </transition>

          <!-- 显示用户输入的内容 -->
          <div v-if="msg.isMine">
            <p class="input-wrapper">{{ msg.input }}</p>
          </div>
        </div>
      </div>
    </div>
    <!-- 输入框和发送按钮 -->
    <input
        type="text"
        v-model="messageInput"
        placeholder="输入消息内容"
        @keyup.enter="sendMessage"
    />
    <button @click="sendMessage">发送</button>
  </div>
</template>

<script>
import axios from 'axios';
import VueTypedJs from 'vue-typed-js'
export default {
  components: {
    VueTypedJs
  },
  name: "ChatBox",
  data() {
    return {
      messages: [
        {text: '你好,我是智能医生,有什么可以帮你的吗?', isMine: false}
      ], // 存储消息的数组
      messageInput: "", // 输入框的绑定数据
    };
  },
  methods: {
    sendMessage() {
      // 保存当前输入的消息,并将其添加到 messages 数组
      const userMessage = this.messageInput.trim();
      if (!userMessage) return; // 如果输入为空,则不发送

      // 将用户输入的消息添加到消息数组,初始时 typedText 为空字符串
      this.messages.push({
        input: userMessage,
        typedText: '', // 初始化 typedText 为空字符串,用于逐步显示消息
        isMine: true, // 表示是自己发送的消息
      });

      // 清空输入框
      this.messageInput = '';

      // 调用 typeMessage 方法来实现打字机效果
      this.typeMessage(userMessage);

      // 发送请求到后端
      this.$request.get(`/chat`, {
        params: {
          message: userMessage,
        }
      }).then(response => {
        try {
          const responseData = response.data; // 获取原始响应数据
          const parsedData = JSON.parse(responseData); // 解析 JSON 字符串

          // 将服务器响应的消息添加到消息数组
          this.messages.push({
            text: parsedData.output.choices[0].message.content,
            isMine: false, // 服务器响应的消息不是用户自己发送的
          });
        } catch (error) {
          console.error("解析响应数据时发生错误:", error);
          // 这里可以添加错误处理逻辑,例如提示用户
        }
      })
          .catch(error => {
            console.error("发送消息失败:", error);
            // 这里可以添加错误处理逻辑,例如提示用户
          });
    },
    typeMessage(text) {
      const messageIndex = this.messages.length - 1; // 获取最后一条消息的索引
      const message = this.messages[messageIndex];
      let i = 0;
      const interval = setInterval(() => {
        if (i < text.length) {
          // 逐步构建 typedText 字符串
          message.typedText += text.charAt(i);
          i++;
        } else {
          // 所有字符都已显示,停止间隔
          clearInterval(interval);
        }
      }, 100); // 间隔时间可以根据需要调整
    },
    scrollToBottom() {
      // 确保聊天框滚动到最新的消息
      this.$nextTick(() => {
        this.$refs.chatBox.scrollTop = this.$refs.chatBox.scrollHeight;
      });
    },
  },
};
</script>

<style scoped>
.chat-container {
  display: flex;
  flex-direction: column;
  width: 50%;
  margin: 0 auto;
  height: 1000px;
  border: 20px;
  border-radius: 8px;
  overflow: hidden;
}

.chat-box {
  flex: 1;
  overflow-y: auto;
  background-color: #f9f9f9;
  margin-bottom: 10px;
  padding: 10px;
  border-radius: 8px;
}

.message {
  padding: 8px;
  margin-bottom: 8px;
  border-radius: 8px;
  max-width: 70%;
  word-wrap: break-word;
}

.my-message {
  margin-left: auto;
  background-color: #007bff;
  color: white;
}

.message:not(.my-message) {
  background-color: #ddd;
  color: black;
}

input[type="text"] {
  width: calc(100% - 100px);
  padding: 10px;
  margin-right: 5px;
}

button {
  width: 80px;
  padding: 10px;
  border: none;
  background-color: #42b983;
  color: white;
  cursor: pointer;
  border-radius: 8px;
}

.text-wrapper p {
  opacity: 0;
  animation: typewriter 2s steps(20, end) forwards;
}

/* 初始样式,用于实现打字机动画的开始状态 */
.typewriter-enter-active {
  animation: typewriter-enter 0.5s ease-out forwards;
}

.typewriter-leave-active {
  animation: typewriter-leave 0.5s ease-in forwards;
}

@keyframes typewriter-enter {
  to {
    opacity: 1;
  }
}

@keyframes typewriter-leave {
  from {
    opacity: 1;
  }
  to {
    opacity: 0;
  }
}

@keyframes typewriter {
  to {
    transform: translateX(0);
    opacity: 1;
  }
}
</style>
后端
接口
package com.example.springboot.controller;

import com.alibaba.dashscope.aigc.generation.Generation;
import com.alibaba.dashscope.aigc.generation.GenerationResult;
import com.alibaba.dashscope.common.Message;
import com.alibaba.dashscope.common.Role;
import com.alibaba.dashscope.exception.ApiException;
import com.alibaba.dashscope.exception.InputRequiredException;
import com.alibaba.dashscope.exception.NoApiKeyException;
import com.alibaba.dashscope.utils.JsonUtils;
import com.example.springboot.common.Result;
import com.example.springboot.utils.chat;
import org.springframework.web.bind.annotation.GetMapping;
import org.springframework.web.bind.annotation.PostMapping;
import org.springframework.web.bind.annotation.RequestParam;
import org.springframework.web.bind.annotation.RestController;

@RestController
public class ChatController {

    @GetMapping("/chat")
    public Result chatWithAI(@RequestParam("message") String message) {
        try {
            GenerationResult result = chat.callWithMessage(message);
            System.out.println(JsonUtils.toJson(result));
            return Result.success(JsonUtils.toJson(result));
        } catch (ApiException | NoApiKeyException | InputRequiredException e) {
            // 使用日志框架记录异常信息
            // Logger.error("An error occurred while calling the generation service", e);
            return Result.error("An error occurred while calling the generation service");
        }
    }
}
依赖包
	<dependency>
			<groupId>com.alibaba</groupId>
			<artifactId>dashscope-sdk-java</artifactId>
			<version>2.14.7</version>
		</dependency>

		<dependency>
			<groupId>com.squareup.okhttp3</groupId>
			<artifactId>okhttp</artifactId>
			<version>4.9.0</version> <!-- 用最新版本替换 -->
		</dependency>
AI Key配置
方式一:对当前用户添加永久性环境变量
当您在CMD中需要为当前用户添加永久性环境变量时,可以运行以下命令:
setx DASHSCOPE_API_KEY "YOUR_DASHSCOPE_API_KEY"

方式二:在代码中显式配置API-KEY
import com.alibaba.dashscope.utils.Constants;

# 以下赋值语句请放在类或方法中运行
Constants.apiKey="YOUR_DASHSCOPE_API_KEY";


 489
489

 被折叠的 条评论
为什么被折叠?


