


1.通过手动配置文件的形式来进行配置
手动配置则是创建普通的java工程,然后再进行pom文件的属性添加如下的内容:
<!--springboot工程需要继承的父工程-->
    <parent>
      <groupId>org.springframework.boot</groupId>
        <artifactId>spring-boot-starter-parent</artifactId>
        <version>2.1.8.RELEASE</version>
    </parent>

    <dependencies>
<!--web开发的起步依赖-->
      <dependency>
            <groupId>org.springframework.boot</groupId>
            <artifactId>spring-boot-starter-web</artifactId>
        </dependency>
    </dependencies>
2.通过idea的自动生成的形式来进行配置
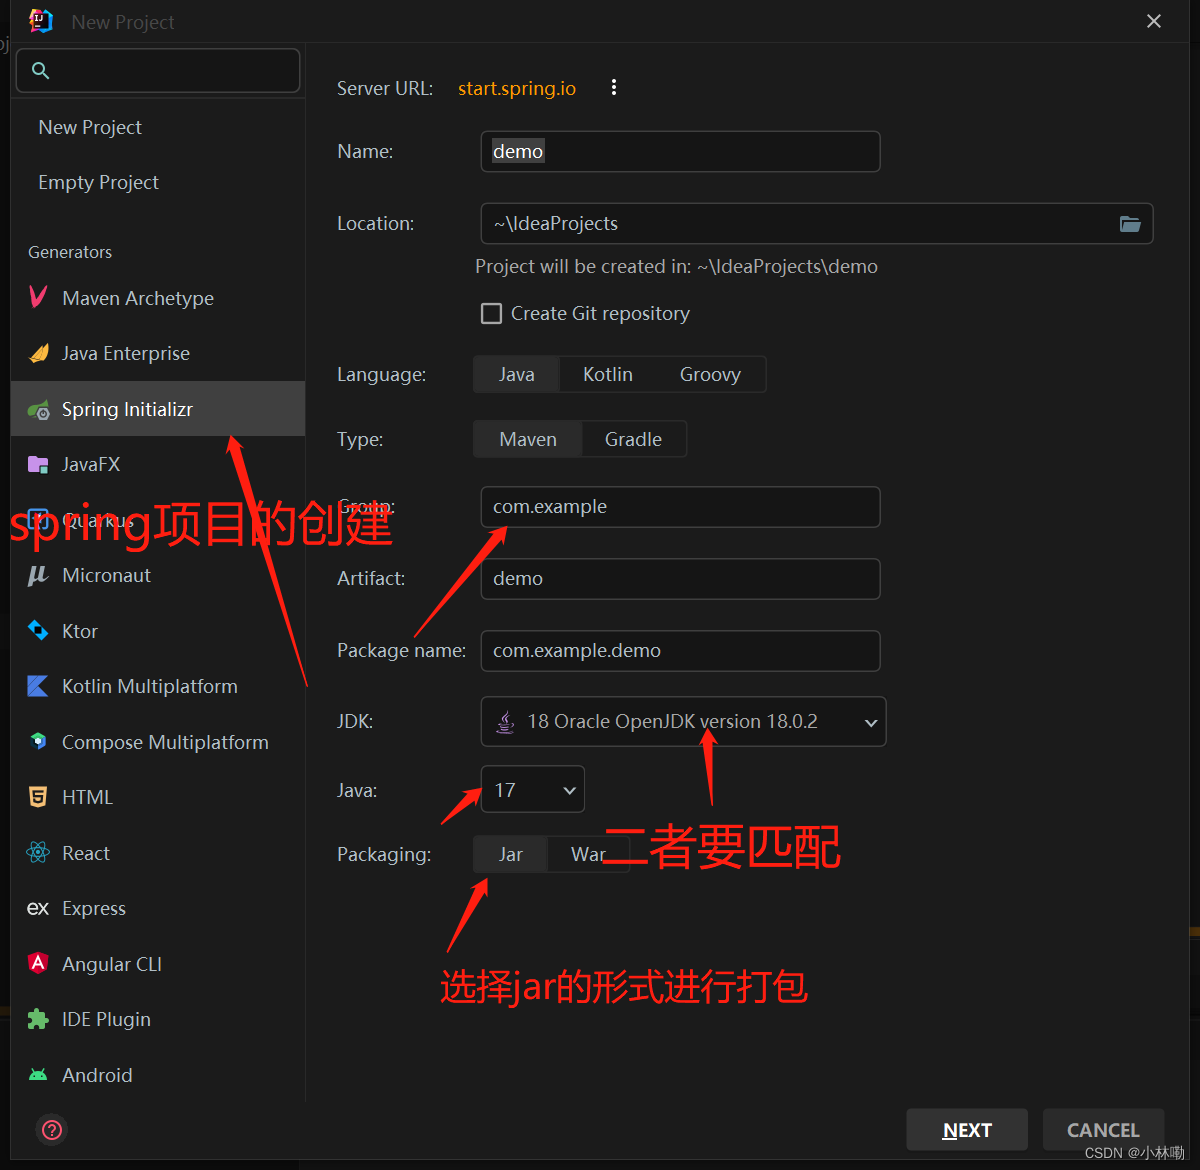
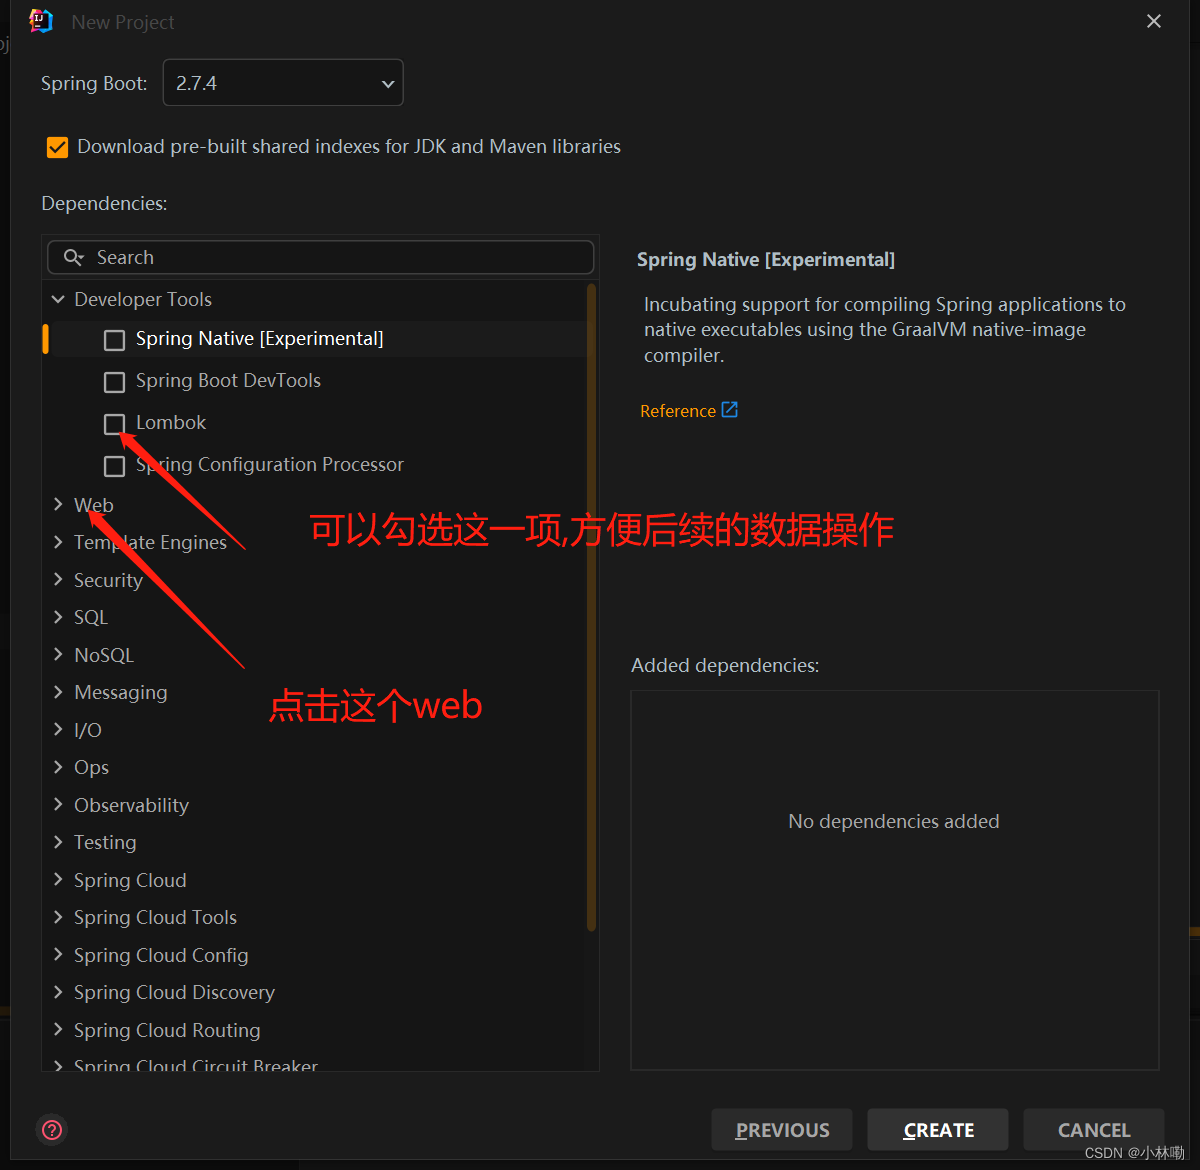

自动构建生成的pom文件如下图所示:
<?xml version="1.0" encoding="UTF-8"?>
<project xmlns="http://maven.apache.org/POM/4.0.0" xmlns:xsi="http://www.w3.org/2001/XMLSchema-instance"
         xsi:schemaLocation="http://maven.apache.org/POM/4.0.0 https://maven.apache.org/xsd/maven-4.0.0.xsd">
    <modelVersion>4.0.0</modelVersion>
    <parent>
        <groupId>org.springframework.boot</groupId>
        <artifactId>spring-boot-starter-parent</artifactId>
        <version>2.7.4</version>
        <relativePath/> <!-- lookup parent from repository -->
    </parent>
    <groupId>com.ydl</groupId>
    <artifactId>springBoot-init</artifactId>
    <version>0.0.1-SNAPSHOT</version>
    <name>springBoot-init</name>
    <description>springBoot-init</description>
    <properties>
        <java.version>17</java.version>
    </properties>
    <dependencies>
        <dependency>
            <groupId>org.springframework.boot</groupId>
            <artifactId>spring-boot-starter-web</artifactId>
        </dependency>

        <dependency>
            <groupId>org.projectlombok</groupId>
            <artifactId>lombok</artifactId>
            <optional>true</optional>
        </dependency>
        <dependency>
            <groupId>org.springframework.boot</groupId>
            <artifactId>spring-boot-starter-test</artifactId>
            <scope>test</scope>
        </dependency>
    </dependencies>

    <build>
        <plugins>
            <plugin>
                <groupId>org.springframework.boot</groupId>
                <artifactId>spring-boot-maven-plugin</artifactId>
                <configuration>
                    <excludes>
                        <exclude>
                            <groupId>org.projectlombok</groupId>
                            <artifactId>lombok</artifactId>
                        </exclude>
                    </excludes>
                </configuration>
            </plugin>
        </plugins>
    </build>

</project>
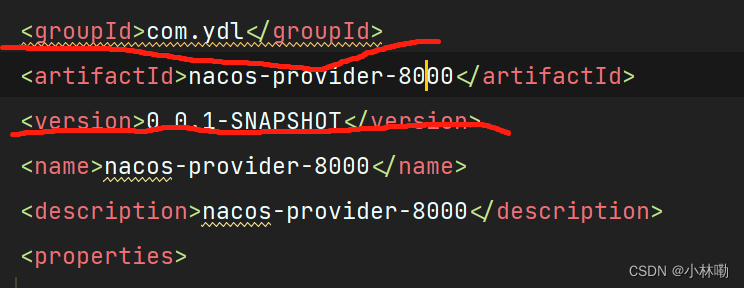
3.如果构建聚合项目,则idea自动生成的module的pom文件需要修改:
parent的组件如下:
<groupId>com.ydl</groupId>
<artifactId>ydl-alibaba-cloud</artifactId>
<version>0.0.1-SNAPSHOT</version>
自动生成的springboot的pom文件中的<parent>标签原始内容如下:
<parent>
     <groupId>org.springframework.boot</groupId>
     <artifactId>spring-boot-starter-parent</artifactId>
     <version>2.7.4</version>
     <relativePath/> <!-- lookup parent from repository -->
</parent>
要修改为同父工程一致,修改后如下所示:
<parent>
     <groupId>com.ydl</groupId>
     <artifactId>ydl-alibaba-cloud</artifactId>
     <version>0.0.1-SNAPSHOT</version>
</parent>
然后将子工程的
<groupId>以及<version>去掉
保持和父工程的一致
查看父工程和子工程的packaging方式,分别应为
<packaging>pom</packaging>
<packaging>jar</packaging>
否则会报错
Tag name: project Description : The <project> element is the root of the descriptor.
The following table lists all of the possible child elements. Version : 3.0.0+
而后将子工程的
<artifactId>nacos-provider-8000</artifactId>
添加到父工程中
<modules>
    <module>nacos-provider-8000</module>
</modules>
4.如果在子工程中不想写导入的包的版本,需要在父工程中指定依赖如下
    <dependencyManagement>
        <dependencies>
            <dependency>
                <groupId>com.alibaba.cloud</groupId>
                <artifactId>spring-cloud-alibaba-dependencies</artifactId>
                <version>2021.0.1.0</version>
                <type>pom</type>
                <scope>import</scope>
            </dependency>

            <dependency>
                <groupId>org.springframework.cloud</groupId>
                <artifactId>spring-cloud-dependencies</artifactId>
                <version>2021.0.1</version>
                <type>pom</type>
                <scope>import</scope>
            </dependency>
        </dependencies>
    </dependencyManagement>


 910
910


 被折叠的 条评论
为什么被折叠?
被折叠的 条评论
为什么被折叠?
 到【灌水乐园】发言


