


目录
2.1.2修改pom文件和application.properties ,applacation启动类相关配置
2.2.2修改pom文件和application.properties ,applacation启动类相关配置
2.3.3Feign是基于interface接口来发现服务的,创建UserServiceInterface
2.4.1创建一个新的注册服务实现instanceServer2
2.4.3多次访问发现服务instanceClient的/login接口,查看结果
2.5.1先配置一个完整的Eureka服务器,已经完成了之前创建的eureka服务。
2.5.2复制之前的eureka,更名为eureka2,修改pom.xml,application.properties
2.5.5修改第一个Eureka的application.properties文件
2.5.6修改第二个Eureka2的application.properties文件
2.5.7修改实例instanceServer的application.properties文件
2.5.8修改实例instanceServer2的application.properties文件
2.5.9 修改实例instanceClient的application.properties文件
1、概述
刚学习的SpringCloud 分布式入门框架搭建,记录一下eclispe搭建过程。
基于Eureka注册中心,实现发现服务客户端和注册服务客户端和之间调用,基于Feign实现服务调用,通过ribbon实现负载均衡,并且配置了Eureka高可用性和Eureka安全认证
springboot版本为2.2.0,SpringCloud版本为Hoxton.RELEASE,jdk1.8
Spring Cloud是基于Spring Boot技术为基础的,在技术选型时,版本不是随便选择的,参考官网介绍
官方链接:https://spring.io/projects/spring-cloud
| Release Train | Boot Version |
|---|---|
| Hoxton | 2.2.x |
| Greenwich | 2.1.x |
| Finchley | 2.0.x |
| Edgware | 1.5.x |
| Dalston | 1.5.x |
2、搭建步骤
第一步:配置Eureka服务器
第二步:创建注册服务实例(Eureka客户端-注册服务@EnableEurekaClient)
第三步:创建发现服务实例(Eureka客户端-发现服务@EnableDiscoveryClient)
第四步:实现发现服务实例调用注册服务实例的示例。
2.1配置Eureka服务器(注册中心)
2.1.1创建springboot项目

勾选Eureka依赖

2.1.2修改pom文件和application.properties ,applacation启动类相关配置
pom.xml
修改 artifactId 为eureka
<?xml version="1.0" encoding="UTF-8"?> <project xmlns="http://maven.apache.org/POM/4.0.0" xmlns:xsi="http://www.w3.org/2001/XMLSchema-instance" xsi:schemaLocation="http://maven.apache.org/POM/4.0.0 https://maven.apache.org/xsd/maven-4.0.0.xsd"> <modelVersion>2.0.0</modelVersion> <parent> <groupId>org.springframework.boot</groupId> <artifactId>spring-boot-starter-parent</artifactId> <version>2.2.0.RELEASE</version> <relativePath/> <!-- lookup parent from repository --> </parent> <groupId>cn.sunreal.springcloud</groupId> <artifactId>eureka</artifactId> <version>0.0.1-SNAPSHOT</version> <name>eureka</name> <description>eurekaf服务</description> <properties> <java.version>1.8</java.version> <spring-cloud.version>Hoxton.RELEASE</spring-cloud.version> </properties> <dependencies> <dependency> <groupId>org.springframework.cloud</groupId> <artifactId>spring-cloud-starter-netflix-eureka-server</artifactId> </dependency> <dependency> <groupId>org.springframework.boot</groupId> <artifactId>spring-boot-starter-test</artifactId> <scope>test</scope> </dependency> <dependency> <groupId>org.springframework.boot</groupId> <artifactId>spring-boot-starter-security</artifactId> </dependency> </dependencies> <dependencyManagement> <dependencies> <dependency> <groupId>org.springframework.cloud</groupId> <artifactId>spring-cloud-dependencies</artifactId> <version>${spring-cloud.version}</version> <type>pom</type> <scope>import</scope> </dependency> </dependencies> </dependencyManagement> <build> <plugins> <plugin> <groupId>org.springframework.boot</groupId> <artifactId>spring-boot-maven-plugin</artifactId> </plugin> </plugins> </build> <repositories> <repository> <id>spring-milestones</id> <name>Spring Milestones</name> <url>https://repo.spring.io/milestone</url> </repository> </repositories> </project>application.properties#1.配置端口 server.port=5121 #2.配置eureka主机名,找到eureka所在的机器 eureka.instance.hostname=localhost #3.是否将自身注册为服务 false表示不注册 eureka.client.register-with-eureka=false #4.是否主动发现服务 false表示不发现 eureka.client.fetch-registry=false #5.对外提供的注册入口,关联其它的Eureka2 eureka.client.service-url.defaultZone=http://localhost:5121/eureka/EurekaApplication.java
package cn.sunreal.springcloud.eureka;

import org.springframework.boot.SpringApplication;
import org.springframework.boot.autoconfigure.SpringBootApplication;
import org.springframework.cloud.netflix.eureka.server.EnableEurekaServer;

@SpringBootApplication
@EnableEurekaServer
public class EurekaApplication {

	public static void main(String[] args) {
		SpringApplication.run(EurekaApplication.class, args);
	}

}
2.2.3启动程序测试
浏览器访问注册中心出现下面页面说明启动成功
localhost:5121

2.2创建一个注册服务实例instanceServer
2.2.1创建springboot项目 instanceserver
勾选以下依赖


2.2.2修改pom文件和application.properties ,applacation启动类相关配置
pom.xml
<?xml version="1.0" encoding="UTF-8"?> <project xmlns="http://maven.apache.org/POM/4.0.0" xmlns:xsi="http://www.w3.org/2001/XMLSchema-instance" xsi:schemaLocation="http://maven.apache.org/POM/4.0.0 https://maven.apache.org/xsd/maven-4.0.0.xsd"> <modelVersion>2.0.0</modelVersion> <parent> <groupId>org.springframework.boot</groupId> <artifactId>spring-boot-starter-parent</artifactId> <version>2.2.0.RELEASE</version> <relativePath/> <!-- lookup parent from repository --> </parent> <groupId>cn.sunreal.springcloud</groupId> <artifactId>instanceserver</artifactId> <version>0.0.1-SNAPSHOT</version> <name>instanceserver</name> <description>instanceServer服务</description> <properties> <java.version>1.8</java.version> <spring-cloud.version>Hoxton.RELEASE</spring-cloud.version> </properties> <dependencies> <dependency> <groupId>org.springframework.boot</groupId> <artifactId>spring-boot-starter-web</artifactId> </dependency> <dependency> <groupId>org.springframework.cloud</groupId> <artifactId>spring-cloud-starter-netflix-eureka-client</artifactId> </dependency> <dependency> <groupId>org.springframework.boot</groupId> <artifactId>spring-boot-starter-test</artifactId> <scope>test</scope> </dependency> </dependencies> <dependencyManagement> <dependencies> <dependency> <groupId>org.springframework.cloud</groupId> <artifactId>spring-cloud-dependencies</artifactId> <version>${spring-cloud.version}</version> <type>pom</type> <scope>import</scope> </dependency> </dependencies> </dependencyManagement> <build> <plugins> <plugin> <groupId>org.springframework.boot</groupId> <artifactId>spring-boot-maven-plugin</artifactId> </plugin> </plugins> </build> <repositories> <repository> <id>spring-milestones</id> <name>Spring Milestones</name> <url>https://repo.spring.io/milestone</url> </repository> </repositories> </project>application.properties#指定实例端口 server.port=5050 #指定实例名,springcloud是通过实例名称来寻址服务的 spring.application.name=instanceServer #指定Eureka服务端访问路径 eureka.client.service-url.defaultZone=http://localhost:5121/eurekaInstanceserverApplication .java
package cn.sunreal.springcloud.instanceserver;

import org.springframework.boot.SpringApplication;
import org.springframework.boot.autoconfigure.SpringBootApplication;
import org.springframework.cloud.netflix.eureka.EnableEurekaClient;

@SpringBootApplication
@EnableEurekaClient
public class InstanceserverApplication {

	public static void main(String[] args) {
		SpringApplication.run(InstanceserverApplication.class, args);
	}

}
2.2.3 写一个服务接口 UserController 为下一步的发现服务调用
UserController.java
package cn.sunreal.springcloud.instanceserver.controller;

import org.springframework.web.bind.annotation.RequestBody;
import org.springframework.web.bind.annotation.RequestMapping;
import org.springframework.web.bind.annotation.RequestMethod;
import org.springframework.web.bind.annotation.RestController;

import cn.sunreal.springcloud.instanceserver.po.User;

@RestController

public class UserController {
	/**
	 *
	 * 用户登录
	 *
	 * @return
	 *
	 */

	@RequestMapping(value = "/login", method = RequestMethod.POST)

	public String login(@RequestBody User user) {

		System.out.println("用户名:" + user.getUsername() + ",密码:" + user.getPassword());

		return "Ok—intanceServer--5050";

	}
}package cn.sunreal.springcloud.instanceserver.po;
import java.io.Serializable;
public class User implements Serializable{
/**
*
*/
private static final long serialVersionUID = 7260598142983180828L;
private Integer id;
private String username;
private String password;
public Integer getId() {
return id;
}
public void setId(Integer id) {
this.id = id;
}
public String getUsername() {
return username;
}
public void setUsername(String username) {
this.username = username;
}
public String getPassword() {
return password;
}
public void setPassword(String password) {
this.password = password;
}
}2.2.3启动服务
先启动Eureka服务端,之后再启动service客户端

启动之后,再次访问localhost:5121,如下说明注册成功

2.3创建发现服务实例instanceClient
2.3.1创建springboot项目instanceClient 创建方法同2.2.1。
2.3.2添加Feign依赖
<dependency>
<groupId>org.springframework.cloud</groupId>
<artifactId>spring-cloud-starter-feign</artifactId>
</dependency>
pom.xml
<?xml version="1.0" encoding="UTF-8"?>
<project xmlns="http://maven.apache.org/POM/4.0.0" xmlns:xsi="http://www.w3.org/2001/XMLSchema-instance"
	xsi:schemaLocation="http://maven.apache.org/POM/4.0.0 https://maven.apache.org/xsd/maven-4.0.0.xsd">
	<modelVersion>2.0.0</modelVersion>
	<parent>
		<groupId>org.springframework.boot</groupId>
		<artifactId>spring-boot-starter-parent</artifactId>
		<version>2.2.0.RELEASE</version>
		<relativePath/> <!-- lookup parent from repository -->
	</parent>
	<groupId>cn.sunreal.springcloud</groupId>
	<artifactId>instanceserver</artifactId>
	<version>0.0.1-SNAPSHOT</version>
	<name>instanceclient</name>
	<description>instanceclient调用端</description>

	<properties>
		<java.version>1.8</java.version>
		<spring-cloud.version>Hoxton.RELEASE</spring-cloud.version>
	</properties>

	<dependencies>
		<dependency>
			<groupId>org.springframework.boot</groupId>
			<artifactId>spring-boot-starter-web</artifactId>
		</dependency>
		<dependency>
			<groupId>org.springframework.cloud</groupId>
			<artifactId>spring-cloud-starter-netflix-eureka-client</artifactId>
		</dependency>

		<dependency>
			<groupId>org.springframework.boot</groupId>
			<artifactId>spring-boot-starter-test</artifactId>
			<scope>test</scope>
		</dependency>
		<dependency>
		<groupId>org.springframework.cloud</groupId>
		<artifactId>spring-cloud-starter-ribbon</artifactId>
		 <version>RELEASE</version>
		</dependency>
		<!-- 添加Feign依赖 -->
		<dependency>
			<groupId>org.springframework.cloud</groupId>
			<artifactId>spring-cloud-starter-feign</artifactId>
			<version>RELEASE</version>
		</dependency>
	</dependencies>

	<dependencyManagement>
		<dependencies>
			<dependency>
				<groupId>org.springframework.cloud</groupId>
				<artifactId>spring-cloud-dependencies</artifactId>
				<version>${spring-cloud.version}</version>
				<type>pom</type>
				<scope>import</scope>
			</dependency>
		</dependencies>

	</dependencyManagement>

	<build>
		<plugins>
			<plugin>
				<groupId>org.springframework.boot</groupId>
				<artifactId>spring-boot-maven-plugin</artifactId>
			</plugin>
		</plugins>
	</build>

	<repositories>
		<repository>
			<id>spring-milestones</id>
			<name>Spring Milestones</name>
			<url>https://repo.spring.io/milestone</url>
		</repository>
	</repositories>

</project>
application.properties
#指定实例端口

server.port=5051

#指定实例名,springcloud是通过实例名称来寻址服务的

spring.application.name=instanceClient

#指定Eureka服务端访问路径
eureka.client.service-url.defaultZone=http://localhost:5121/eureka
InstanceClientApplication.java
启动类增加@EnableFeignClients注解
package cn.sunreal.springcloud.instanceclient;

import org.springframework.boot.SpringApplication;
import org.springframework.boot.autoconfigure.SpringBootApplication;
import org.springframework.cloud.client.discovery.EnableDiscoveryClient;
import org.springframework.cloud.client.loadbalancer.LoadBalanced;
import org.springframework.cloud.openfeign.EnableFeignClients;
import org.springframework.context.annotation.Bean;
import org.springframework.web.client.RestTemplate;
//1.用于启动Spring boot项目
//2.用于标识该项目是一个Eureka客户端(发现服务)
//3.添加Feign客户端支持
@SpringBootApplication
@EnableDiscoveryClient
@EnableFeignClients
public class InstanceClientApplication {


	public static void main(String[] args) {

		SpringApplication.run(InstanceClientApplication.class, args);

	}

	//2.创建RestTemplate实例对象,用来远程调用服务


	//  @Bean

	//  @LoadBalanced

	//  public RestTemplate restTemplate(){

	//  return new RestTemplate();

	//  }


}
2.3.3Feign是基于interface接口来发现服务的,创建UserServiceInterface
UserServiceInterface.java
package cn.sunreal.springcloud.instanceclient.service;

import org.springframework.cloud.openfeign.FeignClient;
import org.springframework.web.bind.annotation.RequestMapping;

import cn.sunreal.springcloud.instanceclient.po.User;

/**
 * Feign是基于interface接口来发现服务的,不同使用controller
 *
 *
 */
//配置服务接口的项目名为instanceServer
@FeignClient(value="instanceServer")
public interface UserServiceInterface {

	@RequestMapping(value="/login")
	public String login(User user);

}
创建接口UserServiceInterface,使用注解@FeignClient(value="instanceServer") 来配置指定 此接口调用名为 instanceServer 的注册服务实例的接口 接口路径为“/login”,上一步已经在controller中创建。
2.3.4创建UserController
对外发布接口controller中调用UserServiceInterface 中的login方法,实现 发现客户端instanceclient调用注册客户端instanceServer 的 /login 接口。
UserController.java
package cn.sunreal.springcloud.instanceclient.controller;
import org.springframework.beans.factory.annotation.Autowired;
import org.springframework.web.bind.annotation.RequestMapping;
import org.springframework.web.bind.annotation.RestController;
import cn.sunreal.springcloud.instanceclient.po.User;
import cn.sunreal.springcloud.instanceclient.service.UserService;
import cn.sunreal.springcloud.instanceclient.service.UserServiceInterface;
@RestController
public class UserController {
@Autowired
private UserServiceInterface userService;
@RequestMapping("/login")
public String login(User user){
String result = userService.login(user);
System.out.println(result);
return result;
}
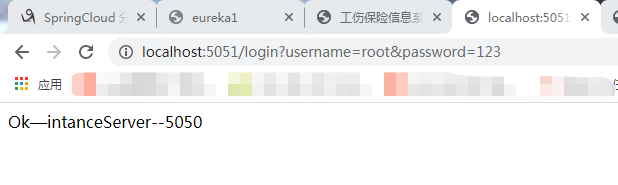
}2.3.5启动instanceclient服务

浏览器访问 发现客户端接口 /login
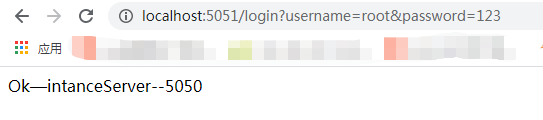
成功返回 instanceServer 客户端中的 /login 方法返回数据,远程服务调用成功!
到此,SpringCloud 分布式入门框架基于Eureka注册中心,实现发现服务客户端和注册服务客户端和之间调用,基于Feign实现服务调用已经成功完成!
下面咱们开始升级版本,首先实现基于ribbon负载均衡实现
2.4基于ribbon负载均衡实现
负载均衡概念:在多个并且相同的服务可用的情况下,通过一定的负载策略,均衡的去调用这些服务,让服务到达一个平衡的状态。
重用的负载策略:轮询、权重、一致性ip等。
2.4.1创建一个新的注册服务实现instanceServer2
1.复制上面的instanceServer项目,重新命名instanceServer2。
2.修改pom.xml
<artifactId>instanceserver2</artifactId>
<?xml version="1.0" encoding="UTF-8"?>
<project xmlns="http://maven.apache.org/POM/4.0.0" xmlns:xsi="http://www.w3.org/2001/XMLSchema-instance"
	xsi:schemaLocation="http://maven.apache.org/POM/4.0.0 https://maven.apache.org/xsd/maven-4.0.0.xsd">
	<modelVersion>2.0.0</modelVersion>
	<parent>
		<groupId>org.springframework.boot</groupId>
		<artifactId>spring-boot-starter-parent</artifactId>
		<version>2.2.0.RELEASE</version>
		<relativePath/> <!-- lookup parent from repository -->
	</parent>
	<groupId>cn.sunreal.springcloud</groupId>
	<artifactId>instanceserver2</artifactId>
	<version>0.0.1-SNAPSHOT</version>
	<name>instanceserver</name>
	<description>instanceServer2服务</description>

	<properties>
		<java.version>1.8</java.version>
		<spring-cloud.version>Hoxton.RELEASE</spring-cloud.version>
	</properties>

	<dependencies>
		<dependency>
			<groupId>org.springframework.boot</groupId>
			<artifactId>spring-boot-starter-web</artifactId>
		</dependency>
		<dependency>
			<groupId>org.springframework.cloud</groupId>
			<artifactId>spring-cloud-starter-netflix-eureka-client</artifactId>
		</dependency>

		<dependency>
			<groupId>org.springframework.boot</groupId>
			<artifactId>spring-boot-starter-test</artifactId>
			<scope>test</scope>
		</dependency>
	</dependencies>

	<dependencyManagement>
		<dependencies>
			<dependency>
				<groupId>org.springframework.cloud</groupId>
				<artifactId>spring-cloud-dependencies</artifactId>
				<version>${spring-cloud.version}</version>
				<type>pom</type>
				<scope>import</scope>
			</dependency>
		</dependencies>
	</dependencyManagement>

	<build>
		<plugins>
			<plugin>
				<groupId>org.springframework.boot</groupId>
				<artifactId>spring-boot-maven-plugin</artifactId>
			</plugin>
		</plugins>
	</build>

	<repositories>
		<repository>
			<id>spring-milestones</id>
			<name>Spring Milestones</name>
			<url>https://repo.spring.io/milestone</url>
		</repository>
	</repositories>

</project>
3.修改application.properties,更换启动端口为5052,保持spring.application.name相同,因为是同一个service所以要保持一致。
#指定实例端口 为了负载均衡创建另外一个service

server.port=5052

#指定实例名,springcloud是通过实例名称来寻址服务的 说明:相同的服务,实例的名称也相同。因此只用修改端口即可。

spring.application.name=instanceServer

#指定Eureka服务端访问路径

eureka.client.service-url.defaultZone=http://localhost:5121/eureka
4.修改UserController代码,用于与instanceServer 接口返回值做区分。
package cn.sunreal.springcloud.instanceserver.controller;

import org.springframework.web.bind.annotation.RequestBody;
import org.springframework.web.bind.annotation.RequestMapping;
import org.springframework.web.bind.annotation.RequestMethod;
import org.springframework.web.bind.annotation.RestController;

import cn.sunreal.springcloud.instanceserver.po.User;

@RestController
public class UserController {

/**

 * 用户登录

 * @return

 */

@RequestMapping(value="/login",method=RequestMethod.POST)

public String login(@RequestBody User user){

	System.out.println("用户名:"+user.getUsername()+",密码:"+user.getPassword());

	return "Ok—intanceServer2--5052";

	}
}
2.4.2启动新建的instanceServer2服务

启动之后,再次访问localhost:5121,如下说明注册成功,此时注册服务客户端已经存在两个。

2.4.3多次访问发现服务instanceClient的/login接口,查看结果
1.成功访问instanceserver 中的 /login接口
2.成功访问到instanceserver2 中的 /login接口

两个服务正常访问ribbon负载均衡实现成功。
2.5 升级Eureka高可用配置
完成以上服务配置虽然能够正常互相访问了但是在示例中,服务的注册、发现和调用,都是基于Eureka注册中心实现。
如果Eureka服务宕机了,整个服务就都不可用了,所以升级一下Eureka高可用。
配置多个Eureka服务器,一个Eureka服务器宕机,但是当只要有一个Eureka还正常运行,就能够提供正常的服务。
第一步:先配置一个完整的Eureka服务器。
第二步:复制另外一个Eureka服务器。
第三步:修改两个Eureka的配置,实现这两个Eureka高可用。
2.5.1先配置一个完整的Eureka服务器,已经完成了之前创建的eureka服务。
2.5.2复制之前的eureka,更名为eureka2,修改pom.xml,application.properties
pom.xml
更改<artifactId>eureka2</artifactId>
<?xml version="1.0" encoding="UTF-8"?>
<project xmlns="http://maven.apache.org/POM/4.0.0" xmlns:xsi="http://www.w3.org/2001/XMLSchema-instance"
	xsi:schemaLocation="http://maven.apache.org/POM/4.0.0 https://maven.apache.org/xsd/maven-4.0.0.xsd">
	<modelVersion>2.0.0</modelVersion>
	<parent>
		<groupId>org.springframework.boot</groupId>
		<artifactId>spring-boot-starter-parent</artifactId>
		<version>2.2.0.RELEASE</version>
		<relativePath/> <!-- lookup parent from repository -->
	</parent>
	<groupId>cn.sunreal.springcloud</groupId>
	<artifactId>eureka2</artifactId>
	<version>0.0.1-SNAPSHOT</version>
	<name>eureka</name>
	<description>eurekaf服务</description>

	<properties>
		<java.version>1.8</java.version>
		<spring-cloud.version>Hoxton.RELEASE</spring-cloud.version>
	</properties>

	<dependencies>
		<dependency>
			<groupId>org.springframework.cloud</groupId>
			<artifactId>spring-cloud-starter-netflix-eureka-server</artifactId>
		</dependency>

		<dependency>
			<groupId>org.springframework.boot</groupId>
			<artifactId>spring-boot-starter-test</artifactId>
			<scope>test</scope>
		</dependency>
		<dependency>
  		  <groupId>org.springframework.boot</groupId>
   		  <artifactId>spring-boot-starter-security</artifactId>
		</dependency>
	</dependencies>

	<dependencyManagement>
		<dependencies>
			<dependency>
				<groupId>org.springframework.cloud</groupId>
				<artifactId>spring-cloud-dependencies</artifactId>
				<version>${spring-cloud.version}</version>
				<type>pom</type>
				<scope>import</scope>
			</dependency>
		</dependencies>
	</dependencyManagement>

	<build>
		<plugins>
			<plugin>
				<groupId>org.springframework.boot</groupId>
				<artifactId>spring-boot-maven-plugin</artifactId>
			</plugin>
		</plugins>
	</build>

	<repositories>
		<repository>
			<id>spring-milestones</id>
			<name>Spring Milestones</name>
			<url>https://repo.spring.io/milestone</url>
		</repository>
	</repositories>

</project>
2.5.3配置两个Eureka高可用(通讯)
两个Eureka服务器,是通过主机名和端口来互相发现的。
因此配置Eureka高可用,就是在配置主机名和端口。
|
| 主机名(eureka.instance.hostname) | 服务端口(server.port) |
| Eureka 1 | eureka1 | 5121 |
| Eureka 2 | eureka2 | 5122 |
2.5.4修改本地hosts文件,注册Eureka主机名
文件位置:C:\Windows\System32\drivers\etc\hosts
| |

2.5.5修改第一个Eureka的application.properties文件
#1.配置端口
server.port=5121
#2.配置eureka主机名,找到eureka所在的机器
eureka.instance.hostname=eureka1
#3.是否将自身注册为服务 false表示不注册
eureka.client.register-with-eureka=false
#4.是否主动发现服务 false表示不发现
eureka.client.fetch-registry=false
#5.对外提供的注册入口,关联其它的Eureka2
eureka.client.service-url.defaultZone=http://eureka1:5121/eureka/
2.5.6修改第二个Eureka2的application.properties文件
#1.配置端口
server.port=5122
#2.配置eureka主机名,找到eureka所在的机器
eureka.instance.hostname=eureka2
#3.由于我们目前创建的应用是一个服务注册中心,而不是普通的应用,默认情况下,这个应用会向注册中心(也是它自己)注册它自己,设置为false表示禁止这种默认行为
eureka.client.register-with-eureka=false
#4.表示不去检索其他的服务,因为服务注册中心本身的职责就是维护服务实例,它也不需要去检索其他服务
eureka.client.fetch-registry=false
#5.对外提供的注册入口,关联其它的Eureka2
eureka.client.service-url.defaultZone=http://eureka2:5122/eureka/
2.5.7修改实例instanceServer的application.properties文件
指定Eureka服务端访问路径 为两个eureka服务地址,用,分割
| #指定实例端口 server.port=5050 #指定实例名,springcloud是通过实例名称来寻址服务的 spring.application.name=instanceServer #指定Eureka服务端访问路径 eureka.client.service-url.defaultZone=http://eureka1:5121/eureka,http://eureka2:5122/eureka |
2.5.8修改实例instanceServer2的application.properties文件
指定Eureka服务端访问路径 为两个eureka服务地址,用,分割
| #指定实例端口 server.port=5052 #指定实例名,springcloud是通过实例名称来寻址服务的 spring.application.name=instanceServer #指定Eureka服务端访问路径 eureka.client.service-url.defaultZone=http://eureka1:5121/eureka,http://eureka2:5122/eureka |
2.5.9 修改实例instanceClient的application.properties文件
| #指定实例端口 server.port=5051 #指定实例名,springcloud是通过实例名称来寻址服务的 spring.application.name=instanceClient #指定Eureka服务端访问路径 |
2.5.10分别启动两个Eureka测试
首先启动两个Eureka1,再启动两个注册service,最后启动发现服务client,分别访问eureka服务地址,查看绑定是否成功
Eureka1

Eureka2

请求发现客户端对外接口正常返回数据
测试是否成功,关闭其中一个Eureka服务,再次请求客户端对外接口,看是否能够正常返回数据,如正常说明配置成功。
2.6Eureka安全认证
在Eureka服务端,开启安全认证,客户端访问需要验证用户和密码。
2.6.1在Eureka服务端开启身份认证
1.在两个eureka服务端引入依赖
<dependency>
<groupId>org.springframework.boot</groupId>
<artifactId>spring-boot-starter-security</artifactId>
</dependency>
2.修改application.properties文件创建用户名密码
#配置Eureka安全认证
#已经过时了
#security.basic.enabled=true
#security.user.name=root
#security.user.password=123456
spring.security.user.name=root
spring.security.user.password=123456
注意 :注释的为已经过时的配置,在springboot2.0以后不支持
3.同时修改对外注册提供的入口地址
eureka1
application.properties
#1.配置端口
server.port=5121
#2.配置eureka主机名,找到eureka所在的机器
eureka.instance.hostname=eureka1
#3.由于我们目前创建的应用是一个服务注册中心,而不是普通的应用,默认情况下,这个应用会向注册中心(也是它自己)注册它自己,设置为false表示禁止这种默认行为
eureka.client.register-with-eureka=false
#4.表示不去检索其他的服务,因为服务注册中心本身的职责就是维护服务实例,它也不需要去检索其他服务
eureka.client.fetch-registry=false
#5.对外提供的注册入口,关联其它的Eureka2
eureka.client.service-url.defaultZone=http://root:123456@eureka1:5121/eureka/
#配置Eureka安全认证
#过时方法
#security.basic.enabled=true
#security.user.name=root
#security.user.password=123456
spring.security.user.name=root
spring.security.user.password=123456
eureka2
application.properties
#1.配置端口
server.port=5122
#2.配置eureka主机名,找到eureka所在的机器
eureka.instance.hostname=eureka2
#3.由于我们目前创建的应用是一个服务注册中心,而不是普通的应用,默认情况下,这个应用会向注册中心(也是它自己)注册它自己,设置为false表示禁止这种默认行为
eureka.client.register-with-eureka=false
#4.表示不去检索其他的服务,因为服务注册中心本身的职责就是维护服务实例,它也不需要去检索其他服务
eureka.client.fetch-registry=false
#5.对外提供的注册入口,关联其它的Eureka2
eureka.client.service-url.defaultZone=http://root:123456@eureka2:5122/eureka/
#配置Eureka安全认证
#过时方法
#security.basic.enabled=true
#security.user.name=root
#security.user.password=123456
spring.security.user.name=root
spring.security.user.password=123456
2.6.2在Eureka客户端进行身份认证
在注册服务系统instanceserver,instanceserver2,发现服务系统instanceClient中,修改application.properties文件,进行身份认证
#指定Eureka服务端访问路径
eureka.client.service-url.defaultZone=http://root:123456@eureka1:5121/eureka,http://root:123456@eureka2:5122/eureka
验证这里遇见个坑,增加身份认证之后 instanceClient 请求接口404错误。
修正:
eureka需要进行登陆验证,在spring boot1.5.9的版本中直接引入依赖后就可以,但在spring boot 2.0.x以后eureka添加验证后出现了服务无法注册的问题,
在在网上发现是因为erureka本身的安全校验问题。需要关闭csrf spring2.x版本的security默认启用了csrf检验,要在eurekaServer端配置security的csrf检验为false,
在eureka服务项目 增加config类WebSecurityConfig,用于关闭默csrf检验
代码如下
package cn.sunreal.springcloud.eureka;

import org.springframework.security.config.annotation.web.builders.HttpSecurity;
import org.springframework.security.config.annotation.web.configuration.EnableWebSecurity;
import org.springframework.security.config.annotation.web.configuration.WebSecurityConfigurerAdapter;

@EnableWebSecurity
public class WebSecurityConfig extends WebSecurityConfigurerAdapter {
    @Override
    protected void configure(HttpSecurity http) throws Exception{
        http.csrf().disable(); //关闭csrf
        super.configure(http);
    }
}
总结
只是一个入门级的搭建,不健全的一个入门框架,主要用于在此记录,之后其他内容需要再进一步学习,共勉。
学习资料
声明 参考资料为 王小帅原创
https://www.cnblogs.com/meizhoulqp/p/11299304.html
示例demo下载路径
https://download.csdn.net/download/weixin_41647530/13765560


 854
854


 被折叠的 条评论
为什么被折叠?
被折叠的 条评论
为什么被折叠?
 到【灌水乐园】发言


