


很零碎的知识点,有的是踩过的坑,不成系统,但是绝对很有用,知道的可以回顾下,不太了解的可以多学习下
1、Python连接MySQL加编码
记得加charset,没加的话部署Linux服务器运行可能有中文乱码,已踩坑

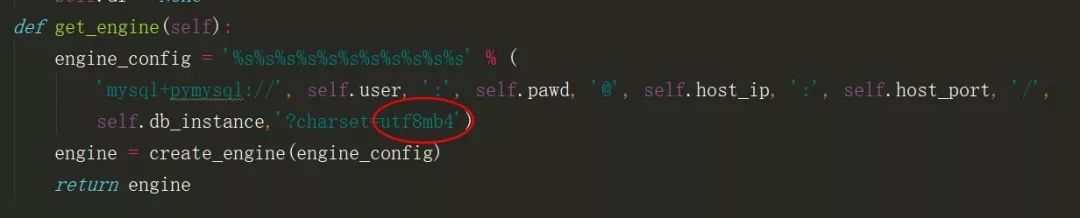
2、最好用utf8mb4
很多时候我会用sqlalchemy创建连接数据库引擎,charset用的utf8mb4,原因在于爬取的文本中有表情,utf8不行,同时,数据库、表,编码也都要保持一致
3、好用的网页解析库PyQuery
from pyquery import PyQuery as pyimport PyQuery as py觉得好用的原因:
1、语法类似JQuery,好记
2、可以增删改查html元素,然后下载网页,这点xpath就比较弱了,下面是我最近用到的一些方法,其他方法可以网上查查
# 爬虫下载网页each_res = requests.get(url).content.decode("utf-8")# 转为pyquery文档doc = py(each_res)# 支持Class选择器,remove用来删除元素doc(".site-navbar ul")("li").remove()# 支持ID选择器doc("#search-form").remove()# 获取属性href的值doc(".pagemenu")("li:first-child")("a").attr["href"]# 设置属性href的值doc(".pagemenu")("li:first-child")("a").attr("href", "./")# 遍历对象images_src = doc("img")for img in images_src:  if py(img).attr["src"]:   print(py(img).attr["src"])# 添加元素doc("head").append('<link rel="stylesheet" href="../common/css/common.css">\n')# 清空后在添加doc(".page-right .item").empty().append("<a href='#' class='ad1'><img></img></a>")# 完美匹配jquery的eq()选择方法doc(".article-content")("div:last-child").eq(-1).remove()# 大招来了,可以将上面增删改查的文档,直接写入html文件,就下载好网页了res = doc.outer_html().encode("utf-8")with open("index.html", "wb") as f:# 写文件用bytes而不是str,所以要转码   f.write(res)get(url).content.decode("utf-8")

# 转为pyquery文档
doc = py(each_res)

# 支持Class选择器,remove用来删除元素
doc(".site-navbar ul")("li").remove()

# 支持ID选择器
doc("#search-form").remove()

# 获取属性href的值
doc(".pagemenu")("li:first-child")("a").attr["href"]

# 设置属性href的值
doc(".pagemenu")("li:first-child")("a").attr("href", "./")

# 遍历对象
images_src = doc("img")
for img in images_src:
  if py(img).attr["src"]:
   print(py(img).attr["src"])

# 添加元素
doc("head").append('<link rel="stylesheet" href="../common/css/common.css">\n')

# 清空后在添加
doc(".page-right .item").empty().append("<a href='#' class='ad1'><img></img></a>")

# 完美匹配jquery的eq()选择方法
doc(".article-content")("div:last-child").eq(-1).remove()

# 大招来了,可以将上面增删改查的文档,直接写入html文件,就下载好网页了
res = doc.outer_html().encode("utf-8")
with open("index.html", "wb") as f:
# 写文件用bytes而不是str,所以要转码
   f.write(res)
4、Linux配置python3环境、pip软链接
下方分别为解压安装,配软连接,注意配python3和pip的时候,与/usr/bin下面的原本的python2和pip命名区分,一般情况下别去动python2的软链接,会导致centos包管理工具yum命令出问题
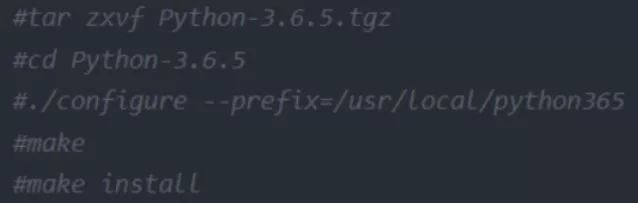
ln -s /usr/local/py365/bin/python3.6 /usr/bin/python3 ln -s /usr/local/py365/bin/pip3 /usr/bin/pip3python3.6 /usr/bin/python3
ln -s /usr/local/py365/bin/pip3 /usr/bin/pip3
5、网站地图、robots协议
robots.txt可以告诉搜索引擎网站哪些数据能爬,如果你想利于网站排名,尽量少disallow,sitemap.xml网站地图则是直接提交让搜索引擎增加收录,这两个文件/路径一般配在网站根目录下,可以直接写到nginx加两个路径指向就行了,主要用来优化网站,利于各加搜索引擎抓取网站信息,增加收录和网站排名
location /sitemap.xml {   alias /var/www/chengxuyuan_12_10/sitemap.xml;}location /robots.txt {   alias /var/www/chengxuyuan_12_10/robots.txt;}
   alias /var/www/chengxuyuan_12_10/sitemap.xml;
}
location /robots.txt {
   alias /var/www/chengxuyuan_12_10/robots.txt;
}
6、Django orm查询values
比如下方,我在查询时候只需要文章的id和title数据,则直接values查这两个字段就行,这样可以提高查询效率
Article.objects.values("id","title")"id","title")Q对象进行逻辑查询,也很常用
filter(Q(is_delete=0)&(Q(title__contains=a)|Q(title__contains=b)))0)&(Q(title__contains=a)|Q(title__contains=b)))7、直接将一个字典保存mysql(键和列名一致)
dic = {"title": title, "time": arttime, "auth": auth, "con": con}df = pd.DataFrame.from_dict(dic, orient='index').Tconn = get_local_engine("centos_test")df.to_sql("这里是表名", conn, if_exists='append', index=False)"time": arttime, "auth": auth, "con": con}
df = pd.DataFrame.from_dict(dic, orient='index').T
conn = get_local_engine("centos_test")
df.to_sql("这里是表名", conn, if_exists='append', index=False)
get_local_engine是我定义的一个获取engine的方法
def get_local_engine(dbname):db_flag = "mysql"host_ip = "127.0.0.1" host_port = 3306db_instance = dbnameuser = "root"pawd = "*************" charset = "utf8"engine_config = '%s%s%s%s%s%s%s%s%s%s%s' % ('mysql+pymysql://', user, ':', pawd, '@', host_ip, ':', host_port, '/', db_instance, '?charset=utf8')engine = create_engine(engine_config, encoding=charset, max_overflow=10)return engine
db_flag = "mysql"
host_ip = "127.0.0.1"
host_port = 3306
db_instance = dbname
user = "root"
pawd = "*************"
charset = "utf8"
engine_config = '%s%s%s%s%s%s%s%s%s%s%s' % ('mysql+pymysql://', user, ':', pawd, '@', host_ip, ':', host_port, '/', db_instance, '?charset=utf8')
engine = create_engine(engine_config, encoding=charset, max_overflow=10)
return engine
8、django admin站点引入富文本编辑器Kindeditor
1、kindeditor安装包直接放在项目static下面
2、在admin.py中加入这段js
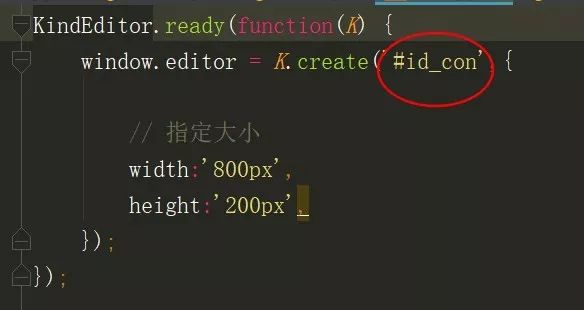
3、kindeditor中config.js改成原本admin文本域的id,如下方截图圈到的
class Media:# 在管理后台的HTML文件中加入js文件, 每一个路径都会追加STATIC_URL/ js = (    'kindeditor/kindeditor-all.js',    'kindeditor/lang.zh_CN.js',    'kindeditor/config.js', )
# 在管理后台的HTML文件中加入js文件, 每一个路径都会追加STATIC_URL/
 js = (
    'kindeditor/kindeditor-all.js',
    'kindeditor/lang.zh_CN.js',
    'kindeditor/config.js',
 )
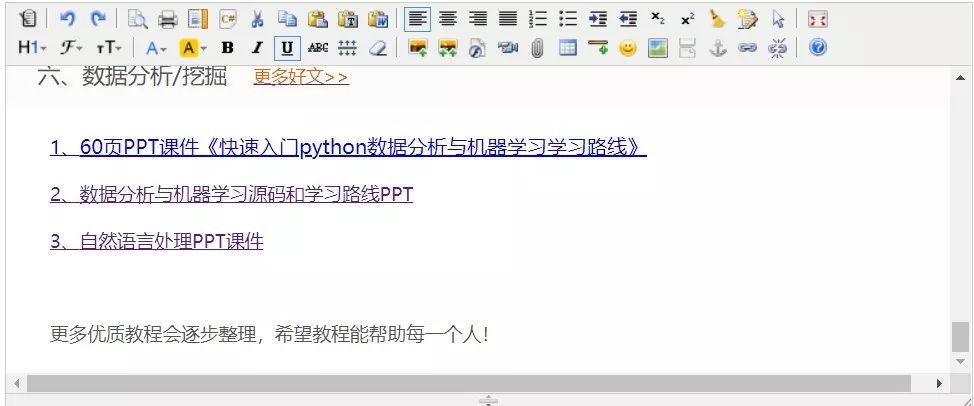
编辑器效果图
python爬虫人工智能大数据公众号


 8554
8554


 被折叠的 条评论
为什么被折叠?
被折叠的 条评论
为什么被折叠?
 到【灌水乐园】发言


