


前提准备工作
1 新建测试用例: https://open.feishu.cn/app?lang=zh-CN

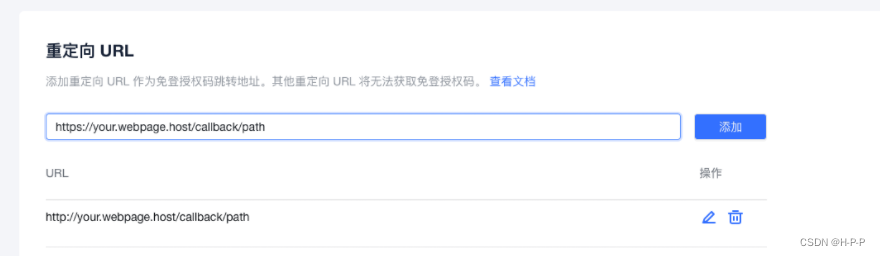
2.在应用的 安全设置 配置重定向路由
开始使用
1. public/index.html
新增:
<script src="https://sf3-cn.feishucdn.com/obj/feishu-static/lark/passport/qrcode/LarkSSOSDKWebQRCode-1.0.2.js"></script>
2.生成二维码
			<div @click="handleFsLogin" > </div>

			data() {
				return: {
					QRLoginObj: '', // 是否生成了二维码
		            client_id: 'cli_9f37047a40******', // 应用的id
					redirect_uri: 'http://127.0.0.1:9514/feishu_login', // 应用配置重定向的地址
		            fs_url: ''
				}
			},
			methods: {
				handleFsLogin() {
					if (this.QRLoginObj !== '') return false; // 避免重複點擊
					this.fs_url =  'https://passport.feishu.cn/suite/passport/oauth/authorize?		client_id=' + client_id +
					                '&redirect_uri=' + redirect_uri +
					                '&response_type=code'
					this.QRLoginObj = QRLogin({
	                id: 'login_container',
	                goto: this.fs_url,
	                width: '260',
	                height: '260',
	                style: 'width:260px;height:260px;border:none' //可选的,二维码html标签的style属性
	            });
	            if (typeof window.addEventListener != 'undefined') {
	                window.addEventListener('message', this.handleMessage, false);
	            } else if (typeof window.attachEvent != 'undefined') {
	                window.attachEvent('onmessage', this.handleMessage);
	            }
			},
			handleMessage() {
            	var origin = event.origin;
	            if (this.QRLoginObj.matchOrigin(origin)) {
	                var loginTmpCode = event.data;
	                window.location.href = `${this.fs_url}&tmp_code=${loginTmpCode}`;
	            }
       		 }
		}
3. 路由拦截 permission.js 文件
import router from './router'
const whiteList = ['/feishu_login'] // no redirect whitelist
router.beforeEach(async(to, from, next) => {
	if (whiteList.indexOf(to.path) !== -1) {
		if (to.path === '/feishu_login') {
			console.log(to.query.code)  // to.query.code 获取到code
			// 请求后端接口 传值 code
			const login = await store.dispatch('user/loginWithFS', to.query.code)
	          if (login === 'success') {
	          		next({ path: '/' })
	          }
		})
	})
})
4.接口配置
export function loginWithFS(data) { // 接口封装
  return request({
    url: 'v0/thirdpart_fs/login',
    method: 'post',
    data
  })
}
// code 获取到的code  redirectUri 应用配置的重定向的地址
export function adminInfo(data) { // vueX分装
 loginWithFS({ code: code, redirectUri: config.fs_redirect_local_normal }).then(d => {
        localStorage.setItem('adminId', d.data.adminId)
        setToken(d.data.token)
        resolve('success')
  }).catch(error => {
        reject(error)
  })
飞书登录完成了,希望可以帮到大家


 被折叠的 条评论
为什么被折叠?
被折叠的 条评论
为什么被折叠?
 到【灌水乐园】发言


