


顺序说明:
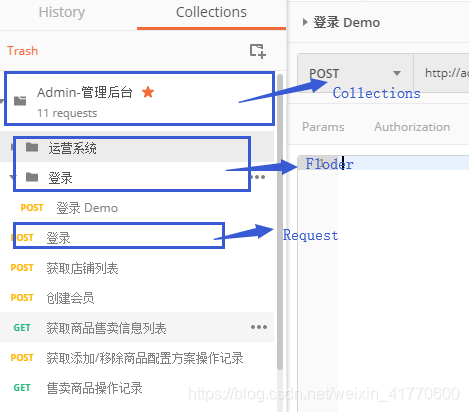
Pre-request Script 和 Tests 可以在集合(Collections)、夹(Folder)、请求(Request)中设置。
集合pre → 夹pre → 请求pre → Request → Response → 集合Tests → 夹Tests → 请求Tests
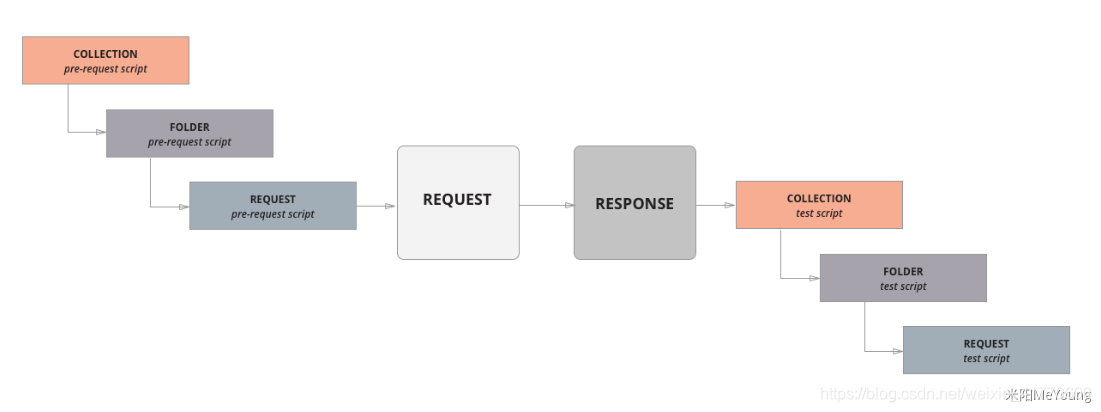
注意:集合夹中的Pre-quest script 和 Tests script 是每个Request请求之前和Response之后都会执行一次
几个常见场景:
集合下所有API 请求发起都需要一个token或uid一类的字段,而这个字段可以由登录后从response获取。那么如果我们不充分利用好Tests,那么我们测试调用时往往需要先执行下 Login 然后拷贝 uid,接着修改要发起请求的uid字段,再发起请求,这样一个集合下如果有几十个API ,那么我们可能需要黏贴修改 N个API的uid字段,这非常麻烦。
正确做法,在login API的Tests 中编写个脚本以达到,Login请求拿到Response后往环境变量和全局变量写入一个变量供其他API使用。
{ "code": 1, "content": { "userId": "123123" }, "msg": "成功", "uid": "7a57ea7b-19cd-1234-1234-fa1be9ff045d1557562660436", }
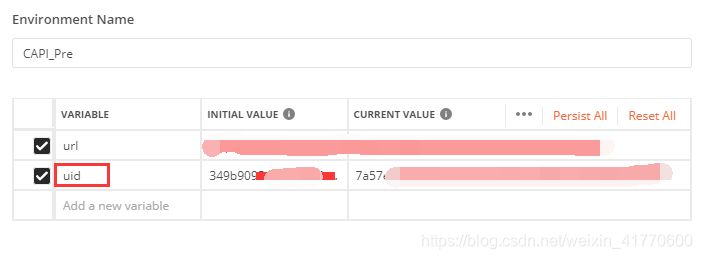
为了获得uid的值,并写入环境变量,我们可以在Tests 中加入如下脚本
// 把reponse 的body转成Json let jsonData = JSON.parse(responseBody); // 解析获得Json中的 uid let uid = jsonData.uid; // 设置一个环境变量 uid 值为 json解析获取到的值 pm.environment.set("uid", uid);
这时发起这个登录请求后,我们就会看到对应的环境变量中增加了一个 uid 环境变量,那么同集合里其他需要uid的API只需要在需要的位置添加 {{uid}} 便可以获取到最新的uid值
通过Postman 测试API时,除了肉眼去看结果返回值,我们还可以在Tests中编写一些脚本用于校验我们的response。
例如还是Login接口,Login response和场景1是一样的,我们想校验接口返回的数据、状态和请求时间等。我们可以在Tests编写如下脚本:
pm.test("Response time is less than 200ms", function () { // 获取请求时间,并校验小于200ms pm.expect(pm.response.responseTime).to.be.below(200); }); pm.test("Status code is 200", function () { // 获取请求状态码,并校验是否为 200 pm.response.to.have.status(200); }); pm.test("json test", function () { // 获取response json var jsonData = pm.response.json(); // 校验msg的值为 成功 pm.expect(jsonData.msg).to.eql("成功"); // 校验 status 为 1 pm.expect(jsonData.content.status).to.eql(1); });
- responseHeaders[String] {Object}:获取response的头部信息,添加String参数则获取指定的头部信息。但官方不推荐这么使用,更推荐使用postman.getResponseHeader(‘xxx’)。
console.log(responseHeaders) console.log(responseHeaders['Content-Type']) console.log(postman.getResponseHeader('Content-Type'))
- responseCookies {Array}:返回一个数组,可以通过postman.getResponseCookie(cookieName) 获取具体的cookie信息。
- responseBody {string}:返回响应正文文本的字符串。可以用JSON.parse()转成数组。
- responseTime {number}:返回响应时间,单位ms
- responseCode[String] {Object}:返回的状态码,不带参数会返回4个属性。 常用的属性是 code 就是状态码。
console.log(responseCode) console.log(responseCode['code'])
pm.environment.set("variable_key", "variable_value");
pm.environment.get("variable_key");
pm.environment.unset("variable_key");
pm.globals.set("variable_key", "variable_value");
pm.globals.get("variable_key");
pm.globals.unset("variable_key");
pm.variables.get("variable_key");
pm.sendRequest("https://postman-echo.com/get", function (err, response) { console.log(response.json()); });
pm.test("Body matches string", function () { pm.expect(pm.response.text()).to.include("string_you_want_to_search"); });
pm.test("Body is correct", function () { pm.response.to.have.body("response_body_string"); });
pm.test("Your test name", function () { var jsonData = pm.response.json(); pm.expect(jsonData.value).to.eql(100); });
如下是说response header包含Content-Type
pm.test("Content-Type is present", function () { pm.response.to.have.header("Content-Type"); });
pm.test("Response time is less than 200ms", function () { pm.expect(pm.response.responseTime).to.be.below(200); });
pm.test("Status code is 200", function () { pm.response.to.have.status(200); });
pm.test("Body is correct", function () { pm.response.to.have.body("msg"); });
pm.test("Successful POST request", function () { pm.expect(pm.response.code).to.be.oneOf([201,202]); });
var jsonObject = xml2Json(responseBody);
Postman尽管提供了不少的变量,但是有时这些变量均无法满足我们的需求。 例如创建用户API,我们需要一个11位并且1开头的不重复的电话号码。例如某API有个时间参数,我们需要传入当前日期等等。 那么这些我们就可以通过pre-request script 中通过编写简单的JS,使可支持。
// 生成10为随机数 function ronNum(){ let num = ""; for(let i=0;i<10;i++){ num +=Math.floor(Math.random()*10) } console.log(num) return num; } // 生成1开头的11位随机数 let phoneNo ="1"+ronNum(); // 设置成环境变量供API引用 pm.environment.set("phone", phoneNo); // 生成 xxxx-xx-xx格式日期 let date = new Date().getFullYear()+"-"+((new Date()).getMonth()+1)+"-"+(new Date()).getDate(); // 设置成date 环境变量 pm.environment.set("date", date);
例如调用删除API,你们为了避免我们每次删除都有效,这时我们往往在删除之前先调用一下添加的接口,这时我们可以再pre-request script中编写个调用add的API,先生成一条数据。在例如假设我们调用API前我们需要需要查阅数据库(假设我们已经提供了数据库交互的API),那么我们也可以把调用数据库API的步奏放于pre-request script。
// 调用 请求 pm.sendRequest("https://postman-echo.com/get", function (err, response) { // 输出 reponse console.log(response.json()); }); // 登陆 请求 pm.sendRequest({ url: "http://admin{{env}}.com/luckyadminweb/checkLogin.do_", method: "POST", header: { "Content-Length": "1", "Content-Type": "application/x-www-form-urlencoded" }, body: { mode: 'urlencoded', urlencoded: [ {key: "username", value: "user1"}, {key: "password", value: "password1"} ] }, function (err, res) { console.log(res); } });
补充内容:
Postman 现在不仅仅支持原生是JavaScript ,Postman 提供的 沙箱(Sandbox)里面还包含了如下库:
cheerio:jQuery子集,提供更快速,精简的API(4.6.0及更高版本中提供)
BackboneJS 不推荐使用:提供简单的模型,视图和集合。这将在未来版本的沙箱中删除。
SugarJS 不推荐使用:使用有用的方法扩展本机JS对象。这将在未来版本的沙箱中删除。
tv4 JSON模式验证器:针对json-schema草案的v4,用于验证JSON对象
CryptoJS:标准和安全的加密算法。支持的算法:AES,DES,EvpKDF,HMAC-MD5,HMAC-SHA1 / 3/256/512,MD5,PBKDF2,Rabbit,SHA1 / 3/224/256/512,TripleDES
以上库不需要导出便可直接使用,Postman 桌面版还提供了 require。
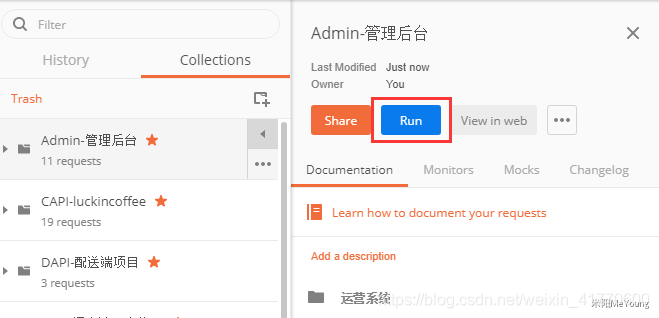
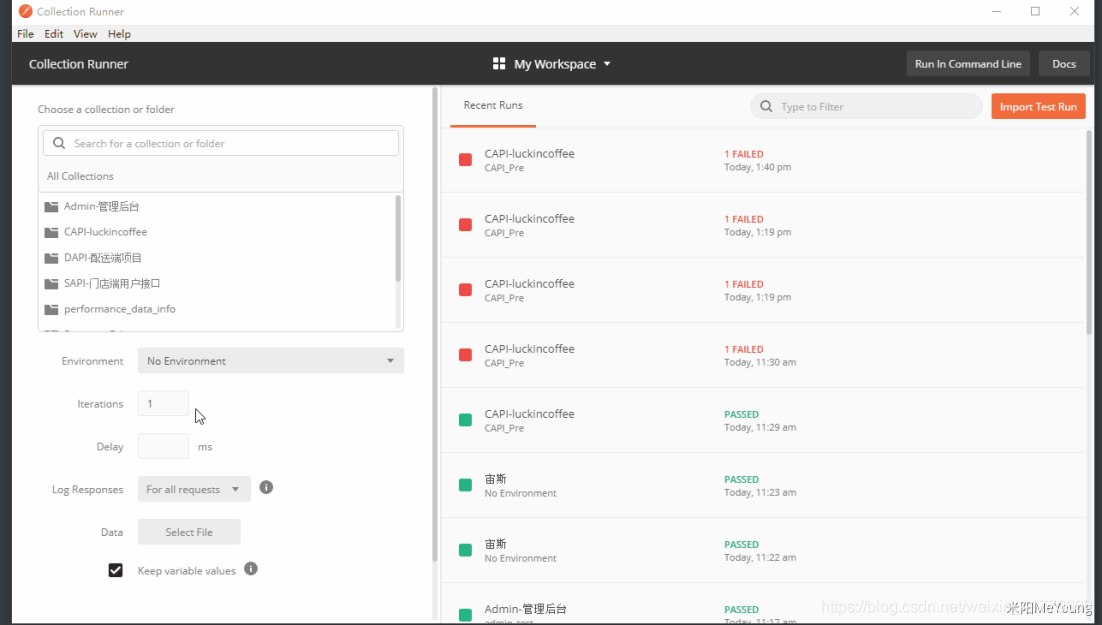
Postman 带有Runner功能,用于批量运行脚本,但是在运行过程中如果集合中某个API调用失败,则剩下API的也将停止运行。
该功能主要有两种用途,一种是逐个运行某个集合下的多个API;另一种是针对某个或某场景API采用数据驱动的方式运行,这个常用于批量造数据。
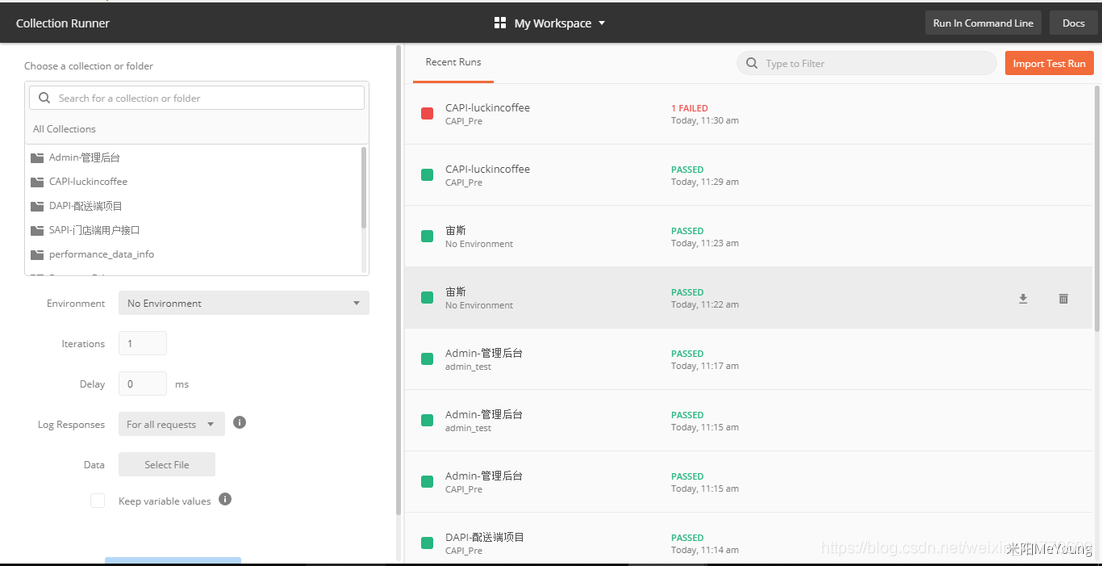
Collection or folder
For all requests:所有请求的reponse都记录
For failed requests:只显示失败的reponse记录
为运行的集合API提供外部数据,支持text、csv和json的格式文件。
默认集合运行中任何环境变量的更改都不会反映到外部的请求构建器中。勾选起来则会替换外部构建器中的环境变量。
数据驱动方式运行:
数据驱动方式除了用于批量测试等价类的测试用例,更常用于通过接口批量造数据。例如我需要10个订单,那么我可以创建个下订单的集合,并在集合从上而下编写下订单过程需要调用的API,并做好接口间的数据传递。
下面我们就以批量测试等价类用例为例子讲解,批量造数据也是类似做法无非过程时常需要调用多个接口罢了。
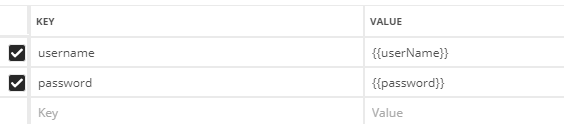
1.那么第一步我们可以本地创建一个Json或者csv文件,设定username和password两个字段,并设置要运行的测试值:
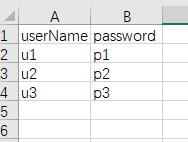
[ { "userName": "u1", "password": "p1" }, { "userName": "u2", "password": "p2" }, { "userName": "u3", "password": "p3" } ]
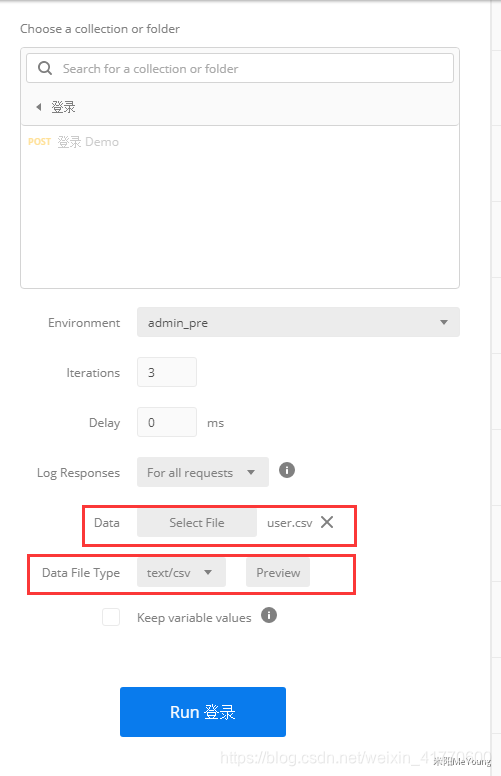
3.Runer运行,设定Data,选择你的csv或json文件后会自动帮你统计出 Iterrations,并可以通过Preview 预览数据源:
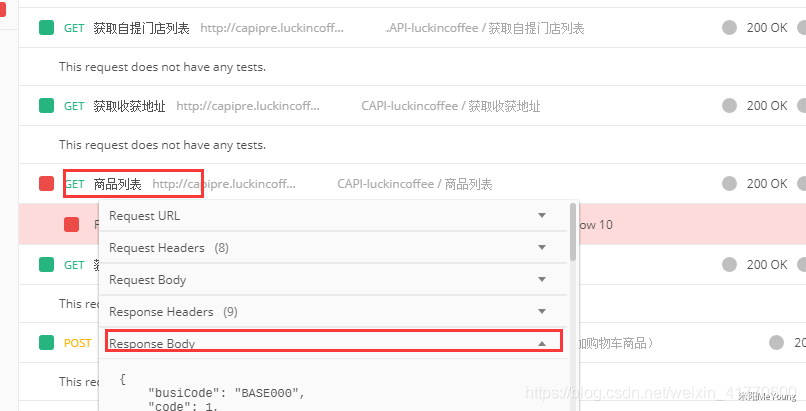
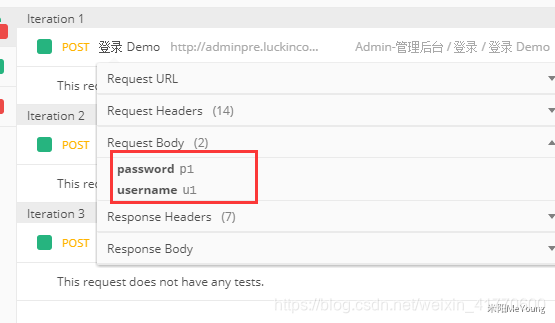
4.点击run,可以结果页面看到我们一个api发起了3次请求,并每次请求都从数据源拿去一条对应的数据:


 618
618

 被折叠的 条评论
为什么被折叠?
被折叠的 条评论
为什么被折叠?
 到【灌水乐园】发言


