


完全基于xml方式的搭建
直接调用xml文件去操作CRUD
添加一个maven项目
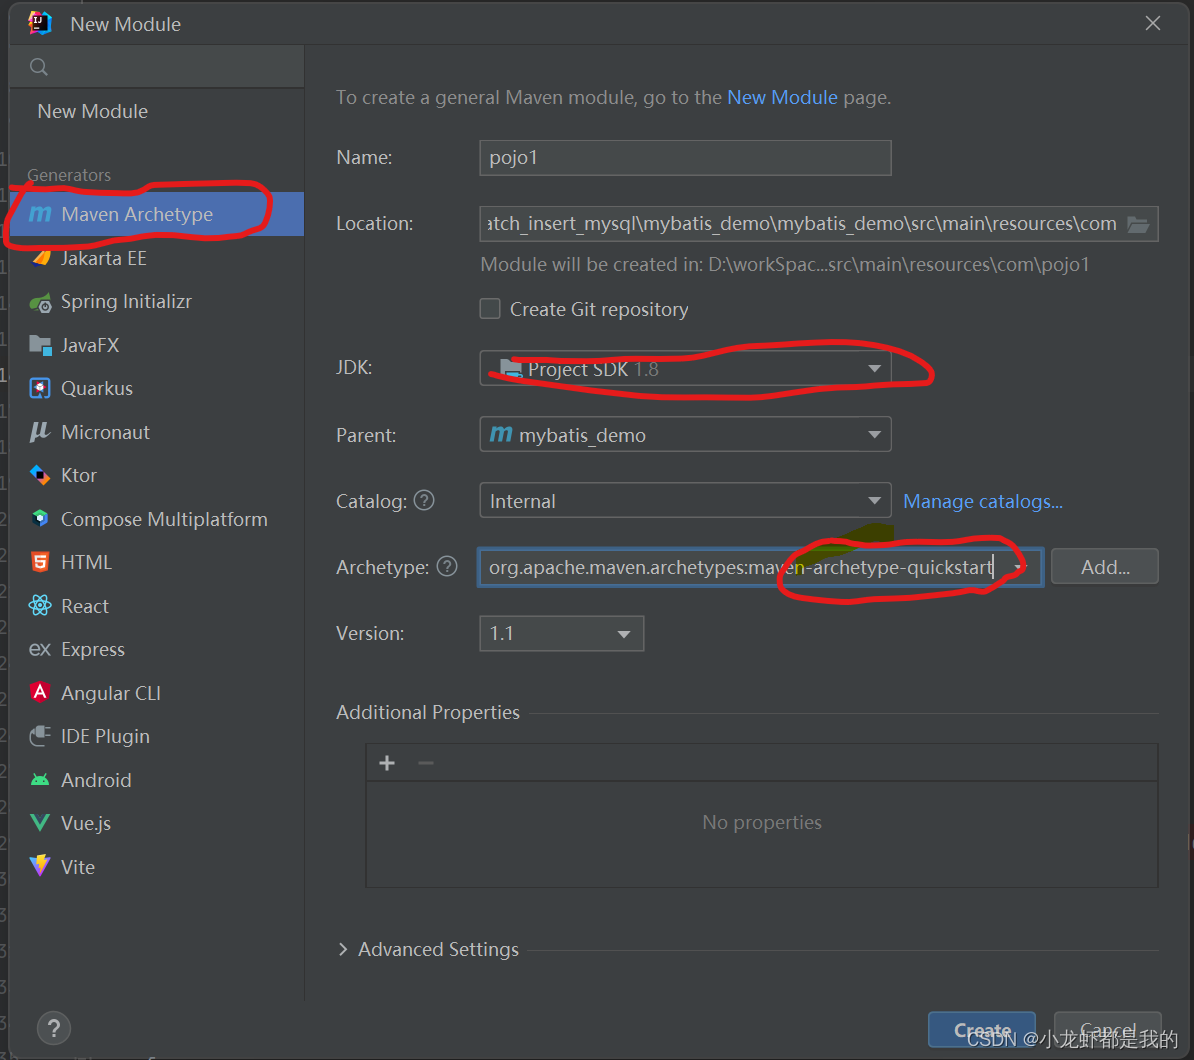
创建项目后添加maven依赖,
<!--mybatis依赖包-->
<dependency>
<groupId>org.mybatis</groupId>
<artifactId>mybatis</artifactId>
<version>3.5.1</version>
</dependency>
<!--数据库的驱动jar-->
<dependency>
<groupId>mysql</groupId>
<artifactId>mysql-connector-java</artifactId>
<version>5.1.37</version>
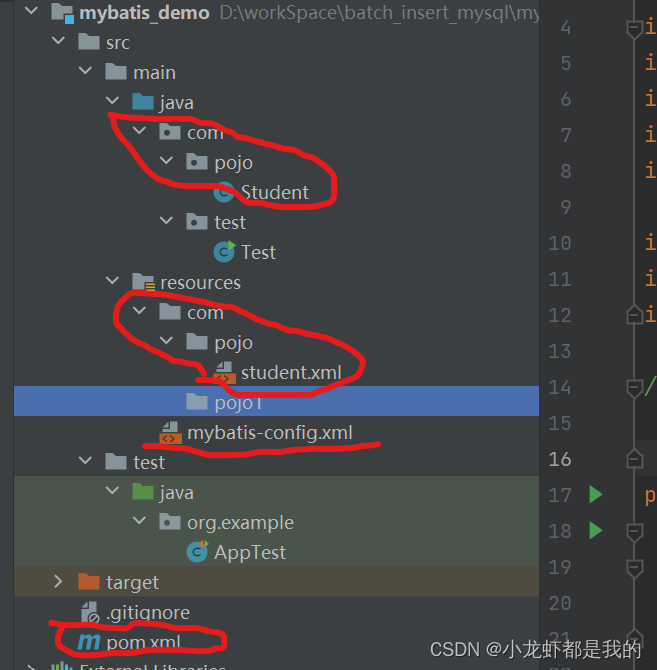
</dependency>在resources目录下创建myatis配置文件 resource.mybatis-config.xml:
文件内容:
<?xml version="1.0" encoding="UTF-8"?>
<!DOCTYPE configuration
PUBLIC "-//mybatis.org//DTD Config 3.0//EN"
"http://mybatis.org/dtd/mybatis-3-config.dtd">
<configuration>
<!--数据库配置信息-->
<environments default="development">
<environment id="development">
<transactionManager type="JDBC"/>
<dataSource type="POOLED">
<property name="driver" value="com.mysql.jdbc.Driver"/>
<property name="url" value="jdbc:mysql://localhost:3306/enjoy_mysql?characterEncoding=UTF-8&allowMultiQueries=true"/>
<property name="username" value="root"/>
<property name="password" value="root"/>
</dataSource>
</environment>
</environments>
<!-- 要扫描写有sql语句的xml包路径/文件 可以指定包或者具体到某个xml文件 -->
<mappers>
<mapper resource="com/pojo/student.xml"/>
</mappers>
</configuration>
在resource.com.pojo路径下写定义了sql语句的xml文件:
文件路径:resources:com/pojo/student.xml
<?xml version="1.0" encoding="UTF-8"?>
<!DOCTYPE mapper
        PUBLIC "-//mybatis.org//DTD Mapper 3.0//EN"
        "http://mybatis.org/dtd/mybatis-3-mapper.dtd">
<!--namespace:设置一个命名空间(当作是java中的包名)-->
<mapper namespace="com">
    <select id="listStudent" resultType="com.pojo.Student">
        select *
        from student
    </select>

    <select id="selectOneStudent" parameterType="_int" resultType="com.pojo.Student">
        select *
        from student
        where number = #{id}
    </select>

</mapper>
写对应的java bean文件,字段与数据库保持一致
package com.pojo;

public class Student {
    private int number;
    private String name;
    private String major;

    public int getNumber() {
        return number;
    }

    public void setNumber(int number) {
        this.number = number;
    }

    public String getName() {
        return name;
    }

    public void setName(String name) {
        this.name = name;
    }

    public String getMajor() {
        return major;
    }

    public void setMajor(String major) {
        this.major = major;
    }

    @Override
    public String toString() {
        return "Student{" +
                "number=" + number +
                ", name='" + name + '\'' +
                ", major='" + major + '\'' +
                '}';
    }
}
测试代码:
package com.test;


import com.pojo.Student;
import org.apache.ibatis.io.Resources;
import org.apache.ibatis.session.SqlSession;
import org.apache.ibatis.session.SqlSessionFactory;
import org.apache.ibatis.session.SqlSessionFactoryBuilder;

import java.io.IOException;
import java.io.InputStream;
import java.util.List;

/**
 * 一个就简单的mybatis搭建
 */
public class Test {
    public static void main(String[] args) throws IOException {
        /**
         * 读取 mybatis相关配置文件
         */
        String resource = "mybatis-config.xml";
        InputStream inputStream = Resources.getResourceAsStream(resource);
        //通过配置参数构建一个 sql会话工厂
        SqlSessionFactory build = new SqlSessionFactoryBuilder().build(inputStream);
        //通过sql会话工厂 --> sql会话
        SqlSession sqlSession = build.openSession();


        //查询所有学生信息
        List<Student> products = sqlSession.selectList("listStudent");
        //参数为 Student.xml文件里相应sql语句的id


        //查询number为12的商品信息
        Student student = sqlSession.selectOne("selectOneStudent", 12);
        //第二个参数的类型为Product.xml文件里相应sql语句的parameterType


    }
}
基于xml的接口映射
解释:这种方式是将接口与xml结合起来,创建接口,然后通过xml实现接口,即将接口的具体实现放在xml文件中,而我们不再是直接调用xml文件去操作CRUD,而是通过调用接口的方式访问。
添加maven项目,添加配置文件,同上操作;
//在resources目录下创建myatis配置文件 resource.mybatis-config.xml:文件内容如下
<?xml version="1.0" encoding="UTF-8"?>
<!DOCTYPE configuration
PUBLIC "-//mybatis.org//DTD Config 3.0//EN"
"http://mybatis.org/dtd/mybatis-3-config.dtd">
<configuration>
<!--数据库配置信息-->
<environments default="development">
<environment id="development">
<transactionManager type="JDBC"/>
<dataSource type="POOLED">
<property name="driver" value="com.mysql.jdbc.Driver"/>
<property name="url"
value="jdbc:mysql://localhost:3306/enjoy_mysql?characterEncoding=UTF-8&allowMultiQueries=true"/>
<property name="username" value="root"/>
<property name="password" value="root"/>
</dataSource>
</environment>
</environments>
<!-- 要扫描写有sql语句的xml包路径/文件 可以指定包或者具体到某个xml文件 -->
<mappers>
<!--<mapper resource="com/pojo/student.xml"/>-->
<mapper resource="com/pojo/StudentMapper.xml"/>
</mappers>
</configuration>
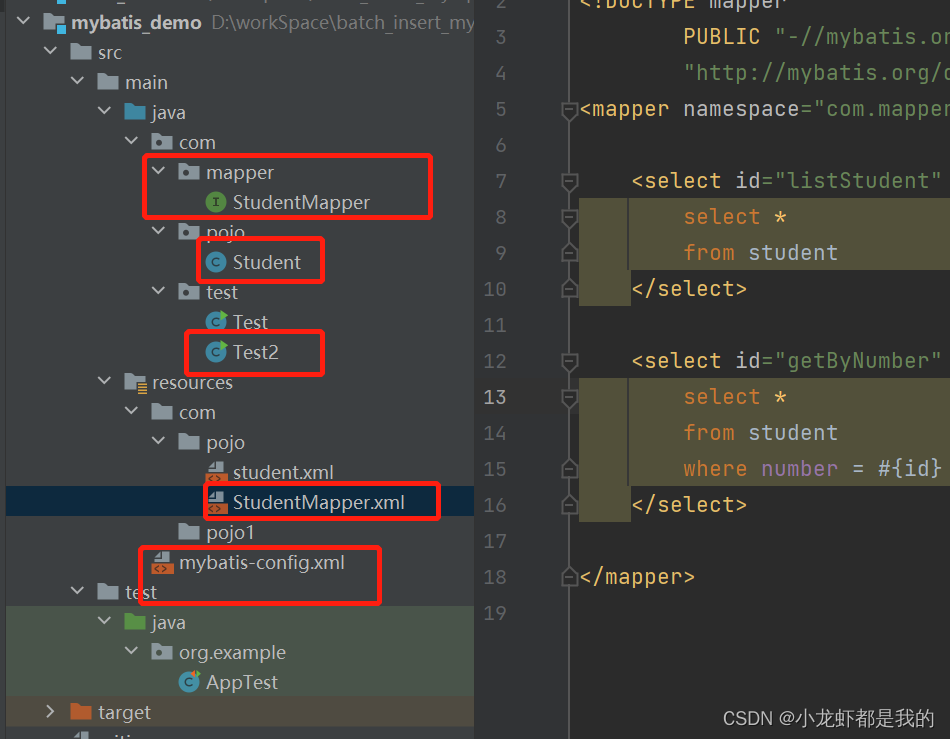
然后在java目录下面创建一个接口:com.mapper.StudentMapper
package com.mapper;

import com.pojo.Student;
import java.util.List;

public interface StudentMapper {
    public interface ProductMapper {

        List<Student> listStudent();

        Student getByNumber(int number);

    }

}
然后再resources目录下创建一个文件:com/pojo/StudentMapper.xml
<?xml version="1.0" encoding="UTF-8"?>
<!DOCTYPE mapper
        PUBLIC "-//mybatis.org//DTD Mapper 3.0//EN"
        "http://mybatis.org/dtd/mybatis-3-mapper.dtd">
<mapper namespace="com.mapper.StudentMapper">

    <select id="listStudent" resultType="com.pojo.Student">
        select *
        from student
    </select>

    <select id="getByNumber" parameterType="_int" resultType="com.pojo.Student">
        select *
        from student
        where number = #{id}
    </select>

</mapper>
测试方法:
package com.test;

import com.mapper.StudentMapper;
import com.pojo.Student;
import org.apache.ibatis.io.Resources;
import org.apache.ibatis.session.SqlSession;
import org.apache.ibatis.session.SqlSessionFactory;
import org.apache.ibatis.session.SqlSessionFactoryBuilder;
import java.io.IOException;
import java.io.InputStream;
import java.util.List;

public class Test2 {
    public static void main(String[] args) throws IOException {
        //读取配置文件信息
        String resource = "mybatis-config.xml";
        InputStream inputStream = Resources.getResourceAsStream(resource);
        //构建一个sql绘画
        SqlSessionFactory sqlSessionFactory = new SqlSessionFactoryBuilder().build(inputStream);
        SqlSession sqlSession = sqlSessionFactory.openSession();

        //获得一个StudentMapper实例
        StudentMapper studentMapper = sqlSession.getMapper(StudentMapper.class);

        //查询所有学生信息
        List<Student> listStudent = studentMapper.listStudent();
        //查询number为12的商品信息
        Student product = studentMapper.getByNumber(12);


    }
}
注意点:
这里有几点是关键,
1: StudentMapper.xml文件里<mapper namespace="com.mapper.StudentMapper">
这里namespace属性必须填写所要映射的接口完全限定名;

2: <select id="getByNumber" parameterType="_int" resultType="Student">
这一句的id相当于接口的某个函数的方法体,
id属性对应接口中的方法名,
parameterType属性对应方法的参数类型,
resultType属性对应方法的返回值类型。


3: 别忘了在mybatis-config.xml文件中配置StudentMapper.xml
    <mapper resource="com/pojo/StudentMapper.xml"/>
基于注解的接口映射:
这种方式将不再需要创建除了mybatis-config.xml之外的映射文件,
采用接口调用的方式操作CRUD
首先依旧是在项目的src/resources路径下建立文件mybatis-config.xml映射文件:
<?xml version="1.0" encoding="UTF-8"?>
<!DOCTYPE configuration
PUBLIC "-//mybatis.org//DTD Config 3.0//EN"
"http://mybatis.org/dtd/mybatis-3-config.dtd">
<configuration>
<!--数据库配置信息-->
<environments default="development">
<environment id="development">
<transactionManager type="JDBC"/>
<dataSource type="POOLED">
<property name="driver" value="com.mysql.jdbc.Driver"/>
<property name="url"
value="jdbc:mysql://localhost:3306/enjoy_mysql?characterEncoding=UTF-8&allowMultiQueries=true"/>
<property name="username" value="root"/>
<property name="password" value="root"/>
</dataSource>
</environment>
</environments>
<!-- 要扫描写有sql语句的xml包路径/文件 可以指定包或者具体到某个xml文件 -->
<mappers>
<!--<mapper resource="com/pojo/student.xml"/>-->
<!--<mapper resource="com/pojo/StudentMapper.xml"/>-->
<!-- 这里是class 然后是对应接口权限路径名-->
<mapper class="com.mapper.StudentMapper1"/>
</mappers>
</configuration>
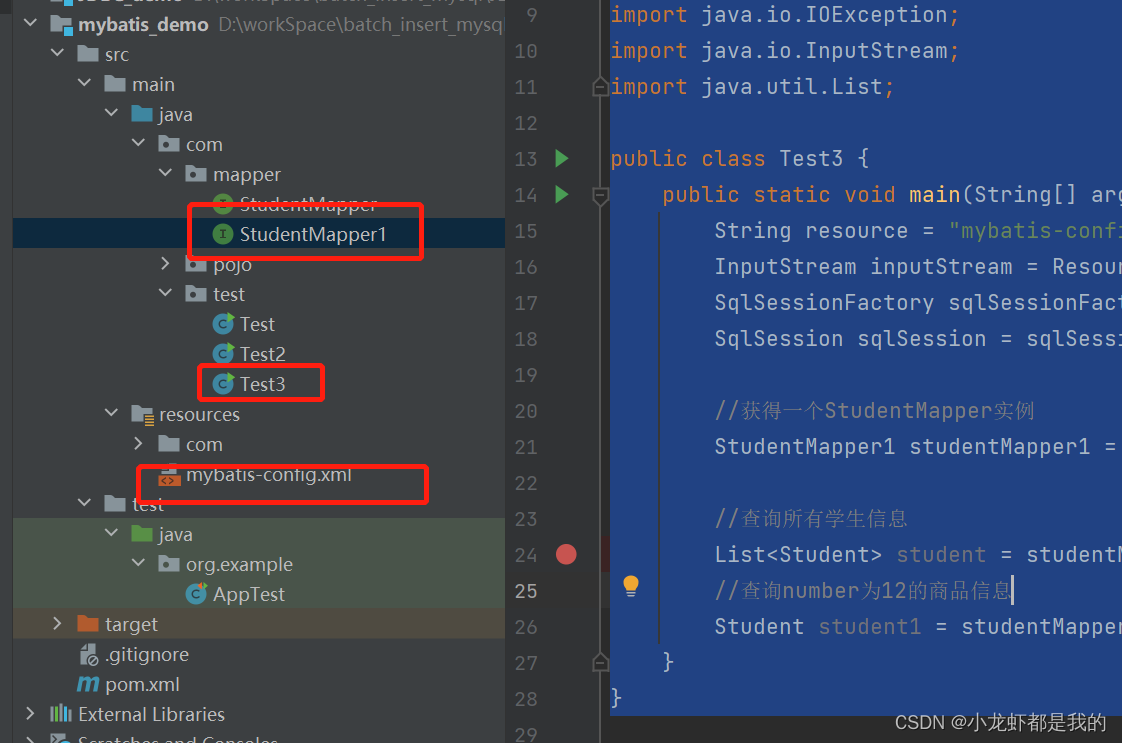
在java下创建接口文件StudentMapper1:
package com.mapper;

import com.pojo.Student;
import org.apache.ibatis.annotations.Mapper;
import org.apache.ibatis.annotations.Select;

import java.util.List;

@Mapper
public interface StudentMapper1 {
    @Select("select * from student")
    List<Student> listStudent();

    @Select("select * from student  where number = #{id}")
    Student getByNumber(int number);
}
测试代码:
package com.test;

import com.mapper.StudentMapper1;
import com.pojo.Student;
import org.apache.ibatis.io.Resources;
import org.apache.ibatis.session.SqlSession;
import org.apache.ibatis.session.SqlSessionFactory;
import org.apache.ibatis.session.SqlSessionFactoryBuilder;
import java.io.IOException;
import java.io.InputStream;
import java.util.List;

public class Test3 {
    public static void main(String[] args) throws IOException {
        String resource = "mybatis-config.xml";
        InputStream inputStream = Resources.getResourceAsStream(resource);
        SqlSessionFactory sqlSessionFactory = new SqlSessionFactoryBuilder().build(inputStream);
        SqlSession sqlSession = sqlSessionFactory.openSession();

        //获得一个StudentMapper实例
        StudentMapper1 studentMapper1 = sqlSession.getMapper(StudentMapper1.class);

        //查询所有学生信息
        List<Student> student = studentMapper1.listStudent();
        //查询number为12的商品信息
        Student student1 = studentMapper1.getByNumber(12);
    }
}


 255
255


 被折叠的 条评论
为什么被折叠?
被折叠的 条评论
为什么被折叠?
 到【灌水乐园】发言


