综述
浏览器外观
Actions
在v3版本中 "manifest_version": 3),只存在action 一种行为,不在分为 browser_action 和 page_action
Manifest
注册扩展的行为:
 "action": {
    "default_icon": "images/icon19.png", // 默认显示的图标
    "default_title": "Google Mail",      // 默认显示的标题,鼠标在图标上悬浮时会显示
    "default_popup": "popup.html"        // 点击图标时弹窗的界面
 },
图标
图标推荐使用宽高都为19像素,更大的图标会被缩小。一般推荐使用png格式的图片
可以通过修改manifest中 default_icon字段,或者调用setIcon()方法来修改扩展的图标
ToolTip
鼠标悬浮时显示的内容,即default_title指定的内容。
修改的manifest中default_title字段,或者调用setTitle()方法,来修改扩展的标题
Badge
可以选择性的显示一个badge——在图标上显示一些文本。Badges 可以很简单的为action更新一些小的扩展状态提示信息。
因为badge空间有限,所以只支持4个以下的字符。
设置badge文字和颜色可以分别使用setBadgeText()和setBadgeBackgroundColor()。
注: Badge 无法在Manifest文件里配置,只能调用方法来设置
Popup
popup 会在用户点击图标后出现。popup 可以包含任意你想要的HTML内容,并且会自适应大小。
在你的browser action中添加一个popup,创建弹出的内容的HTML文件。 修改browser_action的manifest中default_popup字段来指定HTML文件, 或者调用setPopup()方法。
API说明
setBadgeBackgroundColor
chrome.action.setBadgeBackgroundColor(object details)
details ( object )
- color ( array of integer )
范围为[0,255]整数构成的结构,用来描述badge的RGBA颜色。例如:不透明的红色是[255, 0, 0, 255]。 - tabId ( optional integer )
可选参数,将设置限制在被选中的标签,当标签关闭时重置。
设置badge的背景颜色。
setBadgeText
chrome.action.setBadgeText(object details)
设置browser action的badge文字,badge 显示在图标上面。
details ( object )
- text ( string )
任意长度的字符串,但只有前4个字符会被显示出来。 - tabId ( optional integer )
可选参数,将设置限制在被选中的标签,当标签关闭时重置。
注: 在2版本中是chrome.browserAction ,但是在3版本中是:chrome.action 。该开始搞错了,后来才发现了。
<!DOCTYPE html>
<html lang="en">
  <head>
    <meta charset="UTF-8" />
    <meta http-equiv="X-UA-Compatible" content="IE=edge" />
    <meta name="viewport" content="width=device-width, initial-scale=1.0" />
    <title>hello World</title>
    <script src="./jquery.js"></script>
    <script src="./hello.js"></script>
  </head>
  <body>
    <h1>hello World!</h1>
    <a href="#" id="badge1">设置Badge</a>
    <a href="#" id="badge2">取消Badge</a>
  </body>
</html>
$(function () {
  $("#badge1").click((e) => {
    chrome.action.setBadgeText({ text: "New" });
    chrome.action.setBadgeBackgroundColor({ color: [255, 0, 0, 255] });
  });
    $("#badge2").click((e) => {
    chrome.action.setBadgeText({ text: "" });
    chrome.action.setBadgeBackgroundColor({ color: [0,0,0,0] });
  });
});

setPopup
chrome.action.setPopup(object details)
设置一个点击actions时显示在popup中的HTML。
details ( object )
- tabId ( optional integer )
可选参数,将设置限制在被选中的标签,当标签关闭时重置。 - popup ( string )
popup中显示的html文件。如果设置为空字符(‘’),将不显示popup。
这个功能已经在chromium 5.0.316.0版本添加。如果你需要这个功能,可以通过manifest的minimum_chrome_version键值来确认你的扩展不会运行在早期的浏览器版本。
$("#popup").click((e) => {
    chrome.action.setPopup({
        popup: "./popup.html"
    })
});

setTitle
chrome.action.setTitle({title:'标题'})
设置browser action的标题,这个将显示在tooltip中。
onClicked
chrome.action.onClicked.addListener(function(Tab tab) {...});
当点击图标时触发,当显示页面时点击不会触发
右键菜单
chrome.contextMenus 模块用于在Chrome的右键菜单中增加自己的菜单项。
您可以选择针对不同类型的对象(如图片,链接,页面)增加右键菜单项。
您可以根据需要添加多个右键菜单项。一个扩展里添加的多个右键菜单项会被Chrome自动组合放到对应扩展名称的二级菜单里。
右键菜单可以出现在任意文档(或文档中的框架)中,甚至是本地文件(如file://或者Chrome://)中。若想控制右键菜单在不同文档中的显示,可以在调用create()和update()时指定documentUrlPatterns。
注: 低于Chrome 14的版本,右键菜单只能用于http:// 或者 https:// 类型的文档。
配置项
要使用contentMenus API,您必须在清单中声明“contentMenus”权限。同时,您应该指定一个16x16的图标用作右键菜单的标识。例如:
 "permissions": [
     "contextMenus"
 ],
 "icons": {
     "16": "hello_extensions.png",
     "48": "hello_extensions.png",
     "128": "hello_extensions.png"
 }
右键菜单API
create
integer Chrome.contextMenus.create(object createProperties, function callback)
创建一个新的右键菜单项。注意:如果在创建的过程中出现错误,会在回调函数触发后才能捕获到,错误详细信息保存在Chrome.extension.lastError中。
参数:
- createProperties
- type ( optional enumerated string [“normal”, “checkbox”, “radio”, “separator”] )
右键菜单项的类型。默认为“normal”。 - title ( optional string )
右键菜单项的显示文字;除非为“separator”类型,否则此参数是必须的。如果类型为“selection”,您可以在字符串中使用%s显示选定的文本。例如,如果参数的值为 “Translate ‘%s’ to Pig Latin”,而用户还选中了文本“cool”,那么显示在菜单中的将会是 “Translate ‘cool’ to Pig Latin”。 - checked ( optional boolean )
Checkbox或者radio的初始状态:true代表选中,false代表未选中。在给定的radio中只能有一个处于选中状态。 - contexts ( optional array of string [“all”, “page”, “frame”, “selection”, “link”, “editable”, “image”, “video”, “audio”] )
右键菜单项将会在这个列表指定的上下文类型中显示。默认为“page”。 - onclick ( optional function )
当菜单项被点击时触发的函数。参数是:info ,右键菜单项被点击时相关的上下文信息。tab,右键菜单项被点击时,当前标签的详细信息。 - parentId ( optional integer )
右键菜单项的父菜单项ID。指定父菜单项将会使此菜单项成为父菜单项的子菜单。 - documentUrlPatterns ( optional array of string )
这使得右键菜单只在匹配此模式的url页面上生效(这个对框架也适用)。详细的匹配格式见:模式匹配页面。
targetUrlPatterns ( optional array of string ) - 类似于documentUrlPatterns,但是您可以针对img/audio/video标签的src属性和anchor标签的href做过滤。
- enabled ( optional boolean )
启用或者禁用此菜单项,启用为true,禁用为false。默认为true。
- type ( optional enumerated string [“normal”, “checkbox”, “radio”, “separator”] )
- callback ( optional function )
在创建完菜单项后触发。如果创建过程中有错误产生,其详细信息在Chrome.extension.lastError中。
remove
Chrome.contextMenus.remove(integer menuItemId, function callback)
删除一个右键菜单
removeAll
Chrome.contextMenus.removeAll(function callback)
删除此扩展添加的所有右键菜单项。
update
更新已创建的右键菜单项。
参数基本与create一致
demo
太tm不容易了,现在国内搜到的开发文档都是旧版本,导致很多例子直接就报错,找了很久找到了一个好用的例子
配置项:
 "permissions": [
      "contextMenus"
  ],
  "icons": {
      "16": "hello_extensions.png",
      "48": "hello_extensions.png",
      "128": "hello_extensions.png"
  },
  "background": {
      "service_worker": "background.js"
  }
注:原来的是 scripts 现在要用service_worker;值不要加中括号会报错, "service_worker": ["background.js]" 这样是错误的
background.js
chrome.runtime.onInstalled.addListener(function () {
    chrome.contextMenus.create({
        id: 'baidu-search',
        title: '使用度娘搜索:%s',
        contexts: ['selection']
    });
    chrome.contextMenus.onClicked.addListener(function (info, tab) {
        switch (info.menuItemId) {
            case 'baidu-search':
                chrome.tabs.create({ url: 'https://www.baidu.com/s?ie=utf-8&wd=' + encodeURI(info.selectionText) });
                break;
        }
    });
});

桌面通知
通知用户发生了一些重要的事情。桌面通知会显示在浏览器窗口之外。
声明使用通知权限
{
  "name": "My extension",
  ...
  "permissions": [
    "notifications"
  ],
  ...
}
注意: 扩展声明的 notifications 权限总是允许创建通知。 这样申明之后就不再需要调用 webkitNotifications.checkPermission()。
通知API
create
创建通知
chrome.notifications.create(
 id, //保证每个通知的唯一,这个id是字符串类型
 {

    type: 通知类型,有basic(默认)、image、list、progress

    iconUrl: 图标的url

   imageUrl:"image"类型的通知的图片的URL

    appIconMaskUrl: 应用图标URL的掩码,用以规范URL,这个扩展应该是用不到

    title: 通知主标题

    message: 通知副标题

    contextMessage: 通知的备选内容,

    progress:进度

    buttons: [{title:'按钮1的标题',iconUrl:'icon3.png'},{title:'按钮2的标题',iconUrl:'icon4.png'}],  最多两个按钮

    items: [{title:'消息1',message: '今天天气真好!'},{title:'消息2',message: '明天天气估计也不错!'}], 通知列表,对应type是list时使用,只有title和message两个属性

    eventTime: Date.now() + 2000  通知的时间戳
  },
  (id) =>  点击事件
)
update
更新通知
chrome.notifications.update(
cid, //这个应该是对应创建时的那个id,根据id进行更新
{

    type: 'image',

    iconUrl: 'img2.jpg',

    imageUrl: 'img3.jpg',

    title: '更新标题',

    message: '更新副标题',

    contextMessage: '好开心呀,终于会更新了通知里面的内容!'

  },function(wasUpdated){

    wasUpdated ? console.log('更新完成') : console.log('更新失败');

});
clear
清除通知
chrome.notifications.clear(
 notificationId,  要清除通知的id
 function(boolean wasCleared) {
  wasUpdated ? console.log('清除成功') : console.log('清除失败');
})
getAll
获取所有通知
chrome.notifications.getAll(function(object,notifications){

    console.log(object,notifications);

});
监听点击和关闭事件
chrome.notifications.onClicked.addListener((通知id)=>{
  console.log('点击面板内除按钮的其他地方!');
});

chrome.notifications.onButtonClicked.addListener((通知id,按钮序号)=>{
  console.log('点击了按钮!');
});

chrome.notifications.onClosed.addListener(function(){
  console.log('点击了关闭按钮!');
});
通知demo
basic
chrome.notifications.create('basic',
     {
         type: 'basic',
         iconUrl: 'hello_extensions.png',
         title: '主标题',
         message: '副标题',
         buttons: [
             {
                 title: '按钮标题',
                 iconUrl: 'hello_extensions.png'
             }
         ],
         eventTime: Date.now() + 2000
     }
 )

chrome.notifications.create('image',
  {
      type: 'image',
      iconUrl: 'hello_extensions.png',
      title: '主标题',
      message: '副标题',
      imageUrl: 'hello_extensions.png',
      contextMessage: '1111',
      buttons: [
          {
              title: '按钮标题',
              iconUrl: 'hello_extensions.png'
          }
      ],
      eventTime: Date.now() + 2000
  }
)

list
chrome.notifications.create('list',
    {
        type: 'list',
        iconUrl: 'hello_extensions.png',
        title: '主标题',
        message: '副标题',
        contextMessage: '这是个list',
        items: [
            { title: '消息1', message: '哈哈哈' },
            { title: '消息2', message: '你好吗' }
        ],
        buttons: [
            {
                title: '按钮标题',
                iconUrl: 'hello_extensions.png'
            }
        ],
        eventTime: Date.now() + 2000
    }
)

progress
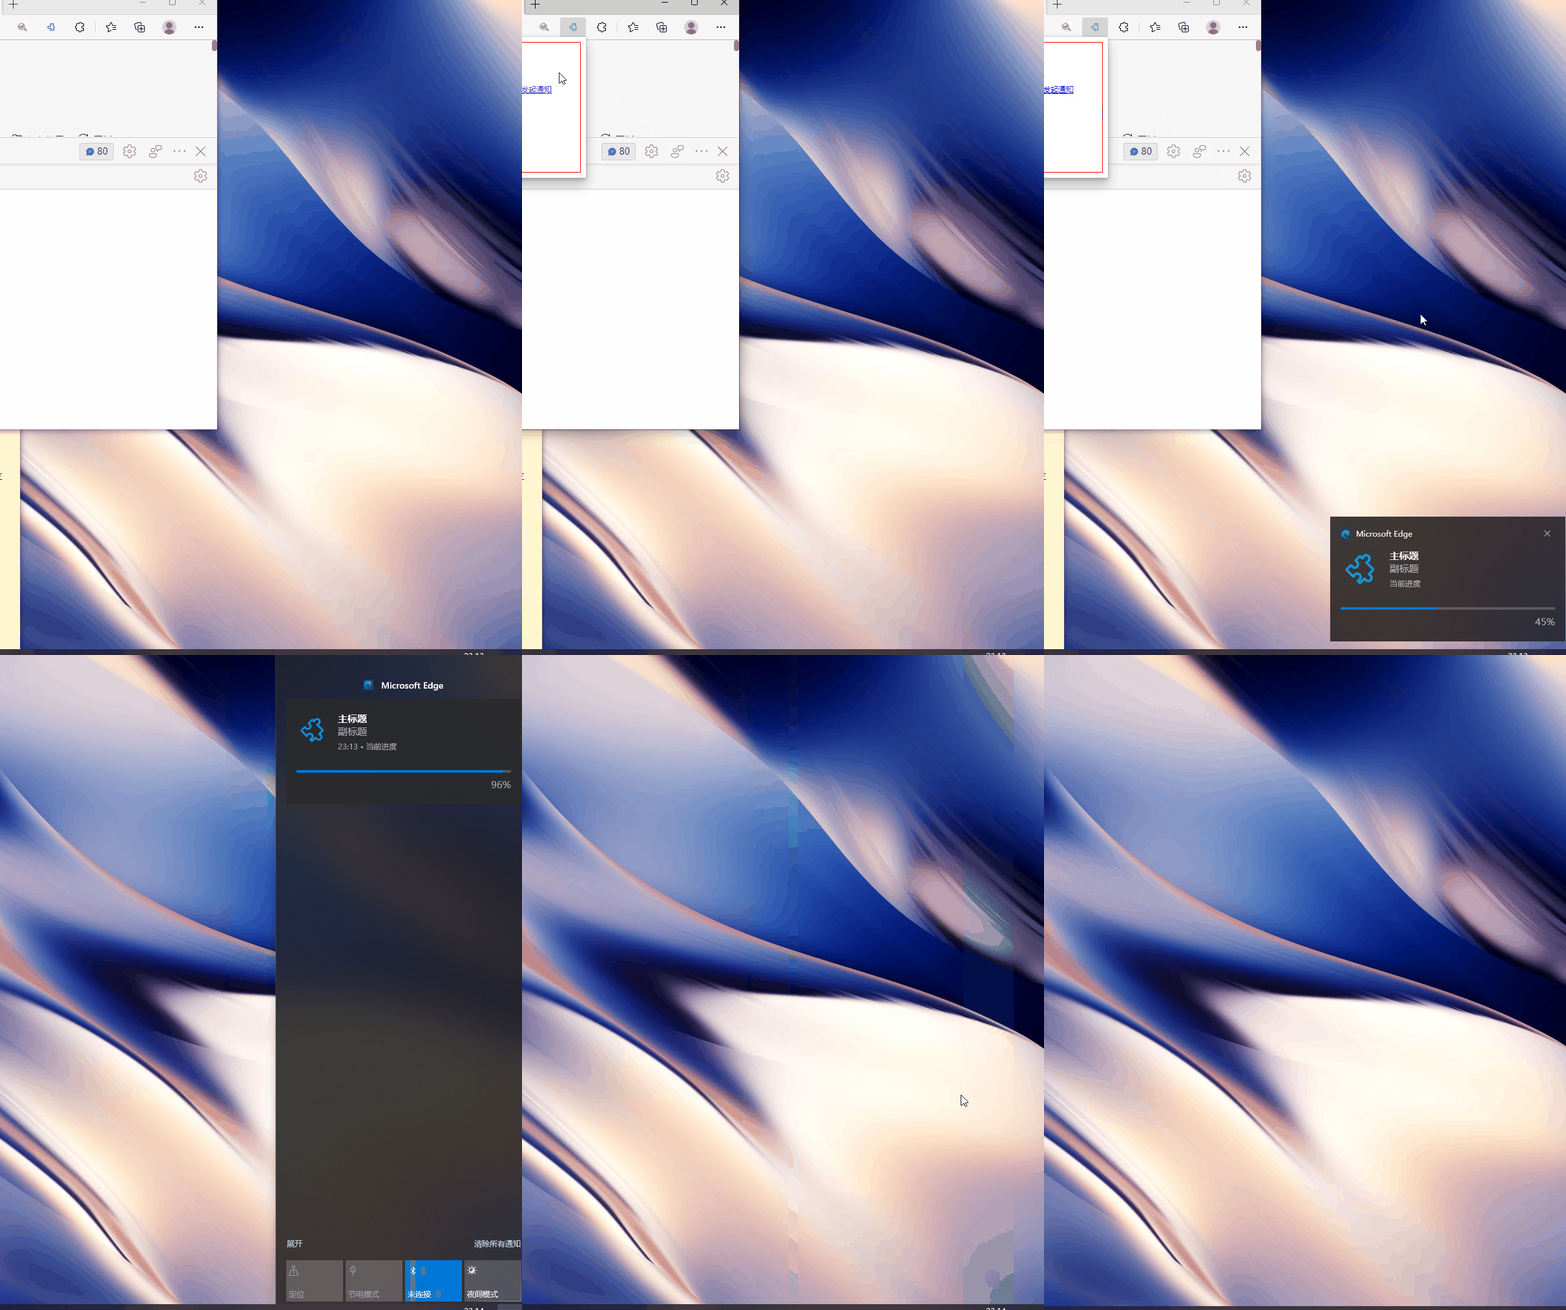
chrome.notifications.create('progress',
      {
          type: 'progress',
          iconUrl: 'hello_extensions.png',
          title: '主标题',
          message: '副标题',
          contextMessage: '当前进度',
          progress: 0,
          eventTime: Date.now() + 200
      }
  )

  setTimeout(() => {
      chrome.notifications.update('progress',
          {
              type: 'progress',
              iconUrl: 'hello_extensions.png',
              title: '主标题',
              message: '副标题',
              contextMessage: '当前进度',
              progress: 45,
              eventTime: Date.now()
          }
      )
  }, 800)

  setTimeout(() => {
      chrome.notifications.update('progress',
          {
              type: 'progress',
              iconUrl: 'hello_extensions.png',
              title: '主标题',
              message: '副标题',
              contextMessage: '当前进度',
              progress: 96,
              eventTime: Date.now()
          }
      )
  }, 1500)

事件
    $('#message').click((e) => {

        chrome.notifications.create('basic',
            {
                type: 'basic',
                iconUrl: 'hello_extensions.png',
                title: '主标题',
                message: '副标题',
                buttons: [
                    {
                        title: '按钮标题',
                        iconUrl: 'hello_extensions.png'
                    }
                ],
                eventTime: Date.now() + 2000
            },
            id => console.log("点击了", id)
        )


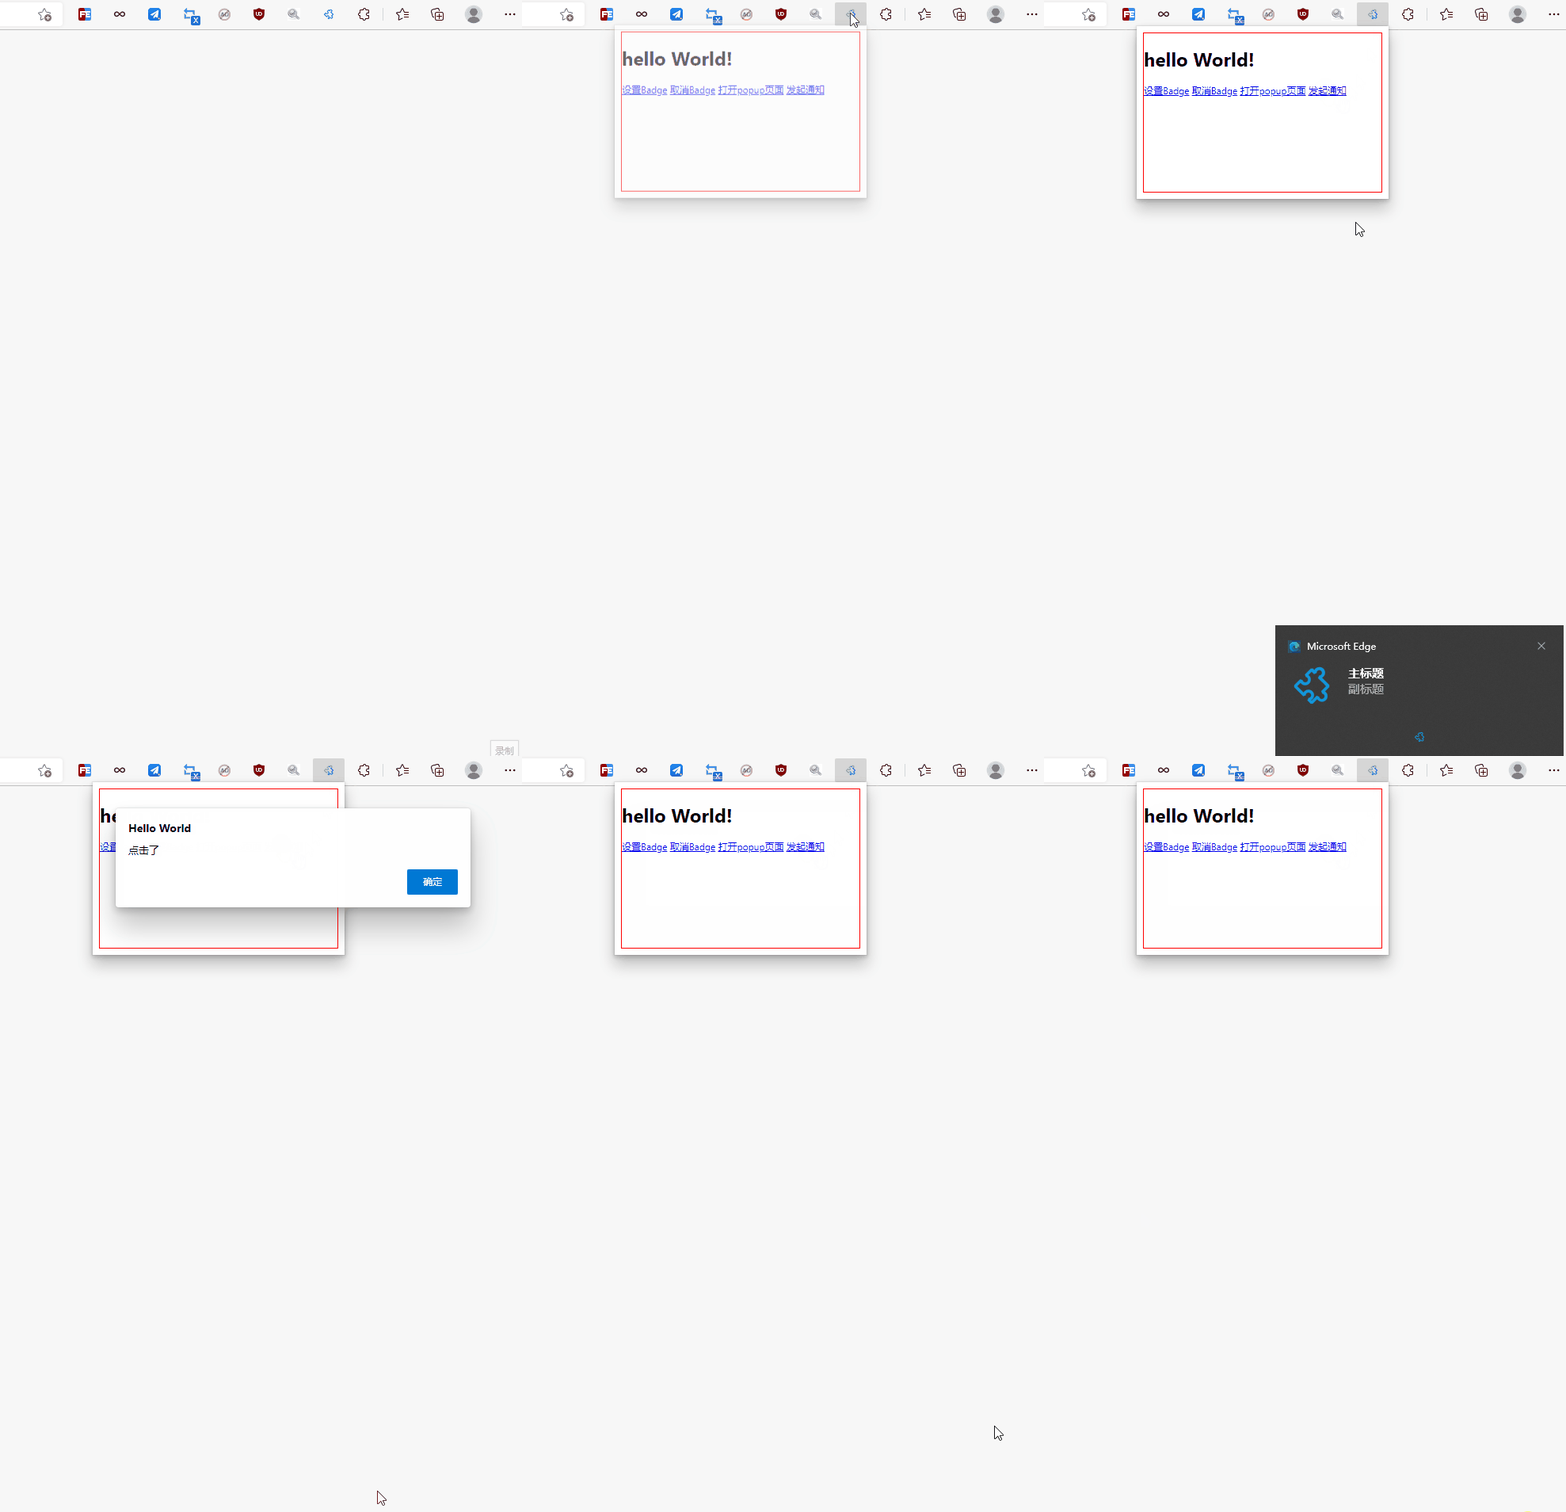
        chrome.notifications.onButtonClicked.addListener((id, number) => {
            alert('点击了')
        });
    })
});
这里感觉事件应该写在background.js 里,但是写在里面会提示alert函数,找不到。background.js应该只能写与chrome有关的事件


 4600
4600

 被折叠的 条评论
为什么被折叠?


