


Dlib 人脸识别
1.开发环境
操作系统:Windows 10
开发工具:Pycharm
库:dlib
2.环境准备
Dlib库的安装是很费劲的一个步骤:
我的安装方法:
1.安装Visual Studio
2.Cmake
3.Boost
4.直接再cmd中pip install dlib
在安装过程中一定要注意Visual Studio的版本。
参考:https://www.jb51.net/article/183137.htm
3 系统设计
3.1文件目录
1.录入人(这些图片是我将录入到csv文件中,作为某某人的特征文件)

2.训练以及测试目录(通过读入以下文件夹中的图片与录入人中的文件进行比对)

3.2 Dlib基本使用
我们先使用一个小demo来介绍Dlib的使用
代码如下:
import cv2
import dlib
from skimage import io
import numpy

list =[]
# 使用特征提取器get_frontal_face_detector
detector = dlib.get_frontal_face_detector()
# dlib的68点模型,使用作者训练好的特征预测器
predictor = dlib.shape_predictor("shape_predictor_68_face_landmarks.dat")
facerec = dlib.face_recognition_model_v1("dlib_face_recognition_resnet_model_v1.dat")
# 图片所在路径
path = "G:\\Pycharm\\Face\\PIN\\"
img = io.imread(path + "裴珠泫.jpg")
dets = detector(img, 1)
print("人脸数:", len(dets))
feature = []
for k, d in enumerate(dets):
    print("第", k + 1, "个人脸的坐标:", d,
          "left:", d.left(),
          "right:", d.right(),
          "top:", d.top(),
          "bottom:", d.bottom())
    cv2.rectangle(img, (d.left(), d.top()), (d.right(), d.bottom()), (0, 0, 255), 2)
    width = d.right() - d.left()
    heigth = d.bottom() - d.top()
    print('人脸面积为:', (width * heigth))
    # 利用预测器预测
    shape = predictor(img, d)
    face_descriptor = facerec.compute_face_descriptor(img, shape)
    print("face_descriptor:",face_descriptor)
    V = numpy.array(face_descriptor)
    print("V:",V)
    feature.append(V)
    print("feature:",feature)
    print(len(feature))
    print(feature[0])
    # 标出68个点的位置
    for i in range(68):
        print(shape.part(i).x, shape.part(i).y)
        list.append((shape.part(i).x, shape.part(i).y))
        cv2.circle(img, (shape.part(i).x, shape.part(i).y), 4, (0, 255, 0), -1, 8)
        cv2.putText(img, str(i), (shape.part(i).x, shape.part(i).y), cv2.FONT_HERSHEY_SIMPLEX, 0.5, (255, 255, 255))
    # 显示一下处理的图片,然后销毁窗口
    print(len(list))
    cv2.imshow('face', img)
    cv2.waitKey(0)
运行结果:

并且通过对我们print的分析我们也可以基本了解以下内容:
1.dlib.get_frontal_face_detector()这个是用来检测图片中有几个人脸。它的内容是一个坐标例如:
2.我们得到了图片得特征点。
3.至于对图片处理过程中得可视化(如上图的运行结果),我们是可有可无的。我们做这个步骤只是为了让我们更加了解它的过程,而该项目实际并不需要这个可视化。
那么接下来我们开始:
第一个文件GetFeature.py(以列表形式获取图片特征点)
import dlib
from skimage import io
import numpy


def GetF(img):
    feature = []
    # 检测人脸
    detector = dlib.get_frontal_face_detector()
    # 基于dlib的68个特征点检测模型,
    predictor = dlib.shape_predictor("shape_predictor_68_face_landmarks.dat")
    # dlib_face_recognition_resnet_model_v1.dat是训练好的人脸识别模型。
    facerec = dlib.face_recognition_model_v1("dlib_face_recognition_resnet_model_v1.dat")
    img = io.imread(img)
    # 检测人脸位置
    dets = detector(img, 1)
    for k, d in enumerate(dets):
        # 利用预测器获取68点
        shape = predictor(img, d)
        # 特征点获取
        face_descriptor = facerec.compute_face_descriptor(img, shape)
        V = numpy.array(face_descriptor)
        feature = V.tolist()
    return feature
第二个文件Incsv.py将我们录入人的图片信息存入CSV
import numpy as np
import cv2
import GetFeature
import csv
import glob

def Incsv():
    f = open('PINface.csv', 'w', encoding='utf-8', newline='')
    csv_writer = csv.writer(f)
    path = "G:\\Pycharm\\Face\\PIN\\"
    for imgPath in glob.glob(path+ '//*.jpg'):
        Felist = GetFeature.GetF(imgPath)
        name = imgPath[20:-4]
        csv_writer.writerow([name, imgPath, Felist])


Incsv()


-
第三个文件read.py我们获取到需要比对的图片的路径,计算出特征,再与刚刚存入CSV文件中的比对。-

-
import csv
import GetFeature
import numpy as np


def readcsv(imgPath):
    url = ''
    name = ''
    with open('PINface.csv', newline='', encoding='utf-8') as f:  # 参数encoding = 'utf-8'防止出现乱码
        reader = csv.reader(f)  # 使用csv的reader()方法,创建一个reader对象  csv.reader()读取结果是列表
        for row in reader:  # 遍历reader对象的每一行
            print(row)
            str = row[2]
            feature = eval(str)
            imgF = GetFeature.GetF(imgPath)
            dist = distance(imgF, feature)
            if dist < 0.41:
                name = row[0]
                url = row[1]
                break
    return name, url


def distance(l1, l2):
    V1 = np.array(l1)
    V2 = np.array(l2)
    dist = np.linalg.norm(V1 - V2)
    print(dist)
    return dist
第4个文件Wind.py窗口
import os
import tkinter as tk
from tkinter import messagebox
from tkinter.filedialog import askopenfilename
from PIL import Image, ImageTk
import Read


def choosepic():
    path_ = askopenfilename()
    path_ = os.path.relpath(path_)
    img_open = Image.open(path_)
    img = ImageTk.PhotoImage(img_open)
    l0.config(image=img)
    l0.image = img

    info = Read.readcsv(path_)
    img_open1 = Image.open(info[1])
    img1 = ImageTk.PhotoImage(img_open1)
    l1.config(image=img1)
    l1.image = img1

    str = info[0]
    messagebox.showinfo("这是", str)

root = tk.Tk()
# root.geometry()
b0 = tk.Button(root, text='选择图片', command=choosepic)
b0.grid(row=0, column=0, pady=5)
l0 = tk.Label(root)
l0.grid(row=1, column=0, pady=5)

test = tk.StringVar()
test.set("将进行识别")
e1 = tk.Entry(root, state='readonly', text=test, width=30)
e1.grid(row=0, column=1, pady=5, columnspan=2)

l1 = tk.Label(root)
l1.grid(row=1, column=1, pady=5)
root.mainloop()
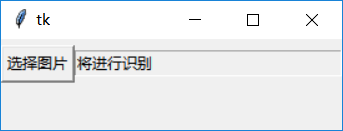
代码运行结果:


参考文献
https://www.jb51.net/article/183137.htm
https://blog.csdn.net/wc781708249/article/details/78562902


 2万+
2万+


 被折叠的 条评论
为什么被折叠?
被折叠的 条评论
为什么被折叠?
 到【灌水乐园】发言


