


前言
对于自定义的组件,可以通过自定义spring-boot-starter来达到开箱即用的目的。
实例

有这样一个公共组件data-author-column,这里是具体的逻辑实现。
对它我们来自定义starter。
创建两个工程,其实可以是一个,这里按照springboot的标准分类,定义两个。
1、data-author-spring-boot-starter
2、data-author-spring-boot-autoconfigure
data-author-spring-boot-starter
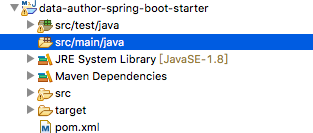
这里面是空的,没有代码实现,重点是pom配置。
 <dependency>
             <groupId>org.springframework.boot</groupId>
             <artifactId>spring-boot-starter</artifactId>
         </dependency>

         <dependency>
        	 <groupId>com.lztec.auto</groupId>
			  <artifactId>data-author-spring-boot-autoconfigure</artifactId>
			  <version>1.0.0-RELEASE</version>
         </dependency>

          <!-- 字段权限 mybatis扩展实现  这里可以不用放,在 data-author-spring-boot-autoconfigure 有依赖,后面会展示依赖结构-->
         <dependency>
         	<groupId>com.lztec.auto</groupId>
			  <artifactId>data-author-column</artifactId>
			  <version>1.0.0-RELEASE</version>
         </dependency>
data-author-spring-boot-autoconfigure

这个工程提供了基础配置实现,这里有三块需要注意:
1、配置代码实现
2、META-INF的目录下文件
3、pom.xml
先看下pom配置
<!-- springboot 自动装配依赖 -->
  		 <dependency>
	      <groupId>org.springframework.boot</groupId>
	      <artifactId>spring-boot-autoconfigure-processor</artifactId>
	      <optional>true</optional>
	    </dependency>

  		<!-- springboot 配置自加载实现 -->
		 <dependency>
		    <groupId>org.springframework.boot</groupId>
            <artifactId>spring-boot-configuration-processor</artifactId>
             <optional>true</optional>
         </dependency>
		<!-- springboot starter 规范约定 -->
        <dependency>
             <groupId>org.springframework.boot</groupId>
             <artifactId>spring-boot-starter</artifactId>
         </dependency>

         <!-- 字段权限 mybatis扩展实现 -->
         <dependency>
         	<groupId>com.lztec.auto</groupId>
			  <artifactId>data-author-column</artifactId>
			  <version>1.0.0-RELEASE</version>
         </dependency>

         <!-- mybatis 依赖 -->
         <dependency>
		    <groupId>org.mybatis.spring.boot</groupId>
		    <artifactId>mybatis-spring-boot-starter</artifactId>
		    <version>2.0.0</version>
		</dependency>
这里也依赖了data-author-column,因为配置代码实现要引用到其中的类信息。
配置代码
@Configuration
@ConditionalOnClass({SqlSessionFactory.class, SqlSessionFactoryBean.class})
@AutoConfigureAfter(DataSourceAutoConfiguration.class)
public class DataAuthorConfiguration {

	@Autowired
	private List<SqlSessionFactory> sqlSessionFactoryList;

	 @PostConstruct
    public void addPageInterceptor() {

		DataAuthorInterceptor interceptor = new DataAuthorInterceptor();
        for (SqlSessionFactory sqlSessionFactory : sqlSessionFactoryList) {
            sqlSessionFactory.getConfiguration().addInterceptor(interceptor);
        }
    }

}
这里根据需要配置注解信息,如果需要配置properties或yml自动配置参数的,可以自定义配置类信息,并使用配置注解。如下:

这是一个配置类信息。

这个地方是配置执行入口。
已经实现了DataAuthorConfiguration代码,那么怎么就能加载实例化它呢,接下来看第三块。
META-INF的目录下的spring.factories文件
org.springframework.boot.autoconfigure.EnableAutoConfiguration=\
data.author.mybatis.spring.boot.autoconfigure.DataAuthorConfiguration
这是加载DataAuthorConfiguration的入口配置。
这块是使用SPI机制,service provider interface。 简单来说,springboot按照约定大于配置的原则,定义了spring-boot-starter配置搜寻规则。
到这里可以对工程分别打jar包了。
依赖使用
如果哪个工程想要使用这个工具,pom引入依赖即可:
<dependency>
  	<groupId>com.lztec.auto</groupId>
	  <artifactId>data-author-spring-boot-starter</artifactId>
	  <version>1.0.0-RELEASE</version>
  </dependency>

可以看到依赖结构树,starter和autoconfigure都依赖了data-auth-column。
实际可以通过autoconfigure做依赖传递。
到这里就结束了。springboot工程会根据条件自动实例化配置。
总结
三个注意点:
1、配置代码实现,基于需要使用注解配置
2、spring.factories 配置
3、pom.xml依赖配置。在springboot2.1之前,有使用spring.provides文件支持。如下:
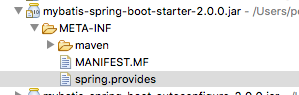

这工程里没有pom配置,采用的事spring.provides。
关于spring.provides的初衷可以参考如下:
It does use pom parsing indirectly, since aether parses the poms. The info may look like its duplicating information but it isn’t exactly. The provides is used to resolve ambiguity. Basically if a provides file says that a ‘starter S provides X’… then ‘S’ takes priority over other things that also provide it.
It is surprising how many things end up multiple times in the dependency graph reachable from severral different things. The provides files were added to avoid some surprising/unwanted suggestions. Think of the provides file as a very strong hint to the ide that a boot developer thought ‘if I want to add X to my pom, you should use starter S’. The dependencies inferred from pom are often just accidental and not as ‘deliberate’. (Heuristics like dependency’s depth in the graph were explored but didn’t provide good results).
@dsyer helped with populating the provides files. This was a long time ago and i’m not sure if it has been kept up to date, so the quality of the info in the various provides file may not be as good/complete as it once was. It has also been a bit of a controversial feature. I’m sure a few people like it, but there’s also a lot of folks who have asked how to turn it of.
简单来说,spring.provides的配置是扁平的,它的出现是要提示我们开发人员,一个starter完整的依赖涉及哪些。pom.xml是传递依赖的,通过一个pom的配置,并不能清晰知晓依赖的完成信息。


 3701
3701


 被折叠的 条评论
为什么被折叠?
被折叠的 条评论
为什么被折叠?
 到【灌水乐园】发言


