


背景
当我们既不想将solr服务端口号加入防火墙,又不想将solr服务放开时,可给solr服务设置密码
然而solr管理界面没有增加修改用户名和密码的操作,所以本文介绍一下通过配置文件给solr服务添加密码。
操作步骤
创建role.properties文件
在 solr-6.5.0_k\server\etc 下创建文件,并添加一下配置
#
# 这个文件定义用户名,密码和角色
#
# 格式如下
#  <username>: <password>[,<rolename> ...]
jiug: 111111,admin
修改 solr-jetty-context.xml 文件
在 solr-6.5.0_k/server/contexts 目录下
<?xml version="1.0"?>
<!DOCTYPE Configure PUBLIC "-//Jetty//Configure//EN" "http://www.eclipse.org/jetty/configure_9_0.dtd">
<Configure class="org.eclipse.jetty.webapp.WebAppContext">
  <Set name="contextPath"><Property name="hostContext" default="/solr"/></Set>
  <Set name="war"><Property name="jetty.base"/>/solr-webapp/webapp</Set>
  <Set name="defaultsDescriptor"><Property name="jetty.base"/>/etc/webdefault.xml</Set>
  <Set name="extractWAR">false</Set>
  <!-- 配置账号密码 -->
  <Get name="securityHandler">
         <Set name="loginService">
                 <New class="org.eclipse.jetty.security.HashLoginService">
                         <Set name="name">jiugRealm</Set>  <!-- 名字与下文保存一致即可 -->
                        <Set name="config"><SystemProperty name="jetty.home" default="."/>/etc/role.properties</Set>
                 </New>
         </Set>
  </Get>
</Configure>
修改 web.xml 文件
在 solr-6.5.0_k/server/solr-webapp/webapp/WEB-INF 目录下
在前添加一下配置
<security-constraint>
    <web-resource-collection>
        <web-resource-name>Solr</web-resource-name> <!--描述-->
        <url-pattern>/</url-pattern>               <!-- 验证的网页的位置-->
      </web-resource-collection>
       <auth-constraint>
          <role-name>admin</role-name>   <!-- 验证的角色,别写成用户名,如有多个角色可以写多个role-name 标签-->
       </auth-constraint>
   </security-constraint>
   <login-config>
          <auth-method>BASIC</auth-method>            <!-- 关键-->
          <realm-name>TestRealm</realm-name>
  </login-config>
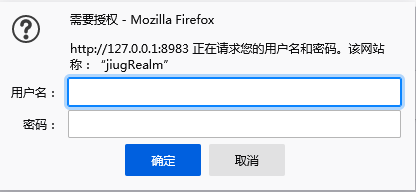
完成配置重启服务
再次访问则需要输入账号密码!
程序访问solr
修改完配置之后,程序访问solr会报401,权限验证不通过
需要进行一下修改才能访问solr
修改访问URL
# 原先http\://127.0.0.1\:8983/solr/jiug
http\://jiug:111111@127.0.0.1\:8983/solr/jiug
引入依赖
<dependency>
    <groupId>commons-codec</groupId>
    <artifactId>commons-codec</artifactId>
    <version>1.7</version>
</dependency>
完成以上操作程序即可成功访问solr!


 1552
1552


 被折叠的 条评论
为什么被折叠?
被折叠的 条评论
为什么被折叠?
 到【灌水乐园】发言


