


目录
1、通过浏览器语言设置国际化化
在日常工作中,如果你的网站需要给不同语言地区的人进行查看,此时就需要使用国际化的基本操作,springmvc的国际化操作比较容易。
login.jsp
<%@ page contentType="text/html;charset=UTF-8" language="java" %>
<%@ taglib prefix="fmt" uri="http://java.sun.com/jsp/jstl/fmt"%>
<html>
<head>
   <title>Title</title>
</head>
<body>
<h1><fmt:message key="welcomeinfo"/></h1>
<form action="login" method="post" >
   <fmt:message key="username"/>: <input type="text" name="username"/><br><br>
   <fmt:message key="password"/>: <input type="password" name="password"/><br><br>
   <input type="submit" value="<fmt:message key="loginBtn"/>"/>
</form>
</body>
</html>
或者使用spring的标签库
<%@ page contentType="text/html;charset=UTF-8" language="java" %>
<%@taglib prefix="form" uri="http://www.springframework.org/tags/form" %>
<html>
<head>
   <title>Title</title>
</head>
<body>
<spring:message code="password"></spring:message>
</body>
</html>
I18nController.java
package cn.tulingxueyuan.controller;
import org.springframework.stereotype.Controller;
import org.springframework.web.bind.annotation.RequestMapping;
@Controller
public class I18nController {
@RequestMapping("i18n")
public String i18n(){
return "login";
}
}
login_en_US.properties
welcomeinfo=welcome to tulingxueyuan.cn
username=USERNAME
password=PASSWORD
loginBtn=LOGIN
login_zh_CN.properties
welcomeinfo=欢迎进入图灵教育
username=用户名
password=密码
loginBtn=登录
springmvc.xml
    <!--注册国际化资源文件-->
    <bean class="org.springframework.context.support.ResourceBundleMessageSource" id="messageSource">
        <property name="basenames">
            <array>
                <value>i18n/login</value>
            </array>
        </property>
        <property name="defaultEncoding" value="UTF-8"></property>

    </bean>
* ·基于浏览器设置的语言切换国际化
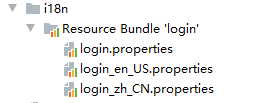
* 1.新建jsp对应的国际化属性资源文件:
* login.properties
* login_en_US.properties
* login_zh_CN.properties
* 2.配置springmvc, 将国际化资源文件注入到springmvc中
* <bean class="org.springframework.context.support.ResourceBundleMessageSource" id="messageSource">
* <property name="basenames">
* <array>
* <value>i18n/login</value>
* </array>
* </property>
*
* </bean>
* 3. 在页面来调用属性资源文件<spring:message></spring:message>
其实SpringMVC中国际化的处理非常简单,就是按照浏览器所带来的语言信息决定的。
- 默认情况下,SpringMVC 根据Accept-Language参数判断客户端的本地化类型。
- 当接受到请求时,SpringMVC 会在上下文中查找-一个本地化解析器(LocalResolver) ,找到后使用它获取请求所对应的本地化类型信息:Locale locale = request.getLocale();//获取浏览器的区域信息
源码:


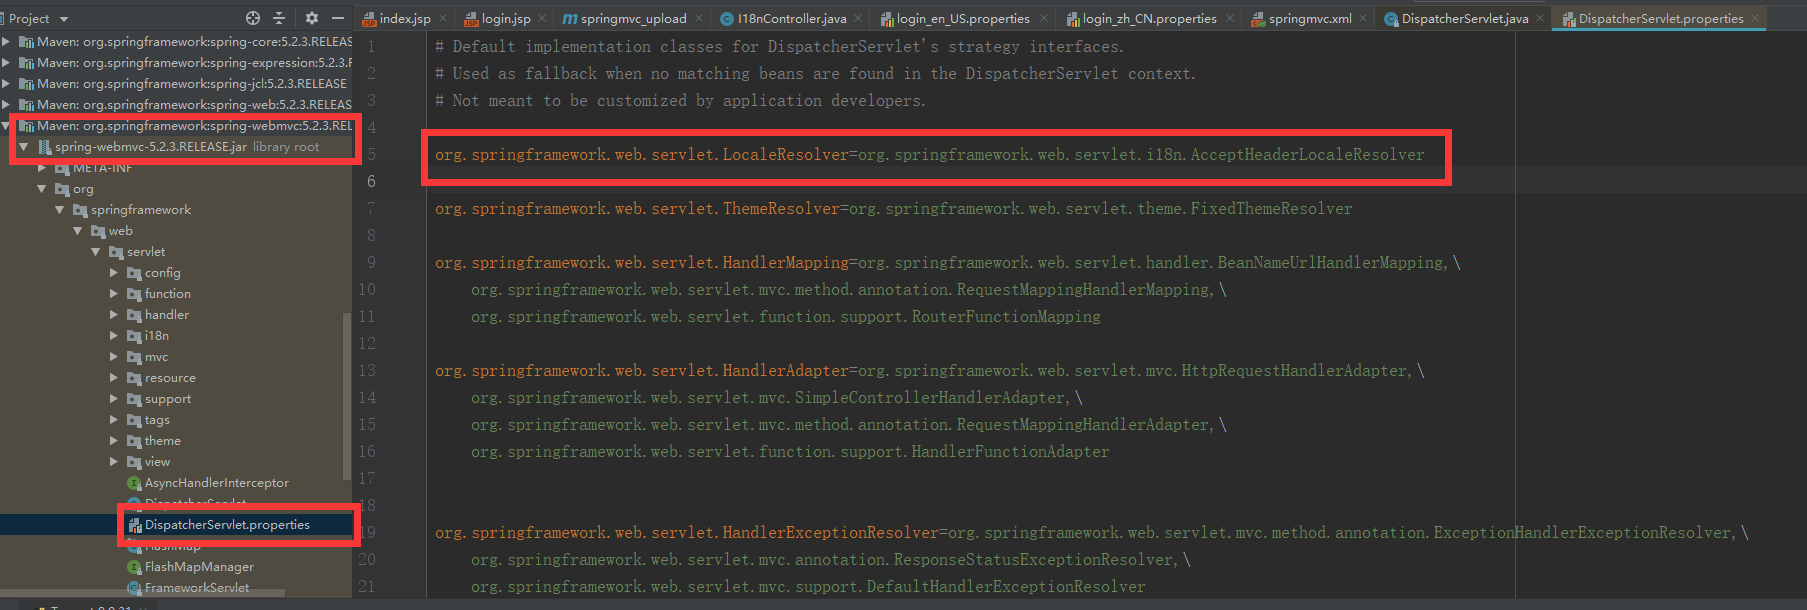
通过图片能够发现,默认调用的是org.springframework.web.servlet.i18n.AcceptHeaderLocaleResolver类

2、通过超链接来切换国际化
- SpringMVC还允许装配--个动态更改本地化类型的拦截器,这样通过指定一个请求参数就可以控制单个请求的本地化类型。
login.jsp
<%@ page contentType="text/html;charset=UTF-8" language="java" %>
<%@ taglib prefix="fmt" uri="http://java.sun.com/jsp/jstl/fmt"%>
<html>
<head>
   <title>Title</title>
</head>
<body>
<h1><fmt:message key="welcomeinfo"/></h1>
<form action="login" method="post" >
   <fmt:message key="username"/>: <input type="text" name="username"/><br><br>
   <fmt:message key="password"/>: <input type="password" name="password"/><br><br>
   <input type="submit" value="<fmt:message key="loginBtn"/>"/>
   <div class="row">
            <a class="col-md-6" href="${basePath}/i18n/zh_CN">中文</a>
            <a class="col-md-6" href="${basePath}/i18n/en_US">English</a>
        </div>
</form>
</body>
</html>
MyLocaleResolver.java
public class MyLocaleResolver implements LocaleResolver {
/**
* 解析并返回locale
* @param request
* @return
*/
@Override
public Locale resolveLocale(HttpServletRequest request) {
Locale locale = null;
String localeStr = request.getParameter("locale");
if(localeStr!=null && ! "".equals(localeStr)){
locale = new Locale(localeStr.split("_")[0],localeStr.split("_")[1]);
}else{
locale = request.getLocale();
}
return locale;
}
/**
* 不支持设置locale的信息
* @param request
* @param response
* @param locale
*/
@Override
public void setLocale(HttpServletRequest request, HttpServletResponse response, Locale locale) {
throw new UnsupportedOperationException(
"Cannot change HTTP accept header - use a different locale resolution strategy");
}
}springmvc.xml
<!--配置区域信息解析器-->
   <bean id="localeResolver" class="cn.tulingxueyuan.MyLocaleResolver"></bean>
除了可以自定义区域信息解析器之外,我们还可以使用SpringMVC中自带的SessionLocaleResolver:
I18nController.java
    @RequestMapping("/i18n/{language}_{country}")
    public String changeLocale(@PathVariable("language") String language,
                               @PathVariable("country") String country,
                               HttpServletRequest request,
                               HttpServletResponse response,
                               @Autowired SessionLocaleResolver localeResolver){
        Locale local=new Locale(language,country);
        localeResolver.setLocale(request,response,local);
        return "login";

    }
spring-mvc.xml
<!--1.使用SessionLocaleResolver 保持Locale的状态   会存session中获取Locale对象-->
    <bean class="org.springframework.web.servlet.i18n.SessionLocaleResolver" id="localeResolver"></bean>
使用LocaleChangeInterceptor来实现国际化:
login.jsp
<%@ page contentType="text/html;charset=UTF-8" language="java" %>
<%@ taglib prefix="fmt" uri="http://java.sun.com/jsp/jstl/fmt"%>
<html>
<head>
   <title>Title</title>
</head>
<body>
<h1><fmt:message key="welcomeinfo"/></h1>
<form action="login" method="post" >
   <fmt:message key="username"/>: <input type="text" name="username"/><br><br>
   <fmt:message key="password"/>: <input type="password" name="password"/><br><br>
   <input type="submit" value="<fmt:message key="loginBtn"/>"/>
   <div class="row">
            <a class="col-md-6" href="${basePath}/i18n/?locale=zh_CN">中文_拦截器</a>
            <a class="col-md-6" href="${basePath}/i18n/?locale=en_US">English_拦截器</a>
        </div>
</form>
</body>
</html>
springmvc.xml
<!--2.方式2:  使用springmvc提供的拦截器,接收local参数(en_US、zh_CN)   设置session中去-->
    <mvc:interceptors>
        <bean class="org.springframework.web.servlet.i18n.LocaleChangeInterceptor"></bean>
    </mvc:interceptors>
* ·使用超链接的方式切换语言 * 1.更改默认本地化语言解析器LocaleResolver 改成SessionLocaleResolver * 方式1: 创建一个请求方法,接收local参数(en_US、zh_CN) 设置session中去 * 方式2: 使用springmvc提供的拦截器,接收local参数(en_US、zh_CN) 设置session中去
3、国际化类型转换和验证失败的信息
- required:必要的参数不存在。如 @RequestParam(“param1”)
标注了一个入参,但是该参数不存在
- typeMismatch:在数据绑定时,发生数据类型不匹配的问,如:
typeMismatch.user.birthday= Date format is erro
- methodInvocation:Spring MVC 在调用处理方法时发生了错误
- 验证失败:如果是JRS303验证的信息: key的前缀为:注解+对象.属性 。如:
NotEmpty.user.username=Username must input!
Length.user.username=Username length must 3-12!
Past.user.birthday=birthday must before today!
4、国际化代码中的内容
1.第一种方法 在Handler方法参数中加入Locale参数,注入ResourceBundleMessageSource 对象
messageSource.getMessage(code, args,locale);
1. 解决java的硬编码的国际化:
*      1.在属性资源文件中加入需要国际化的硬编码内容
*      2.将MessageSource 自动注入进来
*      3.根据messageSource.getMessage 获取国际化内容
*          String code 资源文件中的key
*          args   文本中的参数, 可以用占位符的方式在资源文件文本中设置参数占位符:{0} 方式
*          locale 当前本地化语言
2.第二种方法 或者使用定义工具类:
import javax.servlet.http.HttpServletRequest;

import org.springframework.beans.factory.annotation.Autowired;
import org.springframework.context.support.ResourceBundleMessageSource;

 /**
  * 国际化帮助类
  * @author Administrator
  *
  */
public class I18nMessageUtil {

   private static ResourceBundleMessageSource messageSource;

   private static HttpServletRequest request;

   /**
    * 获取国际化资源属性
    * @param code
    * @param args
    * @return
    */
   public static String getMessage(String code,String... args){
      return messageSource.getMessage(code, args,request.getLocale());
   }
   @Autowired
   public void setMessageSource(ResourceBundleMessageSource messageSource) {
      this.messageSource = messageSource;
   }
   @Autowired
   public void setRequest(HttpServletRequest request) {
      this.request = request;
   }

}


 398
398


 被折叠的 条评论
为什么被折叠?
被折叠的 条评论
为什么被折叠?
 到【灌水乐园】发言


