


项目环境: 在SpringMVC + MyBatis + MySQL。Redis部署在Linux虚拟机。
1、整体思路
参考Ehcache实现MyBatis二级缓存代码(Maven引用对应jar查阅)
使用Spring管理Redis连接池
模仿EhcacheCache,实现RedisCache
2、pom.xml中加入Maven依赖
1
2
3 org.springframework.data
4 spring-data-redis
5 1.6.2.RELEASE
6
7
8
9 redis.clients
10 jedis
11 2.8.0
12
13
14
15 org.mybatis
16 mybatis-ehcache
17 1.0.0
18
3、引入applicationContext.xml中引入redis配置
1
2
3
4
5 classpath:jdbc.properties
6 classpath:redis.properties
7
8
9
10
11
12
13
14
15
16
17
18
19 p:host-name="${redis.host}" p:port="${redis.port}" p:password="${redis.pass}" p:pool-config-ref="poolConfig"/>
20
21
22
23
4、创建缓存实现类RedisCache
1 /**
2 *3 * @描述: 使用第三方内存数据库Redis作为二级缓存4 * @版权: Copyright (c) 20165 * @作者: xiad6 * @版本: 1.07 * @创建日期: 2016年3月2日8 * @创建时间: 下午8:02:579 */
10 public class RedisCache implementsCache11 {12 private static final Logger logger = LoggerFactory.getLogger(RedisCache.class);13
14 private staticJedisConnectionFactory jedisConnectionFactory;15
16 private finalString id;17
18 /**
19 * The {@codeReadWriteLock}.20 */
21 private final ReadWriteLock readWriteLock = newReentrantReadWriteLock();22
23 public RedisCache(finalString id) {24 if (id == null) {25 throw new IllegalArgumentException("Cache instances require an ID");26 }27 logger.debug("MybatisRedisCache:id=" +id);28 this.id =id;29 }30
31 @Override32 public voidclear()33 {34 JedisConnection connection = null;35 try
36 {37 connection =jedisConnectionFactory.getConnection();38 connection.flushDb();39 connection.flushAll();40 }41 catch(JedisConnectionException e)42 {43 e.printStackTrace();44 }45 finally
46 {47 if (connection != null) {48 connection.close();49 }50 }51 }52
53 @Override54 publicString getId()55 {56 return this.id;57 }58
59 @Override60 publicObject getObject(Object key)61 {62 Object result = null;63 JedisConnection connection = null;64 try
65 {66 connection =jedisConnectionFactory.getConnection();67 RedisSerializer serializer = newJdkSerializationRedisSerializer();68 result =serializer.deserialize(connection.get(serializer.serialize(key)));69 }70 catch(JedisConnectionException e)71 {72 e.printStackTrace();73 }74 finally
75 {76 if (connection != null) {77 connection.close();78 }79 }80 returnresult;81 }82
83 @Override84 publicReadWriteLock getReadWriteLock()85 {86 return this.readWriteLock;87 }88
89 @Override90 public intgetSize()91 {92 int result = 0;93 JedisConnection connection = null;94 try
95 {96 connection =jedisConnectionFactory.getConnection();97 result =Integer.valueOf(connection.dbSize().toString());98 }99 catch(JedisConnectionException e)100 {101 e.printStackTrace();102 }103 finally
104 {105 if (connection != null) {106 connection.close();107 }108 }109 returnresult;110 }111
112 @Override113 public voidputObject(Object key, Object value)114 {115 JedisConnection connection = null;116 try
117 {118 connection =jedisConnectionFactory.getConnection();119 RedisSerializer serializer = newJdkSerializationRedisSerializer();120 connection.set(serializer.serialize(key), serializer.serialize(value));121 }122 catch(JedisConnectionException e)123 {124 e.printStackTrace();125 }126 finally
127 {128 if (connection != null) {129 connection.close();130 }131 }132 }133
134 @Override135 publicObject removeObject(Object key)136 {137 JedisConnection connection = null;138 Object result = null;139 try
140 {141 connection =jedisConnectionFactory.getConnection();142 RedisSerializer serializer = newJdkSerializationRedisSerializer();143 result =connection.expire(serializer.serialize(key), 0);144 }145 catch(JedisConnectionException e)146 {147 e.printStackTrace();148 }149 finally
150 {151 if (connection != null) {152 connection.close();153 }154 }155 returnresult;156 }157
158 public static voidsetJedisConnectionFactory(JedisConnectionFactory jedisConnectionFactory) {159 RedisCache.jedisConnectionFactory =jedisConnectionFactory;160 }161
162 }
5、创建中间类RedisCacheTransfer,完成RedisCache.jedisConnectionFactory的静态注入
1 /**
2 *3 * @描述: 静态注入中间类4 * @版权: Copyright (c) 20165 * @作者: xiad6 * @版本: 1.07 * @创建日期: 2016年3月2日8 * @创建时间: 下午8:02:579 */
10 public classRedisCacheTransfer11 {12
13 @Autowired14 public voidsetJedisConnectionFactory(JedisConnectionFactory jedisConnectionFactory) {15 RedisCache.setJedisConnectionFactory(jedisConnectionFactory);16 }17
18 }
6、配置文件redis.properties
1 # Redis settings2 redis.host=192.168.25.132
3 redis.port=6379
4 redis.pass=
5
6 redis.maxIdle=300
7 redis.maxActive=600
8 redis.maxWait=1000
9 redis.testOnBorrow=true
7、mapper中加入MyBatis二级缓存
.....
8、Mybatis全局配置
1 <?xml version="1.0" encoding="UTF-8" ?>
2 /p>
4 "http://mybatis.org/dtd/mybatis-3-config.dtd">
5
6
7
8
9
10
11
12
13
14
15
16
17
18
19
20
21
22
23
24
25
26
27
28
29
30
31
32
33
34
35
36
37
38
39
41
42
43
45
46
47
48
49
50
51
52
53
54
55
9、打印Sql日志,方便测试
1 #定义LOG输出级别为INFO2 log4j.rootLogger=INFO,Console,File3
4 ####定义日志输出目的地为控制台5 log4j.appender.Console=org.apache.log4j.ConsoleAppender6 log4j.appender.Console.Target=System.out7 #可以灵活地指定日志输出格式,下面一行是指定具体的格式8 log4j.appender.Console.layout =org.apache.log4j.PatternLayout9 log4j.appender.Console.layout.ConversionPattern=[%c] - %m%n10
11 ####文件大小到达指定尺寸的时候产生一个新的文件12 log4j.appender.File =org.apache.log4j.RollingFileAppender13 #指定输出目录14 log4j.appender.File.File = logs/ssm.log15 #定义文件最大大小16 log4j.appender.File.MaxFileSize =10MB17 #输出所以日志,如果换成DEBUG表示输出DEBUG以上级别日志18 log4j.appender.File.Threshold =ALL19 log4j.appender.File.layout =org.apache.log4j.PatternLayout20 log4j.appender.File.layout.ConversionPattern =[%p] [%d{yyyy-MM-dd HH\:mm\:ss}][%c]%m%n21
22 ####显示本项目SQL语句部分23 log4j.logger.com.strive.cms=DEBUG
10、测试代码
1 @RunWith(SpringJUnit4ClassRunner.class)2 @ContextConfiguration(locations = {"classpath:applicationContext.xml"})3 public classMyBatisCacheSecondTest4 {5 private static final Logger logger = LoggerFactory.getLogger(MyBatisCacheSecondTest.class);6
7 @Autowired8 privateSiteService service;9
10 /*
11 * 二级缓存测试12 */
13 @Test14 public voidtestCache2() {15 PageInfo page1 = service.querySite("", 1, 2, "", "");16 logger.info(page1.getList().get(1).getName());17
18 PageInfo page2 = service.querySite("", 2, 2, "", "");19 logger.info(page2.getList().get(0).getName());20
21 PageInfo page3 = service.querySite("", 1, 2, "", "");22 logger.info(page3.getList().get(0).getName());23 }24
25 }
首次运行结果

后续运行结果

同条件的查询语句可以发现,已经不再查询Mysql,而是直接取Redis数据
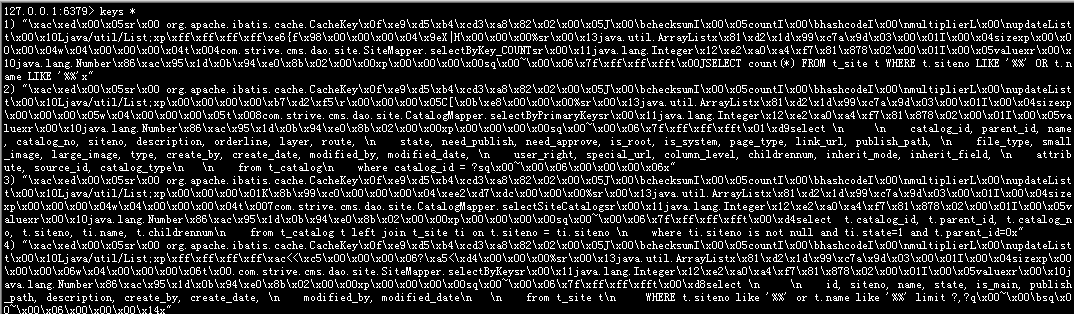
查看Redis数据库 keys *, 会发现多了很多数据,结果如下
至此,Redis基本配置成功。


 978
978


 被折叠的 条评论
为什么被折叠?
被折叠的 条评论
为什么被折叠?
 到【灌水乐园】发言


