


目录 🌻🌻
一、前端分层开发
1.1 需求分析
上一节 使用angularJS并完成了品牌管理的增删改查功能。但是看实现代码,JS和html都放在一起,并不利于后期的维护。现在也可以在前端代码中也运用MVC的设计模式,将代码进行分离,提高程序的可维护性。
1.2 自定义服务
在 AngularJS 中,服务是一个函数或对象,可在你的 AngularJS 应用中使用。在 上一节 开发总结中使用了内置服务$http .其实也可以自己来定义服务,而服务会封装一些操作。我们在不同的控制器中可以调用同一个服务,这样服务的代码将会被重用。现在就修改一下上一节品牌管理的代码,使用自定义服务。
优化 品牌条件查询 (将search代码段移到上面以便优化)
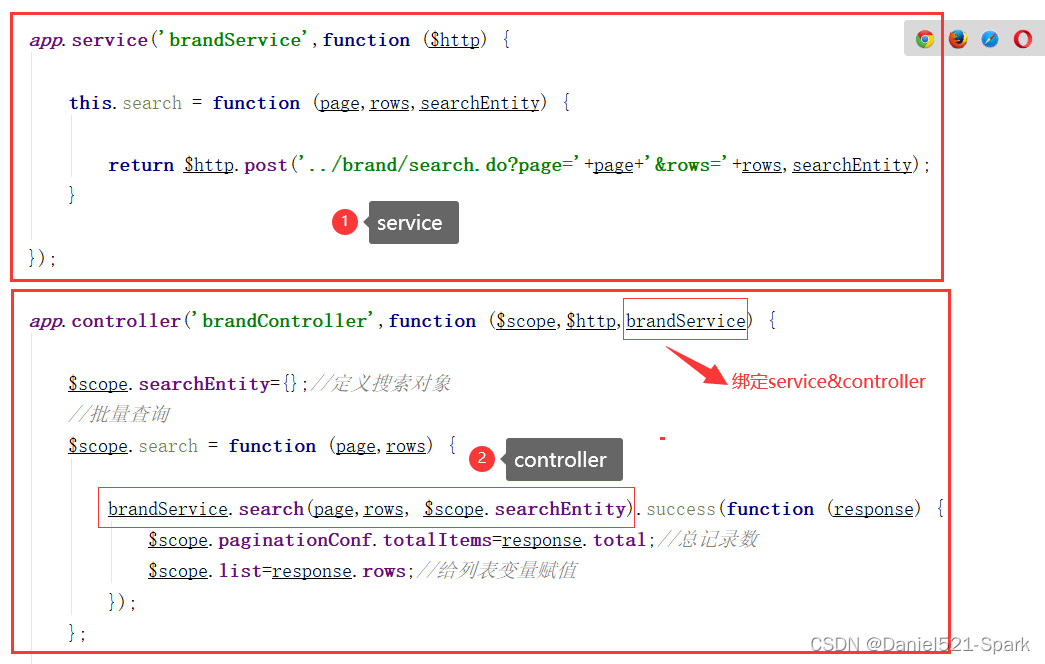
app.service('brandService',function ($http) {

    this.search = function (page,rows,searchEntity) {

              return $http.post('../brand/search.do?page='+page+'&rows='+rows,searchEntity);
          }

      });

app.controller('brandController',function ($scope,$http,brandService) {

          $scope.searchEntity={};//定义搜索对象
          //批量查询
          $scope.search = function (page,rows) {

              brandService.search(page,rows, $scope.searchEntity).success(function (response) {
                  $scope.paginationConf.totalItems=response.total;//总记录数
                  $scope.list=response.rows;//给列表变量赋值
              });
          };
优化 查询所有 (将 findBrandAll 代码段移到上面以便优化)
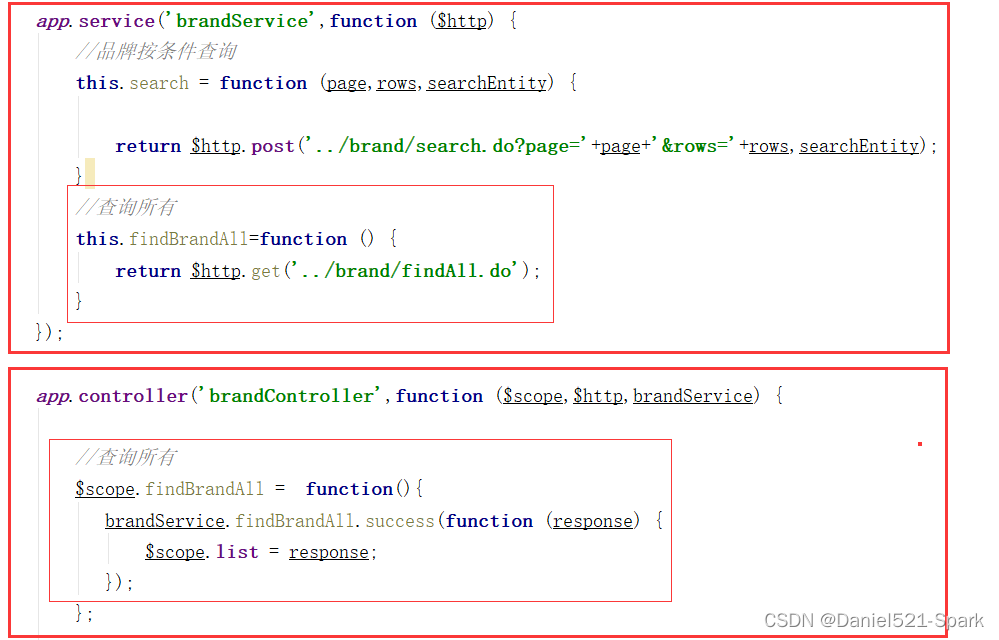
app.service('brandService',function ($http) {
	//品牌按条件查询
    this.search = function (page,rows,searchEntity) {

              return $http.post('../brand/search.do?page='+page+'&rows='+rows,searchEntity);
          }
          //查询所有
	this.findBrandAll=function () {
              return $http.get('../brand/findAll.do');
          }
      });

app.controller('brandController',function ($scope,$http,brandService) {

          //查询所有
          $scope.findBrandAll =  function(){
             brandService.findBrandAll.success(function (response) {
                 $scope.list = response;
             });
          };
优化 新增、查询回显并更新 (将 add、update代码段移到上面以便优化)
app.service('brandService',function ($http) {

           //新增并保存  查询并更新
		this.add = function (entity) {

              return  $http.post('../brand/add.do',entity);
           }
           this.update = function (entity) {

               return  $http.post('../brand/update.do',entity);
           }

           //查询回显——> 更新
           this.findOne = function (id) {

	        return $http.get('../brand/findOne.do?id='+id);
           }

       });

app.controller('brandController',function ($scope,$http,brandService) {

        //查询回显——> 更新
        $scope.findOne = function (id) {

            brandService.findOne(id).success(function (response) {

                $scope.entity = response;

            })
        };

        //新增并保存  查询并更新
        $scope.save = function(){

            var targetObject;

            if ($scope.entity.id != null){ //不为空就为已经有这个数据,那就只能修改或删除

                targetObject =brandService.update($scope.entity);

            }else{
                targetObject =brandService.add($scope.entity);
}

            targetObject.success(function (response) {

                if(response.success){
                    $scope.reloadList();//重新加载
                }else{
                    alert(response.message);
                }
            });
        };
优化 批量删除 (将 delete 代码段移到上面以便优化)
app.service('brandService',function ($http) {
            //批量删除
			this.delete = function (selectIds) {

                return $http.get('../brand/delete.do?ids='+selectIds);

            }
        });
app.controller('brandController',function ($scope,$http,brandService) {
          //批量删除
          $scope.delete = function () {
              //获取选中的复选框
              brandService.delete($scope.selectIds).success(function (response) {

                  if(response.success){
                      $scope.reloadList();//重新加载
                  }else{
                      alert(response.message);
                  }
              })
          };
1.3 代码分离
刚才的优化已经将与后端交互的部分放入自定义服务 (sevice内),目的是不同的控制层都可以重复调用服务层方法。所以现在还需要将代码分离出来,以便调用。
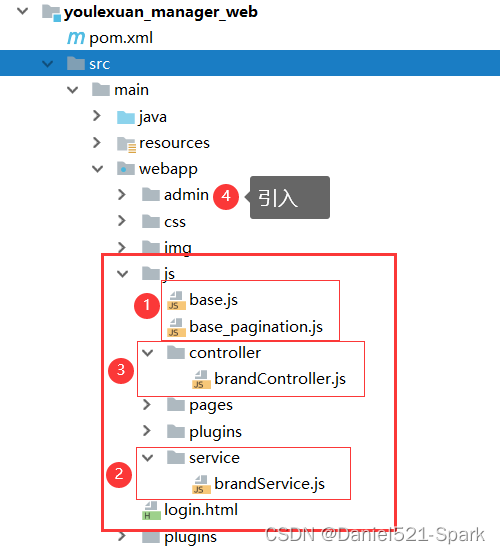
1.3.1 前端基础层
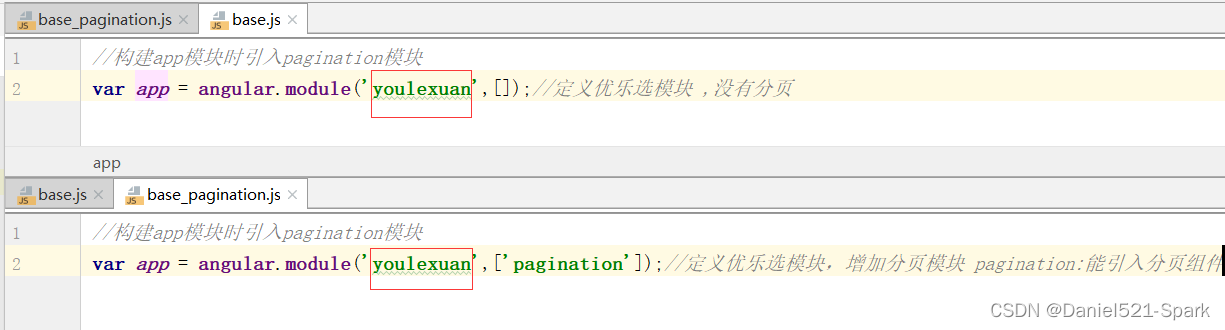
在youlexuan-manager-web工程js下创建base.js 没有分页引入
//构建app模块时引入pagination模块
var app = angular.module('brandApp',[]);//定义优乐选模块 ,没有分页
创建base_pagination.js 有分页引入
//构建app模块时引入pagination模块
var app = angular.module('brandApp',['pagination']);//定义优乐选模块,增加分页模块 pagination:能引入分页组件
一个用于不需要分页功能的页面,一个用于需要分页功能的页面.
1.3.2 前端服务层
在youlexuan-manager-web工程js下创建service文件夹。创建brandService.js
//定义Service层
app.service('brandService',function ($http) {
    //品牌按条件查询
    this.search = function (page,rows,searchEntity) {

        return $http.post('../brand/search.do?page='+page+'&rows='+rows,searchEntity);
    }
    //查询所有
    this.findBrandAll=function () {
        return $http.get('../brand/findAll.do');
    }

    //新增并保存  查询并更新
    this.add = function (entity) {

        return  $http.post('../brand/add.do',entity);
    }
    this.update = function (entity) {

        return  $http.post('../brand/update.do',entity);
    }

    //查询回显——> 更新
    this.findOne = function (id) {

        return $http.get('../brand/findOne.do?id='+id);
    }

    //批量删除
    this.delete = function (selectIds) {

        return $http.get('../brand/delete.do?ids='+selectIds);

    }
});
1.3.3 前端控制层
在youlexuan-manager-web的js文件夹下创建controller文件夹,创建brandController.js
//定义控制层,需要注入service代码
app.controller('brandController',function ($scope,$http,brandService) {
    //批量删除
    $scope.delete = function () {
        //获取选中的复选框

        brandService.delete($scope.selectIds).success(function (response) {

            if(response.success){
                $scope.reloadList();//重新加载
            }else{
                alert(response.message);
            }
        })
    };

    //查询回显——> 更新
    $scope.findOne = function (id) {

        brandService.findOne(id).success(function (response) {

            $scope.entity = response;

        })
    };

    //新增并保存  查询并更新
    $scope.save = function(){

        var targetObject;

        if ($scope.entity.id != null){ //不为空就为已经有这个数据,那就只能修改或删除

            targetObject =brandService.update($scope.entity);

        }else{
            targetObject =brandService.add($scope.entity);
        }

        targetObject.success(function (response) {

            if(response.success){
                $scope.reloadList();//重新加载
            }else{
                alert(response.message);
            }
        });
    };

    //查询所有
    $scope.findBrandAll =  function(){
        brandService.findBrandAll.success(function (response) {
            $scope.list = response;
        });
    };

    $scope.searchEntity={};//定义搜索对象
    //批量查询
    $scope.search = function (page,rows) {

        brandService.search(page,rows, $scope.searchEntity).success(function (response) {
            $scope.paginationConf.totalItems=response.total;//总记录数
            $scope.list=response.rows;//给列表变量赋值
        });
    };

    //重新加载列表 数据
    $scope.reloadList=function(){
        //切换页码
        $scope.search( $scope.paginationConf.currentPage, $scope.paginationConf.itemsPerPage);
    };

    //分页控件配置
    $scope.paginationConf = {  //变量各属性的意义:
        currentPage: 1, //当前页码
        totalItems: 5, //总条数
        itemsPerPage: 5,
        perPageOptions: [5, 10, 15, 20, 30], //页码选项
        onChange: function(){  //更改页面时触发的事件
            $scope.reloadList();//重新加载
        }
    };

    /*分页*/
    $scope.findPage = function(page,rows){

        $http.get('../brand/findPage.do?page='+page+'&rows='+rows).success(function(response){

            $scope.list = response.rows;

            $scope.paginationConf.totalItems = response.total;//更新总记录数
        })
    };

    /**
     * 主要思路:我们需要定义一个用于存储选中ID的数组,当我们点击复选框后判断是选择还是取消选择,
     * 如果是选择就加到数组中,如果是取消选择就从数组中移除。在点击删除按钮时需要用到这个存储了ID的数组。
     这里我们补充一下JS的关于数组操作的知识
     (1)数组的push方法:向数组中添加元素
     (2)数组的splice方法:从数组的指定位置移除指定个数的元素 ,参数1为位置  ,参数2位移除的个数
     (3)复选框的checked属性:用于判断是否被选中
     */
    //批量删除
    $scope.selectIds=[];//选中的ID集合
    //更新复选
    $scope.updateSelection = function($event,id){

        if($event.target.checked){//如果是被选中,则增加到数组
            $scope.selectIds.push(id);
        }else{
            var idx = $scope.selectIds.indexOf(id);
            $scope.selectIds.splice(idx, 1);//删除
        }

    };
});
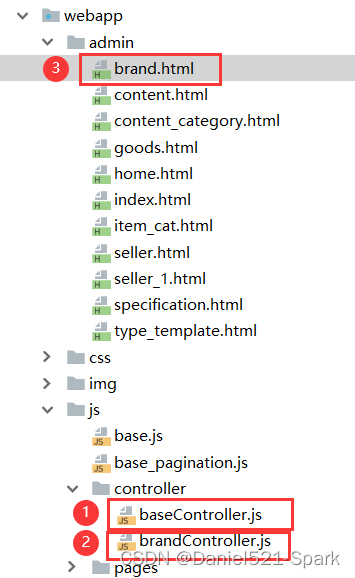
1.3.4 修改页面
去掉brand.html原来的JS代码,引入刚才建立的JS

<script src="../js/base_pagination.js"></script>
<script src="../js/service/brandService.js"></script>
<script src="../js/controller/brandController.js"></script>
二、控制器继承
2.1 需求分析
有些功能是每个页面都有可能用到的,比如分页,复选等等,如果我们再开发另一个功能,还需要重复编写。怎么能让这些通用的功能只写一次呢?我们通过继承的方式来实现。
2.2 前端代码
2.2.1 建立父控制器
在youlexuan-manager-web的js/controller目录下建立baseController.js
app.controller('baseController',function($scope){

    //重新加载列表 数据
    $scope.reloadList=function(){
        //切换页码
        $scope.search( $scope.paginationConf.currentPage, $scope.paginationConf.itemsPerPage);
    };

	//分页控件配置
    $scope.paginationConf = {  //变量各属性的意义:
        currentPage: 1, //当前页码
        totalItems: 5, //总条数
        itemsPerPage: 5,
        perPageOptions: [5, 10, 15, 20, 30], //页码选项
        onChange: function(){  //更改页面时触发的事件
            $scope.reloadList();//重新加载
        }
    };

    /**
     * 主要思路:我们需要定义一个用于存储选中ID的数组,当我们点击复选框后判断是选择还是取消选择,
     * 如果是选择就加到数组中,如果是取消选择就从数组中移除。在点击删除按钮时需要用到这个存储了ID的数组。
     这里我们补充一下JS的关于数组操作的知识
     (1)数组的push方法:向数组中添加元素
     (2)数组的splice方法:从数组的指定位置移除指定个数的元素 ,参数1为位置  ,参数2位移除的个数
     (3)复选框的checked属性:用于判断是否被选中
     */
	//批量删除
    $scope.selectIds=[];//选中的ID集合
	//更新复选
    $scope.updateSelection = function($event,id){

        if($event.target.checked){//如果是被选中,则增加到数组
            $scope.selectIds.push(id);
        }else{
            var idx = $scope.selectIds.indexOf(id);
            $scope.selectIds.splice(idx, 1);//删除
        }

    };

});
2.2.2 修改品牌控制器层
修改 brandController.js

//定义控制层,需要注入service代码
app.controller('brandController',function ($scope,$controller,$http,brandService) {

    $controller('baseController',{$scope:$scope});//继承
    //批量删除
    $scope.delete = function () {
        //获取选中的复选框

        brandService.delete($scope.selectIds).success(function (response) {

            if(response.success){
                $scope.reloadList();//重新加载
            }else{
                alert(response.message);
            }
        })
    };

    //查询回显——> 更新
    $scope.findOne = function (id) {

        brandService.findOne(id).success(function (response) {

            $scope.entity = response;

        })
    };

    //新增并保存  查询并更新
    $scope.save = function(){

        var targetObject;

        if ($scope.entity.id != null){ //不为空就为已经有这个数据,那就只能修改或删除

            targetObject =brandService.update($scope.entity);

        }else{
            targetObject =brandService.add($scope.entity);
        }

        targetObject.success(function (response) {

            if(response.success){
                $scope.reloadList();//重新加载
            }else{
                alert(response.message);
            }
        });
    };

    //查询所有
    $scope.findBrandAll =  function(){
        brandService.findBrandAll.success(function (response) {
            $scope.list = response;
        });
    };

    $scope.searchEntity={};//定义搜索对象
    //批量查询
    $scope.search = function (page,rows) {

        brandService.search(page,rows, $scope.searchEntity).success(function (response) {
            $scope.paginationConf.totalItems=response.total;//总记录数
            $scope.list=response.rows;//给列表变量赋值
        });
    };

    /*分页*/
    $scope.findPage = function(page,rows){

        $http.get('../brand/findPage.do?page='+page+'&rows='+rows).success(function(response){

            $scope.list = response.rows;

            $scope.paginationConf.totalItems = response.total;//更新总记录数
        })
    };
});
c o n t r o l l e r 也是 a n g u l a r 提供的一个服务,可以实现伪继承,实际上就是与 B a s e C o n t r o l l e r 共享 controller也是angular提供的一个服务,可以实现伪继承,实际上就是与BaseController共享 controller也是angular提供的一个服务,可以实现伪继承,实际上就是与BaseController共享scope
2.2.3 修改页面brand.html引入js
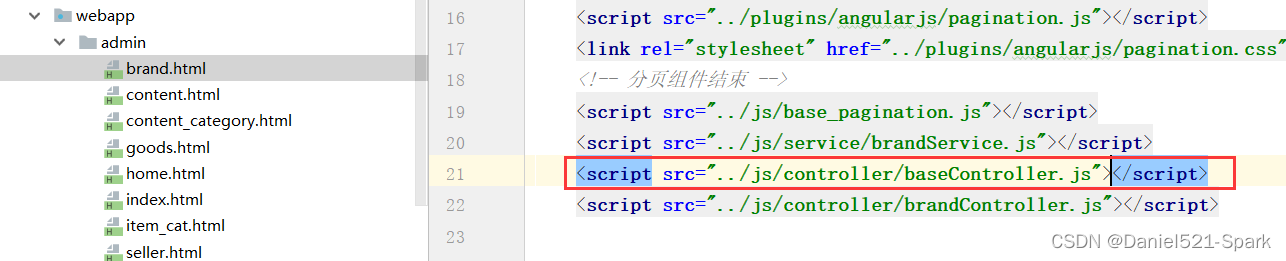
<script src="../js/base_pagination.js"></script>
<script src="../js/service/brandService.js"></script>
<script src="../js/controller/baseController.js"></script>
<script src="../js/controller/brandController.js"></script>
三、代码生成器 (单表CRUD)
(公司一般都有自己的代码生成器)
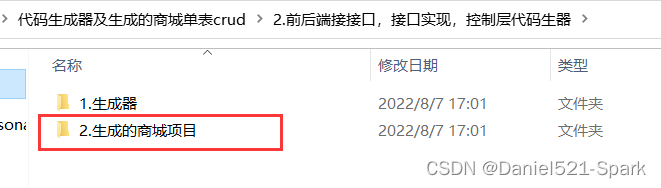
3.1 代码生成
现在来使用 1.生成器 来完成代码的编写。生成后将代码拷贝到工程中。具体步骤如下:
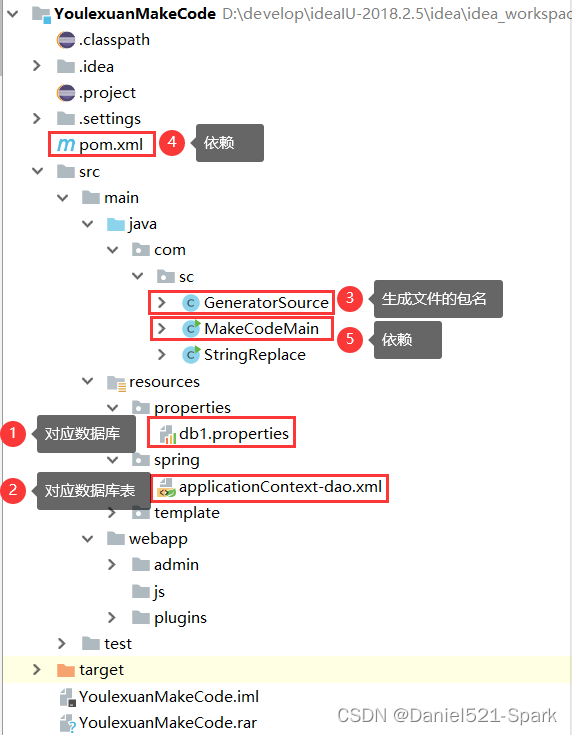
(1)导入(YoulexuanMakeCode)代码生成器 👇🏾👇🏾 工程到开发工具。

IDEA中 配置自己的 maven
(2)修改数据库连接配置:打开src/main/resources/properties/db.properties

jdbc.mydriver=com.mysql.jdbc.Driver
jdbc.myurl=jdbc:mysql://localhost:3306/youlexuan?characterEncoding=utf-8
jdbc.myusername=root
jdbc.mypassword=root
(3)运行代码生成主程序:MakeCodeMain 及可生成代码 。
注: 十二、导入代码生成器后运行报错 解决
Service、ServiceImpl、Controller都生成到了 /src/main/java目录下
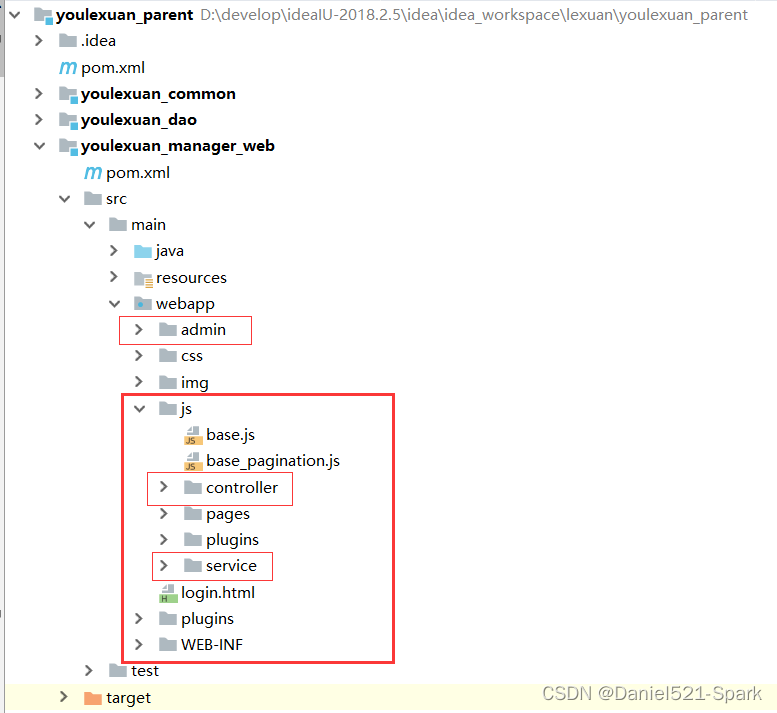
Js文件生成到了 src/main/webapp/js 目录下
Html页面文件生成到了 src/main/webapp/admin目录下

这个生成器不会生成数据访问层和实体类,因为我们之前已经用逆向工程完成了数据访问层与实体类的生成。
(4)提示成功后,到生成路径去找生成的代码,并拷贝到我们的工程中。
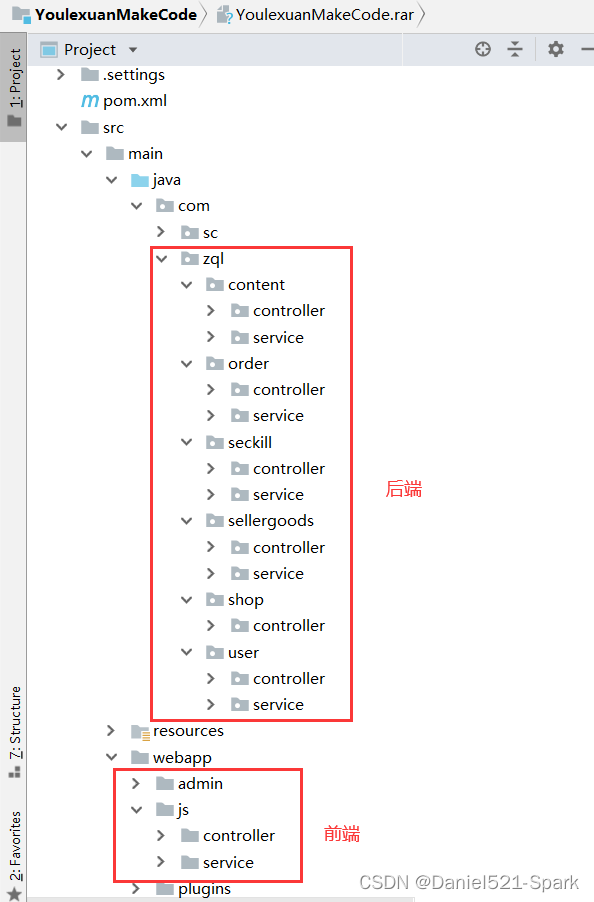
3.2 代码拷贝
将商家商品相关代码拷贝到工程。
(1)拷贝服务接口
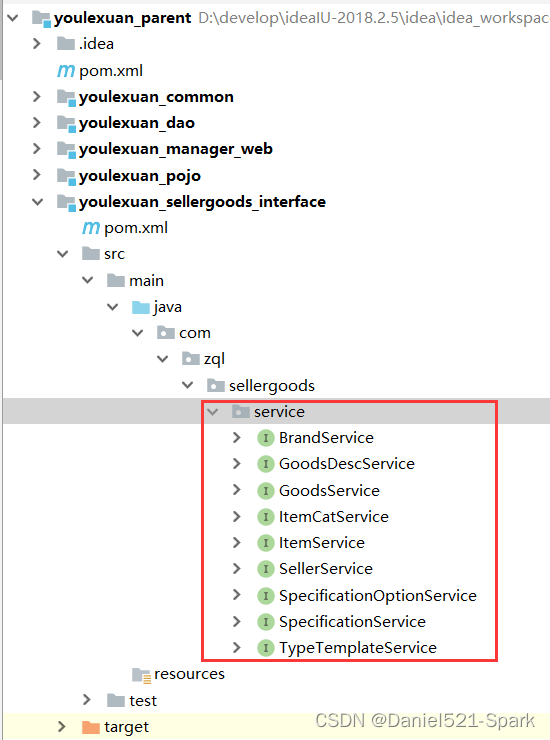
(2)拷贝服务实现类

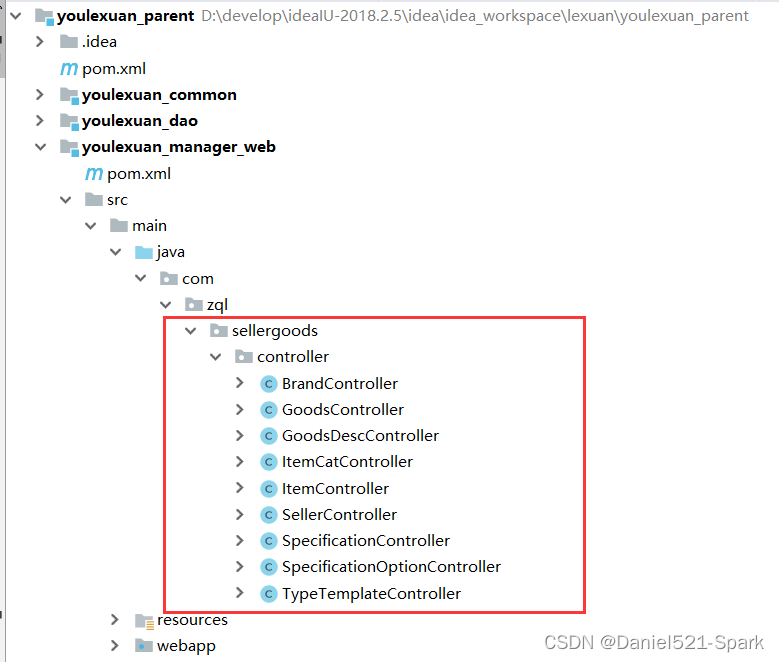
(3)拷贝控制器
(4)拷贝JS
注意:我之前定义为 :myApp,可以改成
3.3 测试
- 安装youlexuan_parent 或 执行maven命令install ,将最新的优乐选代码安装到本地仓库
- 顺序启动以下2个服务 youlexuan-sellergoods-service、youlexuan-manager-web
访问地址:http://localhost:9101/admin/index.html
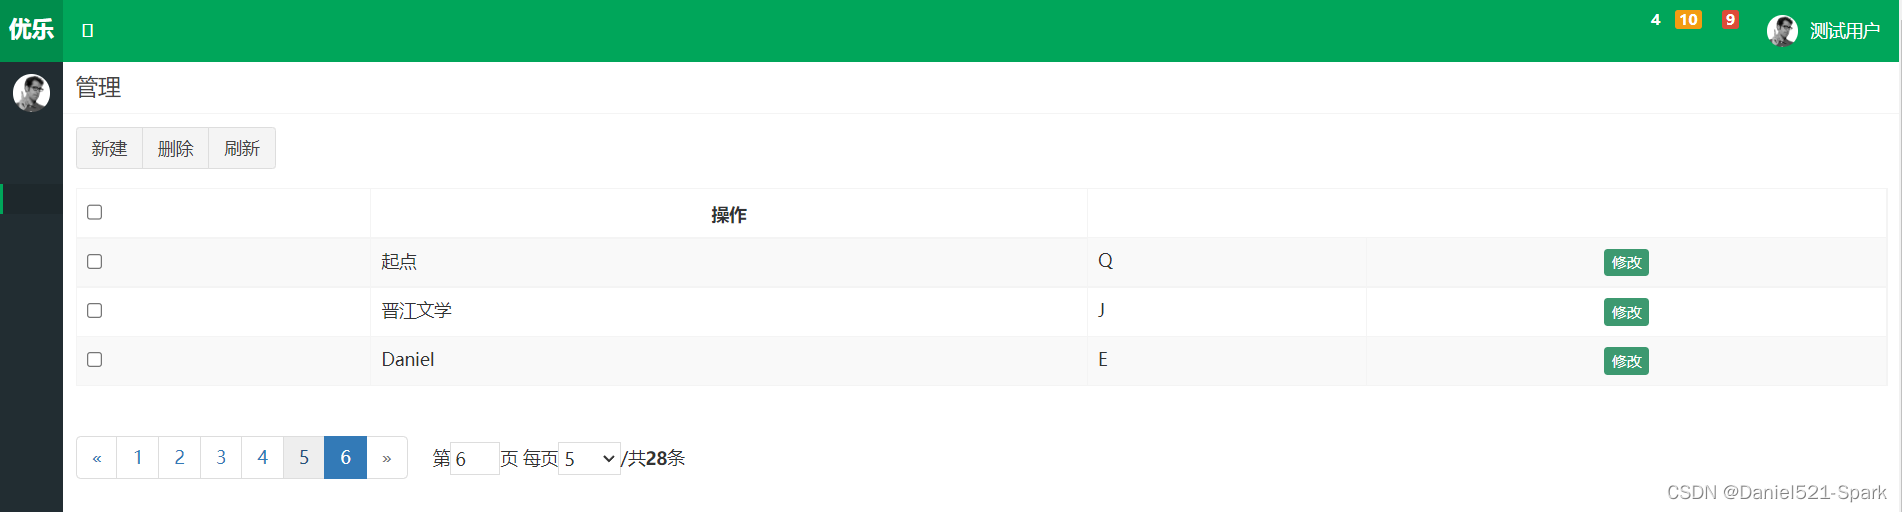
点击:商品管理—》品牌管理----》进行CRUD——》测试成功!!!


 被折叠的 条评论
为什么被折叠?
被折叠的 条评论
为什么被折叠?
 到【灌水乐园】发言


