


一、实现
1、创建git分支,clone下源码
git地址
创建分支
2、图片上传具有文件选择的功能,所以我完全模仿(抄袭)图片上传
报错不慌,全部改完就不报错了
1)在src/config/index.ts中的export type ConfigType中添加
uploadVideoAccept: string[]
uploadVideoMaxSize: number
customUploadVideo: Function | null
2)src/config/video.ts,添加部分的三个属性
/**
 * @description 视频相关的配置
 * @author hutianhao
 */

import { EMPTY_FN } from '../utils/const'

export default {
    // 插入网络视频前的回调函数
    onlineVideoCheck: (video: string): string | boolean => {
        return true
    },

    // 插入网络视频成功之后的回调函数
    onlineVideoCallback: EMPTY_FN,

    //---------下面三个需要自己添加----------

    // accept
    uploadVideoAccept: ['mp4'],

    // 上传图片的最大体积,默认 50M
    uploadVideoMaxSize: 50 * 1024 * 1024,

    // 自定义上传
    customUploadImg: null,

}
3)src/menus/video下新建一个upload-video.ts
img中有自动上传的部分,我只留下了自定义上传部分,如果想深入了解,就仔细看一下源码。
/**
 * @description 上传图片
 * @author wangfupeng
 */

import Editor from '../../editor/index'
import {arrForEach} from '../../utils/util'

export type ResType = {
    errno: number | string
    data: string[]
}

class UploadVideo {
    private editor: Editor

    constructor(editor: Editor) {
        this.editor = editor
    }

    /**
     * 往编辑区域插入视频
     * @param src 视频地址
     */
    public insertVideo(src: string): void {
        const editor = this.editor
        const config = editor.config

        const i18nPrefix = 'validate.'
        const t = (text: string, prefix: string = i18nPrefix): string => {
            return editor.i18next.t(prefix + text)
        }

        // 先插入视频,无论是否能成功
        editor.cmd.do('insertHTML', `<iframe src="${src}" style="max-width:100%;" ></iframe>`)
        // 执行回调函数
        // config.linkVideoCallback(src)

        // 加载视频
        let video: any = document.createElement('video')
        video.onload = () => {
            video = null
        }
        video.onerror = () => {
            config.customAlert(
                t('插入视频错误'),
                'error',
                `wangEditor: ${t('插入视频错误')},${t('视频链接')} "${src}",${t('下载链接失败')}`
            )
            video = null
        }
        video.onabort = () => (video = null)
        video.src = src
    }

    /**
     * 上传视频
     * @param files 文件列表
     */
    public uploadVideo(files: FileList | File[]): void {
        if (!files.length) {
            return
        }

        const editor = this.editor
        const config = editor.config

        // ------------------------------ i18next ------------------------------

        const i18nPrefix = 'validate.'
        const t = (text: string): string => {
            return editor.i18next.t(i18nPrefix + text)
        }

        // ------------------------------ 获取配置信息 ------------------------------

        const maxSize = config.uploadVideoMaxSize
        const maxSizeM = maxSize / 1024 / 1024
        // 自定义上传视频
        const customUploadVideo = config.customUploadVideo

        if (!customUploadVideo) {
            // 没有 customUploadImg 的情况下
            return
        }

        // ------------------------------ 验证文件信息 ------------------------------
        const resultFiles: File[] = []
        const errInfos: string[] = []
        arrForEach(files, file => {
            const name = file.name
            const size = file.size

            // chrome 低版本 name === undefined
            if (!name || !size) {
                return
            }

            if (/\.(mp4|jpeg)$/i.test(name) === false) {
                // 后缀名不合法,不是视频
                errInfos.push(`【${name}】${t('不是视频')}`)
                return
            }

            if (maxSize < size) {
                // 上传图片过大
                errInfos.push(`【${name}】${t('大于')} ${maxSizeM}M`)
                return
            }

            // 验证通过的加入结果列表
            resultFiles.push(file)
        })

        // 抛出验证信息
        if (errInfos.length) {
            config.customAlert(`${t('视频验证未通过')}: \n` + errInfos.join('\n'), 'warning')
            return
        }

        // 如果过滤后文件列表为空直接返回
        if (resultFiles.length === 0) {
            config.customAlert(t('传入的文件不合法'), 'warning')
            return
        }

        // ------------------------------ 自定义上传 ------------------------------
        if (customUploadVideo && typeof customUploadVideo === 'function') {
            customUploadVideo(resultFiles, this.insertVideo.bind(this))
            return
        }

    }
}

export default UploadVideo
4)修改src/menus/video/create-panel-conf.ts
/**
 * @description video 菜单 panel tab 配置
 * @author tonghan
 */

import Editor from '../../editor/index'
import {PanelConf, PanelTabConf} from '../menu-constructors/Panel'
import {getRandom} from '../../utils/util'
import $ from '../../utils/dom-core'
import UploadVideo from './upload-video'
import {videoRegex} from '../../utils/const'

export default function (editor: Editor, video: string): PanelConf {
    const config = editor.config
    const uploadVideo = new UploadVideo(editor)
    // panel 中需要用到的id
    const inputIFrameId = getRandom('input-iframe')
    const btnOkId = getRandom('btn-ok')
    const i18nPrefix = 'menus.panelMenus.video.'
    const t = (text: string, prefix: string = i18nPrefix): string => {
        return editor.i18next.t(prefix + text)
    }

    // panel 中需要用到的id
    const upTriggerId = getRandom('up-trigger-id')
    const upFileId = getRandom('up-file-id')

    /**
     * 插入链接
     * @param iframe html标签
     */
    function insertVideo(video: string): void {
        editor.cmd.do('insertHTML', video + '<p><br></p>')

        // video添加后的回调
        editor.config.onlineVideoCallback(video)
    }

    /**
     * 校验在线视频链接
     * @param video 在线视频链接
     */
    function checkOnlineVideo(video: string): boolean {
        // 编辑器进行正常校验,video 合规则使指针为true,不合规为false
        let flag = true
        if (!videoRegex.test(video)) {
            flag = false
        }

        // 查看开发者自定义配置的返回值
        const check = editor.config.onlineVideoCheck(video)
        if (check === undefined) {
            if (flag === false) console.log(t('您刚才插入的视频链接未通过编辑器校验', 'validate.'))
        } else if (check === true) {
            // 用户通过了开发者的校验
            if (flag === false) {
                editor.config.customAlert(
                    `${t('您插入的网络视频无法识别', 'validate.')},${t(
                        '请替换为正确的网络视频格式',
                        'validate.'
                    )}:如<iframe src=...></iframe>`,
                    'warning'
                )
            } else {
                return true
            }
        } else {
            //用户未能通过开发者的校验,开发者希望我们提示这一字符串
            editor.config.customAlert(check, 'error')
        }
        return false
    }

    // tabs 配置 -----------------------------------------
    const accepts: string = config.uploadVideoAccept.map((item: string) => `video/${item}`).join(',')
    //上传视频的菜单
    const tabsConf: PanelTabConf[] = [
        // first tab
        {
            // 标题
            title: t('插入本地视频'),
            // 模板,//不需要多文件上传如果需要的话,在input中加上 multiple
            tpl: `<div class="w-e-up-img-container">
                    <div id="${upTriggerId}" class="w-e-up-btn">
                        <i class="w-e-icon-upload2"></i>
                    </div>
                    <div style="display:none;">
                        <input id="${upFileId}" type="file" accept="${accepts}"/>
                    </div>
                </div>`,
            // 事件绑定
            events: [
                // 触发选择视频
                {
                    selector: '#' + upTriggerId,
                    type: 'click',
                    fn: () => {
                        const $file = $('#' + upFileId)
                        const fileElem = $file.elems[0]
                        if (fileElem) {
                            fileElem.click()
                        } else {
                            // 返回 true 可关闭 panel
                            return true
                        }
                    },
                },
                // 选择图片完毕
                {
                    selector: '#' + upFileId,
                    type: 'change',
                    fn: () => {
                        const $file = $('#' + upFileId)
                        const fileElem = $file.elems[0]
                        if (!fileElem) {
                            // 返回 true 可关闭 panel
                            return true
                        }

                        // 获取选中的 file 对象列表
                        const fileList = (fileElem as any).files
                        if (fileList.length) {
                            uploadVideo.uploadVideo(fileList)
                        }

                        // 返回 true 可关闭 panel
                        return true
                    },
                },
            ],
        }, // first tab end
        // second tab
        {
            // tab 的标题
            title: t('插入网络视频'),
            // title: editor.i18next.t('menus.panelMenus.video.插入视频'),
            // 模板
            tpl: `<div>
                        <input
                            id="${inputIFrameId}"
                            type="text"
                            class="block"
                            placeholder="${editor.i18next.t('如')}:<iframe src=... ></iframe>"/>
                        </td>
                        <div class="w-e-button-container">
                            <button type="button" id="${btnOkId}" class="right">
                                ${editor.i18next.t('插入')}
                            </button>
                        </div>
                    </div>`,
            // 事件绑定
            events: [
                // 插入视频
                {
                    selector: '#' + btnOkId,
                    type: 'click',
                    fn: () => {
                        // 执行插入视频
                        const $video = $('#' + inputIFrameId)
                        let video = $video.val().trim()

                        // 视频为空,则不插入
                        if (!video) return
                        // 对当前用户插入的内容进行判断,插入为空,或者返回false,都停止插入
                        if (!checkOnlineVideo(video)) return

                        insertVideo(video)

                        // 返回 true,表示该事件执行完之后,panel 要关闭。否则 panel 不会关闭
                        return true
                    },
                },
            ],

        }, // second tab end
    ]


    const conf: PanelConf = {
        width: 300,
        height: 0,
        tabs: [],
    }
    // 显示“插入本地视频”
    if (
        window.FileReader && config.customUploadVideo
    ) {
        conf.tabs.push(tabsConf[0])
    }
    // 显示“插入网络视频”
    if (config.showLinkImg) {
        conf.tabs.push(tabsConf[1])
    }
    return conf
}
5)改完收工,吃饭,吃完后打包上传!
3、打包上传npm
修改名字和version,把所有关联了wangeditor的git地址的地方,都删掉

1)打包
npm run build
2)在npm官方注册账号
https://www.npmjs.com/
必须邮箱验证通过,才能实现发布!!
3)查看自己当前npm的源地址
npm config get registry
如果是 https://registry.npm.taobao.org/ ,就不得行,需要改为npm官方的源地址
4)修改自己的npm镜像,切回到npmjs源
npm config set registry=http://registry.npmjs.org
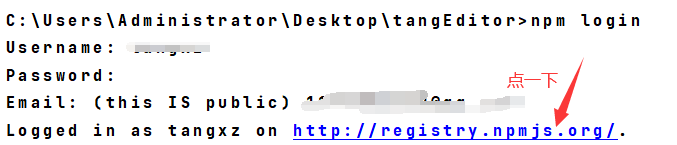
5)登录你的npm官方账号(切换源之后,每次都要重新登录)
npm login
登录成功后,点一下下面的链接,相当于是验证登录
6)发布
npm publish
7)源改回淘宝的
不改的话,你下载自己刚发布的依赖会很慢
npm config set registry=https://registry.npm.taobao.org/
4、使用,开干开干!
1)删掉以前的依赖
npm uninstall wangeditor -S
2)引入自己的依赖
npm i tangeditor --save
源码部分解析:插入本地视频的tab只有在存在自定义方法的时候才会存在。img也是一样的。必须要配置了自定义的上传方法,才会显示插入本地视频这一栏。(我在后面源码部分写了的,不慌)

我的自定义方法代码:
 /**
 * 监听视频上传
 * @param resultFiles 是选中的视频数组,当然我在源码中设置了只允许选中一个,如果需要修改,自己去看源码的node_modules/tangeditor/src/menus/video/create-panel-conf.ts
 * @param insertVideoFn 通过这个对象来把视频插入文本里面。它参数是视频的地址,通常是上传成功之后,后端返回来的数据,我这里写死。
 */
 this.editor.config.customUploadVideo = function (resultFiles, insertVideoFn) {
     console.log(resultFiles[0])
     console.log(insertVideoFn)
     	insertVideoFn("http://localhost:88/api/common/file/video/view/video/艾斯.mp4")
 }
二、我的全部代码
干货甩你一脸
1、springboot上传接口实现
1)配置跨域
如果是网关转发,则只需要网关配置跨域即可。
但是转发的服务和网关都必须在同一个注册中心注册。
否则网关找不到服务。
package gateway.config;

import org.springframework.context.annotation.Bean;
import org.springframework.context.annotation.Configuration;
import org.springframework.web.cors.CorsConfiguration;
import org.springframework.web.cors.reactive.CorsWebFilter;
import org.springframework.web.cors.reactive.UrlBasedCorsConfigurationSource;

@Configuration
public class TangxzBootCorsConfiguration {

    @Bean
    public CorsWebFilter corsWebFilter(){
        UrlBasedCorsConfigurationSource source = new UrlBasedCorsConfigurationSource();

        CorsConfiguration corsConfiguration = new CorsConfiguration();

        //1、配置跨域
        corsConfiguration.addAllowedHeader("*");
        corsConfiguration.addAllowedMethod("*");
        corsConfiguration.addAllowedOrigin("*");
        corsConfiguration.setAllowCredentials(true);

        source.registerCorsConfiguration("/**",corsConfiguration);
        return new CorsWebFilter(source);
    }
}
2)允许文件上传
只需要在接口所在服务的配置中加上这一部分即可,网关不需要添加这个。
spring:
  servlet:
    multipart:
      enabled: true
      file-size-threshold: 0
      max-file-size: 30MB
      max-request-size: 30MB
3)视频返回第一帧为Base图片代码及依赖
<!-- 截取视频的某一帧并返回 -->
<dependency>
    <groupId>org.bytedeco</groupId>
    <artifactId>javacv</artifactId>
    <version>1.4.3</version>
</dependency>

<dependency>
    <groupId>org.bytedeco.javacpp-presets</groupId>
    <artifactId>ffmpeg-platform</artifactId>
    <version>4.0.2-1.4.3</version>
</dependency>
工具类实现:
返回第一帧的图片Base64
建议数据库存储视频的地址,前端需要的时候,直接来后端请求base64图片。
这个时候这个方法就要改为接口
package common_api.utils;

import org.bytedeco.javacv.FFmpegFrameGrabber;
import org.bytedeco.javacv.Frame;
import org.bytedeco.javacv.FrameGrabber;
import org.bytedeco.javacv.Java2DFrameConverter;
import sun.misc.BASE64Encoder;

import javax.imageio.ImageIO;
import java.awt.*;
import java.awt.image.BufferedImage;
import java.io.ByteArrayOutputStream;

/**
 * @author: Tangxz
 * @email: 1171702529@qq.com
 * @cate: 2020/12/20 22:17
 */
public class VideoCover {

    public static String fetchFrame(String videoPath) {
        FFmpegFrameGrabber ff = null;
        byte[] data = null;
        ByteArrayOutputStream os = new ByteArrayOutputStream();
        try {
            ff = new FFmpegFrameGrabber(videoPath);
            ff.start();
            int lenght = ff.getLengthInFrames();
            int i = 0;
            Frame f = null;
            while (i < lenght) {
                // 过滤前5帧,避免出现全黑的图片
                f = ff.grabFrame();
                if ((i > 5) && (f.image != null)) {
                    break;
                }
                i++;
            }
            BufferedImage bi =  new Java2DFrameConverter().getBufferedImage(f);
            String rotate = ff.getVideoMetadata("rotate");
            if (rotate != null) {
                bi = rotate(bi, Integer.parseInt(rotate));
            }
            ImageIO.write(bi, "jpg", os);
        } catch (Exception e) {
            e.printStackTrace();
        } finally {
            try {
                if (ff != null) {
                    ff.stop();
                }
            } catch (FrameGrabber.Exception e) {
                e.printStackTrace();
            }
        }
        BASE64Encoder encoder = new BASE64Encoder();
        return "data:image/jpg;base64,"+encoder.encode(os.toByteArray());
    }

    public static BufferedImage rotate(BufferedImage src, int angel) {
        int src_width = src.getWidth(null);
        int src_height = src.getHeight(null);
        int type = src.getColorModel().getTransparency();
        Rectangle rect_des = calcRotatedSize(new Rectangle(new Dimension(src_width, src_height)), angel);
        BufferedImage bi = new BufferedImage(rect_des.width, rect_des.height, type);
        Graphics2D g2 = bi.createGraphics();
        g2.translate((rect_des.width - src_width) / 2, (rect_des.height - src_height) / 2);
        g2.rotate(Math.toRadians(angel), src_width / 2, src_height / 2);
        g2.drawImage(src, 0, 0, null);
        g2.dispose();
        return bi;
    }

    public static Rectangle calcRotatedSize(Rectangle src, int angel) {
        if (angel >= 90) {
            if(angel / 90 % 2 == 1) {
                int temp = src.height;
                src.height = src.width;
                src.width = temp;
            }
            angel = angel % 90;
        }
        double r = Math.sqrt(src.height * src.height + src.width * src.width) / 2;
        double len = 2 * Math.sin(Math.toRadians(angel) / 2) * r;
        double angel_alpha = (Math.PI - Math.toRadians(angel)) / 2;
        double angel_dalta_width = Math.atan((double) src.height / src.width);
        double angel_dalta_height = Math.atan((double) src.width / src.height);
        int len_dalta_width = (int) (len * Math.cos(Math.PI - angel_alpha - angel_dalta_width));
        int len_dalta_height = (int) (len * Math.cos(Math.PI - angel_alpha - angel_dalta_height));
        int des_width = src.width + len_dalta_width * 2;
        int des_height = src.height + len_dalta_height * 2;
        return new java.awt.Rectangle(new Dimension(des_width, des_height));
    }

}
4)接口代码
package common_api.controller;

import com.tangxz.common.utils.R;
import common_api.utils.VideoCover;
import lombok.extern.slf4j.Slf4j;
import org.springframework.beans.factory.annotation.Value;
import org.springframework.util.AntPathMatcher;
import org.springframework.util.FileCopyUtils;
import org.springframework.web.bind.annotation.*;
import org.springframework.web.multipart.MultipartFile;
import org.springframework.web.servlet.HandlerMapping;

import javax.servlet.http.HttpServletRequest;
import javax.servlet.http.HttpServletResponse;
import java.io.*;
import java.text.SimpleDateFormat;
import java.util.Date;

/**
 * @author: Tangxz
 * @email: 1171702529@qq.com
 * @cate: 2020/12/17 13:38
 */
@Slf4j
@RestController
@RequestMapping("/common/file")
public class FileController {
    @GetMapping("/get")
    public String ww() {
        return "123";
    }

    @Value(value = "${tangxz.path.upload}")
    private String uploadpath;
    @Value(value = "${tangxz.path.gateway}")
    private String gateway;


    /**
     * 图片/视频上传
     *
     * @param file
     * @return
     */
    @PostMapping(value = "/upload")
    public R upload(@RequestParam(name = "file", required = false) MultipartFile file) {
        try {
            String ctxPath = uploadpath;
            String fileName = null;
            String fileType = file.getContentType();
            String nowday = new SimpleDateFormat("yyyy-MM-dd").format(new Date());
            File filePath = new File(ctxPath + File.separator + fileType + File.separator + nowday);
            if (!filePath.exists()) {
                filePath.mkdirs();// 创建文件根目录
            }
            String orgName = file.getOriginalFilename();// 获取文件名
            fileName = orgName.substring(0, orgName.lastIndexOf(".")) + "_" + System.currentTimeMillis() + orgName.substring(orgName.indexOf("."));
            String savePath = filePath.getPath() + File.separator + fileName;
            File savefile = new File(savePath);
            FileCopyUtils.copy(file.getBytes(), savefile);
            String dbpath = fileType + File.separator + nowday + File.separator + fileName;
            if (dbpath.contains("\\")) {
                dbpath = dbpath.replace("\\", "/");
            }
            assert fileType != null;
            //判断文件类型,如果是视频,需要截取第一帧图片返回。
            //不同文件类型的访问接口不一样。
            if (fileType.contains("image")) {
                return R.ok().put("imgUrl", gateway + "/common/file/image/view/" + dbpath);
            } else if (fileType.contains("video")) {
                //多返回一个,封面地址
                String coverUrl = VideoCover.fetchFrame(savePath);
                return R.ok().put("videoUrl", gateway + "/common/file/video/view/" + dbpath).put("coverUrl",coverUrl);
            } else {
                return R.ok().put("url", gateway + "/common/file/image/view/" + dbpath);
            }
        } catch (IOException e) {
            log.error(e.getMessage(), e);
            return R.error().put("error", e.getMessage());
        }
    }


    /**
     * 预览图片
     * 请求地址:http://localhost:88/api/common/file/image/view/{上方组合成的地址:dbpath}
     *
     * @param request
     * @param response
     */
    @GetMapping(value = "/image/view/**")
    public void viewImage(HttpServletRequest request, HttpServletResponse response) {
        response.setContentType("image/jpeg;charset=utf-8");
        view(request, response);
    }

    /**
     * 预览视频
     * 请求地址:     http://localhost:88/api/common/file/video/view/{上方组合成的地址:dbpath}
     * <iframe src="http://localhost:88/api/common/file/video/view/video/mp4/2020-12-20/艾斯.mp4"></iframe>
     * 有些视频格式的问题,所以有些请求无法直接判断文件格式。就直接使用两个方法来实现,一个/image/view,一个video/view
     * @param request
     * @param response
     */
    @GetMapping(value = "/video/view/**")
    public void viewVideo(HttpServletRequest request, HttpServletResponse response) {
        response.setContentType("audio/mp4;charset=utf-8");
        view(request, response);
    }

    /**
     * 浏览图片/视频的实现方法,把文件写入response中
     * @param request
     * @param response
     */
    private void view(HttpServletRequest request, HttpServletResponse response) {
        // ISO-8859-1 ==> UTF-8 进行编码转换
        String filePath = extractPathFromPattern(request);
        // 其余处理略
        InputStream inputStream = null;
        OutputStream outputStream = null;
        try {
            filePath = filePath.replace("..", "");
            if (filePath.endsWith(",")) {
                filePath = filePath.substring(0, filePath.length() - 1);
            }
            //    @Value(value = "${tangxz.path.upload}")
            String localPath = uploadpath;
            String videoUrl = localPath + File.separator + filePath;
            inputStream = new BufferedInputStream(new FileInputStream(videoUrl));
            outputStream = response.getOutputStream();
            byte[] buf = new byte[1024];
            int len;
            while ((len = inputStream.read(buf)) > 0) {
                outputStream.write(buf, 0, len);
            }
            response.flushBuffer();
        } catch (IOException e) {
            log.error("预览失败" + e.getMessage());
            // e.printStackTrace();
        } finally {
            if (inputStream != null) {
                try {
                    inputStream.close();
                } catch (IOException e) {
                    log.error(e.getMessage(), e);
                }
            }
            if (outputStream != null) {
                try {
                    outputStream.close();
                } catch (IOException e) {
                    log.error(e.getMessage(), e);
                }
            }
        }
    }

    /**
     * 把指定URL后的字符串全部截断当成参数
     * 这么做是为了防止URL中包含中文或者特殊字符(/等)时,匹配不了的问题
     *
     * @param request
     * @return
     */
    private static String extractPathFromPattern(final HttpServletRequest request) {
        String path = (String) request.getAttribute(HandlerMapping.PATH_WITHIN_HANDLER_MAPPING_ATTRIBUTE);
        String bestMatchPattern = (String) request.getAttribute(HandlerMapping.BEST_MATCHING_PATTERN_ATTRIBUTE);
        return new AntPathMatcher().extractPathWithinPattern(bestMatchPattern, path);
    }
}
2、前端部分代码
<template>
  <div>
    <el-form :model="dataForm" :rules="rules" ref="dataForm" label-width="100px" class="demo-dataForm">
      <el-form-item label="文章标题" prop="articleTitle" style="width: 304px">
        <el-input v-model="dataForm.articleTitle" placeholder="请输入文章标题"></el-input>
      </el-form-item>

      <el-form-item label="文章分类" prop="tabName">
        <el-radio-group v-model="dataForm.tabName">
          <el-radio v-for="tab in tabs" :label="tab.tabName"></el-radio>
        </el-radio-group>
      </el-form-item>

      <el-form-item label="文章标签" prop="articleLabel">
        <el-checkbox-group v-model="dataForm.articleLabel" style="display: flex;width: 400px;flex-wrap: wrap;">
          <el-checkbox v-for="label in labels" :style="{color:label.labelColor}" :label="label.labelId"
                       name="article_label">{{label.labelName}}
          </el-checkbox>
        </el-checkbox-group>
      </el-form-item>
      <el-form-item label="文章内容" style="">
        <div id="writing" style="width: 100%;height: 200%;z-index: inherit">
        </div>
      </el-form-item>
      <el-form-item>
        <el-button type="primary" @click="submitForm('dataForm')">立即创建</el-button>
      </el-form-item>
    </el-form>
    <div v-html="dataForm.articleContent">

    </div>
    <img :src="cover" alt="封面">
  </div>
</template>

<script>
  import axios from 'axios'
  // 创建一个富文本编辑框
  import E from 'tangeditor'

  export default {
    name: 'writing',
    data () {
      return {
        editor: null,
        tabs: [],
        labels: [],
        // 需要发送三个请求
        // 上传文件、上传文章全部的基础信息、上传文章标签关系。
        // 需要提交的内容
        dataForm: {
          articleTitle: '',
          tabName: '',
          articleContent: '',
          articleLabel: [],
          haveCover: false,
          articleCoverType: '',
          articleCoverImg: '',
        },
        rules: {
          articleTitle: [
            {required: true, message: '请输入文章标题', trigger: 'blur'}
            // {min: 3, max: 5, message: '长度在 3 到 5 个字符', trigger: 'blur'}
          ],
          tabName: [
            {required: true, message: '请选择文章分类', trigger: 'change'}
          ],
          articleLabel: [
            {type: 'array', required: true, message: '请至少选择一个标签', trigger: 'change'}
          ]
        }
      }
    },
    created () {
      this.getTabList()
      this.getLabelList()
    },
    mounted () {
      this.editor = new E('#writing')
      // 配置 onchange 回调函数,将数据同步到 vue 中
      this.editor.config.onchange = (newHtml) => {
        this.dataForm.articleContent = newHtml
      }
      // 创建编辑器
      this.editor.create()
      const _self = this
      /**
       * 监听视频上传
       * @param resultFiles 是 input 中选中的文件列表
       * @param insertImgFn 是获取图片 url 后,插入到编辑器的方法
       */
      this.editor.config.customUploadVideo = function (resultFiles, insertVideoFn) {
        console.log(resultFiles[0])
        console.log(insertVideoFn)
        let formData = new window.FormData()
        formData.append('file', resultFiles[0])
        axios({
          method: 'post',
          url: _self.$http.adornUrl(`/common/file/upload`),
          headers: {
            'Content-Type': 'multipart/form-data'
          },
          data: formData
        }).then((res) => {
          console.log(res.data.videoUrl)
          console.log(res.data.coverUrl)
          insertVideoFn(res.data.videoUrl)
          if (!_self.dataForm.haveCover) {
            _self.dataForm.articleCoverImg = res.data.coverUrl
            _self.dataForm.haveCover = true
            _self.dataForm.articleCoverType = 'video'
          }
        }).catch((err) => {
          console.log('难受', err)
        })
      }
      /**
       * 监听图片上传
       * @param resultFiles 是 input 中选中的文件列表
       * @param insertImgFn 是获取图片 url 后,插入到编辑器的方法
       */
      this.editor.config.customUploadImg = function (resultFiles, insertImgFn) {
        console.log(resultFiles[0])
        let formData = new window.FormData()
        formData.append('file', resultFiles[0])
        axios({
          method: 'post',
          url: _self.$http.adornUrl(`/common/file/upload`),
          headers: {
            'Content-Type': 'multipart/form-data'
          },
          data: formData
        }).then((res) => {
          console.log(res.data.imgUrl)
          insertImgFn(res.data.imgUrl)
          if (!_self.dataForm.haveCover) {
            _self.dataForm.articleCoverImg = res.data.imgUrl
            _self.dataForm.haveCover = true
            _self.dataForm.articleCoverType = 'image'
          }
        }).catch((err) => {
          console.log('难受', err)
        })
      }

    },
    methods: {
      getTabList () {
        this.$http({
          url: this.$http.adornUrl('/home/tab/list'),
          method: 'get'
        }).then(({data}) => {
          if (data && data.code === 0) {
            this.tabs = data.page.list
            console.log('tabs', this.tabs)
          } else {
            this.tabs = []
          }
        })
      },
      getLabelList () {
        this.$http({
          url: this.$http.adornUrl('/home/label/list'),
          method: 'get'
        }).then(({data}) => {
          if (data && data.code === 0) {
            this.labels = data.page.list
            console.log('labels', this.labels)
          } else {
            this.labels = []
          }
        })
      },
      /**
       * 点击提交按钮
       * @param formName
       */
      submitForm (formName) {
        this.$refs[formName].validate((valid) => {
          if (valid) {
            console.log(this.dataForm)
            console.log(this.dataForm.articleLabel.toString())

            // 允许创建

            // 保存图片、视频

            // 存储文章内容和文章、标签关系
            this.saveArticle()
          } else {
            console.log('error submit!!')
            return false
          }
        })
      },
      saveArticle () {
        this.$http({
          url: this.$http.adornUrl(`/home/article/saveArticle`),
          method: 'post',
          data: this.$http.adornData({
            'articleId': this.dataForm.articleId || undefined,
            'articleTitle': this.dataForm.articleTitle,
            'tabName': this.dataForm.tabName,
            'articleLabels': this.dataForm.articleLabel.toString(),
            'articleCoverType': this.dataForm.articleCoverType,
            'articleCoverImg': this.dataForm.articleCoverImg,
            'articleContent': this.dataForm.articleContent,
            // 'articleWriterId': this.dataForm.articleWriterId,
            // 'articleWriterName': this.dataForm.articleWriterName,
            'createTime': new Date(),
            // 'editTime': this.dataForm.editTime,
          })
        }).then(({data}) => {
          if (data && data.code === 0) {
            this.$message({
              message: '操作成功',
              type: 'success',
              duration: 1500,
              onClose: () => {
                this.visible = false
                this.$emit('refreshDataList')
                this.dataForm = {
                  articleTitle: '',
                  tabName: '',
                  articleContent: '',
                  articleLabel: [],
                  haveCover: false,
                  articleCoverType: '',
                  articleCoverImg: '',
                }
              }
            })
          } else {
            this.$message.error(data.msg)
          }
        })
      },
    }
  }
</script>

<style scoped>
  .el-checkbox {
    margin: 0;
    margin-right: 30px;
  }

  /* table 样式 */
  table {
    border-top: 1px solid #ccc;
    border-left: 1px solid #ccc;
  }

  table td,
  table th {
    border-bottom: 1px solid #ccc;
    border-right: 1px solid #ccc;
    padding: 3px 5px;
  }

  table th {
    border-bottom: 2px solid #ccc;
    text-align: center;
  }

  /* blockquote 样式 */
  blockquote {
    display: block;
    border-left: 8px solid #d0e5f2;
    padding: 5px 10px;
    margin: 10px 0;
    line-height: 1.4;
    font-size: 100%;
    background-color: #f1f1f1;
  }

  /* code 样式 */
  code {
    display: inline-block;
    *display: inline;
    *zoom: 1;
    background-color: #f1f1f1;
    border-radius: 3px;
    padding: 3px 5px;
    margin: 0 3px;
  }

  pre code {
    display: block;
  }

  /* ul ol 样式 */
  ul, ol {
    margin: 10px 0 10px 20px;
  }
</style>
三、wangeditor小体验
1、选择图片后自动就上传了,但是如果不要图片或者视频,删除之后不会删除,就很尴尬。以后我应该会写一个方法,来删除没被引用的视频或者图片,写好之后发布出来供大家参考。
2、可以通过 this.editor.config来控制属性,挺人性化的,源码也很简单,非常轻量级。
3、今天一个同学来跟我聊着玩,我就疯狂安利wangeditor,又简单,又好改,最后同学介绍了我一个富文本编辑器,ckeditor。我用了一下,嗯,我真的是孤陋寡闻,之后写个人博客网站的时候,如果这个插件是免费的,我就再试试这个富文本编辑器,虽然一个网站用两个富文本编辑器有点傻逼,但是我就是想用用。你也可以看看ckeditor,挺漂亮的。


 591
591


 被折叠的 条评论
为什么被折叠?
被折叠的 条评论
为什么被折叠?
 到【灌水乐园】发言


