


multiple-executor mode(分布式多服务模式): 1个webServer,多个executorServer分布在不同节点上, 存放元数据的数据库为 MySQL,MySQL 应采用主从模式进行备份和容错。该模式是最严格的生产环境。
集群规划

一、前置准备
需要用到 Azkaban 编译后的 gz包( azkaban-web-server-0.1.0-SNAPSHOT.tar.gz、 azkaban-exec-server-0.1.0-SNAPSHOT.tar.gz、 azkaban-db-0.1.0-SNAPSHOT.tar.gz ) ,手动编译 Azkaban 源码教程见:
二、Multiple Executor 模式部署
2.1 解压
[xiaokang@hadoop01 ~]$ tar -zxvf azkaban-web-server-0.1.0-SNAPSHOT.tar.gz -C /opt/software/
[xiaokang@hadoop01 ~]$ tar -zxvf azkaban-db-0.1.0-SNAPSHOT.tar.gz

[xiaokang@hadoop01 ~]$ scp azkaban-exec-server-0.1.0-SNAPSHOT.tar.gz xiaokang@hadoop02:/home/xiaokang/
[xiaokang@hadoop02 ~]$ tar -zxvf azkaban-exec-server-0.1.0-SNAPSHOT.tar.gz -C /opt/software/

#重命名(可选)
[xiaokang@hadoop01 software]$ mv azkaban-web-server-0.1.0-SNAPSHOT/ web-server
[xiaokang@hadoop02 software]$ mv azkaban-exec-server-0.1.0-SNAPSHOT/ executor-server
2.2 在 MySQL 中创建 azkaban 需要的表
进入 MySQL, 创建数据库azkaban_multiple,并创建需要的表
mysql> create database azkaban_multiple;
Query OK, 1 row affected (0.01 sec)
mysql> use azkaban_two;
Database changed
mysql> source E:\software\azkaban-db-0.1.0-SNAPSHOT\create-all-sql-0.1.0-SNAPSHOT.sql
Query OK, 0 rows affected (0.09 sec)

Query OK, 0 rows affected (0.02 sec)

Query OK, 0 rows affected (0.02 sec)
...


报错的这两张表都建立了一个varchar类型的索引,一个varchar(512)、一个varchar(640),上述报错说的是767字节,而varchar是字符,由于这里我使用的字符集为utf8,这个指每个字符最大的字节数为4,所以很明显 4*512(2048) 和 4*640(2560)都大于767,这里我都改成了varchar(128),问题成功解决!
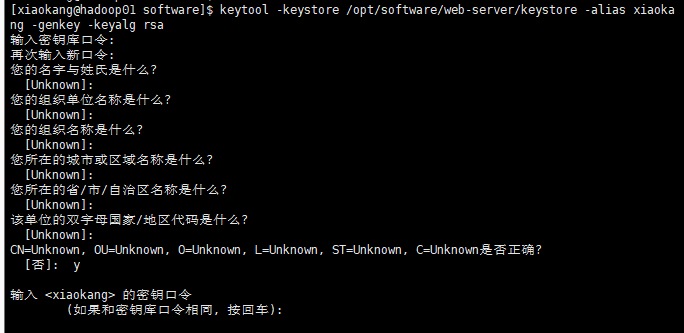
2.3 生成密钥和证书(可选)
#此证书是在web-server中使用,所以建议生成在web-server目录下
[xiaokang@hadoop01 ~]$ keytool -keystore /opt/software/web-server/keystore -alias xiaokang -genkey -keyalg rsa

keytool是 Java 数据证书的管理工具,使用户能够管理自己的公 /私钥 对及相关证书 。
-keystore 指定密钥库的名称及位置 (产生的各类信息将存在 .keystore文件中)
-genkey (或者 -genkeypair) 生成密钥对
-alias 为生成的密钥对指定别名,如果没有默认是 mykey
-keyalg 指定密钥的算法 RSA/DSA,默认是 DSA
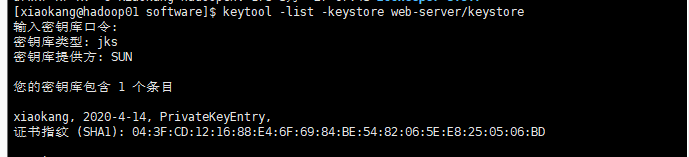
查看密钥库信息:
[xiaokang@hadoop01 software]$ keytool -list -keystore web-server/keystore
2.4 Web 服务器配置
在web服务器目录下创建多级文件夹plugins/jobtypes:
[xiaokang@hadoop01 ~]$ mkdir -p /opt/software/web-server/plugins/jobtypes
进入 azkaban web 服务器安装目录的conf目录下,修改azkaban.properties
#默认 Web Server 存放 web 文件的目录
web.resource.dir=/opt/software/web-server/web
#默认时区为美国,改为亚洲 上海 默认
default.timezone.id=Asia/Shanghai
#用户权限管理信息文件
user.manager.xml.file=/opt/software/web-server/conf/azkaban-users.xml
#executor全局配置文件
executor.global.properties=/opt/software/web-server/conf/global.properties
#jetty配置
#jetty.use.ssl=false
jetty.ssl.port=8443
jetty.port=8081
jetty.keystore=/opt/software/web-server/keystore
jetty.password=xiaokang
jetty.keypassword=xiaokang
jetty.truststore=/opt/software/web-server/keystore
jetty.trustpassword=xiaokang
jetty.maxThreads=25
# Azkaban Executor settings
executor.port=11241
# Azkaban plugin settings
azkaban.jobtype.plugin.dir=/opt/software/web-server/plugins/jobtypes
#数据库配置
database.type=mysql
mysql.port=3306
mysql.host=192.168.1.106
mysql.database=azkaban_multiple
mysql.user=root
mysql.password=xiaokang
mysql.numconnections=100
#去掉MinimumFreeMemory
azkaban.executorselector.filters=StaticRemainingFlowSize,MinimumFreeMemory,CpuStatus
完整配置文件内容如下:
# Azkaban Personalization Settings
azkaban.name=xiaokang
azkaban.label=xiaokang-Azkaban-Multiple
azkaban.color=#FF3601
azkaban.default.servlet.path=/index
web.resource.dir=/opt/software/web-server/web
default.timezone.id=Asia/Shanghai
# Azkaban UserManager class
user.manager.class=azkaban.user.XmlUserManager
user.manager.xml.file=/opt/software/web-server/conf/azkaban-users.xml
# Loader for projects
executor.global.properties=/opt/software/web-server/conf/global.properties
azkaban.project.dir=projects
# Velocity dev mode
velocity.dev.mode=false
# Azkaban Jetty server properties.
jetty.ssl.port=8443
jetty.port=8081
jetty.keystore=/opt/software/web-server/keystore
jetty.password=xiaokang
jetty.keypassword=xiaokang
jetty.truststore=/opt/software/web-server/keystore
jetty.trustpassword=xiaokang
jetty.maxThreads=25
# Azkaban Executor settings
executor.port=11241
# mail settings
mail.sender=
mail.host=
# User facing web server configurations used to construct the user facing server URLs. They are useful when there is a reverse proxy between Azkaban web servers and users.
# enduser -> myazkabanhost:443 -> proxy -> localhost:8081
# when this parameters set then these parameters are used to generate email links.
# if these parameters are not set then jetty.hostname, and jetty.port(if ssl configured jetty.ssl.port) are used.
# azkaban.webserver.external_hostname=myazkabanhost.com
# azkaban.webserver.external_ssl_port=443
# azkaban.webserver.external_port=8081
job.failure.email=
job.success.email=
lockdown.create.projects=false
cache.directory=cache
# JMX stats
jetty.connector.stats=true
executor.connector.stats=true
# Azkaban plugin settings
azkaban.jobtype.plugin.dir=/opt/software/web-server/plugins/jobtypes
# Azkaban mysql settings by default. Users should configure their own username and password.
database.type=mysql
mysql.port=3306
mysql.host=192.168.1.106
mysql.database=azkaban_multiple
mysql.user=root
mysql.password=xiaokang
mysql.numconnections=100
#Multiple Executor
#启用多个执行器模式,随后提交的job会根据情况自行选择执行服务器,否则默认只使用本地执行服务器。
azkaban.use.multiple.executors=true
azkaban.executorselector.filters=StaticRemainingFlowSize,CpuStatus
azkaban.executorselector.comparator.NumberOfAssignedFlowComparator=1
azkaban.executorselector.comparator.Memory=1
azkaban.executorselector.comparator.LastDispatched=1
azkaban.executorselector.comparator.CpuUsage=1
log4j.properties修改日志文件路径:
log4j.appender.server.File=/opt/software/web-server/logs/azkaban-webserver.log
在azkaban web 服务器安装目录的conf目录下, 按照如下配置修改 azkaban-users.xml文件,增加自定义管理员用户。
<azkaban-users>
  <user groups="azkaban" password="azkaban" roles="admin" username="azkaban"/>
  <user groups="azkaban" password="xiaokang" roles="admin" username="xiaokang"/>
  <user password="metrics" roles="metrics" username="metrics"/>

  <role name="admin" permissions="ADMIN"/>
  <role name="metrics" permissions="METRICS"/>
</azkaban-users>
在azkaban web 服务器安装目录的plugins/jobtypes目录下, 新建commonprivate.properties文件,并写入以下内容:
# set execute-as-user
execute.as.user=false
azkaban.native.lib=false
2.5 Executor 服务器配置
进入 azkaban executor 服务器(hadoop02)安装目录的conf目录下,修改azkaban.properties
#默认时区为美国,改为亚洲 上海 默认
default.timezone.id=Asia/Shanghai
#executor全局配置文件
executor.global.properties=/opt/software/executor-server/conf/global.properties
#web服务器url
#azkaban.webserver.url=http://hadoop01:8081
azkaban.webserver.url=https://hadoop01:8443
# Azkaban plugin settings
azkaban.jobtype.plugin.dir=/opt/software/executor-server/plugins/jobtypes
#数据库配置
database.type=mysql
mysql.port=3306
mysql.host=192.168.1.106
mysql.database=azkaban_two
mysql.user=root
mysql.password=xiaokang
mysql.numconnections=100
# Azkaban Executor settings
executor.port=11241
完整配置文件内容如下:
# Azkaban Personalization Settings
default.timezone.id=Asia/Shanghai
# Azkaban UserManager class
# Loader for projects
executor.global.properties=/opt/software/executor-server/conf/global.properties
azkaban.project.dir=projects
# Velocity dev mode
velocity.dev.mode=false
# Azkaban Jetty server properties.
# Where the Azkaban web server is located
azkaban.webserver.url=https://hadoop01:8443
# mail settings
lockdown.create.projects=false
cache.directory=cache
# JMX stats
jetty.connector.stats=true
executor.connector.stats=true
# Azkaban plugin settings
azkaban.jobtype.plugin.dir=/opt/software/executor-server/plugins/jobtypes
# Azkaban mysql settings by default. Users should configure their own username and password.
database.type=mysql
mysql.port=3306
mysql.host=192.168.1.106
mysql.database=azkaban_multiple
mysql.user=root
mysql.password=xiaokang
mysql.numconnections=100
# Azkaban Executor settings
executor.maxThreads=50
executor.flow.threads=30
executor.port=11241
log4j.properties修改日志文件路径:
log4j.appender.server.File=/opt/software/executor-server/logs/azkaban-execserver.log
在azkaban executor 服务器安装目录的plugins/jobtypes目录下, 修改commonprivate.properties文件:
# set execute-as-user
execute.as.user=false
azkaban.native.lib=false
2.6 分发
将hadoop02节点的executor-server分发至hadoop03:
[xiaokang@hadoop02 ~]$ scp -r /opt/software/executor-server xiaokang@hadoop03:/opt/software/
2.7 时间同步
一定要确保各个节点的时间是同步状态
[xiaokang@hadoop01 bin]$ date
2020年 04月 14日 星期二 14:11:41 CST

[xiaokang@hadoop02 bin]$ date
2020年 04月 14日 星期二 14:11:41 CST

[xiaokang@hadoop03 bin]$ date
2020年 04月 14日 星期二 14:11:41 CST
2.8 启动
#先启动hadoop02、hadoop03上的executor服务器
[xiaokang@hadoop03 bin]$ ./start-exec.sh
#手动激活executor服务器
[xiaokang@hadoop01 ~]$ curl http://hadoop02:11241/executor?action=activate
[xiaokang@hadoop01 ~]$ curl http://hadoop03:11241/executor?action=activate
#启动hadoop01上的web服务器
[xiaokang@hadoop01 bin]$ ./start-web.sh
2.9 验证
验证方式一:使用 jps 命令查看:
[xiaokang@hadoop01 bin]$ jps
10513 AzkabanWebServer
10555 Jps

[xiaokang@hadoop02 bin]$ jps
10530 Jps
10486 AzkabanExecutorServer

[xiaokang@hadoop03 bin]$ jps
10423 Jps
10382 AzkabanExecutorServer
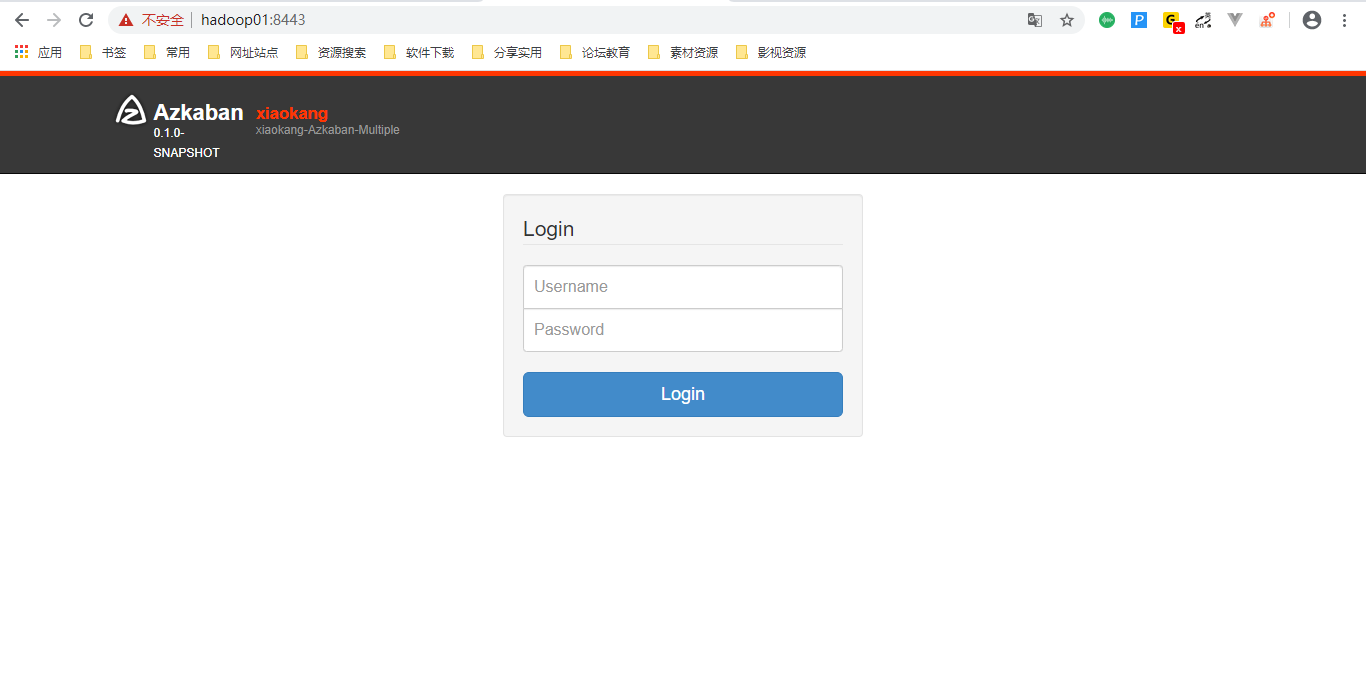
验证方式二:访问 8443 端口,查看 Web UI 界面:
四、基本任务调度
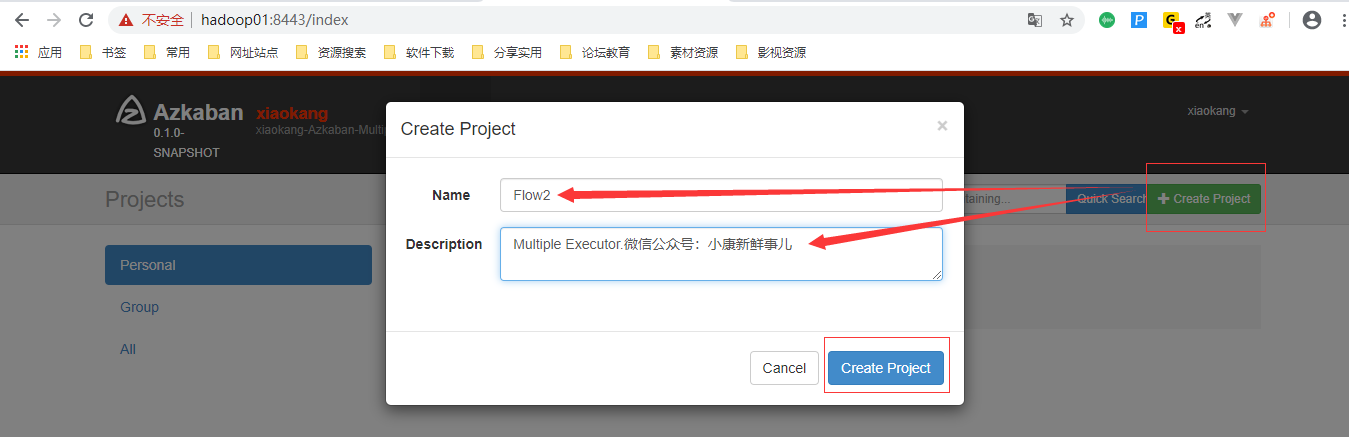
4.1 新建项目
在 Azkaban 主界面创建一个新项目:
4.2 任务配置
新建 multiple.flow 配置文件,内容如下。这里的任务很简单,就是输出一句 Hello Azkaban-Multiple,Flow-2.0! xk1181259634 :
nodes:
  - name: firstJob-xiaokang
    type: command
    config:
      command: echo "Hello Azkaban-Multiple,Flow-2.0! xk1181259634"
如果你希望以 2.0 的方式运行,则需要新建一个 project 文件,指明是使用的是 Flow 2.0:
azkaban-flow-version: 2.0
4.3 打包上传
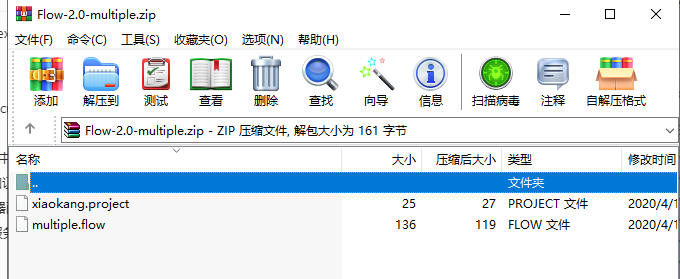
将 multiple.flow和xiaokang.project 打包为 zip 压缩文件:
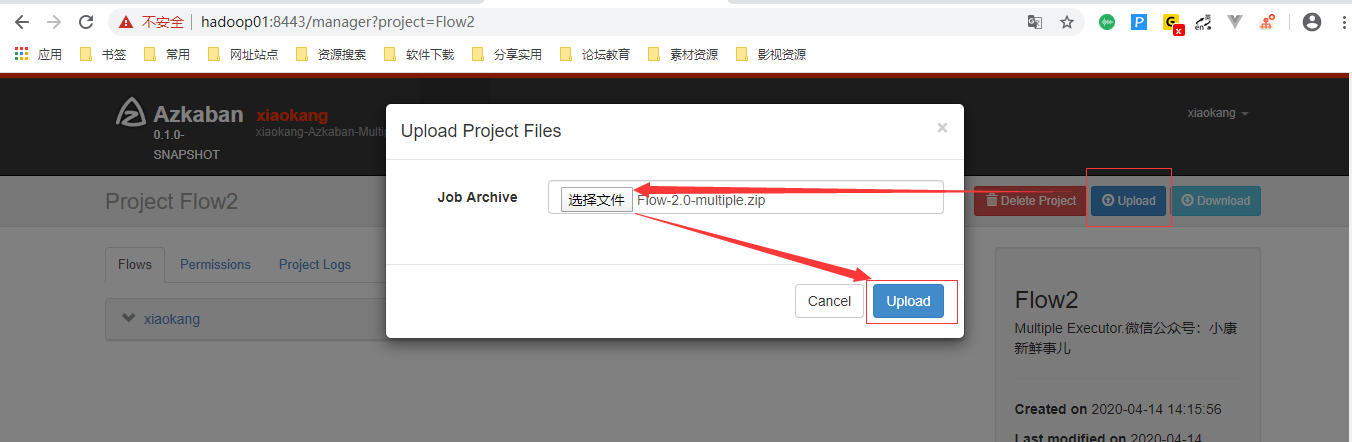
通过 Web UI 界面上传:
上传成功后可以看到对应的 Flows:

4.4 执行任务
点击页面上的 Execute Flow 执行任务:

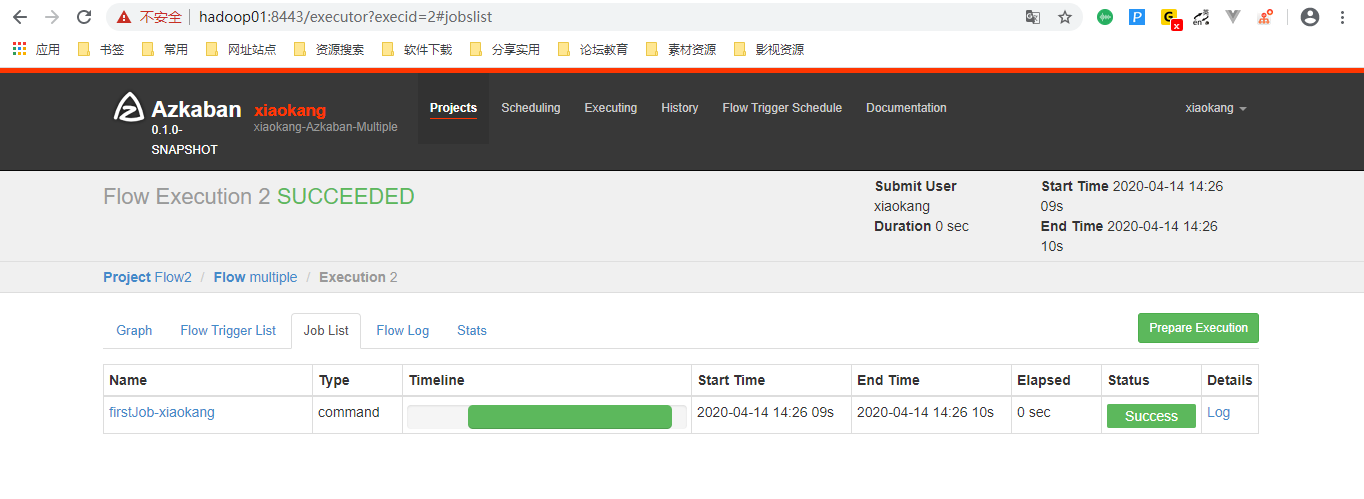
4.5 执行结果
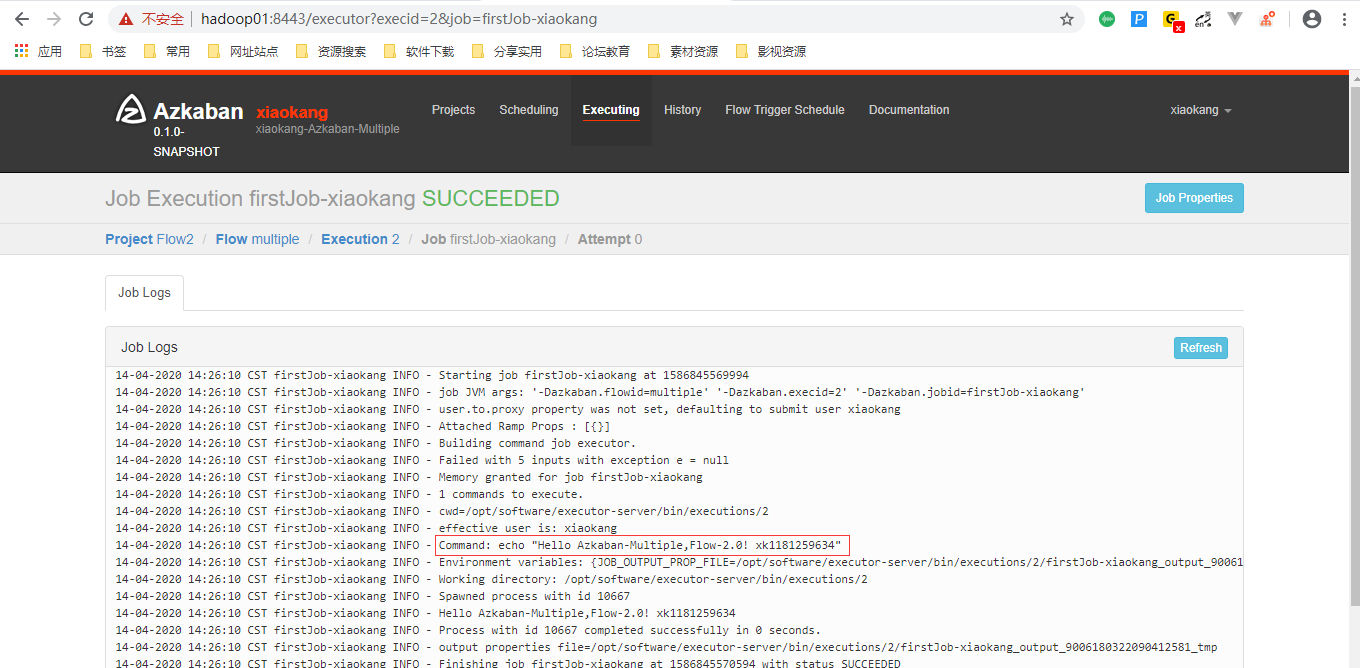
点击 Log 可以查看到任务的执行日志:
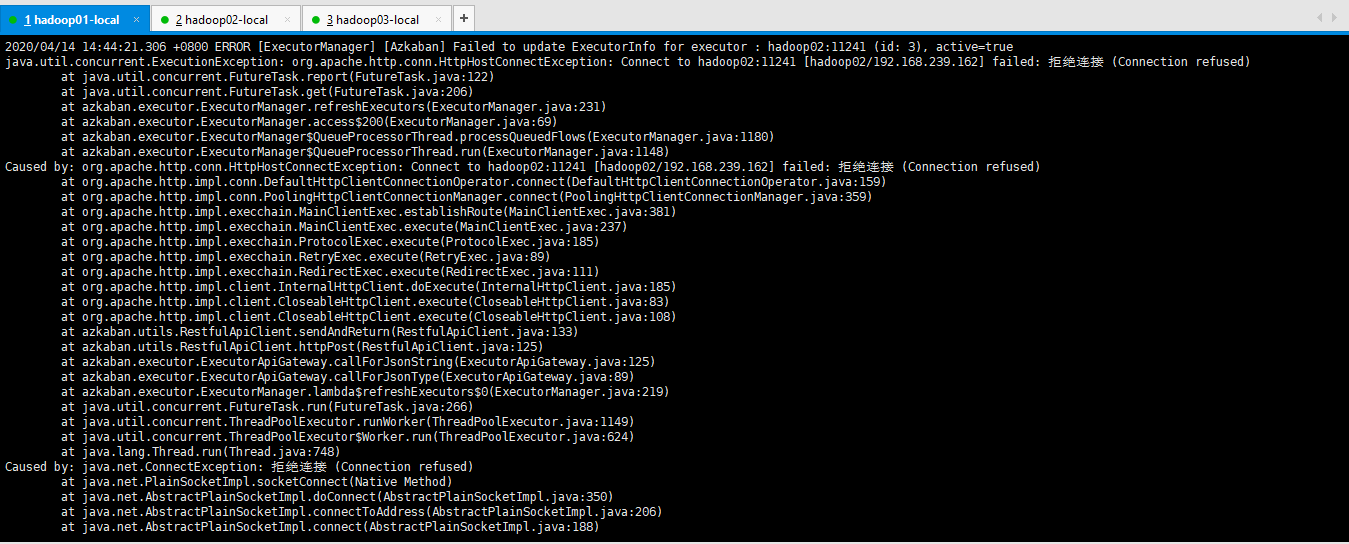
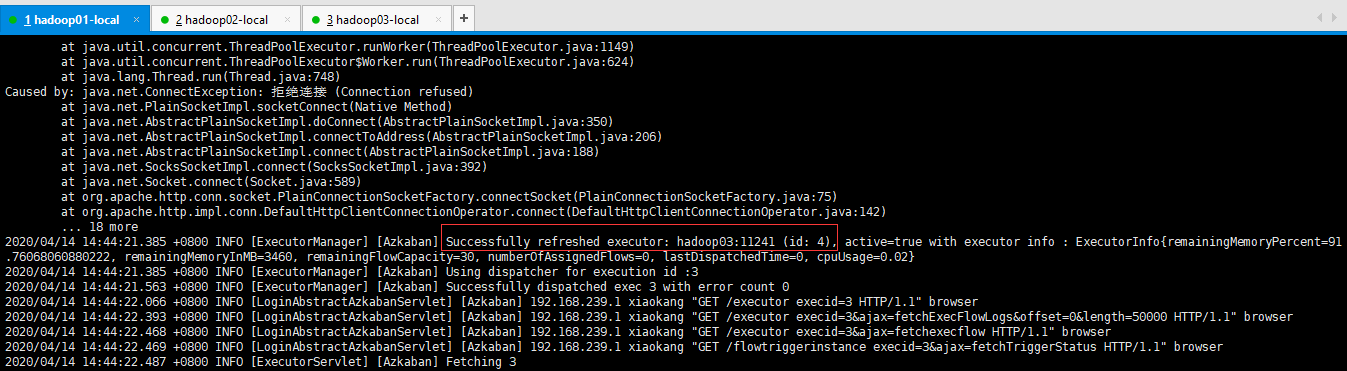
4.6 测试集群
直接kill掉hadoop02的executor服务器:
[xiaokang@hadoop02 bin]$ jps
10792 AzkabanExecutorServer
10828 Jps
[xiaokang@hadoop02 bin]$ kill -9 10792
出现如下结果,说明集群正常:


 472
472


 被折叠的 条评论
为什么被折叠?
被折叠的 条评论
为什么被折叠?
 到【灌水乐园】发言


