


cpolar 的免费版经常会重新分配 HostName 和 Port,总是手动修改太过麻烦,分享一下自动更新配置文件并进行内网穿透的方法。
2025.1.26 更新
开发了一键运行脚本:CpolarAutoUpdater 以减少客户端操作,现在你可以在配置完 config.txt 后,在连接时自动更新主机名称和端口。
假设你已经配置好了服务器端的 cpolar,接下来根据你的系统从目录跳转进行配置。
文章目录
Windows
安装 Git
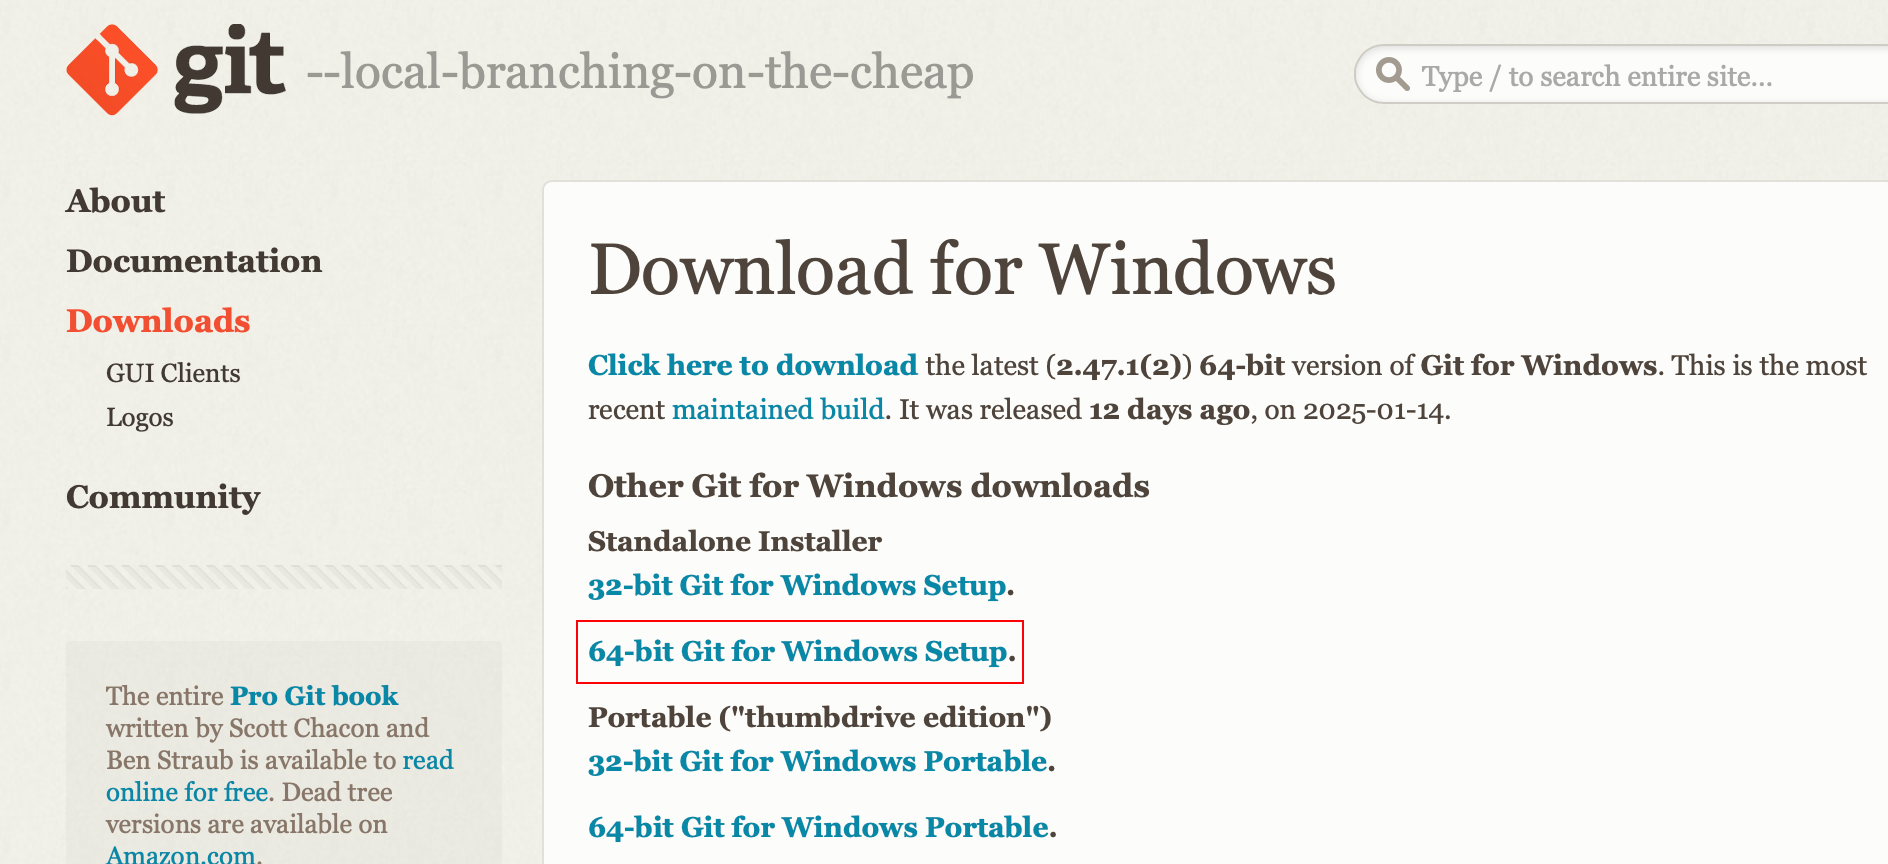
a. 下载 Git
前往 Git 官方下载页面,当前演示的下载版本如图所示:
然后直接运行下载的安装程序,可以全部保持默认设置进行,Git 在安装完成后会自动添加到系统 PATH。
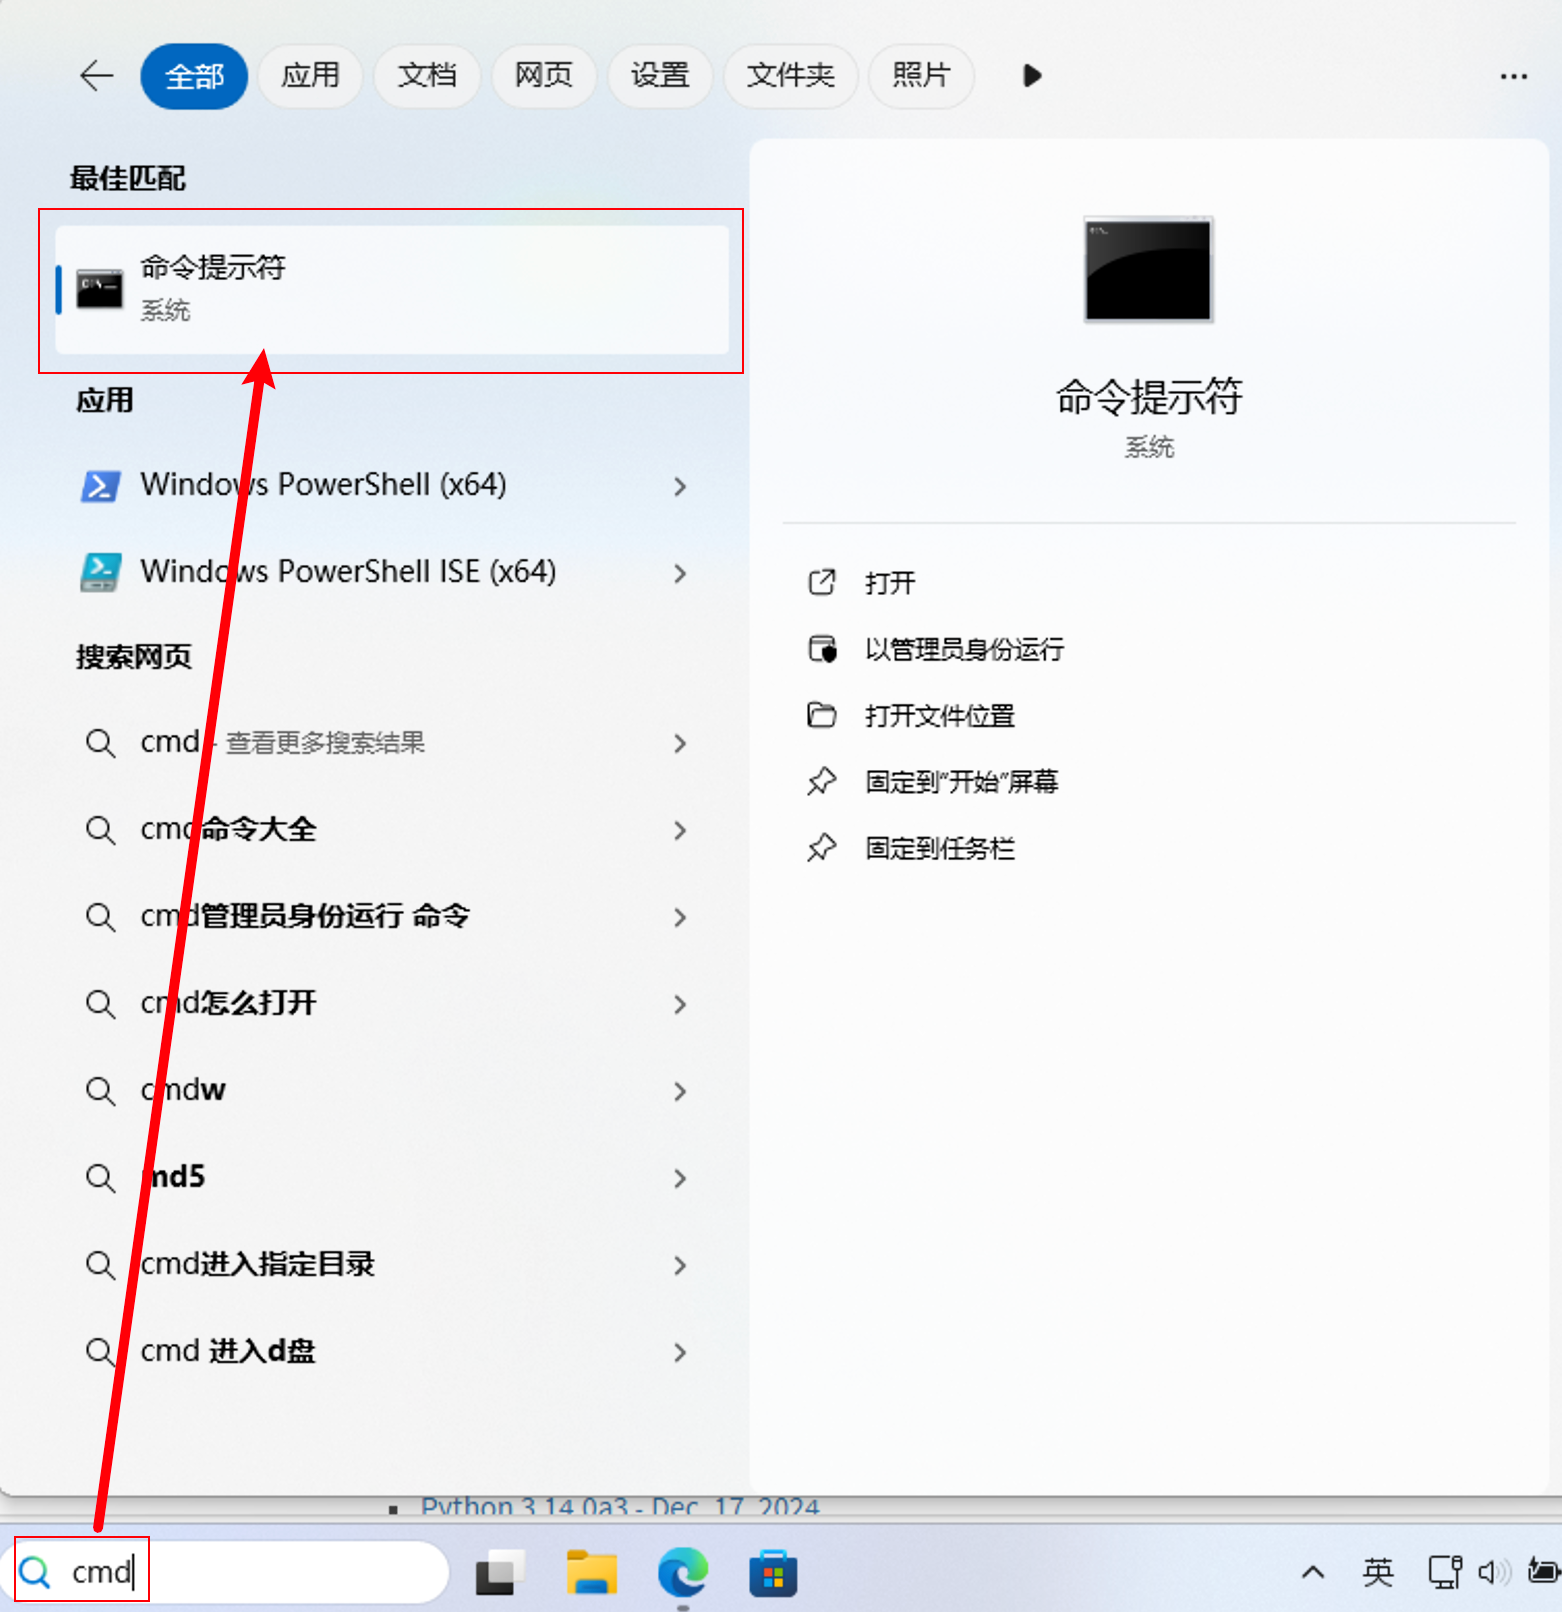
b. 验证安装
如图所示,打开 CMD:
输入以下命令验证 Git 是否安装成功:
git --version
输出:

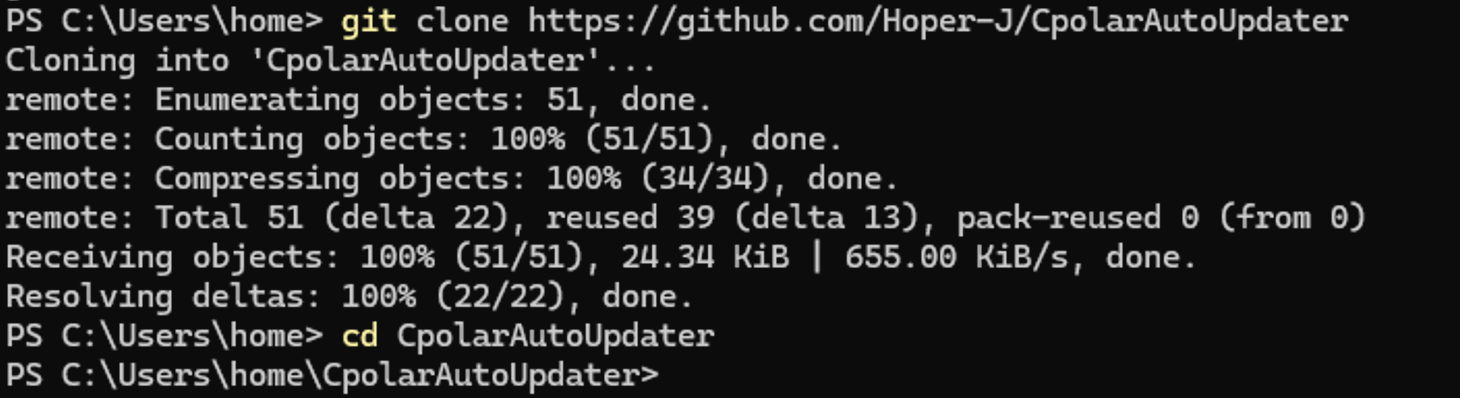
c. 克隆仓库
git clone https://github.com/Hoper-J/CpolarAutoUpdater
cd CpolarAutoUpdater
安装 Python
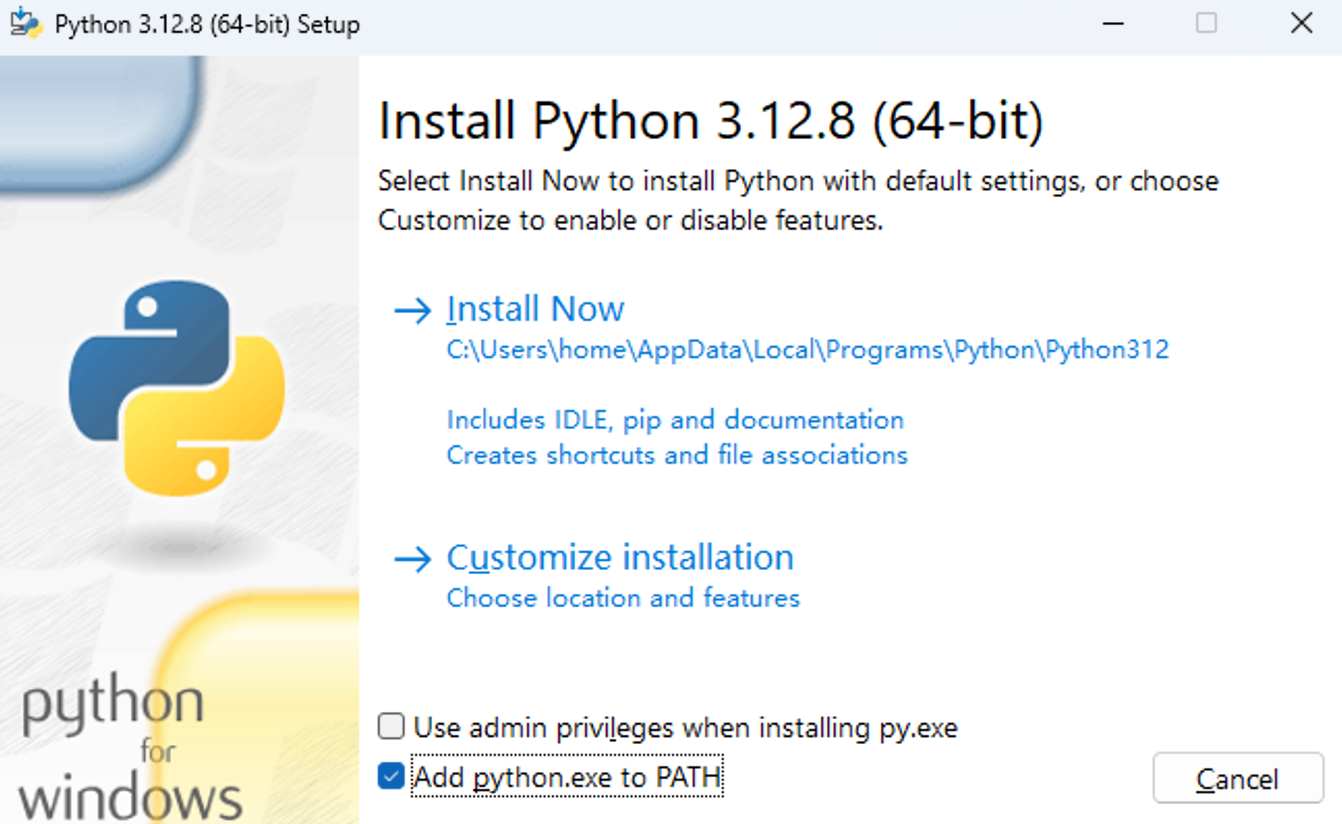
a. 下载 Python
前往 Python 官方下载页面,选择任意版本(当前演示版本为 3.12.8)。然后直接运行下载的安装程序,注意勾选 Add python.exe to PATH,点击 Install Now 完成安装。
b. 验证安装
在 CMD 中输入以下命令验证 Python 是否安装成功:
python --version
输出:

c. 环境配置
pip install paramiko requests beautifulsoup4
运行脚本
python auto_tunnel.py
将自动连接到服务器,Ctrl+D 退出。
Linux / Mac
克隆仓库
git clone https://github.com/Hoper-J/CpolarAutoUpdater
cd CpolarAutoUpdater
配置文件
将 cpolar 的账号/密码以及服务器端的用户名(通过 whoami 获取)填充至配置文件 config.txt 中:
# 请正确填充
cpolar_username = your_cpolar_username
cpolar_password = your_cpolar_password
server_user     = your_server_user

# 自定义
ports           = 8888, 6666
auto_connect    = True

# 以下配置可以不做修改,并不影响最终结果
server_password =
ssh_key_path    = ~/.ssh/id_rsa_server
ssh_host_alias  = server
参数说明
cpolar_username/cpolar_password:cpolar 平台的登录账号和密码。server_user/server_password:远程服务器的 SSH 用户名和密码,密码可以不在配置文件中明文写出,如果不提供,脚本会提示输入。ports:需要映射的端口号,默认为 8888 和 6006 端口(多个端口号之间需要使用英文逗号 “,” 隔开)。auto_connect:决定运行脚本后是否自动连接到服务器,默认为True,运行脚本后自动连接到服务器。设置为False则不自动连接。ssh_key_path:SSH 私钥的存储路径,如果不存在该私钥则自动创建到该路径。ssh_host_alias:本地 SSH 配置的别名,用于简化连接命令。
环境配置
在运行脚本之前,需要满足以下依赖:
requestsbeautifulsoup4paramiko
命令行执行:
pip install requests beautifulsoup4 paramiko
运行脚本
python auto_tunnel.py
将自动连接到服务器,Ctrl+D 退出。
连接服务器(手动)
这里取决于你的
ssh_host_alias,默认ssh_host_alias = server,此时可以使用以下命令免密登录到服务器:ssh server
【可选】别名设置
为方便使用脚本,可以设置别名,使其在任意目录下直接执行。
先查看 Shell 类型
echo $SHELL
/bin/bash表示你使用的是 Bash,配置文件为~/.bashrc。/bin/zsh表示你使用的是 Zsh,配置文件为~/.zshrc。
添加别名
根据你的 Shell 类型,运行以下命令:
- Bash
echo "alias tunnel='python $(pwd)/auto_tunnel.py'" >> ~/.bashrc source ~/.bashrc - Zsh
echo "alias tunnel='python $(pwd)/auto_tunnel.py'" >> ~/.zshrc
source ~/.zshrc
验证别名设置
别名设置完成后,我们可以在任意目录运行以下命令来执行脚本:
tunnel
更改别名名称
如果不想使用
tunnel作为别名,可以在上述命令中替换为你喜欢的名称。例如,将tunnel替换为my_tunnel:echo "alias my_tunnel='python $(pwd)/auto_tunnel.py'" >> ~/.bashrc删除别名
如果需要删除别名,可以使用以下命令:
macOS:
sed -i '' '/alias tunnel/d' ~/.bashrc && source ~/.bashrcLinux:
sed -i '/alias tunnel/d' ~/.bashrc && source ~/.bashrc如果是 Zsh,则替换
~/.bashrc为~/.zshrc。脚本路径更改
如果脚本被移动到其他目录,请重复上述步骤更新别名。
之前的内容
以下为之前的内容(与上文无关),如果你对脚本细节感兴趣可以查看。
配置 ssh config
该部分原文:SSH 远程登录服务器跑实验(含内网穿透)
现在配置一下主机的 ssh 文件。
vim ~/.ssh/config
config 参数:
- Host: 别名,可以直接用于 ssh 登录
- Hostname: IP 地址
- Port: SSH 端口号(如果做了内网穿透,则需要填写对应的端口号)
- 比如:下图对应的是 10387
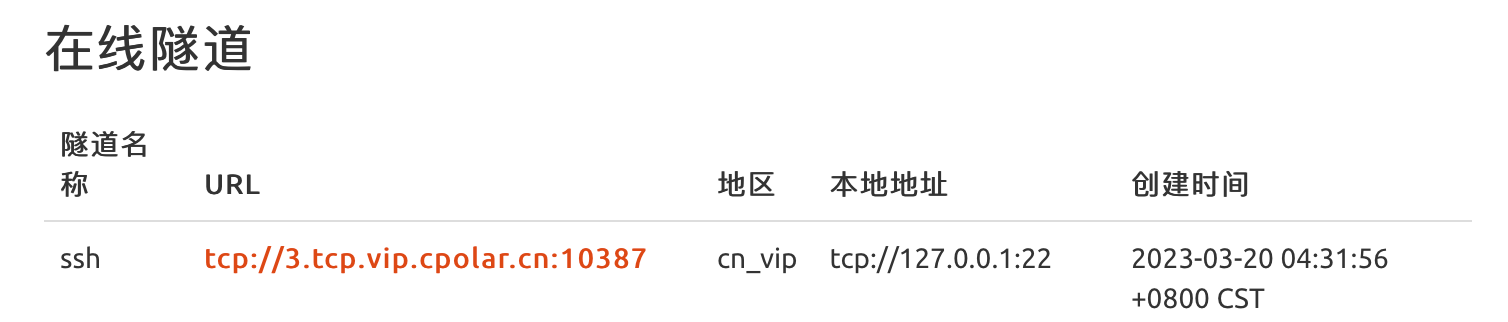
- 比如:下图对应的是 10387
- User: 登录的用户名
- PreferredAuthentications: 指定客户端的认证方法为公钥
- IdentityFile: 当前指的是私钥路径
P.S: 具体的参数信息可以通过 man ssh_config 查看
下面是配置文件样例(以 Ubuntu 为例):
Host Ubuntu-Nat-DDNS					# 你可以改成你想要的名字
	HostName 3.tcp.vip.cpolar.cn		# 填写公网ip
	Port 10387							# 公网 ip 对应的 端口号
	User xx								# 远程主机的登录名
	PreferredAuthentications publickey
    IdentityFile ~/.ssh/id_rsa_ubuntu	# 改成对应的私钥路径或者将其重命名
现在可以通过 ssh Ubuntu-Nat-DDNS 直接登陆。
但 cpolar 的免费版经常会重新分配 HostName 和 Port,所以需要配置一个自动更新的脚本。
编写脚本
vim ~/scripts/update_ssh_cfg.sh
以下是 Python 脚本代码:
#!/usr/bin/env python
import requests
from bs4 import BeautifulSoup
import re
# 登录函数
def login(login_url, username, password, csrf_token):
session = requests.Session()
payload = {
'login': username,
'password': password,
'csrf_token': csrf_token
}
response = session.post(login_url, data=payload)
if response.status_code == 200:
return session
else:
raise Exception('登录失败')
# 获取目标字符串函数
def get_target_string(session, url):
response = session.get(url)
soup = BeautifulSoup(response.text, 'html.parser')
target_element = soup.find('a', href="#ZgotmplZ")
if target_element:
return target_element.text
else:
raise Exception('隧道可能未激活')
# 提取 HostName 和 Port 函数
def extract_hostname_and_port(target_string):
pattern = r'tcp://(.*?):(\d+)'
matches = re.match(pattern, target_string)
if matches:
hostname = matches.group(1)
port = matches.group(2)
return hostname, port
else:
raise Exception('未找到匹配的字符串')
# 更新配置文件函数
def update_config_file(filename, hostname, port):
with open(filename, "r") as file:
content = file.readlines()
is_modified = False
for i, line in enumerate(content):
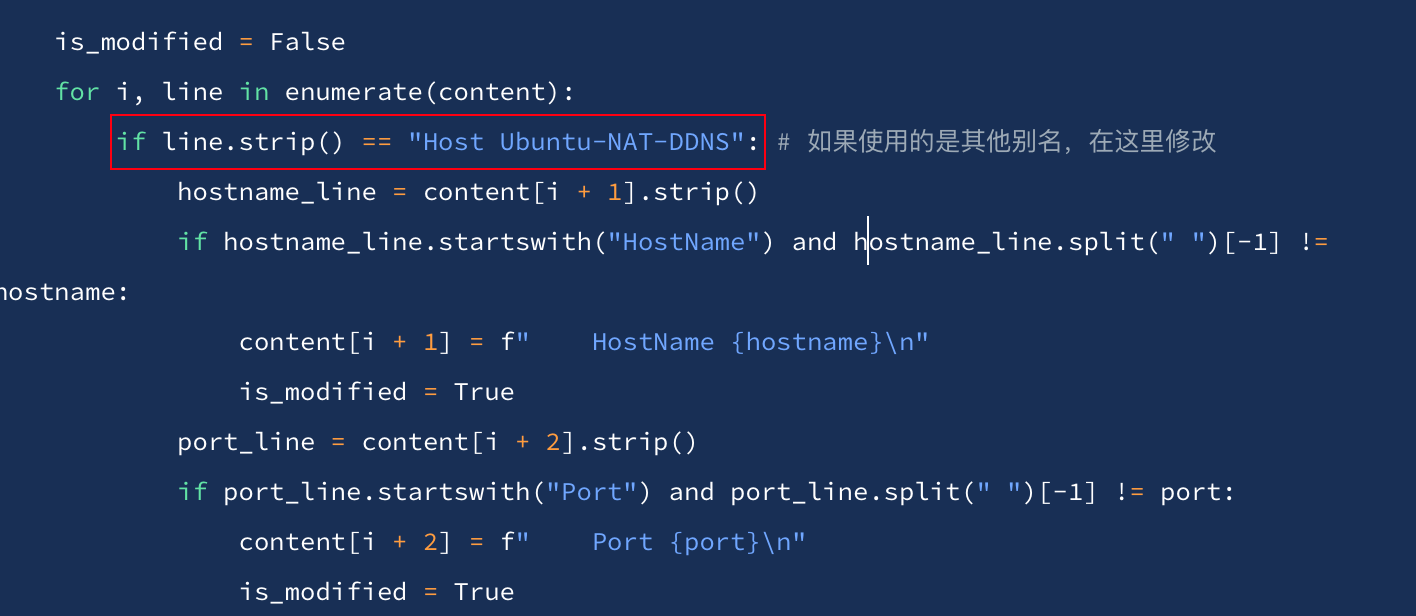
if line.strip() == "Host Ubuntu-NAT-DDNS": # 如果使用的是其他别名,在这里修改
hostname_line = content[i + 1].strip()
if hostname_line.startswith("HostName") and hostname_line.split(" ")[-1] != hostname:
content[i + 1] = f" HostName {hostname}\n"
is_modified = True
port_line = content[i + 2].strip()
if port_line.startswith("Port") and port_line.split(" ")[-1] != port:
content[i + 2] = f" Port {port}\n"
is_modified = True
if not is_modified:
print("HostName 和 Port 未发生变化,无需更新。")
else:
with open(filename, "w") as file:
file.writelines(content)
print("已更新配置。")
# 主程序
def main():
# 配置项
username = ''
password = ''
csrf_token = ''
login_url = 'https://dashboard.cpolar.com/login'
content_url = 'https://dashboard.cpolar.com/status'
config_filename = "/Users/home/.ssh/config"
try:
# 登录
session = login(login_url, username, password, csrf_token)
# 获取目标字符串
target_string = get_target_string(session, content_url)
print(target_string)
# 提取 HostName 和 Port
hostname, port = extract_hostname_and_port(target_string)
print("HostName:", hostname)
print("Port:", port)
# 更新配置文件
update_config_file(config_filename, hostname, port)
except Exception as e:
print("发生错误:", str(e))
# 运行主程序
if __name__ == "__main__":
main()
为脚本添加执行权限:
chmod +x ~/scripts/update_ssh_cfg.sh
如果你不是使用 Ubuntu-NAT-DDNS 作为别名,则修改下方标注出的代码:
另外,你需要填充上面的 username,password 和 csrf_token,其中 csrf_token 可以通过下面的方式获取。
获取 csrf_token
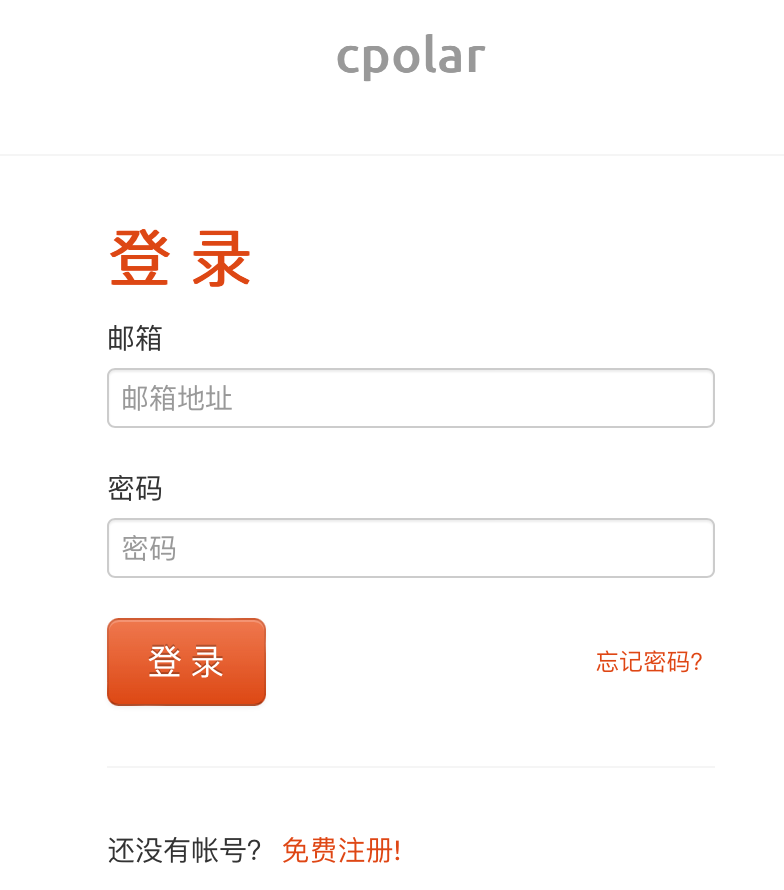
打开登陆界面
访问 https://dashboard.cpolar.com/login
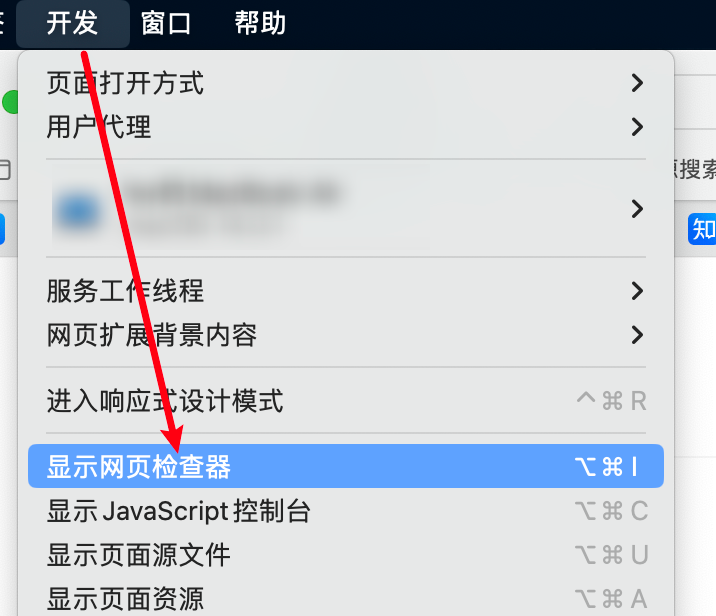
Safari
点击开发->显示网页检查器 或者使用 option + command + L 打开网页检查器
输入账号密码进行登录,点击get-started -> 标头 -> 请求数据
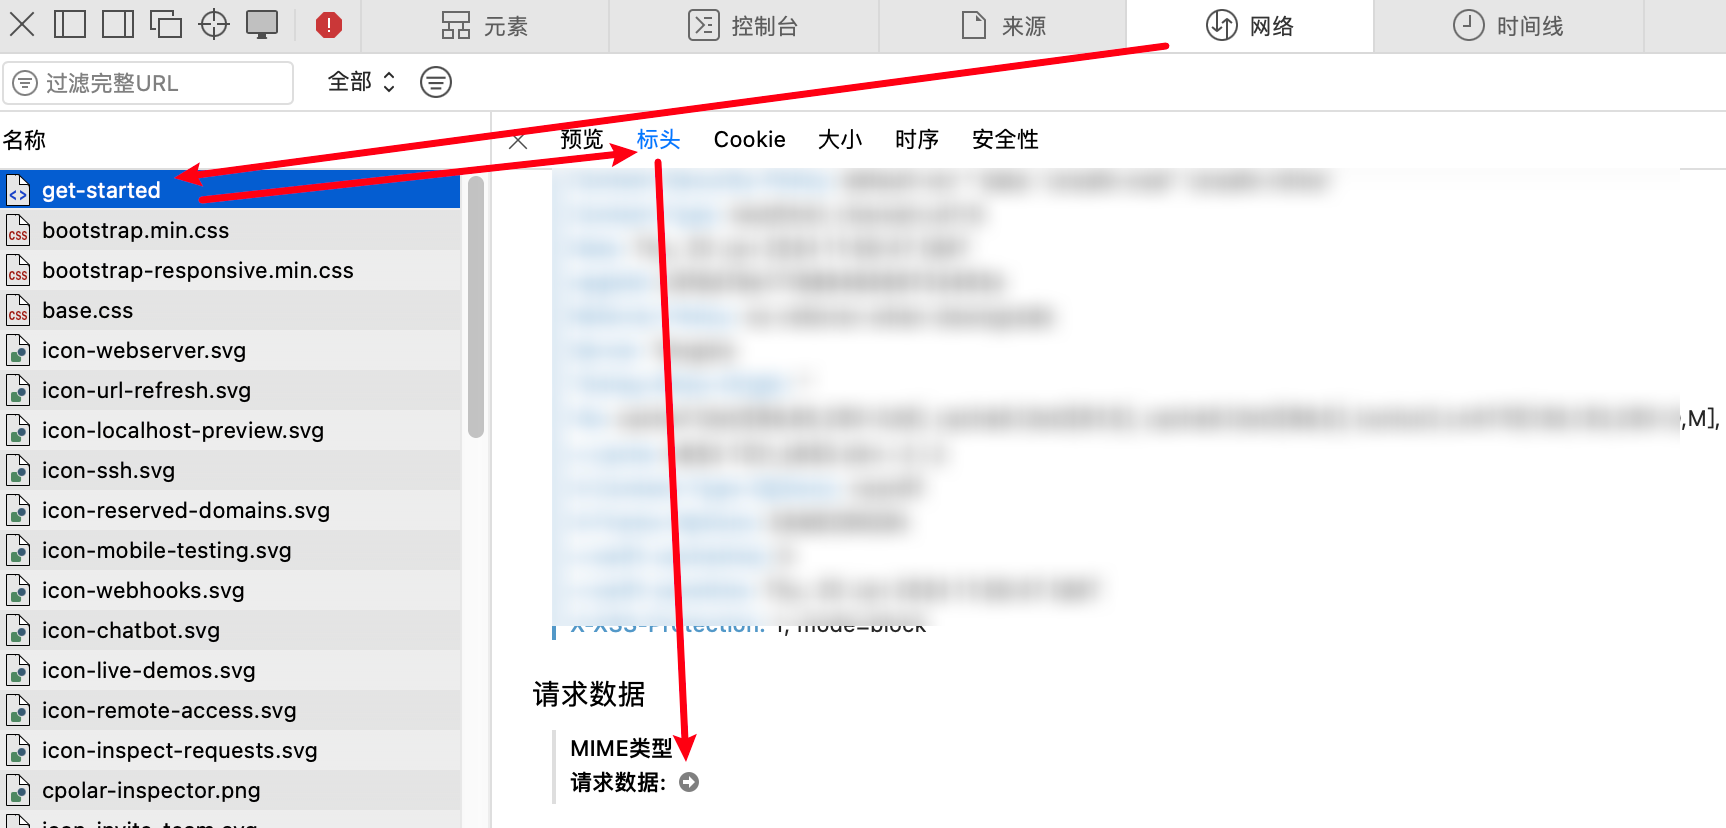
然后你就可以看到三个我们所需要的字段,将其填充回代码部分。

Chrome
使用 F12 打开开发者工具,进入 Network,点击 login -> Payload 查看字段。
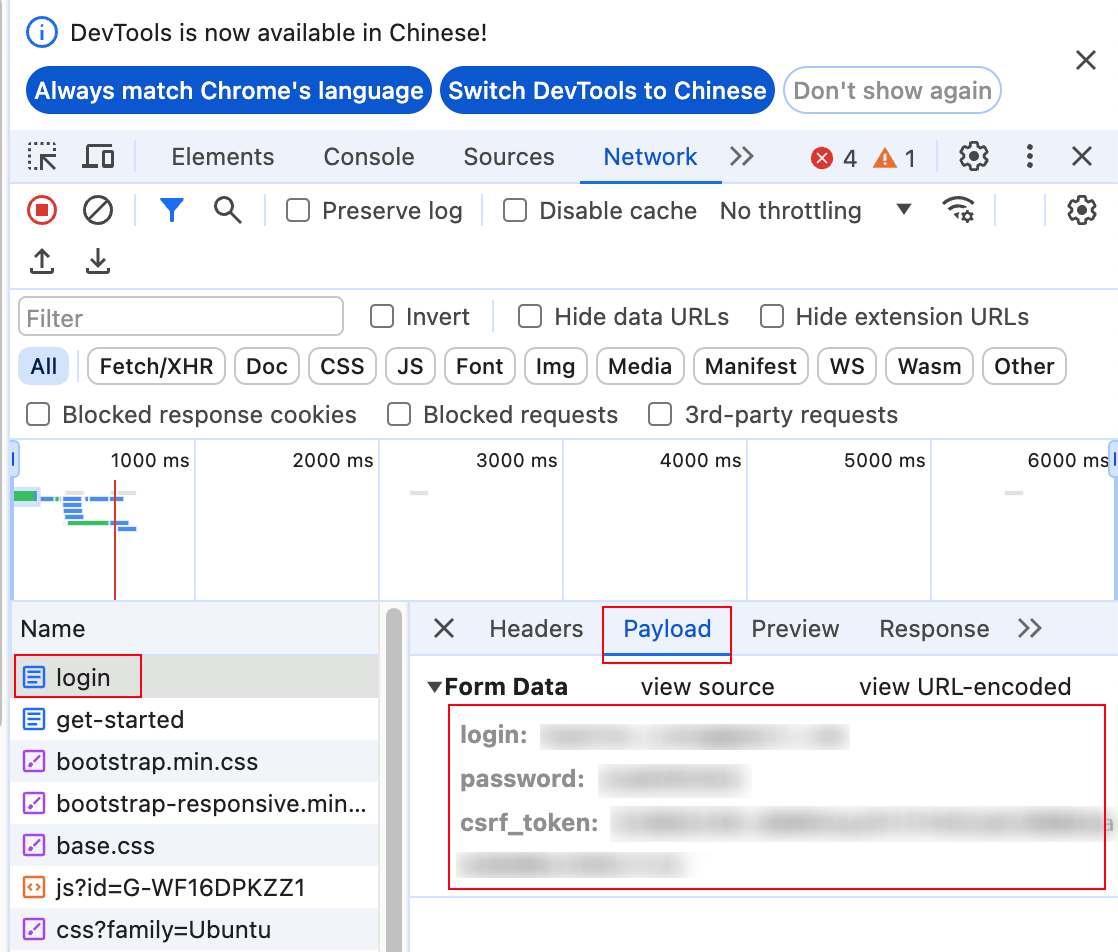
通过以上步骤获取 username,password 和 csrf_token 后,填入代码并使用esc + :wq保存脚本。
设置别名
现在,我们可以使用 update_ssh_cfg && ssh Ubuntu-NAT-DDNS 自动完成内网穿透。
为了方便,我们可以为这段代码设置别名。首先,打开 .bashrc 或 .zshrc 文件(取决于你使用的 shell):
vim ~/.bashrc # 或者 vim ~/.zshrc
在文件末尾添加以下别名配置:
alias update_ssh_cfg='~/scripts/update_ssh_cfg.sh'
alias SSH_UBUNTU='update_ssh_cfg && ssh Ubuntu-NAT-DDNS'
保存并关闭文件后,运行以下命令使修改生效:
source ~/.bashrc # 或者 source ~/.zshrc
现在,可以使用 SSH_UBUNTU 自动更新 HostName 和 Port,并完成内网穿透。


 116
116

 被折叠的 条评论
为什么被折叠?
被折叠的 条评论
为什么被折叠?
 到【灌水乐园】发言


