


原文链接:Mac端编译属于自己的JDK、OpenJDK、OpenJDK11 | Elvin
前言
在学习《深入理解java虚拟机》一书时,想要深入理解java的底层代码、理解jvm的运行方式,jdk的编译是基础操作;因此本篇文章记录了编译jdk的过程。
⚠️:此片文章仅关于macOS操作系统
一、环境准备
1、本机系统版本
macOS Ventura 13.2
2、Boot JDK
Boot JDK是指编译JDK的必要前提,必须在本机有安装了JDK,依赖本地的JDK才可以编译JDK;且安装的版本为编译版本的N-1(有些情况下可以是n-2)版才可以编译,也就是说如果要编译JDK 11,那么本地需要JDK 10、或JDK 11
3、安装Homebrew
1、进入Homebrew的官网:https://brew.sh/
2、复制Install Homebrew标题下的代码:/bin/bash -c "$(curl -fsSL https://raw.githubusercontent.com/Homebrew/install/HEAD/install.sh)"
3、将该代码粘贴到终端运行即可安装Homebrew
4、安装ccache、freetype依赖、autoconf配置工具
//加速编译工具
brew install ccache
//字体引擎,编译中要依赖的freetype
brew install freetype
//软件源码包的自动配置工具
brew install autoconf
5、安装Xcode
可以不安装 xcode,编译JDK要的是 LLVM 的编译命令 clang,只要单独安装 LLVM就可以;但安装 xcode 是最简单的方法,也是最适合java开发的,所以还是安装Xcode好。
我下载的版本是:11.6
方法一
方法二
在mac的app store中搜索下载
⚠️:安装不同版本的xcode可能会出现不同的错误!!!太新的xcode版本可能编译低版本的jdk会出现各种错误;避免出现自己无法解决也没有解决方法先例,选择的xcode版本最好要比xcode8高,编译jdk的文档推荐版本就是8及以上
二、获取 OpenJDK 源码
1、使用Mercurial进行下载 (不推荐)
OpenJDK 源码是通过 Mercurial 管理的。不推荐是因为很多人都说下载很慢,并且会断网,但是我没试。
具体步骤如下:
  1、安装 Mercurial 版本控制工具
  		brew install mercurial
  2、下载源代码
  		hg clone https://hg.openjdk.java.net/jdk/jdk12
2、直接进入网址下载
我下载的是11,其它版本左侧可选(目前只有8、11、17是长期支持版)

下载后解压到自己选择的文件位置,最好是改个名字,且文件夹名称不要带中文
我自己的放在个人根目录下新建的JDK_Compilt文件夹中,且解压的文件改名为csm_openjdk11
三、编译前准备
1、查看官方的编译文档
文档位置就在下载的openjdk源码中(需要解压下载下来的jdk文件)
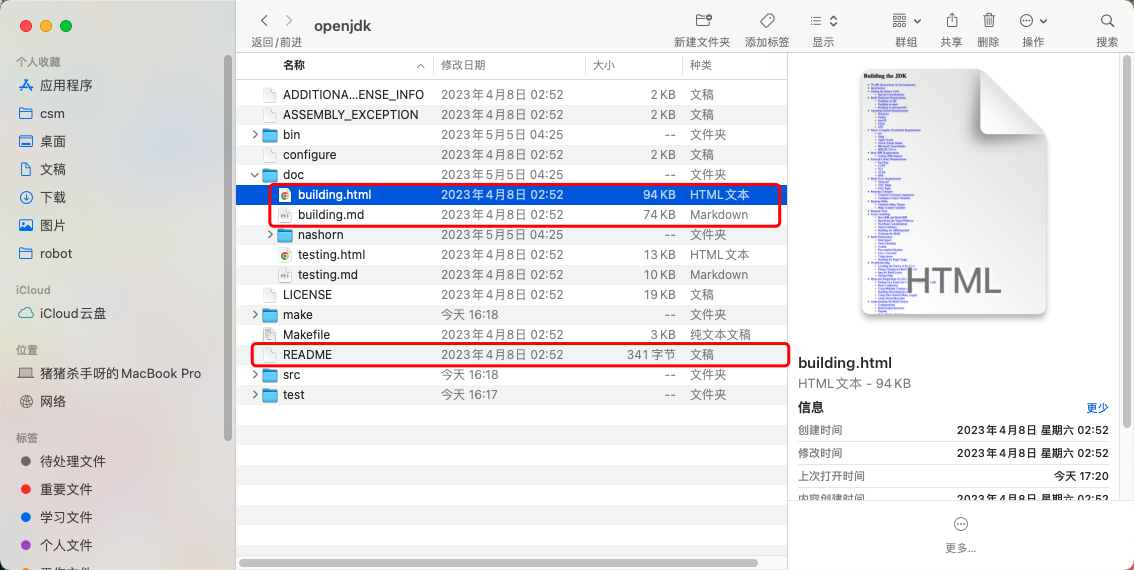
先查看readme文件中的说明
打开building文件:选择macOS的说明,查看适应的环境或说明
2、查看环境版本
2.1、clang
➜  ~ clang --version
Apple clang version 14.0.3 (clang-1403.0.22.14.1)
Target: x86_64-apple-darwin22.3.0
Thread model: posix
InstalledDir: /Library/Developer/CommandLineTools/usr/bin
2.2、clang++
➜  ~ clang++ --version
Apple clang version 14.0.3 (clang-1403.0.22.14.1)
Target: x86_64-apple-darwin22.3.0
Thread model: posix
InstalledDir: /Library/Developer/CommandLineTools/usr/bin
2.3、make版本
➜  ~ make --version
GNU Make 3.81
Copyright (C) 2006  Free Software Foundation, Inc.
This is free software; see the source for copying conditions.
There is NO warranty; not even for MERCHANTABILITY or FITNESS FOR A
PARTICULAR PURPOSE.

This program built for i386-apple-darwin11.3.0
2.4、freetype
➜  ~ freetype-config --version
25.0.19
2.5、ccache
➜  ~ ccache --version
ccache version 4.8.1
Features: file-storage http-storage redis+unix-storage redis-storage

Copyright (C) 2002-2007 Andrew Tridgell
Copyright (C) 2009-2023 Joel Rosdahl and other contributors

See <https://ccache.dev/credits.html> for a complete list of contributors.

This program is free software; you can redistribute it and/or modify it under
the terms of the GNU General Public License as published by the Free Software
Foundation; either version 3 of the License, or (at your option) any later
version.
2.6、JDK
➜  ~ java -version
java version "11.0.19" 2023-04-18 LTS
Java(TM) SE Runtime Environment 18.9 (build 11.0.19+9-LTS-224)
Java HotSpot(TM) 64-Bit Server VM 18.9 (build 11.0.19+9-LTS-224, mixed mode)
2.7、autoconf
➜  ~ autoconf --version
autoconf (GNU Autoconf) 2.71
Copyright (C) 2021 Free Software Foundation, Inc.
License GPLv3+/Autoconf: GNU GPL version 3 or later
<https://gnu.org/licenses/gpl.html>, <https://gnu.org/licenses/exceptions.html>
This is free software: you are free to change and redistribute it.
There is NO WARRANTY, to the extent permitted by law.

Written by David J. MacKenzie and Akim Demaille.
错误
➜  ~ clang -version
xcrun: error: invalid active developer path (/Library/Developer/CommandLineTools), missing xcrun at: /Library/Developer/CommandLineTools/usr/bin/xcrun

//如果出现以上错误,请执行下面的命令
➜  ~ xcode-select --install
3、编译前自动配置
3.1、自动配置
//cd 到解压出来的源码位置,执行sh configure命令即可
➜ ~ cd JDK_Compilt/csm_openjdk11
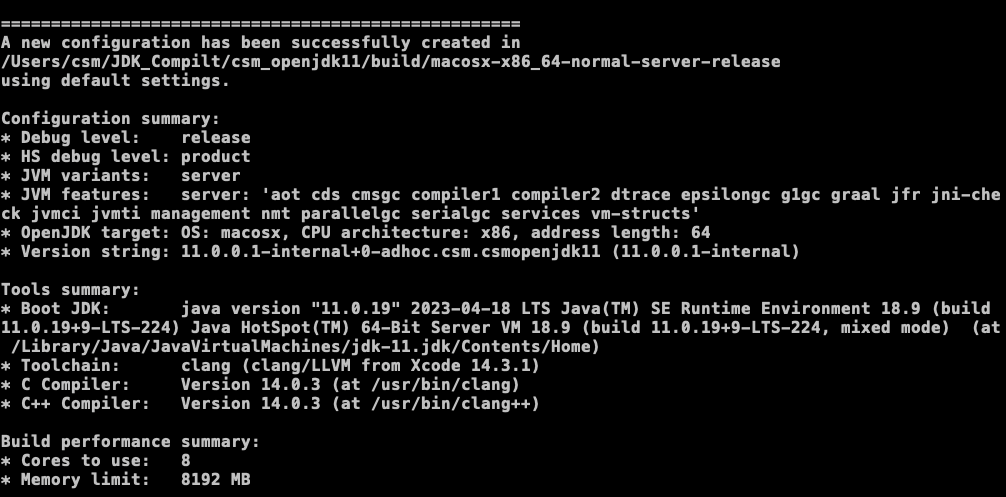
➜ csm_openjdk11 sh ./configure --with-target-bits=64 --with-freetype=bundled --enable-ccache --with-jvm-variants=server,client --with-boot-jdk-jvmargs="-Xlint:deprecation -Xlint:unchecked" --disable-warnings-as-errors --with-debug-level=slowdebug 2>&1 | tee configure_mac_x64.log
//参数说明
--with-target-bits=64 设置32为/64编译
--with-freetype=bundled 指定freetype目录
--enable-ccache 启用ccache,加快编译
--with-jvm-variants 设置要构建的JVM的变体,目前可以选择server、client、minimal、core、zero、zeroshark、custom
--with-boot-jdk-jvmargs 设置运行boot JDK所需要的JVM参数
--disable-warnings-as-errors 忽略警告,mac端使用xcode编译,官方要求加上这个参数
--with-debug-level 启用slowdebug级别调试
2>&1 | tee xxx.log 2>&1错误重定向到标准输出;并将执行打印的信息全部保存到xxx.log文件中
出现如图所示的代码则执行配置成功
3.2、错误
错误1
configure: error: No xcodebuild tool and no system framework headers found, use --with-sysroot or --with-sdk-name to provide a path to a valid SDK
出现以上错误,说明xcode下载完未安装,如果已经安装还是不行;则执行以下命令
sudo xcode-select --switch /Applications/Xcode.app/Contents/Developer/
错误2
–with-freetype错误
当你使用–with-freetype=/usr/local/Cellar/freetype/x.x.x/ 时会遇到如下报错:
configure: error: Valid values for --with-freetype are ‘system’ and ‘bundled’
改成:
--with-freetype=bundled
四、正式编译
Make
//在源码目录下执行make all命令进行全量编译
➜  csm_openjdk11 make all
出现如图所示的代码则执行编译成功

错误
如果报错需要重新编译,则编译前先执行make clean命令清除之前的编译遗留;再执行make all命令
五、简单验证编译的JDK
1、JDK编译后所在目录
/Users/csm/JDK_Compilt/csm_openjdk11/build/macosx-x86_64-normal-serverANDclient-slowdebug/jdk
或镜像
/Users/csm/JDK_Compilt/csm_openjdk11/build/macosx-x86_64-normal-serverANDclient-slowdebug/images/jdk
2、验证
//1、执行cd命令到编译后的jdk目录下的/bin文件夹
➜  ~ cd /Users/csm/JDK_Compilt/csm_openjdk11/build/macosx-x86_64-normal-serverANDclient-slowdebug/jdk/bin
➜  bin
//或
➜  ~ cd /Users/csm/JDK_Compilt/csm_openjdk11/build/macosx-x86_64-normal-serverANDclient-slowdebug/images/jdk/bin
➜  bin

//2、执行./java -version验证
➜  bin ./java -version
openjdk version "11.0.0.1-internal" 2023-05-09
OpenJDK Runtime Environment (slowdebug build 11.0.0.1-internal+0-adhoc.csm.csmopenjdk11)
OpenJDK 64-Bit Server VM (slowdebug build 11.0.0.1-internal+0-adhoc.csm.csmopenjdk11, mixed mode)
➜  bin

//出现上面的结果;至此,编译完成
借鉴链接
更多知识持续更新中!!!
声明
借鉴部分均注明了原文出处,可在文章的借鉴链接处获取原文出处
文中若内容有涉及原版权,请邮件联系elvin-chen@qq.com,涉及的相关文章或内容将会及时更改或取消发布


 1069
1069


 被折叠的 条评论
为什么被折叠?
被折叠的 条评论
为什么被折叠?
 到【灌水乐园】发言


