


需求描述
点击下图中tree视图上的同步退货单按钮,弹出相应的form视图进行退货单同步,然后点击同步按钮调用后端python代码处理。

实现步骤
主要文件目录结构
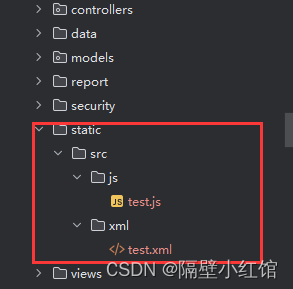
js文件的创建
/** @odoo-module **/
import { registry } from "@web/core/registry";
import { listView } from "@web/views/list/list_view";
import { ListController } from "@web/views/list/list_controller";
import { useService } from "@web/core/utils/hooks";
export class OwlDemoTest extends ListController {

    setup() {
        super.setup();
        this.orm = useService("orm");
    }
    async message_button() {
        await this.orm.call('template.mini.program', 'update_message', [])
        await this.model.load();
     }

}
registry.category("views").add("owl_demo_test", {
    ...listView,
    Controller: OwlDemoTest,
    buttonTemplate: "OwlDemoButtons",
});
define方法的第一个参数为名称,自行定义,require方法表示所用到的依赖,然后对按钮的点击事件绑定相应的方法,这个方法返回一个动作视图(就是所定义的瞬态模型的向导)
创建按钮模板
也就是定义在/static/xml 文件夹下面的xml文件,用来定义所加的按钮
<?xml version="1.0" encoding="utf-8"?>
<templates id="template" xml:space="preserve">

<t t-name="OwlDemoButtons" t-inherit="web.ListView.Buttons" t-inherit-mode="primary" owl="1">
    <xpath expr="(//div/*)[last()]" position="after">
        <button class="btn btn-primary" type="button" t-on-click="message_button">
            测试按钮
        </button>
    </xpath>
</t>

</templates>
xml、js文件引入到__manifest__.py
    "assets": {
        "web.assets_backend":[
            "erp_app/static/src/js/test.js",
            "erp_app/static/src/xml/test.xml",
        ]
    }
对应模型添加方法
    @api.model
    def update_message(self):
        print('执行的代码')
tree视图添加 js_class
<tree js_class="owl_demo_test">
	...
</tree>


 514
514


 被折叠的 条评论
为什么被折叠?
被折叠的 条评论
为什么被折叠?
 到【灌水乐园】发言


