


zabbix服务工作原理:
zabbix-agent (数据采集) ----agent端配置文件 (server 10.0.0.71) —zabbix-server (根据页面配置监控主机/实现报警通知)-----数据库服务
自定义监控项
第一个历程:在被监控端安装zabbix-agent
[root@localhost yum.repos.d]# yum install -y zabbix-agent
下载包含iostat命令的软件包
[root@lb01 ~]# yum provides  iostat
[root@lb01 ~]# yum install -y  sysstat-10.1.5-18.el7.x86_64
测试这个命令是否可以使用,以及取出的数值
[root@lb01 ~]# iostat |awk '$1~/^sda/{print $2}'
13.64
写入配置文件中
[root@lb01 yum.repos.d]# vim /etc/zabbix/zabbix_agentd.conf
296 UserParameter=disk.tps,iostat |awk '$1~/^sda/{print $2}'
写入agent配置文件中允许远程连接的主机
[root@lb01 yum.repos.d]# vim /etc/zabbix/zabbix_agentd.conf
 98 Server=10.0.0.71
提示:是配置的server 不是ServerActive 如果配置错了会出现测试时没有权限的问题zabbix_get [8873]: Check access restrictions in Zabbix agent configuration
zabbix_get [8873]: Check access restrictions in Zabbix agent configuration
重启zabbix-agent服务后测试看看是否可以使用
下载这个软件包测试是否可以连接
[root@lb01 bin]# yum install -y zabbix-get-4.0.13-1.el7.x86_64
测试自定的监控项是否可以获取到
[root@lb01 bin]# zabbix_get -s 10.0.0.71  -k disk.tps
6.90
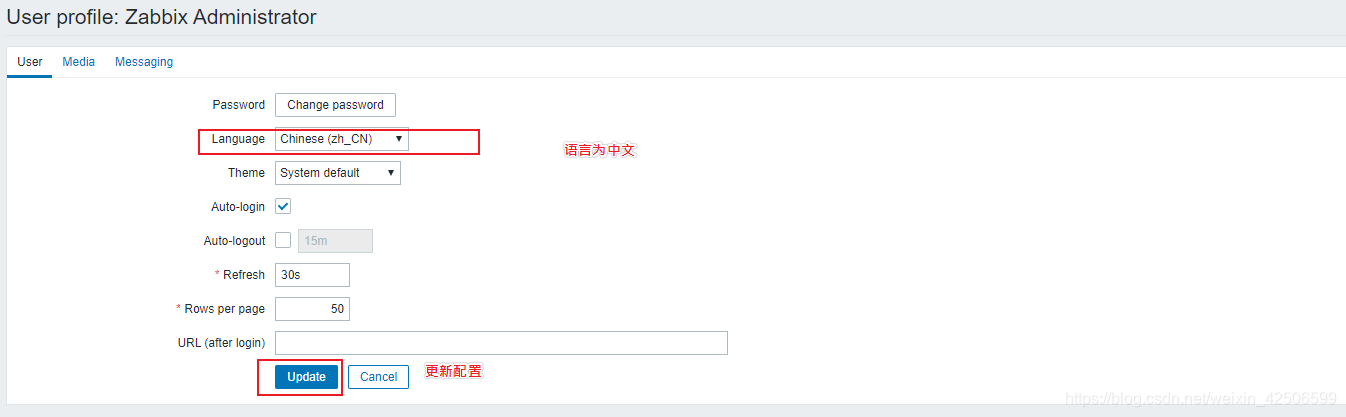
设置语言为中文

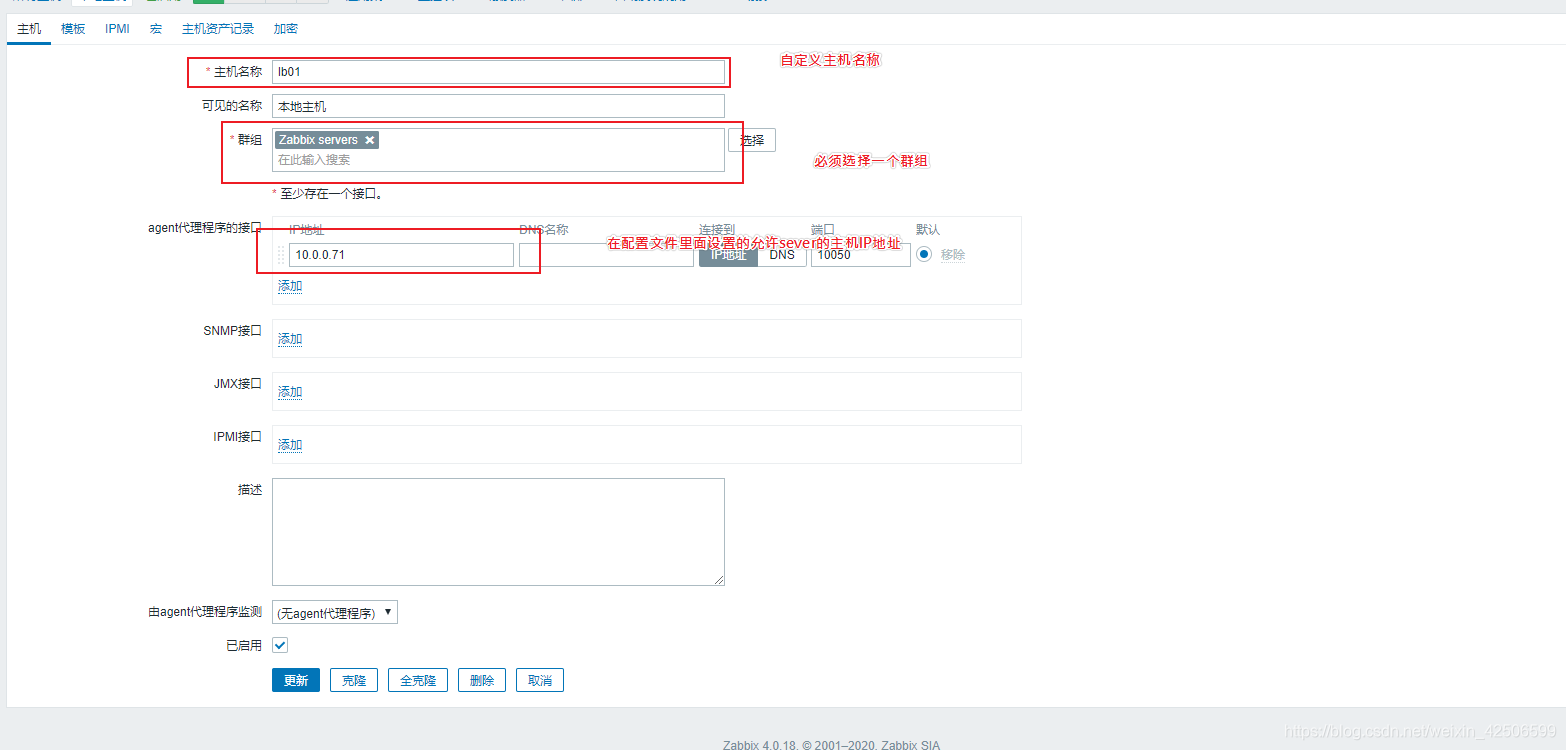
添加主机
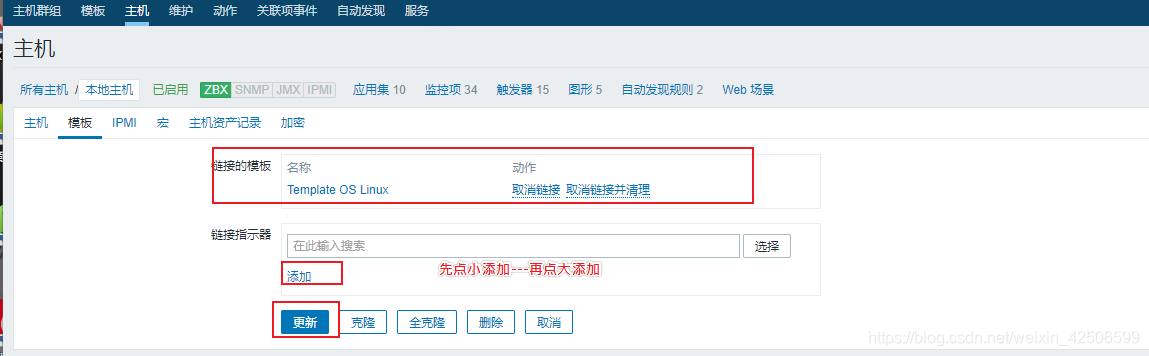
模板
[root@lb01 bin]# systemctl  restart  zabbix-server
[root@lb01 bin]# systemctl  restart  httpd
显示绿色才是对的

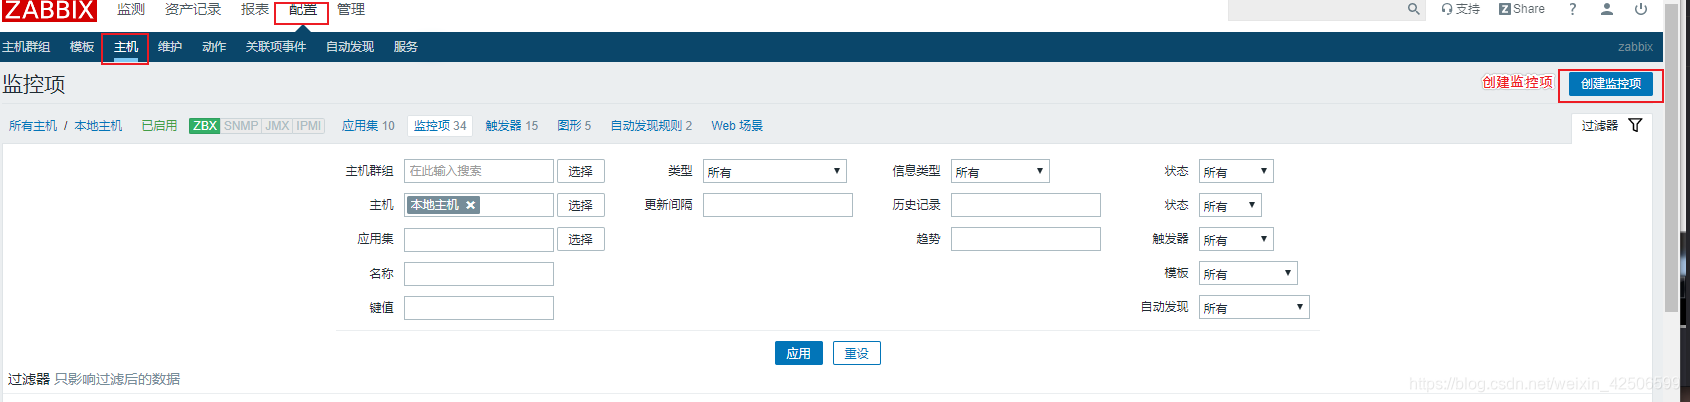
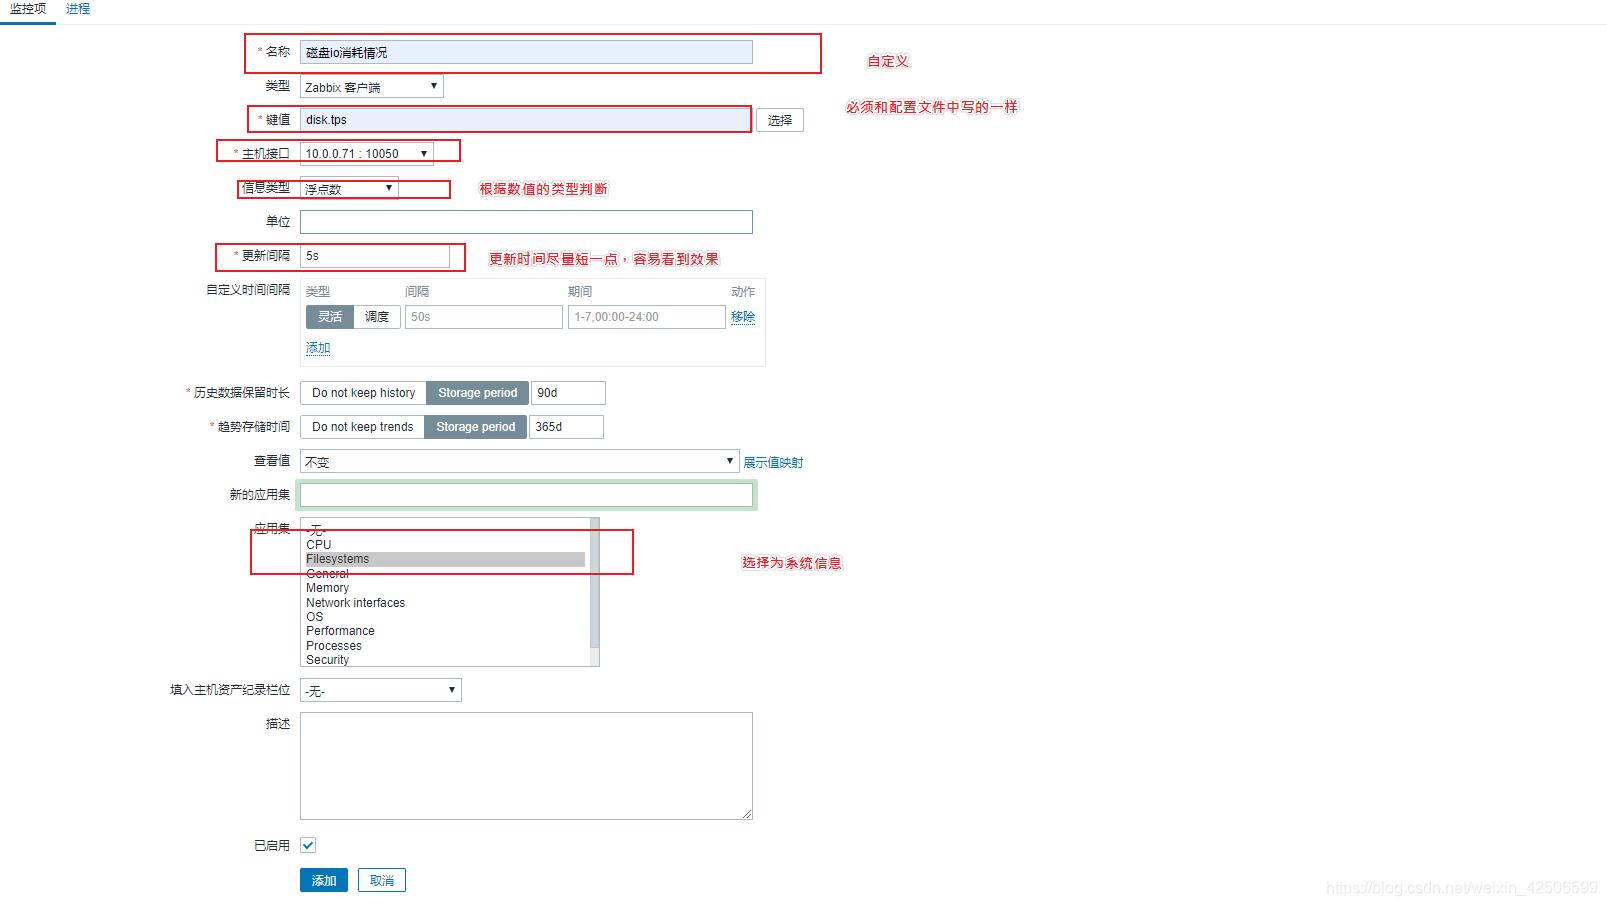
自定义监控项
命令界面操作:
看上面步骤:
第一步:修改配置文件(在客户端进行配置zabbix-agent)
第二步:命令进行测试(在服务端进行操作)
但是我这里设置的是自己监控自己,所以就都是在server端配置的
页面操作:
效果已经出现了
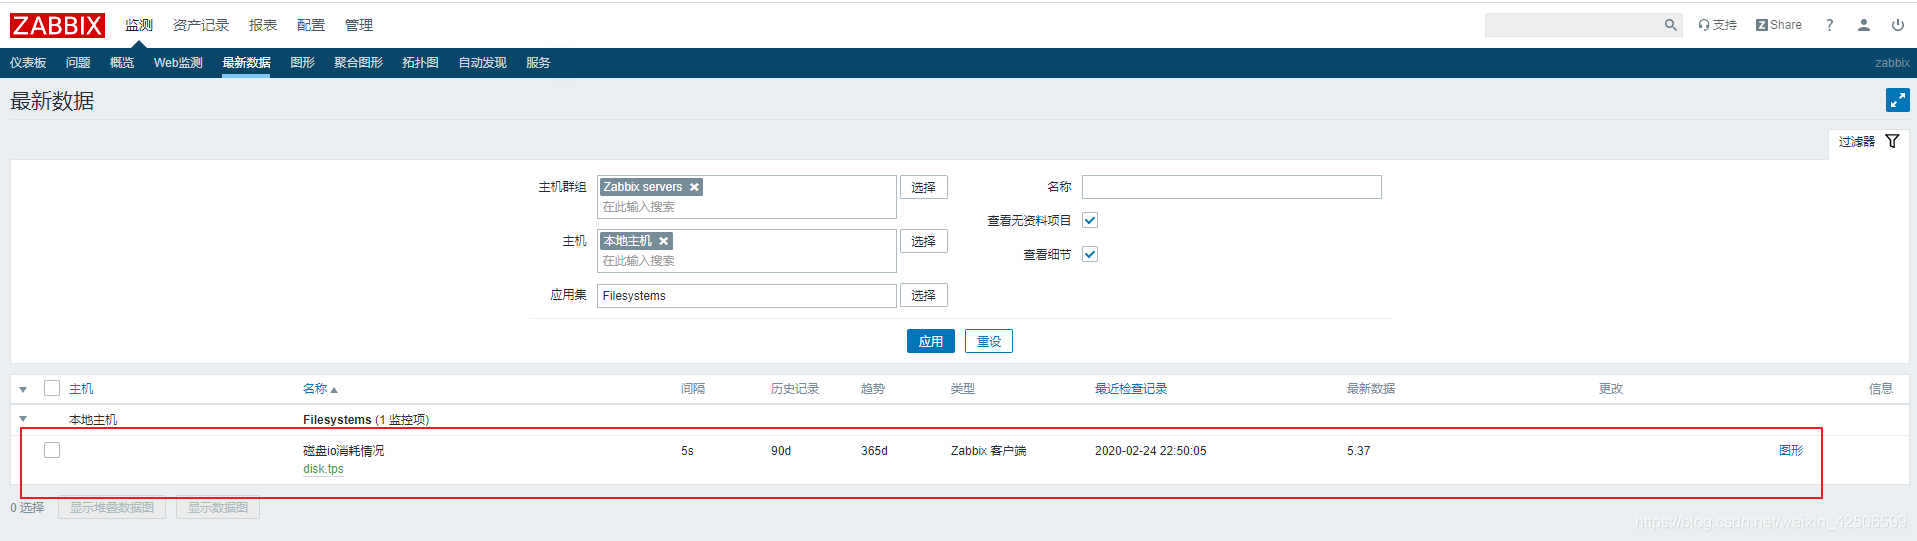
这里常见的错误是:配置错误了—进行调整 —仍然无法显示数据信息
调整管理----一般-----其他------刷新识别错误监控项时间
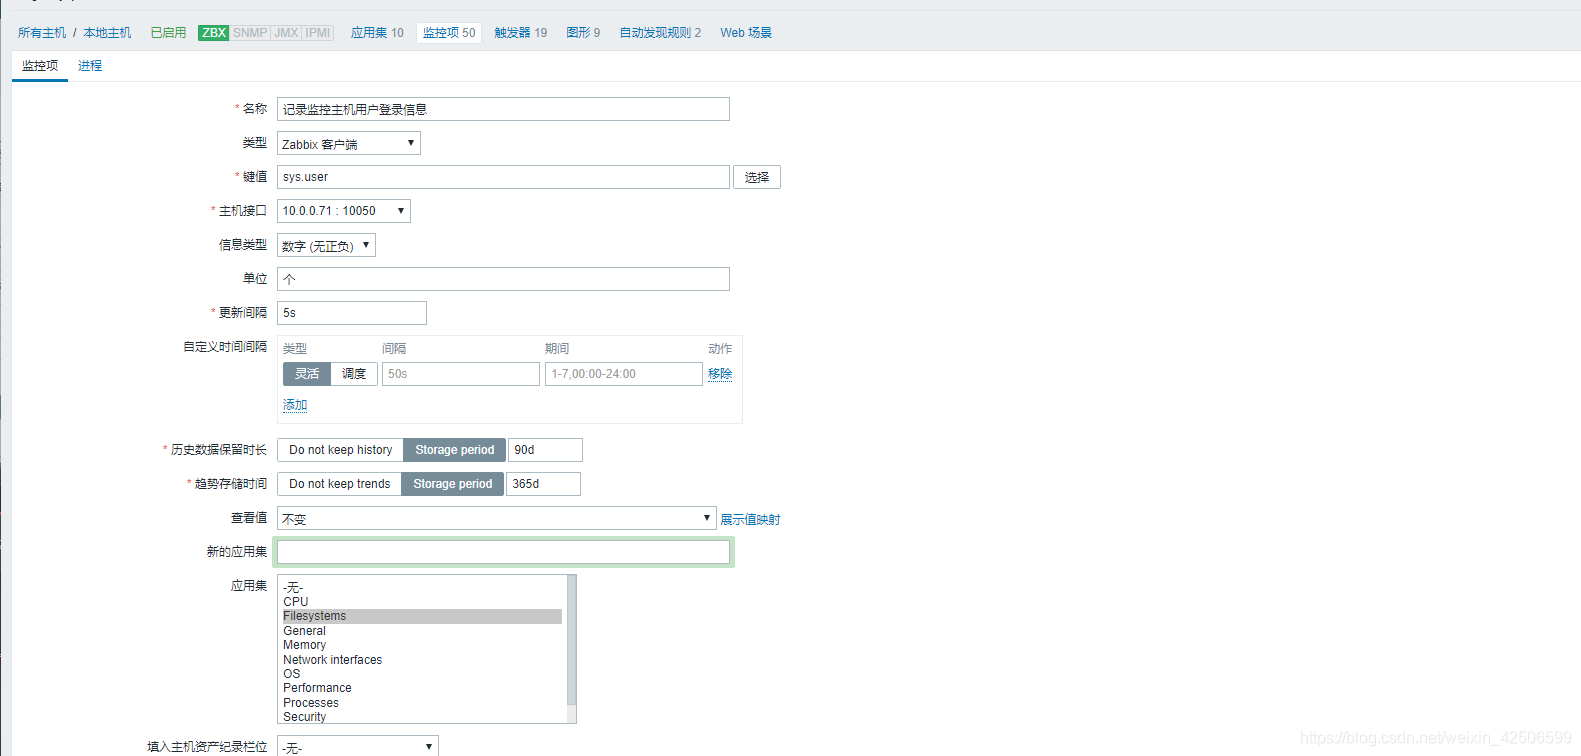
再次新加一个监控项
[root@localhost ~]# vim /etc/zabbix/zabbix_agentd.conf
UserParameter=sys.user,who|wc -l

[root@localhost ~]# systemctl  restart  zabbix-agent.service

[root@localhost ~]#  zabbix_get -s 10.0.0.71  -k sys.user
1
[root@localh

设置触发器
步骤一:

步骤二:
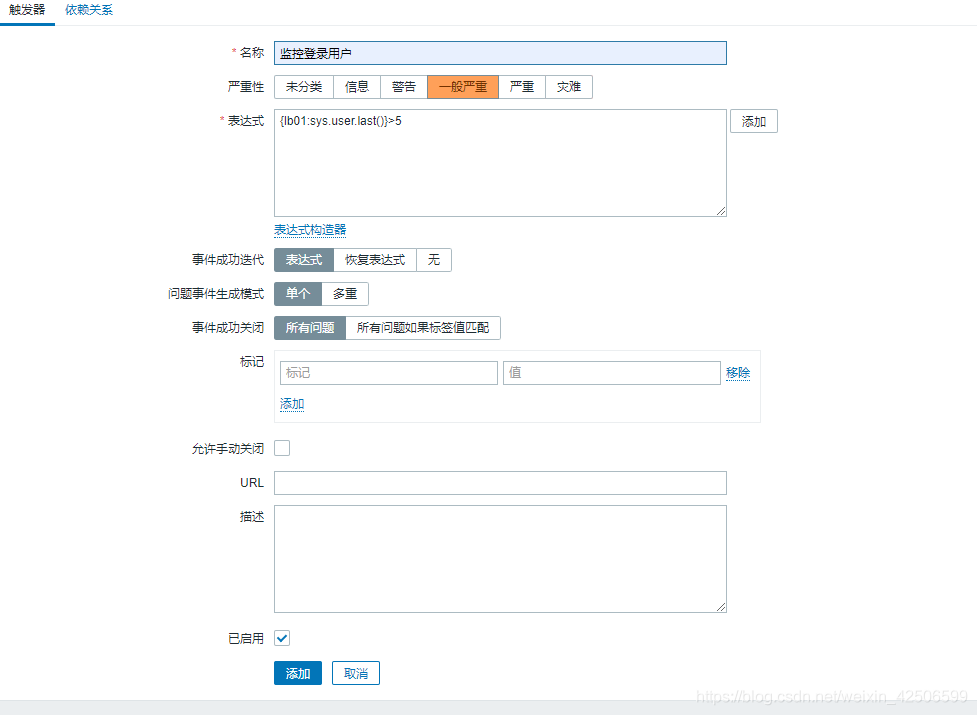
查看

设置报警声音
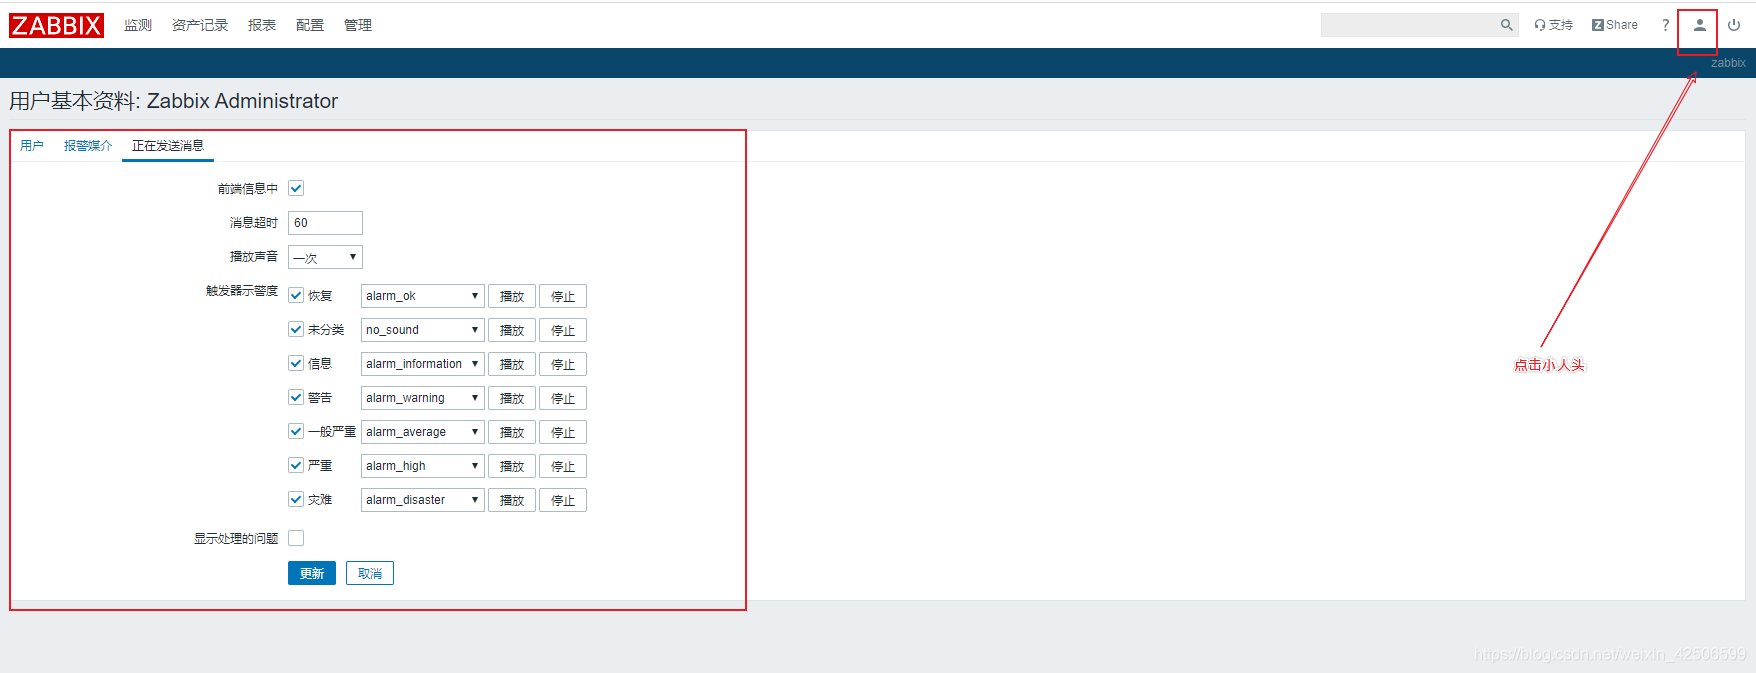
修改报警声音:
第一个里程:页面默认声音是从哪来的
声音是从网站获取到的
第二个里程:找到声音保存站点目录
/etc/httpd/conf.d/zabbix.conf
站点目录信息:/usr/share/zabbix

第三个里程:在站点目录中获取音频信息
音频文件数据: /usr/share/zabbix/audio/音频信息.mp3

第四个里程:将新的音频文件替换老的音频文件
设置触发器之后:
问题:但是没有声音,不知道为什么
可能是页面缓存的问题,过了一会自己就好了
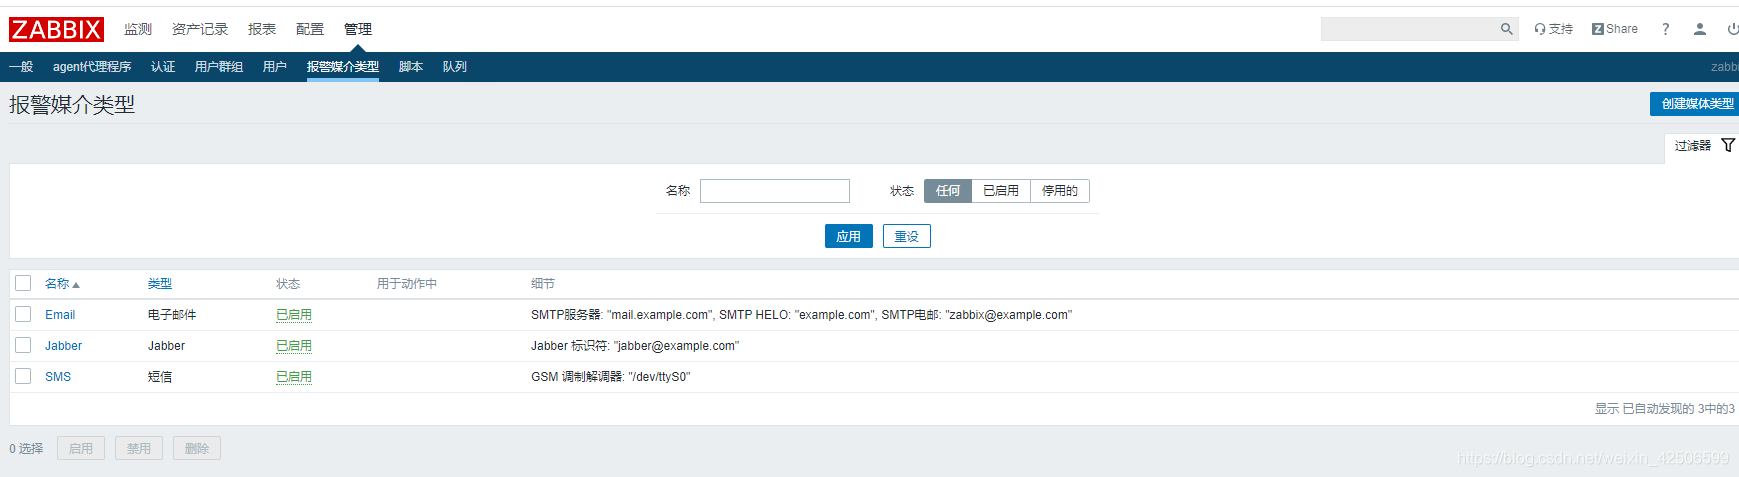
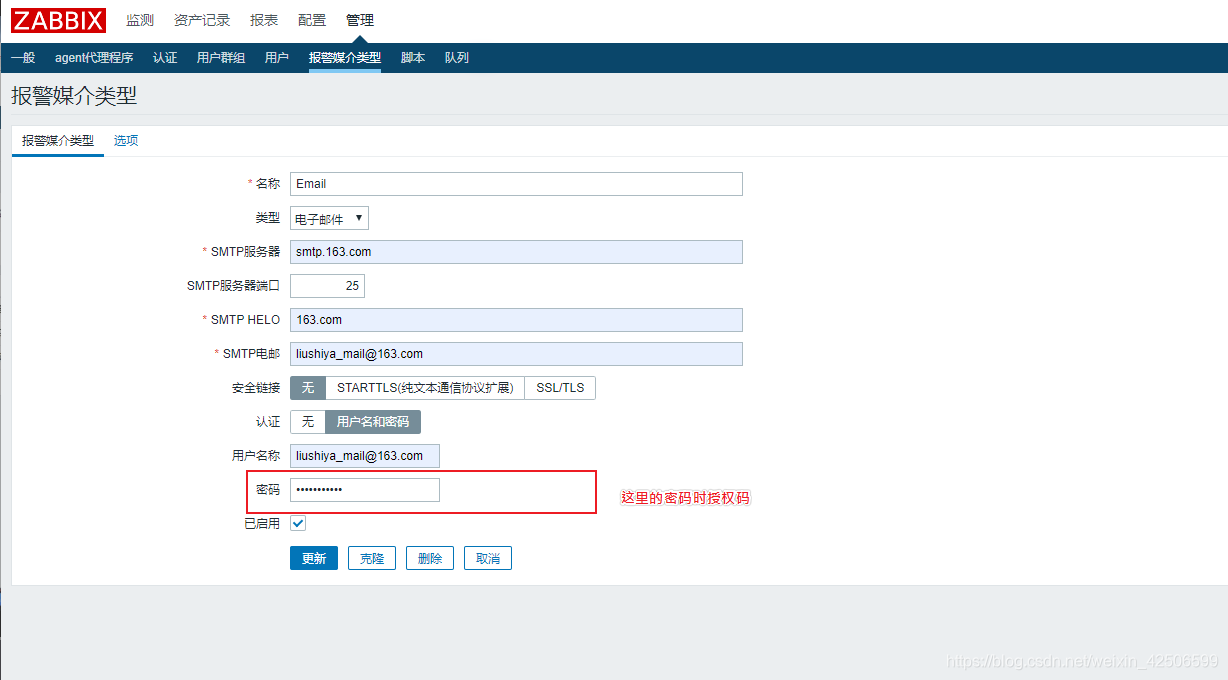
邮件报警:
第一个历程:配置邮件服务器
[root@localhost ~]# yum install -y  mailx
[root@localhost ~]# yum install -y  postfix
[root@localhost ~]# cat  /etc/mail.rc
set from=liushiya_mail@163.com
set smtp=smtp.163.com
set smtp-auth-user=liushiya_mail@163.com
set smtp-auth-password=liushiya111
set smtp-suth=login
[root@localhost ~]# systemctl restart postfix
发送测试
[root@localhost ~]# echo "test" |mail -s "test" liushiya_mail@163.com
页面配置(发送人配置)
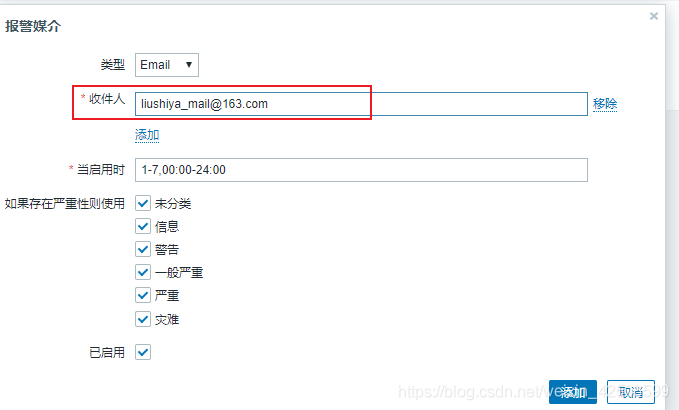
页面配置(接收人)

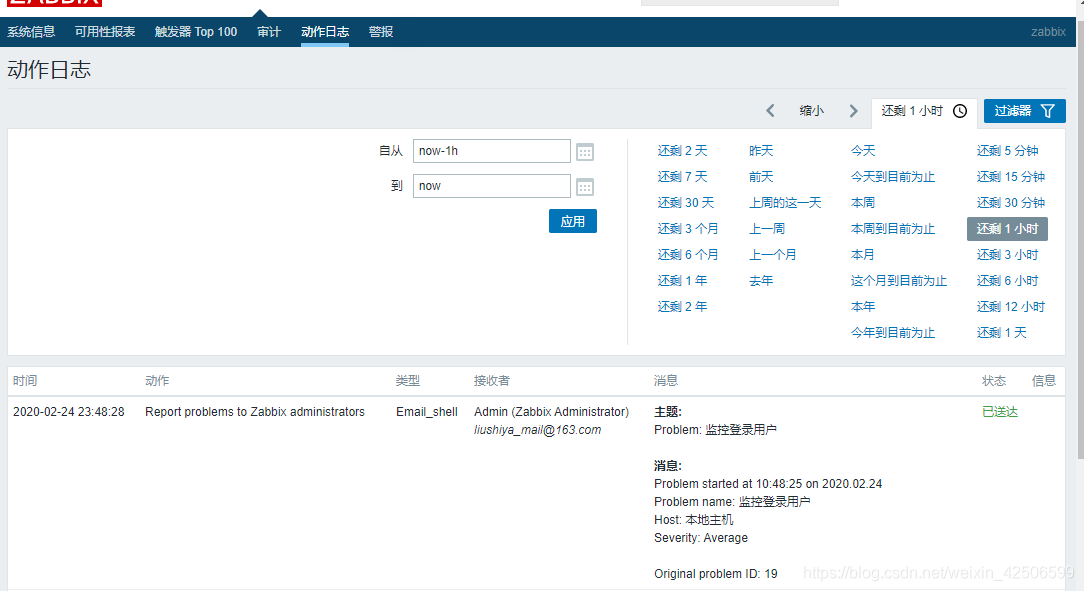
可以在这里查看是否发送的邮件信息
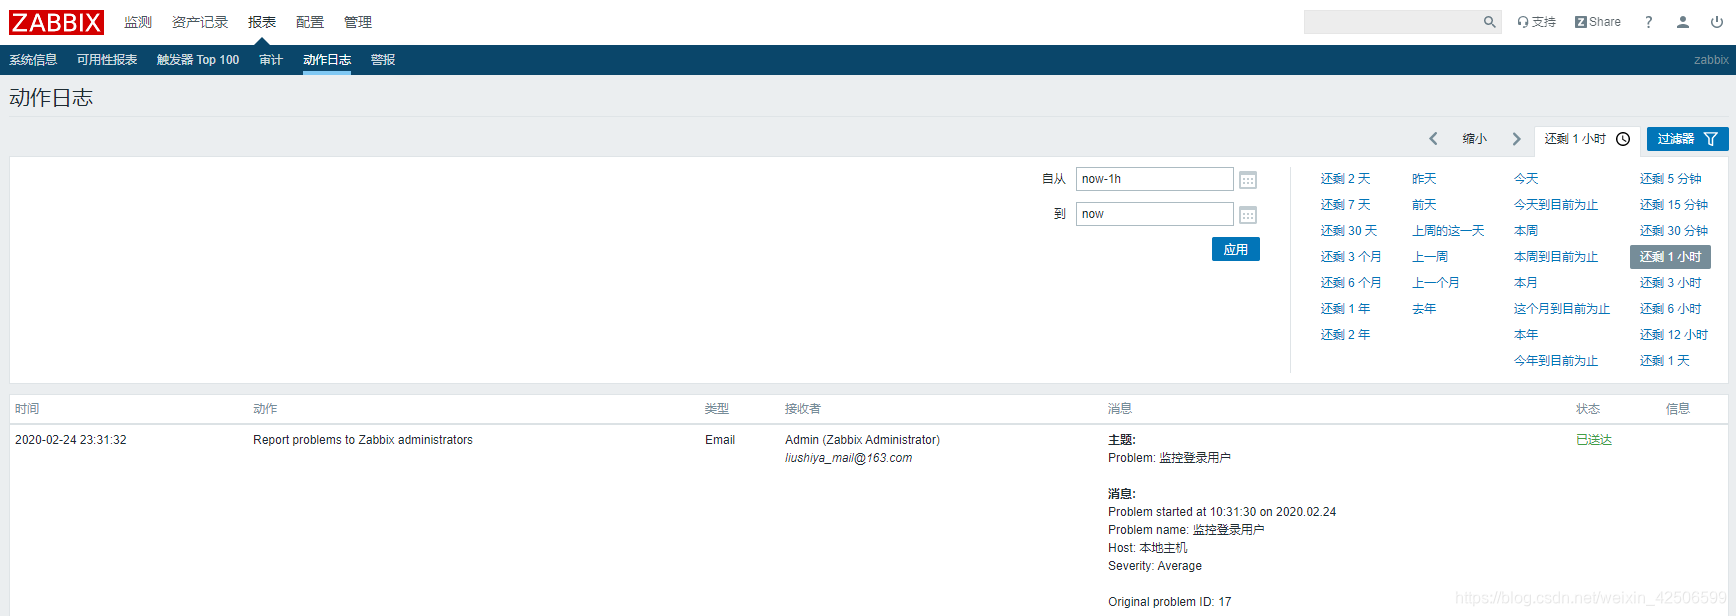
测试成功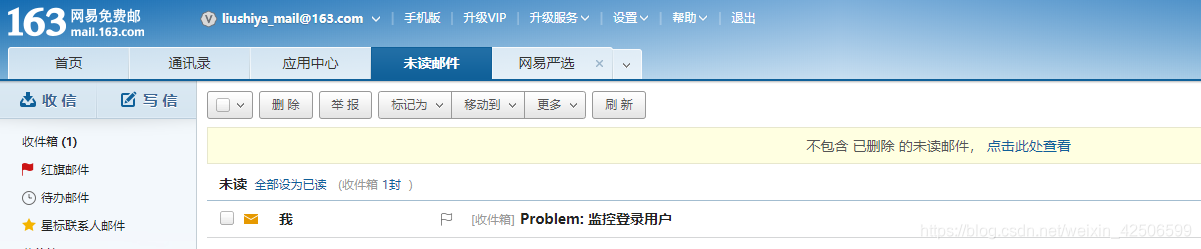
脚本方式邮件报警
创建媒介类型

搜索默认加载脚本的路径信息
[root@localhost ~]# grep  "script"  /etc/zabbix/zabbix_server.conf
#	Full path to location of custom alert scripts.
# AlertScriptsPath=${datadir}/zabbix/alertscripts
AlertScriptsPath=/usr/lib/zabbix/alertscripts  ---这个就是
#	Full path to location of external scripts.
# ExternalScripts=${datadir}/zabbix/externalscripts
ExternalScripts=/usr/lib/zabbix/externalscripts
默认什么也没有
[root@localhost alertscripts]# cat mail_163.py
#!/usr/bin/python
#coding:utf-8
import smtplib
from email.mime.text import MIMEText
import sys
mail_user = 'liushiya_mail@163.com'  #邮箱地址
mail_pass = 'liushiya111'      #授权码

def send_mail(to_list,subject,content):
    me = "zabbix 监控告警平台"+"<"+mail_user+">"
    msg = MIMEText(content, 'plain', 'utf-8')
    msg['Subject'] = subject
    msg['From'] = me
    msg['to'] = to_list
    try:
        s = smtplib.SMTP("smtp.163.com", 25)
        s.login(mail_user,mail_pass)
        s.sendmail(me,to_list,msg.as_string())
        s.close()
        return True
    except Exception,e:
        print str(e)
        return False
if __name__ == "__main__":
    send_mail(sys.argv[1], sys.argv[2], sys.argv[3])
发送一封邮件进行测试
[root@localhost alertscripts]# ./mail_163.py liushiya_mail@163.com test web01
页面操作
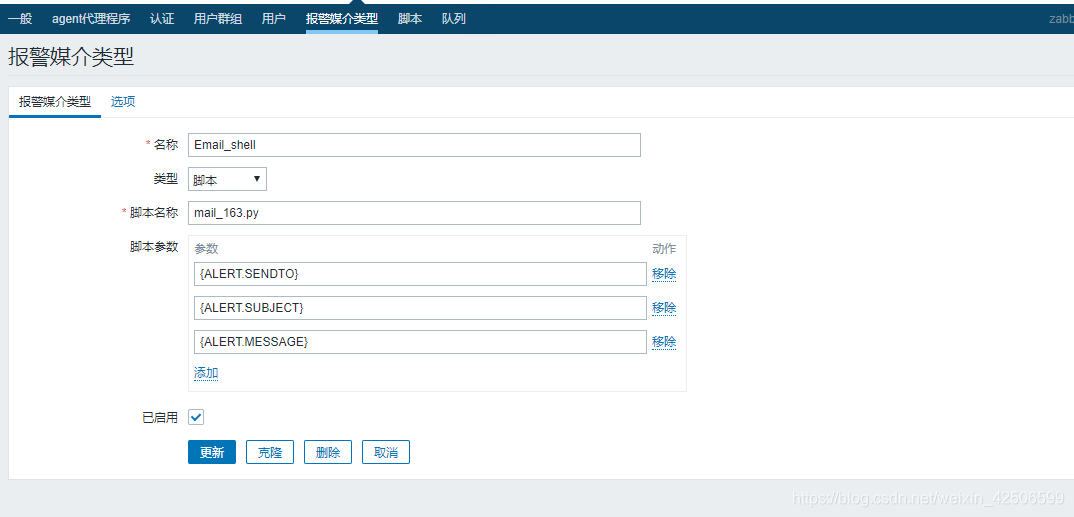
脚本名称必须是和那个目录下的脚本名称是一样的
并且确保脚本执行权限
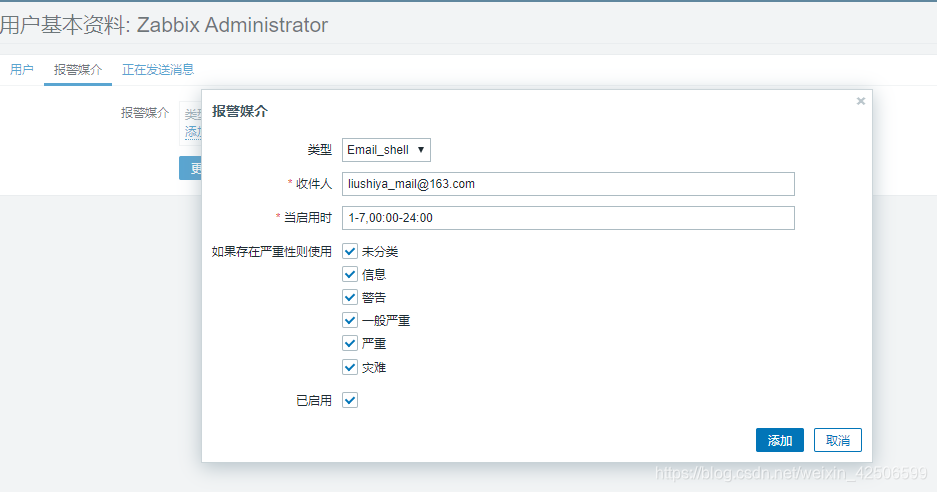
定义脚本邮件接收人信息
小人头处:
可以先将原来的邮件报警方式给移除,以免很多邮件都发过来了。
实验成功
但是有一个问题:
为什么报警时可以发送邮件,但是报警解除时,发送邮件失败。
鼓捣了一下动作就好了,将所有的用户都添加上

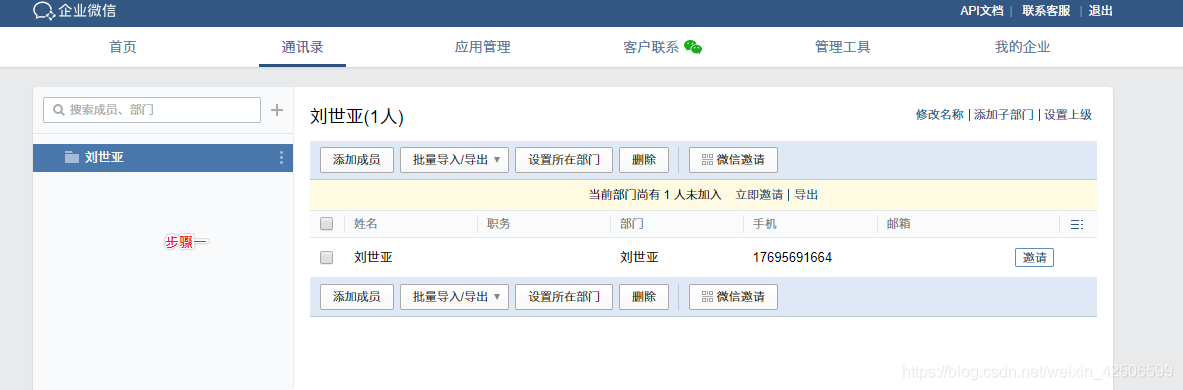
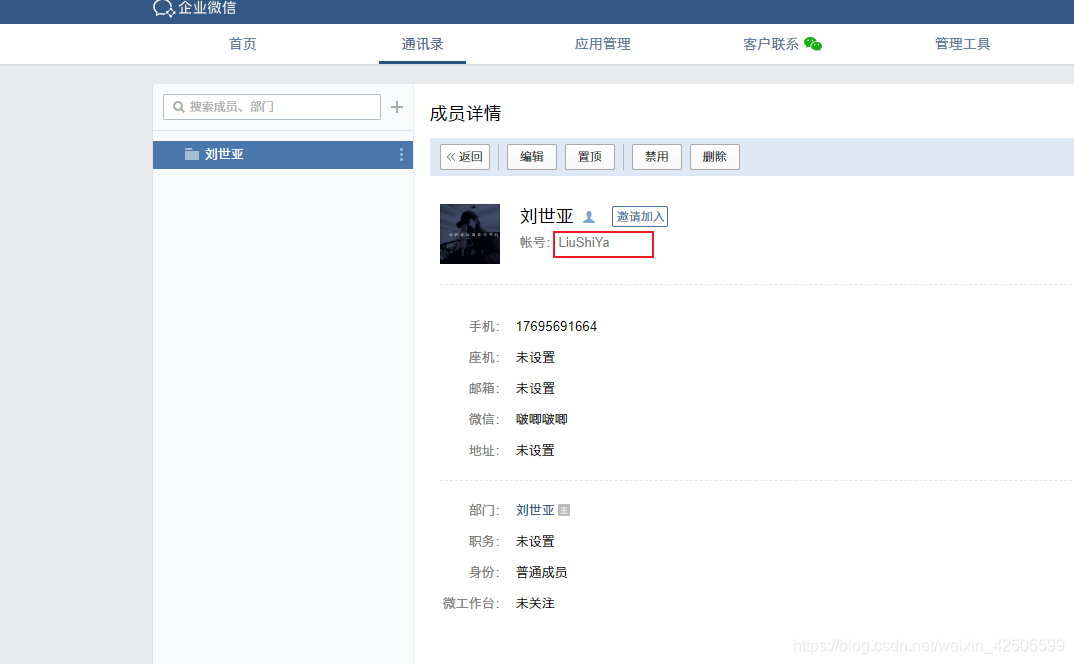
企业微信脚本报警
第一步登录企业微信并查看通讯录人员
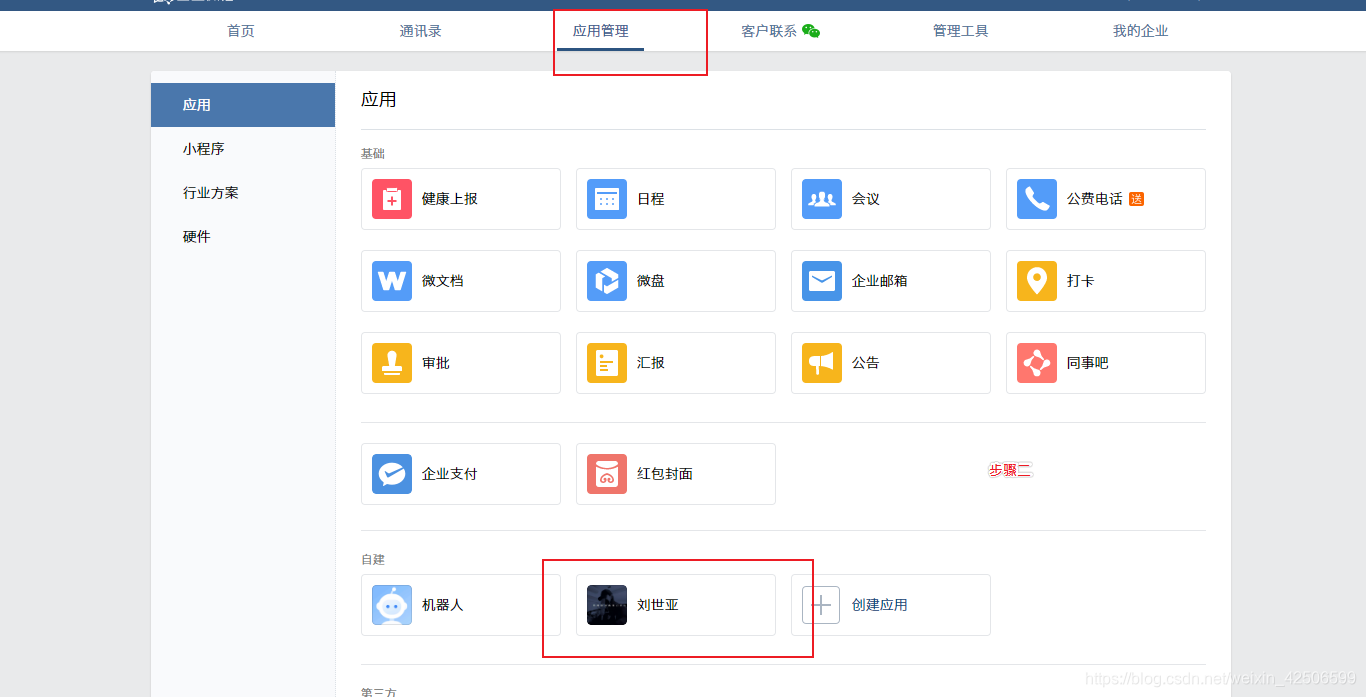
第二步:应用管理 — 添加应用
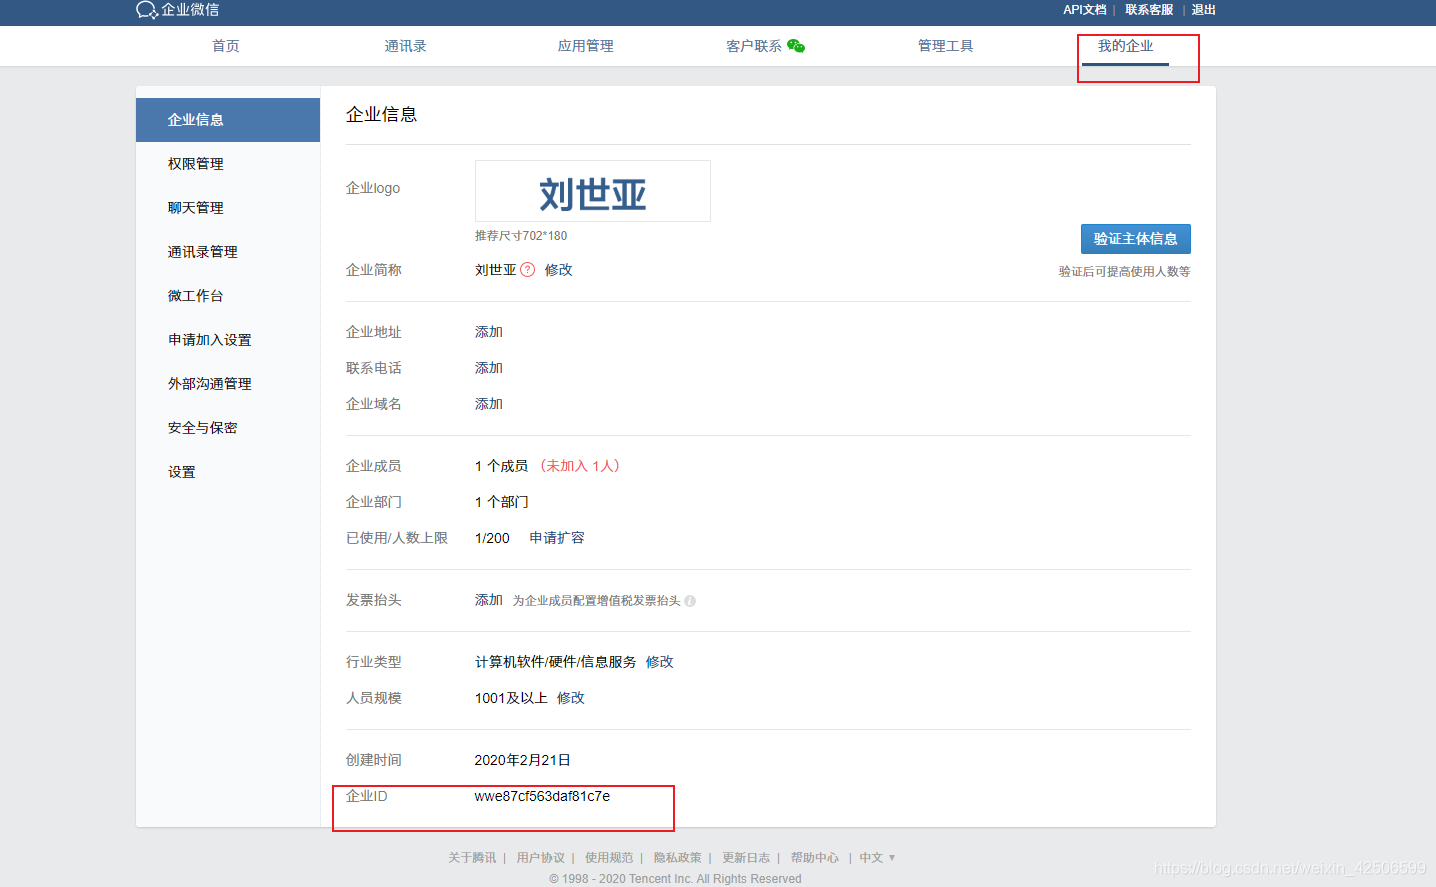
第三步:保留三个信息
AgentId 1000002
Secret YiH6o_OyBKCl7rHiVddWxSGlrjzbVxpNYsLDkYNK0vU
企业ID wwe87cf563daf81c7e
第三个信息 我的企业----企业id信息
上传脚本 并设置权限
修改内容为上面保留的三个内容
[root@localhost alertscripts]# cat weixin.py
#!/usr/bin/env python
#-*- coding: utf-8 -*-
#author: yanggd
#date: 2018-04-20
#comment: zabbix接入微信报警脚本

import requests
import sys
import os
import json
import logging

logging.basicConfig(level = logging.DEBUG, format = '%(asctime)s, %(filename)s, %(levelname)s, %(message)s',
                datefmt = '%a, %d %b %Y %H:%M:%S',
                filename = os.path.join('/tmp','weixin.log'),
                filemode = 'a')

corpid='wwe87cf563daf81c7e'
appsecret='YiH6o_OyBKCl7rHiVddWxSGlrjzbVxpNYsLDkYNK0vU'
agentid=1000002
#获取accesstoken
token_url='https://qyapi.weixin.qq.com/cgi-bin/gettoken?corpid=' + corpid + '&corpsecret=' + appsecret
req=requests.get(token_url)
accesstoken=req.json()['access_token']

#发送消息
msgsend_url='https://qyapi.weixin.qq.com/cgi-bin/message/send?access_token=' + accesstoken

touser=sys.argv[1]
subject=sys.argv[2]
#toparty='3|4|5|6'
message=sys.argv[2] + "\n\n" +sys.argv[3]

params={
        "touser": touser,
#       "toparty": toparty,
        "msgtype": "text",
        "agentid": agentid,
        "text": {
                "content": message
        },
        "safe":0
}

req=requests.post(msgsend_url, data=json.dumps(params))

logging.info('sendto:' + touser + ';;subject:' + subject + ';;message:' + message)
使用账号进行测试
但是出错了
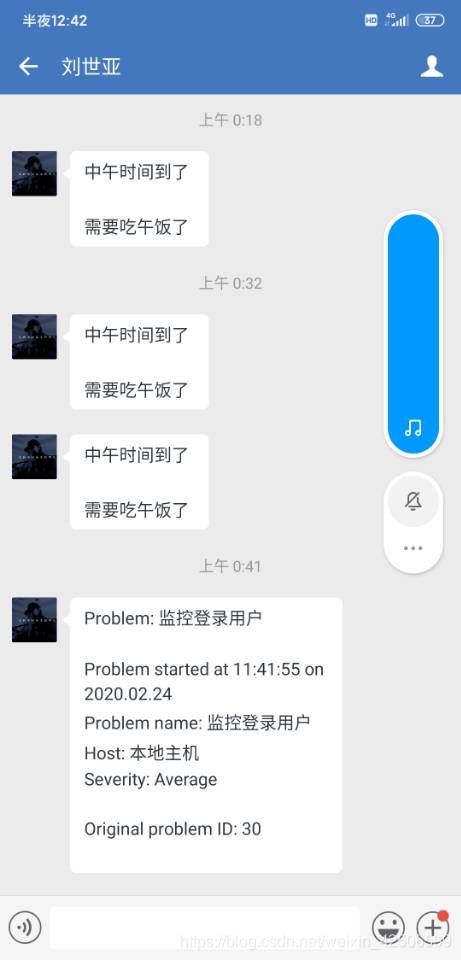
[root@localhost alertscripts]# ./weixin.py  LiuShiYa 中午时间到了  需要吃午饭了
Traceback (most recent call last):
  File "./weixin.py", line 7, in <module>
    import requests
ImportError: No module named requests
[root@localhost alertscripts]#
解决方法:
安装这个模块
[root@localhost alertscripts]# yum install -y  python-pip
pip  install -i  https://pypi.tuna.tsinghua.edu.cn/simple  requests
./weixin.py LiuShiYa 中午时间到了 需要吃午饭了

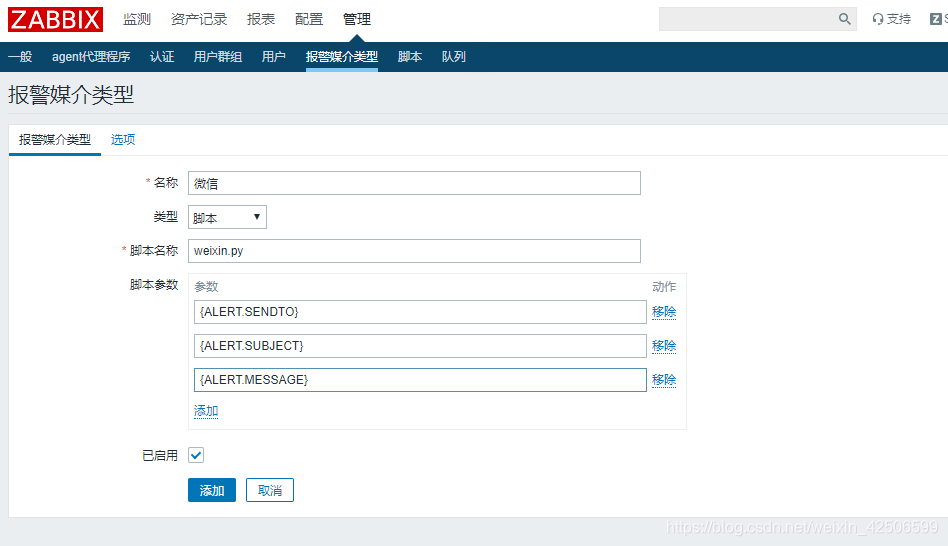
配置监控平台利用脚本进行报警
新建媒介类型
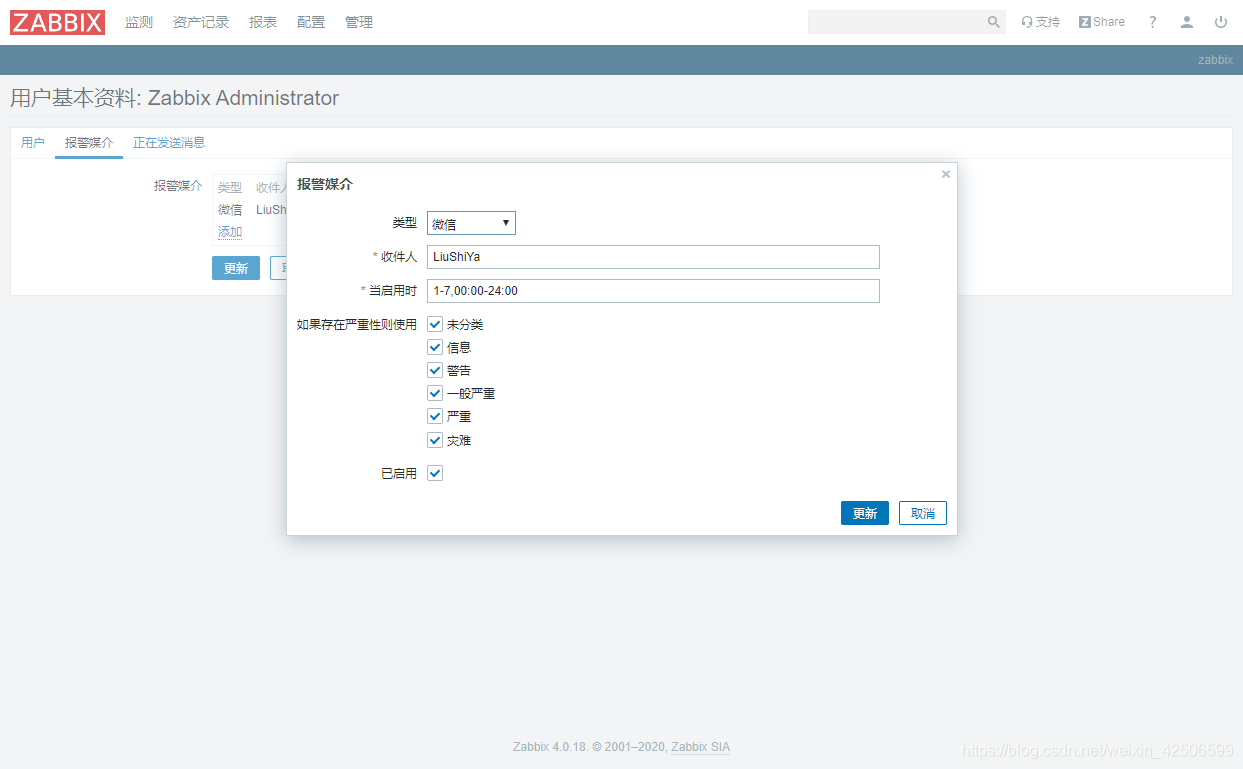
定义接受人员的信息
但是会发现出现错误
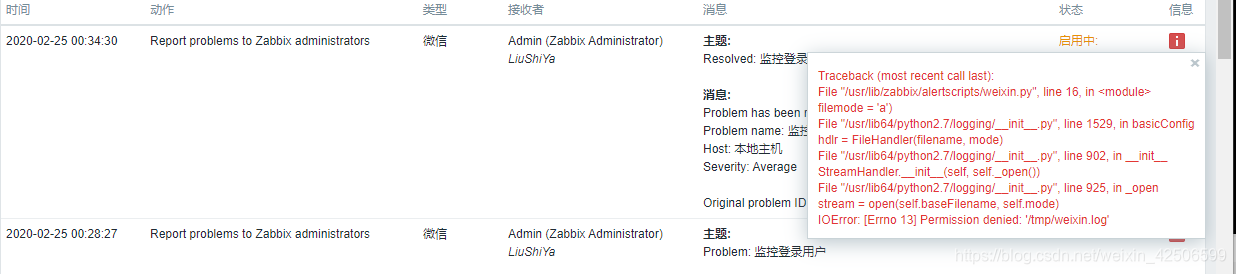
解决:
[root@localhost ~]# ll  /tmp/weixin.log
-rw-r--r-- 1 root root 2775 Feb 24 11:32 /tmp/weixin.log
[root@localhost ~]#
修改属主属组为zabbix
chown zabbix.zabbix /tmp/weixin.log
[root@localhost ~]# ll  /tmp/weixin.log
-rw-r--r-- 1 zabbix zabbix 2775 Feb 24 11:32 /tmp/weixin.log
再次实验是就可以送达了

使用短信或者电话进行报警
付费(阿里大于)
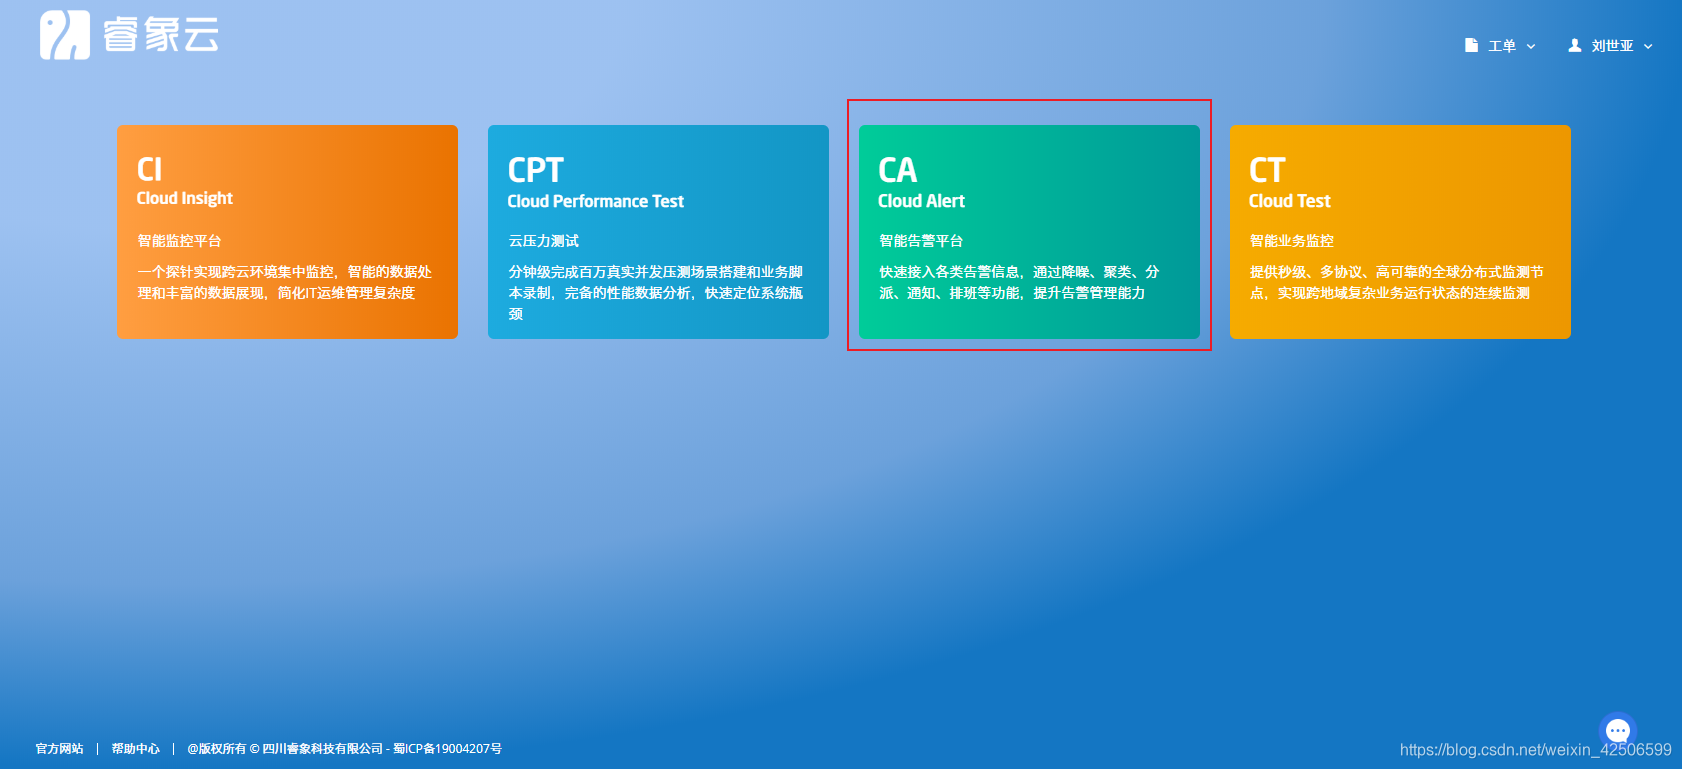
免费(睿象)
登录睿象云
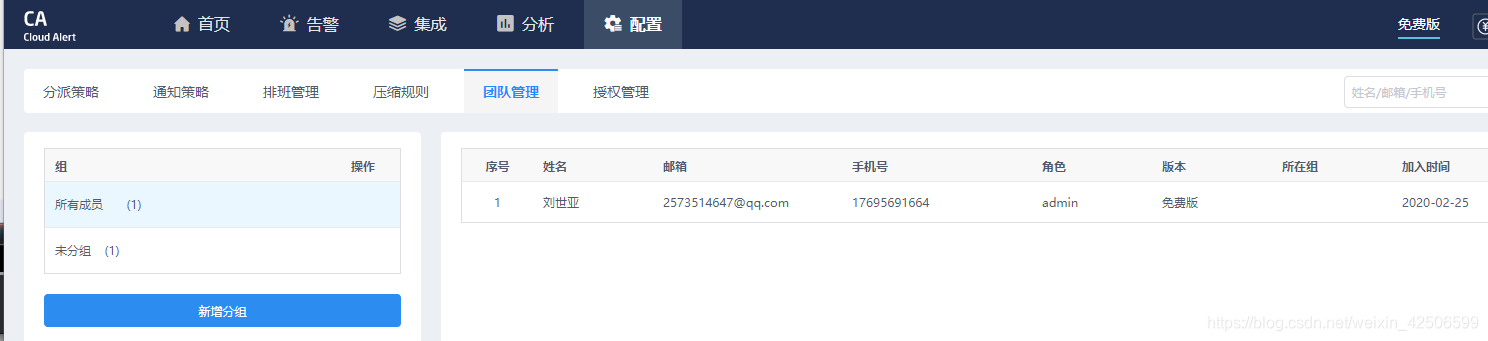
配置—团队管理
集成
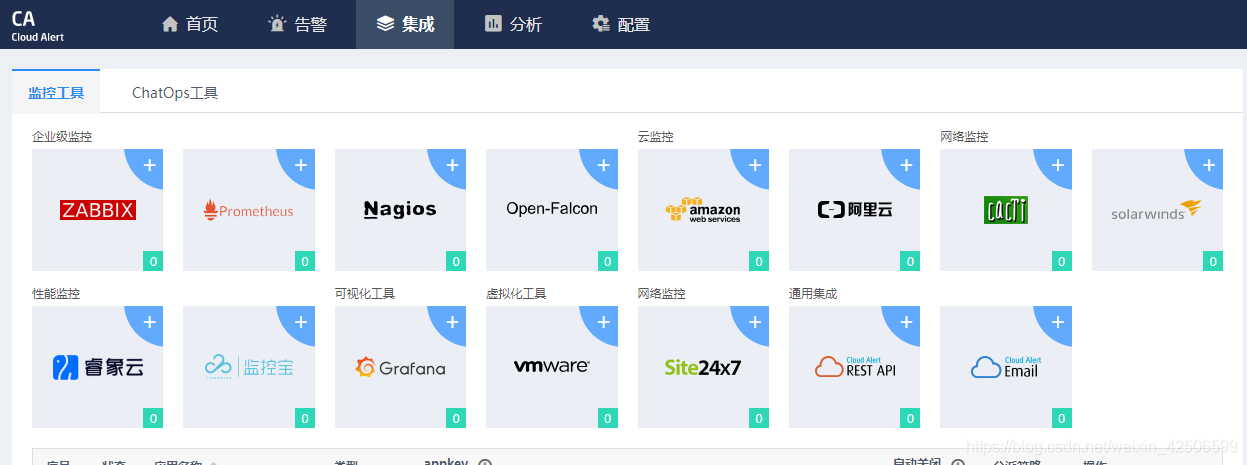
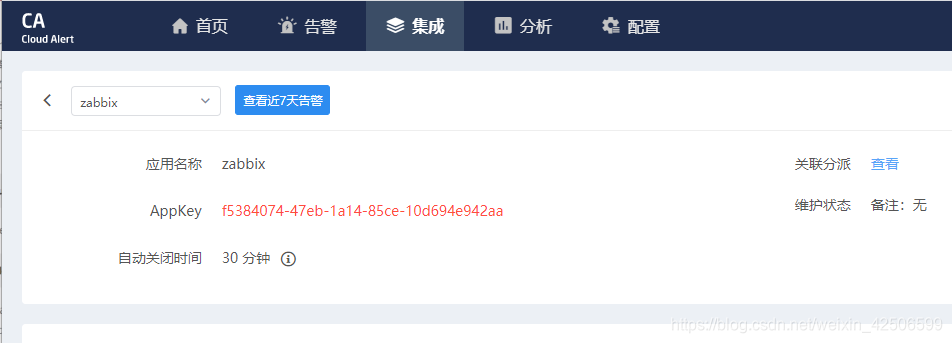
注意目录:是在咱们服务器的脚本目录中
[root@localhost alertscripts]# wget https://download.aiops.com/ca_agent/zabbix/ca_zabbix_release-2.1.0.tar.gz
[root@localhost bin]# bash install.sh f5384074-47eb-1a14-85ce-10d694e942aa
注意这段代码中的输入的地址信息是 http://10.0.0.71/zabbix/
[root@localhost bin]# bash install.sh f5384074-47eb-1a14-85ce-10d694e942aa
./log.sh: line 6: /usr/lib/zabbix/alertscripts/cloudalert/bin/cloudalert.conf: No such file or directory
start to create config file...
Zabbix管理地址: http://10.0.0.71/zabbix/
Zabbix管理员账号: Admin
Zabbix管理员密码:
start to auth by zabbix admin user and password...
% Total % Received % Xferd Average Speed Time Time Time Current
Dload Upload Total Spent Left Speed
100 195 100 70 100 125 460 821 --:--:-- --:--:-- --:--:-- 827
auth success!
% Total % Received % Xferd Average Speed Time Time Time Current
Dload Upload Total Spent Left Speed
100 110 100 42 100 68 452 733 --:--:-- --:--:-- --:--:-- 739
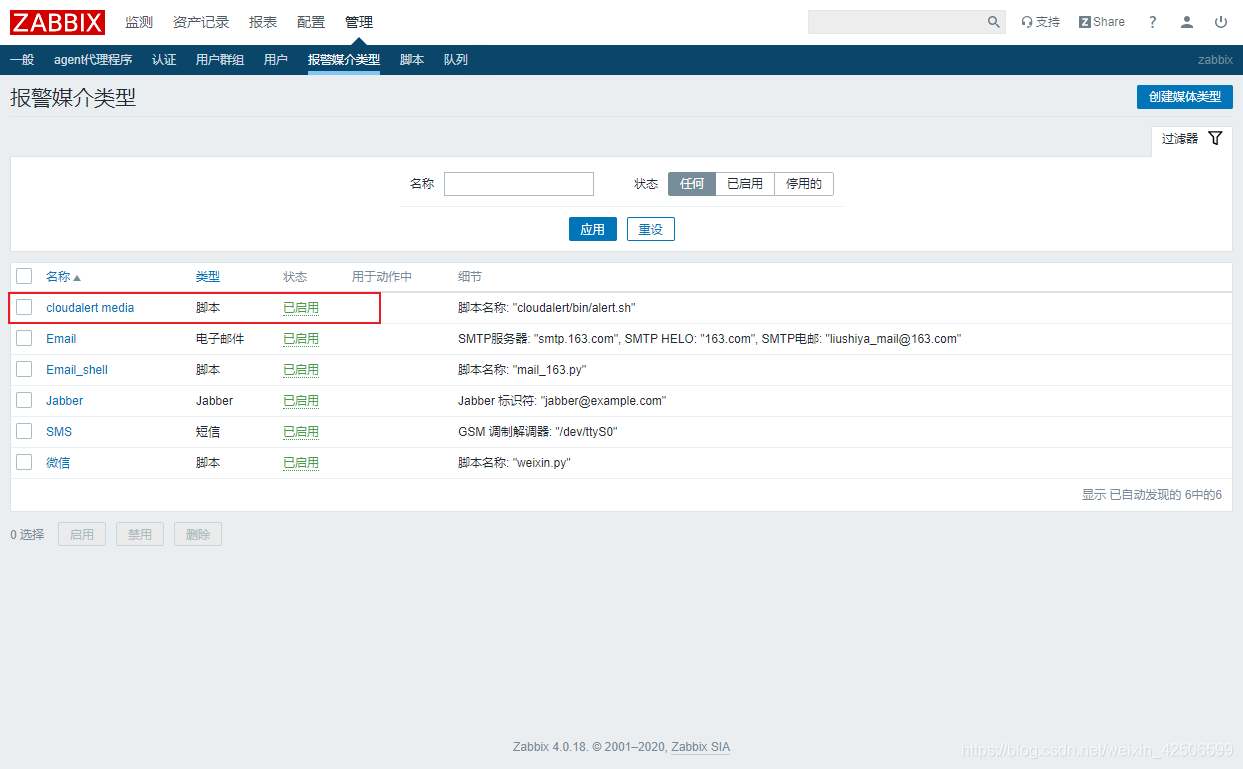
start to create mediatype...
% Total % Received % Xferd Average Speed Time Time Time Current
Dload Upload Total Spent Left Speed
100 398 100 56 100 342 902 5513 --:--:-- --:--:-- --:--:-- 5516
create media type success!
start to create user group...
% Total % Received % Xferd Average Speed Time Time Time Current
Dload Upload Total Spent Left Speed
100 217 100 54 100 163 858 2591 --:--:-- --:--:-- --:--:-- 2629
create user group success!
start to create user in zabbix...
% Total % Received % Xferd Average Speed Time Time Time Current
Dload Upload Total Spent Left Speed
100 635 100 51 100 584 853 9769 --:--:-- --:--:-- --:--:-- 9898
create user success!
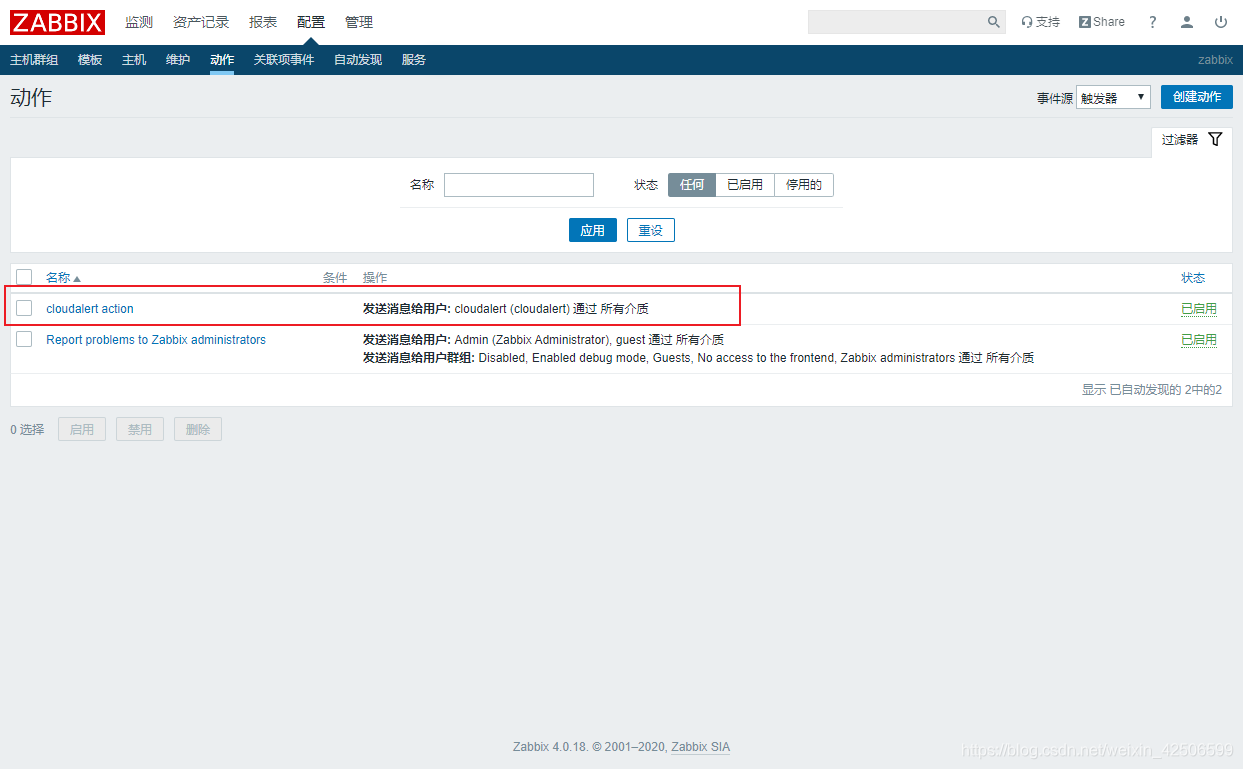
start to create action...
% Total % Received % Xferd Average Speed Time Time Time Current
Dload Upload Total Spent Left Speed
100 2016 100 51 100 1965 365 14092 --:--:-- --:--:-- --:--:-- 14136
create action success!
安装成功.
[root@localhost bin]#
自动增加了一个方式
动作这也会显示新的选项
这一个方式不需要在小人头那设置接受信息,需要在睿象云设置
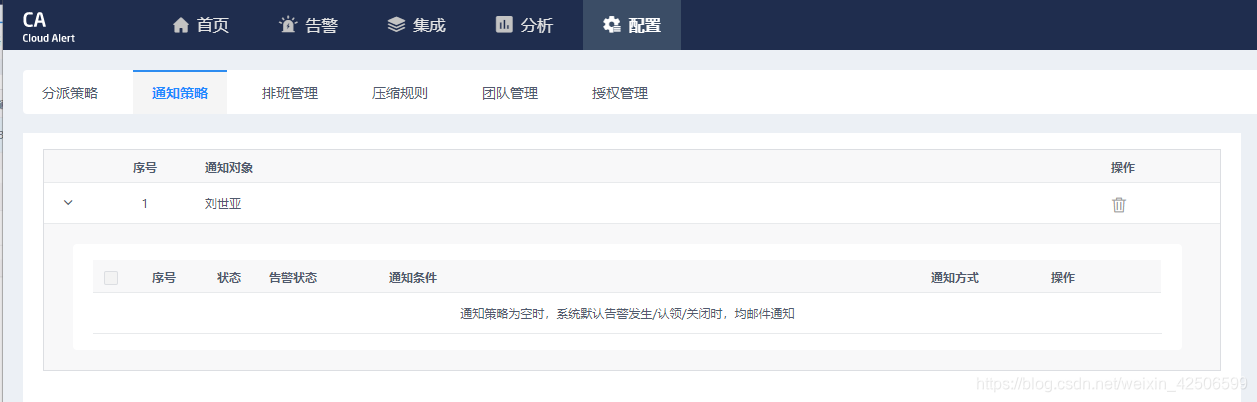
删除原来的,新建通知
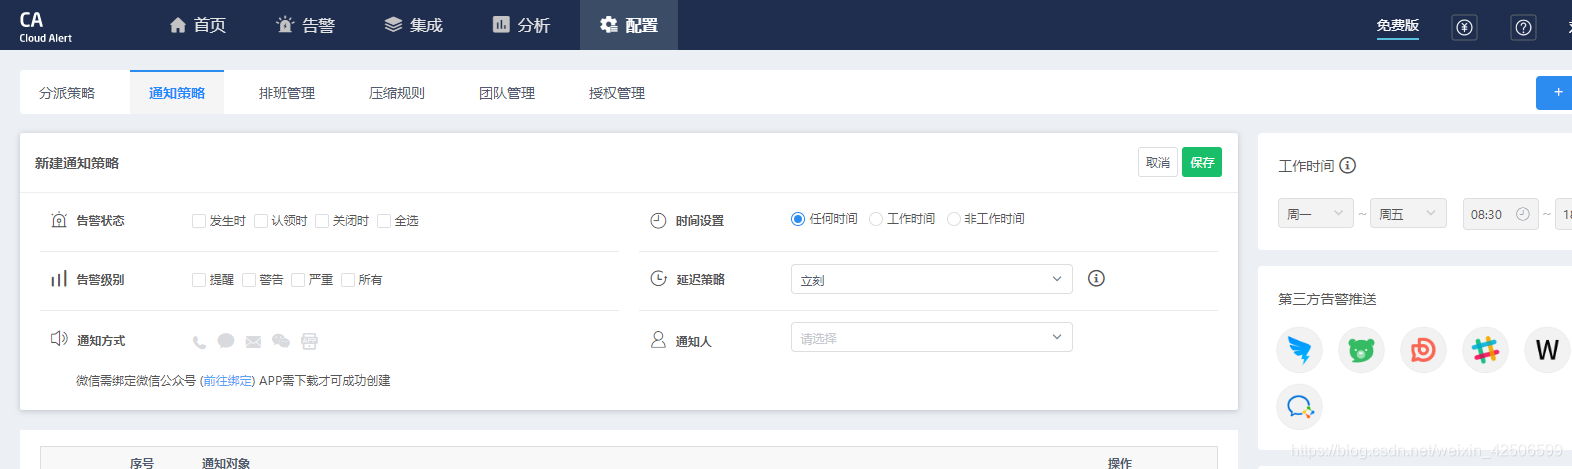
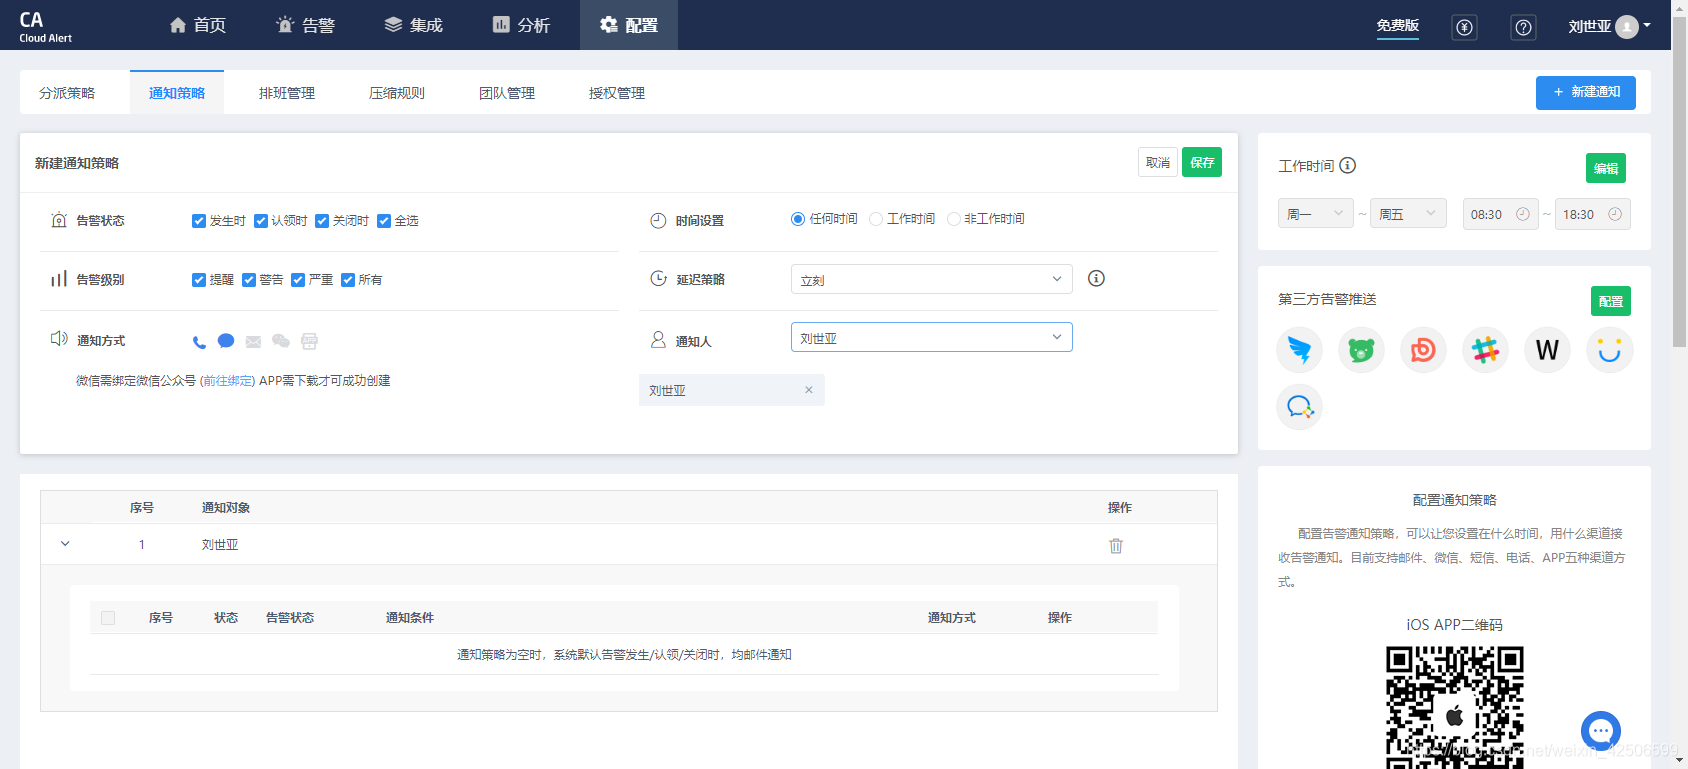
新建分派
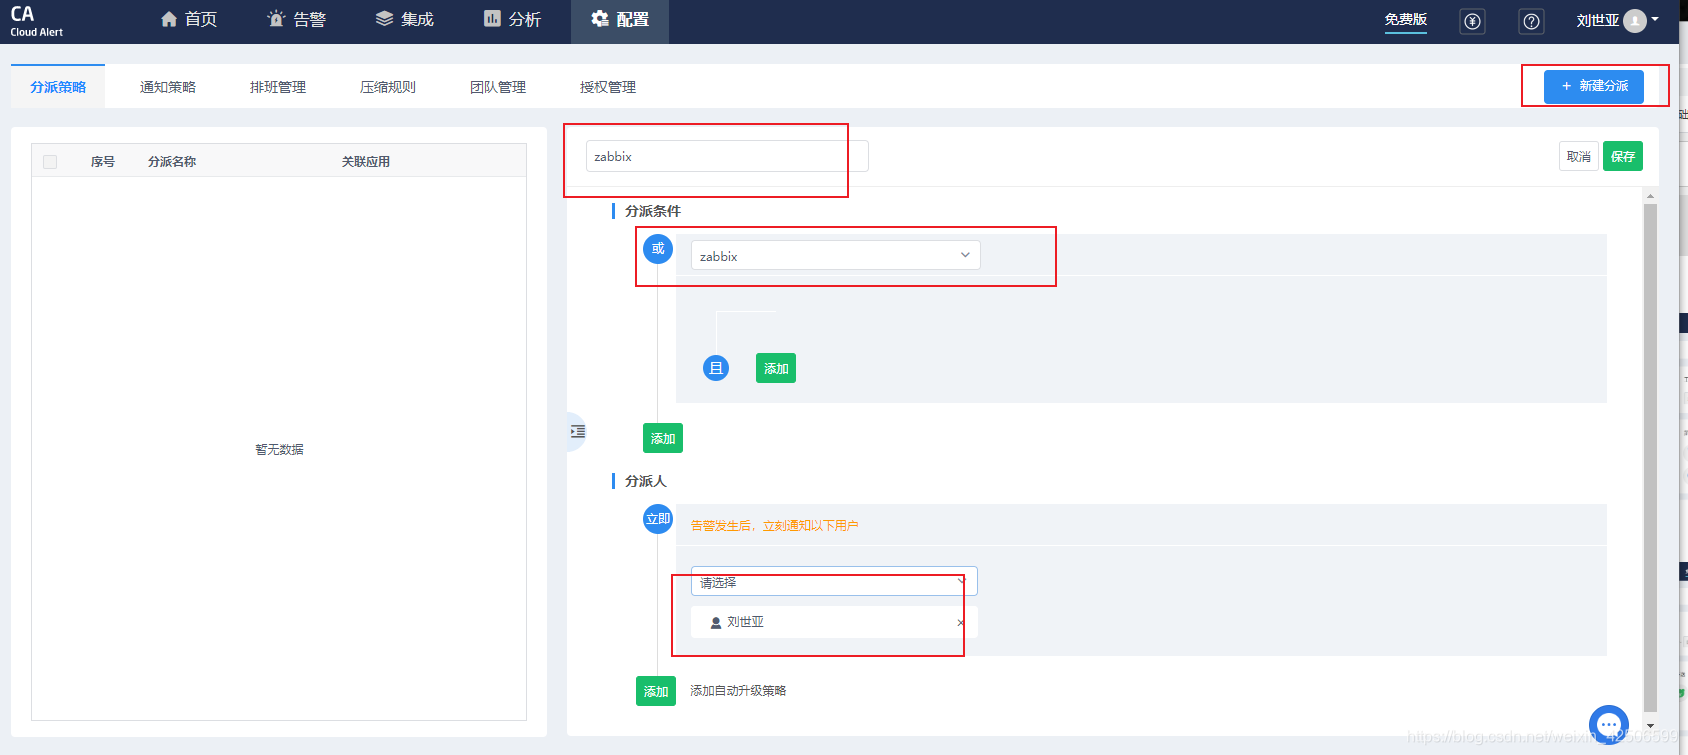
测试就可以了。


 被折叠的 条评论
为什么被折叠?
被折叠的 条评论
为什么被折叠?
 到【灌水乐园】发言


