


在liunx安装xampp
一、下载xmapp:
wget wget https://nchc.dl.sourceforge.net/project/xampp/XAMPP%20Linux/7.3.11/xampp-linux-x64-7.3.11-0-installer.run
二、以root用户对xampp-linux-x64-7.3.11-0-installer.run赋权并执行
chmod 777 xampp-linux-x64-7.3.11-0-installer.run
三、执行安装命令:
[root@localhost wordpress]# ./xampp-linux-x64-7.3.11-0-installer.run
----------------------------------------------------------------------------
Welcome to the XAMPP Setup Wizard.
----------------------------------------------------------------------------
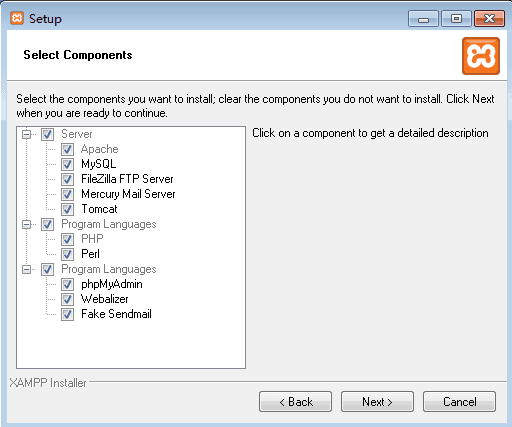
Select the components you want to install; clear the components you do not want
to install. Click Next when you are ready to continue.
XAMPP Core Files : Y (Cannot be edited)
XAMPP Developer Files [Y/n] :y
Is the selection above correct? [Y/n]: y
----------------------------------------------------------------------------
Installation Directory
XAMPP will be installed to /opt/lampp
Press [Enter] to continue:
----------------------------------------------------------------------------
Setup is now ready to begin installing XAMPP on your computer.
Do you want to continue? [Y/n]: y
----------------------------------------------------------------------------
Please wait while Setup installs XAMPP on your computer.
Installing
0% ______________ 50% ______________ 100%
#########################################
----------------------------------------------------------------------------
Setup has finished installing XAMPP on your computer.
[root@localhost wordpress]#
注意:如果不是root会提示如下信息
[wordpress@localhost ~]$ ./xampp-linux-x64-7.3.11-0-installer.run
Error: There has been an error.
This installer requires root privileges. Please become superuser before
executing the installer
Press [Enter] to continue:
至此安装成功。
配置xampp服务
查看xampp服务的命令选项
[root@localhost wordpress]# /opt/lampp/lampp -h
Usage: lampp <action>
start Start XAMPP (Apache, MySQL and eventually others)
startapache Start only Apache
startmysql Start only MySQL
startftp Start only ProFTPD
stop Stop XAMPP (Apache, MySQL and eventually others)
stopapache Stop only Apache
stopmysql Stop only MySQL
stopftp Stop only ProFTPD
reload Reload XAMPP (Apache, MySQL and eventually others)
reloadapache Reload only Apache
reloadmysql Reload only MySQL
reloadftp Reload only ProFTPD
restart Stop and start XAMPP
security Check XAMPP's security
enablessl Enable SSL support for Apache
disablessl Disable SSL support for Apache
backup Make backup file of your XAMPP config, log and data files
oci8 Enable the oci8 extenssion
panel Starts graphical XAMPP control panel
[root@localhost wordpress]#
启动xampp服务
[root@localhost wordpress]# /opt/lampp/lampp start
Starting XAMPP for Linux 7.3.11-0...
XAMPP: Starting Apache...fail.
XAMPP: Another web server is already running.
XAMPP: Starting MySQL...ok.
XAMPP: Starting ProFTPD...ok.
[root@localhost wordpress]#
Apache端口服务启动失败,执行下面命令发现80端口被占用:
[root@localhost wordpress]# netstat -anp | grep 80
tcp 0 0 127.0.0.1:25 0.0.0.0:* LISTEN 3280/master
tcp6 0 0 :::80 :::* LISTEN 12680/httpd
调整端口
一、编辑文档: vi /opt/lampp/etc/httpd.conf把内容Listen 80改为Listen 8080
二、编辑文档: vi /opt/lampp/lampp把内容testport 80改为`testport 8080
三、重启服务:
[root@localhost ~]# /opt/lampp/lampp restart
Restarting XAMPP for Linux 7.3.11-0...
XAMPP: Stopping Apache...ok.
XAMPP: Stopping MySQL...ok.
XAMPP: Stopping ProFTPD...ok.
XAMPP: Starting Apache...ok.
XAMPP: Starting MySQL...ok.
XAMPP: Starting ProFTPD...ok.
[root@localhost ~]#
四、如果服务端口正常,但页面无法访问,检查防火墙是否关闭,下面是centos 7.4操作:
[root@localhost ~]# systemctl status firewalld
[root@localhost ~]# systemctl stop firewalld
[root@localhost ~]# systemctl disable firewalld
Removed symlink /etc/systemd/system/dbus-org.fedoraproject.FirewallD1.service.
Removed symlink /etc/systemd/system/basic.target.wants/firewalld.service.
[root@localhost ~]# systemctl disable firewalld
设置随系统启动
[root@localhost ~]# ln -s /opt/lampp/lampp /etc/rc.d/rc3.d/S99lampp
[root@localhost ~]# ln -s /opt/lampp/lampp /etc/rc.d/rc4.d/S99lampp
[root@localhost ~]# ln -s /opt/lampp/lampp /etc/rc.d/rc5.d/S99lampp
设置密码
用户名 密码 描述
pmp root MySQL/phpMyAdmin 用户 pma设置密码
root root Mysql的root密码
daemon root FTP用户daemon密码
操作记录如下:
[root@localhost ~]# /opt/lampp/lampp security
XAMPP: Quick security check...
XAMPP: MySQL is accessable via network.
XAMPP: Normaly that's not recommended. Do you want me to turn it off? [yes] y
XAMPP: Turned off.
XAMPP: Stopping MySQL...ok.
XAMPP: Starting MySQL...ok.
XAMPP: The MySQL/phpMyAdmin user pma has no password set!!!
XAMPP: Do you want to set a password? [yes] yes
XAMPP: Password:
XAMPP: Password (again):
XAMPP: Setting new MySQL pma password.
XAMPP: Setting phpMyAdmin's pma password to the new one.
XAMPP: MySQL has no root passwort set!!!
XAMPP: Do you want to set a password? [yes] yes
XAMPP: Write the password somewhere down to make sure you won't forget it!!!
XAMPP: Password:
XAMPP: Password (again):
XAMPP: Setting new MySQL root password.
XAMPP: Change phpMyAdmin's authentication method.
XAMPP: The FTP password for user 'daemon' is still set to 'xampp'.
XAMPP: Do you want to change the password? [yes] yes
XAMPP: Password:
XAMPP: Password (again):
XAMPP: Reload ProFTPD...ok.
XAMPP: Done.
[root@localhost ~]#
设置xampp运行远程访问
编辑文件:
[root@localhost ~]# vi /opt/lampp/etc/extra/httpd-xampp.conf
把 Require local调整为 Require all granted
重启服务:
[root@localhost ~]# /opt/lampp/lampp restart
Restarting XAMPP for Linux 7.3.11-0...
XAMPP: Stopping Apache...ok.
XAMPP: Stopping MySQL...ok.
XAMPP: Stopping ProFTPD...ok.
XAMPP: Starting Apache...ok.
XAMPP: Starting MySQL...ok.
XAMPP: Starting ProFTPD...ok.
[root@localhost ~]#
XAMPP
简介
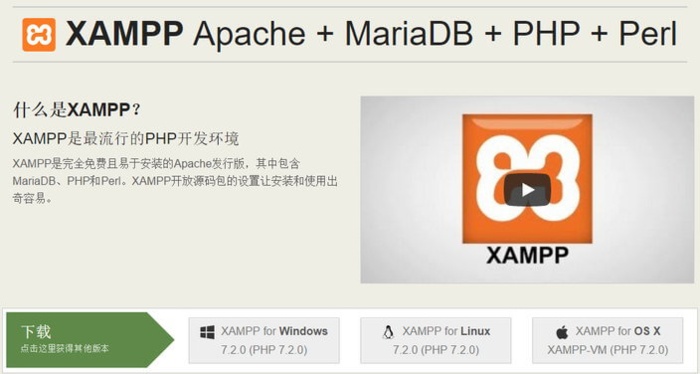
XAMPP 是最流行的 PHP 开发环境,集成了 Apache、MariaDB、PHP 和 Perl,安装即用,可以很方便的在本地电脑上安装我们需要的应用。
- 官网:XAMPP
- 平台:Windows、OS X、Linux
使用
1、下载安装
打开官网,选择相应版本下载安装。
2、启用
安装完成后,打开软件,点击 “Start” 启动 Apache 和 MySQL。
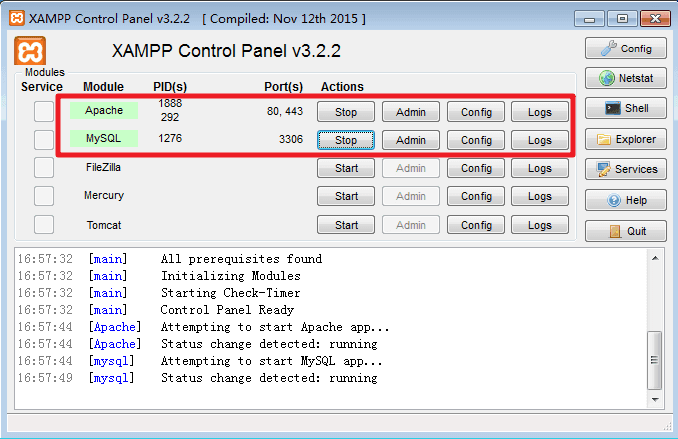
然后,打开浏览器访问 http://localhost ,出现 XAMPP 欢迎页面即表示服务运行正常。
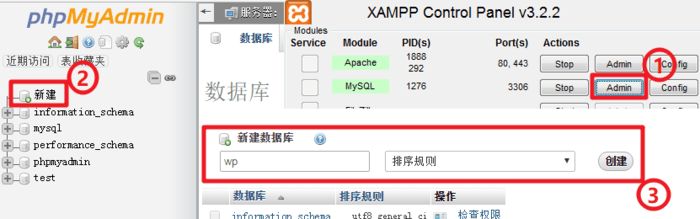
3、创建数据库
在 XAMPP 的控制面板中,点击 MyAQL 的 “Admin” 选项,打开 phpMyAdmin,新建数据库 wp。
4、下载 WordPress
在 WordPress 官网下载 WordPress 程序压缩包,解压并重命名为 testsite。移动到 XAMPP 安装目录中的 htdocs 文件夹内。
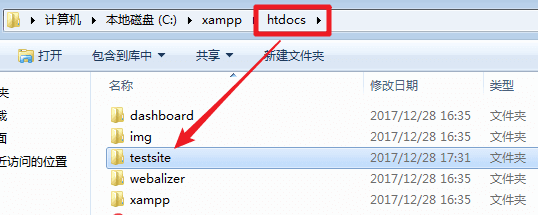
5、安装 WordPress
浏览器打开网址:http://localhost/testsite(testsite 即 WordPress 网站所在文件夹名程),按提示安装 WordPress。

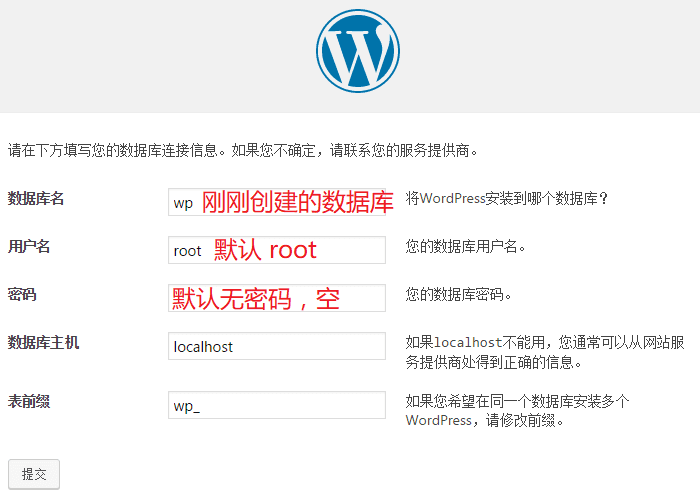

完成后即可进入网站后台。


 2064
2064

 被折叠的 条评论
为什么被折叠?
被折叠的 条评论
为什么被折叠?
 到【灌水乐园】发言


