


架构
架构:四台服务器,三台搭建 k8s 集群,一台做 nfs 服务器
- 17:集群 master
- 18:集群 node01
- 19:集群 node02
- 28:nfs服务器

搭建集群时,如果选择20或以上版本,pvc 会一直pengding,describe 查看报错
waiting for a volume to be created, either by external provisioner “fuseim.pri/ifs” or manually created by system administrator
logs 查看报错
unexpected error getting claim reference: selfLink was empty, can’t make reference
经查阅资料,1.20版本默认删除了SelfLink的功能,导致无法绑定pv和pvc,所以本文选用19版本
搭建 k8s 集群,请参考 使用 rancher 部署 k8s 集群
安装 nfs 服务端
在 28 服务器上操作
安装nfs和rpc服务组件
yum install -y nfs-utils rpcbind
关闭防火墙
systemctl stop firewalld && systemctl disable firewalld
配置NFS服务的配置文件
vim /etc/exports
/home/nfs *(rw,no_root_squash,sync)
配置是否生效
exportfs -r
exportfs
启动服务
systemctl restart rpcbind && systemctl enable rpcbind
systemctl restart nfs && systemctl enable nfs
检查是否启动了rpcbind服务并监听着 111端口
lsof -i :111

安装 nfs 客户端
在 17、18、19 服务器上执行
安装nfs 客户端
yum -y install nfs-utils
systemctl start nfs && systemctl enable nfs
用showmount搜索网络中可用的共享文件
showmount -e 192.168.140.28
挂载
mount -t nfs 192.168.140.28:/home/nfs /mnt
查看是否已挂载
df -h
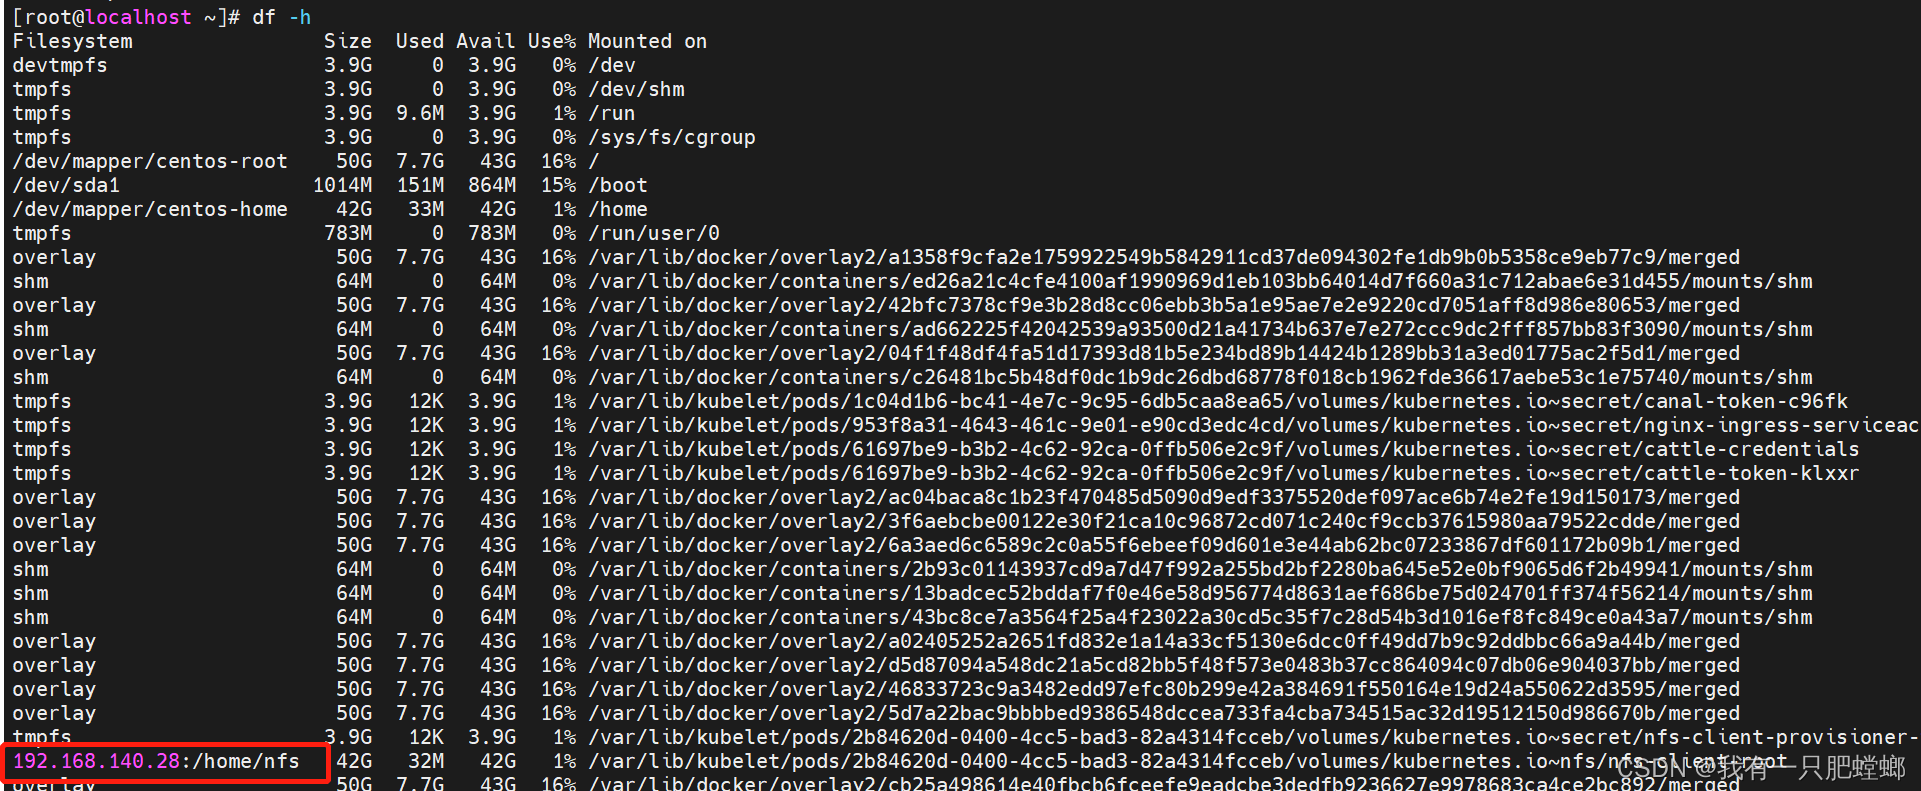
可以转场了
因为测试发现 storageclass 不会自动根据 pvc 创建 pv
如需自动创建,请参考 k8s 部署 NFS Provisioner
创建 storageclass
使用 nfs-client-provisioner 实现
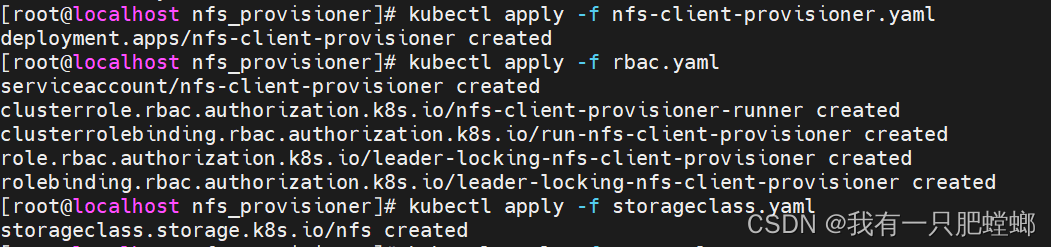
kubectl apply -f nfs-client-provisioner.yaml
内容
kind: Deployment
apiVersion: apps/v1
metadata:
  name: nfs-client-provisioner
  namespace: kube-system
spec:
  replicas: 1
  strategy:
    type: Recreate
  selector:
    matchLabels:
      app: nfs-client-provisioner
  template:
    metadata:
      labels:
        app: nfs-client-provisioner
    spec:
      serviceAccountName: nfs-client-provisioner
      containers:
        - name: nfs-client-provisioner
          image: quay.io/external_storage/nfs-client-provisioner:latest
          volumeMounts:
            - name: nfs-client-root
              mountPath: /persistentvolumes
          env:
            - name: PROVISIONER_NAME
              value: mynfs                 # 根据自己的名称来修改
            - name: NFS_SERVER
              value: 192.168.140.28        # NFS服务器所在的 ip
            - name: NFS_PATH
              value: /home/nfs                  # 共享存储目录
      volumes:
        - name: nfs-client-root
          nfs:
            server: 192.168.140.28         # NFS服务器所在的 ip
            path: /home/nfs                     # 共享存储目录
创建 rbac
kubectl apply -f rbac.yaml
内容
apiVersion: v1
kind: ServiceAccount
metadata:
  name: nfs-client-provisioner
  # replace with namespace where provisioner is deployed
  namespace: kube-system
---
kind: ClusterRole
apiVersion: rbac.authorization.k8s.io/v1
metadata:
  name: nfs-client-provisioner-runner
rules:
  - apiGroups: [""]
    resources: ["persistentvolumes"]
    verbs: ["get", "list", "watch", "create", "delete"]
  - apiGroups: [""]
    resources: ["persistentvolumeclaims"]
    verbs: ["get", "list", "watch", "update"]
  - apiGroups: ["storage.k8s.io"]
    resources: ["storageclasses"]
    verbs: ["get", "list", "watch"]
  - apiGroups: [""]
    resources: ["events"]
    verbs: ["create", "update", "patch"]
---
kind: ClusterRoleBinding
apiVersion: rbac.authorization.k8s.io/v1
metadata:
  name: run-nfs-client-provisioner
subjects:
  - kind: ServiceAccount
    name: nfs-client-provisioner
    # replace with namespace where provisioner is deployed
    namespace: kube-system
roleRef:
  kind: ClusterRole
  name: nfs-client-provisioner-runner
  apiGroup: rbac.authorization.k8s.io
---
kind: Role
apiVersion: rbac.authorization.k8s.io/v1
metadata:
  name: leader-locking-nfs-client-provisioner
  # replace with namespace where provisioner is deployed
  namespace: kube-system
rules:
  - apiGroups: [""]
    resources: ["endpoints"]
    verbs: ["get", "list", "watch", "create", "update", "patch"]
---
kind: RoleBinding
apiVersion: rbac.authorization.k8s.io/v1
metadata:
  name: leader-locking-nfs-client-provisioner
  # replace with namespace where provisioner is deployed
  namespace: kube-system
subjects:
  - kind: ServiceAccount
    name: nfs-client-provisioner
    # replace with namespace where provisioner is deployed
    namespace: kube-system
roleRef:
  kind: Role
  name: leader-locking-nfs-client-provisioner
  apiGroup: rbac.authorization.k8s.io
创建 storageclass
kubectl apply -f storageclass.yaml
内容
apiVersion: storage.k8s.io/v1
kind: StorageClass
metadata:
  name: nfs
# 和 deployment 自定义 value 一致
provisioner: mynfs

创建 pvc
创建 nginx 的 pvc
kubectl apply -f nginx-pvc.yaml
内容
---
apiVersion: v1
kind: PersistentVolumeClaim
metadata:
  name: nginx-pv
spec:
  accessModes:
    - ReadWriteMany
  # 指定刚才创建的 storage-class 的 metadata.name
  storageClassName: "nfs"
  resources:
    requests:
      storage: 2Gi
查看 pvc 是否创建成功,成功状态是 Bound
kubectl get pvc

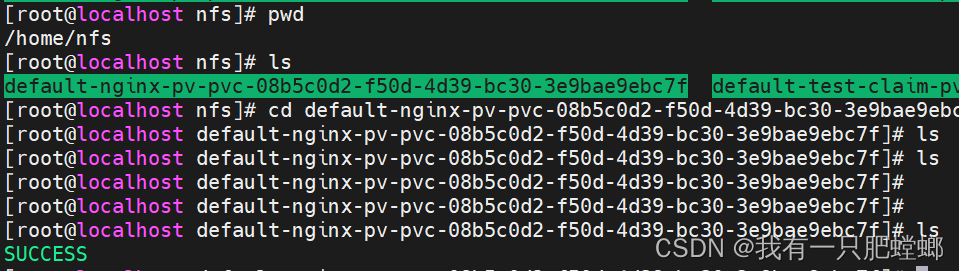
在 28 服务器上可以看到,pv创建成功

创建 pod 来使用 pvc
kubectl apply -f test-busybox.yaml
内容
kind: Pod
apiVersion: v1
metadata:
  name: test-busybox
spec:
  containers:
  - name: test-busybox
    image: busybox:1.24
    command:
      - "/bin/sh"
    args:
      - "-c"
      - "touch /mnt/SUCCESS && exit 0 || exit 1"
    volumeMounts:
      - name: nfs-pvc
        mountPath: "/mnt"
  restartPolicy: "Never"
  volumes:
    - name: nfs-pvc
      persistentVolumeClaim:
      # 和 pvc 的 metadata.name 一致
        claimName: nginx-pv

执行成功后,在 28 服务器的 pvc 上可以看到 SUCCESS


 613
613


 被折叠的 条评论
为什么被折叠?
被折叠的 条评论
为什么被折叠?
 到【灌水乐园】发言


