


为属性注入application.yml配置的值
属性注入的两种情况
私有变量
application.yml
user:
  names: 小黑
  age: 20
  sex: 男
需要注入的类
import org.springframework.beans.factory.annotation.Value;
import org.springframework.context.annotation.Configuration;

@Configuration
public class UserTest {
    @Value("${user.name}")
    private String name;
    @Value("${user.age}")
    private Integer age;
    @Value("${user.sex}")
    private Character sex;

    public String getName() {
        return name;
    }

    public void setName(String name) {
        this.name = name;
    }

    public Integer getAge() {
        return age;
    }

    public void setAge(Integer age) {
        this.age = age;
    }

    public Character getSex() {
        return sex;
    }

    public void setSex(Character sex) {
        this.sex = sex;
    }
}
在别处调用
import com.itblp.springboot.injection.UserTest;
import org.springframework.beans.factory.annotation.Autowired;
import org.springframework.web.bind.annotation.GetMapping;
import org.springframework.web.bind.annotation.RequestMapping;
import org.springframework.web.bind.annotation.RestController;


@RequestMapping("/springboot")
@RestController
public class UserController {

    @Autowired
    private UserTest userTest;

    @GetMapping("/test")
    public void test() {
        System.out.println(userTest.getName() + " " + userTest.getAge() + " " + userTest.getSex());
    }
}
执行结果

静态变量
application.yml
user:
  names: 小黑
  age: 20
  sex: 男
需要注入的类
import org.springframework.beans.factory.annotation.Value;
import org.springframework.context.annotation.Configuration;

@Configuration
public class UserTest {

    private static String name;
    private static Integer age;
    private static Character sex;

    public static String getName() {
        return name;
    }

    @Value("${user.names}")
    public void setName(String name) {
        this.name = name;
    }

    public static Integer getAge() {
        return age;
    }

    @Value("${user.age}")
    public void setAge(Integer age) {
        this.age = age;
    }

    public static Character getSex() {
        return sex;
    }

    @Value("${user.sex}")
    public void setSex(Character sex) {
        this.sex = sex;
    }
}
在别处调用
import com.itblp.springboot.injection.UserTest;
import org.springframework.web.bind.annotation.GetMapping;
import org.springframework.web.bind.annotation.RequestMapping;
import org.springframework.web.bind.annotation.RestController;


@RequestMapping("/springboot")
@RestController
public class UserController {

    @GetMapping("/test")
    public void test() {
        System.out.println(UserTest.getName()+" "+UserTest.getAge()+" "+UserTest.getSex());
    }
}
执行结果
【注意】避免属性注入冲突
spring会优先加载系统环境变量,所以配置文件中的键应该避免冲突
例如:
application.yml
user:
  name: 小黑
  age: 20
  sex: 男
打印结果:
// administrator 20 男
此时获取的user.name其实是计算机的用户名,解决方法是将name改个名字
【扩展】注入其他配置文件中的值
- 新建user.properties
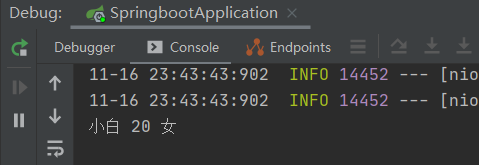
user.names=小白
user.age=20
user.sex=女
- 给要注入的类添加@PropertySource(value = {“classpath:user.properties”}, encoding = “utf-8”)注解
import org.springframework.beans.factory.annotation.Value;
import org.springframework.context.annotation.PropertySource;
import org.springframework.web.bind.annotation.GetMapping;
import org.springframework.web.bind.annotation.RequestMapping;
import org.springframework.web.bind.annotation.RestController;


@RequestMapping("/springboot")
@RestController
@PropertySource(value = {"classpath:user.properties"}, encoding = "utf-8")
public class UserController {

    @Value("${user.names}")
    private String name;

    @Value("${user.age}")
    private String age;

    @Value("${user.sex}")
    private String sex;

    @GetMapping("/test")
    public void test() {
        System.out.println(name+" "+age+" "+sex);
    }
}
执行结果:


 1671
1671


 被折叠的 条评论
为什么被折叠?
被折叠的 条评论
为什么被折叠?
 到【灌水乐园】发言


