


按tab 开始调整网卡名称,从net.if....开始
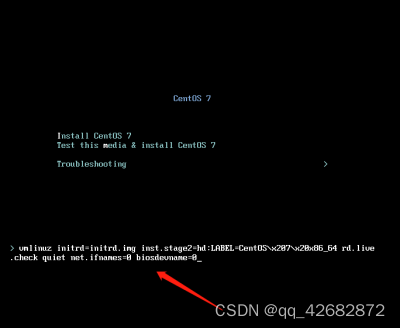
之后按enter进入安装

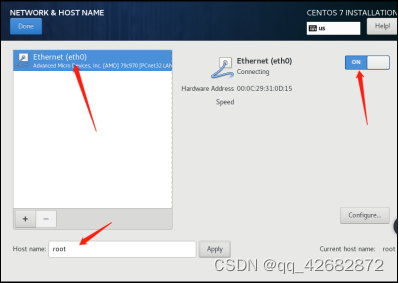
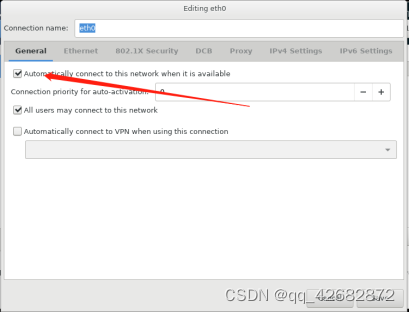
点击configure

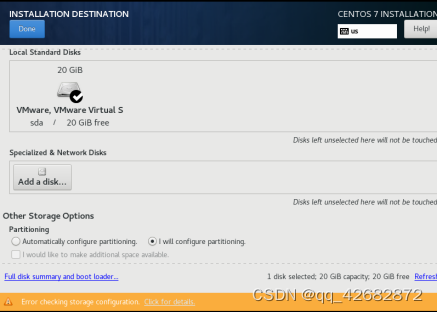
选择 i will ...... 然后 done
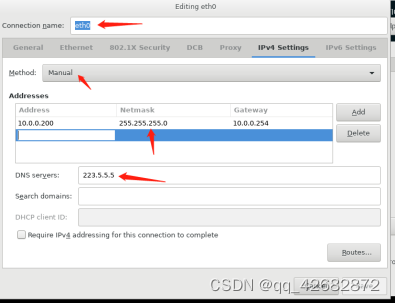
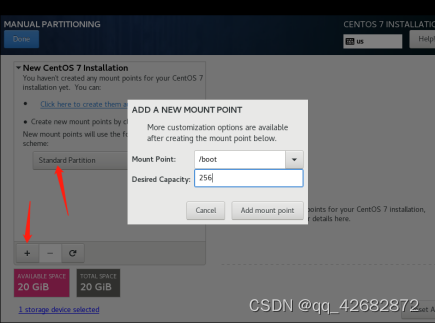
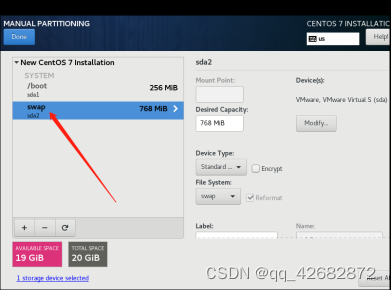
选择 + 号来配置

保存之后重新启动系统即可。
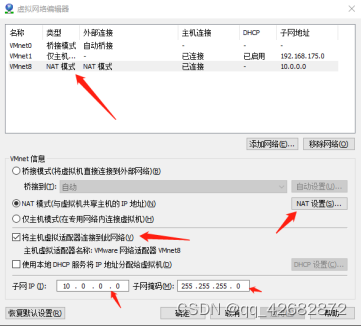
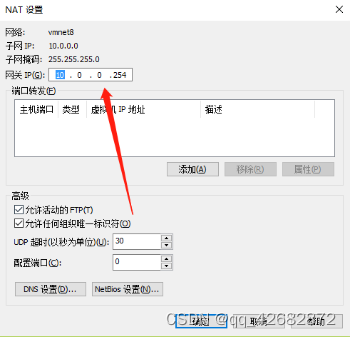
ping www.baidu.com 没有返回需要设置虚拟机的ip
# 配置网卡
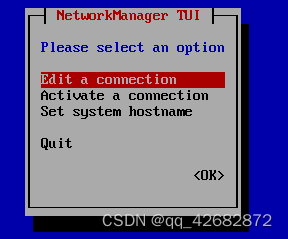
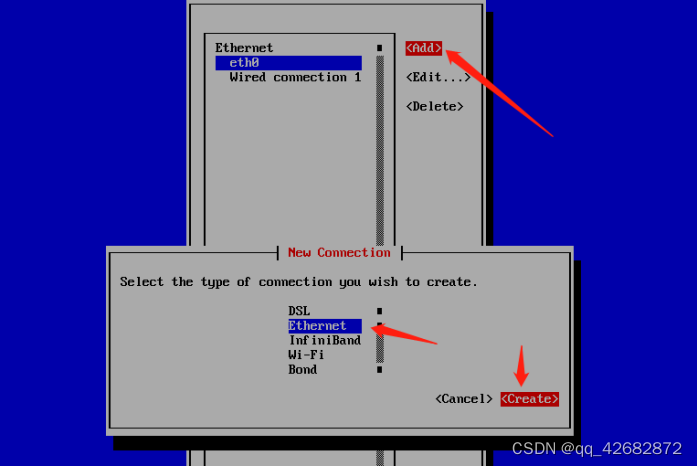
[root@root ~]# nmtui
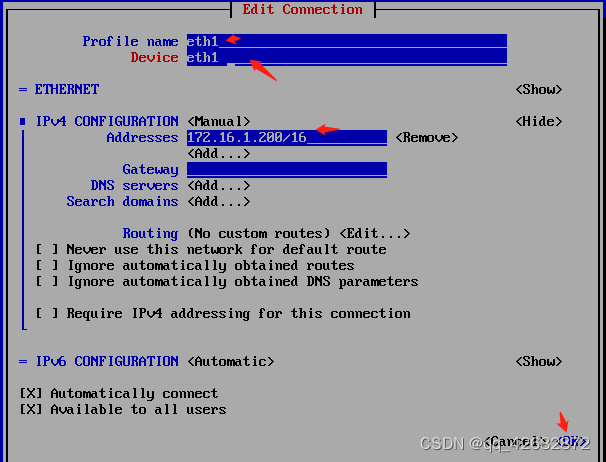
之后重启网卡,使用如下的命令
[root@root ~]# systemctl restart network
查看网卡信息
[root@root ~]# ip addr
之后的配置操作
#####更新yum源
curl -s -o /etc/yum.repos.d/CentOS-Base.repo http://mirrors.aliyun.com/repo/Centos-7.repo
curl -s -o /etc/yum.repos.d/epel.repo http://mirrors.aliyun.com/repo/epel-7.repo
#####安全
[root@root ~]# sed -i 's#SELINUX=.*#SELINUX=disabled#g' /etc/selinux/config
[root@root ~]# sed -i 's/SELINUX=enforcing/SELINUX=disabled/' /etc/selinux/config
[root@root ~]# grep SELINUX=disabled /etc/selinux/config
[root@root ~]# setenforce 0
[root@root ~]# getenforce
#####关闭防火墙
[root@root ~]# systemctl disable firewalld #关闭
[root@root ~]# systemctl stop firewalld #开机关闭
[root@root ~]# systemctl status firewalld #检查状态
#####添加普通用户进行提权
[root@root home]# useradd oldboy
[root@root home]# echo 123456|passwd --stdin oldboy
[root@root home]# \cp /etc/sudoers /etc/sudoers.ori
[root@root home]# echo "oldboy ALL=(ALL) NOPASSWD:ALL " >> /etc/sudoers
[root@root home]# tail -1 /etc/sudoers
[root@root home]# visudo -c
#####设置字符集
[root@root etc]# cp /etc/locale.conf /etc/locale.conf.ori
[root@root etc]# echo 'LANG="zh_CN.UTF-8"' > /etc/locale.conf
[root@root etc]# source /etc/locale.conf
[root@root etc]# echo $LANG
#####时间同步
[root@root etc]# yum install ntpdate -y
[root@root etc]# /usr/sbin/ntpdate ntp3.aliyun.com
[root@root etc]# echo '#crond-id-001:time sync ' >> /var/spool/cron/root
[root@root etc]# */5 * * * * /usr/sbin/ntpdate -u ntp.api.bz >/dev/null 2>&1 &
#####设置命令行安全
[root@root /]# echo "export TMOUT=300" >>/etc/profile #300s没有锁屏自动退出
#[root@root ~]# cat .bash_history 设置历史目录里只有5个
[root@root ~]# echo "export histsize=5" >> /etc/profile
[root@root ~]# echo "export histfilesize=5" >> /etc/profile
[root@root /]# ./etc/profile #执行脚本
#####加大文件描述符
#查看描述符
[root@root /]# ulimit -n
[root@root /]# echo "* - nofile 65535">> /etc/security/limits.conf
[root@root /]# tail -1 /etc/security/limits.conf
#设置
[root@root /]# ulimit -SHn 65535
[root@root /]# ulimit -n
####优化内核
[root@root ~]# vim /etc/sysctl.conf
net.ipv4.tcp_tw_recycle = 1 #开启TCP连接中TIME_WAIT socket的快速回收。默认值为0,表示关闭。
net.ipv4.tcp_syncookies = 1 #开启SYN cookie,出现SYN等待队列溢出时启用cookie处理,防范少量的SYN攻击。默认为0,表示关闭。
net.ipv4.tcp_keepalive_time = 600 #keepalived启用时TCP发送keepalived消息的拼度。默认位2小时。
net.ipv4.ip_local_port_range = 4000 65000 #指定外部连接的端口范围。默认值为32768 61000。
net.ipv4.tcp_max_syn_backlog = 16384 #表示SYN队列的长度,预设为1024,这里设置队列长度为262 144,以容纳更多的等待连接。
net.ipv4.tcp_max_tw_buckets =36000 #系统同时保持TIME_WAIT套接字的最大数量,如果超过这个数值将立刻被清楚并输出警告信息。默认值为180000。对于squid来说效果不是很大,但可以控制TIME_WAIT套接字最大值,避免squid服务器被拖死。
net.ipv4.route.gc_timeout = 100
net.ipv4.tcp_syn_retries = 1 #表示在内核放弃建立连接之前发送SYN包的数量。
net.ipv4.tcp_synack_retries = 1 #设置内核放弃连接之前发送SYN+ACK包的数量。
net.core.somaxconn = 16384 #定义了系统中每一个端口最大的监听队列的长度, 对于一个经常处理新连接的高负载 web服务环境来说,默认值为128,偏小。
net.core.netdev_max_backlog = 16384 #表示当在每个网络接口接收数据包的速率比内核处理这些包的速率快时,允许发送到队列的数据包的最大数量。
net.ipv4.tcp_max_orphans = 16384
#优化内核执行生效
[root@root ~]# sysctl -p
####安装基础软件
[root@root ~]#yum install tree nmap dos2unix lrzsz nc lsof wget tcpdump htop iftop iotop sysstat nethogs -y
#centos7安装
[root@root ~]# yum install -y psmisc net-tools bash-completion vim-enhanced
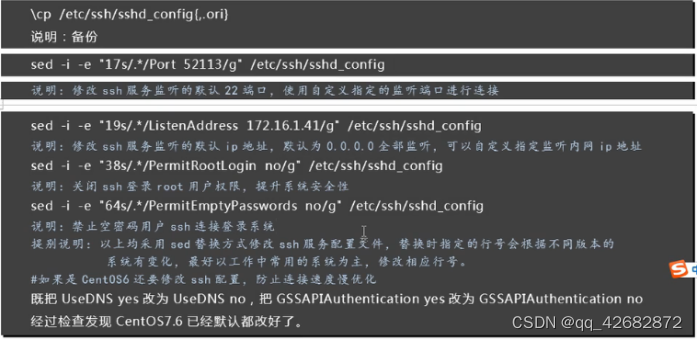
####远程连接优化(不优化)
[root@root ~]# \cp /etc/ssh/sshd_config{,.ori}
[root@root ~]# sed -i -e "17s/.*/Port 52113/g" /etc/ssh/sshd_config
[root@root ~]# sed -i -e "19s/.*/ListenAddress 172.16.1.41/g" /etc/ssh/sshd_config
[root@root ~]# sed -i -e "38s/.*/PermitRootLogin no/g" /etc/ssh/sshd_config
[root@root ~]# sed -i -e "64s/.*/PermitEmptyPasswords no/g" /etc/ssh/sshd_config
####定义系统别名
[root@root ~]# echo "alias grerp='grep --color=auto'" >>/etc/profile
[root@root ~]# echo "alias ll='ls -l --color=auto --time-style=long-iso'" >> /etc/profile
[root@root ~]# source  /etc/profile


####修改yum 中的keepcache=0 设置为1
[root@root ~]# vim /etc/yum.conf
设置为keepcache=1   保留yum的安装包,作缓存
到此,可以说是centos基础环境配置完成。加油吧,小小药。


 653
653


 被折叠的 条评论
为什么被折叠?
被折叠的 条评论
为什么被折叠?
 到【灌水乐园】发言


